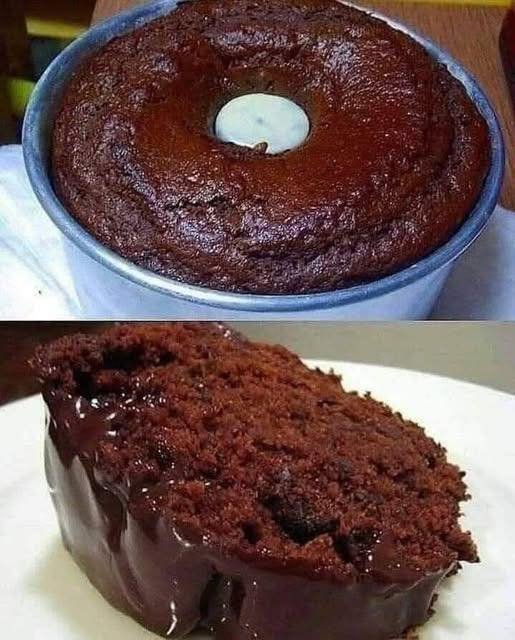
Decadent Chocolate Cake with Wine Glaze

Decadent Chocolate Cake with Wine Glaze

Servings: 8–10
Prep Time: 15 minutes
Bake Time: 1 hour
Total Time: 1 hour 15 minutes

A moist, flavorful chocolate cake with a subtle hint of cinnamon, topped with a smooth wine glaze. Perfect for any occasion or a special treat.


📋 Ingredients

For the Cake:

  • 1 box yellow cake mix

  • ¼ cup brown sugar

  • ¼ cup white sugar

  • 1 packet instant vanilla pudding mix

  • 2 teaspoons cinnamon

  • 4 large eggs

  • ¾ cup water

  • ¾ cup vegetable oil

  • ½ cup white wine

For the Wine Glaze:

  • 1 stick (½ cup) unsalted butter

  • 1 cup white sugar

  • ¼ cup white wine


👩‍🍳 Step-by-Step Instructions

Step 1: Preheat the Oven

  1. Preheat the oven to 350°F (175°C).

  2. Grease a bundt pan or cake mold generously with butter or cooking spray.


Step 2: Prepare the Cake Batter

  1. In a large mixing bowl, combine the cake mix, brown sugar, white sugar, vanilla pudding mix, and cinnamon. Mix well.

  2. Add eggs, water, oil, and white wine.

  3. Mix by hand or with an electric mixer until smooth and fully combined.


Step 3: Bake the Cake

  1. Pour the batter evenly into the prepared bundt pan.

  2. Bake in the preheated oven for 1 hour, or until a toothpick inserted into the center comes out clean or with a few moist crumbs.

  3. Remove from the oven and allow the cake to cool in the pan for 5–10 minutes.


Step 4: Prepare the Wine Glaze

  1. While the cake is baking, melt the butter in a small saucepan over medium heat.

  2. Stir in the white sugar and white wine.

  3. Cook, stirring constantly, until the sugar dissolves and the mixture is smooth. Remove from heat.

  4. Optional: Simmer for a few extra minutes for a thicker glaze.


Step 5: Glaze the Cake

  1. Carefully invert the slightly cooled cake onto a serving plate or wire rack.

  2. Pour the warm glaze slowly over the cake, letting it soak and drip down the sides.


Step 6: Serve

  • Allow the cake to cool completely before slicing, or serve slightly warm.

  • Optional: Serve with whipped cream or vanilla ice cream.


💡 Tips & Notes

  • Oil Measurement: Ensure the oil is ¾ cup, not ¾ teaspoon, for proper texture.

  • Wine Choice: Any white wine is fine—dry (Chardonnay) or sweet (Riesling) both work.

  • Storage: Keep leftovers in an airtight container at room temperature for up to 3 days or in the refrigerator for up to 1 week.


🔄 Variations

  • Add ¼ teaspoon espresso powder to intensify chocolate flavor.

  • Substitute the glaze with a simple chocolate ganache for a richer finish.

  • Sprinkle chopped nuts or chocolate chips on top before serving.
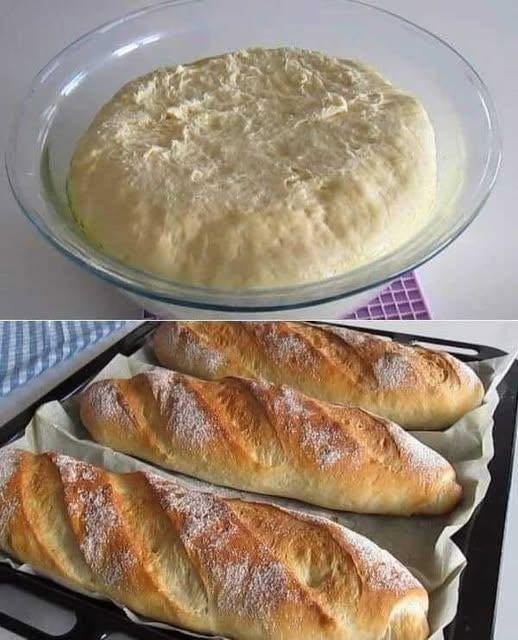
Homemade White Bread

Homemade White Bread

Soft, fluffy loaf with a tender golden crust

Prep Time: 20 minutes
Rise Time: 1½–2½ hours
Bake Time: 30–35 minutes
Total Time: About 3 hours
Yield: 1 standard loaf

This homemade white bread is light, soft, and versatile. It works well for sandwiches, toast, or serving warm with butter. The recipe uses simple pantry ingredients and straightforward techniques suitable for beginners.


Ingredients

For the Bread

  • 4 cups all-purpose flour

  • 2 teaspoons instant yeast

  • 2 teaspoons salt

  • 2 tablespoons sugar

  • 2 tablespoons unsalted butter, softened

  • 1½ cups warm water (about 105–110°F / 40–43°C)

Optional Topping

  • 1 tablespoon milk

  • 1 tablespoon unsalted butter, melted


Step-by-Step Instructions

1. Activate the Yeast

In a small bowl, combine the warm water, sugar, and yeast. Stir gently and let sit for 5–10 minutes, until the mixture becomes foamy. This indicates the yeast is active.


2. Prepare the Dough

In a large mixing bowl, add:

  • Flour

  • Salt

  • Softened butter

Pour in the yeast mixture. Mix until a shaggy dough forms.

Transfer the dough to a lightly floured surface and knead for 8–10 minutes, until smooth, elastic, and slightly tacky but not sticky.

(If using a stand mixer, knead with a dough hook on medium speed for 6–7 minutes.)


3. First Rise

Lightly grease a clean bowl and place the dough inside, turning once to coat. Cover with a clean kitchen towel or plastic wrap.

Let rise in a warm, draft-free place for 1–2 hours, or until doubled in size.


4. Shape the Loaf

Gently press the dough to release excess air. Shape it into a loaf by rolling it tightly and pinching the seam closed.

Place the shaped dough seam-side down into a greased 9 × 5-inch loaf pan.


5. Second Rise

Cover the pan and allow the dough to rise again for 30–45 minutes, until it rises slightly above the edge of the pan.


6. Preheat the Oven

Preheat oven to 375°F (190°C).

If using the topping, mix the milk and melted butter in a small bowl.


7. Bake

Brush the top of the loaf with the milk-butter mixture if desired.

Bake for 30–35 minutes, until:

  • The top is golden brown

  • The loaf sounds hollow when tapped

For accuracy, the internal temperature should reach 190–200°F (88–93°C).


8. Cool

Remove the bread from the pan and place it on a wire rack. Allow to cool completely before slicing to ensure the best texture.


Storage

  • Store at room temperature in an airtight container for 2–3 days

  • Refrigeration is not recommended

  • Freeze sliced bread for up to 2 months


Helpful Tips

  • Warm water should not be hot, as high heat can damage yeast.

  • For a softer crust, brush the loaf with butter after baking.

  • Measure flour accurately by spooning into the cup and leveling off.

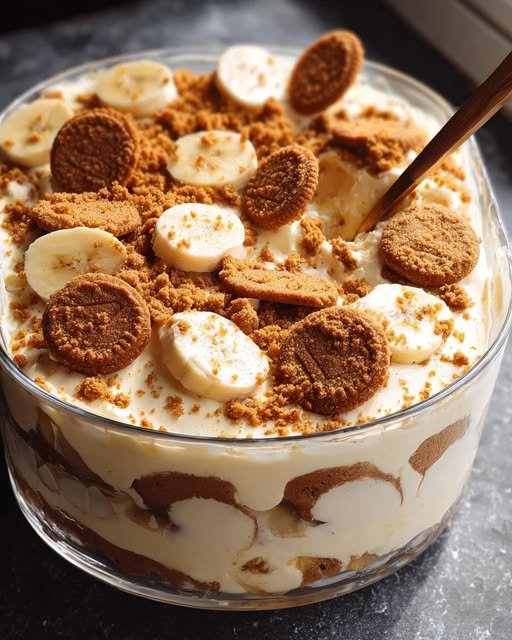
Creamy Sweet Banana Pudding

Creamy Sweet Banana Pudding

This recipe sounds like a dream—the combination of cream cheese and sweetened condensed milk gives it that “mousse-like” texture that sets it apart from traditional puddings.

Since you asked for full recipes, I have organized your notes into a clean, easy-to-follow format for your collection.


Creamy Sweet Banana Pudding

This recipe is exceptionally rich and creamy. Using instant pudding and room-temperature cream cheese ensures a smooth, thick consistency without any cooking required.

  • Prep time: 20 minutes

  • Chill time: 3–4 hours

  • Servings: 10–12

  • Shelf Life: Best eaten within 48 hours.

Ingredients

  • 1 (8-oz) block cream cheese, room temperature

  • 1 (14-oz) can sweetened condensed milk

  • 1 (5-oz) package instant vanilla pudding mix

  • 2 1/2 cups cold milk

  • 2 tsp vanilla extract

  • 8 oz heavy cream, whipped (or one 8-oz tub of Cool Whip)

  • 4 ripe bananas, sliced

  • 10 oz shortbread cookies (like Chessmen or Lorna Doone)

Instructions

  1. Cream the Base: In the bowl of a stand mixer fitted with the whisk attachment, beat the softened cream cheese and sweetened condensed milk until completely smooth. Scrape the sides of the bowl to ensure there are no lumps (about 2–3 minutes).

  2. Thicken the Pudding: Add the dry pudding mix, cold milk, and vanilla. Start on low speed for 30 seconds to avoid a mess, then increase to high. Beat for 4–5 minutes until the mixture is thick and smooth.

  3. Lighten the Texture: Gently fold half (4 oz) of your whipped cream into the pudding mixture until just combined. Set the other half aside for the topping.

  4. Layer the Dish: * Line the bottom of a 9×13 baking dish (or a trifle bowl) with a single layer of shortbread cookies.

    • Place the sliced bananas evenly over the cookie layer.

  5. Assemble: Spread the pudding mixture evenly over the bananas. Top the pudding with the remaining whipped cream, smoothing it to the edges.

  6. Garnish: Crumble any remaining cookies over the top or tuck whole cookies around the edges for decoration.

  7. Chill: Cover with plastic wrap and refrigerate for at least 3–4 hours before serving to allow the cookies to soften slightly and the flavors to meld.


Pro-Tips

  • Banana Ripeness: Use bananas that are yellow with just a few brown spots. If they are too green, they won’t be sweet enough; if they are too dark, they will become mushy too quickly.

  • Smoothness Hack: If your cream cheese is still a bit cold, microwave the unwrapped block for 15 seconds before mixing to prevent lumps.

Morning Vitality Spice Tea

Morning Vitality Spice Tea

A soothing herbal infusion to support digestion, ease stiffness, and awaken the body gently.

Prep Time: 2 minutes
Cook Time: 10 minutes
Yield: 1 large mug or 2 small cups


🫖 Ingredients

  • 2 cups filtered water

  • 3–4 thin slices fresh ginger root, peeled

  • 1 whole cinnamon stick (Ceylon cinnamon recommended for regular use)

  • 4–5 whole cloves

  • 2–3 dried bay leaves

Optional (add after simmering):

  • A squeeze of fresh lemon

  • ½ teaspoon raw honey


🔥 Instructions

  1. Prepare the Spices
    Lightly bruise the ginger slices using the flat side of a knife to release their natural juices. If possible, snap the cinnamon stick in half to expose more aroma and flavor.

  2. Boil Gently
    Add the water, ginger, cinnamon, cloves, and bay leaves to a small saucepan. Bring to a gentle boil.

  3. Simmer
    Reduce the heat to low and cover the pot. Let the tea simmer for 8–10 minutes. Covering helps retain the natural aroma and flavor of the spices.

  4. Strain and Serve
    Strain the tea into your favorite mug. Allow it to cool slightly so it is comfortably warm.

  5. Morning Ritual
    Sip slowly on an empty stomach, 15–20 minutes before breakfast, to gently awaken digestion and support a calm start to the day.


🌱 Why These Spices Are Traditionally Valued

  • Ginger: Traditionally used to support digestion and reduce feelings of heaviness.

  • Cinnamon: Known for its warming nature and ability to support steady energy levels.

  • Cloves: Naturally rich in protective plant compounds and valued for overall wellness.

  • Bay Leaves: Commonly used to soothe the stomach and support digestive comfort.


⚠️ Gentle Use Note

This tea is made with warming spices. If you are sensitive to strong spices, start with a shorter simmer time or fewer spices. If you are pregnant, managing a medical condition, or taking long-term medication, enjoy in moderation and follow your healthcare provider’s guidance.


🌞 Optional Variations

  • Add fennel seeds (½ tsp) for extra digestive comfort

  • Add turmeric (a pinch) for warmth and color

  • Enjoy chilled later in the day as a light herbal infusion

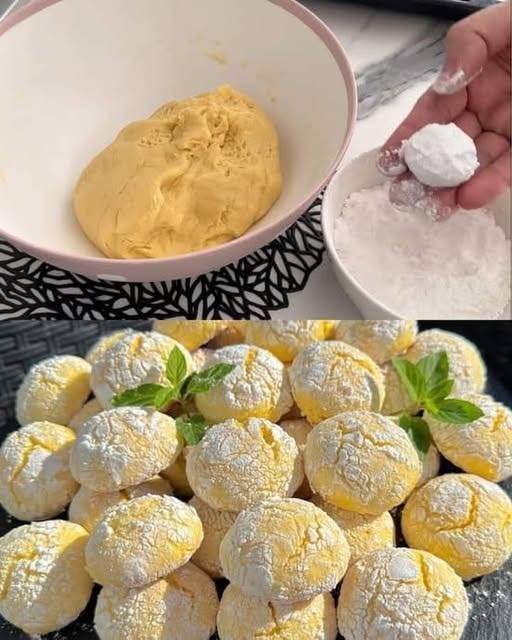
Lemon Crinkle Biscuits

Lemon Crinkle Biscuits

These lemon-flavored biscuits have a soft interior and a lightly crisp exterior. They are coated in powdered sugar before baking, which creates a cracked surface as they expand in the oven.

Preparation Time

15 minutes

Chilling Time (Optional)

30 minutes

Baking Time

12–15 minutes

Yield

Approximately 20–24 biscuits


Ingredients

Biscuit Dough

  • 2 large eggs, at room temperature

  • 100 g granulated sugar

  • 80 ml neutral vegetable oil (such as sunflower oil)

  • Zest of 1 lemon, finely grated

  • 50 ml freshly squeezed lemon juice

  • 380 g all-purpose flour, sifted

  • 12 g baking powder

  • A small pinch of salt

Coating

  • 80 g powdered sugar, for rolling


Instructions

1. Mix the Wet Ingredients

Place the eggs and granulated sugar in a large mixing bowl. Whisk until the mixture becomes pale and slightly thickened.
Add the oil, lemon juice, and lemon zest. Whisk again until fully combined.


2. Combine the Dry Ingredients

In a separate bowl, mix the flour, baking powder, and salt until evenly distributed.


3. Form the Dough

Gradually add the dry ingredients to the wet mixture. Stir with a spatula or wooden spoon until a soft, slightly sticky dough forms.

If the dough is difficult to handle, cover the bowl and refrigerate for 30 minutes to firm it slightly.


4. Shape and Coat

Preheat the oven to 180°C (350°F). Line a baking tray with parchment paper.

Scoop approximately 1 tablespoon of dough and roll it gently into a ball.
Roll each ball in powdered sugar until fully coated.

Arrange the coated dough balls on the prepared baking tray, leaving space between them.


5. Bake

Bake for 12–15 minutes, or until the biscuits have spread and developed a cracked surface.
The tops should remain light in color, while the bottoms may show slight browning.

Remove from the oven and allow the biscuits to cool on the tray for 5 minutes before transferring to a wire rack.


Storage Notes

  • Store cooled biscuits in an airtight container at room temperature for up to 5 days.

  • The texture remains soft as long as the container is well sealed.

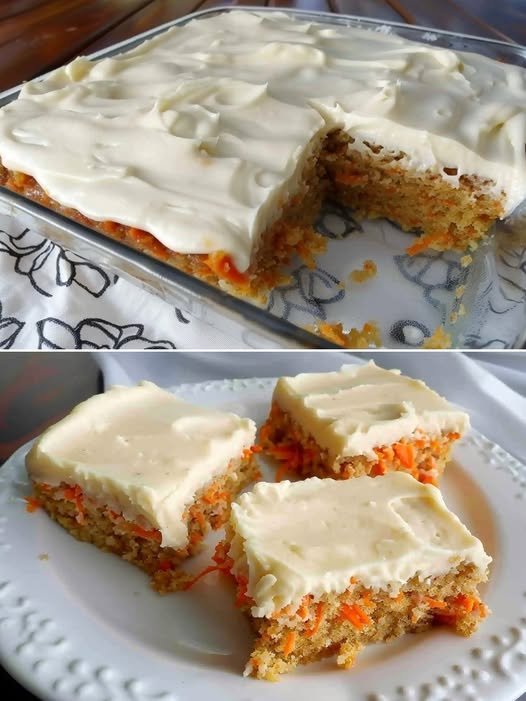
Keto Carrot Cake Bars with Cream Cheese Frosting

Keto Carrot Cake Bars with Cream Cheese Frosting

A rich, spiced dessert that is low-carb, gluten-free, and perfectly “mix-and-bake” simple.

  • Prep time: 15 minutes

  • Cook time: 25 minutes

  • Yields: 12 bars

  • Net Carbs: 7g per bar

Ingredients

The Spiced Cake Base:

  • 1 ½ cups Almond flour

  • ½ cup Coconut flour

  • ¾ cup Erythritol (granulated)

  • 1 tsp Ground cinnamon

  • ¼ tsp Ground nutmeg

  • ¼ tsp Ground ginger

  • 1 tsp Baking powder

  • ¼ tsp Salt

  • 3 Large eggs

  • ½ cup Almond milk (unsweetened)

  • ½ cup Liquid coconut oil

  • 1 tsp Vanilla extract

  • 1 ½ cups Grated carrot (finely grated is best)

  • ½ cup Walnuts or pecans, chopped

The Tangy Frosting:

  • 8 oz Cream cheese, softened

  • ¼ cup Unsalted butter, softened

  • ⅓ cup Erythritol (powdered works best for smooth frosting)

  • 1 tsp Vanilla extract

  • A pinch of Salt


Instructions

  1. Prep Work: Preheat your oven to 350°F (175°C). Line an 8×8 or 9×9 inch baking pan with parchment paper, leaving a slight overhang for easy removal.

  2. Mix Dry Ingredients: In a large bowl, whisk together the almond flour, coconut flour, erythritol, cinnamon, nutmeg, ginger, baking powder, and salt.

  3. Mix Wet Ingredients: In a separate bowl, whisk the eggs, almond milk, liquid coconut oil, and vanilla extract until smooth.

  4. Combine: Pour the wet ingredients into the dry ingredients. Mix until a smooth batter forms. Fold in the finely grated carrots and chopped nuts.

  5. Bake: Spread the batter evenly into your prepared pan. Bake for 22–25 minutes. Tip: Do not overbake! The bars should be set but still moist. 6. Cool: Allow the cake to cool completely in the pan. If the cake is even slightly warm, the frosting will melt.

  6. Make the Frosting: In a medium bowl, use a hand beater to cream together the softened cream cheese and butter. Add the powdered Erythritol, vanilla, and salt. Beat until fluffy and smooth.

  7. Frost and Chill: Spread the icing over the cooled cake. For the best texture and clean slices, place the pan in the fridge for at least 30 minutes before cutting into 12 bars.


💡 Pro-Tips for Success

  • Fine Texture: Finely grate your carrots. Large shreds can release too much moisture and make the bars “soggy”.

  • Clean Slices: Use a sharp knife dipped in warm water (and wiped dry) to get those perfect, bakery-style squares.

  • Storage: These stay delicious in the fridge for up to 5 days or can be frozen for up to 2 months.


Nutritional Profile (Per Bar)

  • Calories: 215 kcal

  • Fat: 19g

  • Net Carbs: 7g

  • Protein: 5g