No-Bake Fruit, Nut & Chocolate Oat Bars

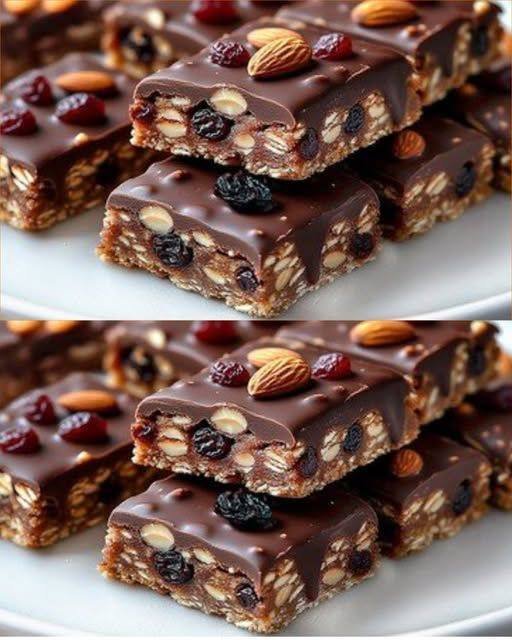
No-Bake Fruit, Nut & Chocolate Oat Bars

A dense, chewy energy-style bar topped with a smooth chocolate layer.

Ingredients

For the Chewy Oat Base:

  • 2 cups Rolled Oats (Old-Fashioned): Provide heart-healthy fiber.

  • ½ cup Creamy Almond Butter or Peanut Butter: Adds healthy fats and protein.

  • ⅓ cup Sugar-Free Maple Syrup: A mindful alternative to traditional sweeteners.

  • ½ cup Slivered or Chopped Almonds: For essential crunch.

  • ½ cup Dried Fruit Mix (Raisins and Dried Cranberries): Natural sweetness.

  • 1 tsp Vanilla Extract and a pinch of Salt: For flavor depth.

For the Chocolate Layer:

  • 1 ½ cups Dark Chocolate Chips (at least 70% cacao): Lower in sugar than semi-sweet.

  • 1 tbsp Coconut Oil (or Butter): Ensures the chocolate stays soft enough to slice.

For the Topping (Garnish):

  • Whole Raw Almonds

  • Dried Cranberries

  • Large Raisins or Dried Cherries


Detailed Instructions

1. Prepare the Base

  • Line an 8×8 inch square baking pan with parchment paper, leaving some overhang on the sides for easy removal.

  • In a large microwave-safe bowl, combine the nut butter and sugar-free syrup. Heat for 30 seconds and stir until smooth.

  • Stir in the vanilla extract and salt.

  • Fold in the oats, slivered almonds, and the dried fruit mix. Stir until everything is thoroughly coated and sticky.

2. Press and Set

  • Transfer the oat mixture into your prepared pan.

  • Use a spatula (or the bottom of a flat measuring cup) to press the mixture down firmly into an even layer. This ensures the bars don’t crumble when cut.

  • Place the pan in the freezer for 10–15 minutes to firm up while you make the topping.

3. The Chocolate Layer

  • In a small bowl, combine the dark chocolate chips and coconut oil.

  • Melt in the microwave in 20-second intervals, stirring in between, until completely smooth.

  • Pour the melted chocolate over the chilled oat base and spread it evenly with a spatula.

4. Garnish and Chill

  • While the chocolate is still wet, artistically arrange your whole almonds, cranberries, and raisins on top.

  • Refrigerate for at least 1–2 hours until the chocolate is set.

  • Lift the bars out using the parchment paper edges and slice them into 16 even squares.


Storage Tip

Keep these bars in an airtight container in the refrigerator for up to a week, or freeze them for a quick grab-and-go snack later!

Refreshing Celery & Lime Hydrator

Refreshing Celery & Lime Hydrator

A crisp, nutrient-dense drink to support hydration and wellness.

Ingredients

  • 1 bunch Fresh Celery: Look for bright green, crisp stalks.

  • 1-2 Fresh Limes: Adds vitamin C and a bright, citrusy flavor.

  • 1 small handful Fresh Parsley (Optional): For an extra boost of antioxidants.

  • 1/2 cup Cold Filtered Water: To help with the blending process.


Detailed Instructions

1. Prepare the Vegetables

  • Separate the celery stalks and wash them thoroughly under cold running water to remove any soil.

  • Chop the stalks into small, 1-inch pieces to make them easier for your blender to process.

  • If using parsley, give it a quick rinse and remove any thick, woody stems.

2. Blend

  • Place the chopped celery and parsley into a high-speed blender.

  • Add the filtered water.

  • Blend on high for 60–90 seconds until the mixture is completely liquefied and looks like a bright green smoothie.

3. Strain (Optional)

  • If you prefer a smooth juice, pour the mixture through a fine-mesh strainer or a nut milk bag into a glass pitcher.

  • Weight Watchers Tip: If you enjoy the texture, drinking it unstrained keeps all the beneficial fiber, which helps you feel full longer!

4. Add Citrus & Serve

  • Squeeze the juice of 1 to 2 fresh limes into the celery juice.

  • Stir well and serve immediately over ice for the most refreshing flavor.


Why this works for your plan

  • Zero Points: Celery and lime are generally zero-point foods, making this a perfect “anytime” drink.

  • Hydration: High water content helps keep your skin glowing and your energy levels up.

  • No Added Sugars: Unlike store-bought juices, this version has no hidden sweeteners.

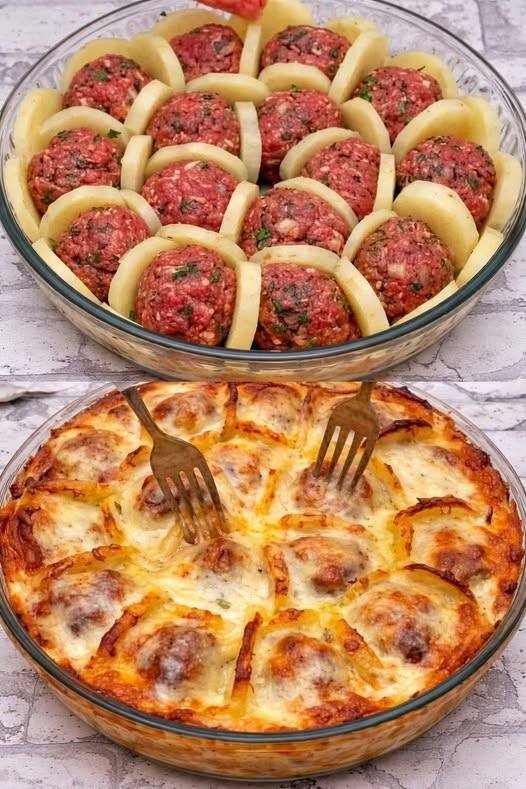
Cheesy Potato & Meatball Bake

Cheesy Potato & Meatball Bake

A hearty, protein-packed French-inspired dish that uses clever layering for a stunning presentation.

Ingredients

The Base & Meatballs:

  • 3 Large Potatoes: Boiled until tender but firm, then sliced.

  • 1 lb Lean Ground Beef or Turkey: (At least 93% lean to stay point-friendly).

  • 1 chopped White Onion: For sweetness and depth.

  • 2 cloves Garlic, minced: A fresh alternative to processed powders.

  • 1/4 cup Fresh Parsley, chopped: For brightness and color.

  • 1 Egg: To bind the meatballs.

  • Salt and Black Pepper: To taste.

The Topping:

  • 1 cup Low-Fat Mozzarella or Light Shredded Cheese: To get that melted, golden finish.

  • Optional: A pinch of nutmeg or paprika for a warm, savory aroma.


Detailed Instructions

1. Prepare the Potatoes

  • Place the whole potatoes in a pot of salted water.

  • Bring to a boil and cook for about 15–20 minutes until they are “al dente” (soft enough to slice, but not falling apart).

  • Drain, let them cool slightly, then peel and slice them into uniform rounds.

2. Mix the Meatballs

  • In a large bowl, combine the ground meat, chopped onion, garlic, parsley, and egg.

  • Season with salt and pepper.

  • Mix by hand until just combined. Roll the mixture into small, even-sized meatballs (roughly the size of a golf ball).

3. Assemble the Dish

  • Preheat your oven to 200°C (400°F).

  • In a round baking dish, begin arranging the potato slices and meatballs.

  • The Technique: Place a potato slice vertically against the edge of the dish, then a meatball, then another potato slice. Repeat this in concentric circles until the dish is full and the meatballs are “cradled” by the potatoes.

4. Bake and Melt

  • Cover the dish with foil and bake for 20 minutes.

  • Remove the foil. Top the entire dish evenly with the shredded cheese.

  • Return to the oven for another 10–15 minutes, or until the meatballs are fully cooked through and the cheese is golden and bubbly.


Serving Suggestion

This dish is quite filling on its own, but it pairs beautifully with a large green salad tossed in a light vinaigrette to keep your points low while adding volume to your meal.

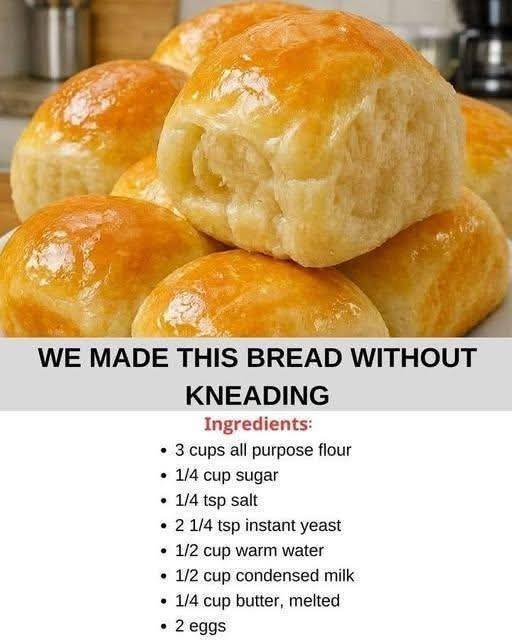
No-Knead Condensed Milk Rolls

No-Knead Condensed Milk Rolls

Super soft, fluffy, and requires only 2 minutes of active mixing.

Ingredients

  • 3 cups All-Purpose Flour: Provides the structure for the rolls.

  • 1/4 cup Granulated Monk Fruit or Stevia: Replaces the refined sugar for a lighter option.

  • 1/4 tsp Salt: To balance the sweetness and strengthen the dough.

  • 2 1/4 tsp (1 packet) Instant Yeast: Essential for the rise without kneading.

  • 1/2 cup Warm Water: To activate the yeast (ensure it is warm to the touch, not hot).

  • 1/2 cup Condensed Milk: For that signature milky flavor and soft crumb.

  • 1/4 cup Butter, melted: Adds richness and moisture.

  • 2 Eggs: Helps with the rise and creates a golden, brioche-like texture.


Detailed Instructions

1. Mix the Base

  • In a large bowl, whisk together the warm water, melted butter, condensed milk, and eggs until smooth.

  • Add the instant yeast and sugar substitute to the liquid mixture and stir.

2. Combine with Flour

  • Add the all-purpose flour and salt to the wet ingredients.

  • Use a sturdy spatula or wooden spoon to mix for about 2 minutes until a sticky, shaggy dough forms and no dry flour remains.

  • Note: Do not be tempted to add more flour; a sticky dough is the secret to a soft roll.

3. First Rise

  • Cover the bowl with a clean kitchen towel or plastic wrap.

  • Let the dough rest in a warm, draft-free spot for 1 to 1.5 hours, or until it has doubled in size.

4. Shape and Second Rise

  • Gently deflate the dough and turn it out onto a lightly floured surface.

  • Divide the dough into 12 equal portions and roll them into smooth balls.

  • Place the balls into a greased baking pan, cover, and let them rise again for 30–45 minutes until puffy.

5. Bake

  • Preheat your oven to 175°C (350°F).

  • Optional: Brush the tops with a little egg wash (1 egg beaten with a splash of water) for a shiny finish.

  • Bake for 20–25 minutes or until the tops are a beautiful golden brown.

Friendly Cinnamon Muffin Donuts

WW-Friendly Cinnamon Muffin Donuts

These muffins provide that classic “donut” texture using a simple, protein-rich base. By swapping the coating, you can enjoy that signature crunch without the heavy sugar hit.

Ingredients

The Batter Base:

  • 2 cups Self-Rising Flour: Provides the structure and lift.

  • 1 cup Sweetened Condensed Milk: This acts as your sweetener and fat source (look for a fat-free or low-fat version to lower the point count further).

  • 2 Large Eggs: To bind the batter and add a boost of protein.

The Mindful Coating:

  • ½ cup Granulated Stevia or Monk Fruit: A 1:1 sugar substitute to keep the “crunch” without the glycemic spike.

  • 1 teaspoon Ground Cinnamon: For that classic aromatic flavor.

  • 2–3 tablespoons Light Butter (Melted): Used sparingly to help the cinnamon mixture stick.


Detailed Instructions

1. Preparation

  • Preheat: Set your oven to 180°C (350°F). Ensure the rack is in the center position for even browning.

  • Prep the Pan: Lightly spray a standard 12-cup muffin tray with non-stick cooking spray or use silicone liners to ensure the muffins pop out easily.

2. Create the Batter

  • In a large mixing bowl, crack the two eggs and whisk them lightly.

  • Pour in the sweetened condensed milk and whisk until the eggs and milk are fully incorporated.

  • Slowly fold in the self-rising flour.

  • Pro Tip: Use a spatula to mix until just combined. If you overmix, the muffins will become tough rather than fluffy. Stop as soon as you see no more dry flour streaks.

3. Bake to Perfection

  • Spoon the batter into the prepared muffin cups, filling each about ¾ of the way full. This gives them room to rise into a “donut hole” dome.

  • Place in the oven and bake for 18–22 minutes.

  • The Test: Insert a toothpick into the center of a muffin; if it comes out clean or with just a few dry crumbs, they are ready. They should be a light golden brown.

4. The Finishing Touch

  • While the muffins are cooling for a minute, combine the cinnamon and sugar substitute in a small, shallow bowl.

  • Melt your light butter in a separate small bowl.

  • While the muffins are still warm, lightly brush the tops with a thin layer of butter.

  • Immediately roll the buttered top into the cinnamon-sweetener mix.

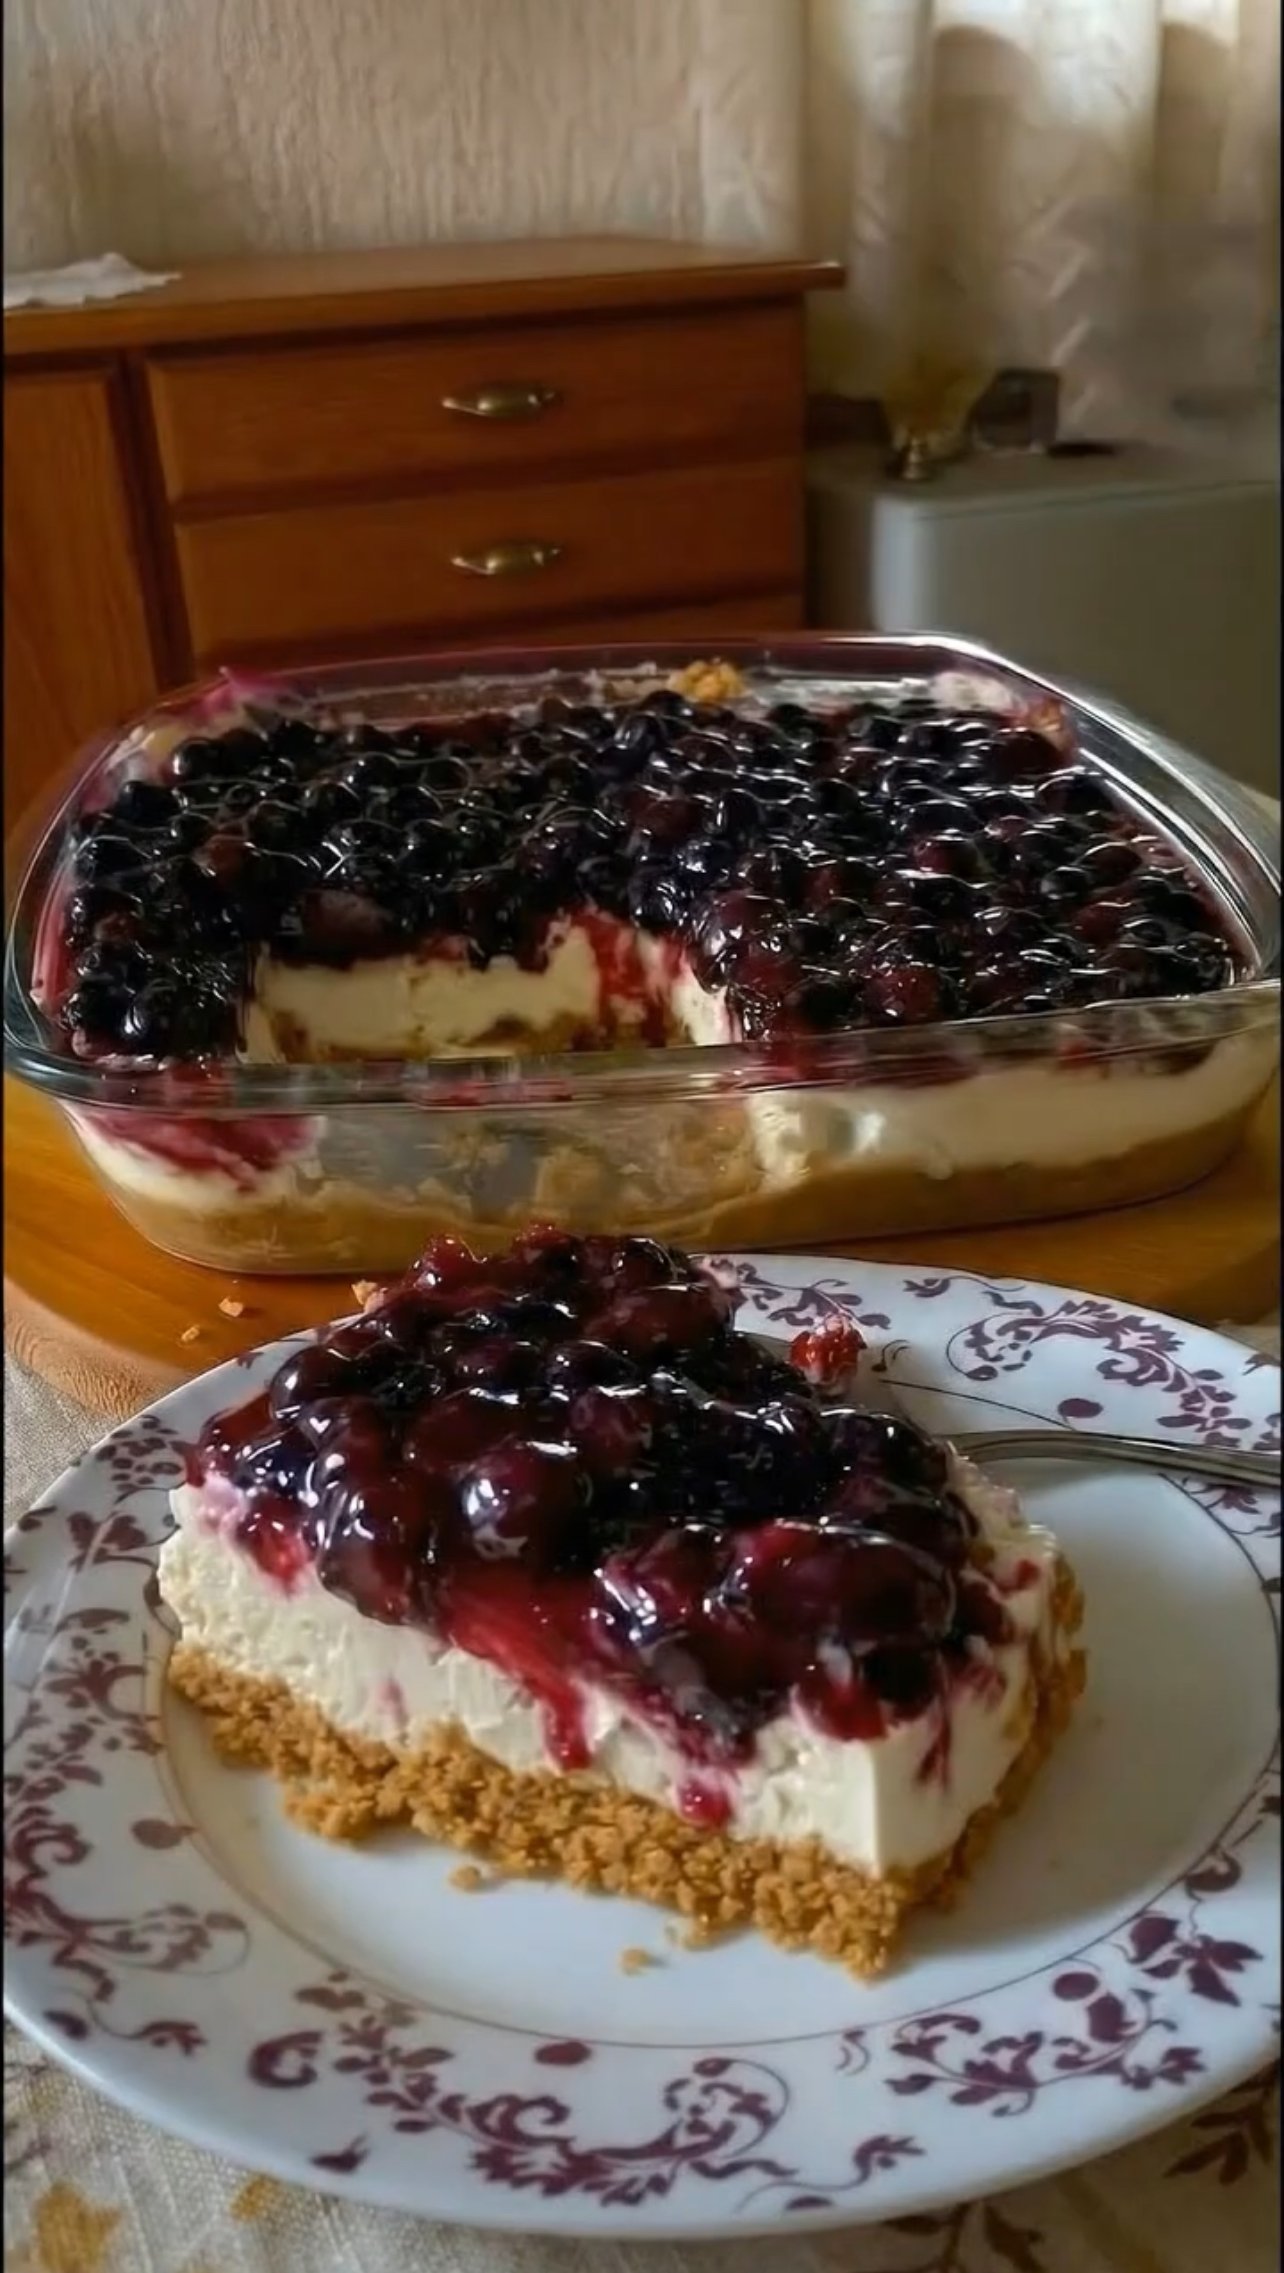
Elegant Baked Blueberry Cheesecake


Elegant Baked Blueberry Cheesecake

Ingredients

For the Crust:

  • 2 cups digestive biscuits or graham crackers (crushed)
  • ½ cup melted butter
  • 2 tbsp sugar (optional)

For the Cheesecake Filling:

  • 2 cups cream cheese (room temperature)
  • ¾ cup sugar
  • 2 large eggs (room temperature)
  • 1 cup heavy cream
  • 1 tsp vanilla essence
  • 1 tbsp cornflour (optional – helps prevent cracks)

For the Blueberry Topping:

  • 2 cups fresh or frozen blueberries
  • ¼ cup sugar
  • 1 tbsp lemon juice
  • 1 tbsp cornflour + 2 tbsp water (mix to make slurry)

👩‍🍳 Step-by-Step Method

Step 1: Prepare the Crust

  1. Crush biscuits into fine crumbs using a blender or rolling pin.
  2. Mix crumbs with melted butter (and sugar if using).
  3. Press mixture firmly into the bottom of a greased 8×8 inch baking dish or springform pan.
  4. Bake at 180°C (350°F) for 10 minutes.
  5. Remove and let it cool.

Step 2: Make the Cheesecake Filling

  1. In a large bowl, beat cream cheese until smooth and creamy.
  2. Add sugar and mix well.
  3. Add eggs one at a time, mixing gently (do not overbeat).
  4. Add heavy cream, vanilla essence, and cornflour.
  5. Mix until smooth and lump-free.

💡 Tip: Overmixing adds air and causes cracks.

Step 3: Bake the Cheesecake

  1. Pour the filling over the cooled crust.
  2. Tap the pan gently to remove air bubbles.
  3. Bake at 160°C (320°F) for 45–55 minutes.
    • Center should be slightly jiggly.
  4. Turn off oven and leave cheesecake inside for 1 hour (door slightly open).
  5. Cool completely at room temperature.
  6. Refrigerate for at least 4 hours or overnight.

Step 4: Prepare the Blueberry Topping

  1. In a saucepan, add blueberries, sugar, and lemon juice.
  2. Cook on medium heat until berries release juice.
  3. Add cornflour slurry and cook until thick and glossy.
  4. Let it cool completely.

Step 5: Assemble

  1. Spread cooled blueberry topping evenly over chilled cheesecake.
  2. Chill for another 30–60 minutes before slicing.
  3. Slice with a warm knife for clean cuts.

✨ Pro Tips for Perfect Cheesecake

✔ Use room temperature ingredients

✔ Don’t overmix

✔ Bake at low temperature

✔ Chill properly for best texture