Keto Drop Biscuits are a delightful and low-carb alternative to traditional biscuits. They are perfect for those following a ketogenic diet or anyone looking to reduce their carbohydrate intake. These biscuits are tender, buttery, and easy to make. Enjoy them as a side dish with keto-friendly soups, stews, or as a snack. Here’s a delicious Keto Drop Biscuits recipe with nutrition facts and serving information.
Recipe: Keto Drop Biscuits
Ingredients:
2 cups almond flour
1/4 cup coconut flour
1 tablespoon baking powder
1/2 teaspoon salt
1/2 cup unsalted butter, melted
4 large eggs
1/4 cup unsweetened almond milk or coconut milk
1/2 cup shredded cheddar cheese (optional, for added flavor)
2 tablespoons fresh chives, finely chopped (optional, for added flavor)
Nutrition Facts (Per Serving – Recipe makes approximately 12 biscuits):
Calories: 215
Total Fat: 19g
Saturated Fat: 6g
Carbohydrates: 6g
Dietary Fiber: 3g
Sugars: 1g
Protein: 7g
Servings:
This recipe makes approximately 12 Keto Drop Biscuits.
Instructions:
1. Preheat and Prepare:
Preheat your oven to 350°F (175°C). Line a baking sheet with parchment paper.
2. Mix Dry Ingredients:
In a large mixing bowl, whisk together the almond flour, coconut flour, baking powder, and salt.
3. Add Wet Ingredients:
Add the melted butter, eggs, and unsweetened almond milk to the dry ingredients. Mix until a thick, uniform dough forms.
4. Optional Additions:
If desired, stir in the shredded cheddar cheese and finely chopped chives for added flavor.
5. Form Biscuits:
Using a spoon or your hands, drop approximately 2 to 2.5 tablespoons of dough onto the prepared baking sheet to create each biscuit. Leave some space between each one.
6. Bake:
Place the baking sheet in the preheated oven and bake for about 15-20 minutes, or until the biscuits are golden brown and cooked through.
7. Serve:
Once baked, remove the biscuits from the oven and let them cool for a few minutes. Enjoy your Keto Drop Biscuits as a side to your favorite keto dishes, or as a snack with butter or cream cheese.
Mix honey and yogurt. Stir in blueberries and almonds. Place them in a tray to freeze. Freeze 2 hours for solid results. 18-25 frozen protein bites.
Nutritional Info :
Smart points 2
Title: Wholesome Blueberry Yogurt Protein Bites: A Quick and Nutrient-Packed Delight
Introduction: Elevate your snacking experience with our delectable Blueberry Yogurt Protein Bites – a nutritious blend of fresh blueberries, slivered almonds, and the goodness of plain yogurt. In just five minutes, you can prepare a delightful treat that not only satisfies your sweet cravings but also provides a boost of protein. These frozen protein bites are a testament to simplicity meeting indulgence, making them an ideal addition to your healthy snack repertoire.
Ingredients: Gather the following wholesome ingredients to embark on your journey to creating Blueberry Yogurt Protein Bites:
1 cup plain yogurt
2 tablespoons honey
1 cup fresh blueberries
1/2 cup slivered almonds
Preparation: In a few simple steps, transform these ingredients into frozen bites of delight:
Begin by mixing honey and yogurt in a bowl, ensuring a smooth and well-incorporated blend.
Stir in fresh blueberries and slivered almonds into the honey-yogurt mixture. The vibrant blueberries add a burst of antioxidants, while the slivered almonds contribute a satisfying crunch and an extra dose of protein.
Place the concoction into a tray, spreading it evenly for uniform freezing.
Allow the Blueberry Yogurt Protein Bites to freeze for a minimum of two hours to achieve a solid and refreshing consistency.
Once frozen, enjoy the fruits of your minimal effort – 18 to 25 bite-sized, frozen protein delights.
Nutritional Information: Savor the satisfaction of a healthy treat with just 2 SmartPoints per Blueberry Yogurt Protein Bite. This nutritional transparency allows you to indulge without compromising your wellness goals, making them an excellent choice for those on a mindful eating journey.
Tips and Variations: Experiment with different yogurt varieties such as Greek yogurt for an extra protein punch or flavored yogurts to add a hint of sweetness. Consider swapping almonds for other nuts like walnuts or pecans to tailor the recipe to your taste preferences.
Conclusion: Blueberry Yogurt Protein Bites are not just a snack; they are a celebration of health and flavor in every bite. Perfect for a quick energy boost or a guilt-free dessert alternative, these frozen delights offer a symphony of textures and tastes. Share this delightful recipe with your friends and family, and let the goodness of fresh blueberries and slivered almonds redefine your approach to wholesome snacking.
Yoghurt ice cream in 2 minutes I make this every year
INGREDIENTS
2 tsp vanilla flavor
2 cups yoghurt
3 tbsp honey
2 tsp vanilla flavorFrozen dessert
2 cups of yogurt in total (500 ml)
3 tbsp milk
Topping as desired
Preparation
It’s so quick and tastes like store-bought ice cream!
First mix all the ingredients well in a plastic bowl for the yogurt ice cream without an ice cream maker.
Place the bowl in the freezer for at least 4 hours. Decorate as desired. Enjoy!
Bon appetit
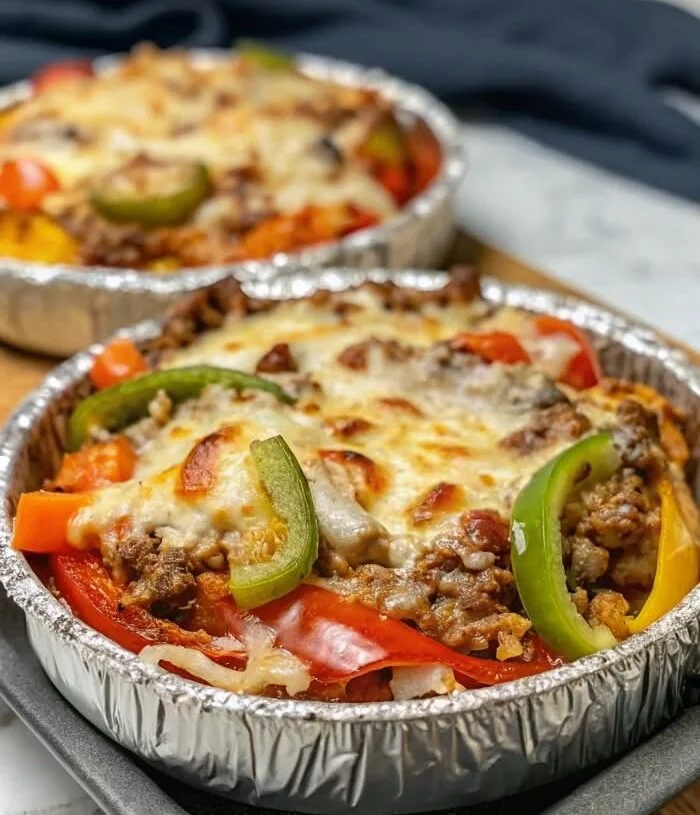
Pizza night just got a whole lot healthier! Say hello to your new favorite guilt-free indulgence: the WW Low Carb Crustless Pizza Bowl. If you’re on the Weight Watchers plan or simply trying to eat healthier without sacrificing taste, this dish delivers everything you love about pizza—melty cheese, rich marinara, savory toppings—without the extra carbs, fat, or SmartPoints that come with a traditional crust.
Made with simple ingredients, this recipe is low in carbohydrates, high in protein, and incredibly satisfying. Plus, it’s quick to prepare, customizable to your liking, and perfect for meal prep or a cozy weeknight dinner. Whether you’re watching your weight, managing carbs, or just looking for a delicious low-effort meal, this pizza bowl will check all your boxes.
Why This Recipe Works for Weight Watchers
Unlike traditional pizza, which can easily rack up points thanks to crust and high-fat toppings, this bowl skips the bread entirely—meaning lower SmartPoints without compromising on flavor. By layering lean proteins, fresh vegetables, and part-skim mozzarella in a bowl and baking it to bubbly perfection, you get all the pizza satisfaction at a fraction of the cost to your daily points budget.
This recipe is also versatile and can be adjusted for WW Blue, Green, and Purple plans depending on the ingredients you use.
Key Features
Low in carbs and calories
High in protein
Only 3–5 WW SmartPoints per serving
Completely customizable
No crust, no problem!
Gluten-free, keto-friendly, and diabetic-friendly
Ingredients
Serves: 2 Serving Size: 1 full pizza bowl
½ cup no-sugar-added marinara sauce (such as Rao’s or homemade)
¾ cup part-skim shredded mozzarella cheese
½ cup cooked lean ground turkey (93% lean) or diced grilled chicken breast
¼ cup turkey pepperoni slices (about 15 slices)
¼ cup diced green bell pepper
¼ cup chopped red onion
¼ cup sliced mushrooms
1 tablespoon grated Parmesan cheese
1 teaspoon Italian seasoning
1/4 teaspoon garlic powder
Crushed red pepper flakes (optional)
Fresh basil or parsley (for garnish)
All ingredients are WW-friendly and designed to keep points low while maximizing taste.
Nutrition Information (Per Serving)
Calories: 280
Protein: 28g
Carbohydrates: 8g
Fat: 15g
Fiber: 2g
Sugars: 4g (naturally from vegetables & sauce)
WW SmartPoints (approx.):
Blue: 4
Green: 5
Purple: 3
SmartPoints were calculated using the WW Recipe Builder with low-fat, low-carb ingredients. Adjust based on your plan and chosen brands.
Step-by-Step Instructions
Step 1: Prepare the Base
Preheat your oven to 400°F (200°C). While the oven heats, grab two oven-safe bowls or small baking dishes.
Spoon ¼ cup of marinara sauce into the bottom of each bowl, spreading it evenly to cover the base.
Step 2: Layer the Protein
Divide your cooked lean ground turkey or chicken evenly between the bowls. This adds hearty protein without spiking your SmartPoints. If you’re using pepperoni, set half aside for the top layer and layer the rest here.
Step 3: Add Vegetables
Top the protein with your chopped onions, mushrooms, and peppers. These non-starchy veggies are zero points on most WW plans and add bulk, nutrition, and flavor without any guilt.
Step 4: Sprinkle with Seasoning
Sprinkle Italian seasoning, garlic powder, and crushed red pepper flakes (if desired) over the veggies. This enhances the flavor without adding calories or points.
Step 5: Add the Cheese
Top each bowl with approximately ⅜ cup of shredded part-skim mozzarella cheese. It may not seem like much, but when melted, it delivers all the gooey satisfaction you expect from pizza.
Finish with a few turkey pepperoni slices on top and a sprinkle of grated Parmesan cheese for that classic pizzeria vibe.
Step 6: Bake to Perfection
Place bowls on a baking tray and bake for 12–15 minutes, or until the cheese is bubbling and golden brown. For a crispier top, broil on high for an additional 1–2 minutes—but watch closely to avoid burning.
Step 7: Garnish and Serve
Remove from the oven and let sit for 2–3 minutes. Garnish with fresh basil or chopped parsley, and enjoy immediately. The aroma and appearance will convince even the biggest pizza lovers that this is the real deal!
Why This Recipe Is Healthy
No refined grains: Skipping the crust cuts out unnecessary calories and carbs.
High in lean protein: Keeps you full longer, supports metabolism, and aids recovery.
Low sugar: Using a no-added-sugar marinara keeps this low-glycemic.
Nutrient-dense vegetables: Add fiber, vitamins, and volume to keep you satisfied.
This pizza bowl turns a comfort food favorite into a nutrient-packed, guilt-free indulgence.
Tips for Success
Use a high-quality marinara sauce with no added sugars and minimal ingredients.
Pre-cook the meat before layering to ensure food safety and even flavor.
Don’t over-bake – the goal is melted cheese and warm toppings, not dried-out protein.
Portion wisely – each bowl is a hearty serving. Pair with a light side salad for balance.
Make it microwaveable – assemble the bowl in a glass container for a fast WW lunch!
Flavor Variations
Spicy Italian: Add turkey Italian sausage, crushed red pepper, and black olives.
Veggie Deluxe: Omit meat and load up on spinach, zucchini, olives, and artichokes.
BBQ Chicken: Swap marinara for sugar-free BBQ sauce, use diced chicken and red onion, and top with a bit of reduced-fat cheddar.
White Pizza Bowl: Use ricotta and garlic as your base, top with spinach and mushrooms.
Each variation can be adapted to fit into WW-friendly point limits.
Substitutions
Dairy-Free: Use a dairy-free mozzarella alternative. Points may vary.
Vegetarian: Omit meat and double the veggies or add plant-based crumbles.
No Turkey Pepperoni? Try lean turkey bacon or omit for a lower-fat version.
Low Sodium: Use a low-sodium sauce and cheese to reduce salt intake.
Make-Ahead & Storage
Meal prep: Assemble all ingredients in a storage-safe dish and refrigerate for up to 3 days.
Freezer friendly: Freeze the assembled (unbaked) bowls. Thaw overnight and bake as directed.
Reheating: Microwave in 1-minute bursts or reheat in the oven at 350°F until warmed through.
Serving Suggestions
Serve with a WW-friendly side salad with balsamic vinaigrette.
Pair with steamed vegetables or roasted broccoli.
Enjoy with a glass of sparkling water with lemon for a full, balanced meal.
Frequently Asked Questions
Q: Can I use store-bought rotisserie chicken?
Yes! Just make sure it’s skinless and check the sodium content for SmartPoint tracking.
Q: Is this keto-friendly?
Absolutely. It’s low in carbs and high in protein, making it suitable for both keto and WW plans.
Q: Can I eat this cold?
While best hot, it’s tasty chilled like leftover pizza—though cheese will firm up.
Final Thoughts
The WW Low Carb Crustless Pizza Bowl is proof that you can enjoy your favorite comfort foods without compromising your health goals. It’s delicious, filling, and loaded with flavor while staying well within your SmartPoint allowance.
From quick dinners to satisfying meal prep, this recipe is one you’ll want to bookmark and return to again and again. With endless variations and only minutes to prepare, it’s the perfect solution for busy, health-conscious pizza lovers.
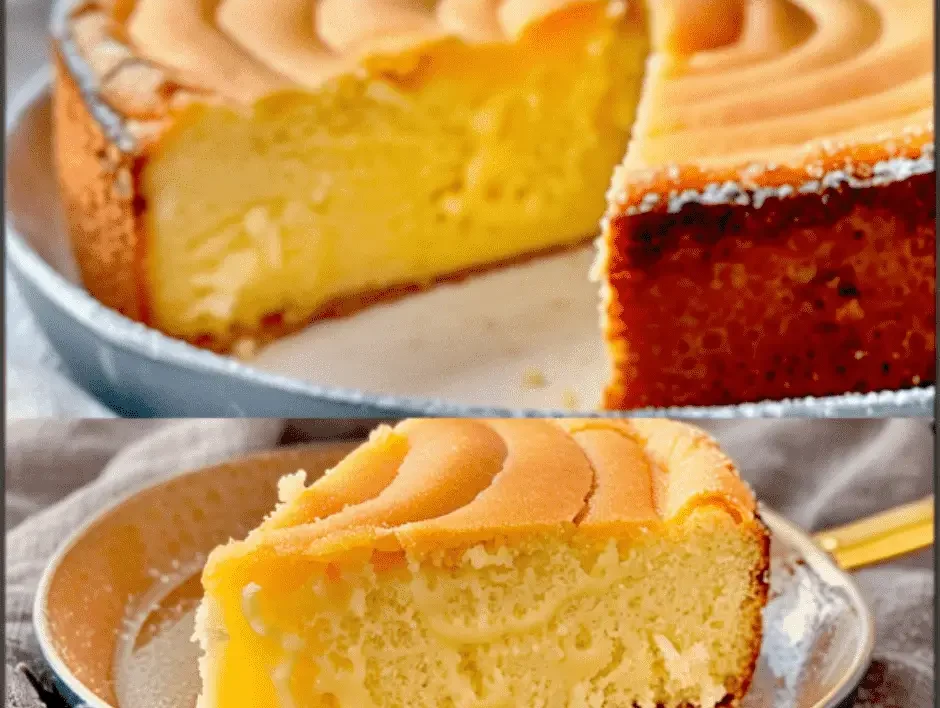
This Keto Creamy Custard Cake is a very delicious, decadent dessert, and it is also low in carbs. This dessert has a smooth and velvety custard base and a light, airy top. This dessert is ideal for anyone on a ketogenic or gluten-free diet because it features low-carb components like almond milk, coconut flour, and Erythritol. This cake has a special texture that makes this dessert different and appealing. As the batter bakes, it separates into different layers and forms a soft sponge top & creamy custard underneath. This cake has a subtle vanilla flavor and it is mildly sweet, & is filling without a strong taste. We can have this Keto Creamy Custard Cake without anything, or we can add some whipped cream and fresh berries to enhance the taste.
STATS:
Serving size: 1 slice
Cook time: Fifty mins
Cuisine: American
Total time: One hour, five mins
Calories: 210 kcal
Prep time: Fifteen mins
Course: Dessert
Diet: Keto, Gluten-Free
Serving: 8 servings
EQUIPMENT:
Baking pan
Parchment paper
Beater
Spatula
Whisk
Knife
INGREDIENTS:
4 large eggs
1/3 cup Erythritol powder
2 tbsp. coconut flour
¼ tsp. xanthan gum
¼ tsp. salt
1 & ½ cups almond milk
½ cup heavy cream
1 tbsp. vanilla extract
Butter
INGREDIENTS NOTES:
EGGS:
We utilize the eggs which should be at the ambient temperature for the best texture and volume.
ERYTHRITOL POWDER:
Erythritol powder is used to make this dessert and it dissolves easily and quickly.
COCONUT FLOUR:
Coconut flour is required in very small amounts as it absorbs moisture very effectively.
XANTHAN GUM:
Xanthan gum is added to thicken the consistency and stabilize the layers.
SALT:
Salt is added to balance the sweetness & improve the flavor overall.
ALMOND MILK:
Almond milk without sugar is used to make this custard cake and it is low in carbs and preserves the lightness of the custard.
HEAVY CREAM:
It is added in the dessert to prepare the rich & creamy dessert.
VANILLA EXTRACT:
It is added to the dessert to make this dish warm and rich.
BUTTER:
Butter is used to grease the dish as it helps the easy removal of the cake.
INSTRUCTION:
We can preheat the oven to three-twenty-five degrees F.
Then we can apply the butter in the pan to grease the dish.
We can divide the eggs sprinkle salt and beat the eggs till we get the stiff peaks.
Then add the Erythritol and yolks in another bowl till they get light and fluffy.
We can add the xanthan gum and coconut flour and stir.
Now we can add the heavy cream, vanilla, and warm almond milk to the dry ingredients by mixing continuously till it gets smooth.
We can carefully fold the egg whites in three parts as the batter will be runny.
Now we can add the batter in the pan and smooth the top layer with the spatula.
We can put the cake to bake for 45 to 50 minutes, or until the center jiggles a little and the top is brown.
When the cake gets cool down we can place the cake in the fridge to get set.
We can slice the Keto Creamy Custard Cake with a knife and serve.
SERVING IDEAS:
We can top this custard cake with the keto whipped cream.
You can also dust the Erythritol powder on the cake.
We can also add fresh raspberries or strawberries to the cake.
You can also pour some keto-friendly chocolate sauce on the cake.
We can also garnish the mint on the cake.
You can also serve this cake with keto-friendly tea or coffee.
TIPS:
We should use the eggs at the ambient temperature.
You don’t have to mix the egg whites too much and fold them softly with the batter otherwise the egg whites will get deflated.
We can use a glass or metal pan for even baking.
You have to properly cool down the cake so we can make the clean slices.
STORAGE INFORMATION:
FRIDGE:
We can put the cake in a sealed box and preserve the cake for 5 days.
FREEZER:
We can cover the slice of the cake in plastic wrap and preserve the cake for one month.
FAQs:
Can we make this cake with the almond flour?
No, we can’t make this cake with the almond flour & we just have to use the coconut flour to make this cake as it absorbs moisture well; we have to reformulate the ingredients if we have to use the almond flour.
How to make a dairy-free cake?
We can use full-fat coconut cream in place of heavy cream to make this cake dairy-free.



 Low in carbs and calories