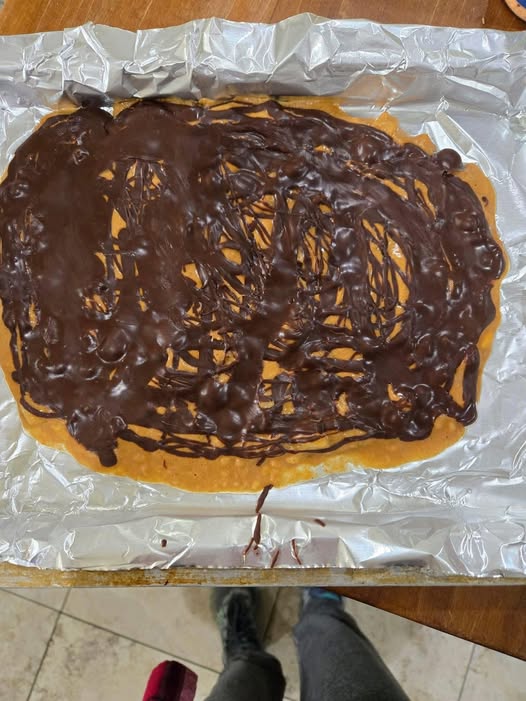
Frozen chocolate peanut butter bark

Serves 8 Frozen chocolate peanut butter bark is a delightful fruity spin on the more traditional frozen yogurt bark. This is 2 weight watchers points per serving! Simply arrange banana slices on a sheet pan, and mash them down until they flatten and form a base for your toppings—in this case, reconstituted powdered peanut butter and melted dark chocolate. After the bark freezes, cut or break it into pieces, and store it in a freezer-safe container for up to 2 weeks.

Ingredients

  • Banana
  • 2 large cut into 1/2-inch-thick slices
  • Powdered peanut butter
  • ¾ cup s
  • Lily’s Dark chocolate baking chips
  • 3 oz or similar product
  • Flaky salt
  • ¼ tsp

Instructions

  1. Line a sheet pan with foil or parchment paper. Arrange the banana slices on the pan to form a rectangle (about 8 x 5 inches). Cover the banana slices with a sheet of parchment paper; press the slices using the bottom of a glass or a dry measuring cup so that they flatten and touch each other. Carefully peel off the top sheet of parchment.
  2. In a small bowl, stir together the powdered peanut butter and 7 to 8 tablespoons of water until smooth; spread the peanut butter over the bananas.
  3. In a small microwave-safe bowl, microwave the chocolate chips on High until melted and smooth, about 1 minute, stopping to stir every 20 seconds. Drizzle the chocolate evenly over the peanut butter and gently spread to cover. Sprinkle evenly with the salt. Freeze until fully firm, at least 1 hour. Cut or break into 8 pieces.
  4. Serving size: 1 piece

Frozen chocolate peanut butter bark

Serves 8 Frozen chocolate peanut butter bark is a delightful fruity spin on the more traditional frozen yogurt bark. This is 2 weight watchers points per serving! Simply arrange banana slices on a sheet pan, and mash them down until they flatten and form a base for your toppings—in this case, reconstituted powdered peanut butter and melted dark chocolate. After the bark freezes, cut or break it into pieces, and store it in a freezer-safe container for up to 2 weeks.

Ingredients

  • Banana
  • 2 large cut into 1/2-inch-thick slices
  • Powdered peanut butter
  • ¾ cup s
  • Lily’s Dark chocolate baking chips
  • 3 oz or similar product
  • Flaky salt
  • ¼ tsp

Instructions

  1. Line a sheet pan with foil or parchment paper. Arrange the banana slices on the pan to form a rectangle (about 8 x 5 inches). Cover the banana slices with a sheet of parchment paper; press the slices using the bottom of a glass or a dry measuring cup so that they flatten and touch each other. Carefully peel off the top sheet of parchment.
  2. In a small bowl, stir together the powdered peanut butter and 7 to 8 tablespoons of water until smooth; spread the peanut butter over the bananas.
  3. In a small microwave-safe bowl, microwave the chocolate chips on High until melted and smooth, about 1 minute, stopping to stir every 20 seconds. Drizzle the chocolate evenly over the peanut butter and gently spread to cover. Sprinkle evenly with the salt. Freeze until fully firm, at least 1 hour. Cut or break into 8 pieces.
  4. Serving size: 1 piece

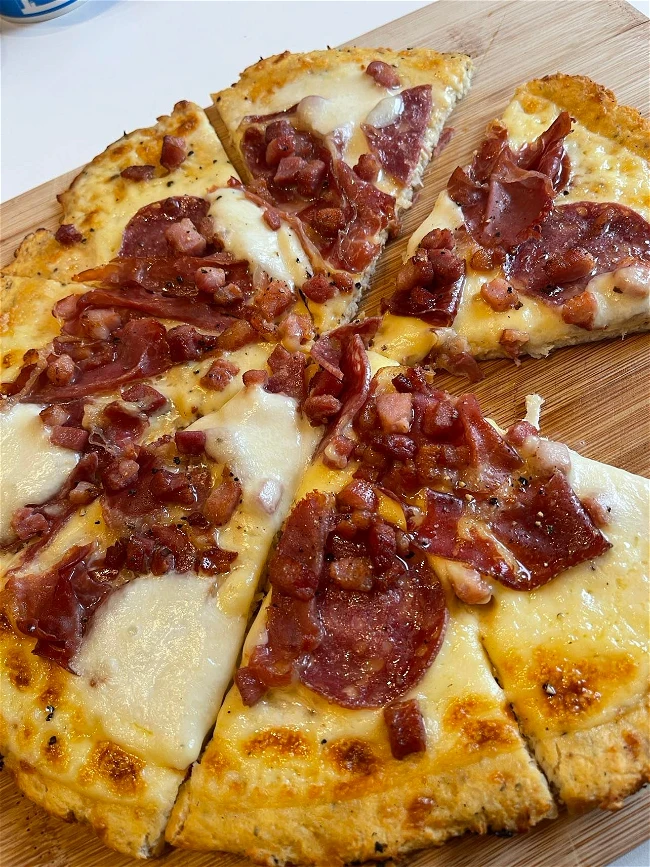
Carnivore Pizza Recipe

Ingredients:

For the Crust:

  • 1 1/2 cups (180g) mozzarella cheese, shredded
  • 1/4 cup (60g) cream cheese
  • 1 large egg
  • 1 cup (100g) almond flour
  • 1/2 tsp garlic powder (optional)
  • 1/4 tsp salt
  • 1/4 tsp baking powder

For the Toppings:

  • 1/2 cup (120g) pizza sauce (optional, can omit for strict carnivore)
  • 1 1/2 cups (180g) shredded mozzarella cheese
  • 1/2 cup (75g) cooked ground beef
  • 1/2 cup (75g) cooked sausage, crumbled
  • 4 slices pepperoni or other carnivore-friendly deli meats
  • 2 slices cooked bacon, chopped
  • 1/2 cup (60g) cooked chicken breast, shredded
  • 1/4 cup (30g) Parmesan cheese (optional, for extra flavor)

Instructions:

  1. Preheat Oven:
    • Preheat your oven to 400°F (200°C) and line a baking sheet with parchment paper or use a pizza stone if you have one.
  2. Make the Crust:
    • In a microwave-safe bowl, combine the shredded mozzarella and cream cheese. Microwave for 30-45 seconds until melted and easy to stir.
    • Stir in the egg, almond flour, garlic powder, salt, and baking powder. Mix until smooth and dough-like.
    • Transfer the dough to the prepared baking sheet and shape it into a pizza crust about 1/4-inch thick.
  3. Bake the Crust:
    • Bake the crust in the preheated oven for 10-12 minutes or until golden and firm.
  4. Assemble the Pizza:
    • Once the crust is done, spread a thin layer of pizza sauce (optional) over the crust. Sprinkle a generous amount of shredded mozzarella cheese over the sauce.
    • Top with your carnivore toppings: ground beef, sausage, pepperoni, bacon, and chicken.
  5. Bake Again:
    • Return the pizza to the oven and bake for an additional 5-7 minutes, until the cheese is melted and bubbly. Optionally, sprinkle Parmesan on top for extra flavor.
  6. Serve:
    • Slice and enjoy your delicious, low-carb carnivore pizza!

Tip: Customize with any other meats or toppings that fit your carnivore diet!

Street Corn Chicken Rice

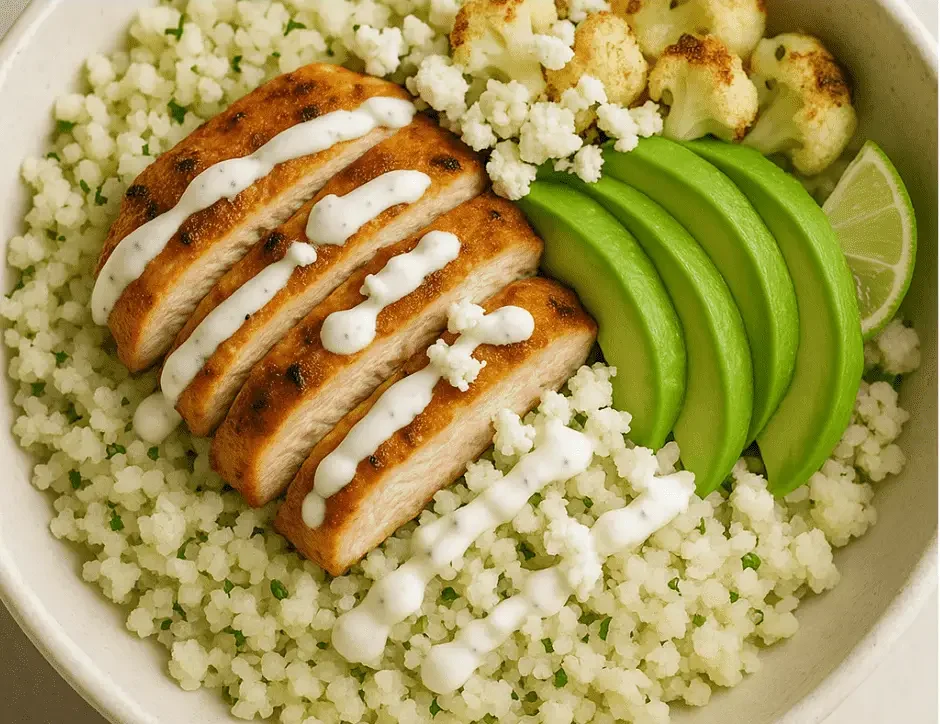
The keto bowl of Street Corn Chicken Rice is a satisfying & healthy meal that is perfect for those on low-carb/strict-keto diets. We have crafted the recipe to smartly swap the corns & rice for their low-carb counterparts. These bowls feature cauliflower rice & corns(extremely keto), marinated cooked chicken slices, lime crema with keto mayo, sour cream, lime, etc., & all keto toppings like wedges of lime, avocado slices, crumbled cheese, chopped cilantro. This keto bowl of Street Corn Chicken Rice is perfectly seasoned, packed with healthy fats, proteins, and many essential nutrients.


NUMERICAL OVERVIEW:

  • Diet: Ketogenic
  • Course: Main course
  • Cuisine: Fusion/Tex-Mex
  • Time for prep: Fifteen mins
  • Twenty-five mins for cooking
  • Working time(in total): Forty minutes
  • Size/serving: A bowl/person
  • Yield in total: 4 bowls
  • Mode of cooking: Grill(grill pan) + stovetop
  • Level of difficulty: Easy to normal

TOOLS:

  • Board & knife for cutting & chopping
  • A grill pan/skillet
  • Rice grater/food processor(for making the rice from cauliflower)
  • Bowls for mixing
  • Tongs/spatula
  • Baking sheet/tray
  • Spoons & cups, to measure

INGREDIENTS:

FOR THE CHICKEN:

  • One tsp. of cumin
  • 2 tbsps. of oil(olive)
  • Chili powder, 1/2 tsp
  • 2 breasts of chicken, boneless & skinless
  • To taste of salt & pepper
  • 1 tsp. of paprika, smoked
  • Fresh juice of half a lime

STRICT KETO VERSION OF THE STREET CORN:

  • 1/4th tsp. of powdered garlic
  • Florets of cauliflower, 1.5 cups
  • 0.25 tsp. of paprika
  • To taste of salt
  • 1 tbsp. of oil(avocado)

CREMA:

  • Fresh juice of a lime
  • 0.5 cup of sour cream, full-fat
  • To taste of salt & pepper
  • 1/4th cup of mayonnaise(avocado-oil based)
  • To taste of salt & pepper
  • 1 clove of minced garlic
  • Chopped cilantro, one tbsp.

RICE BASE:

  • 1 tbsp. of coconut oil/butter
  • Rice of cauliflower, 2 cups
  • To taste of salt

TOPPINGS:

  • Wedges of lime
  • 1/2 sliced avocado
  • Cojita cheese(crumbled), two tbsps.
  • 1/4thc up of fresh cilantro, chopped


INSTRUCTIONS:

COOKING CHICKEN:

  1. Include & mix the paprika, juice of lime, cumin, pepper(black), oil of olives, salt, powdered chili, & garlic in a bowl.
  2. Add chicken to the above marinade you just made.
  3. Coat all the chicken properly & refrigerate while covered it for a minimum of fifteen mins.
  4. Place a skillet on the stove over a normal-fulll flame.
  5. Add the marinated chicken to that skillet.
  6. After ~seven mins, turn the side of the chicken.
  7. Fry for the same precise length of time on the other side.
  8. Check that the chicken must be tender from inside & golden & crisp from the outer side.
  9. If it’s done, dish it out, cool it, then slice/dice the chicken.

PREPARING THE STRICT KETO VERSION OF CORN:

  1. First, prepare the corn-sized bits of cauliflower florets.
  2. Then coat them properly with the mixture of salt, paprika, oil of avocado, & powdered garlic.
  3. Spread the seasoned corn-sized cauliflower bits on the baking sheet/tray.
  4. Shift that baking tray to the oven for roasting the cauliflower bits for ~twenty mins at 200 °C.
  5. After ~ten mins mix them to change their position for even roasting.
  6. Check them after twenty mins, and remove them from the oven if they are crisp & golden.

LIME CREMA:

  1. Mix juice of lime, sour cream, pepper, mayo, salt, minced garlic, & chopped cilantro in a bowl.
  2. Now, you can refrigerate your lime crema.

COOKING OF CAULIFLOWER RICE:

  1. Include oil/butter in a skillet over a normal flame.
  2. Include the cauliflower rice in that melted butter/hot oil.
  3. Sprinkle the salt, mix & cook them until tender(~five mins).

ASSEMBLING:

  1. Grab the four serving bowls.
  2. Add an equal amount of cauliflower rice in each bowl.
  3. Now, top the rice with chicken slices, cauliflower”corn”, avocado slices, drizzle of lime crema, cheese, & fresh cilantro one by one.
  4. Finally, press half a fresh lime’s juice into each bowl.
  5. Your strict keto bowls of Street Corn Chicken Rice are ready to serve!

TIPS:

  • Use an airfryer to have the extra crispy cauliflower corns
  • You may use the leftover/rotisserie chicken for the quick work.
  • You may use the chipotle/jalapenos for the spicy version.
  • Longer marination of chicken & longer refrigerating of crema will give you deep flavor.

HOW TO PRESERVE(LEFTOVERS):

NOTE: Never store an assembled rice bowl

CHILLING:

  • Save every component individually in the containers(sealed). Refrigerate them all for ~four days. Bring all components to the surrounding temperature while rewarming the rice & chicken. Then assemble them for quick serving.

FREEZING:

  • You may save the chicken & rice of cauliflower individually in the container with sealed lids. Freeze them for ~sixty days. Never freeze the crema & topping. Defrost & reheat the chicken, prepare the lime crema & toppings fresh. Assemble them all to serve.

FAQs:

What can I use in place of the dairy cheese?

  • You may use extra cream, paste of avocado, or almond-based crumbled cheese in place of dairy cheese. You can also skip the cheese if you want.

Will the frozen cauliflower rice work?

  • Absolutely! You need to defrost & drain extra water properly, then your cauliflowers are good to go.


NUTRITIONAL FACTS/SERVING:

Size/serve: 1 Bowl
Calories: ~395 kcal
Carbs in total: Nine grams
Fiber: 4 g
Net carbohydrates: Five grams
Fats: 27 grams
Sugar: Two grams
Proteins: 27 g
Sodium: 510 mg

Weight Watchers-Friendly Sausage and Egg Breakfast Muffins

1 Point Egg Muffins
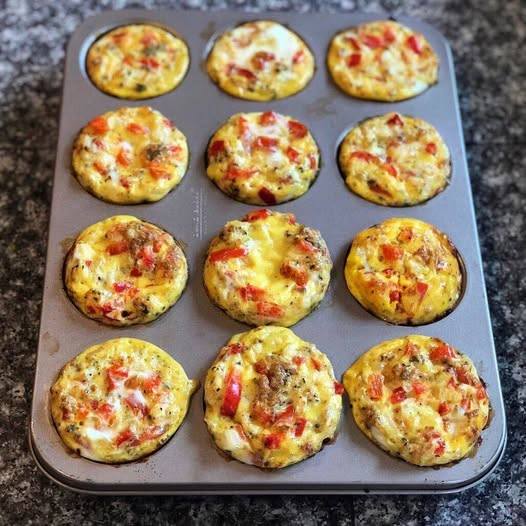
Introduction: Indulge in a culinary masterpiece with our delectable 1-Point Egg Muffins, a delightful fusion of flavors and textures that will elevate your breakfast experience. Packed with pre-cooked ham, finely diced bell pepper, and onion, these savory muffins are a perfect blend of protein and vegetables. Whether you’re seeking a convenient meal prep option or a sophisticated brunch dish, our egg muffins are a versatile addition to your culinary repertoire.
Ingredients:
1/2 lb pre-cooked ham, diced (bacon or sausage can be substituted)
1 bell pepper, finely diced
1/2 onion, finely diced
10 eggs
1/2 tsp salt
1/2 tsp pepper
2 tbsp avocado oil (bacon fat can be used for added flavor)
Instructions:
Preheat Oven to Perfection: Begin by preheating your oven to 375°F, ensuring the ideal temperature for achieving the perfect texture and flavor in our egg muffins.
Chop with Precision: Meticulously dice the pre-cooked ham, bell pepper, and onion to create bite-sized pieces that will be evenly distributed throughout each muffin, providing a burst of flavor in every bite.
Whisk and Mix with Finesse: Crack the eggs into a spacious bowl and whisk them to perfection. Add the meticulously chopped ingredients, along with 1/2 teaspoon of salt and pepper each, creating a harmonious blend of flavors.
Grease for Success: Ensure the muffin tin is generously coated with your preferred fat or oil, preventing any sticking issues during baking. Alternatively, opt for muffin tin liners for a hassle-free baking experience.
Spoonfuls of Culinary Art: Carefully spoon the egg mixture into each section of the muffin tin, filling them almost to the brim. Anticipate a delightful puffing up as they bake, promising an aesthetically pleasing presentation.
Bake to Perfection: Place the muffin tin in the preheated oven and let the magic happen for approximately 20 minutes. The result? A golden-brown exterior with a perfectly cooked, fluffy interior.
Cooling Elegance: Allow the egg muffins to cool slightly before serving, enhancing the overall texture and ensuring a delightful dining experience.
Nutritional Information (Per Serving):
Calories: 311kcal
Carbohydrates: 3g
Protein: 26g
Fat: 20g

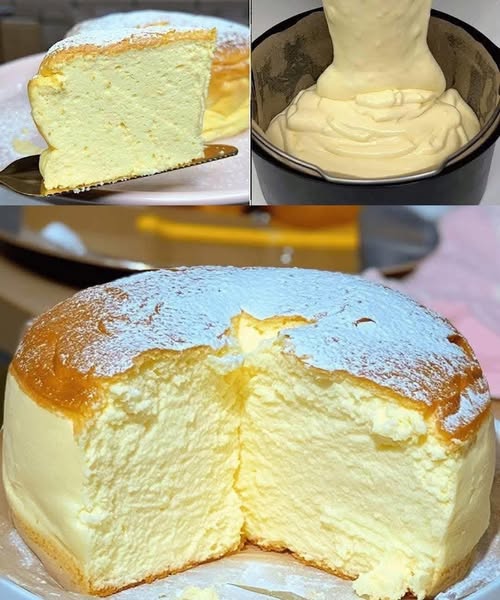
Two Ingredient Cloud Cake

Yields: 8-10 servings
Prep time: 30 minutes
Cook time: 60-70 minutes
Ingredients:
For the Batter:
3 large eggs, separated (yolks and whites)
1/4 cup (56g) light cream cheese, softened (Philadelphia 1/3 less fat or similar)
1/4 cup (60ml) unsweetened almond milk or skim milk
2 tbsp (30g) unsalted butter (or light butter alternative, if available and suitable for baking)
1/4 cup (30g) all-purpose flour, sifted
1 tbsp (8g) cornstarch, sifted
1/4 tsp cream of tartar (optional, but helps stabilize egg whites)
1/2 cup (80g) erythritol or another granular sugar substitute equivalent to 1/2 cup sugar
1/2 tsp vanilla extract
Pinch of salt
For the Water Bath:
Boiling water
For Dusting (Optional):
1-2 tsp powdered erythritol or other powdered sugar substitute
Equipment:
8-inch round springform pan or cake pan with a removable bottom
Parchment paper
Aluminum foil
Large roasting pan (for water bath)
Electric mixer
Spatulas
Whisk
Instructions:
Prepare the Pan: Grease and flour your 8-inch springform pan. Line the bottom with parchment paper. For easy removal and to prevent water from seeping in during the water bath, wrap the outside of the pan securely with 2-3 layers of aluminum foil. Preheat your oven to 325°F (160°C).
Make the Cheese Base:
In a heatproof bowl set over a pot of simmering water (double boiler), combine the softened light cream cheese, unsweetened almond milk (or skim milk), and butter. Whisk constantly until the mixture is smooth and fully combined. Remove from heat.
Whisk in the egg yolks one at a time until fully incorporated.
Sift in the flour and cornstarch into the mixture. Whisk until smooth and no lumps remain. Stir in the vanilla extract and a pinch of salt. Set aside.
Whip the Meringue:
In a very clean, dry bowl (preferably glass or metal), add the egg whites and cream of tartar (if using).
Using an electric mixer, start whipping the egg whites on medium speed until foamy.
Gradually add the erythritol (or sugar substitute) a little at a time while continuing to whip.
Increase the speed to high and whip until you achieve glossy, soft peaks. The to meringue should hold its shape but still be pliable. Do not over-whip to stiff peaks, as this can make the cake dry.
Combine the Batters:
Add about one-third of the meringue to the cheese base mixture. Gently fold it in with a spatula to lighten the batter.
Add the remaining meringue in two additions, gently folding until just combined. Be careful not to deflate the meringue; this is key to the soufflé texture. Overmixing will result in a dense cake.
Bake with Water Bath:
Pour the batter into the prepared springform pan. Gently tap the pan on the counter a few times to release any large air bubbles.
Place the springform pan into the larger roasting pan. Carefully pour boiling water into the roasting pan until it comes about 1 inch up the sides of the springform pan.
Carefully transfer the roasting pan to the preheated oven.
Bake for 60-70 minutes, or until the top is golden brown and the cake is set but still slightly wobbly in the center. An inserted skewer should come out with moist crumbs.
Cooling and Serving:
Once baked, turn off the oven and prop the oven door open slightly with a wooden spoon. Let the cheesecake cool in the oven for about 30-60 minutes. This slow cooling helps prevent the cake from deflating too much.
Remove the cake from the oven and the water bath. Carefully remove the aluminum foil. Let it cool completely on a wire rack before refrigerating for at least 2-3 hours (preferably overnight) to firm up.
Once chilled, carefully run a thin knife around the edge of the pan before releasing the springform.
Dust with powdered erythritol before serving, if desired.
Weight Watchers Point Considerations (Estimate):
Light Cream Cheese: Significantly lower in points than full-fat.
Unsweetened Almond Milk/Skim Milk: Very low or zero points.
Erythritol/Sugar Substitute: Zero points.
Butter: This is where some points will come from. Using a good quality light butter or a smaller amount if you can adjust, helps.
Flour & Cornstarch: These will contribute points.
Eggs: Points depend on the plan, but generally moderate.
To get accurate points for your specific cake, you would need to input all the exact ingredients and their quantities into your WW app and divide by the number of servings. For example, if the entire cake comes out to 30 points and you cut 10 slices, each slice would be 3 points.
Enjoy your light and airy Japanese Soufflé Cheesecake

Carnivore Fluffy Pancakes

Table of Contents

🥞🔥 Carnivore Fluffy Pancakes

Forget flour and sugar—these Carnivore Fluffy Pancakes are a protein-packed, ultra-satisfying alternative that blow traditional pancakes out of the water. With a tender texture and buttery flavor, they’re ideal for low-carb, keto, and carnivore diets alike. Bonus: they’re quick to whip up and endlessly customizable with zero guilt.

📝 Ingredients (Base Version):

  • 4 large eggs
  • 4 oz cream cheese (or 1/2 cup, softened)
  • 2 tbsp beef gelatin (gives the “fluffy” texture – like flour!)
  • 1 tbsp butter or ghee (for cooking)
  • Pinch of salt
  • Optional: splash of vanilla extract or cinnamon (for more flavor, if tolerated)

👨‍🍳 Instructions:

  1. Blend the Batter
    • In a blender or mixing bowl, combine eggs, cream cheese, gelatin, and salt.
    • Blend or whisk until very smooth—no lumps. Let it sit for 2–3 minutes to activate the gelatin.
  2. Heat the Pan
    • Heat a nonstick or cast iron skillet over medium-low heat. Add a small amount of butter or ghee.
  3. Cook the Pancakes
    • Pour small rounds of batter (about 3–4 inches wide) into the pan.
    • Cook for 2–3 minutes per side, flipping once bubbles form and the edges firm up.
    • Repeat until all batter is used.
  4. Serve & Enjoy!
    • Serve warm with a pat of butter, whipped cream cheese, or even bacon slices on top!

🍽️ Servings:

Makes 6–8 small pancakes (Serves 2)

🔍 Notes:

  • Beef gelatin is key for fluffiness! It mimics the structure that flour provides in regular pancakes.
  • You can double the batch and refrigerate the leftovers—great for meal prep.

💡 Tips:

  • For extra richness, separate the eggs and whip the egg whites until fluffy—fold into the batter for extra airy pancakes.
  • Want it sweeter (but still carnivore-ish)? Add a pinch of cinnamon or vanilla extract.
  • Use a ring mold for perfect circular shapes and even thickness.
  • Make a savory version: add shredded cheese or crispy bacon bits to the batter!

🧾 Nutritional Info (per serving, approx. 3–4 pancakes):

  • Calories: ~320
  • Protein: ~20g
  • Fat: ~26g
  • Carbs: <1g
  • Fiber: 0g
  • Sugar: 0g

🌿 Carnivore Health Benefits:

  • Zero carbs: Supports ketosis, fat burning, and blood sugar stability
  • High in protein & healthy fats: Keeps you full and fuels your body
  • Gelatin: Great for joint health, skin elasticity, and gut support
  • Eggs & cream cheese: Rich in essential vitamins like A, D, B12, and choline

❓ Q&A:

Q: Can I use bone broth protein powder instead of gelatin?
A: Yes! It works similarly but may be less fluffy—great for added nutrition though.

Q: What toppings are allowed on carnivore?
A: Try butter, whipped cream cheese, unsweetened mascarpone, or melted cheese. For keto-carnivore, a small drizzle of sugar-free syrup may be okay.

Q: Can I prep the batter in advance?
A: Yes! Store in the fridge up to 24 hours. Let it sit at room temp for 10 mins before cooking for best texture.

Q: Can I make these dairy-free?
A: Use duck fat or tallow for cooking and replace cream cheese with a mix of egg yolks and beef tallow.

Q: Are these freezer-friendly?
A: Absolutely. Freeze in layers with parchment paper. Reheat in a skillet or toaster oven.