Bacon, Pickle & Cheese Grilled Sandwich

Smoky bacon, melty cheddar and Swiss, and tangy dill pickles layered between buttery, golden bread — this grilled sandwich is next-level comfort food with a zesty twist.

Prep Time: 5 minutes
Cook Time: 8–10 minutes
Total Time: ~15 minutes
Servings: 1 sandwich
Dietary: Comfort food

Ingredients

  • Bacon – 2 slices

  • Bread – 2 slices (white, sourdough, or your favorite)

  • Unsalted butter – 1 tbsp

  • Dill pickles – 4 slices

  • Swiss cheese – 2 slices

  • Cheddar cheese – 2 slices

Instructions

  1. Cook the bacon: In a skillet or oven, cook bacon until crispy. Transfer to a paper towel-lined plate to drain.

  2. Prepare the bread: Spread butter evenly over one side of each bread slice.

  3. Assemble the sandwich: Place one slice of bread, buttered side down, in a preheated skillet. Layer cheddar cheese, cooked bacon, dill pickle slices, and Swiss cheese. Top with the second bread slice, buttered side out.

  4. Grill the sandwich: Cook over medium-low heat, pressing gently, for 3–4 minutes per side, until bread is golden and cheese is fully melted.

  5. Serve: Slice in half and enjoy hot.

Quick Notes & Pro Tips

  • Low and slow: Use medium-low heat so the cheese melts before the bread gets too dark.

  • Crispier finish: Press gently with a spatula for a panini-like effect.

  • Pickle prep: Pat pickles dry to avoid a soggy sandwich.

Why You’ll Love It

This isn’t your average grilled cheese. The smoky bacon and creamy melted cheeses are perfectly balanced by the bright, tangy crunch of dill pickles — an addicting combination in every bite.

Ingredient Details & Substitutions

  • Bread: Sourdough or rye adds a heartier texture.

  • Cheese: Swap Swiss for provolone or add pepper jack for heat.

  • Pickles: Try bread-and-butter pickles for a sweeter twist.

Variations & Serving Suggestions

  • Spicy kick: Add sliced jalapeños or a smear of hot mustard.

  • Deli-style: Layer in smoked turkey or ham for a heartier melt.

  • Dip it: Serve with tomato soup or a creamy ranch dressing.

Storage & Make-Ahead

  • Best fresh: Enjoy immediately for the crispiest texture.

  • Reheat: Warm in a skillet or air fryer to restore crunch (avoid microwaving).

FAQs

Q: Can I make this without bacon?
A: Absolutely — swap in turkey bacon or skip for a vegetarian version.

Q: Can I make this in a panini press?
A: Yes! A press will create even more melt and crispness.

Personal Note

This sandwich is one of my favorite “guilty pleasure” lunches — a mashup of a grilled cheese and a deli pickle plate. It’s easy, indulgent, and deeply satisfying.

Grilled Teriyaki Chicken with Pineapple

Juicy teriyaki-marinated chicken paired with caramelized grilled pineapple, finished with sesame seeds and green onions — a tropical, sweet-savory meal perfect for summer grilling.

Prep Time: 15 minutes (plus 2–8 hours marinating)
Cook Time: 15–20 minutes
Total Time: ~2½–9 hours
Servings: 4
Dietary: Dairy-free

Ingredients

For the marinade:

  • Sesame oil (1 tbsp)

  • Fresh ginger – grated (1 tsp)

  • Garlic – finely chopped (2 cloves)

  • Brown sugar – packed (2 tbsp)

  • Soy sauce (¼ cup)

  • Pineapple juice (½ cup)

  • Teriyaki sauce (1 cup)

For the chicken & pineapple:

  • Ripe pineapple – cut into circles (1 whole)

  • Boneless, skinless chicken thighs or breasts (4 pieces)

For garnish:

  • Chopped green onions

  • Toasted sesame seeds

Instructions

  1. Make the marinade: In a bowl, mix sesame oil, ginger, garlic, brown sugar, soy sauce, pineapple juice, and teriyaki sauce until well combined.

  2. Marinate the chicken: Place chicken in a dish or zip-top bag. Pour the marinade over it, seal, and refrigerate for at least 2 hours (overnight for best flavor).

  3. Preheat the grill: Set to medium-high heat.

  4. Grill the chicken: Remove chicken from the marinade (reserve leftover marinade for basting). Grill 6–7 minutes per side, brushing with the marinade occasionally, until internal temperature reaches 165°F (74°C). Discard any marinade that touched raw chicken.

  5. Grill the pineapple: Place pineapple rings on the grill for 2–3 minutes per side, until charred and caramelized.

  6. Serve: Top chicken with grilled pineapple rings. Sprinkle with chopped green onions and toasted sesame seeds.

Quick Notes & Pro Tips

  • Marinate longer: Overnight marination deepens the flavor.

  • Char the pineapple: Look for grill marks — they bring sweetness and a smoky touch.

  • Brush with marinade: Adds layers of flavor while cooking, but toss any marinade that touched raw chicken.

  • Chicken choice: Thighs stay juicier on the grill, but breasts work great with careful cooking.

Why You’ll Love It

This dish blends sweet, smoky, and savory flavors with minimal effort. The teriyaki and pineapple combo creates a bright, tropical balance — perfect for a casual backyard cookout or an easy weeknight dinner.

Step-by-Step Cooking Guide

1. Marinating the Chicken

  • Combine all marinade ingredients and soak the chicken for at least 2 hours.

2. Grilling the Chicken & Pineapple

  • Grill chicken to 165°F, brushing occasionally with marinade. Grill pineapple until caramelized.

3. Serving

  • Top grilled chicken with pineapple rings and garnish with green onions and sesame seeds.

Ingredient Details & Substitutions

  • Teriyaki sauce: Use a thick, glaze-style teriyaki for richer coating.

  • Soy sauce: Sub with tamari for gluten-free.

  • Pineapple: Fresh works best for grilling; canned rings can be used in a pinch.

Variations & Serving Suggestions

  • Add heat: Stir sriracha or chili flakes into the marinade for a spicy kick.

  • Rice bowl: Serve over steamed rice with stir-fried veggies for a full meal.

  • Skewers: Cut chicken and pineapple into chunks, thread onto skewers, and grill for kabobs.

Storage & Make-Ahead

  • Refrigerate: Store leftovers in an airtight container for up to 3 days.

  • Freeze: Freeze marinated raw chicken for up to 2 months; thaw before grilling.

  • Reheat: Warm gently in a skillet or low oven to avoid drying out.

FAQs

Q: Can I bake this instead of grilling?
A: Yes — bake at 400°F for 20–25 minutes (add pineapple during the last 10 minutes).

Q: Can I use chicken drumsticks or wings?
A: Absolutely — just adjust cooking times and ensure they reach 165°F internally.

Q: How do I prevent the chicken from drying out?
A: Use thighs or brine chicken breasts for extra moisture before marinating.

Personal Note

This recipe came from my love for Hawaiian-style teriyaki plates — juicy chicken, sweet pineapple, and a pop of sesame crunch. It’s become a summer staple in my kitchen.

Your turn!
Tried this Grilled Teriyaki Chicken with Pineapple? Leave a review or tag me on social media — I’d love to see your version!

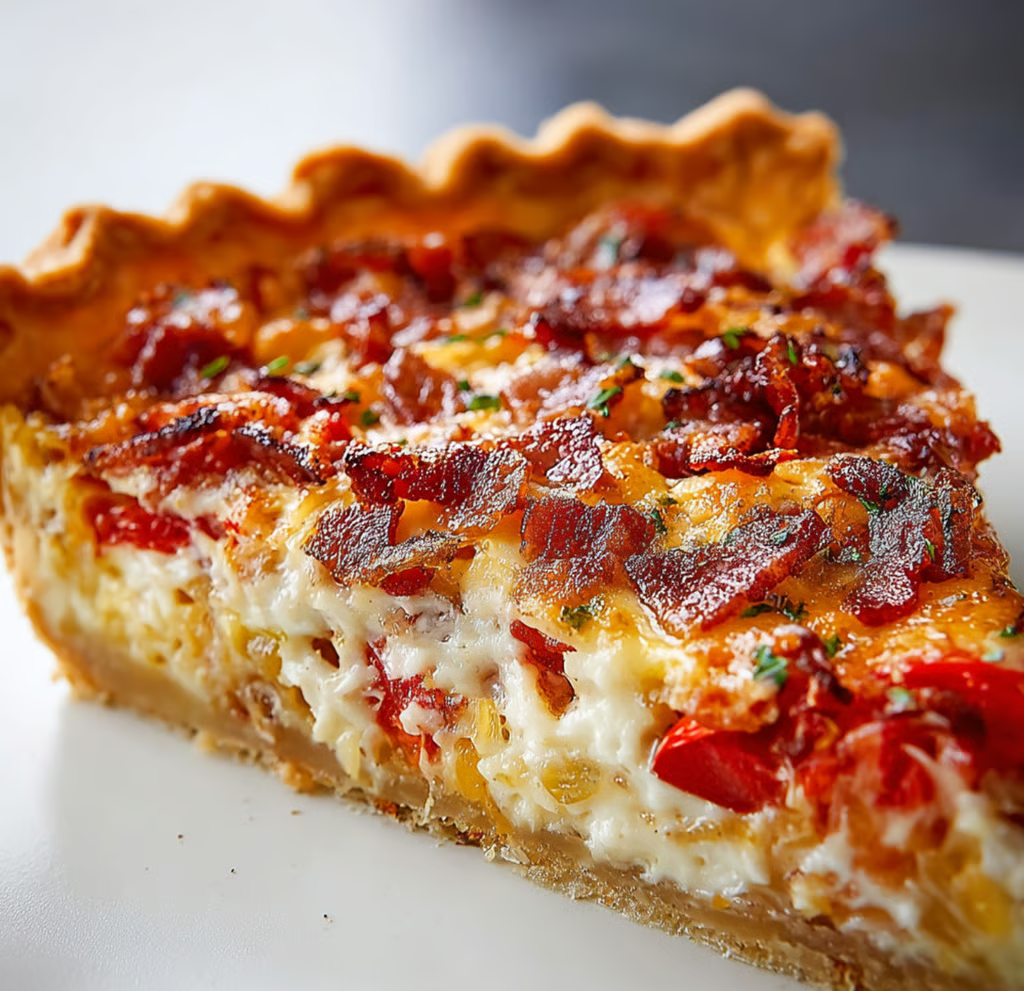
Bacon, Tomato & Onion Pie

A savory pie layered with caramelized onions, crisp bacon, juicy tomatoes, and a creamy, cheesy topping — the perfect comfort dish for brunch, dinner, or potlucks.

Prep Time: 20 minutes
Cook Time: 35–40 minutes
Total Time: ~1 hour
Servings: 6–8
Dietary: Comfort food, Crowd-pleaser

Ingredients

For the crust:

  • One pre-baked deep 9-inch pie shell

For the filling:

  • 8–6 thick slices of bacon – fried crisp and chopped

  • 2 medium tomatoes – thinly sliced

  • 1 large yellow onion – very thinly sliced

For the topping:

  • Mozzarella cheese – shredded (1 ½ cups)

  • Mayonnaise (½ cup)

  • Sour cream (½ cup)

  • All-purpose flour (1 tbsp)

  • Garlic powder (½ tsp)

  • Salt (¼ tsp)

  • Black pepper (¼ tsp)

For garnish (optional):

  • Fresh parsley or chives – chopped (1 tbsp)

Instructions

  1. Preheat oven: Set to 350°F (175°C). Place a baking sheet on the lower rack (to catch drips).

  2. Caramelize the onions: In a skillet over medium heat, cook onion slices in a little bacon grease until soft and golden brown (about 10 minutes). Let cool slightly.

  3. Layer the filling: In the pre-baked pie shell, layer half the onions, half the tomatoes, and half the bacon. Repeat with remaining onions, tomatoes, and bacon.

  4. Make the topping: In a bowl, mix mozzarella, mayonnaise, sour cream, flour, garlic powder, salt, and pepper until smooth.

  5. Assemble & bake: Spread the topping evenly over the layered filling. Bake for 35–40 minutes until bubbly and golden on top.

  6. Cool & serve: Let rest for a few minutes. Garnish with parsley or chives before slicing.

Quick Notes & Pro Tips

  • Pre-bake the crust: Ensures a crisp base that holds up to the filling.

  • Onions: Slow-cook them for deeper flavor.

  • Tomatoes: Pat slices dry to avoid excess moisture in the pie.

  • Serving tip: Let the pie cool slightly before slicing so it holds its shape.

Why You’ll Love It

This pie combines layers of smoky bacon, caramelized onions, and fresh tomatoes with a creamy, cheesy topping that bakes up golden and bubbly. It’s hearty enough for dinner but elegant enough for brunch.

Step-by-Step Cooking Guide

1. Prepping the Filling

  • Fry bacon until crisp. Caramelize onions in the rendered grease for rich flavor.

2. Layering the Pie

  • Onion, tomato, bacon — twice for even flavor distribution.

3. Mixing the Topping

  • Whip together the creamy mixture with mozzarella for a tangy, cheesy finish.

Ingredient Details & Substitutions

  • Cheese: Try cheddar or a mozzarella–Parmesan mix for more depth.

  • Sour cream: Swap for Greek yogurt for a lighter topping.

  • Crust: Use homemade pie dough or a store-bought pastry shell.

Variations & Serving Suggestions

  • Add a kick: Sprinkle in red pepper flakes or a dash of hot sauce.

  • Vegetarian version: Skip the bacon and add sautéed mushrooms or spinach.

  • Serving idea: Pair with a fresh green salad or serve as a side to grilled meats.

Storage & Make-Ahead

  • Refrigerate: Store covered for up to 3 days.

  • Reheat: Warm slices in a 325°F oven for 10–15 minutes to keep the crust crisp.

  • Make-ahead: Pre-cook bacon and onions and assemble layers a day ahead; bake fresh.

FAQs

Q: Can I use different cheese?
A: Yes — sharp cheddar, Gruyère, or a blend adds great flavor.

Q: Can I make this crustless?
A: Yes — pour filling into a greased pie dish and bake until set.

Q: How do I prevent a soggy crust?
A: Pat tomatoes dry and pre-bake the crust thoroughly.

Personal Note

This pie is inspired by classic Southern tomato pie but takes it up a notch with caramelized onions and smoky bacon. It’s the kind of dish that disappears fast at family gatherings.

Your turn!
Tried this Bacon, Tomato & Onion Pie? Leave a review or tag me on social media — I’d love to see your version!


Would you like me to make a “breakfast version” (with eggs for a quiche-like texture) or turn this into individual mini pies for parties?

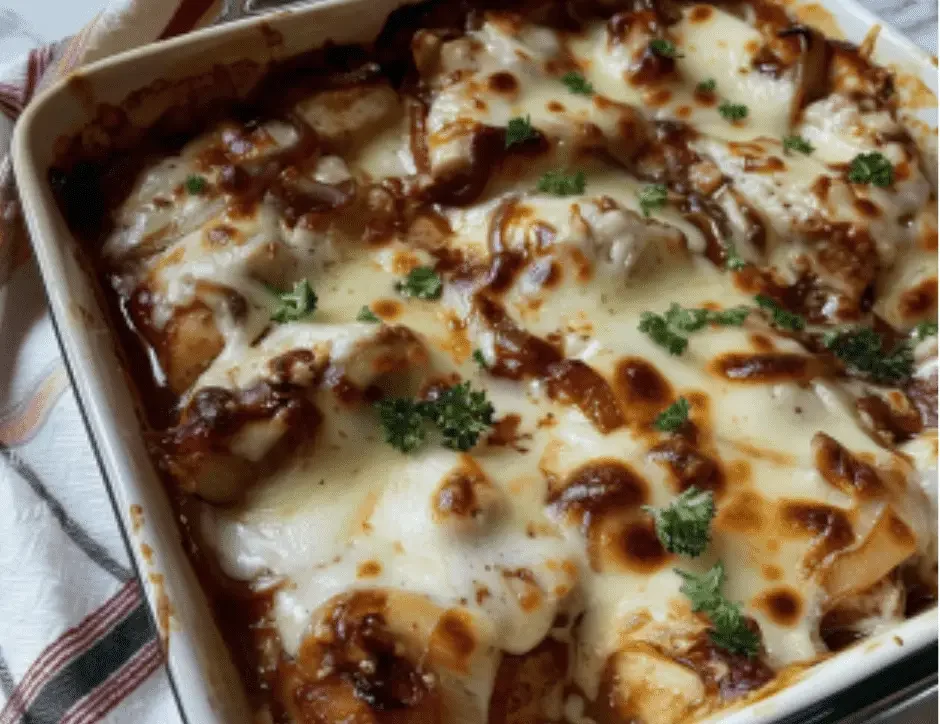
French Onion Chicken Bake

This keto French Onion Chicken Bake is a delicious and amazing dish. This baked dish had a large no of healthy fats & proteins, so we won’t feel hungry till the next meal. It is made with a mix of tender chicken with caramelized onions, Gruyere cheese, along with herbs, and beef broth. These ingredients will deepen the taste of the dish and also make the dish aromatic and appetizing. This dish is prepared fast in only fifty minutes, so it is perfect for a weeknight dinner, but also on busy days. We can serve this tasty baked dish along with cauliflower mash or steamed vegetables for a filling and healthy meal. This dish is very delightful, so everyone will like to have it.


STATS:

  • Serving size: 1 fillet with topping
  • Time of cook: 35 mints.
  • Serving: 4
  • Overall time: 50 mints.
  • Caloric content: 400 Kcal
  • Cuisine: American & French-inspired
  • Time of prep: 15 mints.
  • Course: Main course
  • Diet: Keto & Low-Carb

EQUIPMENT:

  • Oven-safe baking dish
  • Big dish
  • Measuring spoons
  • Bowl
  • Measuring cups

INGREDIENTS:

  • Four chicken breasts
  • One tablespoon organic olive oil
  • 3 large yellow onions
  • Black pepper
  • 3 tablespoons grass fed butter
  • 2 garlic cloves
  • 1 cup organic Gruyere cheese block
  • ½ cup Homemade beef broth
  • 1 tablespoon Coconut aminos
  • Salt
  • 1 teaspoon fresh thyme

INGREDIENT NOTES:

YELLOW ONIONS:

  • We use yellow onions to make this dish as they caramelize well, and they also add sweetness and deep taste to the dish.

GRUYERE CHEESE BLOCK:

  • It is utilized to add a slightly tangy & nutty taste, and it also melts nicely in the dish.

GRASS FED BUTTER:

  • It is used to boost the caramelization taste of onions, and it also makes the dish rich.

HOMEMADE BEEF BROTH:

  • We have to use the reduced sodium broth to add the umami flavor in the dish & chicken broth is also a great alternative.

COCONUT AMNOS:

  • We have to use the coconut aminos to add the umami flavor in the dish without the carbs.

THYME:

  • We have to use fresh thyme to add the strong herbal aroma to the dish; dry thyme works great.

OLIVE OIL:

  • It is used to saute the onions and also prevents the food from sticking to the pan.


INSTRUCTIONS:

  1. We have to preheat the oven at three-seventy-five degrees F.
  2. Then we can heat oil in a pan on moderate settings.
  3. We can add slices of onions and cook for around twenty minutes to get them caramelized.
  4. Then we can add butter and garlic in between.
  5. We can sprinkle black pepper, thyme, and salt on the chicken fillet.
  6. Put the chicken fillet on a tray along with keto beef broth, & coconut aminos.
  7. Sprinkle caramelized onions and Gruyere cheese around the chicken fillet.
  8. Now we can bake this for 25 minutes to properly cook the chicken.
  9. We can serve French Onion Chicken Bake after 5 mints.

SERVING SUGGESTIONS:

  • We can serve this Bake dish with steamed broccoli or asparagus.
  • We can pair this bake with cauliflower mash for a filling meal.
  • You can have this bake dish along with salad & vinaigrette.
  • We can add sautéed mushrooms on the side of this dish.
  • You can garnish with parsley or chives.

TIPS:

  • We have to slowly caramelized onions to prepare the flavorful and sweet dish.
  • You have to utilize a meat thermometer to monitor the interior temperature of 165 degrees F.
  • We can also add a little heavy cream to prepare a rich dish.
  • You can easily use mozzarella cheese for a different flavor profile.

STORAGE INFORMATION:

FRIDGE:

  • Put the bake dish in the sealed container for around 4 days.

FREEZER:

  • Put the bake dish in a closed box and preserve the dish for three months.

FAQs:

Can I utilize chicken thighs to prepare this dish?

  • We can utilize chicken thighs to prepare this dish, and modify the time of cooking as required.

Is this baked dish dairy-free?

  • This baked dish is not dairy-free, but we can use dairy-free cheese or eliminate the cheese to prepare a dairy-free dish.

Will we prepare the dish before time?

  • We can prepare and assemble the dish, store it in the fridge, and bake the next day.


NUTRITIONAL INFORMATION:

Fiber: 2g
Net Carbs: 5g
Fat: 20g
Sodium: 600mg
Protein: 45g
Calcium: 200mg
Caloric content: 400 kcal
Iron: 2mg
Vitamin A: 400 IU
Potassium: 700mg
Total Carbs: 7g

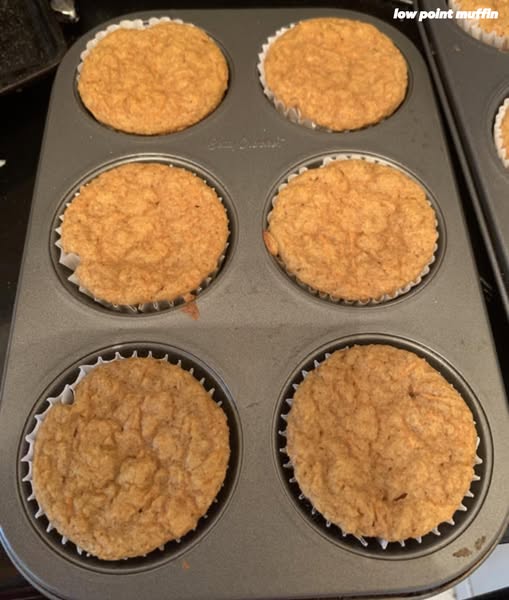
Apple Spice Cake Muffins

When doing my weekend food prep, I usually make a banana loaf for the week but being that my bananas aren’t ripe enough yet, i asked chat GPT for a low point muffin recipe and made these 1 point carrot ones. They turned out really good. I added a bit of sugar free maple syrup and I used apple pie spice instead of cinnamon and nutmeg. I also used blueberry kodiak mix with a tad of cinammon oat one too.
1 cup shredded carrots
2 eggs
1/4 cup unsweetened applesauce
1/2 cup nonfat plain Greek yogurt
1/2 cup monk fruit sweetener or other zero-point sweetener
1 tsp vanilla extract
1 tsp baking powder
1/2 tsp baking soda
1 tsp cinnamon
1/4 tsp nutmeg
Pinch of salt
1 cup Kodiak Cakes Power Cakes mix
1. Preheat oven to 350°F (175°C) and line a muffin tin with 12 liners or spray with nonstick spray.
2. Mix wet ingredients: eggs, applesauce, Greek yogurt, sweetener, vanilla, and either grated carrots or pumpkin.
3. Stir in dry ingredients: Kodiak mix, baking powder, baking soda, spices, and salt.
4. Fold in any optional add-ins if using.
5. Spoon batter evenly into 12 muffin cups.
6. Bake for 18–22 minutes, or until a toothpick comes out clean.

Weight Watchers Chicken Parmesan

INGREDIENTS
¼ cup grated parmesan cheese
2 tbsp Italian seasoned breadcrumbs
⅛ tsp paprika
1 tsp dried parsley
½ tsp garlic powder
¼ tsp ground pepper
1 lb boneless skinless chicken breast 4 breasts ¼ lbs each
INSTRUCTIONS
Preheat oven to 400 degrees F.
In a medium mixing bowl, combine parmesan cheese, bread crumbs, and seasonings; mix well.
Dip each chicken breast in mixture, fully coating
Place on nonstick baking sheet.
Bake approx 20 to 25 minutes, or until chicken is fully cooked.
NOTES
MyWW Points: Blue Plan 2 and Green Plan 3 2 WW Freestyle Points and 3 Smart Points

NUTRITION
SERVINGS4 Calories: 172.9kcalCarbohydrates: 3.3gProtein: 27.1gFat: 5gSaturated Fat: 1.8g
Chicken Parmesan

Introduction: Step into the realm of culinary sophistication with our Chicken Parmesan recipe, a tantalizing symphony of flavors that promises to elevate your dining experience. This meticulously crafted dish combines the succulence of boneless, skinless chicken breast with a harmonious blend of parmesan cheese, Italian seasoned breadcrumbs, and an array of aromatic seasonings. With a mere 172.9 calories per serving, this gourmet creation effortlessly caters to both taste and health-conscious individuals. Join us on a culinary journey as we unveil the artistry behind this delectable Chicken Parmesan masterpiece.

Ingredients:

¼ cup grated parmesan cheese
2 tbsp Italian seasoned breadcrumbs
⅛ tsp paprika
1 tsp dried parsley
½ tsp garlic powder
¼ tsp ground pepper
1 lb boneless, skinless chicken breast (4 breasts, ¼ lbs each)

Step-by-Step Culinary Elegance:

Preparation Perfection: Preheat your oven to 400 degrees Fahrenheit, setting the stage for the transformation of simple ingredients into a gourmet delight. The preheating process ensures optimal cooking conditions, imparting a golden crispness to the Chicken Parmesan.
A Symphony of Flavors: In a medium mixing bowl, artfully combine the grated parmesan cheese, Italian seasoned breadcrumbs, paprika, dried parsley, garlic powder, and ground pepper. This meticulous blending of ingredients forms the essence of the dish, promising a burst of flavors in every succulent bite.
Coating Brilliance: Dip each boneless, skinless chicken breast into the seasoned mixture, ensuring a full and even coating. This step is crucial for infusing the chicken with the rich flavors and textures that define the classic Chicken Parmesan experience.
Arrangement and Baking: Place the coated chicken breasts on a nonstick baking sheet, allowing each piece to bask in the radiant heat of the oven. Bake for approximately 20 to 25 minutes, or until the chicken reaches the pinnacle of tenderness and is fully cooked.
Gastronomic Insights and Nutritional Considerations:

Weight Watchers Points: Revel in the knowledge that this culinary masterpiece is a mindful choice, with 2 Blue Plan points and 3 Green Plan points, as well as 2 WW Freestyle Points and 3 Smart Points. This makes it an ideal option for those seeking a balance between indulgence and wellness.
Nutritional Value: Each serving boasts a mere 172.9 calories, offering a guilt-free gastronomic experience. The chicken serves as an excellent source of protein, with 27.1g per serving, while maintaining a moderate fat content of 5g.
Conclusion: Our Chicken Parmesan recipe transcends the ordinary, inviting you to savor a gourmet dining experience in the comfort of your home. Immerse yourself in the symphony of flavors, the tender chicken, and the crispy coating, all converging to create a dish that is as pleasing to the palate as it is to the eye. Whether you’re hosting a dinner party or seeking to impress your loved ones with a culinary masterpiece, our Chicken Parmesan promises to be the star of your dining table.