Cheesy BBQ Beef & Tater Tot Skillet

A hearty, one-pan dinner with seasoned ground beef, tangy BBQ sauce, crispy tater tots, and melty cheddar cheese — perfect for a quick family-friendly meal.

Prep Time: 10 minutes
Cook Time: 20–25 minutes
Total Time: ~35 minutes
Servings: 6
Dietary: Kid-friendly, One-pan meal

Ingredients

  • Ground beef – 1 lb

  • Frozen tater tots – 1 bag (32 oz)

  • Cheddar cheese – shredded (1 cup)

  • Onion – chopped (1 medium)

  • Olive oil – 2 tbsp

  • Tomato sauce – 1 can (8 oz)

  • Ketchup – ¼ cup

  • BBQ sauce – 2 tbsp

  • Mustard – 1 tbsp

  • Worcestershire sauce – 1–2 tbsp

  • Garlic – minced (1 tbsp)

  • Salt – ½ tsp

  • Black pepper – ½ tsp

  • Onion powder – 1 tsp

  • Paprika – 1 tsp

Instructions

  1. Cook the tater tots: Bake according to package directions until golden and crispy.

  2. Cook the beef: Heat olive oil in an oven-safe skillet over medium heat. Add ground beef and chopped onion. Cook for 6–8 minutes, breaking up the beef, until browned.

  3. Season: Stir in garlic, salt, black pepper, onion powder, and paprika. Cook for 1 minute until fragrant.

  4. Make the sauce: Mix in tomato sauce, ketchup, BBQ sauce, mustard, and Worcestershire sauce. Simmer for 5 minutes to blend flavors.

  5. Assemble: Arrange crispy tater tots in a single layer over the beef mixture.

  6. Add cheese & broil: Sprinkle cheddar cheese evenly on top. Broil for 1–2 minutes until the cheese melts and bubbles.

  7. Serve: Remove from the oven and serve hot straight from the skillet.

Quick Notes & Pro Tips

  • Crispier tots: Bake them until fully golden before adding to the skillet.

  • Customize the flavor: Use smoky BBQ sauce for depth or add a pinch of cayenne for heat.

  • Make it a meal: Serve with a side salad or steamed veggies.

Why You’ll Love It

This dish combines everything you want in comfort food — flavorful beef, tangy-sweet BBQ sauce, crispy tots, and melty cheese — all made in one skillet for easy prep and cleanup.

Ingredient Details & Substitutions

  • Beef: Swap with ground turkey or chicken for a lighter version.

  • Cheese: Try pepper jack or mozzarella for a different flavor profile.

  • BBQ sauce: Go with a spicy or honey BBQ to change up the taste.

Variations & Serving Suggestions

  • Tex-Mex twist: Add diced green chilies, taco seasoning, and top with sour cream.

  • Loaded version: Garnish with green onions, bacon bits, or jalapeño slices.

  • Serve it with: Cornbread or garlic bread for a fuller meal.

Storage & Make-Ahead

  • Refrigerate: Store leftovers in an airtight container for up to 3 days.

  • Reheat: Warm in the oven at 350°F for 10–15 minutes or in a skillet until heated through.

  • Make-ahead: Cook beef mixture ahead of time and assemble with tots and cheese before baking.

FAQs

Q: Can I make this without broiling?
A: Yes — bake at 375°F for 5–7 minutes to melt the cheese if you prefer not to broil.

Q: Can I use fresh potatoes instead of tater tots?
A: Yes — par-cook or roast diced potatoes first for similar crispiness.

Q: Can I make it spicier?
A: Add hot sauce, cayenne, or use a spicy BBQ sauce for a kick.

Personal Note

This recipe came together on a busy weeknight when I wanted something hearty but fuss-free. The BBQ and ketchup combo gives the beef a sloppy-joe vibe, and the cheesy tots on top make it irresistible!

Crispy Baked Parmesan Crusted Chicken

Juicy chicken breasts coated in a golden, garlicky Parmesan-breadcrumb crust and topped with a gooey blend of mozzarella and Parmesan — a comforting, restaurant-quality dinner made at home.

Prep Time: 20 minutes
Cook Time: 20–25 minutes
Total Time: ~45 minutes
Servings: 4
Dietary: Kid-friendly, Crowd-pleaser

Ingredients

For the chicken:

  • 4 boneless, skinless chicken breasts

For the breading & coating:

  • Bread crumbs – 1 cup

  • Parmesan cheese – grated (½ cup)

  • Dried Italian seasoning – ½ tsp

  • Salt – ½ tsp

  • Black pepper – ¼ tsp

  • All-purpose flour – ½ cup

  • Eggs – 2 large

  • Milk – ¼ cup

For the cheese topping:

  • Parmesan cheese – grated (½ cup)

  • Mozzarella cheese – shredded (1 cup)

  • Garlic – minced (2 cloves)

For cooking:

  • Olive oil – 2 tbsp

Instructions

  1. Preheat oven: Set to 375°F (190°C). Lightly grease a baking dish with olive oil.

  2. Prepare breading: In a shallow dish, combine bread crumbs, ½ cup Parmesan, Italian seasoning, salt, and black pepper.

  3. Prepare wet & dry dips: In one dish, whisk eggs and milk. In another, add flour for dredging.

  4. Bread the chicken: Dredge each chicken breast in flour, then dip in egg mixture, and coat with bread crumbs.

  5. Pan-sear: Heat olive oil in a skillet over medium-high. Cook chicken for 3–4 minutes per side until golden brown.

  6. Assemble: Transfer seared chicken to the baking dish. In a bowl, mix remaining ½ cup Parmesan, mozzarella, and garlic. Sprinkle over chicken.

  7. Bake: Cook for 20–25 minutes until chicken reaches an internal temperature of 165°F (74°C) and cheese is melted and bubbly.

  8. Serve: Let rest briefly, then serve hot with mashed potatoes, pasta, or vegetables.

Quick Notes & Pro Tips

  • Thin chicken cooks faster: Pound chicken breasts to an even thickness for consistent cooking.

  • Crispier finish: Broil for 1–2 minutes after baking for a golden cheese crust.

  • Use fresh Parmesan: It melts and flavors better than pre-grated.

Why You’ll Love It

This dish delivers crispy, juicy chicken with a flavorful cheesy topping — the perfect balance between a weeknight dinner and a dish that feels special.

Ingredient Details & Substitutions

  • Breadcrumbs: Use panko for extra crunch.

  • Cheese: Try provolone or fontina in place of mozzarella for a melty twist.

  • Herbs: Add fresh basil or parsley to the cheese topping for brightness.

Variations & Serving Suggestions

  • Turn it into Chicken Parmesan: Add marinara sauce before baking.

  • Low-carb option: Use crushed pork rinds or almond flour instead of breadcrumbs.

  • Pair it with: Garlic mashed potatoes, buttered noodles, or a crisp Caesar salad.

Storage & Make-Ahead

  • Refrigerate: Store leftovers in an airtight container for up to 3 days.

  • Freeze: Wrap cooked chicken tightly and freeze for up to 2 months.

  • Reheat: Warm in the oven at 350°F to keep the coating crisp.

FAQs

Q: Can I use chicken thighs instead?
A: Yes — boneless, skinless thighs work great (adjust cook time slightly).

Q: Can I make this ahead?
A: Yes — bread the chicken up to 1 day in advance. Pan-sear and bake when ready.

Q: How do I keep the breading from falling off?
A: Pat chicken dry before breading and press crumbs firmly to adhere.

Personal Note

This recipe is my go-to when I want a quick but impressive dinner. The golden, cheesy crust is always a hit with kids and adults alike, and it pairs beautifully with almost any side.

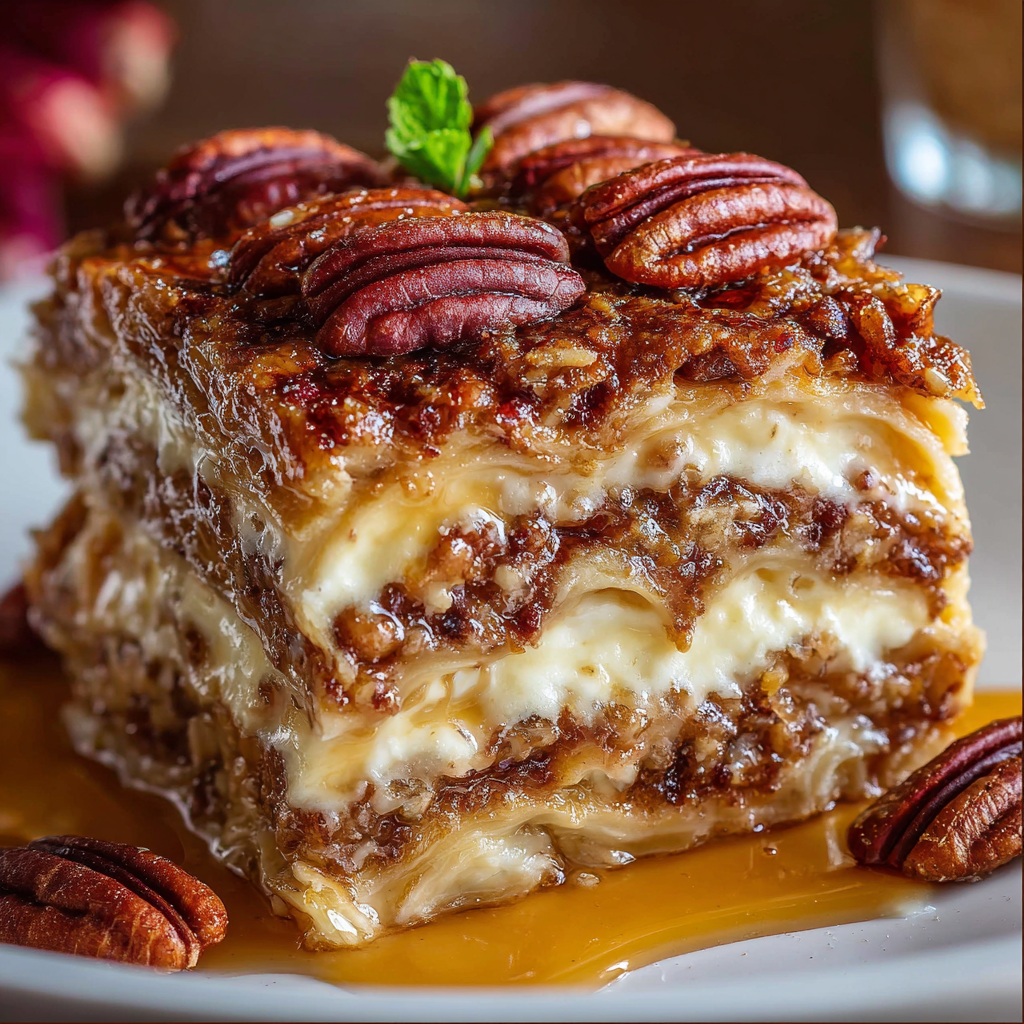
No-Bake Pecan Pie Layered Dessert

A creamy, crunchy layered dessert featuring a buttery graham cracker crust, fluffy cream cheese filling, gooey pecan pie topping, and whipped cream — no oven needed!

Prep Time: 20 minutes
Chill Time: 2+ hours
Total Time: ~2½ hours
Servings: 12–15
Dietary: No-bake, Make-ahead friendly

Ingredients

  • Butter – melted (1 cup)

  • Powdered sugar – 1 cup

  • Brown sugar – packed (1 cup)

  • Graham crackers – crushed (1 pkg / 9 oz)

  • Cream cheese – softened (1 pkg / 8 oz)

  • Whipped topping – divided (1 tub / 8 oz)

  • Pecan pie filling – (1 jar / 12 oz)

  • Pecans – toasted & chopped (1 cup)

Instructions

  1. Make the crust: Mix crushed graham crackers with melted butter and brown sugar. Press into a 9×13-inch dish.

  2. Prepare the filling: Beat softened cream cheese with powdered sugar until smooth. Fold in half the whipped topping. Spread evenly over the crust.

  3. Add the pecan layer: Spread pecan pie filling evenly over the cream cheese layer.

  4. Top & garnish: Spread the remaining whipped topping on top. Sprinkle with toasted pecans.

  5. Chill: Refrigerate for at least 2 hours (or overnight) before serving.

Quick Notes & Pro Tips

  • Soft cream cheese: Let it come to room temp for a silky-smooth filling.

  • Crust firmness: Press crust firmly to prevent crumbling when slicing.

  • Make ahead: Chill overnight for the best set and flavor.

Why You’ll Love It

This dessert is creamy, crunchy, and indulgently sweet — a no-bake treat perfect for holidays, potlucks, or anytime you want the flavors of pecan pie without turning on the oven.

Ingredient Details & Substitutions

  • Crust: Swap graham crackers for vanilla wafers or crushed shortbread cookies.

  • Filling: Add a splash of vanilla extract for extra flavor depth.

  • Topping: Drizzle with caramel sauce or sprinkle mini chocolate chips for added indulgence.

Variations & Serving Suggestions

  • Mini cups: Assemble in individual dessert cups for parties.

  • Chocolate twist: Add a layer of chocolate pudding between the cream cheese and pecan filling.

  • Holiday flair: Top with a drizzle of cinnamon glaze or crushed toffee bits.

Storage & Make-Ahead

  • Refrigerate: Store covered in the fridge for up to 4 days.

  • Freeze: Freeze (without whipped topping) for up to 1 month; thaw and top before serving.

FAQs

Q: Can I use homemade pecan filling?
A: Absolutely — homemade filling gives a richer, more customized flavor.

Q: Can I make this gluten-free?
A: Use gluten-free graham crackers or cookies for the crust.

Q: Can I double the whipped topping?
A: Yes — for an extra fluffy, creamy top layer.

Personal Note

This recipe is one of my favorite no-bake desserts for the holidays — it’s decadent, easy to assemble, and always a hit at gatherings.

Your turn!
Tried this No-Bake Pecan Pie Layered Dessert? Leave a comment or tag me on social media — I’d love to see your version!

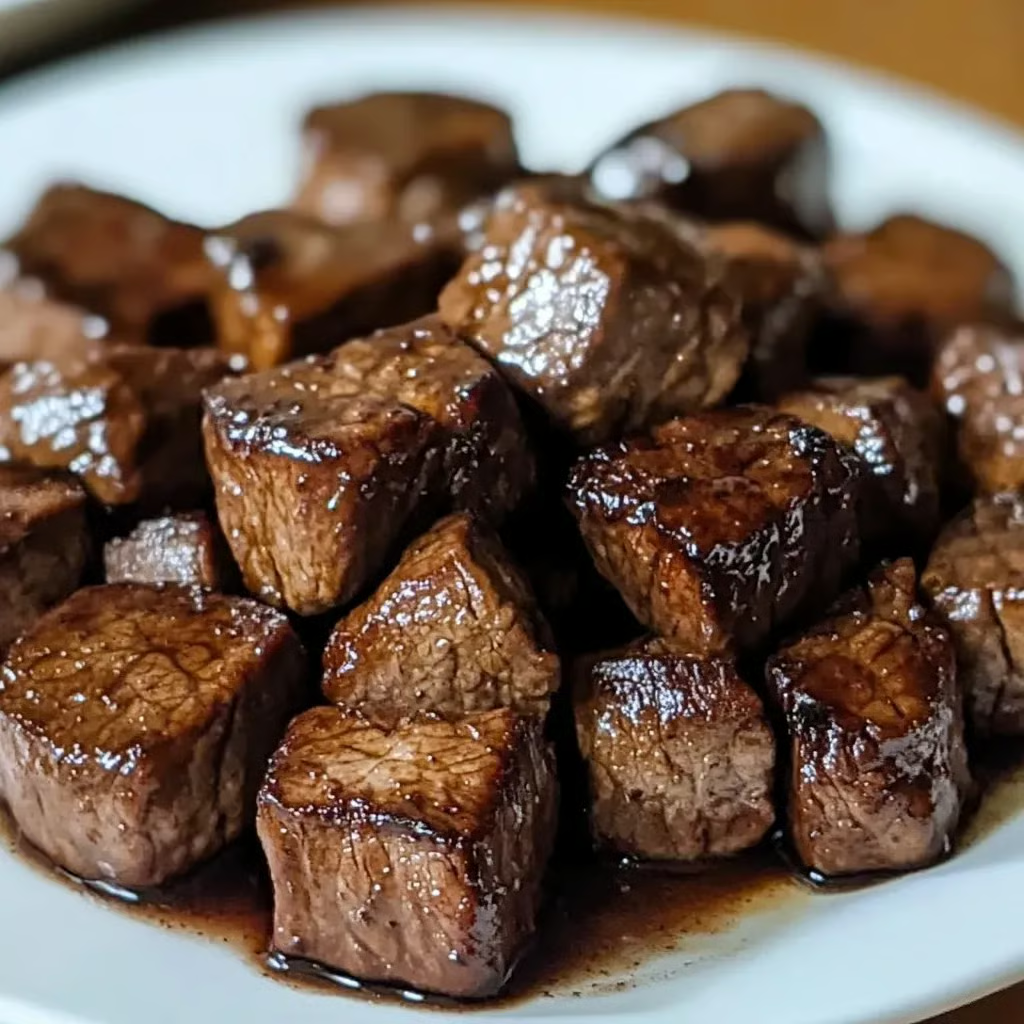
Slow Cooker Beef Tips in Savory Gravy

Fork-tender chunks of beef simmered in a rich, savory sauce with optional hearty vegetables — a comforting, set-it-and-forget-it slow cooker meal.

Prep Time: 15 minutes
Cook Time: 6–8 hours (low) or 3–4 hours (high)
Total Time: ~6–8 hours
Servings: 6–8
Dietary: Gluten-free adaptable

Ingredients

For the beef:

  • Beef sirloin, chuck roast, or stew meat – 2 lbs, cut into bite-sized chunks

  • Salt – 1 tsp

  • Black pepper – 1 tsp

  • Olive oil – 1–2 tbsp (for browning, optional)

For the sauce:

  • Beef broth – 1 cup (low-sodium preferred)

  • Soy sauce – ¼ cup

  • Worcestershire sauce – ¼ cup

  • Brown sugar – 3 tbsp

  • Tomato paste – 2 tbsp

  • Garlic – 3 cloves, minced

  • Smoked paprika – 1 tsp

  • Onion powder – ½ tsp

  • Red pepper flakes – ¼ tsp (optional)

Optional add-ins:

  • Baby potatoes – 1 lb, halved

  • Baby carrots – 1 cup

  • Mushrooms – 1 cup, sliced

  • Onion – 1 medium, roughly chopped

  • Cornstarch slurry – 1–2 tbsp cornstarch + 2 tbsp cold water (for thickening)

Instructions

  1. Prep the beef: Pat beef chunks dry with paper towels. Season evenly with salt and pepper.

  2. Brown the beef (optional): Heat olive oil in a skillet over medium-high. Sear beef in batches until browned on all sides. (Skip if short on time.)

  3. Make the sauce: In a bowl, whisk together beef broth, soy sauce, Worcestershire, brown sugar, tomato paste, garlic, paprika, onion powder, and red pepper flakes.

  4. Assemble in slow cooker: Place beef in slow cooker. Add optional vegetables around and on top. Pour sauce over everything, coating the beef well.

  5. Cook: Cover and cook on low for 6–8 hours or high for 3–4 hours, until beef is fork-tender.

  6. Thicken (optional): About 20 minutes before serving, mix cornstarch with cold water. Stir into the slow cooker, cover, and cook on high until the sauce thickens.

  7. Serve: Spoon beef and sauce over mashed potatoes, rice, or egg noodles. Garnish with fresh parsley if desired.

Quick Notes & Pro Tips

  • Choose the right cut: Chuck roast is budget-friendly and melts beautifully after slow cooking.

  • Brown for flavor: While optional, searing the beef adds a deeper, richer taste.

  • Thicker sauce: Adjust cornstarch to reach your preferred gravy consistency.

Why You’ll Love It

This dish is hearty, versatile, and family-friendly. With minimal prep, you get beef that’s melt-in-your-mouth tender and swimming in a savory, well-balanced gravy — comfort food made easy.

Ingredient Details & Substitutions

  • Beef: Swap for pork shoulder or even chicken thighs for a different twist.

  • Vegetables: Add parsnips, celery, or sweet potatoes for variety.

  • Soy sauce: Use tamari for a gluten-free version.

Variations & Serving Suggestions

  • Make it creamy: Stir in ¼ cup heavy cream or sour cream at the end for a silky sauce.

  • Serve it with: Mashed potatoes, egg noodles, or crusty bread to soak up the gravy.

  • Add wine: Replace ¼ cup broth with red wine for a deeper, richer flavor.

Storage & Make-Ahead

  • Refrigerate: Store in an airtight container for up to 4 days.

  • Freeze: Cool completely and freeze for up to 2 months.

  • Reheat: Warm gently on the stovetop or in the microwave until heated through.

FAQs

Q: Can I make this in the oven instead?
A: Yes — bake in a covered Dutch oven at 160°C (325°F) for 2½–3 hours.

Q: How do I make it less sweet?
A: Reduce brown sugar to 1–2 tbsp or skip entirely for a more savory profile.

Q: Can I prep this the night before?
A: Absolutely — assemble all ingredients in the slow cooker insert, cover, and refrigerate overnight.

Personal Note

This recipe is my go-to when I want a hearty dinner with little hands-on time. The soy-Worcestershire-tomato combo builds a flavorful gravy that tastes like it’s been simmering all day (because it has!).

Garlic Parmesan Chicken Meatloaf

A juicy, flavor-packed chicken meatloaf topped with a buttery garlic-Parmesan glaze — comfort food with a delicious Italian twist.

Prep Time: 15 minutes
Cook Time: 45–50 minutes
Total Time: ~1 hour
Servings: 6–8
Dietary: High-protein, Comfort food

Ingredients

For the meatloaf:

  • Ground chicken – 900 g

  • Grated Parmesan cheese – 100 g

  • Panko breadcrumbs – 60 g

  • Large eggs – 2

  • Garlic – 4 cloves, minced

  • Garlic powder – 1 tsp

  • Onion powder – 1 tsp

  • Dried basil – ½ tsp

  • Dried parsley – ½ tsp

  • Fine salt – ½ tsp

  • Ground black pepper – ½ tsp

  • Whole milk – 60 ml

For the garlic-Parmesan glaze:

  • Unsalted butter – 45 g

  • Garlic – 2 cloves, minced

  • Grated Parmesan cheese – 25 g

  • Fresh parsley – 1 tbsp, finely chopped

  • Fine salt – pinch

Instructions

  1. Prep the oven: Preheat to 190°C (375°F). Line a baking sheet with parchment or lightly grease a loaf pan.

  2. Make the meatloaf mixture: In a large bowl, mix ground chicken, Parmesan, panko, eggs, garlic, garlic powder, onion powder, basil, parsley, salt, pepper, and milk until combined. Do not overmix.

  3. Shape & bake: Form into a loaf shape on the baking sheet or press into the loaf pan. Bake for 40–45 minutes, or until the internal temperature reaches 74°C (165°F).

  4. Make the glaze: While the meatloaf bakes, melt butter in a small saucepan over medium heat. Add garlic and sauté 1–2 minutes. Stir in Parmesan and parsley; cook 1–2 minutes until slightly thickened. Add a pinch of salt.

  5. Glaze & finish: Brush the glaze over the meatloaf and return to the oven for 5–7 minutes.

  6. Rest & serve: Let rest for 5 minutes before slicing. Garnish with extra parsley.

Quick Notes & Pro Tips

  • Don’t overmix: This keeps the meatloaf tender and juicy.

  • Check temp: Use a meat thermometer — chicken must reach 74°C (165°F).

  • Extra moisture: Swap some chicken for ground turkey thigh if you prefer a richer texture.

Why You’ll Love It

This isn’t your average meatloaf — it’s moist, flavorful, and topped with a buttery garlic-Parmesan glaze that adds an irresistible savory finish. Perfect for weeknight dinners or meal prep.

Ingredient Details & Substitutions

  • Breadcrumbs: Use regular or Italian-style breadcrumbs for a different flavor.

  • Cheese: Try Asiago or Pecorino Romano for a sharper taste.

  • Milk: Substitute with cream for extra richness.

Variations & Serving Suggestions

  • Make it spicy: Add ¼ tsp red pepper flakes to the glaze.

  • Serve it with: Garlic mashed potatoes, roasted vegetables, or a simple Caesar salad.

  • Mini loaves: Form into smaller loaves or muffin tins for quicker cooking and meal prep.

Storage & Make-Ahead

  • Refrigerate: Store in an airtight container for up to 3 days.

  • Freeze: Wrap slices individually and freeze for up to 2 months.

  • Reheat: Warm in a 175°C (350°F) oven until heated through.

FAQs

Q: Can I use ground turkey instead of chicken?
A: Absolutely — or use a blend for extra flavor.

Q: How do I keep chicken meatloaf from drying out?
A: Don’t overbake, and let it rest before slicing. The glaze also adds moisture.

Q: Can I make this ahead?
A: Yes — assemble and refrigerate up to 24 hours before baking.

Personal Note

This meatloaf came from my love for Italian-style chicken dishes — the garlic-Parmesan combo makes it feel special while staying family-friendly and easy to make.

Cheesy Baked Zucchini Casserole

Thinly sliced zucchini layered with cheddar, Parmesan, and golden breadcrumbs — a simple yet flavorful side dish that’s crispy on top and tender inside.

Prep Time: 10 minutes
Cook Time: 25–30 minutes
Total Time: ~40 minutes
Servings: 4–6
Dietary: Vegetarian

Ingredients

For the zucchini base:

  • Zucchini – 3 medium, sliced

  • Garlic – 2 cloves, minced

  • Olive oil – 2 tbsp

  • Salt – to taste

  • Black pepper – to taste

For the cheesy topping:

  • Cheddar cheese – shredded (120 g)

  • Parmesan cheese – grated (50 g)

  • Breadcrumbs – (100 g)

Instructions

  1. Preheat the oven: Set to 190°C (375°F). Grease a baking dish with olive oil or non-stick spray.

  2. Season the zucchini: In a mixing bowl, toss zucchini slices with minced garlic, olive oil, salt, and black pepper.

  3. Assemble the dish: Spread zucchini evenly in the baking dish. Sprinkle with cheddar and Parmesan, then top with breadcrumbs.

  4. Bake: Cook for 25–30 minutes, until zucchini is tender and the topping is golden brown.

  5. Cool & serve: Let rest for a few minutes before serving warm.

Quick Notes & Pro Tips

  • Slice evenly: Uniform zucchini slices ensure even cooking.

  • Extra crispy: Broil for 1–2 minutes at the end for a deeper golden crust.

  • Cheese swap: Try mozzarella or Gruyère for a different flavor.

Why You’ll Love It

This casserole transforms simple zucchini into a cheesy, crunchy side dish that pairs beautifully with grilled meats, pasta, or roasted chicken. It’s quick, hearty, and a great way to use up summer zucchini.

Ingredient Details & Substitutions

  • Breadcrumbs: Use panko for a lighter, crunchier texture.

  • Cheese: Swap cheddar for a milder mozzarella or use sharp Parmesan only for a bolder taste.

  • Add-ins: Mix in chopped herbs like basil or thyme for freshness.

Variations & Serving Suggestions

  • Make it spicy: Add chili flakes or smoked paprika to the breadcrumb mix.

  • Add protein: Sprinkle cooked, crumbled bacon or sausage over the zucchini before baking.

  • Pair it: Serve alongside grilled chicken, steak, or pasta for a full meal.

Storage & Make-Ahead

  • Refrigerate: Store leftovers in an airtight container for up to 3 days.

  • Reheat: Warm in the oven at 180°C (350°F) for 10 minutes to keep the topping crisp.

  • Make-ahead: Assemble up to 12 hours ahead; bake just before serving.

FAQs

Q: Can I use yellow squash instead of zucchini?
A: Yes — or use a mix of both for color and flavor variety.

Q: Can I make this gluten-free?
A: Swap regular breadcrumbs for gluten-free panko.

Q: How do I prevent watery zucchini?
A: Salt slices and let them rest for 10 minutes, then pat dry before assembling.

Personal Note

This dish started as a way to use up garden zucchini, but it’s become a go-to side at family dinners. The cheesy, garlicky topping makes even picky eaters happy.