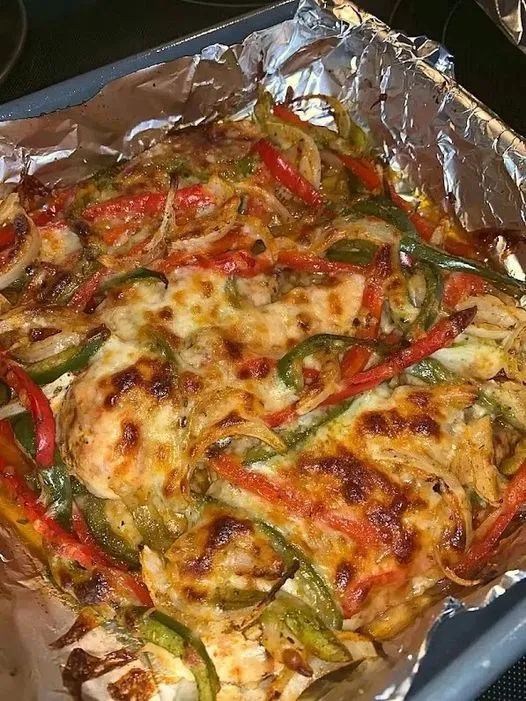
Easy Fajita Chicken Breasts Casserole

The  Fajita Chicken Breasts Casserole is a delightful twist on a classic Tex-Mex favorite, carefully crafted to be both flavorful and health-conscious. This wholesome dish features tender chicken breasts seasoned with a harmonious blend of cumin, chili powder, garlic, and paprika, offering a burst of vibrant flavors with every bite. The addition of colorful bell peppers and minced onions not only adds a pleasing visual appeal but also contributes a delightful crunch and sweetness to the dish. Topped with a generous sprinkling of reduced-fat mozzarella cheese, this casserole bakes to golden perfection, creating a satisfyingly gooey and cheesy layer over the succulent chicken and vegetables.

Thank you for reading this post, don’t forget to subscribe!

Garnished with freshly chopped cilantro or parsley for a final touch of brightness, this dish is as visually stunning as it is delicious. Whether served over cauliflower rice, steamed vegetables, or enjoyed on its own, this Fajita Chicken Breasts Casserole promises to be a comforting and nutritious meal option that’s perfect for any occasion. With its balanced flavors, customizable spice level, and suitability for meal prep, it’s a versatile recipe that’s sure to become a household favorite among those following a  plan or simply looking for a lighter take on a beloved classic.

Ingredients:

  • 3-4 small boneless, skinless chicken breasts (about 1 1/2 lbs/750g), or 2 large chicken breasts, sliced lengthwise
  • 2 bell peppers (1 red and 1 green), seeded and sliced into strips
  • 1 medium onion, minced
  • 1 teaspoon ground cumin
  • 1 1/2 teaspoons chili powder
  • 1 teaspoon garlic powder or minced garlic
  • 2 teaspoons paprika
  • Salt and freshly ground black pepper to taste
  • 1 tablespoon vegetable oil
  • 1 cup grated reduced-fat mozzarella cheese or your favorite reduced-fat cheese
  • Chopped fresh cilantro or parsley for garnish

Directions:

  1. Preheat your oven to 400°F (200°C) and lightly coat a baking dish with cooking spray.
  2. Season chicken breasts on both sides with cumin, chili powder, garlic, paprika, salt, and pepper. Reserve some seasoning for later use.
  3. Place the chicken breasts in the prepared baking dish and drizzle with oil. Top with peppers and onions, and sprinkle with the remaining fajita seasonings. Finish with grated reduced-fat mozzarella cheese.
  4. Bake the chicken fajita casserole for 20 to 30 minutes (depending on thickness) or until the chicken is cooked through and reaches an internal temperature of 165°F (74°C). You can broil the dish for 2 minutes at the end to crisp the top if desired.
  5. Serve immediately over cauliflower rice, steamed vegetables, zucchini noodles, or on its own.
  6. Garnish with chopped fresh cilantro or parsley before serving.

Points:

  • This recipe makes approximately 4 servings.
  • Points per serving (without accompaniments): Each serving is approximately 4-5  SmartPoints, depending on specific ingredients used.

Notes:

  • Adjust the spiciness according to your preference by increasing or decreasing the amount of chili powder and black pepper.
  • For a smoky flavor, you can substitute the paprika with smoked paprika.
  • This recipe is great for meal prep as it can be easily reheated for a quick and delicious lunch or dinner.
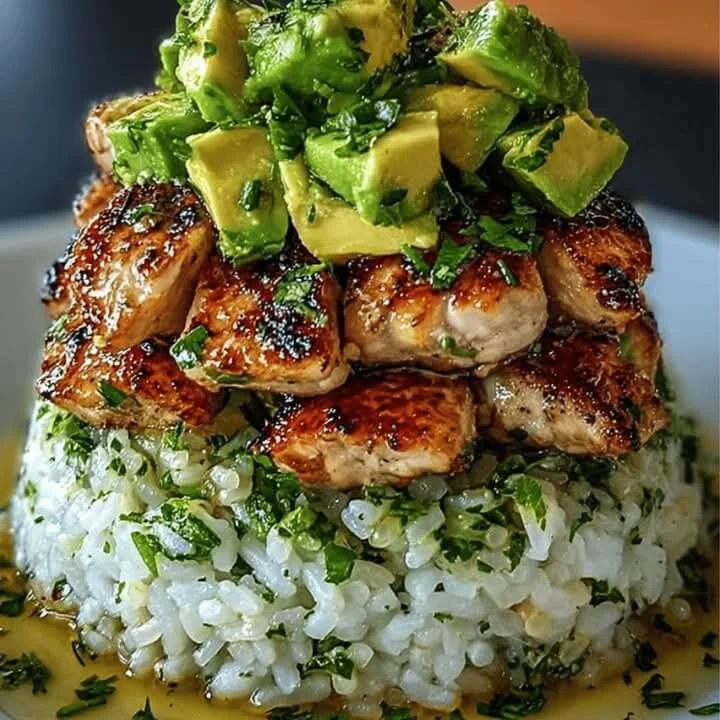
Honey Lemon Chicken & Avocado Rice Stack

Mediterranean Honey Lemon Chicken & Avocado Rice Stack
Table of Contents
This Mediterranean Honey Lemon Chicken & Avocado Rice Stack is a vibrant, layered dish that combines warm, zesty chicken with a fragrant herb rice base and creamy avocado. It’s not only visually stunning but also packed with bold flavors and nutritious ingredients. Perfect for a summer lunch, light dinner, or a meal-prep-friendly option, this recipe brings together the brightness of the Mediterranean with a modern presentation. Think of it as a wholesome grain bowl—stacked!

Total Time:
Prep Time: 15 minutes

Cook Time: 20 minutes

Total Time: 35 minutes

Servings: 2–3 stacks

Ingredients:
For the Chicken:
2 boneless, skinless chicken breasts

2 tablespoons extra virgin olive oil

1 tablespoon honey

Juice of 1 lemon (about 2 tablespoons)

2 garlic cloves, minced

1 teaspoon dried oregano

½ teaspoon dried thyme

Salt and black pepper, to taste

For the Rice Layer:
1 cup cooked basmati or brown rice

1 tablespoon olive oil

½ teaspoon dried mint or parsley

Pinch of salt

For the Avocado Layer:
1 ripe avocado, diced

Juice of ½ lemon

Salt and pepper, to taste

Optional Toppings:
Cherry tomatoes, halved

Cucumber, finely diced

Crumbled feta cheese

Chopped fresh parsley or basil

See also Mushroom Rice
Drizzle of extra virgin olive oil

Instructions:
1. Marinate and Cook the Chicken:
In a bowl, combine olive oil, honey, lemon juice, minced garlic, oregano, thyme, salt, and pepper.

Add the chicken breasts and coat well. Marinate for at least 15 minutes (or overnight if time allows).

Heat a skillet or grill pan over medium heat. Cook the chicken 5–6 minutes per side until golden brown and cooked through.

Let it rest for 5 minutes, then slice thinly.

2. Prepare the Rice Layer:
In a bowl, toss the cooked rice with olive oil, dried mint or parsley, and a pinch of salt.

Warm slightly if desired or use at room temperature.

3. Make the Avocado Layer:
In a separate bowl, gently mix the diced avocado with lemon juice, salt, and pepper.

Mash slightly for a chunky texture, or keep in cubes depending on preference.

4. Assemble the Stack:
Use a food ring mold or a clean measuring cup to layer the stack (lightly oil it if needed).

Press a layer of herbed rice into the bottom.

Add a layer of avocado mix and press gently.

Top with sliced honey lemon chicken.

Gently lift the mold to reveal your stack.

5. Garnish and Serve:
Top with cherry tomatoes, diced cucumber, crumbled feta, chopped herbs, and a drizzle of olive oil.

Serve immediately for the best presentation and flavor.

Tips for Success:
Marinate Longer for Deeper Flavor:
If time permits, marinate the chicken for 2–4 hours or overnight in the fridge. The longer soak enhances the lemon-honey-garlic notes.

Use a Mold for a Clean Stack:
A stainless steel food ring or a 1-cup measuring cup works great for clean layering. Lightly oil the inside to release easily.

See also Rotisserie Chicken Mushroom Soup
Keep Avocado Fresh:
Toss avocado with lemon juice immediately after dicing to prevent browning. Assemble just before serving for the best color and texture.

Warm or Room Temp:
The rice can be served warm, but make sure the avocado isn’t hot when layering. Keep components at similar temperatures for best stacking and taste.

Slice Chicken Thinly:
For the best bite and presentation, let the chicken rest after cooking and then slice it thinly across the grain.

Customize Texture:
You can mash the avocado slightly for a creamier middle layer or keep it cubed for a chunkier, fresher feel.

Variations:
Grain Swap:
Substitute the rice with:

Quinoa for extra protein

Farro for a nutty bite

Cauliflower rice for a low-carb option

Protein Options:

Swap chicken with grilled shrimp, salmon, or chickpeas for a pescatarian or vegetarian version.

Spicy Kick:
Add red pepper flakes or a dash of harissa paste to the chicken marinade for a spicy Mediterranean flair.

Avocado Sauce Alternative:
Blend the avocado with a bit of yogurt, lemon, olive oil, and garlic to create a smooth avocado cream layer or drizzle.

Add Crunch:
Top with toasted pine nuts, crispy chickpeas, or crushed pita chips for added texture.

Make It a Bowl:
If you don’t want to stack, simply layer all components in a bowl and serve as a deconstructed version.

Vegan Version:
Use maple syrup instead of honey, and substitute chicken with grilled tofu, tempeh, or roasted vegetables.

Q&A: Frequently Asked Questions
Q1: Can I make this ahead of time?
Yes, you can prep the components (chicken, rice, and avocado) ahead of time. Store them separately in airtight containers. Assemble the stacks just before serving for best texture and presentation.

See also Mediterranean-Style Creamy Beef & Tortellini Pasta
Q2: What can I use if I don’t have a food ring mold?
You can use a 1-cup measuring cup or even a cleaned tuna can with both ends removed. Lightly oil it for easy release.

Q3: How do I store leftovers?
Store leftovers in separate containers. Avocado may brown over time, so it’s best eaten fresh. Add lemon juice to slow oxidation.

Q4: Can I serve this cold?
Yes! This recipe works well chilled, especially in summer. Just let the rice and chicken cool completely before stacking.

Q5: Is this gluten-free?
Yes—this dish is naturally gluten-free as long as you use certified gluten-free rice and ingredients.

Estimated Nutrition (Per Stack – serves 2–3)
Note: Values are estimates and may vary based on exact portions and toppings.

Calories: ~450–500 kcal

Protein: 28–32g

Carbohydrates: 35–40g

Fat: 22–25g

Fiber: 5–7g

Sugar: 6–8g

Sodium: ~400–500mg

Includes chicken, avocado, rice, olive oil, and toppings like feta and vegetables.

Conclusion
The Mediterranean Honey Lemon Chicken & Avocado Rice Stack is a perfect harmony of flavors—sweet, citrusy, herbaceous, and creamy—all layered into a stunning stack. Whether you’re preparing a beautiful brunch, an elegant lunch, or simply want a fresh, wholesome meal-prep idea, this dish fits the bill. It’s easy to adapt, impressively presented, and bursting with Mediterranean goodness.

Try it once, and you’ll be stacking it again and again!

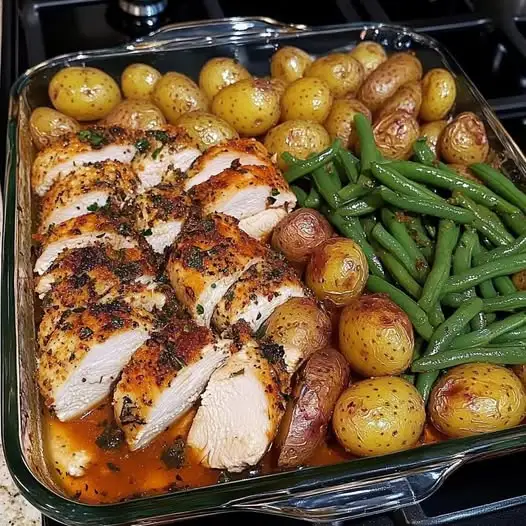
One-Pan Garlic Herb Chicken with Potatoes & Green Beans Recipe

One-Pan Garlic Herb Chicken with Potatoes & Green Beans Recipe

‼️

Ingredients
For the Chicken
4 boneless, skinless chicken breasts 🍗
2 tbsp olive oil 🛢
2 tsp garlic powder
1 tsp onion powder
1 tsp dried oregano 🌿
1 tsp paprika 🌶
Salt &  black pepper to taste 🧂
For the Vegetables
3 cups baby potatoes 🥔 (quartered)
2 cups fresh green beans 🥦
2 tbsp olive oil 🛢
2 garlic cloves 🧄 (minced)
1 tsp dried thyme 🌱
1 tsp smoked paprika 🌶
Salt &  pepper to taste 🧂
For the Sauce
1/4 cup chicken bone broth 🍲
Juice of 1 lemon 🍋
1 tbsp Dijon mustard 🥄
Directions
Preheat the oven: Preheat to 400°F (200°C) and lightly grease a large  baking dish.
Season the chicken: Rub chicken breasts with olive oil, garlic powder, onion powder, oregano, paprika, salt, and pepper. Set aside.
Prepare the veggies: Toss potatoes and green beans in olive oil, minced garlic, thyme, paprika, salt, and pepper. Spread evenly in the baking dish.
Assemble the dish: Nestle the chicken breasts on top of the veggies.
Make the sauce: Whisk together chicken broth, lemon juice, and Dijon mustard. Drizzle over the chicken and vegetables.
Bake: Roast for 40-45 minutes or until the chicken reaches an internal temperature of 165°F (74°C) and the potatoes are tender.
Serve & enjoy: Let rest for 5 minutes before slicing the chicken. Plate with veggies and drizzle any remaining sauce from the pan for extra flavor!
Notes & Variations
Veggie swap: Use carrots, zucchini, or bell peppers instead of green beans.
Make it spicy: Add a dash of chili flakes for a kick. 🌶
Add cheese: Sprinkle Parmesan over the dish during the last 10 minutes of baking for a cheesy finish. 🧀

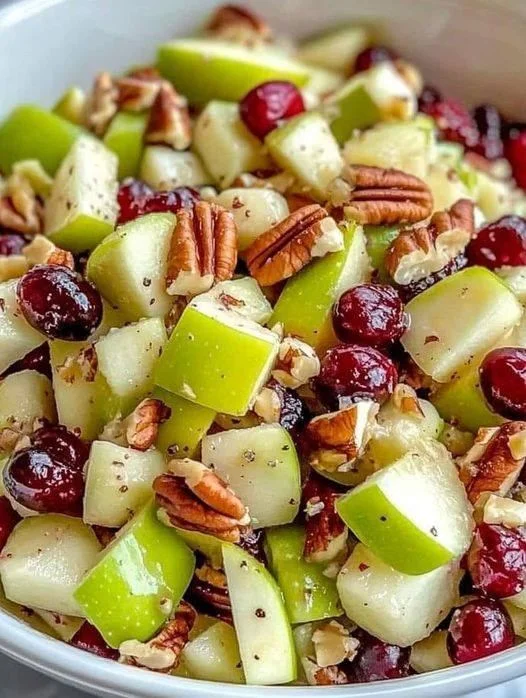
Apple Salad with Honeycrisp Apples, Celery, Grapes, Pecans, and Dried Cranberrie

Introduction: A Fresh, Flavorful, and Nutrient-Dense Salad
Salads are a cornerstone of healthy eating, and when prepared thoughtfully, they can serve as both a satisfying and nutrient-packed meal. This WW Apple Salad with Honeycrisp Apples, Celery, Grapes, Pecans, and Dried Cranberries brings together the best of fresh fruits, crunchy vegetables, and healthy fats for a refreshing dish that’s perfect for any occasion. Whether you’re seeking a light lunch, an energizing snack, or a flavorful side dish, this salad delivers on both taste and health benefits while keeping SmartPoints low.

Made with the crisp sweetness of Honeycrisp apples, the freshness of celery, and the sweetness of grapes and dried cranberries, this salad is bursting with vibrant flavors and textures. Pecans add a delightful crunch while also providing healthy fats and protein, making the dish more filling. It’s the perfect balance of sweet, savory, and satisfying, without being too heavy.

by TaboolaSponsored Links
You May Like
Play War Thunder now for free
War Thunder
War Thunder – Register now for free and play against over 75 Million real Players
War Thunder
Villas For Sale in Dubai Might Surprise You
Villas In Dubai | Search Ads
In this comprehensive guide, we’ll take you through the step-by-step process of creating this Apple Salad, providing the exact measurements, detailed instructions, and nutritional information. Whether you’re following the WW program, a Keto lifestyle, or simply want to enjoy a refreshing and delicious salad, this recipe will suit all your needs.

Ingredients for WW Apple Salad with Honeycrisp Apples, Celery, Grapes, Pecans, and Dried Cranberries
The key to making this WW Apple Salad both tasty and nutritious is the careful selection of fresh ingredients. Each component adds its own unique texture, flavor, and nutritional value, resulting in a delightful mix of sweetness, crunch, and tang.

For the Salad:
2 medium Honeycrisp apples (or any other variety you prefer) – Honeycrisp apples are known for their crisp texture and perfect balance of sweetness and tartness. This variety of apple is ideal for a fresh salad, providing a refreshing crunch and natural sweetness.
2 stalks celery, finely chopped – Celery adds a refreshing, crunchy texture and is low in calories, which makes it the perfect low-carb ingredient. It’s also packed with fiber and antioxidants.
1 cup red or green grapes, halved – Grapes are naturally sweet, which complements the apples and dried cranberries in this salad, adding a burst of juiciness.
1/2 cup pecans, roughly chopped – Pecans provide healthy fats, fiber, and protein, making them a great addition to balance the sweetness of the fruit and offer some crunch.
1/4 cup dried cranberries, unsweetened or lightly sweetened – Dried cranberries provide a chewy texture and a pop of color, while also contributing some natural sweetness and antioxidants.
1/4 cup crumbled feta cheese (optional) – Feta cheese adds a salty, tangy flavor that enhances the sweetness of the fruit, though you can omit it if you’re looking for a dairy-free version.
For the Dressing:
1/4 cup plain Greek yogurt – The creamy base of this dressing, Greek yogurt, is rich in protein and provides a tangy, smooth texture. For a lighter version, you can substitute it with non-fat yogurt.
1 tablespoon honey or maple syrup – A touch of honey or maple syrup adds a natural sweetness to balance the tartness of the apples and cranberries.
1 tablespoon apple cider vinegar – Apple cider vinegar is a great addition to the dressing for a tangy kick that balances out the sweetness of the honey and fruits.
1 tablespoon fresh lemon juice – Lemon juice adds a fresh and zesty flavor that brightens up the dressing and helps tie all the flavors together.
1 teaspoon Dijon mustard – Adds a mild kick and depth of flavor to the dressing, perfectly complementing the sweetness and creaminess.
Salt and pepper, to taste – Season the dressing to taste with salt and black pepper to enhance the overall flavor.
1 teaspoon olive oil (optional) – For a little extra creaminess and smooth texture, you can add a small amount of olive oil to the dressing.

Step-by-Step Instructions
Now that we’ve gathered all the ingredients for the WW Apple Salad, let’s walk through the process of making this delicious, healthy dish. The steps are simple and easy to follow, and the salad can be prepared in about 15-20 minutes. Let’s get started:

Step 1: Prepare the Ingredients
Start by prepping all your ingredients before assembling the salad. This ensures everything is ready to go when you’re ready to toss everything together.

Chop the apples: Core and slice the Honeycrisp apples into bite-sized pieces. You can choose to leave the skin on for added fiber, or peel them if you prefer a smoother texture. To prevent the apples from browning, you can toss them in a small amount of lemon juice or apple cider vinegar.
Chop the celery: Wash and chop the celery stalks into small pieces. Celery adds a wonderful crunch and is low in calories, so it’s a perfect base for the salad.
Prepare the grapes: Wash the grapes thoroughly, then slice them in half. Grapes add a sweet burst of flavor, so be sure to evenly distribute them throughout the salad.
Chop the pecans: Roughly chop the pecans. If you prefer, you can toast them for an added flavor boost, though this is optional.
Prepare the cranberries: If you’re using dried cranberries, make sure they’re unsweetened or lightly sweetened to keep the carb count low. If the cranberries are too sticky, you can lightly coat them with a dusting of cornstarch or arrowroot powder to keep them from clumping together.
Crumbled feta: If using, crumble the feta cheese into small pieces and set aside. It will be sprinkled on top at the end.
Step 2: Make the Dressing
While the salad ingredients are being prepped, make the creamy dressing.

In a small bowl, combine the Greek yogurt, honey, apple cider vinegar, lemon juice, and Dijon mustard. Whisk them together until smooth and well combined.
Taste the dressing and adjust the seasoning. Add salt and pepper as needed to enhance the flavors. If you prefer a slightly thinner dressing, you can add a small amount of water or additional lemon juice.
Step 3: Assemble the Salad
Once all the ingredients are ready, it’s time to assemble the salad.

In a large mixing bowl, add the prepared Honeycrisp apples, celery, grapes, pecans, and dried cranberries.
Pour the dressing over the salad and toss gently to combine. Be sure that each piece of fruit and vegetable is coated in the creamy dressing.
If using, sprinkle the crumbled feta cheese over the top and toss again lightly.
Step 4: Serve and Enjoy
Serve the salad immediately or refrigerate it for later use. This WW Apple Salad is a perfect side dish for grilled chicken or as a standalone meal. It’s perfect for meal prepping and can last for up to 2-3 days when stored in an airtight container in the fridge.

Tips for Making the Best WW Apple Salad
Use fresh ingredients: The key to a flavorful salad is using the freshest ingredients you can find, especially when it comes to the apples and grapes. Honeycrisp apples are sweet and crisp, which makes them ideal for this salad.
Dressing options: If you prefer a dairy-free version of this salad, you can swap the Greek yogurt for a plant-based yogurt (such as coconut or almond milk yogurt). Additionally, you can opt for agave syrup or stevia as a substitute for honey if you’re avoiding sugar.
Make it a meal: To turn this side salad into a more substantial meal, consider adding some grilled chicken, shrimp, or a scoop of your favorite protein. It will help balance out the macronutrients and keep you full for longer.
Keep it crunchy: If you plan to make the salad ahead of time, it’s a good idea to keep the dressing separate until just before serving to ensure the fruits and vegetables stay crisp.
Add extra texture: If you’re looking for additional crunch, try adding some chopped almonds, walnuts, or sunflower seeds for a boost of healthy fats.
Nutritional Breakdown
This WW Apple Salad is not only delicious but also a healthy choice, providing a good balance of vitamins, antioxidants, and fiber with low SmartPoints. Here’s the nutritional breakdown per serving:

Per Serving (1/4 of the recipe):
Calories: 140 kcal
Protein: 2g
Fat: 9g
Carbohydrates: 17g
Fiber: 3g
Net Carbs: 14g
Sugar: 12g
Sodium: 90mg
SmartPoints Breakdown (Weight Watchers):
Blue Plan: 4 SmartPoints per serving
Green Plan: 5 SmartPoints per serving
Purple Plan: 4 SmartPoints per serving
Conclusion
This WW Apple Salad is an ideal dish for anyone following the Weight Watchers program or anyone simply looking for a nutritious, low-carb salad option. It’s packed with fresh fruits, vegetables, healthy fats, and a creamy dressing that ties everything together in a delightful way. Whether served as a side dish or enjoyed as a standalone meal, this salad will keep you satisfied and on track with your dietary goals.

Enjoy it as a refreshing snack, a light lunch, or a side at your next gathering—this salad is sure to become a favorite in your meal prep rotation!

Sugar-Free Apple Cocoa Cake

Just Apples & Cocoa!

If you’ve been searching for a guilt-free dessert that’s naturally sweet, rich in flavor, and supports your health goals, this recipe is a game-changer. With only a few wholesome ingredients — apples, eggs, and cocoa — you can make a moist, chocolaty cake without a single grain of sugar. Perfect for breakfast, snacks, or dessert!

Ingredients

  • 4 medium sweet apples (Fuji, Honeycrisp, Gala) – naturally sweet and juicy.

  • 4 large eggs – for structure and protein.

  • 5 tablespoons unsweetened cocoa powder – deep chocolate flavor without sugar.

  • 1 teaspoon baking powder – for a light rise.

  • Olive oil – for greasing the baking mold.

Instructions

  1. Prepare the apples
    Wash, peel, and core the apples. Cut them into chunks and blend into a smooth purée.

  2. Make the batter
    In a large mixing bowl, combine the apple purée, eggs, cocoa powder, and baking powder. Whisk or blend until the mixture is lump-free and silky.

  3. Get the pan ready
    Lightly grease a baking pan with olive oil. Pour in the batter and smooth the top.

  4. Bake
    Preheat the oven to 180°C (350°F). Bake for 35–40 minutes, or until a toothpick inserted in the center comes out clean.

  5. Cool & enjoy
    Let the cake cool completely before slicing. Serve plain, or with a sprinkle of extra cocoa powder.

Why it’s great for weight loss

This cake is naturally sweet from apples, high in fiber, rich in protein, and low in calories. Cocoa adds flavor and antioxidants without sugar.

See also  Healthy 5-Minute Breakfast Recipe: Oatmeal with Apples and Bananas

 Q&A

Q: Can I use green apples?
A: Yes, but they’re tart — the cake will be less sweet.

Q: How long does it keep?
A: Store in an airtight container in the fridge for up to 4 days, or freeze for 1 month.

Q: Can I make it vegan?
A: Replace each egg with 1 tbsp ground flaxseed + 3 tbsp water.

Q: Is it sweet like regular cake?
A: No, it’s mildly sweet — think of it as a healthy chocolate loaf.

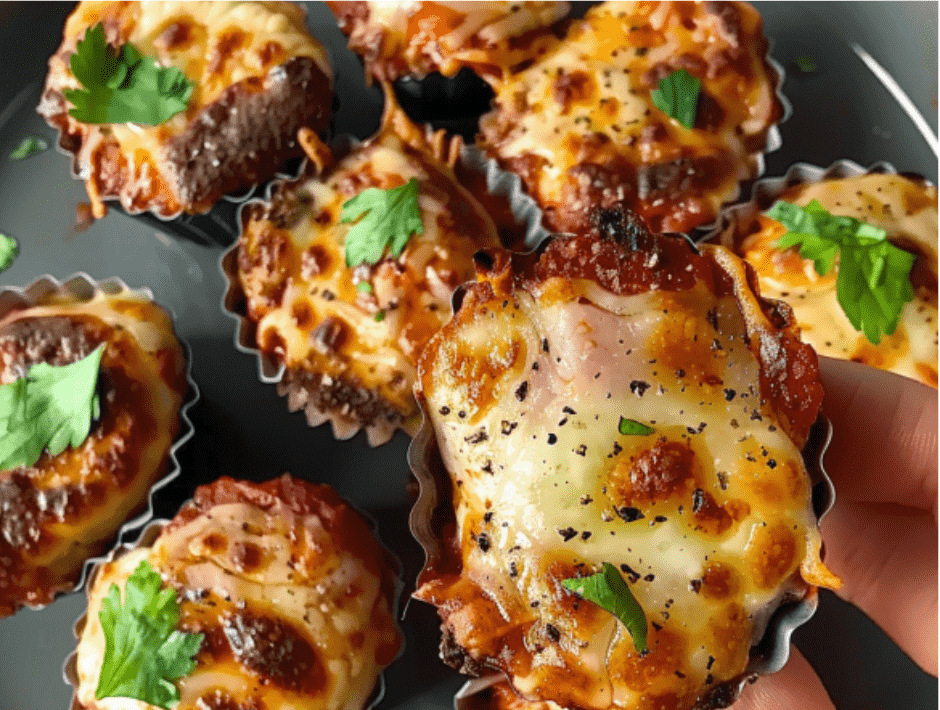
Keto Chicken Parmesan Cups

Keto Chicken Parmesan Cups are a keto dish and they also contain of low no of carbs. This dish is very flavorful and tasty, so everyone will enjoy it whether they are on a diet or not. This dish is made with a combination of mozzarella and parmesan cheese, keto marinara sauce, egg, almond flour, and seasoned with Italian seasoning, black pepper & salt. We can serve this as a side salad, zucchini noodles, or solo. This dish has lots of protein and healthy fats, so it is good to have this dish in a keto diet. These cups contain 3g net carbs so we can easily serve this dish on a keto diet. This dish stores well, so we would prepare this in advance. We can easily customize these cups and add the favorite cheese, sauce, and herbs for a different flavor profile.


STATS:

  • Cook time: 20 mints.
  • Total time: 35 mints.
  • Serving size: 2 cups
  • Calories: 220 kcal
  • Cuisine: Italian-American
  • Prep time: 15 mints.
  • Course: Appetizer
  • Diet: Keto, Low-Carb
  • Servings: 6

EQUIPMENT:

  • Muffin tin
  • Mixing bowls
  • Spoon or scoop
  • Grater
  • Oven

INGREDIENTS:

  • 2 cups of chicken
  • 1 cup mozzarella cheese
  • ½ cup Parmesan cheese
  • ½ cup marinara sauce
  • 1 egg
  • ¼ cup almond flour
  • 1 tsp. Italian seasoning
  • Salt and pepper
  • Fresh basil

INGREDIENT NOTES:

CHICKEN:

  • We have to utilize the cooked and shredded chicken to prepare these cups to save time.

PARMESAN CHEESE:

  • We utilize the parmesan cheese to salt the sharp and savory taste in this bake.

EGGS:

  • Eggs help bind the ingredients and they help to hold the chicken mix together.

KETO MARINARA SAUCE:

  • We have to utilize the keto-friendly marinara sauce to prepare these cups without the additional carbs.

MOZZARELLA CHEESE:

  • This cheese should be made with full-fat milk and it should be fresh when you make these cups.

ALMOND FLOUR:

  • It is low-carb flour, and it is utilized to provide the structure.

ITALIAN SEASONING:

  • It is included in these parmesan cups to provide the taste in these cups.

SALT & PEPPER:

  • It is used to provide the flavor in this dish.

BASIL LEAVES:

  • It is used to garnish the dish for the burst of color.


INSTRUCTIONS:

  1. We can pre-heat the oven to three-seventy-five degrees F.
  2. Then we can apply the oil in a muffin tin and place the cups.
  3. Take a big dish and add the chicken, egg, almond flour, Parmesan, Italian seasoning, salt, & black pepper.
  4. We can add the chicken mixture, press properly, and form a well in the middle.
  5. Then we can add one spoonful of keto marinara sauce in every cup and then sprinkle mozzarella cheese.
  6. Bake these cups for eighteen to twenty minutes.
  7. We can slightly cool these cups, garnish with the basil, and serve warm.

SERVING SUGGESTIONS:

  • Serve these parmesan cups with a fresh salad with balsamic vinaigrette.
  • We can pair these cups with roasted zucchini or asparagus.
  • You can dip these cups in additional marinara sauce or garlic aioli
  • We can also serve these parmesan cups with zoodles for whole dinner.
  • You can also give these cups in the school lunchbox.
  • We can also add a full spoonful of pesto sauce for additional flavor.

TIPS:

  • We would utilize the silicone muffin cups to remove the cups easily.
  • You would also prepare these cups in double the amount for meal prep purposes.
  • We would also sprinkle some chili flakes for the additional spice.
  • We would also add some turkey or beef in place of chicken to make it more flavorful.

STORAGE INFORMATION:

FRIDGE:

  • Put these cups in the sealed box and preserve them for around four days.

FREEZER:

  • We can place these cups in a bag and preserve them for two months.

FAQs:

Can I use a can of chicken to prepare these cups?

  • We will use the can of chicken to prepare these cups, but we have to drain and shred the chicken.

Are these Parmesan cups gluten-free?

  • These parmesan cups are gluten-free, but check the label of keto marinara and seasoning to ensure they are gluten-free also.

Can I make these parmesan cups before the time?

  • We can easily prepare and store these parmesan cups in advance and utilize them when required.

Is there any alternative to almond flour?

  • We would utilize the keto bread crumbs, or coconut flour, in place of almond flour to provide the structure in these cups.


NUTRITIONAL INFORMATION:

Fiber: 1g
Net Carbs: 3g
Protein: 22g
Calories: 220 kcal
Fat: 13g
Calcium: 180mg
Iron: 1.2mg
Vitamin A: 450 IU
Total carbs: 4g
Sodium: 430mg
Potassium: 300mg