Baked Cheesy Chicken Bread Rolls

Baked Cheesy Chicken Bread Rolls

A savory, melt-in-your-mouth snack featuring seasoned shredded chicken and bubbly melted cheese nestled in soft dinner rolls.

  • Prep time: 15 minutes

  • Cook time: 15 minutes

  • Total time: 30 minutes

Ingredients

For the Chicken Filling

  • Chicken: 1 cup boiled and shredded chicken (rotisserie chicken works great here)

  • Onion: 1 small, finely chopped

  • Capsicum (Bell Pepper): ½ cup, finely chopped

  • Garlic: 1 tsp garlic paste

  • Condiments: 2 tbsp ketchup (or pizza sauce) and 2 tbsp mayonnaise

  • Seasoning: Salt (to taste), ½ tsp black pepper, ½ tsp red chili powder, and ½ tsp chili flakes (optional for heat)

For the Rolls & Topping

  • Bread: 1 pack of dinner rolls or slider buns

  • Cheese: 1½ cups mozzarella or cheddar cheese, grated

  • Butter Mixture: 2 tbsp butter (melted) mixed with 1 tsp garlic powder

  • Garnish: Freshly chopped parsley or coriander


Detailed Instructions

1. Sauté the Savory Filling

Heat 1 tablespoon of oil in a non-stick pan over medium heat. Add the finely chopped onion and garlic paste, sautéing for about 2 minutes until the onion becomes translucent and soft. Add the shredded chicken and chopped capsicum.

2. Season and Combine

Stir in the salt, black pepper, red chili powder, and chili flakes. Mix thoroughly and cook for 3–4 minutes to allow the flavors to meld and the capsicum to soften slightly. Remove the pan from the heat. Once the mixture has cooled for a minute, stir in the ketchup (or pizza sauce) and mayonnaise until the chicken is evenly coated and creamy.

3. Prepare and Stuff the Rolls

Preheat your oven to 180°C (350°F). Take your dinner rolls and make a deep slit down the center of each, being careful not to cut all the way through to the bottom. Gently pull the bread apart and stuff each roll generously with the prepared chicken filling.

4. Add Cheese and Butter

Place the stuffed rolls side-by-side on a baking tray lined with parchment paper. Sprinkle the grated mozzarella or cheddar cheese over the top of the filling in each roll. Using a pastry brush, coat the tops and sides of the bread with the melted garlic butter.

5. Bake to Perfection

Place the tray in the center rack of the oven. Bake for 12–15 minutes, or until the cheese is completely melted and bubbling, and the edges of the rolls have turned a beautiful golden brown.

6. Garnish and Serve

Remove from the oven and immediately sprinkle with fresh parsley or coriander. Serve these rolls while hot, ideally paired with extra ketchup or a creamy garlic dipping sauce.


Tips for the Best Rolls

  • Don’t Overfill: While it’s tempting to pile the chicken high, keep the filling level with the top of the bread to ensure the cheese stays on the roll rather than sliding off onto the tray.

  • Soft vs. Crusty: If you prefer a softer roll, cover the tray loosely with aluminum foil for the first 8 minutes of baking, then remove it for the final 5 minutes to melt the cheese.
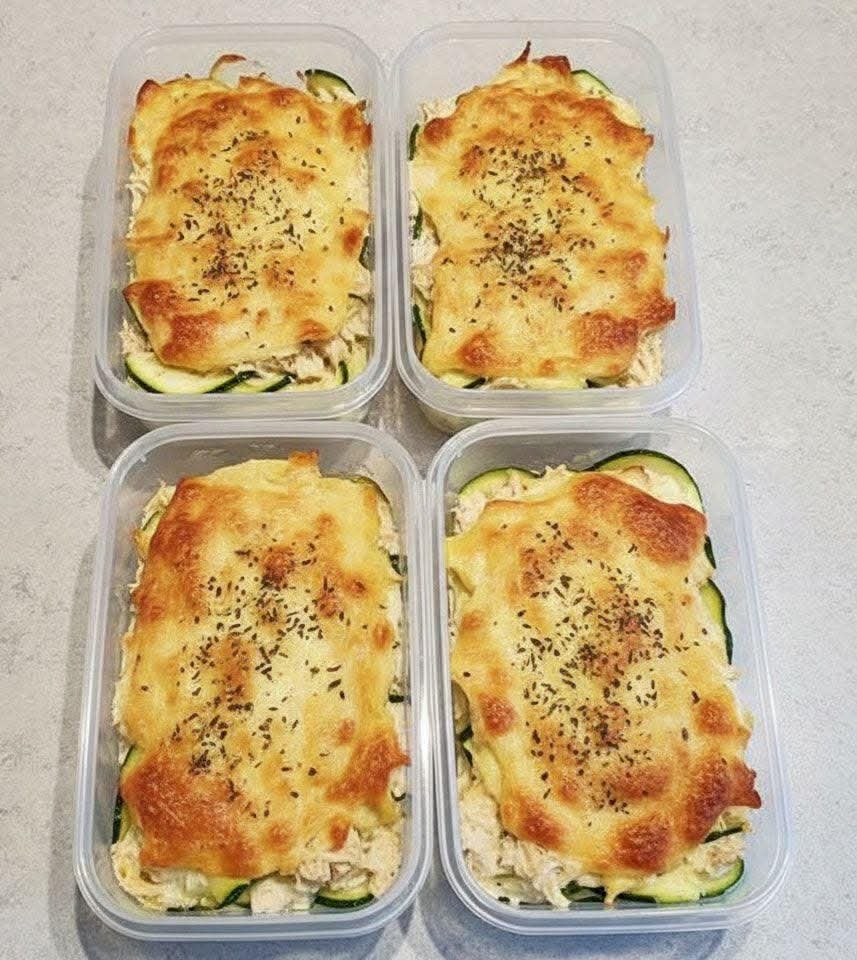
Zucchini & Creamy Chicken Melt


Zucchini & Creamy Chicken Melt

Prep time: 15 mins | Cook time: 25 mins | Servings: 4


Ingredients

Protein: 2 large chicken breasts (poached and shredded) or 1 rotisserie chicken.


Vegetables: 2 medium zucchinis, sliced into thin rounds or long ribbons.


Creamy Base: 1/2 cup Greek yogurt or sour cream, and 4 oz softened cream cheese.


Seasoning: 1 tsp garlic powder, 1 tsp onion powder, salt, and black pepper to taste.


Topping: 1.5 cups shredded mozzarella or cheddar cheese and dried oregano/parsley for the garnish.


Preparation Steps

Prep the Zucchini: Slice the zucchini into thin rounds (as seen in the photo). If you want to avoid extra liquid, sprinkle them with a pinch of salt, let them sit for 10 minutes, and pat them dry with a paper towel.


Mix the Filling: In a large bowl, combine the shredded chicken, Greek yogurt (or sour cream), cream cheese, and seasonings. Mix until the chicken is well-coated and creamy.


Layer the Containers:


Place a layer of zucchini slices at the bottom of your containers or a large baking dish.


Spread the chicken mixture evenly over the zucchini.


Top with another layer of zucchini (optional) and then a generous layer of shredded cheese.


Bake: Place the containers (ensure they are oven-safe!) or the baking dish in an oven preheated to 400°F (200°C). Bake for 15–20 minutes until the cheese is bubbly and golden brown.


Finish: Sprinkle with dried herbs while the cheese is still hot.


Pro-Tips for Success

The “Crunch” Factor: If you want a bit of texture, you can add a sprinkle of almond flour or crushed crackers on top of the cheese before baking.


Meal Prep: Let the meals cool completely before putting the lids on to prevent steam from making the zucchini too soft.


Spice it up: Add a dash of red pepper flakes or chopped jalapeños to the chicken mixture if you prefer a bit of heat.

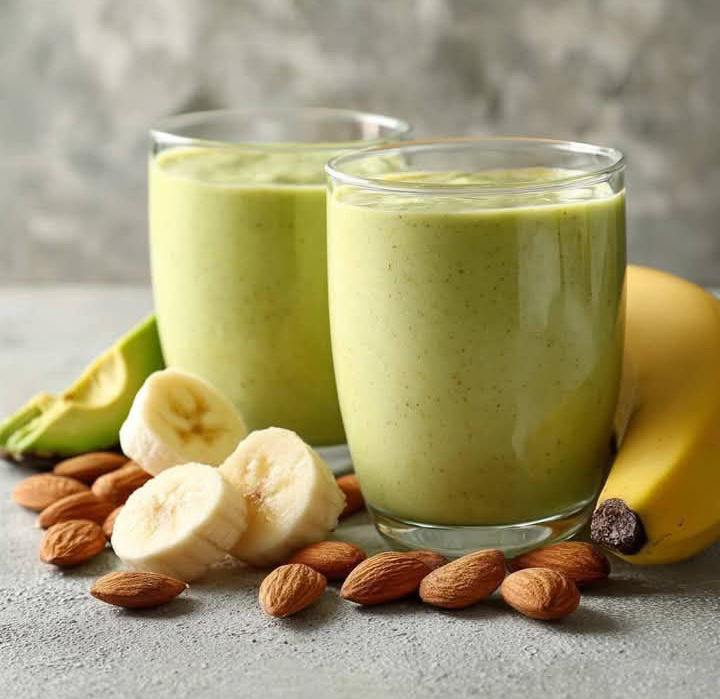
Creamy Avocado & Banana Power Smoothie


Creamy Avocado & Banana Power Smoothie

Prep time: 5 minutes | Servings: 1-2


Ingredients

1 ripe avocado (pitted and peeled)


1 large ripe banana (frozen slices work best for a thicker texture)


1/4 cup raw almonds (or 1 tablespoon of almond butter)


1 1/2 cups almond milk (unsweetened)


1 tablespoon honey or maple syrup (optional, for extra sweetness)


A handful of ice cubes (if using fresh fruit instead of frozen)


Instructions

Prep the base: Place the almonds in the blender first and pulse until they are finely ground to ensure a smooth texture.


Combine: Add the avocado, banana, almond milk, and sweetener (if using) to the blender.


Blend: Start on a low speed and gradually increase to high. Blend for about 45–60 seconds until the mixture is completely smooth and pale green.


Adjust: If the smoothie is too thick, add a splash more almond milk. If you prefer it colder, add a few ice cubes and blend again.


Serve: Pour into glasses and garnish with a few almond slivers or a slice of banana on top.


Nutritional Benefits

Healthy Fats: The avocado provides monounsaturated fats which are great for heart health.


Potassium: Both the banana and avocado are excellent sources of potassium.


Fiber: This combination keeps you feeling full and satisfied for longer.

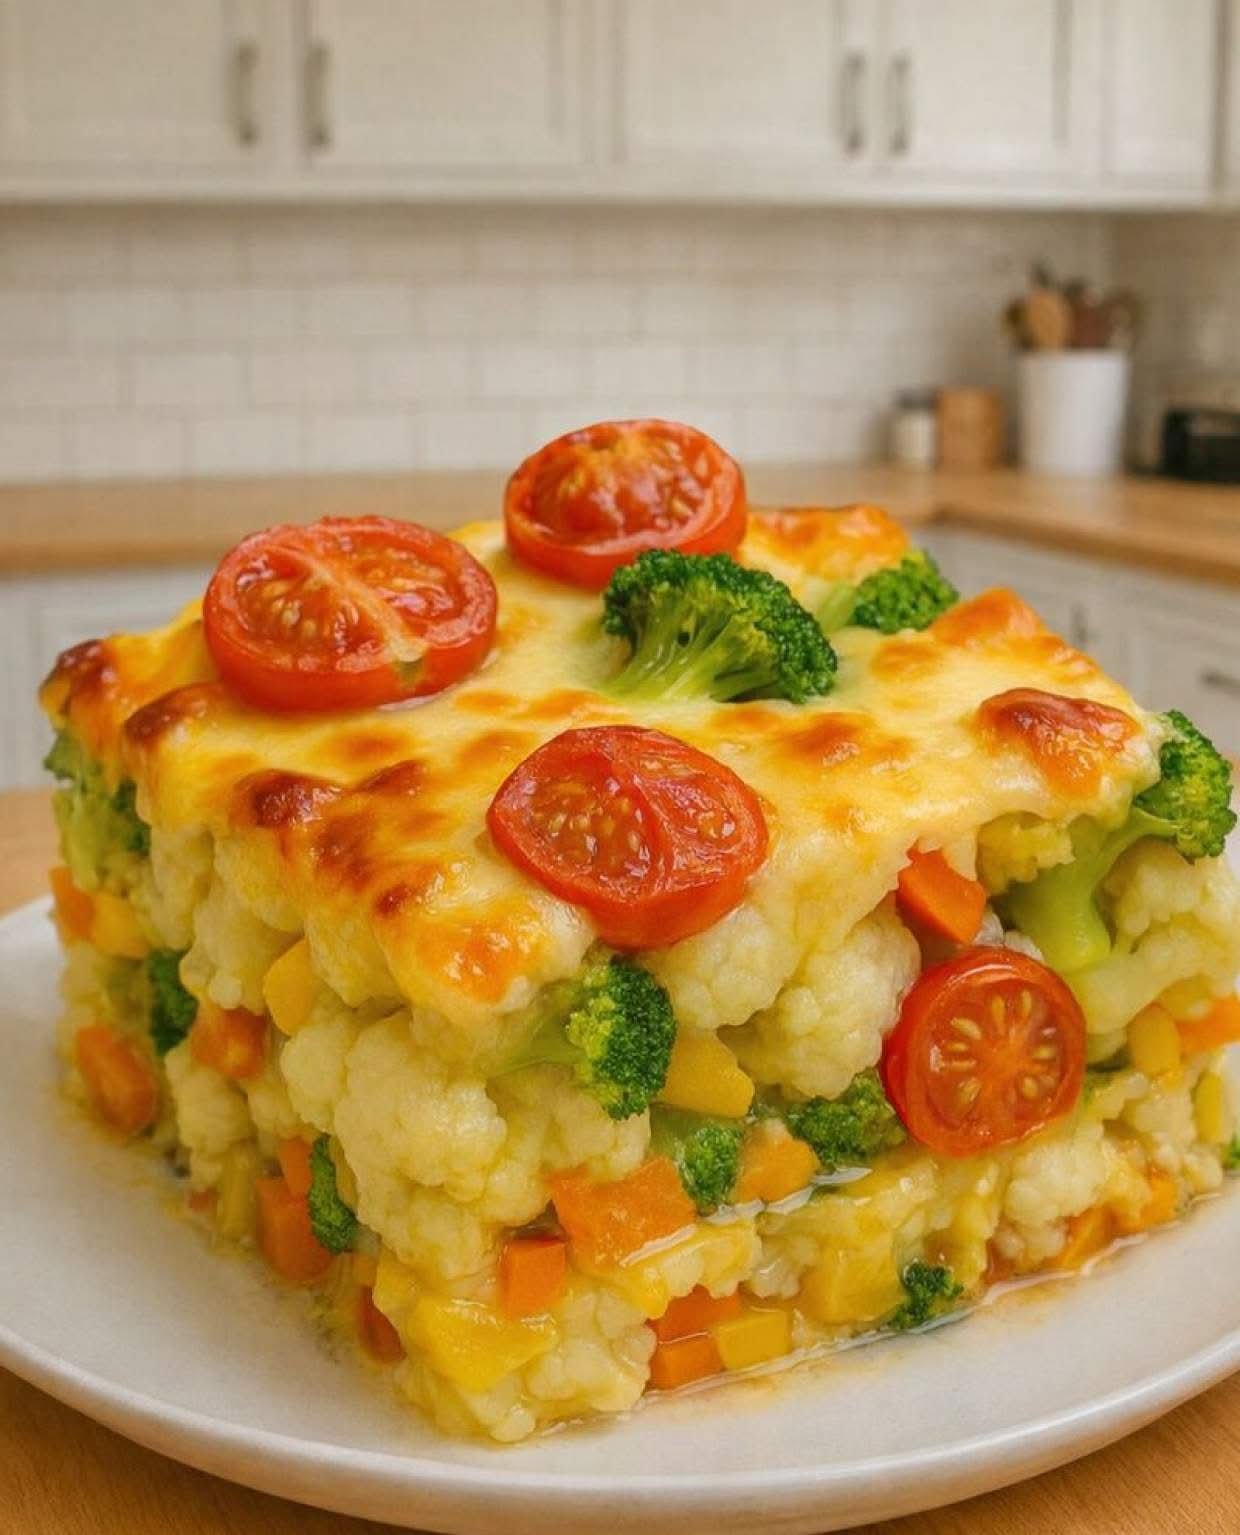
Cheesy Vegetable Bake Recipe

Cheesy Vegetable Bake Recipe

Ingredients

Vegetables: 1 large head of Cauliflower, 1 large head of Broccoli, 3 large Carrots (diced), and 1 yellow Bell Pepper (diced).


Topping: 3-4 Cherry tomatoes (halved) and 2 cups shredded Mozzarella or Cheddar cheese.


The Sauce (Béchamel):


4 tablespoons Butter


1/4 cup All-purpose flour


2 cups Whole milk


1/2 teaspoon Garlic powder


Salt and black pepper to taste


Instructions

Prepare the Vegetables: Cut the cauliflower and broccoli into medium-sized florets. Steam or par-boil the cauliflower, broccoli, and carrots for about 5 minutes until “fork-tender” but still firm. Drain well and pat dry (this prevents the dish from being watery).


Make the Cheese Sauce: In a saucepan, melt the butter over medium heat. Whisk in the flour and cook for 1 minute. Gradually pour in the milk, whisking constantly until the sauce thickens. Remove from heat and stir in half of the shredded cheese, garlic powder, salt, and pepper.


Assemble the Bake:


To get the “square” look from the photo, use a square springform pan or a deep square glass baking dish lined with parchment paper.


Toss the steamed vegetables and diced peppers together in a bowl, then pack them tightly into the dish.


Pour the cheese sauce evenly over the top, allowing it to seep down through the crevices.


The Topping: Sprinkle the remaining cheese over the top. Place the halved cherry tomatoes and a few small broccoli florets on top of the cheese for decoration.


Bake: Preheat your oven to 200°C (400°F). Bake for 20–25 minutes until the cheese is bubbly and golden brown.


Serving: If using a springform pan, let the dish rest for 10 minutes before removing the sides so the “vegetable block” holds its shape.


Pro Tips for Success

Avoid Sogginess: Make sure the vegetables are very well-drained after steaming. You can even roast them slightly beforehand to remove excess moisture.


Add Protein: You can easily add cooked chicken cubes or chickpeas between the vegetable layers for a more filling meal.


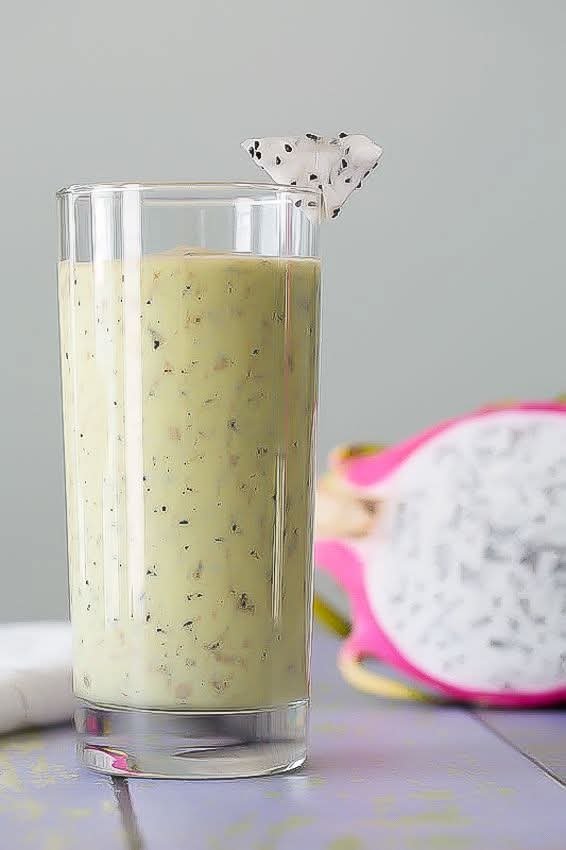
Creamy Avocado & Dragon Fruit Smoothie

Creamy Avocado & Dragon Fruit Smoothie

Ingredients

  • 1/2 medium Avocado (ripe, for creaminess)

  • 1/2 White Dragon Fruit (peeled and cubed; use frozen for a thicker texture)

  • 1 cup Milk of choice (Almond, Coconut, or Soy milk work best for this flavor profile)

  • 1 tbsp Honey or Maple Syrup (to taste)

  • 1/2 frozen Banana (optional, for extra sweetness and thickness)

  • Splash of Lime juice (optional, to brighten the flavor and keep the avocado green)

Instructions

  1. Prep the Fruit: Cut the dragon fruit in half and scoop out the white flesh with the black seeds. Do the same for the avocado.

  2. Blend: Place the avocado, dragon fruit, milk, and sweetener into a high-speed blender.

  3. Process: Blend on high until completely smooth. The black seeds will remain intact but smaller, giving it the signature speckled look seen in your photo.

  4. Serve: Pour into a tall glass.

  5. Garnish: To match the photo, cut a small triangular wedge or use a melon baller on a fresh piece of dragon fruit and place it on the rim of the glass.

Why this combination works:

  • The Texture: Avocado contains healthy fats that act as a natural thickener, making the smoothie feel like a milkshake.

  • The Flavor: Dragon fruit has a very mild, slightly sweet flavor (similar to a cross between a kiwi and a pear), which complements the buttery, neutral taste of the avocado perfectly.


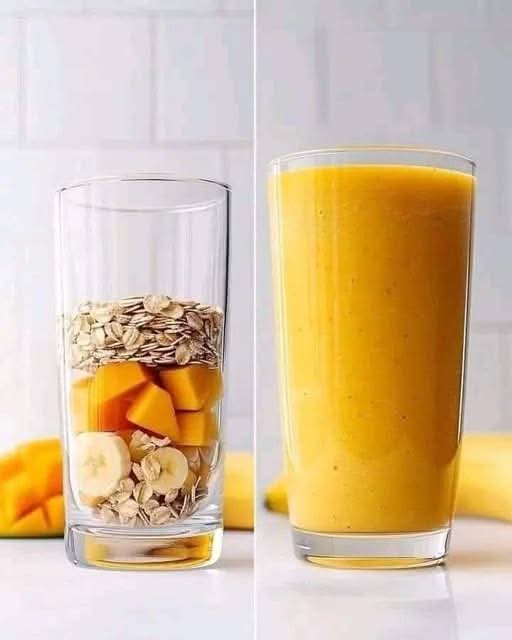
Mango Banana Oat Breakfast Smoothie


🥭 Mango Banana Oat Breakfast Smoothie

Ingredients

Category Ingredient Quantity
Fiber Rolled Oats (Old Fashioned) ¼ cup
Fruit Fresh or Frozen Mango (cubed) 1 cup
Fruit Ripe Banana ½ large
Liquid Orange Juice or Coconut Water ½ cup
Creaminess Milk or Yogurt (Dairy or Plant-based) ½ cup
Optional Honey or Agave Syrup 1 tsp
Optional Fresh Turmeric or Ginger A tiny pinch (for extra glow)


Instructions

  1. Soften the Oats (Optional): If you prefer a completely smooth texture without any “chew,” place the oats in the blender first and pulse them into a fine powder before adding other ingredients.

  2. Layer Your Ingredients: Add your liquid base (orange juice/milk) first. Follow with the oats, then the banana and mango chunks. Placing the frozen items on top helps push everything down into the blades.

  3. The Blend: Start on a medium speed to break down the oats and fruit, then finish on high for 45 seconds. You want to ensure the oats are fully pulverized for that “silk” finish seen in the second image.

  4. Adjust Consistency: * Too thick? Add a splash more orange juice.

    • Too thin? Add a few ice cubes or more frozen mango.


Why this combination works

  • The Oats: They act as a natural thickener and provide slow-release energy, preventing a “sugar crash” later in the morning.

  • The Mango: High in Vitamin C and fiber, it provides that intense tropical color and natural sweetness.

  • The Banana: This is the “glue” of the smoothie; it provides the creamy, emulsified texture that binds the oats and juice together.

Pro Tip for Texture

If you have the time, let the blended smoothie sit for 2–3 minutes before drinking. This allows the oats to hydrate slightly, making the drink even creamier!