Easy Recipes
Avocado Blueberry Smoothie
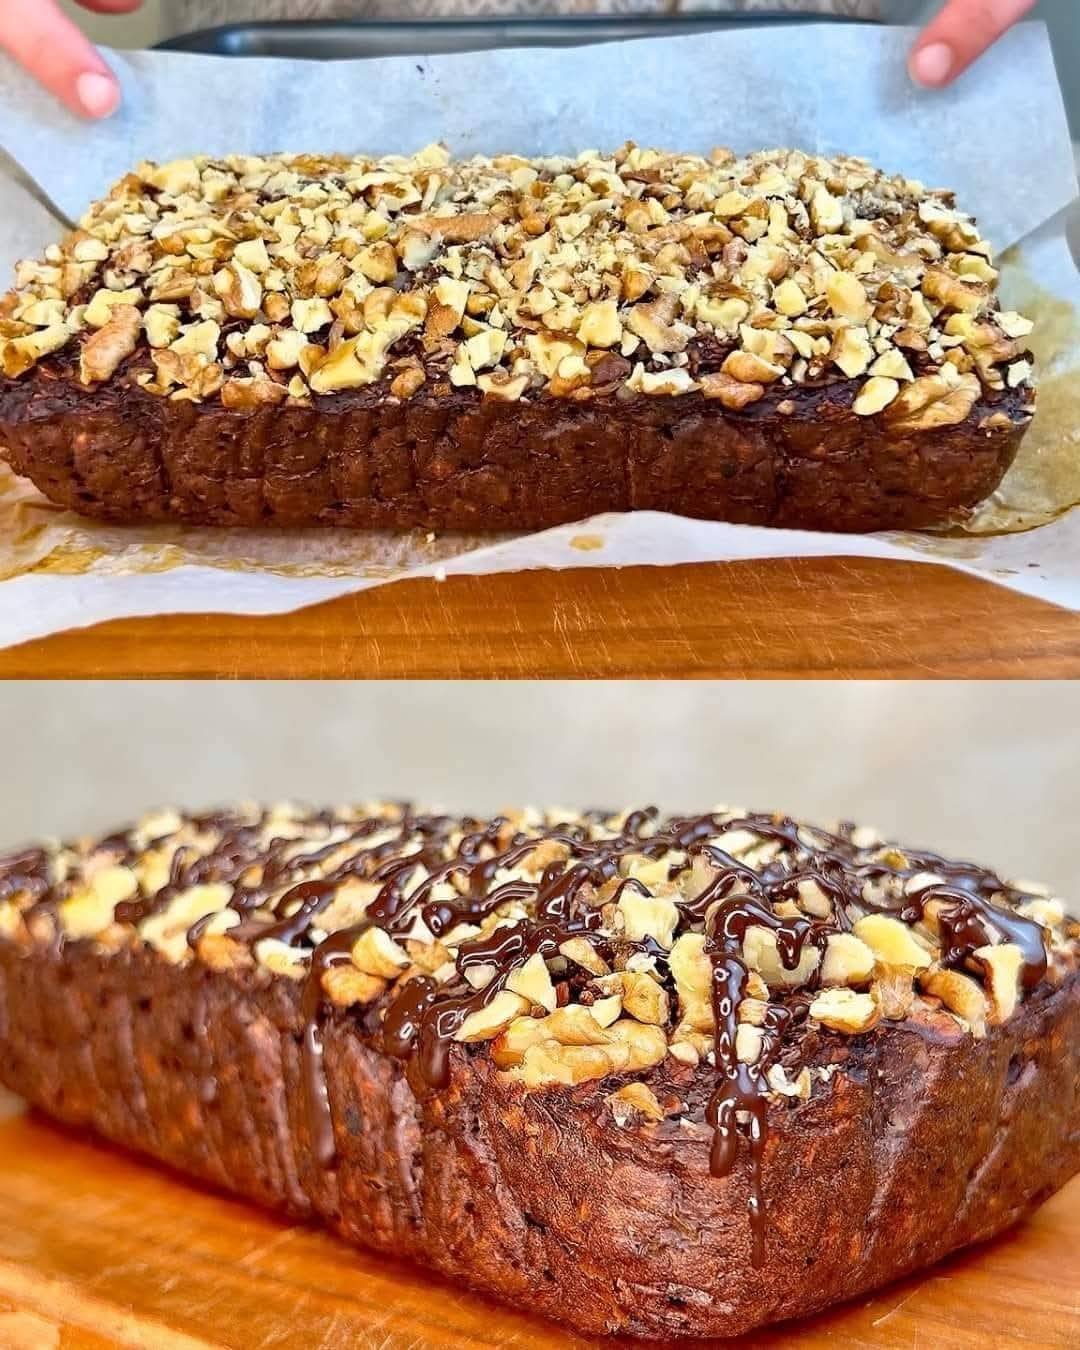
Flourless Chocolate Banana Oat Loaf
Prep Time: 10 minutes
Bake Time: 35–45 minutes
Servings: 6–8 slices
A soft, rich loaf made with oats, bananas, and cocoa. It contains no flour and has a naturally sweet flavor from ripe bananas.
🧺 Ingredients
-
120 g oat flakes (use certified gluten-free if needed)
-
250 ml hot milk (dairy or plant-based)
-
2 medium ripe bananas
-
2 eggs
-
4 tablespoons (45 g) cocoa or carob powder
-
1 tablespoon baking powder
-
A small pinch of salt
-
40 g chopped nuts (walnuts, pecans, or almonds)
-
Sugar-free dark chocolate, melted or finely chopped (for topping)
👩🍳 Instructions
1️⃣ Soften the Oats
Place the oat flakes in a mixing bowl.
Pour the hot milk over them and stir gently.
Let them rest for about 10 minutes, so the oats absorb the liquid and become tender.
2️⃣ Prepare the Banana Mixture
Peel the bananas and place them in a separate bowl.
Mash them with a fork until smooth and creamy.
Add the eggs and whisk gently until the mixture looks evenly blended.
3️⃣ Combine the Batter
Add the cocoa powder, baking powder, and salt to the banana mixture.
Stir until smooth and well mixed.
Add the softened oats and milk to the bowl.
Mix gently until everything is evenly combined.
Fold in half of the chopped nuts, keeping the rest for the top.
4️⃣ Bake the Loaf
Lightly coat a loaf pan with oil or line it with parchment paper.
Pour the batter into the pan and spread it evenly.
Sprinkle the remaining nuts over the surface.
Bake in a preheated oven at 350°F (180°C) for 35–45 minutes, until:
-
The top looks set
-
The center feels firm
-
A toothpick inserted comes out clean
5️⃣ Finish and Serve
Allow the loaf to cool slightly in the pan.
Drizzle melted dark chocolate over the top.
Let the chocolate firm up before slicing and serving.
🍽️ Serving Ideas
-
Enjoy warm or cooled
-
Serve with yogurt or fruit
-
Pair with tea or coffee
-
Lightly dust with cocoa powder if desired
💡 Helpful Tip
For a finer, more cake-like texture, you can blend the dry oats briefly to make oat flour before adding the hot milk.
Keto Mexican White Trash Casserole
Turmeric & Ginger Wellness Elixir
Yield: About 1 liter
A warm, aromatic drink made from simple kitchen ingredients such as onion, garlic, ginger, lemon, and turmeric. It is often enjoyed as a comforting herbal-style infusion.
🧺 Ingredients
-
1 medium onion (yellow or red)
-
1 large bulb of garlic
-
3 cm piece of fresh ginger root
-
2 lemons
-
2 tablespoons ground turmeric
-
⅛ teaspoon black pepper
-
2 tablespoons raw honey
-
1 liter filtered water
👩🍳 Instructions
1️⃣ Prepare the Ingredients
Onion and Garlic
Peel the onion and garlic cloves.
Chop the onion into medium pieces and gently press the garlic cloves to release their natural aroma.
Ginger
Wash the ginger root well.
Slice it thinly or grate it to help its flavor blend into the liquid.
Lemons
Cut the lemons and squeeze out the juice.
Set the juice aside so it can be added later.
2️⃣ Simmer the Base
Heat the Water
Pour the 1 liter of water into a large pot and bring it to a gentle boil.
Add the Vegetables
Place the onion, garlic, and ginger into the water.
Gentle Cooking
Lower the heat and let the mixture simmer softly for 15–20 minutes, allowing the flavors to infuse.
Add the Spices
Stir in the turmeric and black pepper.
Continue simmering for 5 more minutes, then remove the pot from the heat.
3️⃣ Strain and Sweeten
Strain
Pour the liquid through a fine strainer or cloth into a glass jar or pitcher.
The solid pieces can be discarded.
Cool Slightly
Allow the liquid to cool until warm but not hot.
Add Lemon and Honey
Stir in the lemon juice and honey until fully dissolved.
Adding them at a lower temperature helps keep their natural flavor.
🍵 How to Enjoy
-
Shake or stir before using
-
Take 1 tablespoon on its own, or
-
Mix 1 tablespoon into a cup of warm water and drink as a tea
🧊 Storage
Store the elixir in a sealed glass container in the refrigerator for up to 1 week.
💡 Helpful Notes
This drink is made from everyday foods known for their strong flavor and aroma.
It is intended as a comforting homemade infusion, not as a medical treatment.
If you have food sensitivities or are following a special diet, you may wish to check with a qualified health professional before using regularly.
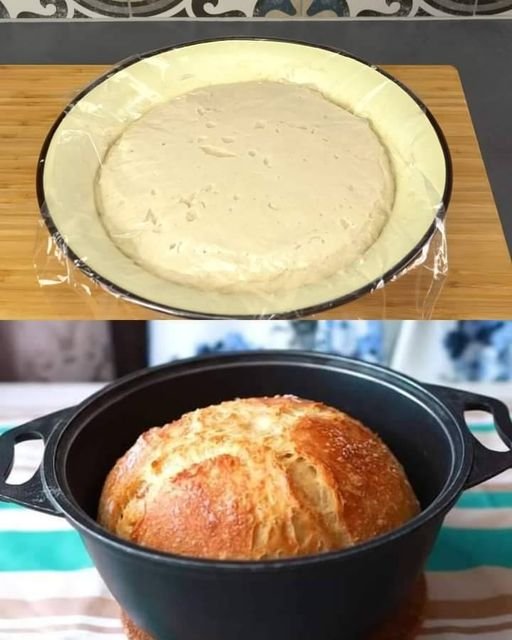
Crusty 4-Ingredient Artisan Bread
Prep Time: 10 minutes
Rest Time: 1½–2 hours
Bake Time: 45 minutes
Serves: 1 round loaf
This simple bread uses only four ingredients to create a loaf with a crisp outside and soft inside, perfect for everyday meals.
🧺 Ingredients
-
4 cups (500 g) all-purpose flour or bread flour
-
1½ cups (370 ml) warm water (about 100°F / 38°C)
-
2 tablespoons (10 g) dry yeast
-
1 teaspoon salt
👩🍳 Instructions
1️⃣ Prepare the Dough
Mix Dry Ingredients
In a large mixing bowl, combine the flour, dry yeast, and salt. Stir gently to blend.
Add Water
Pour in the warm water.
Stir with a spoon or spatula until all the flour is moistened and a soft, slightly sticky dough forms.
Rest the Dough
Cover the bowl with a cloth or plastic wrap.
Place it in a warm, comfortable spot for 1½ to 2 hours, until the dough has grown in size and the surface looks airy and bubbly.
2️⃣ Prepare the Baking Pot
About 30 minutes before baking, place a heavy oven-safe pot with a lid (such as a Dutch oven) inside your oven.
Preheat the oven to 450°F (230°C).
Warming the pot helps create a nicely textured crust.
3️⃣ Shape the Loaf
Lightly dust your work surface and hands with flour.
Carefully transfer the dough onto the surface.
Fold the edges gently toward the center a few times to form a loose round shape.
Try to keep the air inside the dough for a light interior.
Place the dough on a piece of parchment paper.
With a small knife, make a shallow line or “X” on top so the bread can expand evenly while baking.
4️⃣ Bake the Bread
Carefully take the warm pot out of the oven.
Lift the dough using the parchment paper and place it into the pot.
Cover with the lid and bake for 30 minutes.
Remove the lid and continue baking for 10–15 minutes, until the bread turns a rich golden color.
5️⃣ Cool the Bread
Remove the bread from the pot and place it on a rack or plate.
Let it cool for at least 30 minutes before slicing.
This helps the inside finish setting and improves texture.
💡 Helpful Tip (No Dutch Oven)
If you do not have a heavy pot, bake the bread on a regular baking tray.
Place a shallow dish of water on the oven rack below the bread to create gentle steam, which helps form a crisp outer layer.
🍽️ Serving Ideas
-
Enjoy with butter or olive oil
-
Serve with soup or salad
-
Use for sandwiches or toast