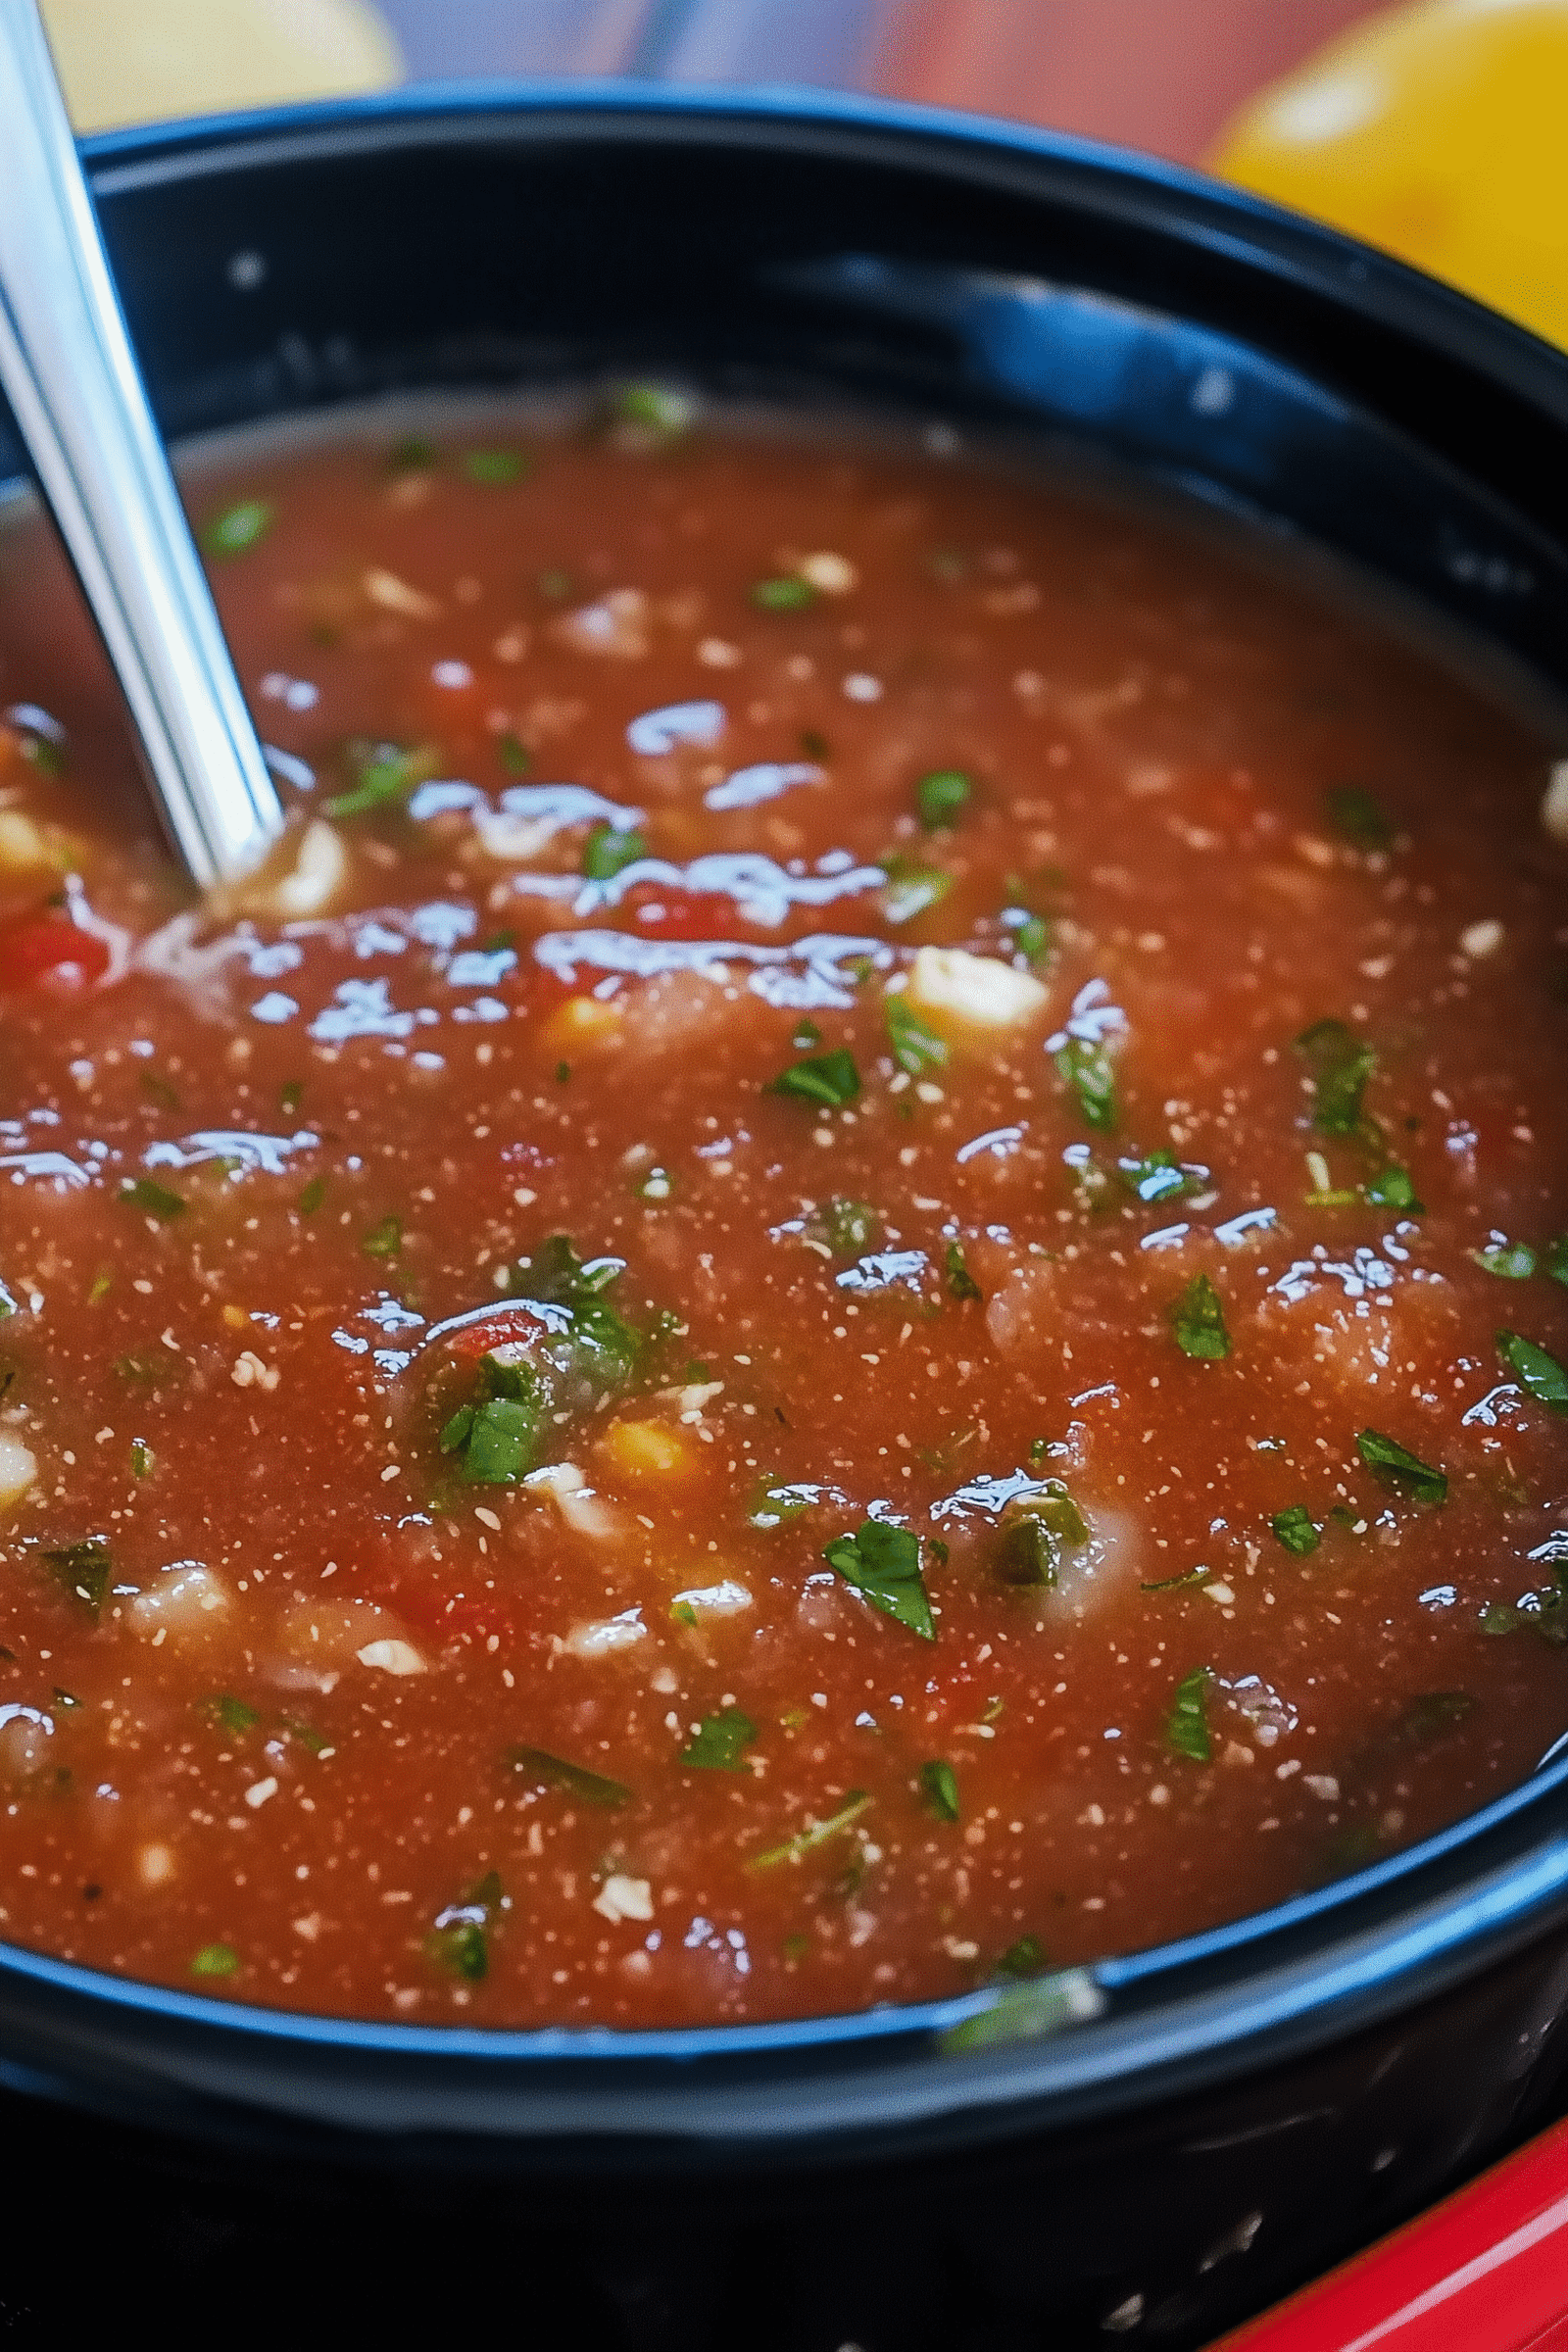
Best Homemade Salsa Ever

Best Homemade Salsa Ever

Every great gathering starts with chips and salsa—and this homemade salsa recipe brings bold, fresh, tangy, and slightly spicy flavors straight to your kitchen. Quick, easy, and endlessly versatile, it’s perfect with chips, tacos, eggs, or grilled meats.


Why You’ll Love This Recipe

  • Ready in just 5 minutes

  • Bursting with bold, fresh tomato flavor

  • Easily customizable to your preferred spice level

  • Better than store-bought and more budget-friendly

  • Perfect for parties, taco nights, or casual snacking


Ingredients

  • 1 (28 oz) can whole tomatoes, with juice

  • 2 (10 oz) cans Rotel (diced tomatoes with green chilies)

  • ¼ cup chopped onion

  • 1 small garlic clove, chopped

  • 1 jalapeño pepper, cut into 4 pieces

  • ¼ tsp sugar

  • ¼ tsp salt

  • ¼ tsp ground cumin

  • ½ cup fresh cilantro (or more to taste)

  • Juice of ½ lime


Instructions

Step 1: Combine Ingredients

In a blender or food processor, add:

  • Whole tomatoes with juice

  • Both cans of Rotel

  • Chopped onion

  • Garlic

  • Jalapeño

  • Sugar, salt, cumin

  • Lime juice

  • Cilantro


Step 2: Blend

Pulse 10–15 times, or until the salsa reaches your preferred consistency: chunky or smooth.


Step 3: Taste and Adjust

Try the salsa with a tortilla chip and adjust:

  • Salt

  • Lime juice

  • Cilantro


Step 4: Chill

Transfer to a container and refrigerate for at least 1 hour to let the flavors meld.


Step 5: Serve

Serve cold with tortilla chips, spoon over tacos, or use as a topping for eggs, grilled meats, or nachos.


Tips for Success

  • For extra heat, add another jalapeño or include the seeds

  • Fresh tomatoes are great in season, but canned works year-round

  • Add more lime or cilantro for a bright, herbaceous punch

  • Store in glass containers to preserve flavor longer


Storage & Reheating

  • Refrigerator: Up to 5 days in an airtight container

  • Freezer: Up to 2 months; thaw in fridge and stir before serving


FAQs

Can I make it spicier?
Yes! Add a second jalapeño, keep the seeds, or toss in a serrano pepper.

What if I don’t have Rotel?
Substitute with diced tomatoes and a small can of green chilies.

Is this salsa chunky or smooth?
Pulse less for chunky, more for smooth—it’s up to you!


Final Thoughts

Once you make this salsa, store-bought versions will feel bland. Bright, balanced, and versatile, it’s a recipe that shines from last-minute gatherings to Taco Tuesdays. You can also tweak it: add mango for sweetness, chipotle for smokiness, or roasted garlic for depth.

Serve it up and watch it disappear in minutes!


Share Your Dip

Whip up a batch? Tag #HomemadeSalsaLove or #SalsaObsession on Instagram to show off your creation!

🍋 Strong Fat-Burning Detox Drink

🍋 Strong Fat-Burning Detox Drink — Full Recipe

Ingredients

  • 1 glass (250–300 ml) cold water

  • Juice of 1 fresh lemon

  • 6–8 mint leaves

  • 1 tablespoon grated ginger (fresh)

  • ½ teaspoon honey (optional)

  • Ice cubes (optional)

  • 2–3 thin lemon slices for extra flavor

  • Instructions

    1. In a glass, squeeze the juice of one fresh lemon.

    2. Add the grated ginger. Let it sit for 3–5 minutes so the flavor releases.

    3. Add mint leaves and gently press them with a spoon to release the aroma.

    4. Pour in cold water and mix well.

    5. Add honey if you prefer a lightly sweet taste.

    6. Drop in ice cubes and lemon slices. Stir and serve immediately.

    How It Works (Healthy Explanation)

    This drink hydrates the body, boosts digestion, increases vitamin C intake, and may support natural metabolism. Lemon supports detoxification, ginger may help digestion, and mint soothes the stomach. It’s not a miracle fat burner, but it can support a healthy routine when paired with a balanced diet.


    💬 Q&A (350 Words Total Including Recipe Above)
    Q1: Does this drink really burn fat?

    It can assist your body by improving hydration, digestion, and metabolism, but no drink alone burns fat dramatically. Sustainable weight loss comes from combining such drinks with healthy eating and activity.

  • Q2: How many times should I drink it?

    Once daily is enough—preferably in the morning on an empty stomach or 30 minutes before breakfast.

    Q3: Can I drink it at night?

    Yes, but ginger may feel stimulating for some people. If you are sensitive, drink it earlier in the day.

    Q4: How long should I use this drink?

    You can safely use it for 2–4 weeks. Take a break afterward if needed.

    Q5: Can it help reduce belly fat?

    It may help reduce bloating and improve digestion. Real belly fat reduction requires a calorie deficit over time.

    Q6: Who should avoid it?

    People with citrus allergies, acid reflux, or stomach ulcers should limit lemon and ginger. Pregnant individuals should moderate ginger.

    Q7: Can I store this drink?

    Fresh is best. But you can prepare a larger batch and refrigerate for up to 24 hours.

    Q8: Can I add cucumber?

    Yes! Cucumber can improve hydration and enhance the detox effect.

If you want, I can also create a stronger version, a warm version, or a 7-day plan.

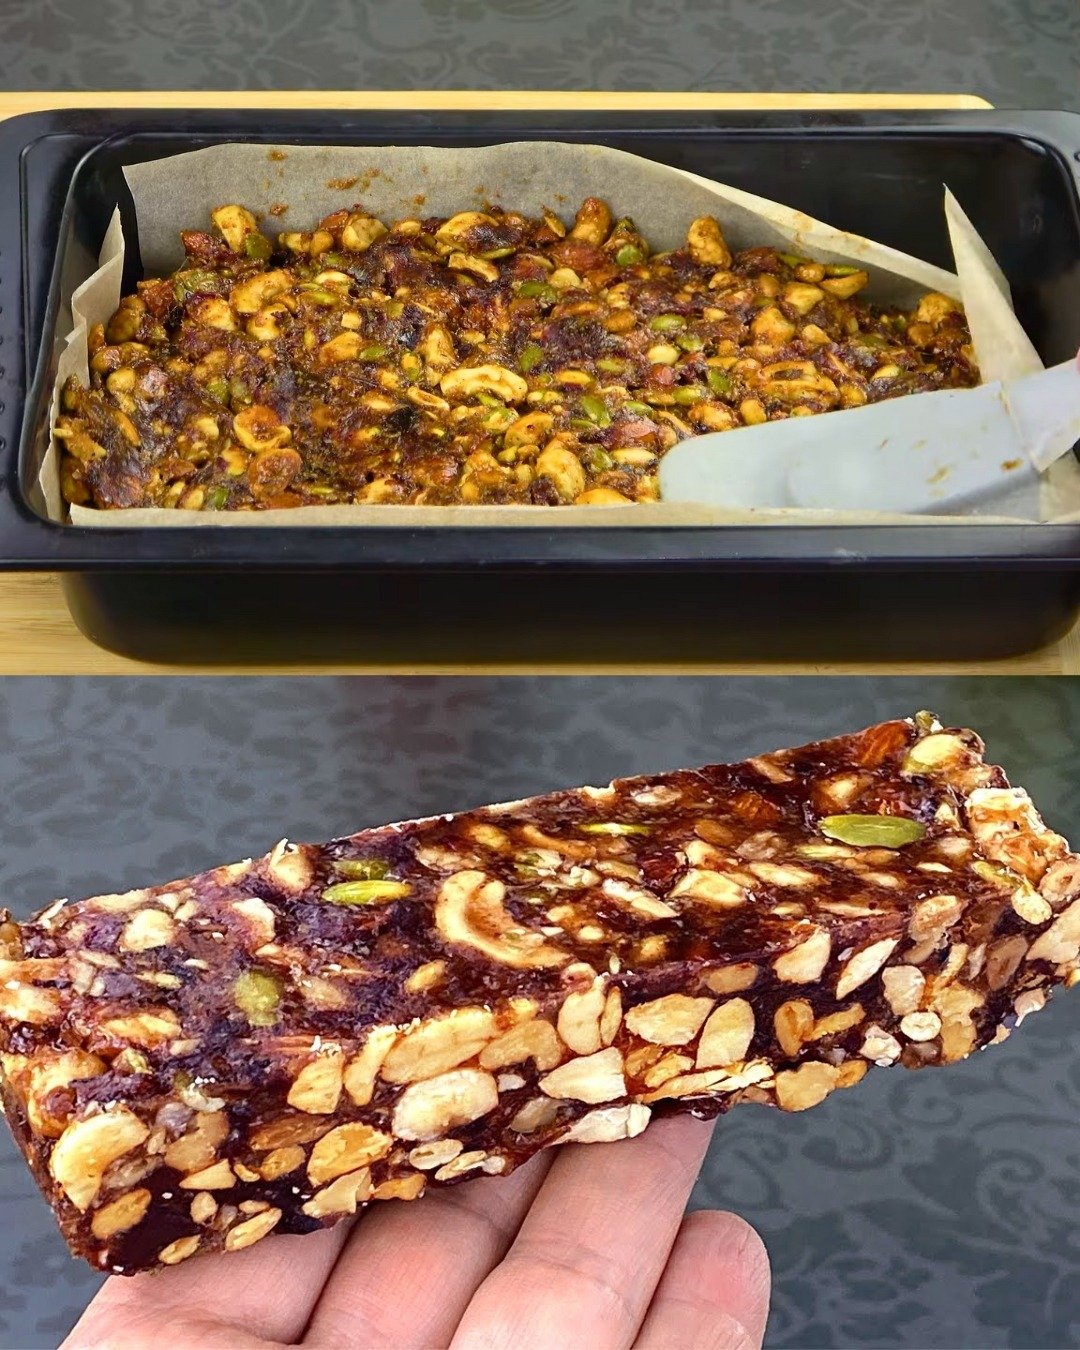
Homemade Nut and Date Energy Bars

Homemade Nut and Date Energy Bars

Yields: 8–10 bars | Prep time: 15 mins | Chilling time: 1 hour

Ingredients

The Nut & Seed Base:

  • 70 g (1/2 cup) Cashews

  • 70 g (1/2 cup) Walnuts

  • 70 g (1/2 cup) Almonds

  • 70 g (1/2 cup) Hazelnuts

  • 40 g (1/4 cup) Pine nuts

  • 70 g (1/3 cup) Pumpkin seeds

The Natural Binder:

  • 150 g (1 cup) Dates, pitted

  • Cold water (for soaking)


Instructions

1. Prepare the Dates

  • Soak: Place the pitted dates in a small bowl and cover them with cold water. Let them soak for about 15 minutes to soften.

  • Blend: Drain the water and place the softened dates into a food processor. Blend until they form a thick, smooth paste. If the mixture is too dry to move, add 1 tablespoon of the soaking water back in.

2. Toast and Chop the Nuts

  • Toast (Optional but recommended): For a deeper flavor, spread all the nuts and pumpkin seeds on a baking sheet and toast them in a preheated oven at 325°F (160°C) for 8–10 minutes. Watch closely so they don’t burn.

  • Chop: Roughly chop the larger nuts (walnuts, almonds, hazelnuts, cashews) into smaller pieces. You want a variety of sizes to ensure the bars hold together well while still having a great crunch.

3. Combine the Ingredients

  • In a large mixing bowl, combine the chopped nuts, pine nuts, and pumpkin seeds.

  • Add the date paste to the bowl.

  • Mix: Use a sturdy spatula or clean hands to thoroughly mix the ingredients. Ensure every nut and seed is well-coated in the sticky date paste, as this is what prevents the bars from crumbling.

4. Press and Chill

  • Line the Pan: Line a small rectangular baking dish or loaf pan with parchment paper, leaving some overhang on the sides for easy removal.

  • Press: Transfer the mixture into the pan. Use a spatula or the bottom of a heavy glass to press the mixture down as firmly and evenly as possible. The more you compress it, the better the bars will hold their shape.

  • Chill: Place the pan in the refrigerator for at least 1 hour (or 30 minutes in the freezer) to allow the date paste to set firmly.

5. Slice and Serve

  • Use the parchment paper “handles” to lift the block out of the pan.

  • Place it on a cutting board and use a sharp knife to slice it into bars or bite-sized squares.


Storage Tip

Store these bars in an airtight container in the refrigerator for up to two weeks, or in the freezer for up to two months. They are best served chilled.

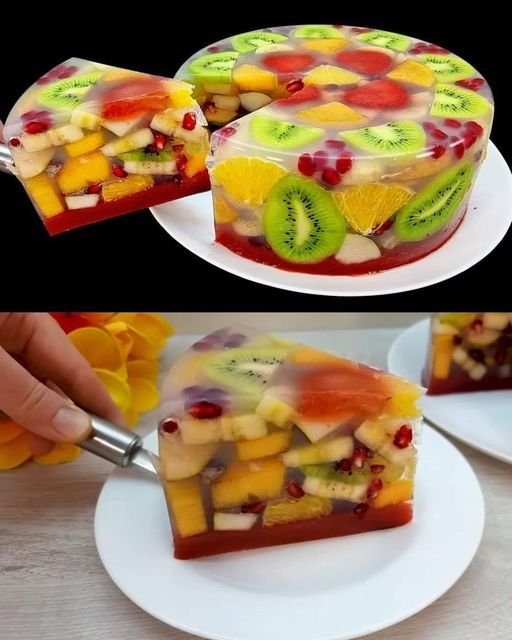
Fresh and Fruity Jelly Cake

Fresh and Fruity Jelly Cake

A colorful, multi-layered jelly cake filled with fresh fruit, perfect for a light dessert or celebratory treat.

Prep Time: 30 minutes
Chill Time: 4–6 hours (or overnight)
Servings: 6–8


🧺 Ingredients

Jelly Base

  • 3 cups water

  • 1 cup sugar (adjust to taste depending on the sweetness of your fruit)

  • 4 tablespoons (approx. 40 g) unflavored gelatin powder (or use clear agar-agar for a vegan version)

  • 1 tablespoon lemon juice

Fruit Selection

  • 2 kiwis, peeled and sliced into rounds

  • 1 cup strawberries, hulled and sliced

  • 2 bananas, sliced

  • 1 orange or 1 mango, peeled and cut into segments

  • ½ cup pomegranate seeds


👩‍🍳 Instructions

1️⃣ Prepare the Fruit

  1. Wash all fruit thoroughly.

  2. Slice the kiwis, strawberries, bananas, and oranges/mangoes into uniform pieces.

  3. For an attractive presentation, place the visually appealing slices (like kiwi and strawberries) against the sides and bottom of your mold or silicone pan first.


2️⃣ Make the Jelly Mixture

  1. Bloom the Gelatin: In a small bowl, mix the gelatin with ½ cup cold water. Let it sit for 5 minutes until soft.

  2. Dissolve the Sugar: In a saucepan, combine the remaining 3 cups of water and sugar. Heat gently over medium heat until the sugar fully dissolves.

  3. Combine: Remove from heat and stir in the bloomed gelatin until the mixture is fully clear.

  4. Add the lemon juice for brightness.

  5. Cool: Let the mixture reach room temperature. Avoid pouring hot jelly directly over the fruit to prevent softening or cloudiness.


3️⃣ Assemble the Cake

  1. Arrange the prepared fruit in your mold, layering carefully to fill any gaps.

  2. Pour the cooled jelly mixture gently over the fruit until fully covered.

  3. Lightly tap the mold on the counter to release any trapped air bubbles.


4️⃣ Chill and Set

Place the mold in the refrigerator for at least 4–6 hours, or ideally overnight, until the jelly is firm and set.


5️⃣ Unmold and Serve

  1. Briefly dip the bottom of the mold into warm water for 5–10 seconds to loosen the edges.

  2. Place a serving plate over the mold and gently flip it to release the jelly cake.

  3. Slice into wedges with a sharp, warm knife for clean edges.


💡 Tips for Success

  • For a sparkling “jeweled” look, add the pomegranate seeds last so they settle into the smaller gaps between the fruit.

  • Use fruits that are firm and fresh for best results.

  • Serve chilled for a refreshing dessert.

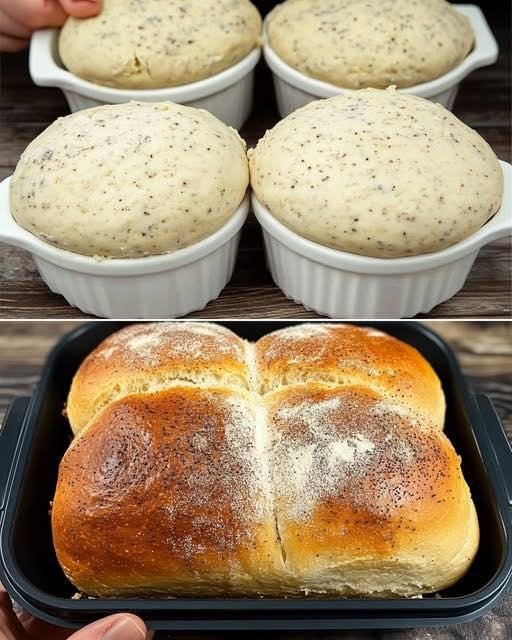
Grandma’s Secret Soft Poppy Seed Bread

Grandma’s Secret Soft Poppy Seed Bread
This soft, fluffy, and lightly sweet bread is speckled with nutty poppy seeds. Perfect for breakfast, sandwiches, or just enjoying with butter and jam.
Servings: 1 loaf (about 12 slices)
Prep Time: 15 minutes
Rise Time: 1–1.5 hours
Bake Time: 30–35 minutes
Ingredients
For the dough:
3 cups all-purpose flour
2 teaspoons instant yeast
2 tablespoons sugar
1 teaspoon salt
1 cup warm milk
2 tablespoons unsalted butter, melted
1 large egg
For the filling/topping:
2 tablespoons poppy seeds
1 tablespoon sugar
1 teaspoon melted butter (optional, for brushing)
Instructions
Prepare the dough:
In a large bowl, combine flour, yeast, sugar, and salt. Add warm milk, melted butter, and egg. Mix until a soft dough forms. Knead for 8–10 minutes until smooth and elastic.
First rise:
Place the dough in a lightly greased bowl, cover, and let rise in a warm place for 1 hour or until doubled in size.
Shape the bread:
Punch down the dough and roll it into a rectangle about 12×8 inches. Sprinkle poppy seeds evenly over the surface. Roll the dough tightly into a log, pinching the seam to seal. Place the log into a greased loaf pan.
Second rise:
Cover the loaf and let it rise for another 30–40 minutes until slightly puffy.
Bake:
Preheat the oven to 180°C (350°F). Brush the top lightly with melted butter and sprinkle a few extra poppy seeds. Bake for 30–35 minutes until golden brown and cooked through. Tap the bottom of the loaf—it should sound hollow.
Cool:
Remove from the pan and let the bread cool on a wire rack before slicing.
Serving ideas:
Toast with butter or cream cheese
Make sandwiches or French toast
Enjoy with honey or jam
Storage:
Store in an airtight container at room temperature for up to 3 days
Freeze for up to 2 months

Soft and Cheesy Stuffed Bread Rolls

Soft and Cheesy Stuffed Bread Rolls

Yields: 8–10 large rolls
Prep Time: 20 minutes
Rest Time: 1 hour 20 minutes
Bake Time: 20–25 minutes

These rolls are soft, fluffy, and filled with melted cheese and colorful vegetables. They are perfect for sharing at meals or serving as a warm snack.


🧺 Ingredients

For the Dough

  • 1 cup warm milk

  • 1 cup warm water

  • 2 tablespoons sugar

  • 1 tablespoon instant yeast

  • 4–5 cups all-purpose flour (added gradually)

  • 1 teaspoon salt

  • ¼ cup vegetable oil

For the Filling

  • 2 cups shredded cheese (mozzarella or cheddar blend)

  • 1 red bell pepper, finely diced

  • 1 yellow bell pepper, finely diced

  • 2 tablespoons fresh parsley or green onions, finely chopped

For the Glaze

  • 1 egg yolk

  • 1 tablespoon milk


👩‍🍳 Instructions

1️⃣ Prepare the Dough

Activate the Yeast
In a large bowl, combine the warm milk, warm water, sugar, and yeast.
Stir gently and let the mixture rest for 5 minutes, until it becomes foamy.

Mix the Dough
Add the vegetable oil and salt to the yeast mixture.
Gradually add the flour, one cup at a time, mixing gently until a soft dough forms.

Work the Dough
Continue mixing and gently shaping the dough for about 8 minutes, until it becomes smooth and flexible.

First Rest
Place the dough in a lightly oiled bowl.
Cover and let it rest in a warm place for about 1 hour, until it has increased in size.


2️⃣ Shape and Fill the Rolls

Lightly dust your work surface with flour and place the dough on it.

Roll the dough into a large, thin rectangle.

Spread the shredded cheese evenly over the surface.
Sprinkle the diced red and yellow peppers and chopped parsley on top of the cheese.

Starting from the long side, gently roll the dough into a long log.

Using a knife or plain dental floss, slice the log into rounds about 1½ to 2 inches thick.


3️⃣ Final Rest and Baking

Arrange the rolls, cut side up, in a greased baking dish or on a parchment-lined tray.

Cover lightly and let them rest for 20 minutes.
While they rest, preheat the oven to 375°F (190°C).

Mix the egg yolk with the milk and gently brush it over the tops and sides of the rolls.

Bake for 20–25 minutes, until the rolls are golden on top and the cheese inside is melted.


🍽️ Serving Ideas

Serve warm so the cheese stays soft and stretchy.
These rolls are delicious with:

  • Marinara sauce

  • Garlic butter

  • Soup or salad

  • As a party or lunch bread


💡 Helpful Tips

✔ Add olives or corn for extra flavor
✔ Use pizza cheese for extra melt
✔ Store leftovers in an airtight container for up to 2 days
✔ Reheat gently in the oven or pan