Creamy Iced Dessert (No-Bake Frozen Treat)

Creamy Iced Dessert (No-Bake Frozen Treat)

Yield: 6–8 servings
Prep Time: 15 minutes
Chill/Freeze Time: 3–4 hours
Total Time: About 4 hours
Course: Dessert

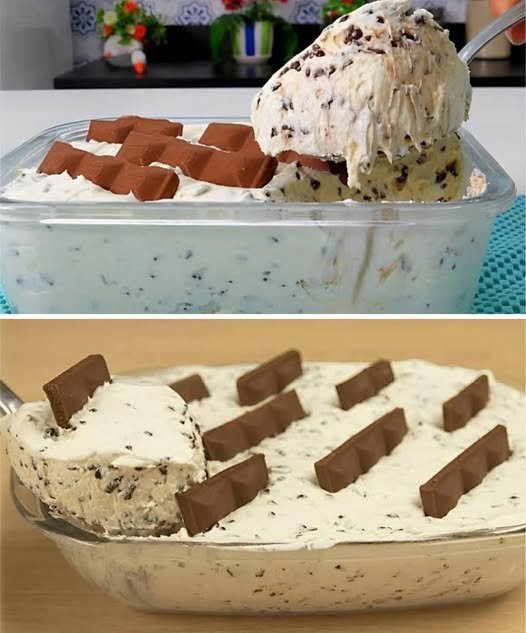
This creamy frozen dessert is made with a rich milk base, folded with whipped cream, and finished with chocolate pieces. It’s smooth, refreshing, and perfect for special occasions.


🧾 Ingredients

  • ¾ cup (200 ml) whipped cream (prepared)

  • ½ cup powdered milk

  • 1 can (395 g / 14 oz) sweetened condensed milk

  • 1 carton (240 ml / 8 oz) heavy cream

  • 1 cup chocolate flakes or chocolate chips

  • 1 chocolate bar, chopped (for topping)


👩‍🍳 Instructions


1️⃣ Prepare the Cream Base

  • In a saucepan, add:

    • Sweetened condensed milk

    • Heavy cream

    • Powdered milk

  • Stir until fully combined.


2️⃣ Thicken the Mixture

  • Place saucepan over medium heat.

  • Stir constantly to prevent sticking.

  • Cook until mixture thickens slightly and coats the back of a spoon.

  • Do not boil.


3️⃣ Cool Completely

  • Remove from heat.

  • Transfer to a bowl and let cool to room temperature.


4️⃣ Whip the Cream

  • Prepare whipped cream according to package instructions.

  • Whip until soft peaks form.


5️⃣ Combine

  • Gently fold whipped cream into the cooled milk mixture.

  • Use slow folding motions to keep the mixture airy.


6️⃣ Add Chocolate

  • Stir in chocolate flakes gently.


7️⃣ Assemble

  • Pour mixture into a glass dish.

  • Sprinkle chopped chocolate bar on top.


8️⃣ Chill

  • Refrigerate or freeze for at least 3 hours until firm and cold.


🍽 Serving

Serve well chilled or semi-frozen.


💡 Tips & Variations

✔ Add vanilla extract for extra flavor
✔ Use white chocolate or dark chocolate
✔ Add crushed cookies or nuts
✔ Use molds for individual portions
✔ Add fruit pieces for a fresh twist


❄️ Storage

  • Freezer: Up to 1 month

  • Refrigerator (soft texture): Up to 3 days


🧮 Nutrition (Approximate per serving)

  • Calories: 320–380

  • Fat: 18–22 g

  • Carbohydrates: 35–40 g

  • Protein: 6–7 g

Cooked Cabbage with Eggs

Cooked Cabbage with Eggs

Yield: 2–3 servings
Prep Time: 10 minutes
Cook Time: 10–15 minutes
Total Time: About 25 minutes
Course: Breakfast / Lunch / Dinner

This simple dish combines tender sautéed cabbage with softly scrambled eggs. It’s affordable, nutritious, and quick to prepare, making it perfect for any meal of the day.


🧾 Ingredients

  • 2 cups shredded cabbage (green or red)

  • 3 large eggs

  • 2 tablespoons olive oil

  • 2 cloves garlic, minced (optional)

  • Salt, to taste

  • Black pepper, to taste

Optional add-ins:

  • ½ small onion, sliced

  • ¼ teaspoon smoked paprika or cumin

  • ¼ cup shredded cheese

  • Chopped parsley or green onions


👩‍🍳 Instructions


1️⃣ Heat the Pan

  • Place a large skillet over medium heat.

  • Add olive oil and allow it to warm.


2️⃣ Cook the Garlic

  • Add minced garlic (and onion, if using).

  • Sauté for 30–60 seconds until fragrant, stirring constantly.


3️⃣ Cook the Cabbage

  • Add shredded cabbage to the pan.

  • Season with salt and pepper.

  • Cook for 5–7 minutes, stirring occasionally, until cabbage becomes soft with slightly golden edges.

✔ Do not overcook — cabbage should remain slightly crisp.


4️⃣ Add the Eggs

  • Push cabbage to one side of the pan.

  • Crack eggs into the empty side.

  • Gently scramble eggs until just set.


5️⃣ Combine

  • Mix eggs and cabbage together.

  • Taste and adjust seasoning if needed.


6️⃣ Serve

Serve hot as a main dish or side.


💡 Flavor Variations

  • Spicy: Add chili flakes or paprika

  • Vegetable boost: Add carrots or bell peppers

  • Creamy: Stir in cheese at the end

  • Herbed: Add dill or parsley

  • Protein boost: Add cooked sausage or tofu


🍽 Serving Ideas

  • Eat on its own

  • Serve with whole-grain bread

  • Use as sandwich or wrap filling

  • Serve with rice or potatoes


❄️ Storage

  • Refrigerate in airtight container for up to 3 days

  • Reheat in skillet for best texture


🧮 Nutrition (Approximate per serving)

  • Calories: 180–220

  • Protein: 10–12 g

  • Fat: 12–14 g

  • Carbohydrates: 8–10 g

  • Fiber: 3–4 g


🧠 Tips for Best Results

✔ Use fresh cabbage
✔ Cook over medium heat
✔ Avoid overcooking
✔ Season gradually
✔ Try different spices

Young and Healthy with this Daily Habit

Young and Healthy with this Daily Habit

Ever wonder how some people maintain their health and vitality well into their later years? There’s an old saying: “Simple habits make a strong body.” And it’s true! A 95-year-old Chinese doctor has revealed the secret to his youthful liver and healthy intestines – a simple, natural drink made with carrots and tomatoes.

Why Carrot & Tomato?

Carrots: These humble root vegetables are rich in beta-carotene, fiber, and antioxidants. They not only support liver detoxification but also improve digestion and protect cells from damage.

Tomatoes: Packed with lycopene, vitamin C, and potassium, tomatoes are known to reduce inflammation, improve heart and liver health, and keep the intestines happy.

Simple Recipe: Carrot & Tomato Vitality Drink

Ingredients:

  • 1 medium carrot (peeled and chopped)
  • 1 ripe tomato (chopped)
  • ½ cup water
  • Optional: A squeeze of fresh lemon juice for extra freshness

How to Make It:

    1. Blend: Add the carrot, tomato, and water into a blender. Blend until smooth.
    2. Strain (Optional): If you prefer a smoother drink, you can strain it.
  1. Enhance (Optional): Add a squeeze of lemon juice if desired.
  2. Drink Fresh: Enjoy once a day, preferably in the morning.

Why It Works

This light and natural drink is filled with essential nutrients that support liver function and gut health. The fiber aids in digestion, while the antioxidants assist the liver in flushing out toxins. Over time, it keeps the body feeling light, clean, and youthful, just like that wise 95-year-old doctor.

No need for fancy supplements or complicated routines. Sometimes, the simplest ingredients are the most powerful. So, why not try this daily habit and give your liver and intestines the care they deserve!

 Top Benefits of Carrot & Tomato Vitality Drink

    1. Boosts Immunity

        • Carrots are rich in beta-carotene (a precursor of vitamin A), which supports a healthy immune system.

      • Tomatoes contain vitamin C and lycopene, both of which enhance immune function.

    1. Improves Vision

      • Carrots are famous for their high vitamin A content, crucial for eye health and night vision.

    1. Promotes Skin Glow

      • Antioxidants like beta-carotene and lycopene help combat free radicals, leading to clearer, healthier skin.

    1. Aids Digestion

      • Both carrots and tomatoes have good fiber content, promoting a healthy gut and regular bowel movements.

    1. Detoxifies the Body

      • The drink supports liver function and helps flush out toxins naturally.

    1. Heart Health Support

      • Lycopene in tomatoes helps reduce LDL (bad) cholesterol and supports heart function.

 Tips for Making the Drink

    • Ingredients: 2 carrots, 2 ripe tomatoes, a pinch of black salt, lemon juice, and optional ginger or mint.

    • Blend: Peel and chop carrots, cut tomatoes, and blend until smooth. Strain if desired.

    • Serve: Chill slightly or serve over ice for a refreshing morning drink.

  • Enhance: Add a dash of turmeric or a bit of beetroot for extra nutrients and color.

 Why It’s Important

    • Great as a morning vitality booster or a midday pick-me-up.

    • Acts as a natural multivitamin drink without added sugar or preservatives.

  • Helps you hit your daily vegetable intake goals easily.

  • A healthy substitute for caffeinated or sugary beverages.

Basque Burnt Cheesecake

Basque Burnt Cheesecake

Yield: 6–8 servings
Pan Size: 6-inch (15 cm) round pan
Prep Time: 15 minutes
Bake Time: 30 minutes
Chill Time: 4 hours
Total Time: About 5 hours
Course: Dessert

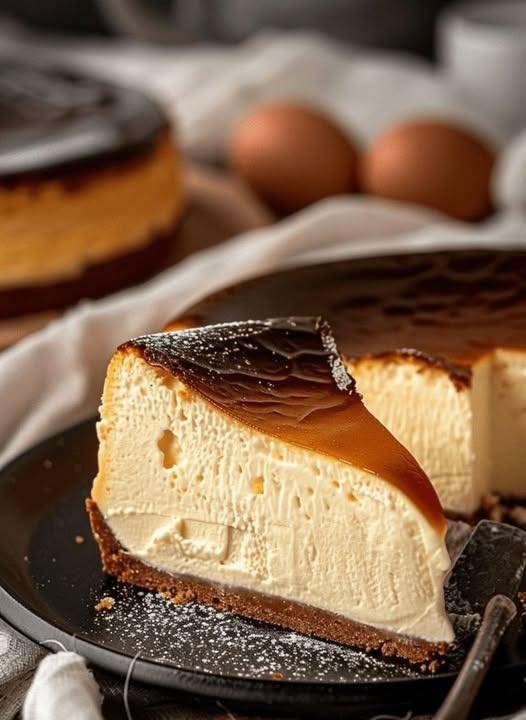
Basque Burnt Cheesecake is famous for its dark, caramelized top and ultra-creamy center. It looks deeply browned on the outside but stays soft and custard-like inside. No crust is needed, and the recipe is very simple.


🧾 Ingredients

  • 340 g (12 oz) cream cheese, softened

  • 80 g (2.8 oz) white sugar

  • 3 large eggs, room temperature

  • 1 teaspoon vanilla extract

  • 1 g (about ¼ tsp) salt

  • 150 g (5.3 oz) whipping cream (heavy cream)

  • 10 g (0.4 oz) cornstarch or cake flour


👩‍🍳 Instructions


1️⃣ Prepare the Pan

  • Lightly grease a 6-inch round pan.

  • Line the bottom and sides with parchment paper, allowing paper to rise above the edges (this helps remove the cake easily).

  • Preheat oven to 210°C (415°F).


2️⃣ Soften the Cream Cheese

  • Place cream cheese in a bowl.

  • Mash with a spatula or mix on low speed until smooth and creamy.

  • Make sure there are no lumps.


3️⃣ Add Sugar

  • Add sugar to cream cheese.

  • Mix until fully combined and mixture looks lighter and smooth.


4️⃣ Add Eggs

  • Add eggs one at a time, mixing well after each addition.

  • The batter should look smooth and slightly fluffy after all eggs are added.


5️⃣ Add Flavor and Cream

  • Mix in vanilla extract and salt.

  • Add whipping cream and stir until fully blended.


6️⃣ Add Starch

  • Sift in cornstarch (or cake flour).

  • Mix gently until batter is completely smooth.


7️⃣ Pour and Remove Air

  • Pour batter into prepared pan.

  • Tap pan gently on the counter a few times to release air bubbles.


8️⃣ Bake

  • Place pan on the middle oven rack.

  • Bake at 210°C (415°F) for 30 minutes.

  • The top should be dark brown (almost burnt).

  • Center will still jiggle when shaken.


9️⃣ Cool and Chill

  • Let cheesecake cool at room temperature.

  • Refrigerate for at least 4 hours before slicing.

✔ Texture improves after chilling
✔ Flavor deepens after 1 day


🧠 Tips for Best Results

✔ All ingredients should be room temperature
✔ Do not overmix after adding eggs
✔ Do not bake longer than 30 minutes
✔ Dark top = correct result
✔ Use parchment paper, not foil


🔁 Variations

  • Stronger cheese flavor: Add 50 g more cream cheese

  • Softer texture: Add 20–30 ml more cream

  • Lemon version: Add 1 tsp lemon zest

  • Chocolate version: Add 80 g melted dark chocolate


❄️ Storage

  • Refrigerator: Up to 4 days

  • Freezer: Up to 1 month (wrap tightly)


🧮 Nutrition (Approximate per slice)

  • Calories: 280–320

  • Fat: 20–23 g

  • Carbohydrates: 18–22 g

  • Protein: 5–6 g

Almond Cream Cake (Yeast-Based Almond Cake)

Almond Cream Cake (Yeast-Based Almond Cake)

Yield: 12–16 slices
Prep Time: 30 minutes
Rising Time: 1 hour 20 minutes
Bake Time: 35–40 minutes
Total Time: About 3 hours
Course: Dessert

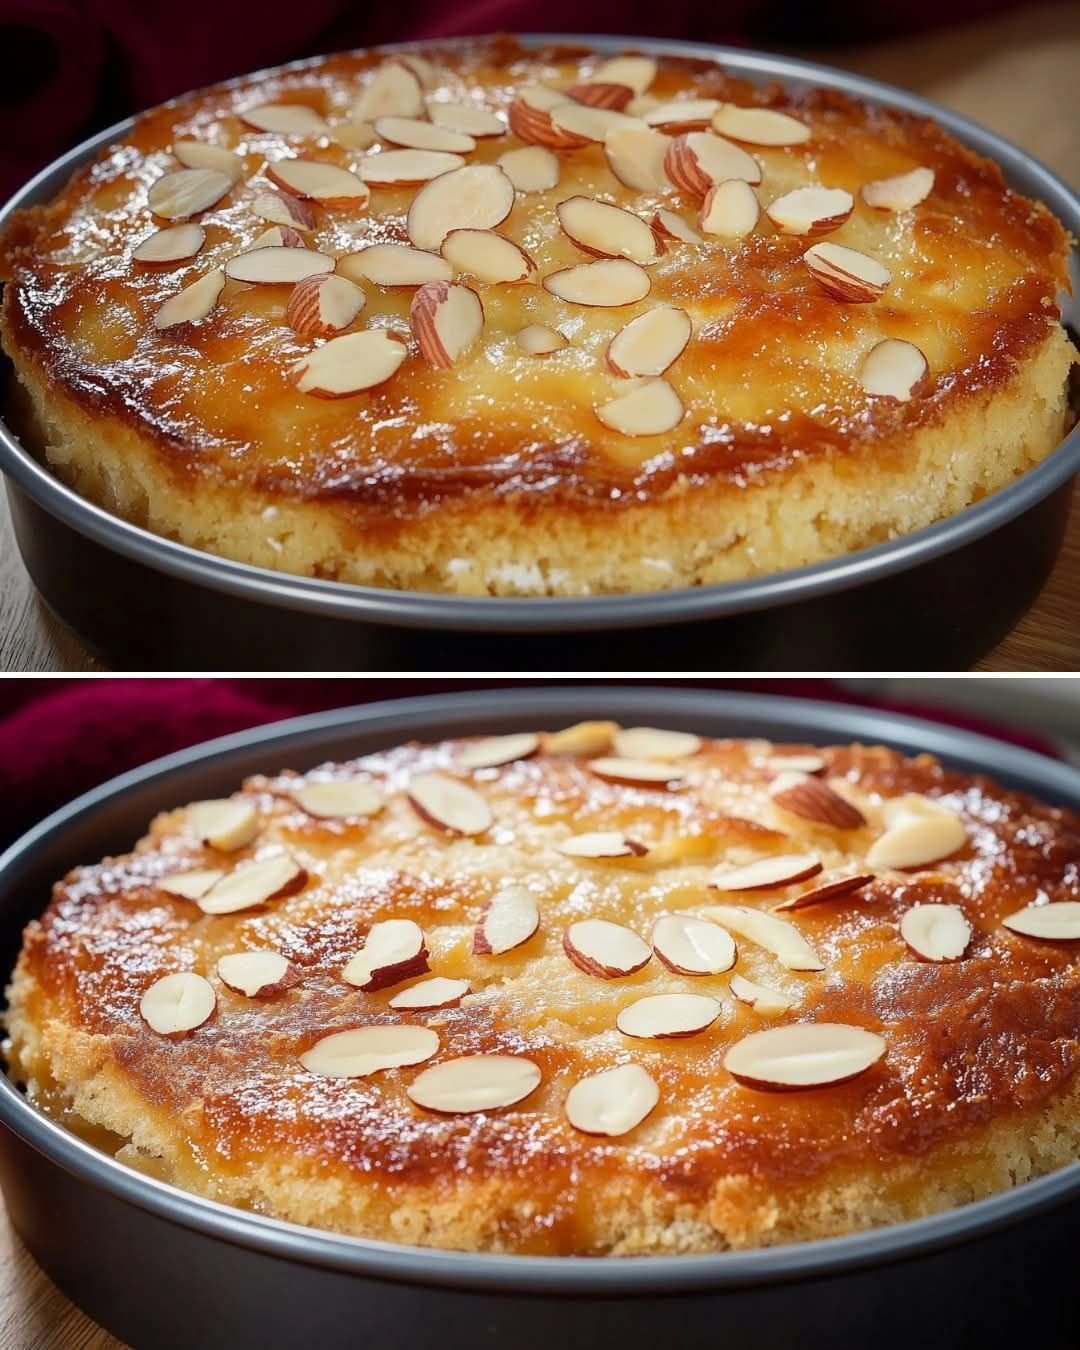
This soft, buttery yeast cake is topped with a sugar-butter crust, soaked with cream, and finished with almond flakes for a rich and tender texture. It’s similar to European bakery cream cakes and perfect for tea or special occasions.


🧾 Ingredients

For the Dough:

  • 200 ml (¾ cup + 1 tbsp) warm milk

  • 2 teaspoons active dry yeast

  • 2 tablespoons sugar

  • 2 large eggs (room temperature)

  • ½ teaspoon vanilla extract (or 2 g vanillin)

  • Pinch of salt

  • 120 g (½ cup) butter, melted and cooled

  • 470 g (about 4 cups) all-purpose flour

For the Topping:

  • 120 g (½ cup) sugar

  • 50 g (¼ cup) cold butter

  • Almond slices or almond flakes (as needed)

For the Cream Finish:

  • 125 ml (½ cup) heavy cream


👩‍🍳 Instructions


1️⃣ Activate the Yeast

  • Warm milk to about 43°C (110°F) — warm, not hot.

  • Add sugar and sprinkle yeast on top.

  • Stir gently and let sit 15–20 minutes until foamy.

✔ This step ensures a light, airy cake.


2️⃣ Prepare Wet Ingredients

In a large bowl, combine:

  • Activated yeast mixture

  • Eggs

  • Melted butter

  • Vanilla
    Whisk until smooth.


3️⃣ Make the Dough

  • Sift flour and add gradually to the wet mixture.

  • Add salt.

  • Knead for 10–15 minutes until soft and elastic.
    The dough should be smooth and slightly tacky, not sticky.


4️⃣ First Rise

  • Place dough in a greased bowl.

  • Cover and let rise in a warm place for 1 hour until doubled in size.


5️⃣ Prepare the Sugar-Butter Topping

  • Mix sugar with cold butter using fingers until crumbly.
    This creates a light crust during baking.


6️⃣ Shape and Second Rise

  • Grease a 9×13 inch (23×33 cm) pan.

  • Spread dough evenly into the pan.

  • Cover and let rise 20–30 minutes.

  • Preheat oven to 180°C (350°F).


7️⃣ Add Topping

  • Make small indentations with fingers across the dough.

  • Sprinkle sugar-butter mixture evenly on top.


8️⃣ Bake

  • Bake for 25–30 minutes until lightly golden.


9️⃣ Cream & Almond Finish

  • Remove cake from oven.

  • Pour heavy cream evenly over hot cake.

  • Sprinkle almond flakes on top.

  • Return to oven for 10 minutes.

✔ The cream soaks into the cake, making it moist and rich.


🔟 Cool and Serve

  • Cool completely in pan.

  • Cut into squares and serve at room temperature.


🧠 Helpful Tips

✔ Milk must be warm, not hot
✔ Use room-temperature eggs
✔ Bake on center rack
✔ Don’t skip second rise — it improves texture
✔ Let cake cool before slicing for best structure


🔁 Variations

  • Lemon version: Add 1 tsp lemon zest

  • Almond flavor: Add ½ tsp almond extract

  • Spiced: Add cinnamon or cardamom

  • Nut-free: Use coconut flakes instead of almonds

  • Dairy-free: Use plant milk, vegan butter, and coconut cream

  • Gluten-free: Use gluten-free baking flour blend


❄️ Storage

  • Room temperature (covered): 2–3 days

  • Refrigerator: Up to 5 days

  • Freezer: Up to 1 month (wrap tightly)


🧮 Nutrition (Approximate per slice)

  • Calories: 350–400

  • Fat: 18–22 g

  • Carbohydrates: 40–45 g

  • Protein: 6–7 g

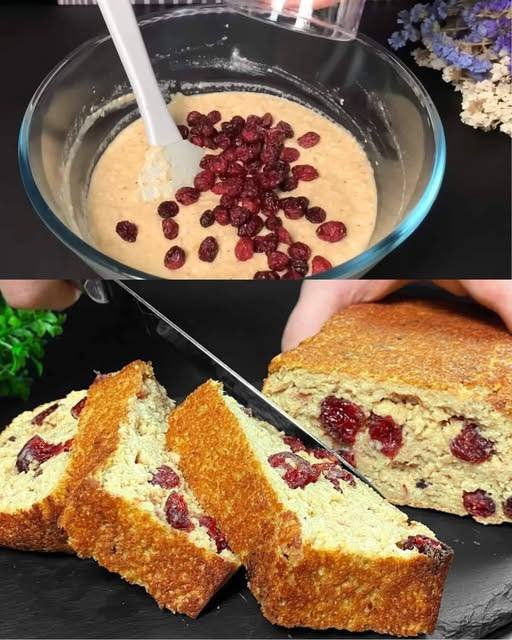
Healthy Diet Cake with Oats and Apples – Ready in Just 5 Minutes Prep

Healthy Diet Cake with Oats and Apples – Ready in Just 5 Minutes Prep

Ingredients:

    • 1 cup oats
      • 2 apples, grated
      • 100 ml water
      • 1 banana, mashed
    • 2 eggs
    • 80g cranberries
    • 1 teaspoon baking powder
  • 1/4 teaspoon cinnamon
  • Butter for greasing the pan

Instructions:

    1. Preheat the Oven:
      • Preheat your oven to 180°C (360°F).
  1. Prepare the Batter:
      • In a large mixing bowl, combine the oats, grated apples, water, mashed banana, and eggs. Mix well until all ingredients are evenly incorporated.


      • Add the cranberries, baking powder, and cinnamon to the mixture. Stir until everything is well combined.
  2. Prepare the Pan:
        • Grease a baking dish with butter to prevent the cake from sticking.


    • Pour the batter into the prepared baking dish, spreading it out evenly.
  3. Bake the Cake:
        • Place the baking dish in the preheated oven and bake for 40 minutes, or until the cake is golden brown and a toothpick inserted into the center comes out clean.


  4. Cool and Serve:
        • Allow the cake to cool in the pan for a few minutes before transferring it to a wire rack to cool completely.
      • Slice and serve warm or at room temperature.


Cooking Tips:

      • For added texture, you can include chopped nuts or seeds in the batter.
    • Use ripe bananas for a sweeter cake without adding any sugar.
    • If you don’t have cranberries, you can substitute them with raisins, dried cherries, or chopped dates.

Nutritional Benefits:

      • Oats are rich in fiber, which aids in digestion and helps keep you feeling full longer.
      • Apples provide vitamins and antioxidants that are beneficial for overall health.
      • Bananas are a good source of potassium, which is essential for heart health.
  • Eggs add high-quality protein and essential nutrients to the cake.

Why You’ll Love This Recipe:

      • It’s a quick and easy recipe that fits perfectly into a busy lifestyle.
      • The natural sweetness from fruits means no added sugar is needed.
      • It’s a healthy, nutritious option that can be enjoyed any time of the day.
    • The cake is moist and flavorful, with a delightful mix of textures from the oats and cranberries.

Dietary Information:

    • This cake is free from added sugar and flour, making it suitable for those on a sugar-free or gluten-free diet (ensure oats are certified gluten-free if necessary).
  • It contains eggs, so it’s not suitable for a vegan diet, but you can substitute the eggs with a flaxseed or chia seed egg replacement.