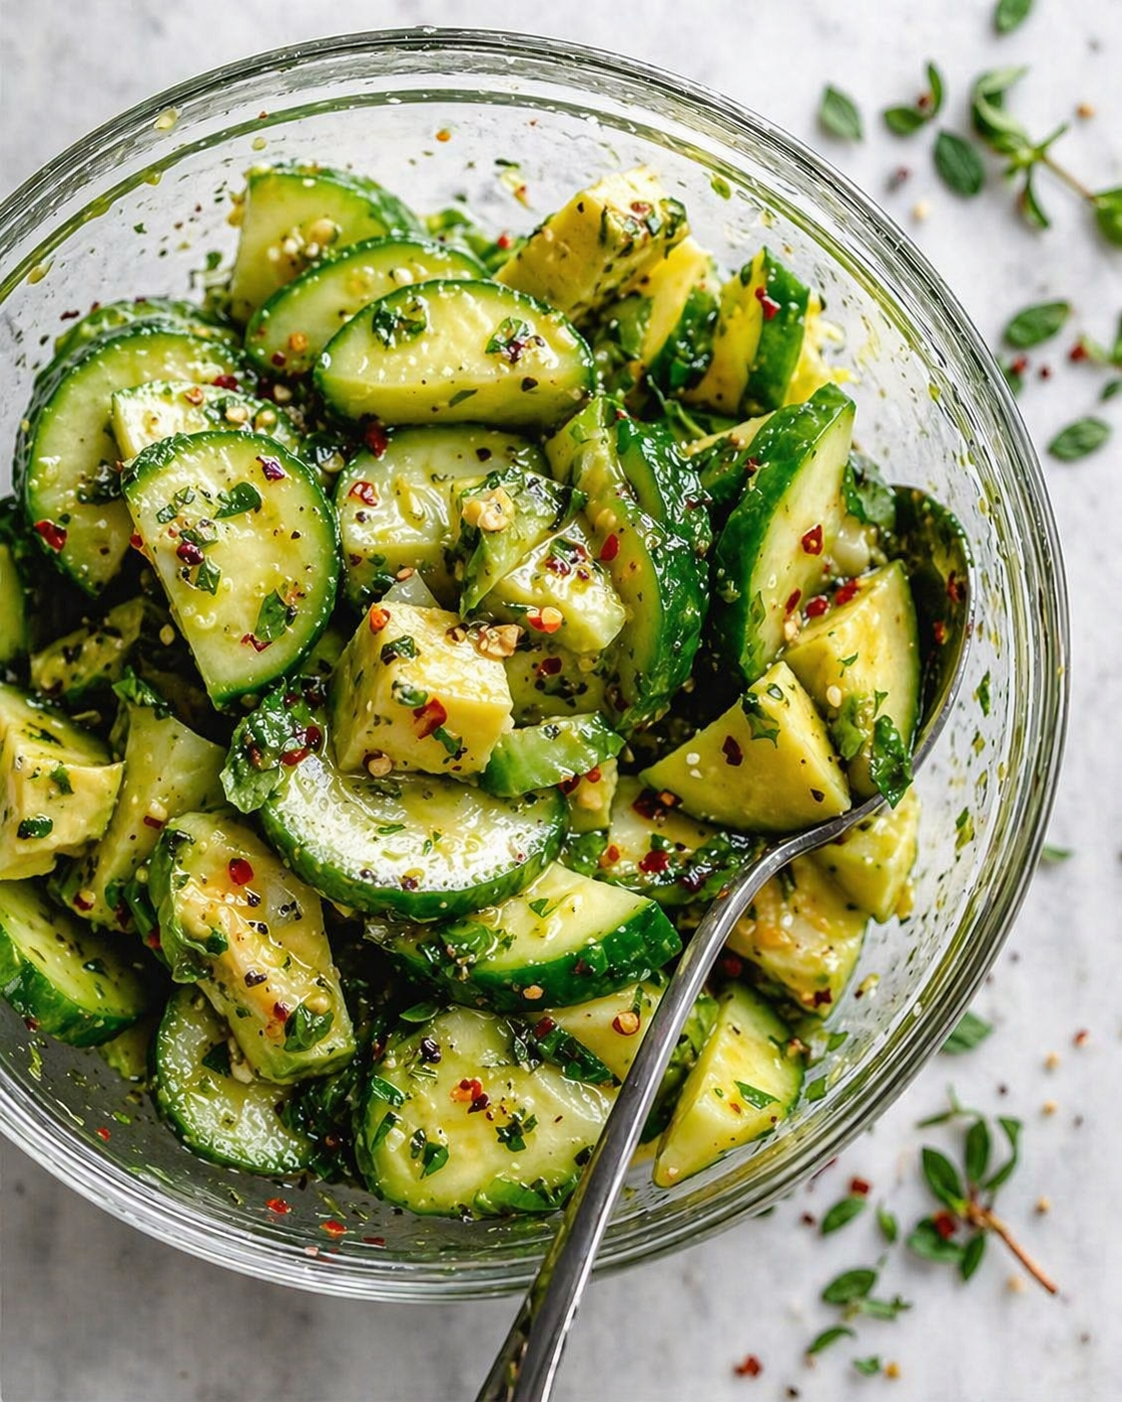
Cucumber Avocado Herb Salad

Cucumber Avocado Herb Salad

Serves: 4
Prep time: 15 minutes

Ingredients

For the salad:

  • 2 large cucumbers
  • 2 ripe but firm avocados
  • 2 tablespoons chopped fresh parsley
  • 1 tablespoon chopped fresh cilantro or dill
  • 1 tablespoon chopped fresh mint, optional
  • 1 small garlic clove, finely minced

For the dressing:

  • 3 tablespoons olive oil
  • 1 1/2 tablespoons lemon juice or lime juice
  • 1 teaspoon Dijon mustard
  • 1 teaspoon honey or maple syrup
  • 1/2 teaspoon salt
  • 1/4 teaspoon black pepper
  • 1/2 teaspoon red pepper flakes, or to taste

Instructions

  1. Wash the cucumbers and slice them into thick half-moons.
  2. Cut the avocados into bite-size chunks.
  3. In a large bowl, whisk together the olive oil, lemon juice, Dijon mustard, honey, salt, black pepper, garlic, and red pepper flakes.
  4. Add the chopped herbs and stir.
  5. Gently add the cucumbers and avocado to the bowl.
  6. Toss very carefully until everything is coated without mashing the avocado.
  7. Taste and add more salt, lemon juice, or chili flakes if needed.
  8. Serve immediately.

Tips

  • Use firm avocados so the salad stays chunky.
  • Chill the cucumbers first for a fresher, crisper texture.
  • Add the avocado right before serving for the best appearance.

Optional add-ins

  • Crumbled feta
  • Thinly sliced red onion
  • Cherry tomatoes
  • Toasted sesame seeds
  • Chickpeas for extra protein

Storage

This salad is best eaten fresh. If needed, store it in the fridge for up to 1 day in an airtight container. Press plastic wrap directly onto the surface to help reduce avocado browning.
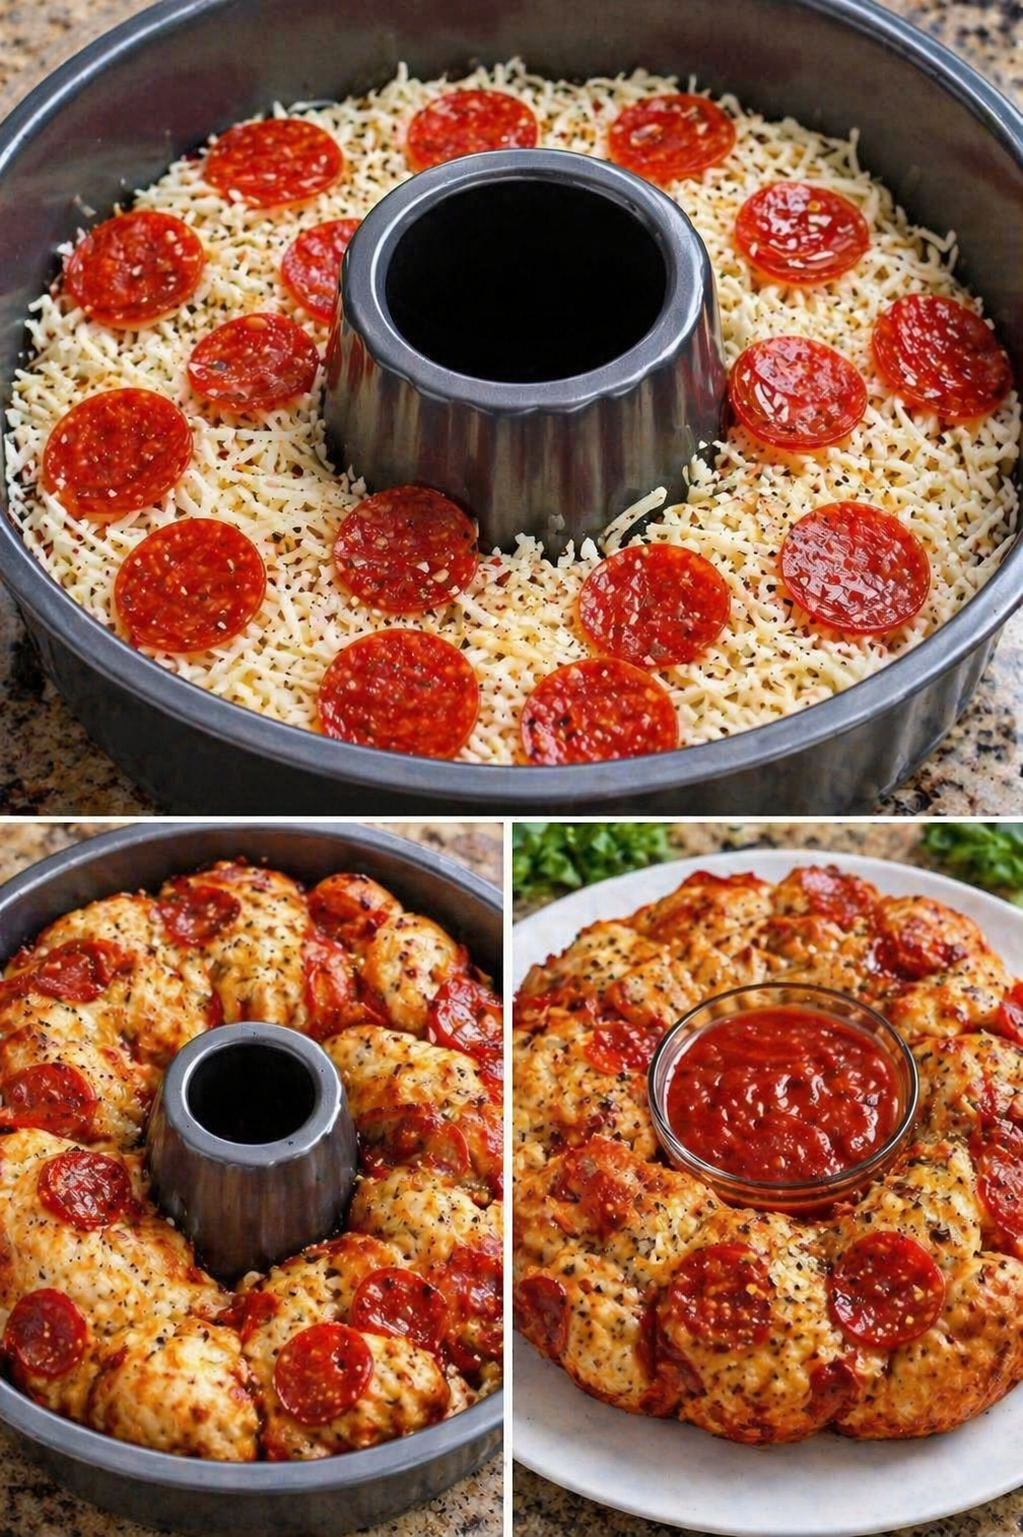
Pepperoni Pizza Monkey Bread Ring

Pepperoni Pizza Monkey Bread Ring

πŸ›’ Ingredients

The Base:

  • 2 cans (approx. 450g each) Refrigerated biscuit dough (or homemade pizza dough cut into 1-inch pieces)

  • 1/4 cup Unsalted butter, melted

  • 2 tbsp Olive oil

The Mix-ins:

  • 2 cups Shredded Mozzarella cheese

  • 1 cup Pepperoni slices (halved or quartered)

  • 1/2 cup Grated Parmesan cheese

  • 1 tbsp Italian seasoning (dried oregano, basil, parsley)

  • 1 tsp Garlic powder

The Dip:

  • 1 cup Marinara or Pizza sauce (warmed for serving)


πŸ‘¨β€πŸ³ Step-by-Step Instructions

  1. Prep the Pan & Oven 🌑️

    • Preheat your oven to 175Β°C (350Β°F).

    • Generously grease a 10-inch bundt pan with butter or non-stick spray. ➑️ This is crucial to ensure the ring slides out easily!

  2. Prepare the Dough Bites βœ‚οΈ

    • Cut each biscuit into quarters (or cut your fresh dough into small, golf-ball-sized pieces).

    • In a large bowl, toss the dough pieces with the melted butter and olive oil until coated.

  3. Seasoning Shake-up πŸ§‚

    • In a separate small bowl, mix the Parmesan cheese, Italian seasoning, and garlic powder.

    • Sprinkle this mixture over the buttered dough and toss again.

  4. Assemble the Ring πŸ—οΈ

    • Scatter a handful of pepperoni and mozzarella into the bottom of the bundt pan.

    • Layer about half of the dough pieces over the toppings.

    • Add another layer of cheese and pepperoni. ➑️ Repeat until all ingredients are used, ending with a few pepperoni slices on top.

  5. Bake to Golden Perfection πŸ”₯

    • Bake for 28–32 minutes.

    • The top should be deep golden brown, and the center should be firm to the touch. ➑️ If the top browns too quickly, cover loosely with foil.

  6. The Flip & Serve πŸ”ƒ

    • Let the pan cool for 5–10 minutesβ€”this allows the cheese to set slightly so the ring stays together.

    • Place a large plate over the top of the pan and carefully flip it over.

    • Lift the pan off to reveal your pizza ring!

  7. Add the Centerpiece πŸ…

    • Place a small bowl of warm marinara sauce in the center hole of the ring for dipping.


πŸ€” Common Questions (Q&A)

Q: Can I make this ahead of time? A: You can assemble it a few hours early and keep it covered in the fridge, but it is best baked fresh. Reheating is easy in the oven at 150°C for about 10 minutes. ⏰

Q: My center feels a bit doughy, what happened? A: Bundt pans vary in thickness. If the outside is brown but the inside is soft, lower the heat slightly and bake for an extra 5 minutes. You can also test the internal temperature with a thermometer; it should reach 88°C (190°F). 🌑️

Q: What other fillings can I add? A: Feel free to get creative! Finely chopped green peppers, black olives, or cooked sausage bits work beautifully alongside the pepperoni. πŸ«‘


Enjoy your pull-apart pizza party! πŸ•βœ¨

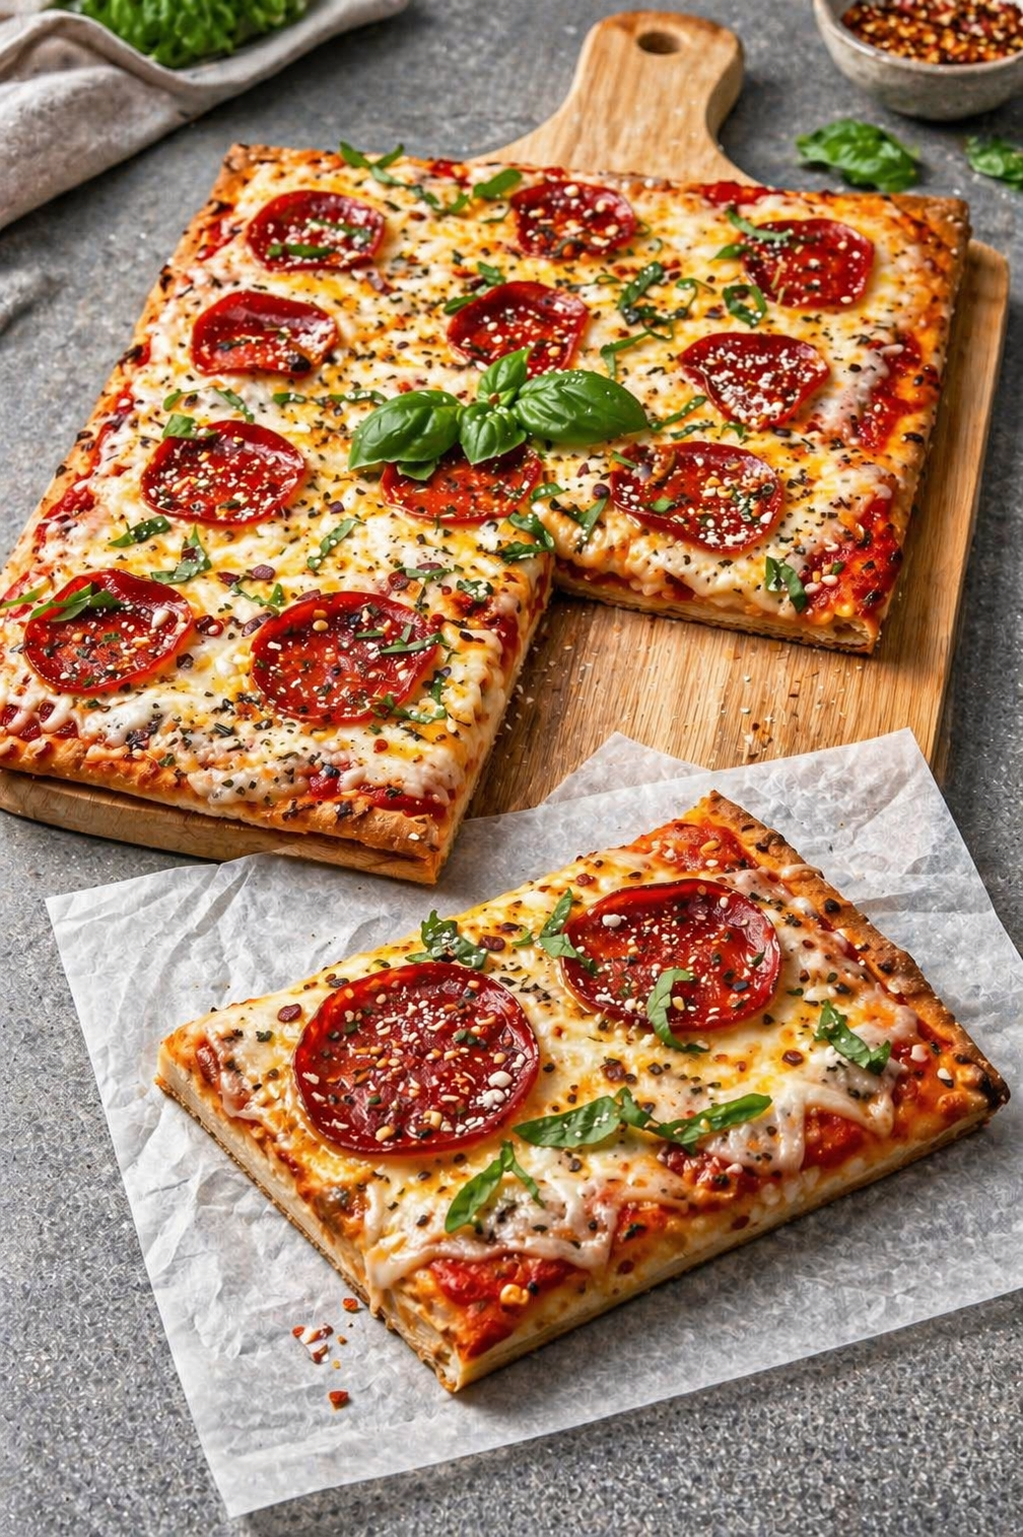
Homemade Sheet Pan Pepperoni Pizza

πŸ• Homemade Sheet Pan Pepperoni Pizza

πŸ›’ Ingredients

For the Dough:

  • 2 Β½ cups All-purpose flour or Bread flour

  • 1 cup Warm water (about 43Β°C)

  • 1 tsp Sugar

  • 1 packet (7g) Active dry yeast

  • 2 tbsp Olive oil

  • 1 tsp Salt

For the Toppings:

  • 1 cup Pizza sauce (rich tomato base)

  • 2 cups Shredded Mozzarella cheese

  • Β½ cup Grated Parmesan cheese

  • 15-20 slices Large Pepperoni

  • Fresh Basil (for garnish)

  • Dried Oregano & Red Pepper Flakes


πŸ‘¨β€πŸ³ Step-by-Step Instructions

  1. Activate the Yeast πŸ§ͺ

    • In a small bowl, combine warm water, sugar, and yeast.

    • Let it sit for about 5-10 minutes until it becomes foamy. ➑️ This means the yeast is alive and ready!

  2. Mix the Dough πŸ₯£

    • In a large bowl, whisk flour and salt.

    • Add the yeast mixture and olive oil.

    • Stir until a shaggy dough forms, then knead on a floured surface for 5 minutes until smooth and elastic.

  3. The First Rise πŸ“ˆ

    • Place dough in an oiled bowl and cover with a damp cloth.

    • Let it rise in a warm spot for 1 hour or until it has doubled in size.

  4. Shape the Pizza πŸ“

    • Preheat your oven to 220Β°C (425Β°F).

    • Generously oil a rectangular baking sheet.

    • Press the dough out into the corners of the pan. If it shrinks back, let it rest for 5 minutes and try again.

  5. Layer the Flavors πŸ…

    • Spread a thin layer of pizza sauce over the dough. ➑️ Leave a small border for the crust.

    • Sprinkle a heavy layer of Mozzarella and half of the Parmesan.

    • Lay the pepperoni slices evenly across the top.

  6. Bake to Perfection πŸ”₯

    • Bake for 15–20 minutes.

    • You are looking for a golden-brown crust and bubbling cheese. ➑️ The pepperoni should be slightly crisp at the edges!

  7. The Finishing Touch 🌿

    • Remove from the oven. Immediately sprinkle with the remaining Parmesan, dried oregano, red pepper flakes, and fresh basil leaves.

    • Slice into squares and enjoy!


πŸ€” Common Questions (Q&A)

Q: How do I get the bottom of the crust extra crispy? A: Use a dark metal baking sheet and don’t be afraid of the olive oil! The oil essentially “fries” the bottom of the dough in the oven, creating that crunch. πŸ₯–

Q: Can I use store-bought dough? A: Absolutely! Just make sure to let it come to room temperature for about 30 minutes before stretching it, or it will be too “snappy” to stay in the corners of the pan. πŸ›οΈ

Q: Why did my basil turn black? A: Heat causes fresh basil to oxidize and wilt. For the brightest color and best flavor, always add fresh basil after the pizza comes out of the oven. πŸƒ


Enjoy your meal! 🍽️✨

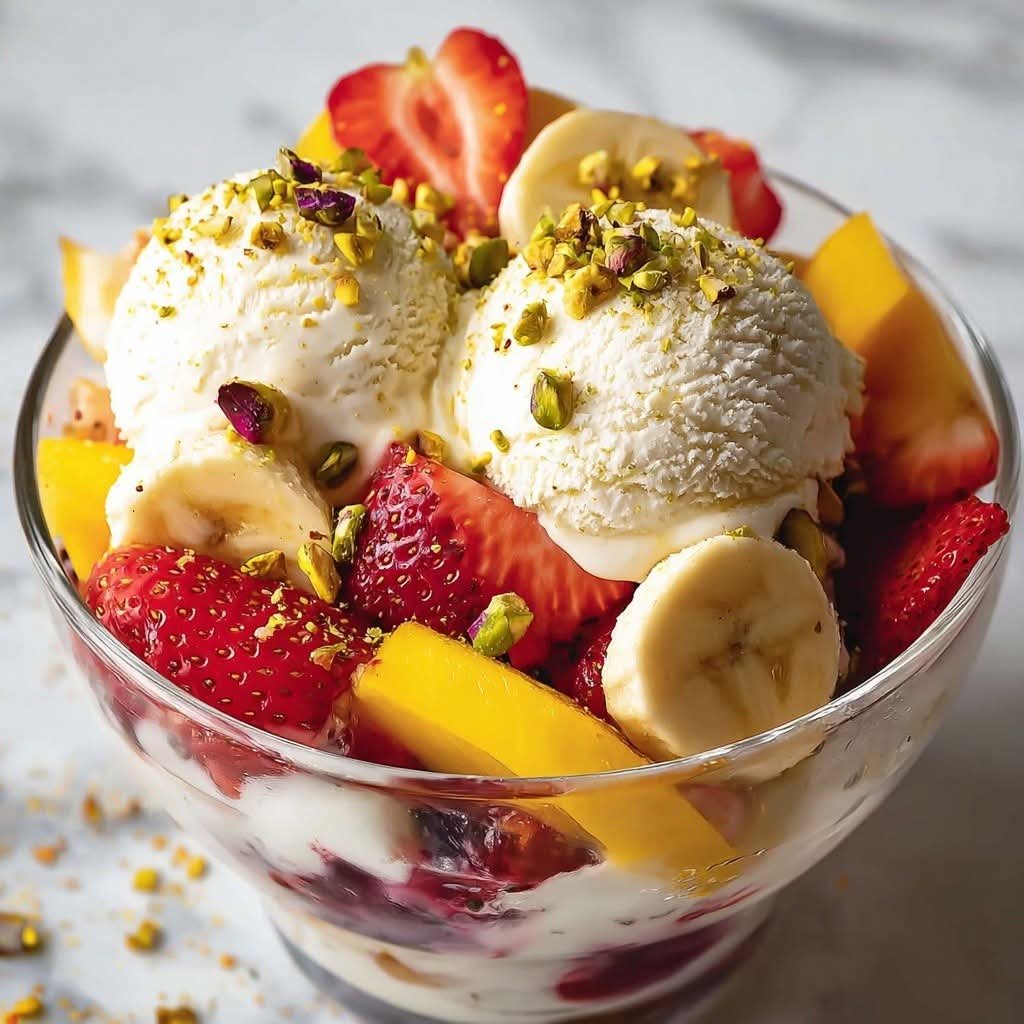
Pistachio Fruit Sundae

Pistachio Fruit Sundae

Ingredients

  • Base: 2 cups Greek yogurt or vanilla bean ice cream.

  • Fruit: 1 cup fresh strawberries (halved), 1 ripe mango (sliced into wedges), and 1 banana (sliced).

  • Topping: ΒΌ cup roasted pistachios (roughly crushed).

  • Garnish: A drizzle of honey or agave nectar (optional).

Instructions

  1. Prepare the Fruit: Wash the strawberries and remove the stems. Slice them into halves or quarters. Peel the mango and cut the flesh into long, thick wedges. Slice the banana into rounds just before serving to prevent browning.

  2. Layer the Bowl: Start by placing a few spoonfuls of your base (yogurt or ice cream) at the bottom of a clear glass bowl. Add a handful of mixed berries or mango slices around the sides to create a beautiful visual layer.

  3. The Main Scoops: Place two large, generous scoops of vanilla ice cream or thick Greek yogurt right in the center.

  4. Arrange the Fruit: Tuck the mango wedges and strawberry halves around the scoops. Lean the banana slices against the sides, ensuring they are nestled securely.

  5. The Finishing Touch: Generously sprinkle the crushed pistachios over the top. The green color provides a beautiful contrast against the white cream and red berries.

  6. Optional Drizzle: For an extra touch of sweetness, drizzle a teaspoon of honey over the fruit and nuts.


Quick Tips

  • Texture: To get that perfect “crushed” look for the pistachios, pulse them in a blender for just two seconds or crush them with the side of a knife.

  • Temperature: Serve immediately in a chilled glass to keep the fruit crisp and the base from melting too quickly.

Enjoy your vibrant, nutrient-packed dessert!

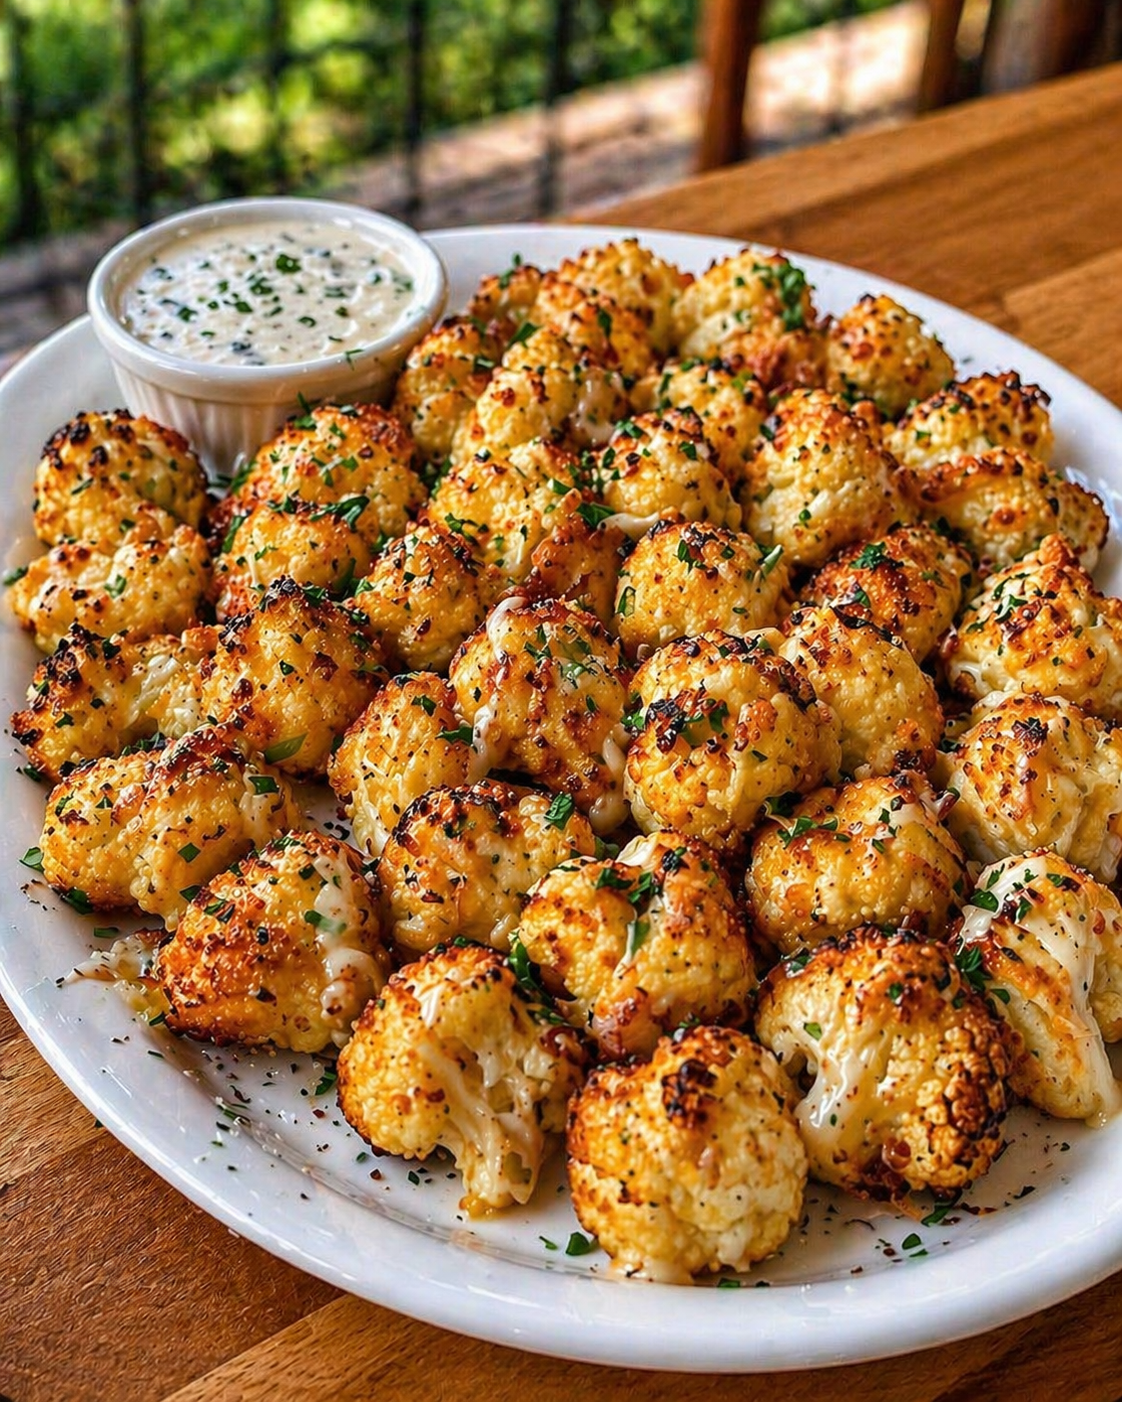
Crispy Garlic Parmesan Cauliflower

Crispy Garlic Parmesan Cauliflower

πŸ›’ Ingredients

The Roast:

  • 1 Large head of cauliflower (cut into bite-sized florets)

  • 3 tbsp Extra virgin olive oil

  • 1/2 cup Freshly grated Parmesan cheese

  • 1/2 cup Panko breadcrumbs (for extra crunch)

  • 1 tsp Garlic powder

  • 1 tsp Paprika (for that golden color) 🌢️

  • Salt and black pepper to taste

The Garlic Butter Drizzle:

  • 2 tbsp Unsalted butter (melted)

  • 2 Cloves garlic (minced)

  • 2 tbsp Fresh parsley (finely chopped) 🌿

For Serving:

  • Ranch dressing or a Garlic Aioli dip πŸ₯£


πŸ‘©β€πŸ³ Step-by-Step Instructions

1. Prep & Dry 🚿

  • Preheat your oven to 200Β°C. Line a large baking sheet with parchment paper.

  • Wash the cauliflower florets and pat them very dry with a kitchen towel. ➑️ Excess water will cause the cauliflower to steam rather than crisp up!

2. The Coating πŸ₯£

  • In a large mixing bowl, toss the florets with the olive oil until every piece is shiny.

  • In a small separate bowl, mix the Parmesan, Panko, garlic powder, paprika, salt, and pepper.

  • ➑️ Sprinkle the dry mix over the cauliflower and toss again until the crumbs stick to the oil-coated florets.

3. Arrange for Airflow πŸ’¨

  • Spread the cauliflower onto the baking sheet in a single layer.

  • ➑️ Make sure they aren’t touching each other! Space is the secret to getting those crispy, browned edges.

4. The Golden Bake πŸ”₯

  • Bake for 20–25 minutes.

  • Halfway through, use a spatula to flip the florets. ➑️ Bake until they are tender when pierced with a fork but dark golden-brown on the outside.

5. The Flavor Finish ✨

  • While the cauliflower is hot, mix the melted butter, minced garlic, and parsley in a small bowl.

  • ➑️ Drizzle this mixture over the roasted bites and give them a quick toss right on the tray.

6. Serve Hot 🍽️

  • Transfer to a platter and serve immediately while they are at peak crunchiness. ➑️ Pair with a cool dipping sauce to balance the warm garlic flavor!


❓ Common Questions (Q&A)

Q: Can I make these in an Air Fryer? A: Yes! Air fry at 190Β°C for 12–15 minutes, shaking the basket halfway through. They come out even crunchier this way! 🌬️πŸ”₯

Q: Why isn’t the coating sticking to my cauliflower? A: Usually, this happens if the florets are too dry or if there isn’t enough oil. Make sure the cauliflower is well-coated in oil before you add the dry Parmesan mixture. πŸ§€βœ”οΈ

Q: Is there a vegan alternative? A: Absolutely! Replace the Parmesan with nutritional yeast or a vegan parm alternative, and use olive oil or vegan butter for the final drizzle. 🌱✨


✨ Pro-Tips for Success:

  • Fresh is Best: Use a fresh block of Parmesan and grate it yourself. The pre-shredded kind in bags often has starch that prevents it from melting and crisping properly. πŸ§€πŸ”ͺ

  • The Squeeze: A tiny squeeze of fresh lemon juice right before serving can brighten up the heavy garlic and cheese flavors! πŸ‹

  • High Heat: Don’t be afraid of the high temperature; that’s what creates the “caramelization” (the brown bits) which carries all the flavor! 🌑️

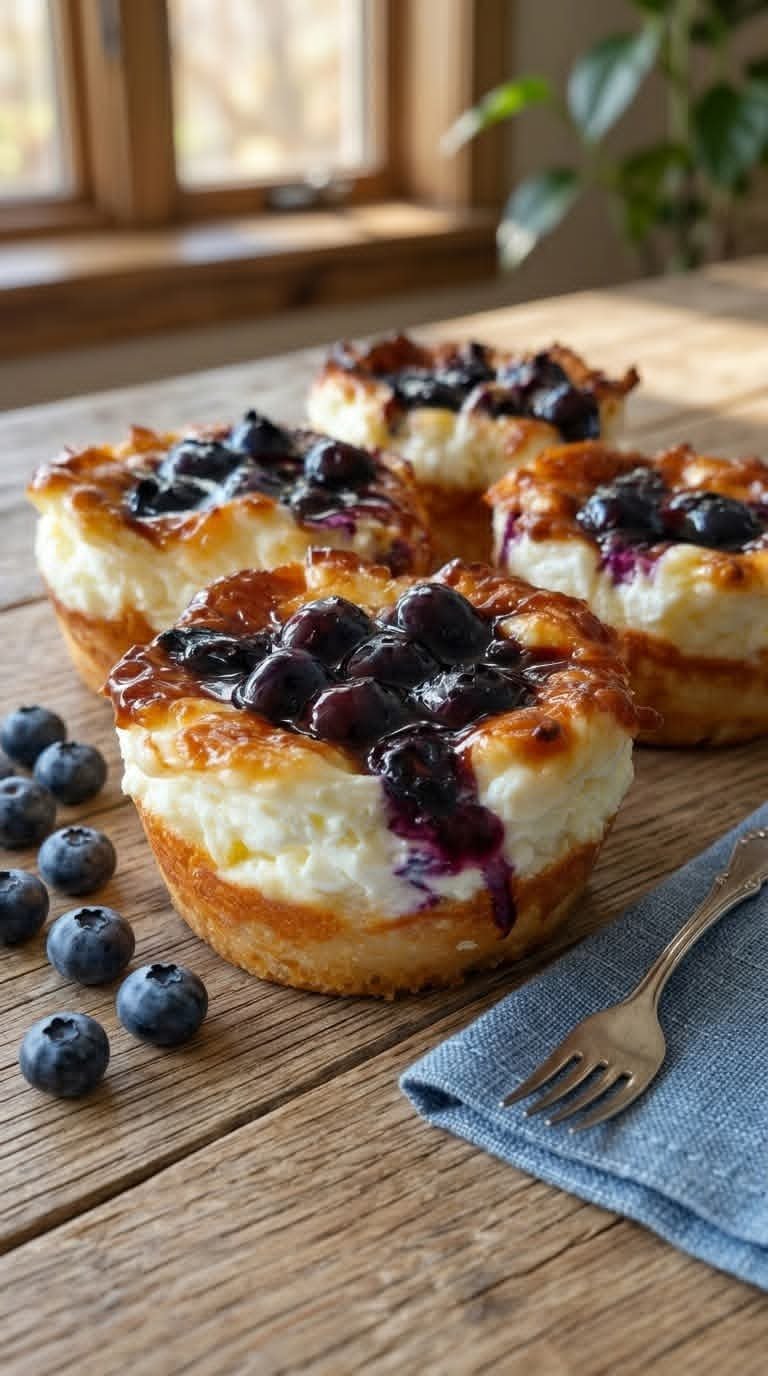
Blueberry Cream Cheese Cottage Cheese Breakfast Cups

Blueberry Cream Cheese Cottage Cheese Breakfast CupsΒ 

Ingredients (12 cups)

  • 2 cups cottage cheese
  • 8 oz cream cheese (softened)
  • 1 cup fresh blueberries
  • 1/4 cup honey
  • 1 tsp vanilla extract
  • 1/4 cup almond flour
  • 1/4 tsp salt

Instructions

1. Blend the base
Add cottage cheese, cream cheese, honey, vanilla, almond flour, and salt into a blender or food processor. Blend until smooth and creamy.

2. Add blueberries
Gently fold in the blueberries. Keep some whole for better texture.

3. Fill cups
Spoon the mixture evenly into 12 muffin liners, silicone cups, or small bowls.

4. Chill
Refrigerate for at least 1 hour until set.

5. Serve
Enjoy cold. Add extra blueberries on top if you like.

Time

  • Prep: 10 minutes
  • Chill: 1 hour
  • Total: 1 hour 10 minutes

Nutrition (per cup)

  • ~120 calories
  • 8g protein
  • 7g fat
  • 8g net carbs

Tips

  • Use full-fat cottage cheese for best taste
  • Store in fridge (airtight) for up to 4 days

Simple, creamy, high-protein, and perfect for meal prepΒ πŸ’ͺ

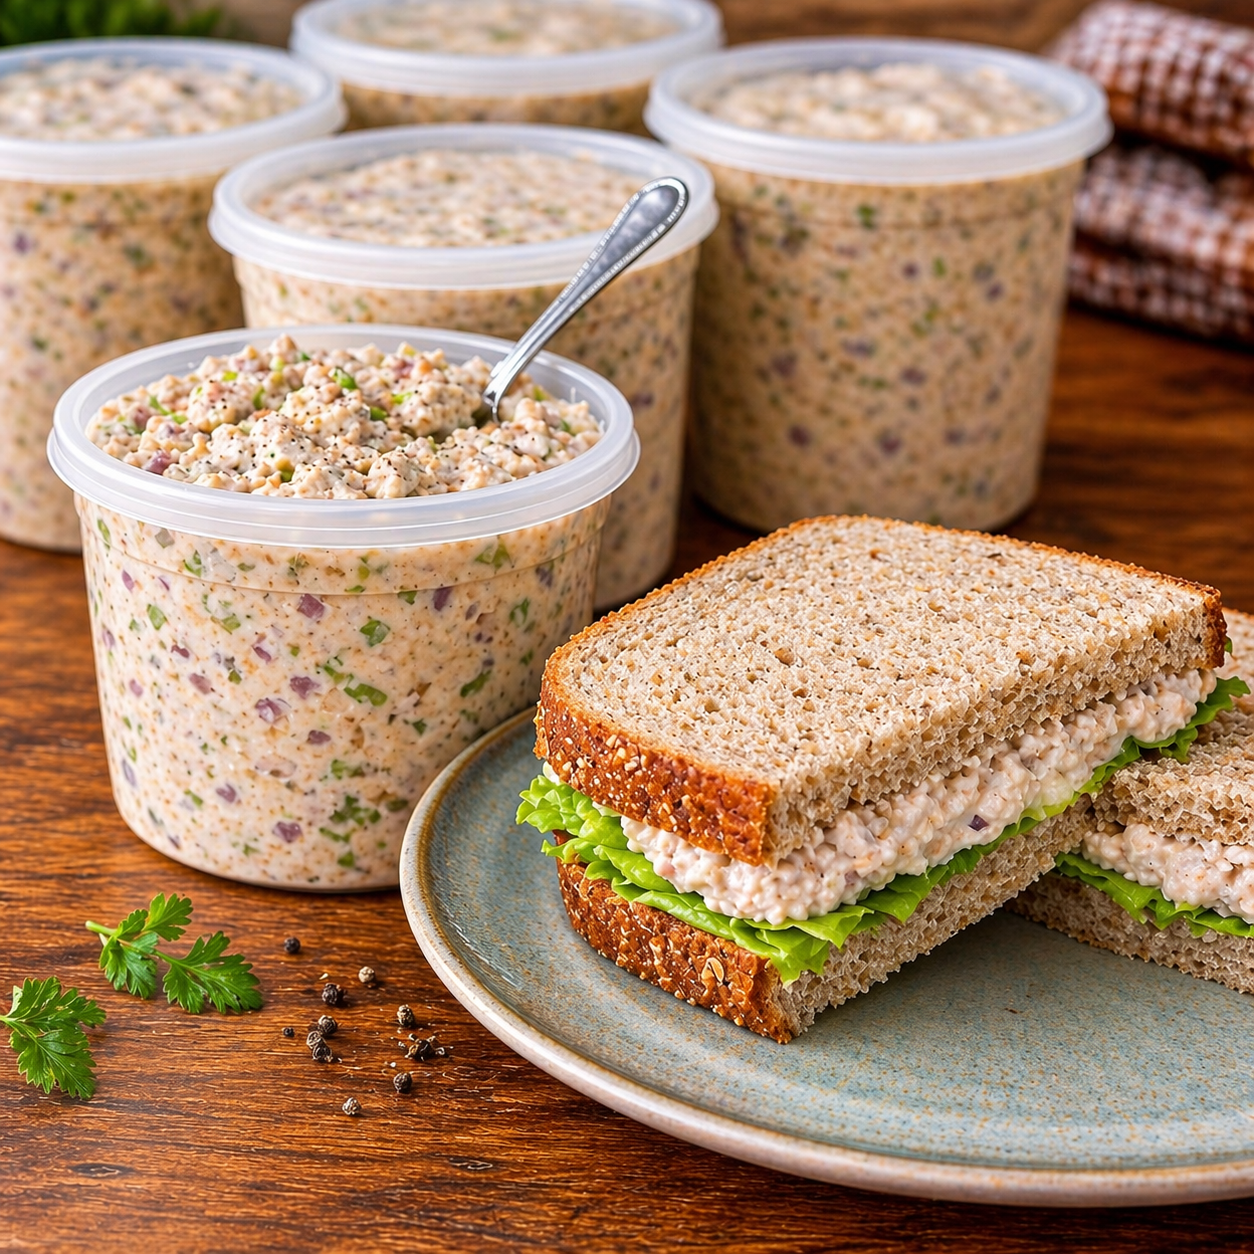
Classic Meal-Prep Chicken Salad

πŸ₯ͺ Classic Meal-Prep Chicken Salad

πŸ›’ Ingredients

The Protein:

  • 1 kg (approx. 2.2 lbs) Chicken breast (poached, roasted, or rotisserie)

  • Water or chicken broth for poaching

The Creamy Base:

  • 1.5 cups Mayonnaise (or a mix of mayo and Greek yogurt for a lighter version)

  • 2 tbsp Dijon mustard

  • 1 tbsp Lemon juice πŸ‹

  • 1 tsp Garlic powder

  • Salt and cracked black pepper to taste

The Mix-ins (The Crunch):

  • 1 cup Celery (finely diced)

  • 1/2 cup Red onion (finely minced)

  • 1/4 cup Fresh parsley or chives (chopped) 🌿

  • Optional: 1 cup halved red grapes or diced apples (for a hint of sweetness like in the image)

For Serving:

  • Whole grain or sourdough bread 🍞

  • Fresh lettuce leaves πŸ₯¬


πŸ‘©β€πŸ³ Step-by-Step Instructions

1. Prepare the Chicken πŸ—

  • If using raw chicken, poach it in simmering water or broth for 12–15 minutes until fully cooked.

  • ➑️ Pro Tip: Let the chicken cool completely before cutting. This keeps the juices inside!

  • Dice the cooled chicken into small, uniform cubes (about 1cm) to match the texture in the photo.

2. Whisk the Dressing πŸ₯£

  • In a very large mixing bowl, combine the mayonnaise, Dijon mustard, lemon juice, garlic powder, salt, and pepper.

  • ➑️ Whisk until smooth and creamy. Taste and adjust seasoning if necessary.

3. Add the Crunch πŸ₯—

  • Add the diced celery, minced onion, and herbs to the dressing bowl.

  • ➑️ If you are adding grapes or apples, toss them in now. Stir well to ensure the aromatics are coated in the dressing.

4. The Big Mix πŸ”„

  • Fold the diced chicken into the dressing mixture.

  • ➑️ Use a large spatula to turn the chicken over until every piece is generously coated.

5. Portion & Chill ❄️

  • Transfer the salad into airtight containers (like the round ones in the photo).

  • ➑️ Crucial Step: Refrigerate for at least 1 hour before serving. This allows the flavors to meld together and the dressing to thicken.
6. Assemble the Sandwich πŸ₯ͺ

  • Lay out your bread. Place a fresh, crisp lettuce leaf on the bottom slice (this acts as a barrier to keep the bread from getting soggy!).

  • ➑️ Add a thick layer of chicken salad, top with the second slice of bread, and slice diagonally.


❓ Common Questions (Q&A)

Q: How long can I keep this in the fridge? A: This chicken salad stays fresh for 3 to 4 days when stored in an airtight container in the refrigerator. 🧊⏳

Q: Can I freeze chicken salad? A: It is not recommended. Mayonnaise-based dressings tend to separate and become oily/watery once thawed, changing the texture significantly. πŸš«β„οΈ

Q: My salad is a bit dry the next day, what should I do? A: The chicken and celery often absorb some of the dressing overnight. Simply stir in an extra tablespoon of mayo or a splash of lemon juice to revive the creaminess! πŸ₯£βœ¨


✨ Pro-Tips for Success:

  • Texture Balance: Finely dicing the celery and onion ensures you get a bit of “crunch” in every bite without any single flavor being too overpowering. πŸ§…πŸ”ͺ

  • The “Bread Barrier”: Always put the lettuce against the bread to keep your sandwich fresh and firm if you are packing it for lunch later! πŸ₯¬πŸ₯ͺ

  • Herb Freshness: Add the fresh parsley right before serving for the brightest green color and best aroma. 🌿

Enjoy your meal prep! πŸ˜‹βœ¨

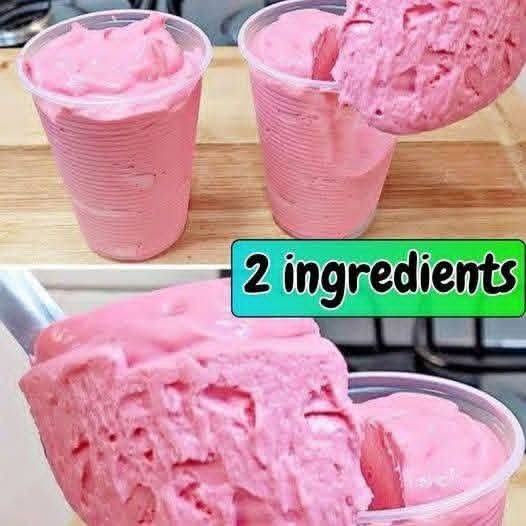
πŸ˜€πŸ™‚ Creamy dessert with 2 ingredients No condensed milk needed.. Send a simple Hello.

Creamy Dessert with 2 Ingredients: Simple, Delicious, and No Condensed Milk Needed

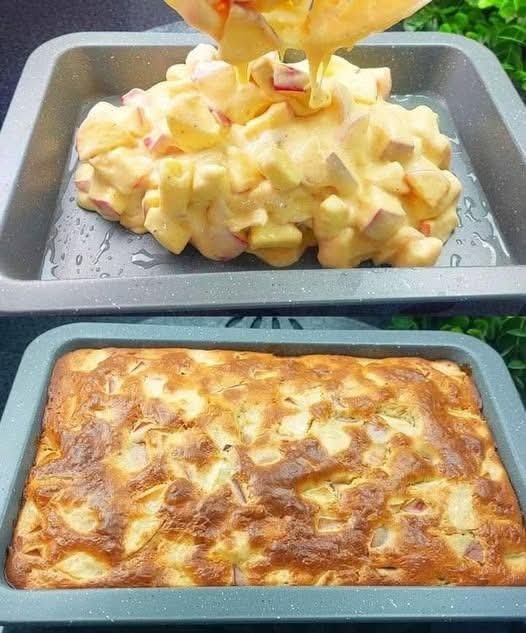
Super Simple and Quick Blender Apple Pie

How to Make Apple Pie

This Apple Pie is easy and simple to make. See below the list of all ingredients and required quantities. And then, a very complete preparation method with details of the recipe.

Recipe Ingredients:

  • 4 large apples (peeled and diced)
  • 3 eggs
  • 3.5 ounces (100 grams) of sugar
  • 1 teaspoon of vanilla extract
  • 3.4 ounces (100 ml) of milk
  • 2.8 ounces (80 grams) of vegetable oil
  • 8.5 ounces (240 grams) of all-purpose flour
  • 2 teaspoons of baking powder
  • 1 pinch of salt

Instructions:

In a large bowl, add the eggs, sugar, vanilla extract, and a pinch of salt. Beat well until the sugar is fully dissolved and the mixture is light and frothy.

Mix the milk and oil into the egg mixture, beating until well combined. Sift the flour and baking powder, then add to the liquid mixture. Stir well until the batter is smooth and homogeneous.

Spread the diced apples evenly on the bottom of a greased baking pan. Pour the batter over the apples, smoothing the surface with a spatula.

Bake in a preheated oven at 350Β°F (180Β°C) for about 35 minutes, or until a toothpick inserted into the center comes out clean. Allow to cool slightly before serving.

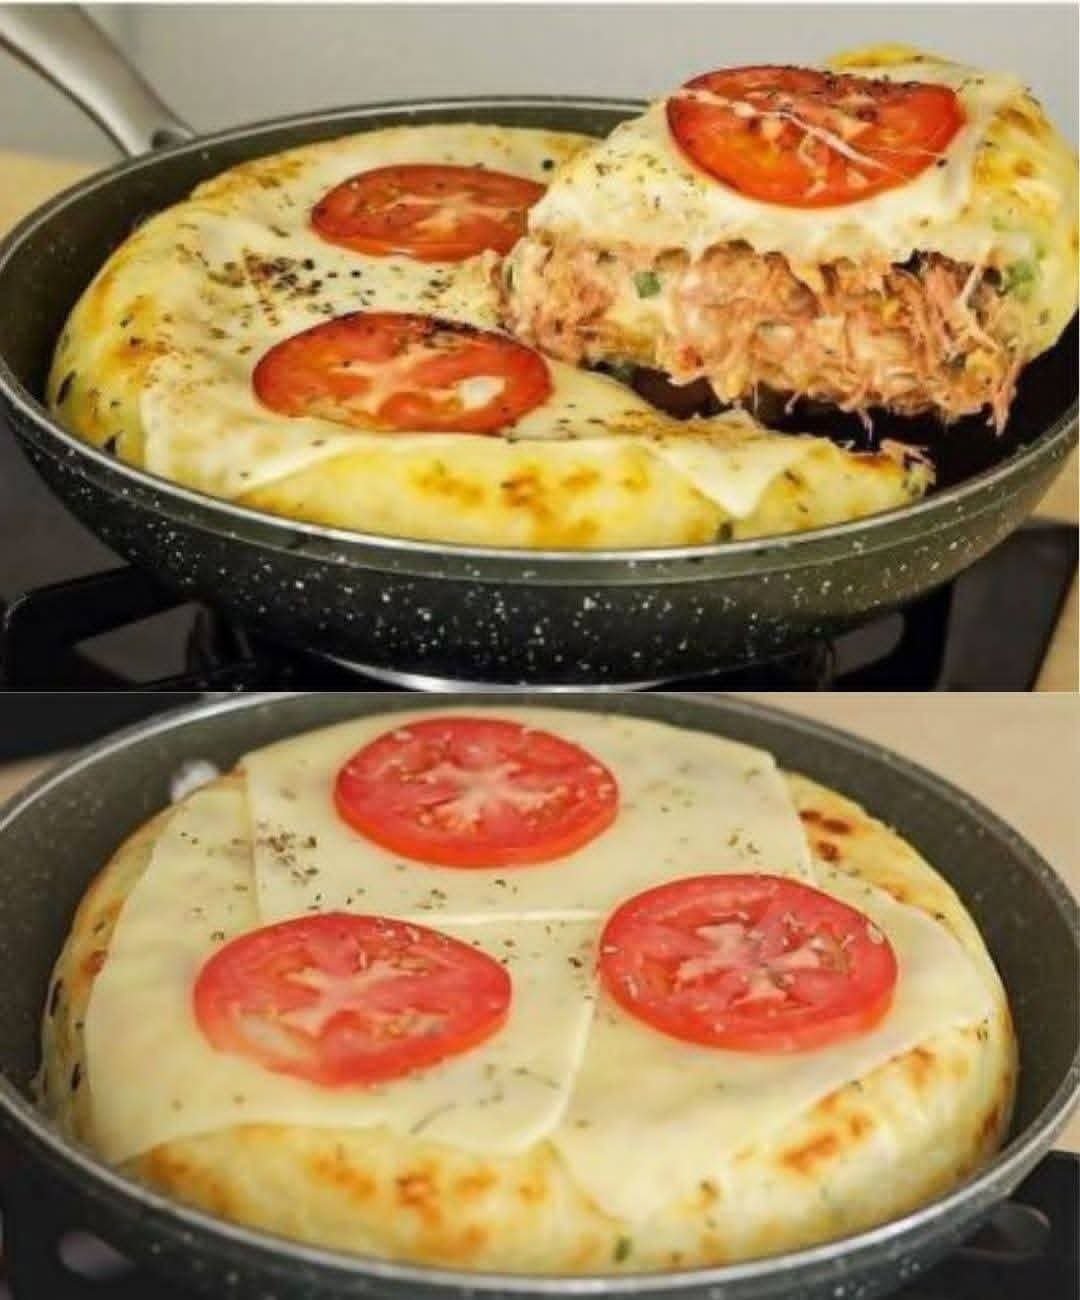
Quick Skillet Snack With Cheese And Chicken Stuffing, In Minutes

How to Make Quick Skillet Snack

Learn how to for snack or breakfast step-by-step recipes inspired by top online culinary schools. Whether you’re an aspiring chef or just love gourmet cooking at home, these professional recipe ideas are perfect for busy days and high-quality meals.

Recipe Ingredients:

  • 2 tablespoons of vegetable oil
  • Β½ onion, chopped
  • 2 garlic cloves, chopped or grated
  • 2 small tomatoes, diced
  • 300 grams (10.5 oz) of shredded dried beef or shredded chicken breast
  • Black pepper and cilantro, parsley to taste
  • 1 tablespoon of cream cheese

Dough Ingredients:

  • 800 grams/28 oz (1 ΒΎ lbs) of cassava
  • 1 tablespoon of margarine
  • Salt, cilantro, green onions, and oregano to taste

Instructions:

Prepare the Dough:

Peel and cook the cassava in salted water until it’s very soft, almost at a purΓ©e consistency.

Mash the cooked cassava on a plate using a fork, mixing in 1 tablespoon of margarine.

Season with cilantro, green onions, oregano, and salt. Stir well to combine.

Prepare the Filling:

Heat 2 tablespoons of oil in a skillet over medium heat.

SautΓ© the chopped onion until golden, then add the garlic and cook until fragrant.

Add the diced tomatoes and stir. Then, add the shredded beef or chicken and black pepper.

Cook for a few minutes until the tomatoes soften, then stir in the cream cheese to make the filling creamy.

Assembly:

In the same skillet or another one, spread half of the cassava dough to cover the entire bottom of the frying pan.

Place the filling in the middle, then add two or more slices of mozzarella cheese on top.

Cover with the remaining cassava dough, pressing gently with a spoon to form a compact layer.

Cover the skillet and cook over low heat until both sides are golden brown, flipping carefully midway through.

To finish, add cheese and tomato (optional) on top…

Roasted Garlic & Herb Okra

Roasted Garlic & Herb Okra
This method removes the “slick” texture often associated with okra, leaving it crispy and flavorful.
πŸ›’ Ingredients
500g Fresh Okra 🌿
2 tbsp Extra Virgin Olive Oil πŸ«’
3 cloves Garlic, minced πŸ§„
1 tsp Dried Oregano or Thyme 🌿
½ tsp Paprika ✨
1 squeeze Fresh Lemon juice πŸ‹
Pinch Salt and Black Pepper πŸ§‚
πŸ‘©β€πŸ³ Step-by-Step Instructions
1. Prep the Okra
Wash the okra thoroughly and pat it completely dry with a towel. 🚿 ➑️ 🧻
Tip: Drying it well is the secret to keeping it crispy!
Trim the stem ends and slice the okra into 1-inch pieces or leave them whole if they are small. πŸ”ͺ
2. Season for Flavor
In a large bowl, toss the okra with olive oil, minced garlic, oregano, and paprika. πŸ₯£ ➑️ πŸ«’
Ensure every piece is lightly coated in the oil and herbs. πŸ”„
3. Arrange for Roasting
Spread the okra in a single layer on a baking sheet. Do not crowd the pan! ➑️ πŸ“œ
Crowding causes them to steam rather than roast.
4. Roast to Perfection
Place in a preheated oven at 400Β°F (200Β°C). 🌑️ ➑️ πŸ”₯
Roast for 15–20 minutes, tossing halfway through, until the edges are golden brown and slightly charred. ⏱️ ➑️ ✨
5. The Final Touch
Remove from the oven and immediately add a squeeze of fresh lemon juice. πŸ‹
Serve warm as a side dish or a healthy snack. 🍽️
❓ Common Questions (Q&A)
Q: Does okra cure diabetes?
A: No food can cure diabetes. Okra is excellent for people managing blood sugar because its high fiber content slows down sugar absorption in the digestive tract, but it should be part of a broader medical plan. 🩺 βœ…
Q: How do I stop okra from being “slimy”?
A: High heat (roasting or frying) and acid (like lemon juice or vinegar) are the best ways to reduce the natural mucilage of the vegetable. πŸ‹ ➑️ πŸ”₯
Q: Can I use frozen okra?
A: Yes, but it is harder to get crispy. If using frozen, roast it directly from the freezer at a higher temperature to evaporate the moisture quickly. 🧊 ➑️ 🌑️
Q: Is the “Okra Water” trend effective?
A: While soaking okra in water overnight and drinking it is popular, eating the whole vegetable is much better because you get the full benefit of the fiber! πŸ₯— πŸ’ͺ
Kitchen Tip: For an extra savory kick, sprinkle a little nutritional yeast or grated Parmesan cheese over the okra during the last 2 minutes of roasting! πŸ§€βœ¨

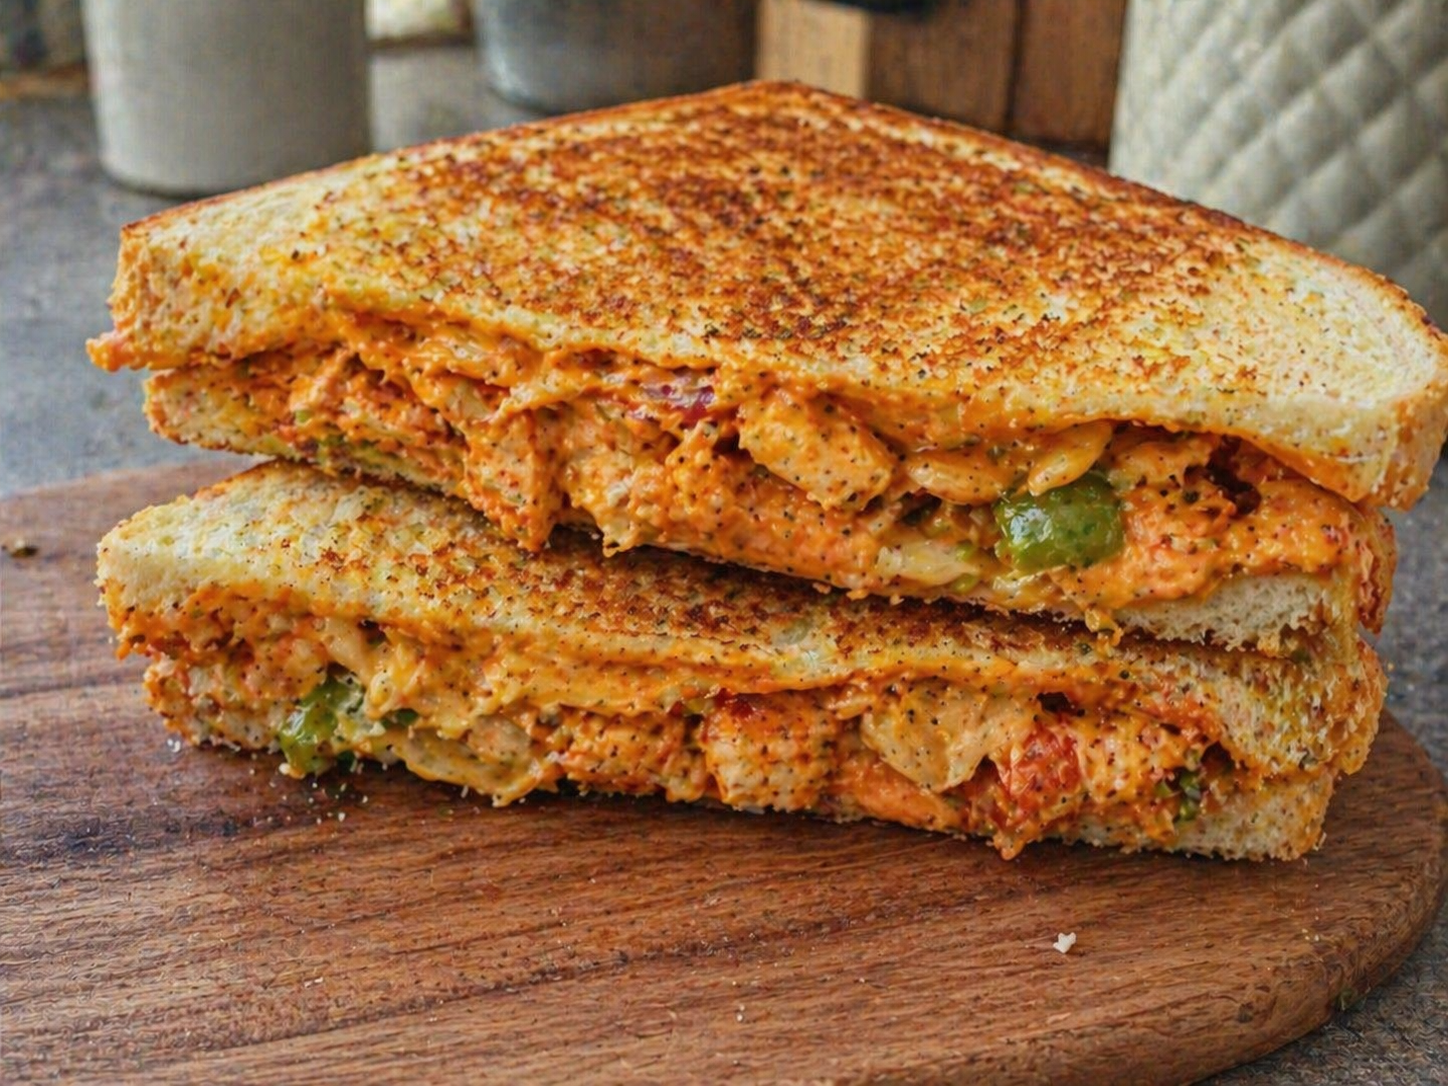
Tandoori Mayo Sandwich

Tandoori Mayo Sandwich

Ingredients

For the filling

  • 2 cups cooked chicken, shredded or small cubes
  • 1/2 cup mayonnaise
  • 2 tablespoons yogurt
  • 1 tablespoon tandoori masala
  • 1 teaspoon red chili powder
  • 1/2 teaspoon black pepper
  • 1/2 teaspoon salt, or to taste
  • 1 teaspoon lemon juice
  • 1 teaspoon garlic paste
  • 1/2 teaspoon cumin powder
  • 1/2 cup capsicum, finely chopped
  • 1/4 cup onion, finely chopped
  • 2 tablespoons fresh coriander, chopped

For the sandwich

  • 8 bread slices
  • 2 to 4 cheese slices or 1/2 cup grated cheese
  • 2 tablespoons butter
  • 2 tablespoons mayo for spreading, optional

Instructions

1. Make the tandoori mayo mixture

In a bowl, add mayonnaise, yogurt, tandoori masala, red chili powder, black pepper, salt, lemon juice, garlic paste, and cumin powder. Mix well until smooth.

2. Prepare the filling

Add the cooked chicken, capsicum, onion, and fresh coriander to the bowl. Mix everything well until the chicken is fully coated in the creamy tandoori mayo sauce.

3. Assemble the sandwich

Lay out the bread slices.
Spread a thin layer of mayo on one side of each slice if using.
Add the tandoori chicken filling on 4 slices.
Top with cheese slices or grated cheese.
Cover with the remaining bread slices.

4. Toast the sandwich

Heat a pan or sandwich maker.
Spread butter on the outside of the bread.
Toast on medium heat for 2 to 3 minutes on each side until golden brown and crispy.
Cook until the cheese melts and the filling is heated through.

5. Serve

Cut into halves or triangles and serve hot with fries, ketchup, garlic mayo, or chili sauce.

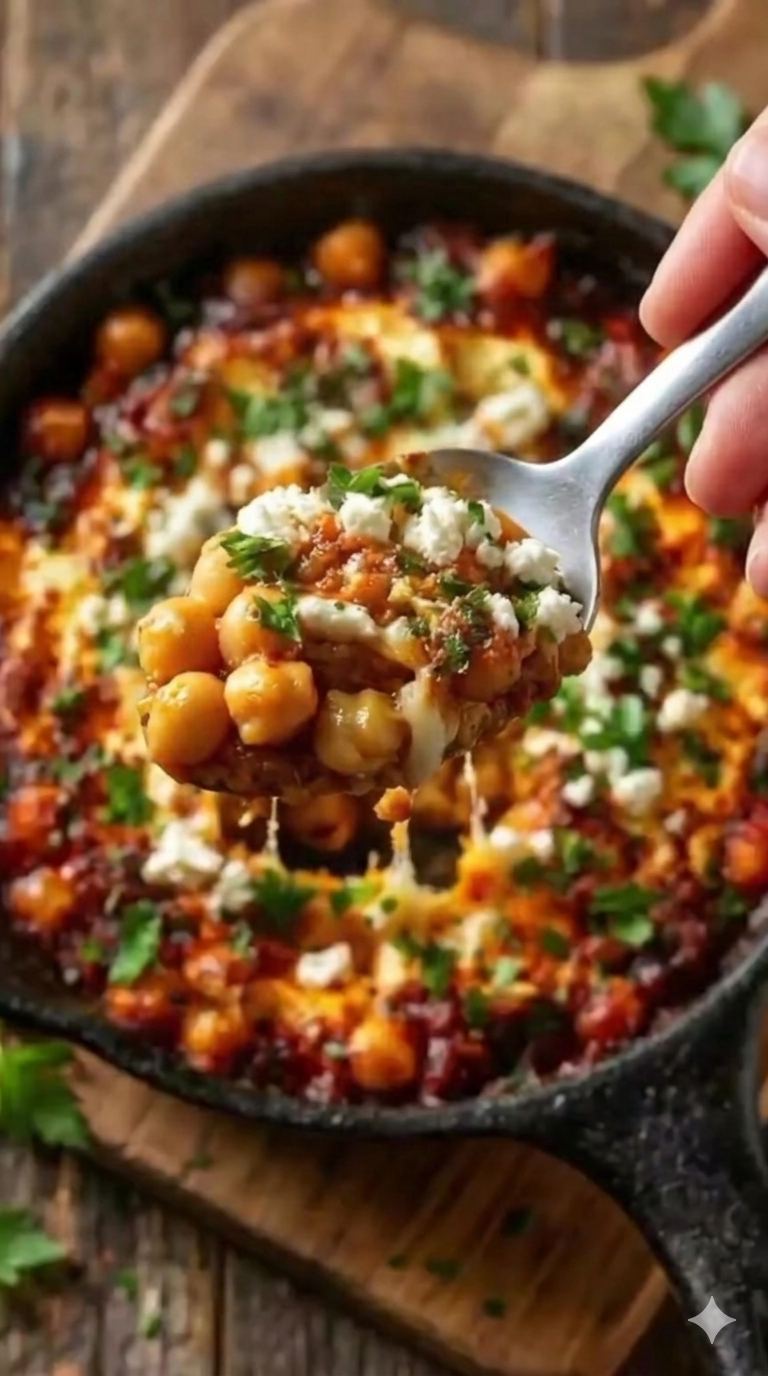
Mediterranean Chickpea Casserole: Healthy Vegan Dinner πŸ…πŸ«’

Mediterranean Chickpea Casserole: Healthy Vegan Dinner πŸ…πŸ«’


Hearty, saucy, cheesy-but-vegan. Think baked chickpeas in tomato with olives, herbs, and a golden top.


Serves 4–6 | Prep 15 min, Bake 30 min, One dish


Ingredients


For the casserole base:

Olive oil: 2 tbsp

Yellow onion: 1 medium, diced

Bell pepper: 1 red, diced β€” color + sweetness

Garlic: 4 cloves, minced

Zucchini: 1 medium, diced Β½-inch

Chickpeas: 2 cans / 30 oz total, drained + rinsed

Crushed tomatoes: 1 can / 28 oz

Tomato paste: 2 tbsp β€” deepens flavor

Vegetable broth: Β½ cup

Kalamata olives: Β½ cup, pitted + halved

Capers: 1 tbsp, drained β€” optional but adds briny punch


Mediterranean spices + herbs:

Dried oregano: 2 tsp

Smoked paprika: 1 tsp

Ground cumin: 1 tsp

Red pepper flakes: Β½ tsp β€” optional heat

Kosher salt: 1 tsp

Black pepper: Β½ tsp

Fresh parsley: ΒΌ cup, chopped + more for garnish

Fresh basil: ΒΌ cup, torn β€” add at end

Lemon zest: 1 tsp


For the golden top:

Cherry tomatoes: 1 cup, halved β€” roast on top

Breadcrumbs: Β½ cup, panko or gluten-free

Nutritional yeast: 3 tbsp β€” cheesy, vegan

Olive oil: 1 tbsp β€” to toast breadcrumbs

Pine nuts: 2 tbsp, optional β€” for crunch


Method


SautΓ© the veg β€” 8 min

Preheat oven to 400Β°F / 200Β°C. Large oven-safe skillet or 9×13 dish. Heat 2 tbsp olive oil over medium. Add onion, bell pepper, Β½ tsp salt. SautΓ© 4 min until soft. Add garlic, zucchini, oregano, paprika, cumin, red pepper flakes. Cook 3 min until fragrant and zucchini starts to soften.


Build the sauce β€” 5 min

Stir in tomato paste, cook 1 min to caramelize. Add crushed tomatoes, broth, chickpeas, olives, capers, remaining Β½ tsp salt, pepper. Simmer 4–5 min until slightly thickened. Turn off heat. Stir in lemon zest, parsley, and half the basil. Taste: should be bold, tomatoey, briny, herby.


Top + bake β€” 30 min

Press cherry tomato halves cut-side up into the top β€” they’ll roast + burst. Mix breadcrumbs, nutritional yeast, 1 tbsp olive oil, pine nuts, pinch salt. Sprinkle evenly over casserole.

Bake uncovered 25–30 min until bubbling at edges and top is golden + crisp. If top isn’t brown at 25 min, broil 60–90 sec. Watch it.


Rest + finish

Rest 5 min β€” it sets up. Top with remaining fresh basil, more parsley, crack of black pepper, drizzle of good olive oil. Lemon wedges on side.


Macros per serving β€” for 5:

Calories: ∼350

Protein: 12g

Carbs: 42g

Fat: 16g

Fiber: 12g

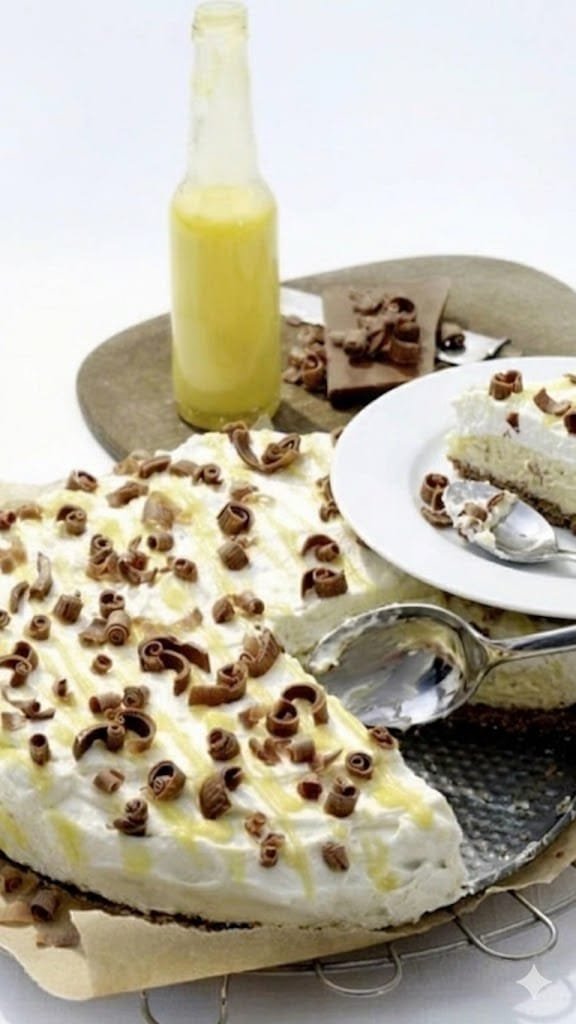
Lemon Drizzle Meringue Cake

Lemon Drizzle Meringue Cake.
Ingredients
For the Meringue Base:

4 Large egg whites (room temperature)

225g Caster sugar

1 tsp White wine vinegar

1 tsp Cornflour

For the Topping:

300ml Double cream (heavy whipping cream)

150g Lemon curd (store-bought or homemade)

50g Milk or dark chocolate (for curls)

1 Lemon (zested)

Instructions

Prep the Oven: Preheat your oven to 140Β°C. Line a large baking tray with parchment paper and draw an 8-inch circle on the back to use as a guide.

Whisk the Egg Whites: In a clean, grease-free bowl, whisk the egg whites until stiff peaks form. Gradually add the caster sugar one tablespoon at a time, whisking constantly until the mixture is thick, glossy, and holds its shape.

Fold in Stabilizers: Gently fold in the vinegar and cornflour. This gives the meringue its signature marshmallowy center.

Bake: Spread the meringue onto the parchment circle, smoothing the top. Bake for 1 hour, then turn off the oven and let the meringue cool completely inside with the door slightly ajar to prevent cracking.

Whip the Cream: Once the meringue is cold, whip the double cream until it reaches soft peaks.

Assemble: Carefully peel the meringue off the paper and place it on a serving plate. Spread the whipped cream over the top.

Decorate: Drizzle the lemon curd generously over the cream. Use a vegetable peeler to create chocolate curls from the chocolate bar and sprinkle them over the cake along with fresh lemon zest.

Serve immediately for the best texture and enjoy that perfect balance of tart and sweet!

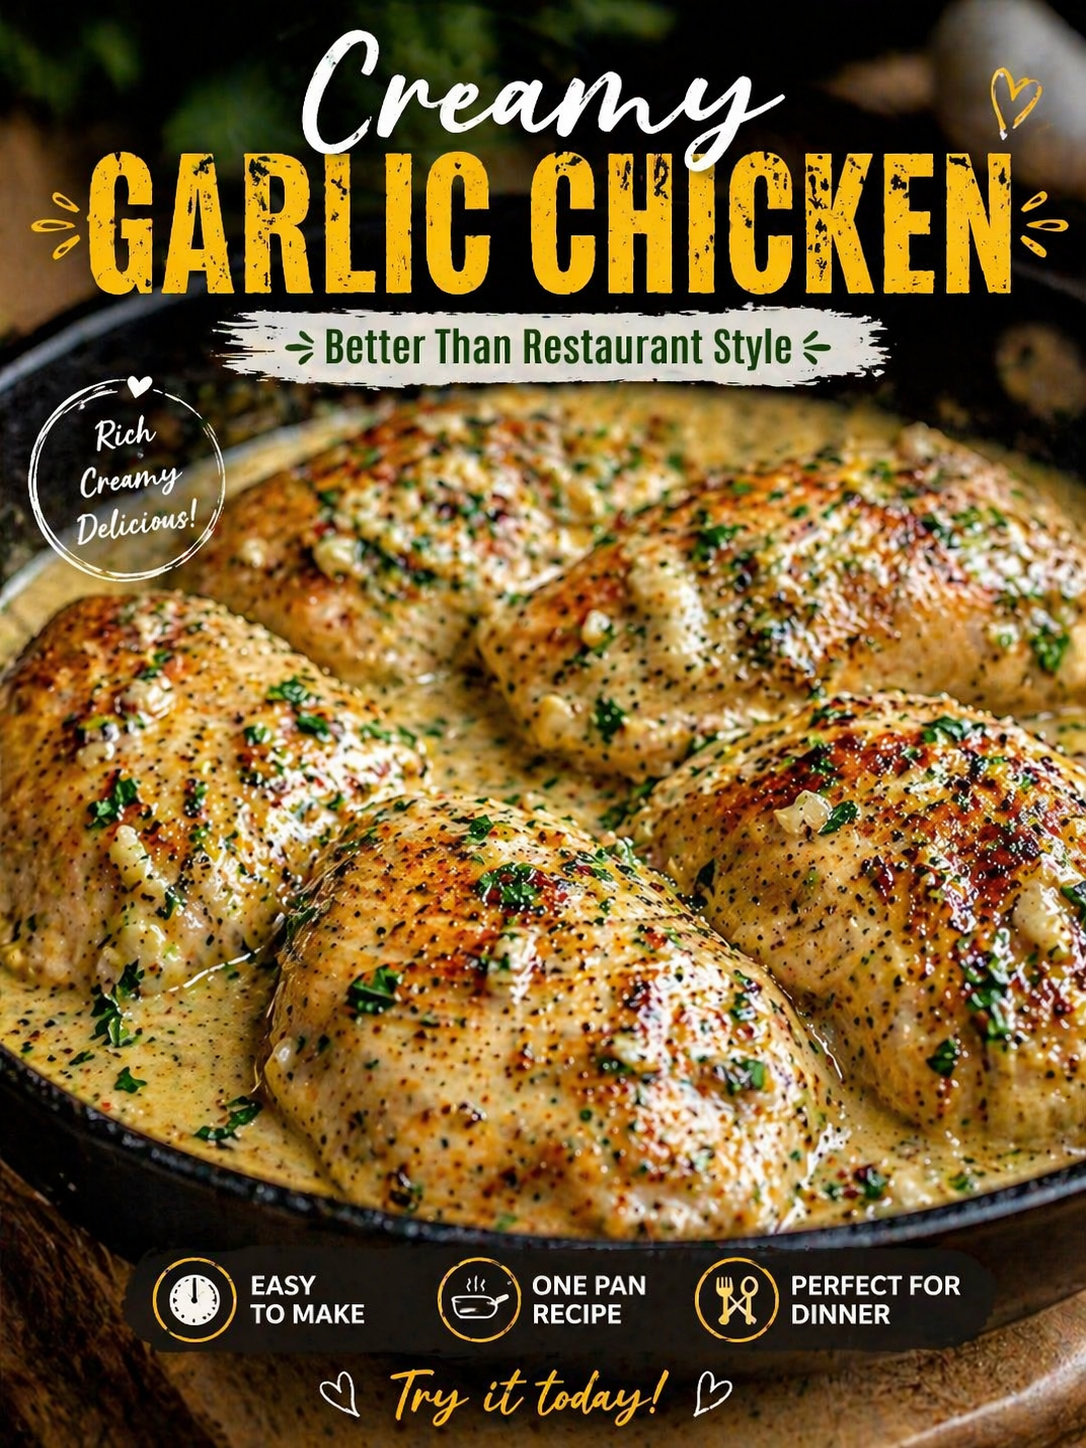
Creamy Garlic Chicken

Creamy Garlic Chicken

Ingredients

  • 2 large chicken breasts or 4 small fillets
  • 1 teaspoon salt
  • 1 teaspoon black pepper
  • 1 teaspoon paprika
  • 1 teaspoon garlic powder
  • 2 tablespoons olive oil
  • 1 tablespoon butter
  • 5 to 6 garlic cloves, minced
  • 1 cup heavy cream
  • 1/2 cup chicken broth
  • 1/2 cup grated parmesan cheese
  • 1 teaspoon dried oregano
  • 1 teaspoon dried parsley
  • 1/2 teaspoon chili flakes, optional
  • 1 tablespoon chopped fresh parsley for garnish

Instructions

  1. Season the chicken with salt, black pepper, paprika, and garlic powder.
  2. Heat olive oil in a pan over medium heat.
  3. Add the chicken and cook for 5 to 6 minutes on each side until golden brown and cooked through. Remove and set aside.
  4. In the same pan, add butter and minced garlic. SautΓ© for about 30 seconds until fragrant.
  5. Pour in the chicken broth and stir well.
  6. Add heavy cream, parmesan cheese, oregano, parsley, and chili flakes.
  7. Stir and let the sauce simmer for 2 to 3 minutes until slightly thick and creamy.
  8. Return the chicken to the pan and spoon the sauce over it.
  9. Cook for another 2 minutes on low heat.
  10. Garnish with fresh parsley and serve hot.

Best served with

  • Mashed potatoes
  • Rice
  • Pasta
  • Garlic breads

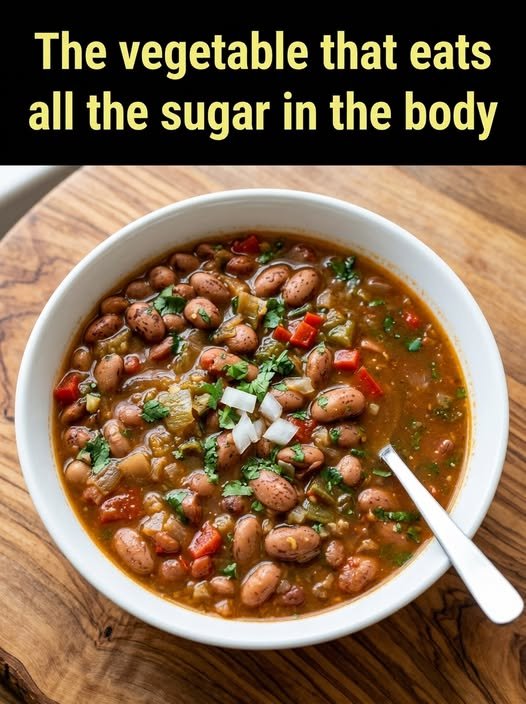
Mediterranean White Bean & Dill Stew

This version is inspired by the photo, featuring a rich tomato base, fresh dill, and a side of pickled cabbage (sauerkraut).

Description

A hearty, creamy, and fiber-packed soup that uses β€œpantry staples” to create a gourmet, blood-sugar-friendly meal. The creaminess comes from mashing a portion of the beans directly into the broth.

  • Prep time:Β 10 mins (if using canned)

  • Cook time:Β 20 mins

  • Servings:Β 4

Ingredients

  • Beans:Β 2 cans (15 oz) Cannellini or Navy beans, rinsed and drained.

  • Vegetables:Β 1 large yellow onion (diced), 2 carrots (chopped), 2 stalks celery (sliced).

  • Aromatics:Β 3 cloves garlic (minced), 1 tbsp tomato paste.

  • Liquid:Β 4 cups vegetable broth or water.

  • Herbs:Β 1/4 cup fresh dill (chopped), 1 bay leaf.

  • Fat:Β 3 tbsp extra virgin olive oil.

  • Acid:Β Juice of half a lemon.

  • Seasoning:Β Salt and black pepper to taste.

Instructions

  1. SautΓ©:Β Heat olive oil in a large pot. Add onion, carrots, and celery. Cook for 8 minutes until softened.

  2. Flavor:Β Stir in the garlic and tomato paste. Cook for 1 minute until the paste darkens slightly.

  3. Simmer:Β Add the beans, bay leaf, and broth. Bring to a boil, then reduce heat and simmer for 15 minutes.

  4. Thicken:Β Use a wooden spoon to mash aboutΒ $1/4$Β of the beans against the side of the pot. This creates that β€œcreamy” texture seen in the photo.

  5. Finish:Β Stir in the fresh dill and lemon juice. Season with salt and pepper.

  6. Serve:Β Top with a drizzle of olive oil. Serve with a side of sauerkraut (the white garnish in the small bowl) for added probiotics.

Nutritional Info (Per Serving)

Nutrient Amount
Calories 280 kcal
Protein 12g
Fiber 11g
Net Carbs 24g
Fat 11g

The β€œSugar-Eating” Benefit

  • Low Glycemic Index:Β White beans have a GI of around 31, meaning they digest very slowly.

  • Fiber Barrier:Β The high soluble fiber creates a gel-like substance in your gut that slows the entry of sugar into your bloodstream.

  • Alpha-Amylase Inhibitors:Β Often called β€œstarch blockers,” these natural compounds in white beans interfere with the enzymes that break down carbs into sugar.

Q&A

Q: Can I use dried beans?Β A:Β Yes! Soak 1 cup of dried beans overnight, then simmer them for 60–90 minutes before following the recipe steps.

Q: Why add dill at the end?Β A:Β Dill is a delicate herb; adding it at the end preserves its bright flavor and vitamin C content.

Q: Is this safe for Diabetics?Β A:Β Yes, it is highly recommended by organizations like the American Diabetes Association because of its β€œslow-burn” energy profile.

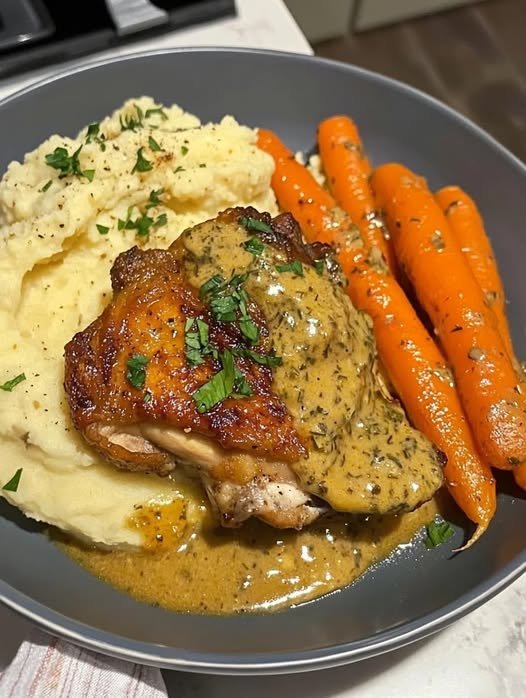
Garlic Herb Chicken & Carrot Plate

Ingredients

  • 2 boneless chicken breasts or 4 chicken thighs
  • 3 carrots, peeled and sliced
  • 3 cloves garlic, minced
  • 2 tablespoons olive oil
  • 1 tablespoon butter
  • 1 teaspoon dried oregano
  • 1 teaspoon dried thyme
  • 1 teaspoon parsley
  • 1/2 teaspoon black pepper
  • 1 teaspoon salt
  • 1/2 teaspoon paprika
  • 1 tablespoon lemon juice

Instructions

  1. Season the chicken with salt, pepper, paprika, oregano, thyme, and parsley.
  2. Heat 1 tablespoon olive oil in a pan over medium heat. Cook chicken for 5 to 7 minutes per side until golden and fully cooked. Remove.
  3. In the same pan, add butter, remaining olive oil, and garlic. SautΓ© for 30 seconds.
  4. Add carrots and cook for 6 to 8 minutes until tender.
  5. Return chicken to the pan, drizzle with lemon juice, and spoon the garlic herb mixture over the top.
  6. Serve the chicken with the carrots on the side.

Optional add-ons

  • Mashed potatoes
  • Rice
  • Steamed beans
  • A light cream sauce

Cheesy Mashed Potato Cakes: The Perfect 5-Ingredient Snack

Cheesy Mashed Potato Cakes: The Perfect 5-Ingredient Snack
How to Make Cheesy Mashed Potato Cakes

These bites are crispy outside, soft inside, and packed with cheesy flavor. Perfect for any occasion, they disappear fast from the table. You don’t need cooking classes or costly meal delivery services to prepare something delicious at home. With a bit of planning and our detailed meal prep guide, you can create amazing dishes with confidence and ease.

Recipe Ingredients:
2 eggs
1 cup shredded cheddar cheese (about 4 oz or 115 g)
ΒΌ cup chopped chives (about 15 g)
3 cups mashed potatoes, cold or at room temperature (about 700–750 g)
Salt and pepper to taste
Instructions:
First, preheat your oven to 392 Β°F (200 Β°C). Lightly grease a standard muffin tin using butter, cooking spray, or a little oil to keep the puffs from sticking.

Then, in a large mixing bowl, combine the mashed potatoes, shredded cheese, eggs, chopped chives, and a pinch of salt and pepper. Stir well until everything is fully blended.

After that, fill each muffin cup with the mixture, making sure to fill them up to the top for a nice, full shape.

Next, place the muffin tin in the oven and bake for about 25 to 30 minutes, or until the tops turn a beautiful golden brown and the edges become slightly crispy.
Once baked, remove the tray from the oven and let the puffs rest for a few minutes.

Finally, use a spoon or butter knife to gently lift each puff from the tin.

Serve warm as a tasty side dish, a party snack, or even a light lunch!

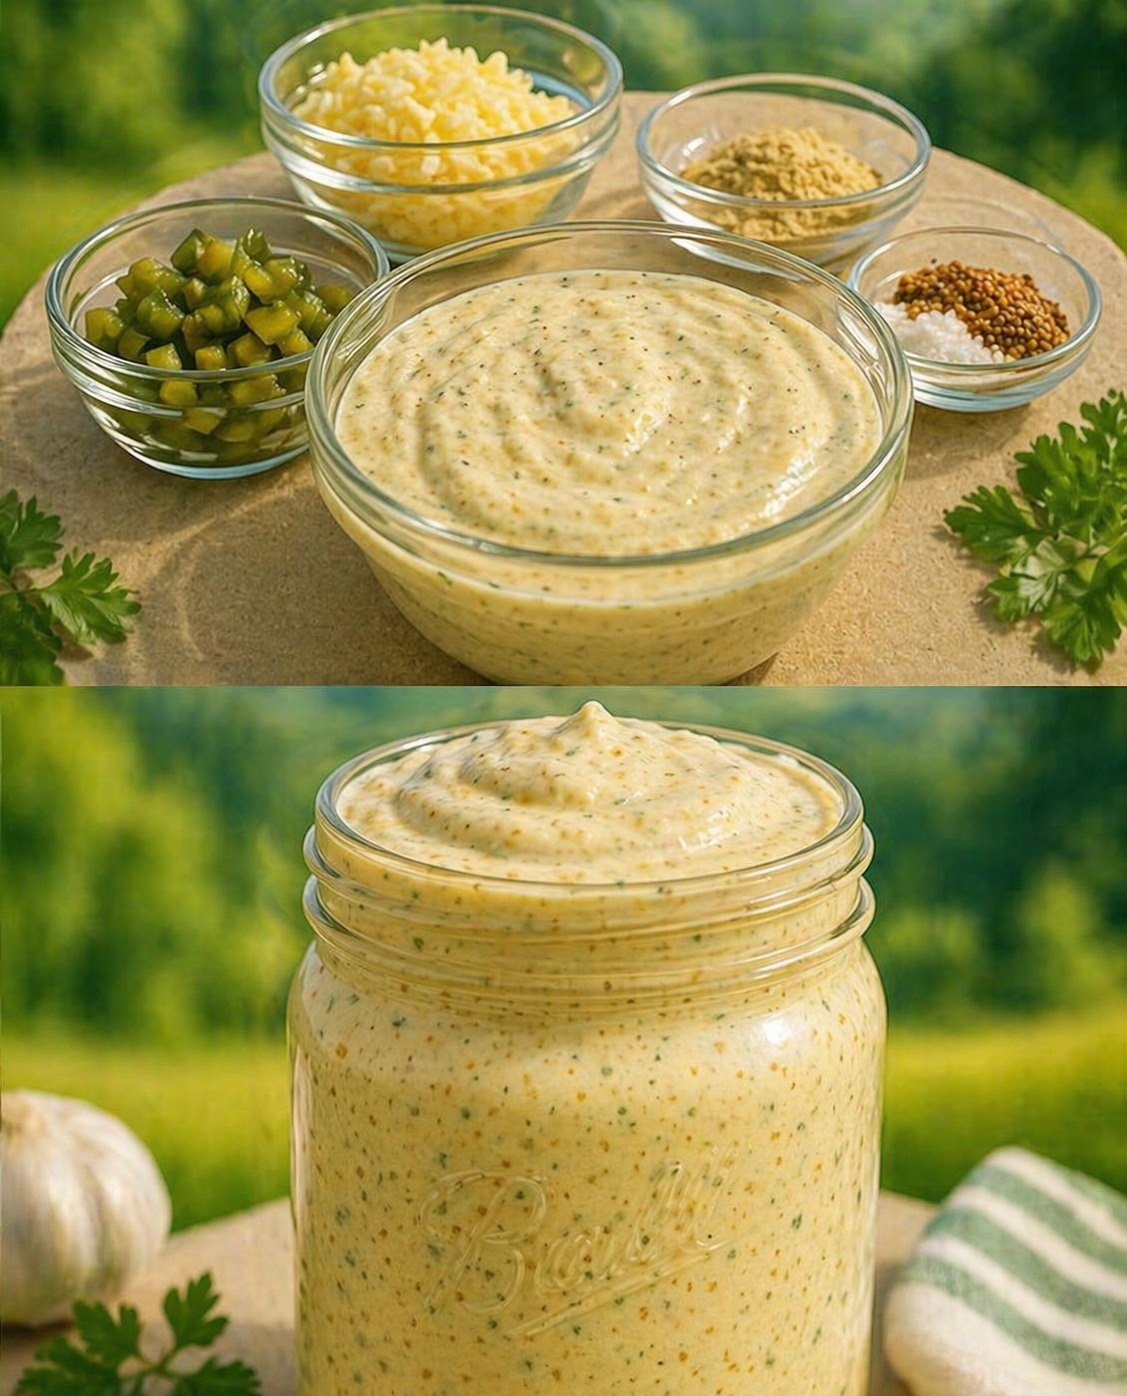
creamy pickle-mustard mayo sauce.

Ingredients

  • 1 cup mayonnaise
  • 2 tablespoons yellow mustard
  • 2 tablespoons Dijon mustard
  • 1/4 cup finely chopped pickles or relish
  • 2 tablespoons grated or finely chopped cheese
  • 1 teaspoon garlic powder
  • 1/2 teaspoon black pepper
  • 1/2 teaspoon paprika
  • 1/2 teaspoon dried parsley or 1 tablespoon fresh parsley
  • 1 teaspoon pickle juice or lemon juice
  • Salt to taste

Method

  1. Add mayonnaise, yellow mustard, and Dijon mustard to a bowl.
  2. Mix in chopped pickles, cheese, garlic powder, black pepper, paprika, and parsley.
  3. Add pickle juice or lemon juice and stir until smooth.
  4. Taste and adjust salt or mustard as needed.
  5. Chill for 15 to 30 minutes before serving.

Use for

  • Burgers
  • Sandwiches
  • Fries
  • Grilled chicken
  • Shawarma wraps

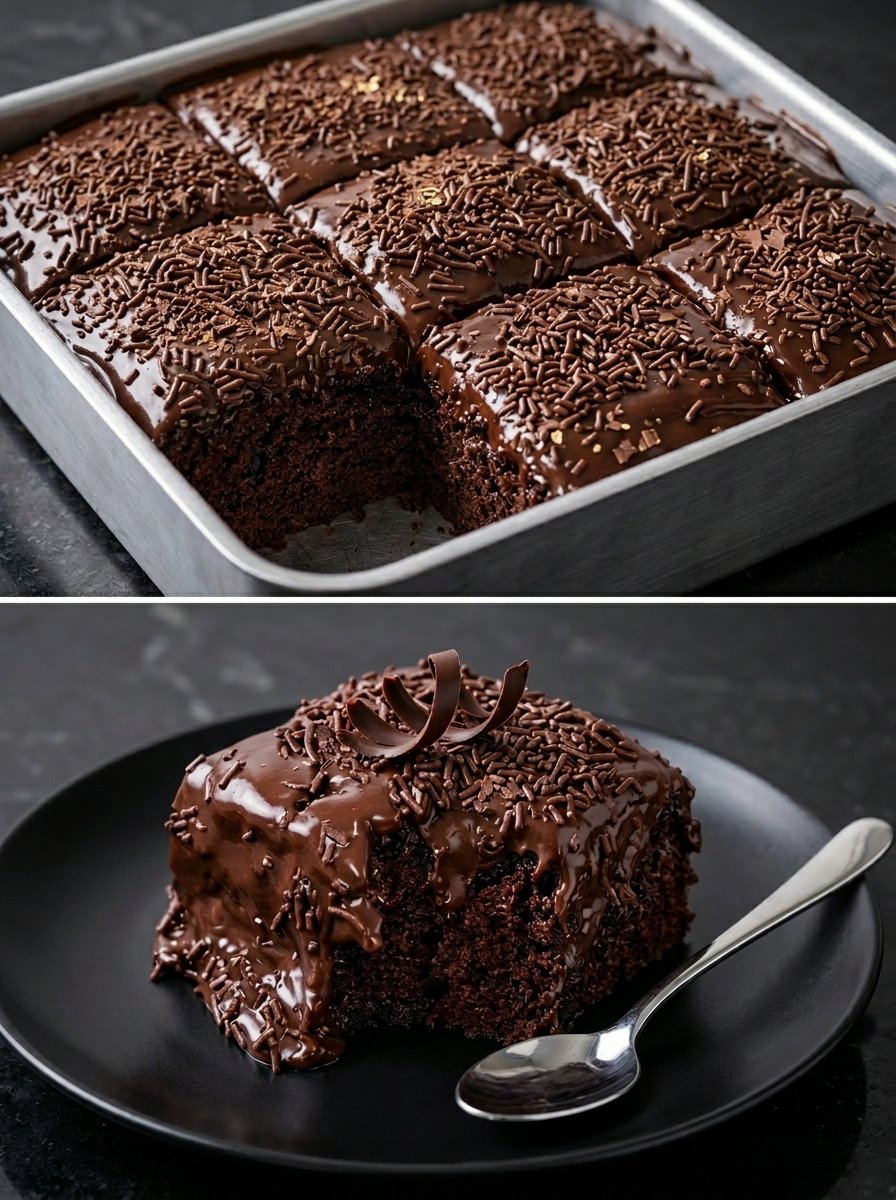
Ultimate Chocolate Fudge Tray Cake

Ultimate Chocolate Fudge Tray Cake

A soft, deep chocolate cake topped with a thick glossy fudge frosting and lots of chocolate sprinkles 🀎

πŸ›’ Ingredients

πŸŽ‚ For the chocolate cake:

  • 2 cups all-purpose flour 🌾
  • 2 cups granulated sugar 🍚
  • 3/4 cup unsweetened cocoa powder 🍫
  • 2 tsp baking powder
  • 1 1/2 tsp baking soda
  • 1 tsp salt πŸ§‚
  • 2 large eggs πŸ₯šπŸ₯š
  • 1 cup whole milk πŸ₯›
  • 1/2 cup vegetable oil
  • 2 tsp vanilla extract 🌼
  • 1 cup hot coffee or hot water β˜•
    • Coffee makes the chocolate flavor deeper, but water works too

🍫 For the fudge frosting:

  • 1/2 cup butter 🧈
  • 1/2 cup heavy cream or whole milk πŸ₯›
  • 1/3 cup unsweetened cocoa powder 🍫
  • 2 1/2 to 3 cups powdered sugar
  • 1 tsp vanilla extract
  • 100 g dark or semi-sweet chocolate, chopped 🍫
  • Pinch of salt

✨ For topping:

  • 1/2 to 3/4 cup chocolate sprinkles 🍫
  • Optional chocolate curls for garnish πŸŽ€
  • Optional mini chocolate chips πŸͺ

🍽️ Equipment

  • 9×13 inch baking pan
  • Mixing bowls πŸ₯£
  • Whisk or hand mixer
  • Saucepan
  • Spatula
  • Cooling rack

πŸ‘©β€πŸ³ Step-by-step recipe

1. Prep the oven and pan πŸ”₯

  • Preheat your oven to 175Β°C / 350Β°F.
  • Grease a 9×13 inch pan well.
  • You can also line the bottom with parchment paper for easier removal.

2. Mix the dry ingredients πŸ₯£

In a large bowl, add:

  • flour
  • sugar
  • cocoa powder
  • baking powder
  • baking soda
  • salt

Whisk everything together until evenly combined 🀎


3. Add the wet ingredients πŸ₯šπŸ₯›

Add to the same bowl:

  • eggs
  • milk
  • oil
  • vanilla

Whisk until smooth.

The batter will look thick at first β€” that’s normal 😊


4. Pour in hot coffee or water β˜•

  • Slowly add the hot coffee while mixing.
  • Stir until the batter is smooth and fairly thin.

This thin batter gives you that moist, soft, fluffy crumb you see in the image 😍


5. Bake the cake πŸŽ‚

  • Pour the batter into the prepared pan.
  • Tap the pan gently on the counter to remove air bubbles.
  • Bake for 30 to 38 minutes, or until:
    • a toothpick inserted in the center comes out with a few moist crumbs
    • the top springs back lightly when touched

⏰ Do not overbake, or the cake may dry out.


6. Cool slightly 🌬️

  • Let the cake cool in the pan for about 15–20 minutes.
  • You want it warm, not hot, when frosting it.

This helps the frosting spread beautifully and slightly melt over the top like in your photo 🀀


🍫 Make the fudge frosting

7. Heat the base 🧈

In a saucepan over low-medium heat, add:

  • butter
  • cream or milk
  • cocoa powder
  • chopped chocolate
  • pinch of salt

Stir until melted, glossy, and smooth ✨


8. Add sugar and vanilla 🍚

  • Remove from heat.
  • Stir in vanilla.
  • Gradually whisk in powdered sugar until thick, smooth, and spreadable.

Texture tip πŸ’‘

You want it:

  • thicker than glaze
  • softer than stiff buttercream

It should slowly drip off a spoon but still hold on the cake.

If too thick:

  • add 1–2 tbsp warm milk πŸ₯›

If too thin:

  • add a little more powdered sugar

🍰 Frost and decorate

9. Spread the frosting

  • Pour or spoon the warm fudge frosting over the slightly warm cake.
  • Use a spatula to spread it evenly.
  • Let some areas stay a little thicker for that luscious bakery-style look 😍

10. Add sprinkles immediately 🍫

  • Scatter chocolate sprinkles generously over the frosting.
  • Add chocolate curls on top if you want the same dramatic finish as the plated slice πŸŽ€

Because the frosting is still soft, the sprinkles will stick perfectly ✨


❄️ Let it set

  • Leave the cake at room temperature for 30–60 minutes so the frosting settles.
  • The top will become glossy, fudgy, and slightly firm while staying soft inside 🀎

πŸ”ͺ Slice and serve

Cut into squares and serve just like the photo 🍽️

For extra indulgence:

  • warm each slice for 10 seconds in the microwave πŸ”₯
  • serve with vanilla ice cream 🍨
  • drizzle extra melted chocolate on top 🍫

⏱️ Time

  • Prep time: 20 minutes
  • Bake time: 30–38 minutes
  • Cooling/frosting time: 30 minutes
  • Total: about 1 hour 20 minutes

πŸ˜‹ What this cake tastes like

This cake is:

  • super moist πŸ’§
  • deeply chocolatey 🍫
  • soft and fluffy inside ☁️
  • topped with thick fudge frosting 🀎
  • slightly gooey and rich, like a cross between chocolate cake and brownie πŸŽ‚βœ¨

πŸ’‘ Tips for best results

βœ… For extra moist cake

  • Use oil instead of butter
  • Don’t skip the hot coffee
  • Don’t overbake

βœ… For glossy frosting

  • Frost while the cake is still a little warm
  • Use chopped real chocolate in the frosting
  • Stir until fully smooth

βœ… For the exact look in your image

  • Bake in a metal tray
  • Cut into large squares
  • Use lots of chocolate sprinkles
  • Let the frosting drip a little over the sides 🀀

🍫 Optional upgrades

Add-ins for the cake:

  • 1/2 cup chocolate chips πŸͺ
  • 1 tsp espresso powder β˜•
  • 1/2 cup sour cream for extra richness πŸ₯›

Toppings:

  • crushed chocolate cookies πŸͺ
  • toasted nuts 🌰
  • caramel drizzle 🍯
  • ganache layer under the sprinkles 🍫

πŸ“¦ Storage

  • Keep covered at room temperature for 2 days
  • Refrigerate for up to 5 days
  • Microwave a slice for 10–15 seconds before serving for that melty top again πŸ”₯

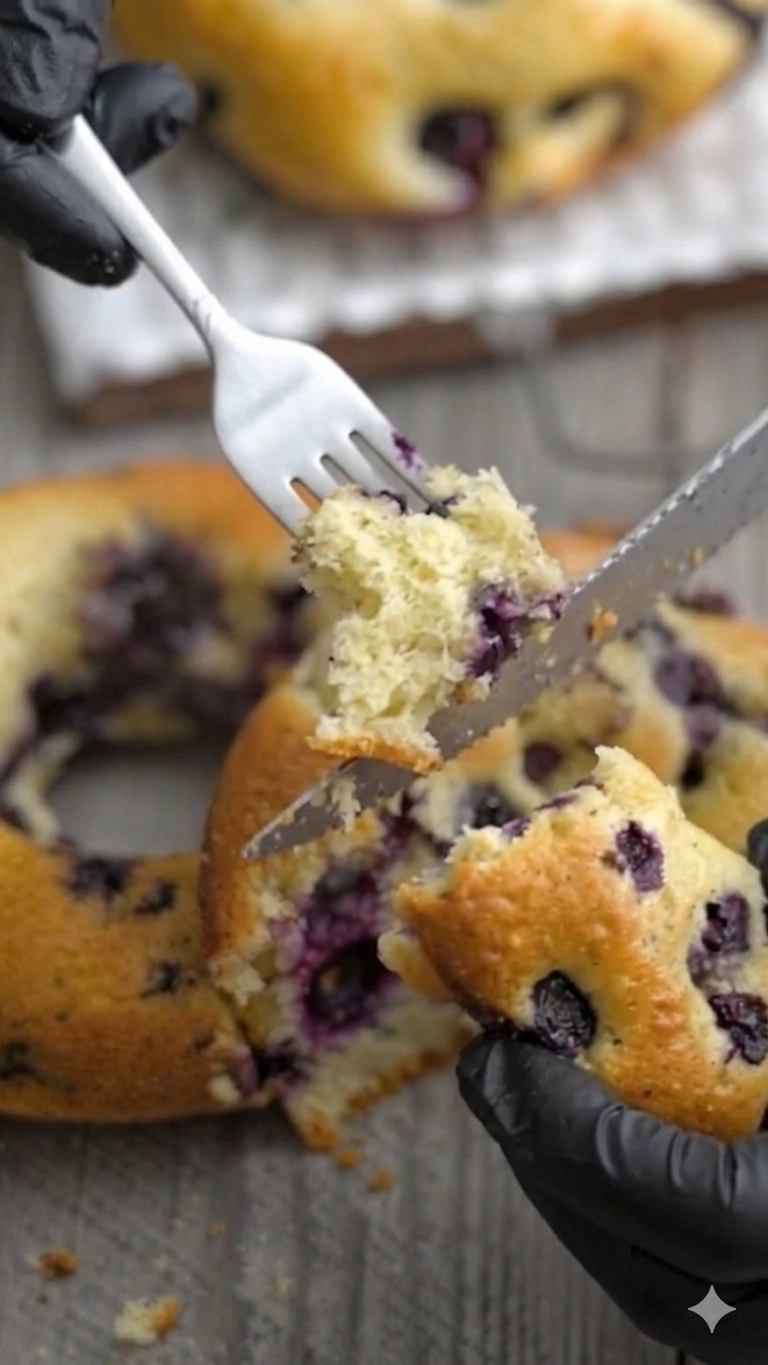
Blueberry Bagel Cakes

Blueberry Bagel Cakes.

Ingredients

  • Dry: 1 Β½ cups all-purpose flour, 1 tsp baking powder, ΒΌ tsp salt.

  • Wet: 2 large eggs, Β½ cup granulated sugar, Β½ cup Greek yogurt (plain or vanilla), ΒΌ cup melted butter (slightly cooled), 1 tsp vanilla extract.

  • The Star: 1 cup fresh or frozen blueberries (tossed in a teaspoon of flour to prevent sinking).


Instructions

  1. Prep the Oven and Pan: Preheat your oven to 180Β°C. Generously grease a 6-cavity donut pan with butter or non-stick spray.

  2. Mix the Base: In a large bowl, whisk together the eggs and sugar until light and slightly frothy. Stir in the Greek yogurt, melted butter, and vanilla extract until the mixture is smooth and well-combined.

  3. Combine: Gently fold in the flour, baking powder, and salt. Be careful not to overmix; stop as soon as the white streaks of flour disappear to ensure the cakes stay tender.

  4. Add Blueberries: Gently fold in the blueberries. If using frozen ones, do not thaw them first, as this will streak the batter purple.

  5. Fill and Bake: Spoon the batter into the donut pan, filling each cavity about ΒΎ full. Use the back of a spoon to smooth the tops.

  6. Bake: Place in the oven for 15–18 minutes, or until a toothpick comes out clean and the tops are golden brown.

  7. Cool and Serve: Let them cool in the pan for 5 minutes before transferring to a wire rack.

Pro Tip: Serve these warm with a light dusting of powdered sugar or a simple lemon glaze for extra zing!

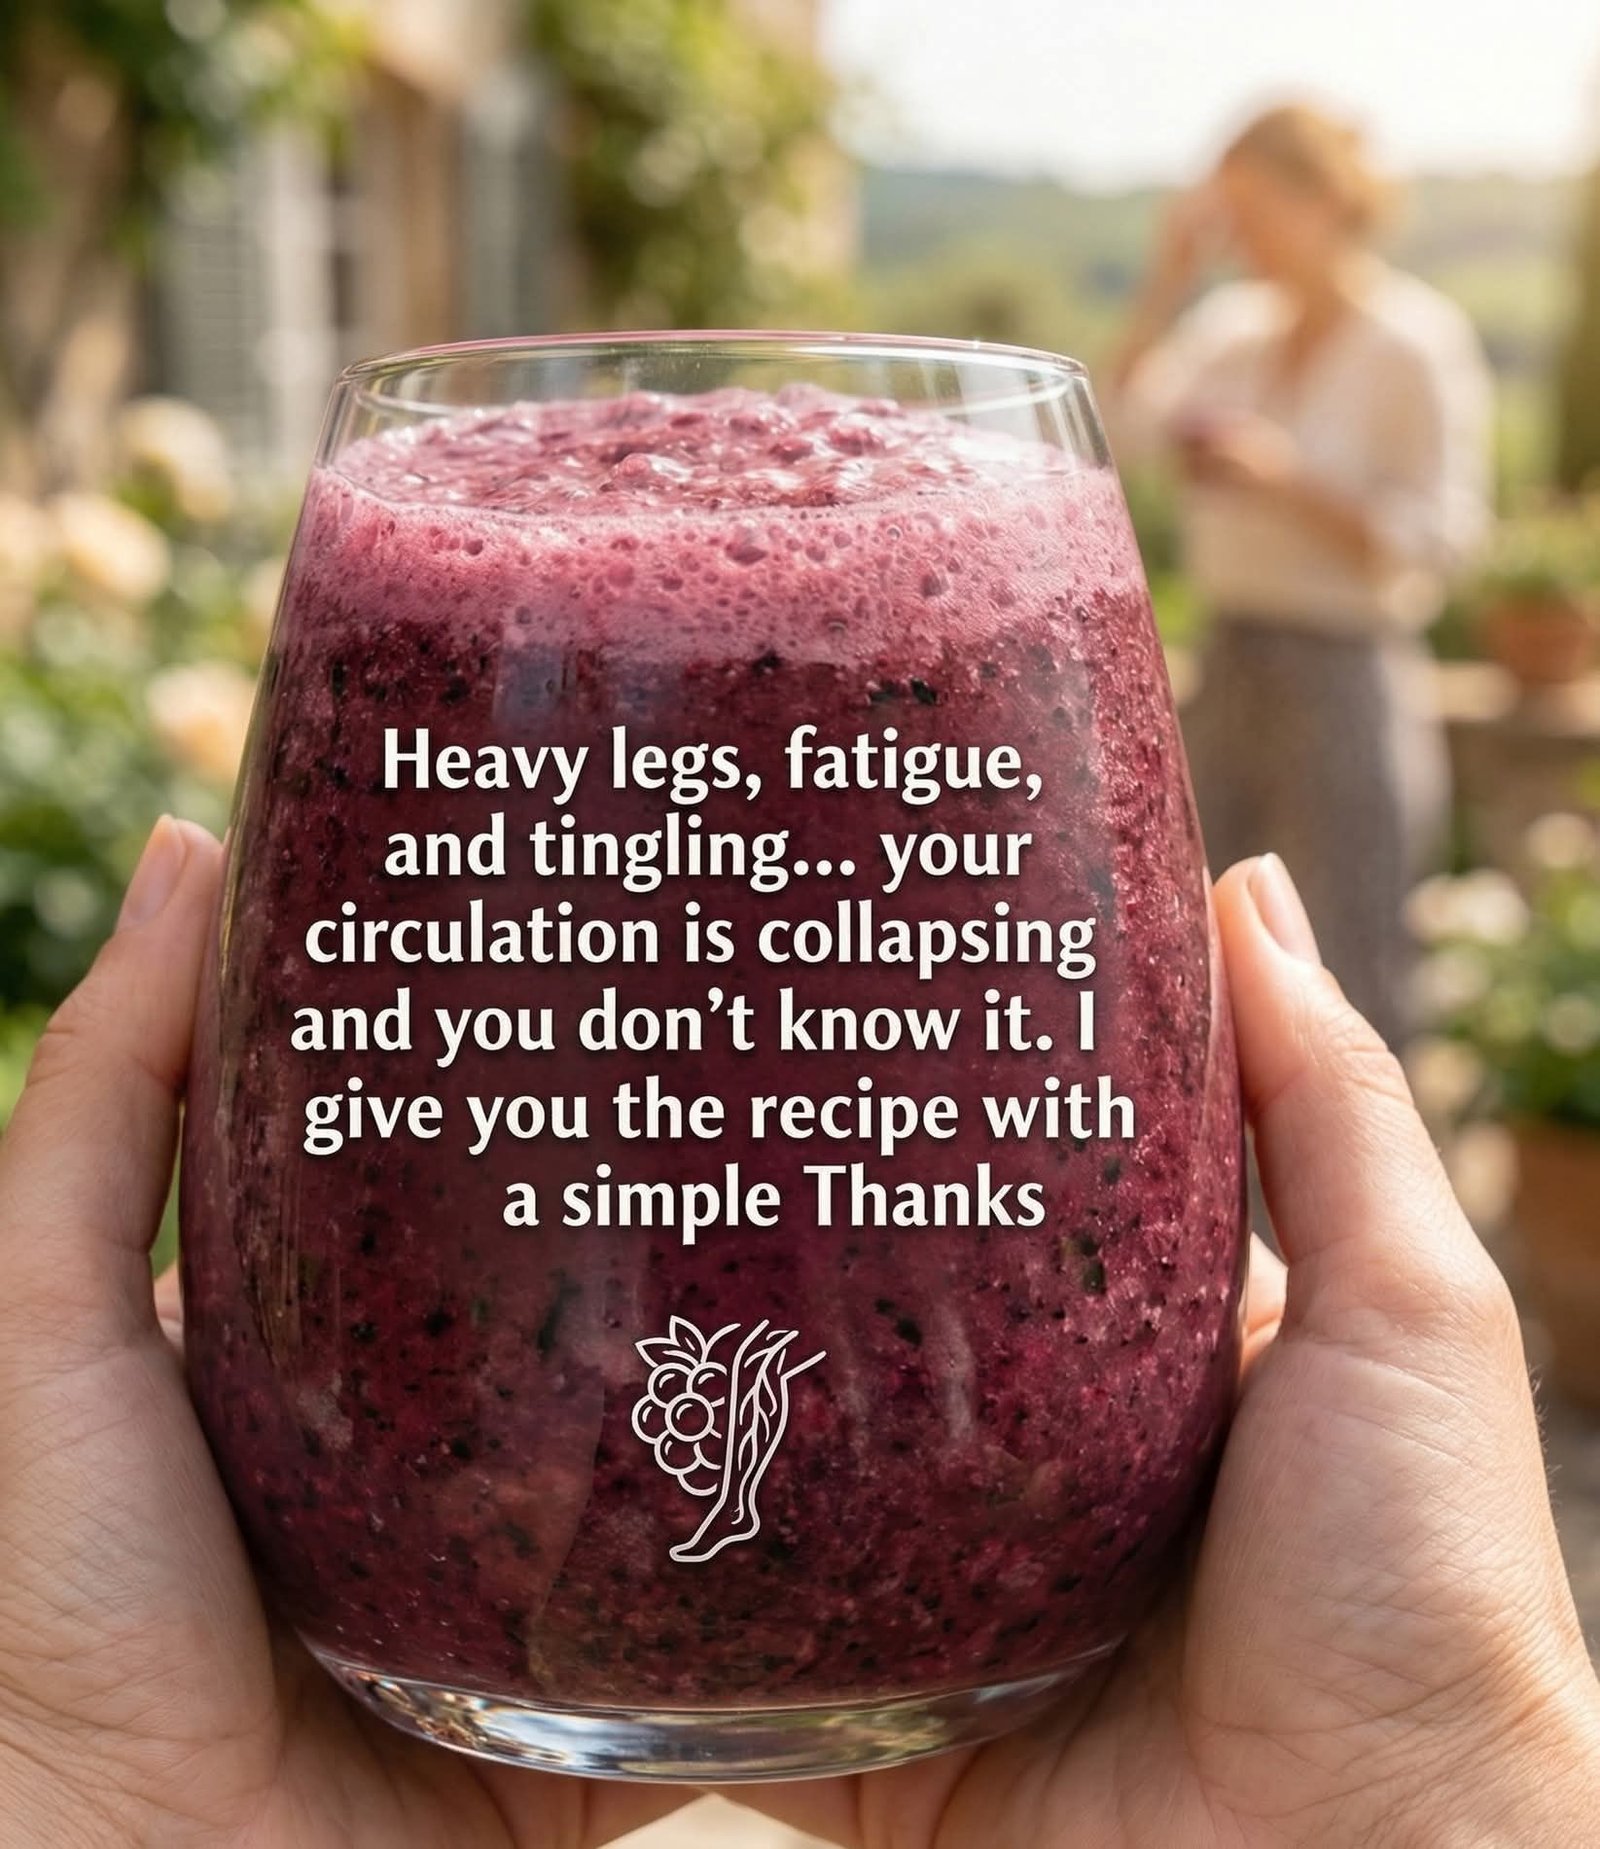
Berry & Beet Vitality Smoothie

Berry & Beet Vitality Smoothie

Yields: 1 Large Serving 🍽️

πŸ›’ Ingredients

  • 1/2 cup Raw beets, peeled and grated ➑️ (High in nitrates for blood flow) πŸ₯—

  • 1 cup Mixed berries (blueberries, raspberries, blackberries) ➑️ (Rich in flavonoids) 🫐

  • 1/2 Orange, peeled ➑️ (Vitamin C helps iron absorption) 🍊

  • 1 tsp Fresh ginger, grated ➑️ (Supports warmth and digestion) 🫚

  • 1 cup Coconut water or plain water ➑️ (For hydration) πŸ’§

  • 1 tbsp Chia seeds or flaxseeds ➑️ (Omega-3s for heart health) 🌾


πŸ‘©β€πŸ³ Step-by-Step Instructions

  1. Prep the Beets ➑️ If you don’t have a high-powered blender, grate the raw beet first. This ensures you don’t end up with crunchy chunks in your drink. πŸ₯—

  2. Combine Ingredients ➑️ Place the berries, beets, orange, and ginger into the blender. πŸŒ€

  3. Add Liquid ➑️ Pour in the coconut water. Start with 1 cup; you can add more later if you prefer a thinner consistency. 🌊

  4. Boost ➑️ Add your chia or flaxseeds. ➑️ ✨

  5. Blend ➑️ Blend on high until the mixture is completely smooth and turns that vibrant deep purple color seen in the photo. πŸŒͺ️

  6. Serve Immediately ➑️ Pour into a glass and enjoy fresh to get the most out of the nutrients. πŸ₯€


❓ Q & A

Q: Why beets for circulation? πŸ₯— A: Beets contain natural nitrates, which the body converts into nitric oxide. This helps relax and widen blood vessels, making it easier for blood to flow. ➑️ πŸ›£οΈ

Q: Can I use cooked beets? πŸ₯£ A: Yes, but raw beets typically contain higher levels of nitrates. If using cooked beets, make sure they aren’t pickled (in vinegar), as that will change the taste significantly! ➑️ 🚫

Q: Is this a replacement for medical treatment? 🩺 A: No. While these ingredients are very healthy, “heavy legs and tingling” can sometimes be signs of more serious issues like DVT or anemia. Think of this smoothie as a delicious “helper,” not a “healer.” ➑️ πŸ₯

Q: How often should I drink this? ⏱️ A: Once a day or a few times a week is a great way to add more fiber and antioxidants to your routine! ➑️ πŸ—“οΈ


Pro-Tip: Add a squeeze of lemon juice at the end to brighten the earthy flavor of the beets! πŸ‹

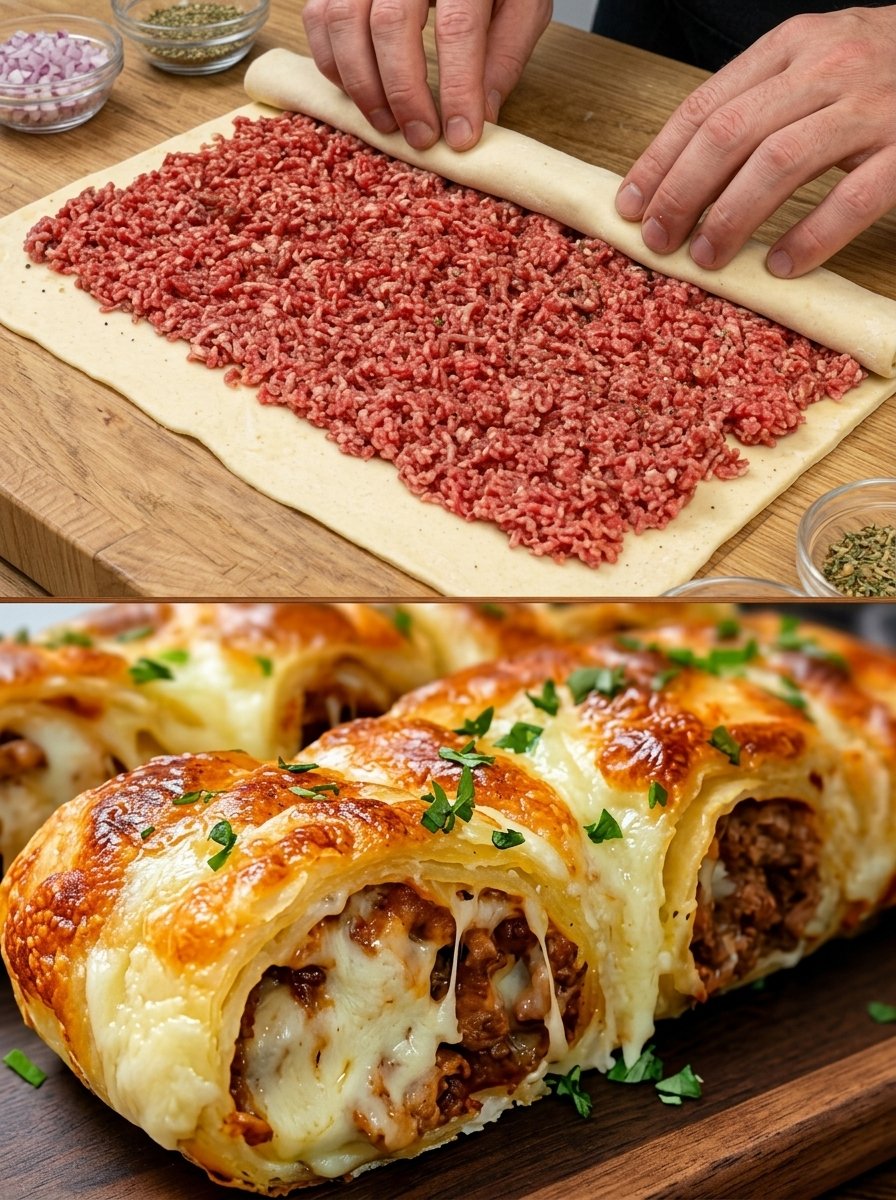
Savory Minced Meat & Cheese Pastry Roll

Savory Minced Meat & Cheese Pastry Roll

A delicious, golden-brown pastry filled with seasoned meat,Β melty cheese, and a surprise touch of chopped eggsΒ for extra richness.

Meat & Seafood

πŸ›’Β Ingredients

  • Puff Pastry:Β 1 large sheet (thawed)Β πŸ₯

  • Minced Meat:Β 300g (Beef or Chicken work best)Β πŸ₯©

  • Butter:Β 1 tbsp (for greasing/brushing) 🧈

  • Aromatics:Β 1 Onion (finely chopped) & 1 tsp Dried Basil 🌿

  • Protein Boost:Β 2 Boiled eggs (finely chopped)Β πŸ₯š

  • Cheese:Β 100g Grated Mozzarella or CheddarΒ πŸ§€

  • Freshness:Β 1 bunch Parsley (chopped) 🌱

  • Seasoning:Β Salt and black pepper to tasteΒ πŸ§‚


πŸ‘©β€πŸ³Β Step-by-Step Instructions

  1. Prep the Meat Filling ➑️ In a pan, sauté the chopped onion with a little oil until soft. Add the minced meat and cook until browned. Season with salt, pepper, and dried basil. Drain any excess fat and let it cool slightly. 🍳

  2. Prepare the Dough ➑️ Roll out your puff pastry sheet on a lightly floured surface or parchment paper.Β πŸ“œ

  3. Layer the Flavors ➑️ Spread the cooked minced meat evenly across the pastry, leaving a small border at the edges. Top with the chopped boiled eggs and half of the chopped parsley. 🌿

  4. Add the Cheese ➑️ Sprinkle the grated cheese generously over the meat and egg layer.Β πŸ§€

  5. Roll It Up ➑️ Carefully roll the pastry tightly (like a Swiss roll) starting from the long edge. Pinch the ends to seal everything inside.Β πŸŒ€

  6. Bake to Golden Perfection ➑️ Place the roll on a greased baking tray. Brush the top with melted butter or an egg wash for extra shine. Bake atΒ 200Β°CΒ for aboutΒ 20–25 minutesΒ until the pastry is puffed and deep golden brown.Β πŸ•’

  7. Final Touch ➑️ Remove from the oven, sprinkle with the remaining fresh parsley, and slice into thick rounds while warm. ✨


❓ Common Questions (Q&A)

Discover more
Eggs
Baked Goods
Desserts

Q: Can I use raw meat directly on the pastry?Β A:Β It is much safer and tastier to cook the meat first. This prevents the pastry from getting soggy from the meat juices and ensures the onions are perfectly soft.Β πŸ₯˜

Q: My pastry isn’t rising, what happened?Β A:Β Make sure your oven is fully preheated before putting the tray in. Puff pastry needs that initial β€œblast” of heat to create those beautiful, flaky layers!Β πŸ”₯

Q: Can I make this ahead of time?Β A:Β You can roll it up and keep it in the fridge (covered) for a few hours before baking. Just bake it fresh when you’re ready to eat! ❄️

Q: What should I serve this with?Β A:Β It pairs perfectly with a crisp green salad or a simple garlic yogurt dip.Β πŸ₯—

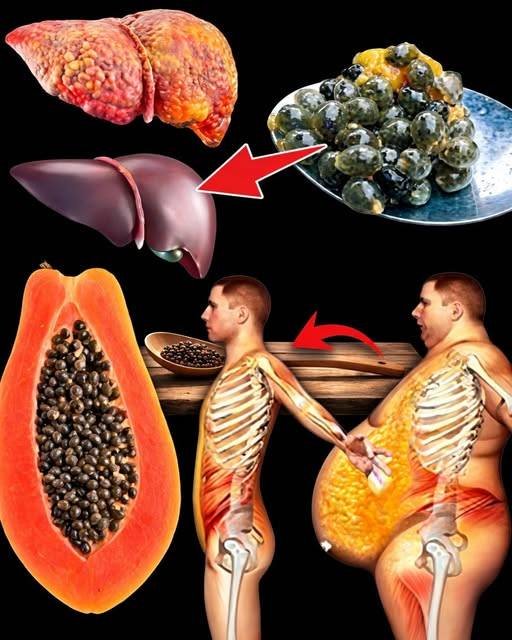
Papaya Seed Digestive Tonic

Papaya Seed Digestive Tonic

A light, refreshing tonic with a slightly peppery taste β€” best enjoyed in small amounts for balance 😊


πŸ›’ Ingredients

➑️ 1 tsp fresh papaya seeds (start with ½ tsp if new)
➑️ 1 cup fresh papaya flesh 🍈
➑️ Β½ cup water or coconut water πŸ₯₯
➑️ Juice of Β½ lemon or lime πŸ‹
➑️ 1 tsp honey (optional) 🍯


πŸ‘©β€πŸ³ Step-by-Step Recipe

πŸ”Ή Step 1: Prepare Seeds

➑️ Scoop seeds from a ripe papaya
➑️ Rinse lightly to clean them


πŸ”Ή Step 2: Add to Blender

➑️ Add papaya seeds
➑️ Add papaya flesh 🍈
➑️ Pour water or coconut water πŸ₯₯
➑️ Add lemon or lime juice πŸ‹


πŸ”Ή Step 3: Blend

➑️ Blend until smooth and well combined πŸ₯€


πŸ”Ή Step 4: Taste & Adjust

➑️ Taste the tonic
➑️ Add honey if you like a little sweetness 🍯


πŸ”Ή Step 5: Serve

➑️ Pour into a glass
➑️ Drink fresh for best flavor and freshness ✨


πŸ’‘ Pro Tips

✨ Start with a small amount of seeds (they are strong in taste)
✨ Use ripe papaya for natural sweetness
✨ Drink 3–4 times a week, not in large amounts


❓ Q & A

Q1: Can papaya seeds help with digestion?
➑️ They may support digestion and help reduce bloating

Q2: Can I drink it every day?
➑️ It’s better to enjoy it a few times per week, not daily

Q3: What do the seeds taste like?
➑️ Slightly bitter and peppery 🌿

Q4: Can I skip honey?
➑️ Yes, it’s optional β€” the papaya adds natural sweetness

Q5: Are there any precautions?
➑️ Use in small amounts and avoid overuse


⚠️ Gentle Note

➑️ Enjoy in moderation for best balance
➑️ Not recommended during pregnancy
➑️ Always pair with a healthy diet

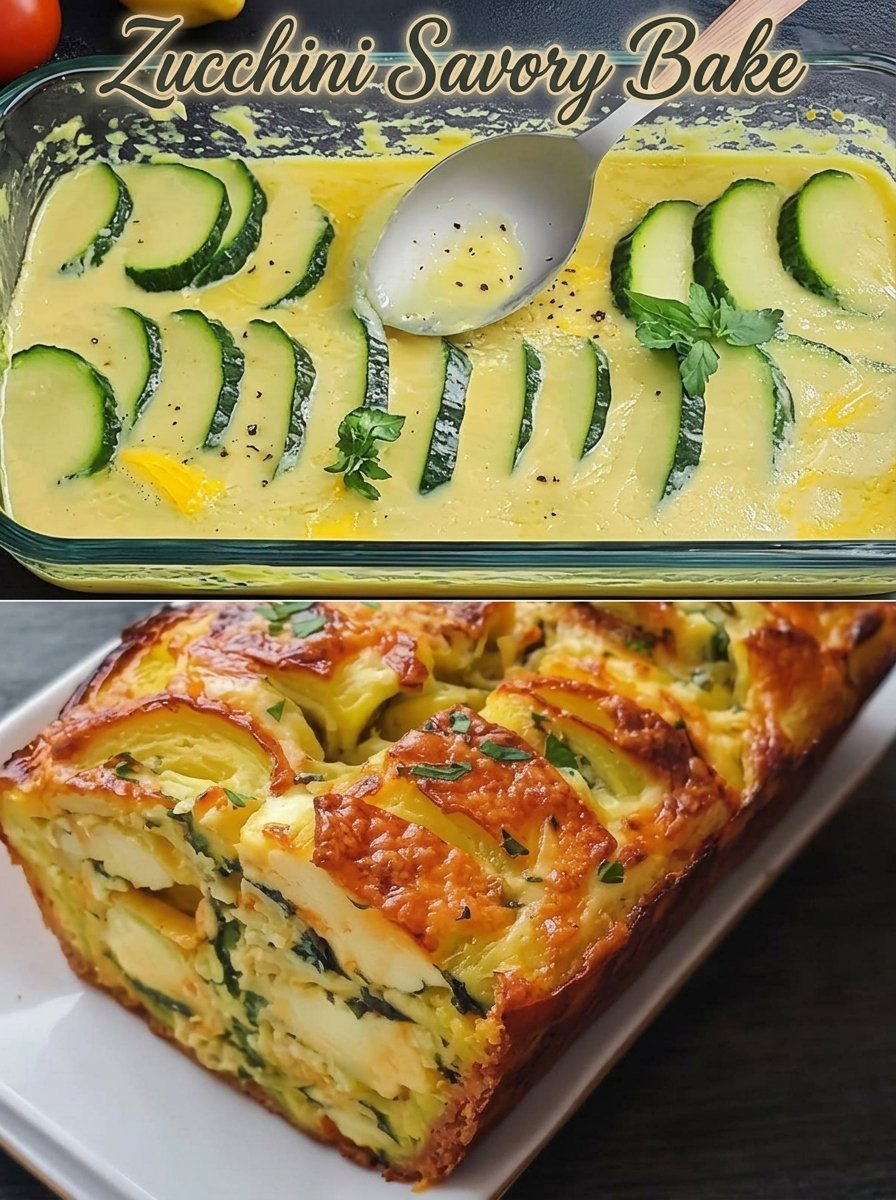
Zucchini Savory Bake (Soft & Cheesy Delight)

Zucchini Savory Bake (Soft & Cheesy Delight)


πŸ›’ Ingredients

➑️ 2 zucchini (sliced)
➑️ Olive oil (for sautéing)
➑️ Salt & black pepper (to taste)
➑️ 4 eggs
➑️ 1 tsp sugar
➑️ 60 ml oil
➑️ 100 ml milk
➑️ 120 g flour
➑️ 11 g baking powder
➑️ 1 medium potato (grated)
➑️ 1 onion (finely chopped)
➑️ 2 tbsp grated Parmesan cheese
➑️ Fresh spreadable cheese (cream cheese or ricotta)
➑️ Extra Parmesan (for topping)


πŸ‘©β€πŸ³ Step-by-Step Recipe

πŸ”Ή Step 1: Prepare Vegetables

➑️ Slice zucchini into thin rounds πŸ₯’
➑️ Grate the potato and lightly squeeze out extra moisture
➑️ Finely chop the onion


πŸ”Ή Step 2: SautΓ© Zucchini

➑️ Heat a little olive oil in a pan
➑️ Add zucchini slices
➑️ Sprinkle salt & black pepper
➑️ Cook for 4–5 minutes until slightly soft and lightly golden ✨
➑️ Set aside to cool


πŸ”Ή Step 3: Prepare Batter

➑️ In a large bowl, crack 4 eggs πŸ₯š
➑️ Add sugar and whisk well
➑️ Pour in oil and milk πŸ₯›
➑️ Mix until smooth


πŸ”Ή Step 4: Add Dry Ingredients

➑️ Add flour and baking powder
➑️ Mix gently until you get a smooth batter (no lumps)


πŸ”Ή Step 5: Combine Everything

➑️ Add sautéed zucchini
➑️ Add grated potato and chopped onion
➑️ Mix everything well πŸ₯„
➑️ Add grated Parmesan cheese πŸ§€


πŸ”Ή Step 6: Assemble

➑️ Grease a baking dish with oil
➑️ Pour half of the mixture
➑️ Spread a layer of fresh spreadable cheese
➑️ Pour the remaining mixture on top


πŸ”Ή Step 7: Final Touch

➑️ Sprinkle extra Parmesan on top πŸ§€βœ¨


πŸ”Ή Step 8: Bake

➑️ Bake in a preheated oven at 180°C (350°F)
➑️ Bake for 35–40 minutes until golden and set
➑️ Let it cool slightly before slicing 😊


πŸ’‘ Pro Tips

✨ Squeeze excess water from zucchini for better texture
✨ Add herbs like parsley for extra flavor 🌿
✨ Serve warm for best taste


❓ Q & A

Q1: Can I skip potato?
➑️ Yes, but potato makes it softer and more filling

Q2: Can I use another cheese?
➑️ Yes! Mozzarella or cheddar works great πŸ§€

Q3: How do I store it?
➑️ Keep in the fridge for up to 2 days 🧊

Q4: Can I make it without oven?
➑️ Yes! Cook in a covered pan on low heat like a thick pancake 🍳

Q5: How do I know it’s done?
➑️ The top turns golden and a toothpick comes out clean βœ