Easy & Healthy 5-Ingredient Ice Cream

Easy & Healthy 5-Ingredient Ice Cream

This Easy & Healthy 5-Ingredient Ice Cream is creamy, naturally sweet, refreshing, and incredibly simple to make. Made with frozen fruit, yogurt, and natural ingredients, it tastes like soft-serve ice cream without heavy cream or refined sugar.

Prep Time & Servings

Prep Time: 10 minutes

Freeze Time: Optional 1 hour

Total Time: 10–70 minutes

Servings: 4

Ingredients

2 frozen bananas

1 cup frozen berries

½ cup Greek yogurt

1 tablespoon honey or maple syrup

1 teaspoon vanilla extract

Optional Toppings

Fresh berries

Dark chocolate chips

Crushed nuts

Coconut flakes

Chia seeds

Granola

How to Make Healthy 5-Ingredient Ice Cream

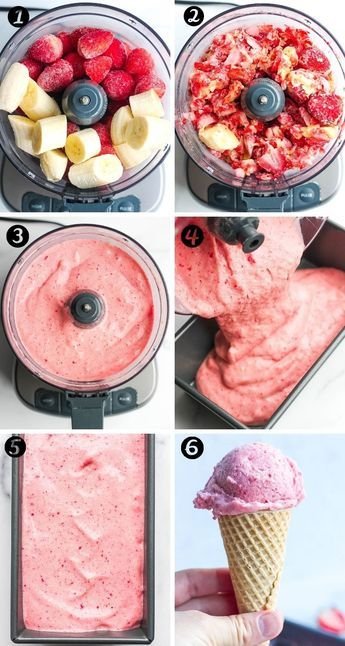
Step 1: Blend the Ingredients

Add to a blender or food processor:

frozen bananas

frozen berries

Greek yogurt

honey

vanilla

Blend until:

smooth

thick

creamy

Scrape down the sides as needed.

Step 2: Adjust Texture

If too thick:

add a small splash of milk

If too soft:

freeze for 30–60 minutes

Step 3: Serve

Serve immediately for soft-serve texture.

Or freeze slightly for scoopable ice cream.

Add your favorite toppings.

Helpful Tips

Use Frozen Bananas

They create the creamy ice cream texture naturally.

Blend Slowly

This prevents overheating the mixture.

Freeze for Firmer Texture

Short freezing gives classic ice cream consistency.

Use Ripe Bananas

Riper bananas make the dessert naturally sweeter.

Frequently asked questions 

Can I make this dairy-free?

Yes, use dairy-free yogurt.

How long does it last?

About 2 weeks frozen.

Can I use fresh fruit?

Frozen fruit works best for creamy texture.

Do I need an ice cream maker?

No.

Is it refined sugar-free?

Yes, if using only fruit or maple syrup.

Nutritional Information

Calories: 160

Protein: 5g

Carbohydrates: 30g

Fiber: 4g

Fat: 2g

Saturated Fat: 1g

Sugar: 20g

Sodium: 35mg
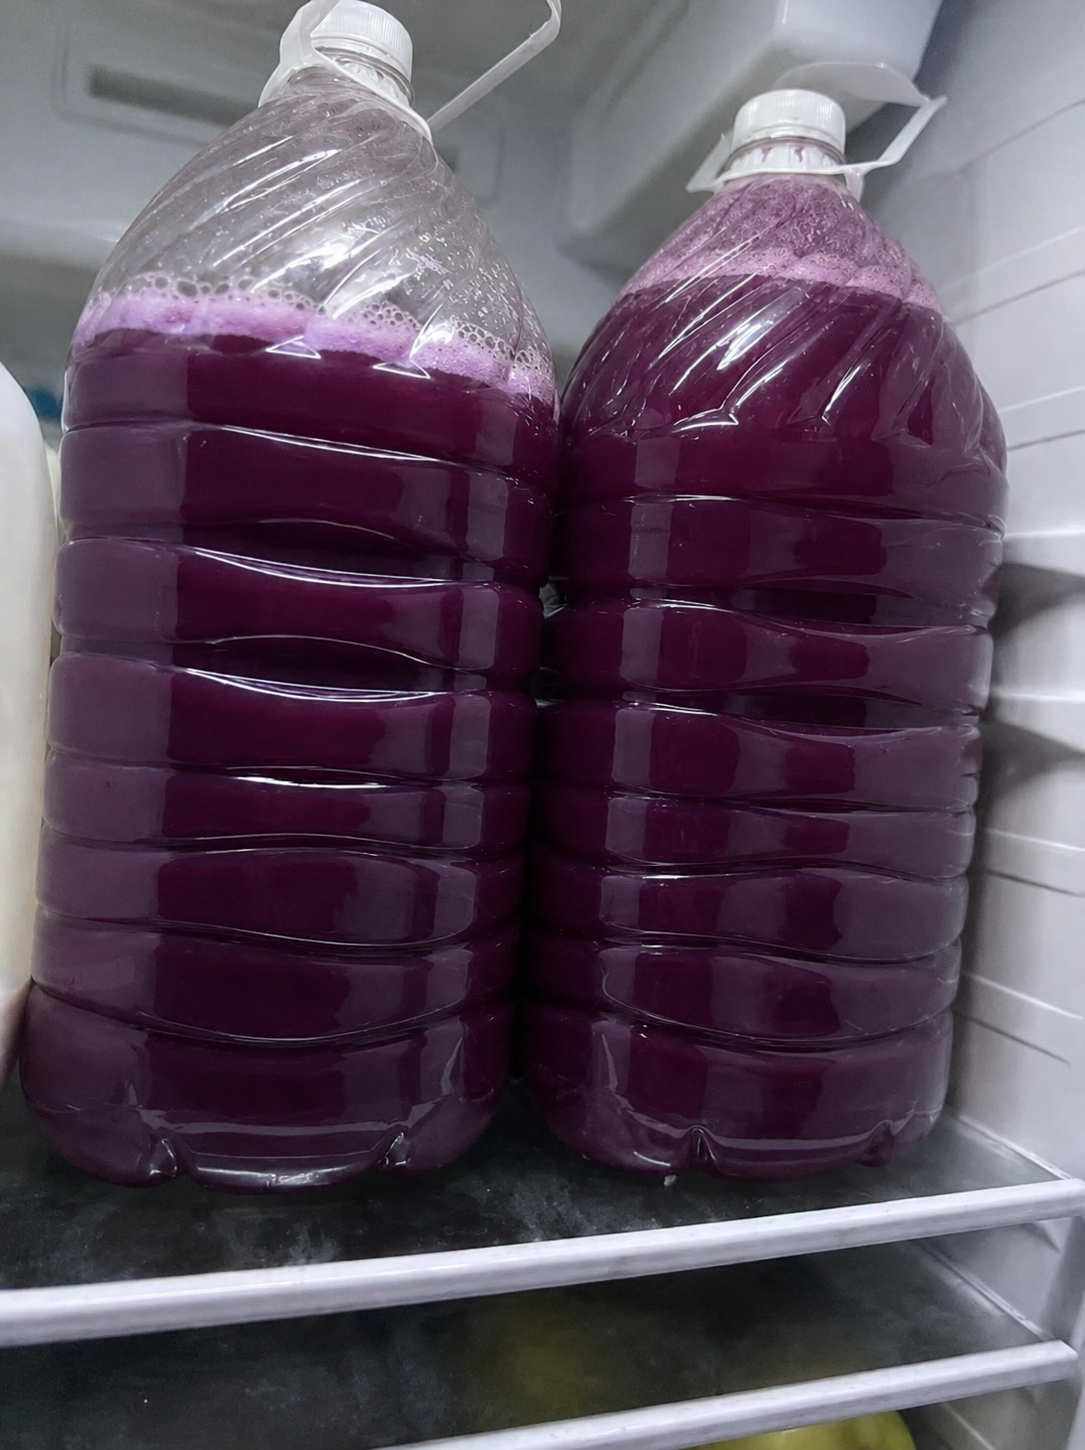
Purple Cabbage Juice 💜🥤

Purple Cabbage Juice 💜🥤

A vibrant homemade drink packed with refreshing flavor and beautiful natural color!

🛒 Ingredients

  • 1 medium purple cabbage, chopped
  • 6 cups water
  • 1 cup sugar or honey
  • 2 tbsp lemon juice
  • 1 tsp vanilla extract
  • Small piece ginger, sliced
  • Ice cubes

👩‍🍳 Step-by-Step Recipe

🥬 Step 1: Prepare the Cabbage

➡️ Wash the purple cabbage thoroughly.
➡️ Chop into small pieces for easier cooking.


💜 Step 2: Boil the Cabbage

➡️ Add cabbage and water to a large pot.
➡️ Bring to a boil over medium heat.
➡️ Cook for 20–25 minutes until the water turns deep purple.


🌀 Step 3: Blend the Mixture

➡️ Allow the cabbage mixture to cool slightly.
➡️ Blend the cabbage with some cooking liquid until smooth.


🥤 Step 4: Strain the Juice

➡️ Pour through a fine sieve or cheesecloth.
➡️ Collect the smooth purple juice in a bowl or pot.


🍋 Step 5: Add Flavor

➡️ Stir in sugar or honey, lemon juice, vanilla extract, and ginger.
➡️ Mix well until fully dissolved.


❄️ Step 6: Chill & Serve

➡️ Pour into clean bottles or jars.
➡️ Refrigerate until cold.
➡️ Serve over ice cubes and enjoy!


🌟 Tips

✅ Lemon juice makes the purple color brighter.
✅ Use honey for a more natural sweetness.
✅ Add sparkling water for a fizzy version.
✅ Serve extra cold for the best flavor.


💪 Benefits

✔️ Rich in antioxidants
✔️ High in vitamin C
✔️ Helps support hydration
✔️ Naturally colorful without artificial dyes
✔️ May support digestion


🥗 Nutrition (Per Serving)

  • Calories: ~70
  • Carbs: 18g
  • Protein: 1g
  • Fat: 0g
  • Fiber: 2g

❓Q/A

❓Why is the juice purple?

➡️ Purple cabbage contains natural pigments called anthocyanins.

❓Can I use less sugar?

➡️ Yes! Adjust sweetness to your taste.

❓How long does it last?

➡️ Store refrigerated for up to 4 days.


✨ Conclusion

This Purple Cabbage Juice is colorful, refreshing, and easy to make. Perfect for parties, family gatherings, or a unique homemade drink everyone will talk about!

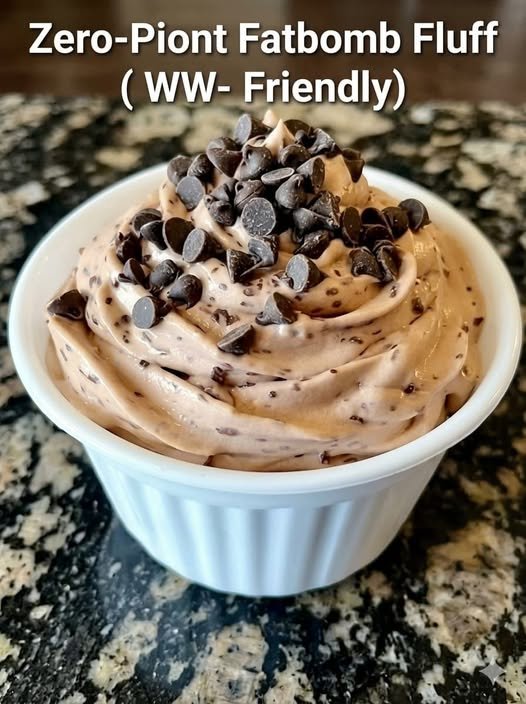
Zero Point Fatbomb Fluff

Zero Point Fatbomb Fluff 🍫✨

Ingredients 🍴

  • 1 cup Greek yogurt
  • 2 tbsp cocoa powder
  • 2 tbsp sugar-free sweetener or honey
  • 2 tbsp mini chocolate chips

Detailed Procedure 👩‍🍳

Step 1: Prepare the Mixing Bowl 🥣

➡️ Take a medium bowl and make sure it is clean and dry.
➡️ Cold bowls help the fluff stay thick and creamy.


Step 2: Add the Yogurt 🍦

➡️ Spoon the Greek yogurt into the bowl.
➡️ Stir it slowly for a few seconds to make it smooth.


Step 3: Mix the Chocolate Flavor 🍫

➡️ Add cocoa powder to the yogurt.
➡️ Add the sweetener or honey.
➡️ Mix very well using a whisk or spoon until the color becomes fully chocolatey with no dry powder left.


Step 4: Make It Fluffy ✨

➡️ Whisk the mixture for about 2–3 minutes.
➡️ The more you whisk, the lighter and fluffier it becomes.
➡️ Scrape the sides of the bowl while mixing so everything blends evenly.


Step 5: Add Chocolate Chips 🍪

➡️ Fold in half of the chocolate chips gently.
➡️ Do not overmix or the fluff may lose some airiness.


Step 6: Chill the Fluff ❄️

➡️ Place the bowl in the fridge for 15–20 minutes.
➡️ Chilling helps the texture become thicker and creamier.


Step 7: Serve & Decorate 🍴

➡️ Spoon the fluff into a serving bowl or ramekin.
➡️ Sprinkle the remaining chocolate chips on top.
➡️ Serve cold and enjoy the creamy chocolate texture.


Quick Q&A ❓

Can I freeze it?

✅ Yes, freeze for 1–2 hours for an ice-cream-like texture.

Can I use regular yogurt?

✅ Yes, but Greek yogurt makes it thicker and creamier.

How long does it last?

✅ Store in the fridge for up to 2 days.

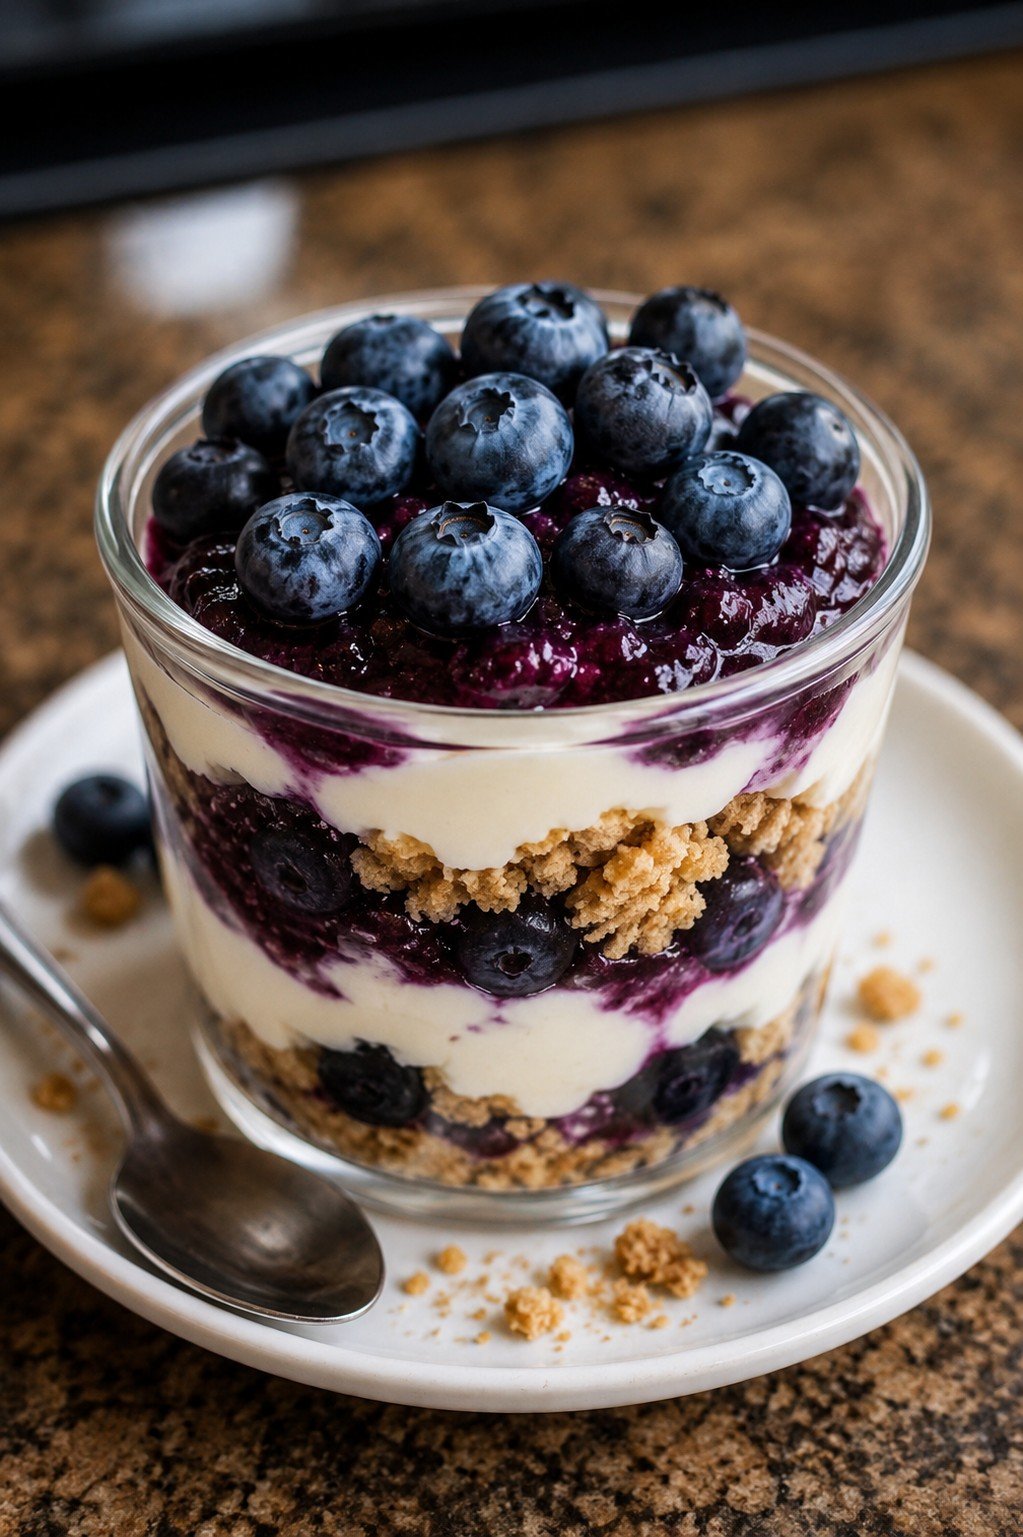
Baked Blueberry Cottage Cheese Breakfast Bowls

Baked Blueberry Cottage Cheese Breakfast Bowls 🫐🥣

These creamy blueberry breakfast bowls are soft, lightly sweet, and packed with juicy blueberries in every bite. Perfect for cozy mornings, meal prep, or a healthy dessert!

Ingredients 🥄

  • 1 cup cottage cheese
  • 2 eggs
  • 2 tbsp honey or maple syrup
  • 1 tsp vanilla extract
  • 1 cup blueberries
  • ½ cup oats or granola

Step-by-Step Instructions 👩‍🍳

🫐 Step 1: Prepare the Blueberries

  • Wash the blueberries gently under cool water.
  • Pat them dry with a paper towel.

👉 Keep a few extra blueberries for topping later.


🥣 Step 2: Make the Creamy Mixture

  • In a mixing bowl, add:
    • cottage cheese
    • eggs
    • honey
    • vanilla
  • Whisk everything together until creamy and smooth.

✨ The mixture should look thick and creamy.


🌾 Step 3: Add the Oats

  • Stir the oats or granola into the mixture.
  • Mix gently so everything combines evenly.

👉 This gives the bowls a soft baked texture.


🍇 Step 4: Fold in Blueberries

  • Add most of the blueberries into the bowl.
  • Carefully fold them into the batter so they don’t burst too much.

🧈 Step 5: Prepare Baking Dish

  • Lightly grease small ramekins or one baking dish.
  • Pour the mixture evenly into the dishes.
  • Sprinkle extra blueberries on top.

🔥 Step 6: Bake

  • Bake at 175°C (350°F) for about 25–30 minutes.

✅ The top should look lightly golden and the center should be set.


❄️ Step 7: Cool & Serve

  • Let the bowls cool for 5 minutes.
  • Add extra granola or honey on top if desired.

✨ Serve warm for the best cozy flavor.


Quick Q&A ❓

Can I use frozen blueberries?

Yes 👍 No need to thaw them first.

Is this good for meal prep?

Absolutely 😊 Store in the fridge for up to 3 days.

Can I make it sweeter?

Yes 🍯 Add a little extra honey or maple syrup.

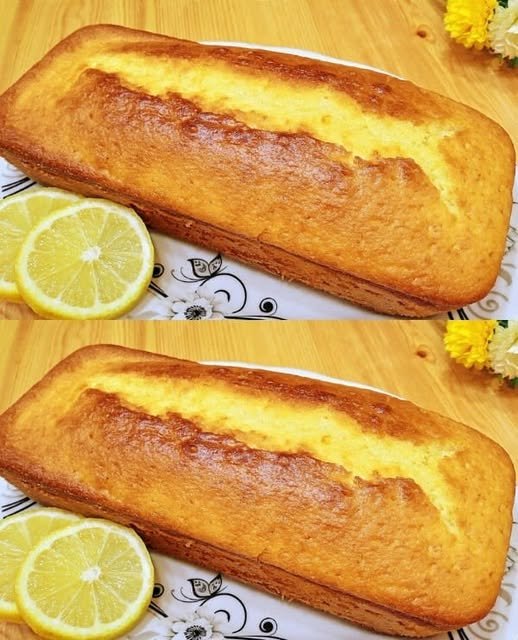
Easy Lemon Cake 🍋🍰

Easy Lemon Cake 🍋🍰

Soft, fluffy, and full of fresh lemon flavor, this easy lemon cake is perfect for tea time, breakfast, or dessert. Even beginners can make it perfectly on the first try!

Ingredients 🥄

  • 4 eggs
  • 1 cup sugar
  • Juice & zest of 1 lemon
  • 1 cup vegetable oil
  • 4/5 cup milk
  • 4 tsp baking powder
  • 2½ cups all-purpose flour

Step-by-Step Instructions 👩‍🍳

🥚 Step 1: Beat the Eggs & Sugar

  • Crack the eggs into a large mixing bowl.
  • Add the sugar.
  • Beat with a whisk or mixer for 3–4 minutes until light, pale, and slightly fluffy.

👉 This helps make the cake soft and airy.


🍋 Step 2: Add Lemon Flavor

  • Grate the lemon zest carefully.
  • Squeeze the lemon juice.
  • Add both to the egg mixture.

✨ The zest gives the cake a strong fresh lemon aroma.


🥛 Step 3: Add Wet Ingredients

  • Pour in the vegetable oil and milk.
  • Mix slowly until smooth and fully combined.

👉 Do not overmix.


🌾 Step 4: Add Dry Ingredients

  • In another bowl, combine:
    • flour
    • baking powder
  • Gradually add the dry ingredients into the wet mixture.
  • Stir gently until the batter becomes smooth with no dry flour left.

✨ The batter should be thick but pourable.


🧈 Step 5: Prepare the Pan

  • Grease a loaf pan with oil or butter.
  • Lightly dust with flour to prevent sticking.

🔥 Step 6: Bake the Cake

  • Pour the batter into the prepared pan.
  • Bake at 170°C (340°F) for about 40–45 minutes.

✅ The cake is ready when:

  • the top is golden
  • a toothpick inserted in the center comes out clean

❄️ Step 7: Cool & Serve

  • Let the cake cool for 10 minutes before removing from the pan.
  • Slice and enjoy with tea or coffee ☕🍋

Quick Q&A ❓

Can I use butter instead of oil?

Yes 👍 Melted butter works well too.

How do I make it extra lemony?

Add a little extra lemon zest on top after baking.

Can beginners make this?

Absolutely 😊 This is one of the easiest homemade cakes.

Lemon & Ginger Wellness Tonic

Lemon & Ginger Wellness Tonic

A refreshing homemade wellness tonic packed with lemon, ginger, turmeric, and apple cider vinegar to help support digestion, hydration, and natural energy. Perfect as a morning wellness shot or soothing warm drink.

🛒 Ingredients

  • 2 large Lemons (washed well) 🍋
  • 3-inch piece Fresh ginger root (peeled & sliced) 🌿
  • 1 tsp Ground turmeric (or 1-inch fresh turmeric root) ✨
  • 1 tbsp Apple cider vinegar (with “the mother”)
  • 1 pinch Black pepper
  • 1 cup Filtered water 💧
  • Optional: 1 tsp Raw honey or natural sweetener 🍯

👩‍🍳 Step-by-Step Instructions

1️⃣ Prepare the Ingredients

Slice the lemons into thin rounds.
Peel and grate the ginger (and turmeric if using fresh) to release maximum flavor and nutrients.

2️⃣ Blend or Steep

🥤 Method A — Smoothie Style

Add lemons, ginger, turmeric, black pepper, and water to a blender. Blend until smooth.

☕ Method B — Infusion Style

Simmer ginger and turmeric in water for about 10 minutes.
Remove from heat, cool slightly, then stir in fresh lemon juice and apple cider vinegar.


3️⃣ Strain (Optional)

For a smoother tonic, strain the mixture through a fine-mesh strainer or cheesecloth into a clean jar or bottle. Press the solids well to extract all the liquid.


4️⃣ Store

Pour into a glass bottle or airtight jar and refrigerate.
Keeps fresh for about 5–7 days.


🥄 How to Use

  • Take 1–2 tablespoons daily as a wellness shot.
  • Or mix into warm (not boiling) water for a soothing tea.

💡 Pro Tip

Drinking this tonic first thing in the morning may help wake up your digestive system and keep you feeling refreshed and hydrated throughout the day.