Carnivore Zero Carb Pancakes Recipe

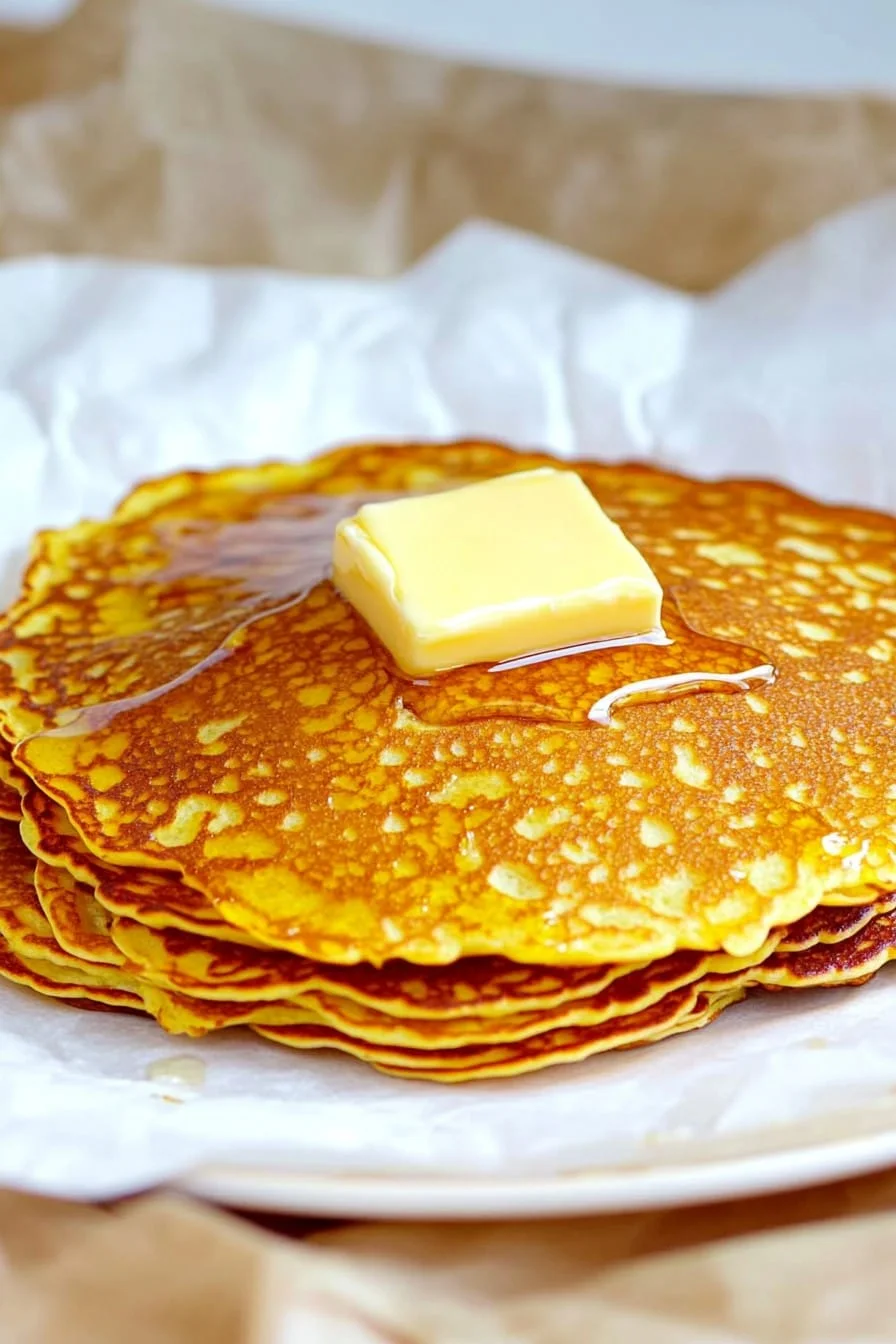
These Carnivore Zero Carb Pancakes are a perfect breakfast option for anyone on a strict carnivore diet. Made with animal-based ingredients only, these pancakes are fluffy, rich, and packed with protein, while containing zero carbs. They’re ideal for those who want to indulge in a breakfast classic without breaking their diet.

Table of Contents

Ingredients:

  • 4 large eggs (pasture-raised if possible)
  • 2 oz cream cheese (softened)
  • 1/4 cup heavy cream (for a creamier texture)
  • 2 tbsp beef tallow or butter (for cooking)
  • 1/4 tsp salt
  • 1/4 tsp vanilla extract (optional, for flavor)
  • 1/2 tsp baking powder (optional, for fluffiness)
  • 1 tbsp collagen peptides (optional, for added protein and texture)
  • 2 tbsp shredded mozzarella cheese (optional, for extra fluffiness and richness)

Instructions:

  1. Prepare the Pancake Batter:
    • In a medium bowl, crack the eggs and whisk them together until fully combined.
    • Add the softened cream cheese to the eggs and mix until smooth. If the cream cheese is too firm, you can microwave it for a few seconds to soften it up.
    • Stir in the heavy cream and vanilla extract (if using) to add moisture and flavor. Add the salt and mix everything well.
    • If you want fluffier pancakes, add the baking powder. You can also add the collagen peptides for extra protein and a smooth texture. Lastly, mix in the shredded mozzarella cheese if using for added fluffiness and richness.
  2. Heat the Pan:
    • Place a skillet or griddle on medium heat and add the beef tallow or butter. Let it melt and coat the bottom of the pan evenly. You want a non-stick surface, so make sure the fat is spread out.
  3. Cook the Pancakes:
    • Pour a small amount of the pancake batter (about 1/4 cup) into the hot skillet. Use a spoon or spatula to gently spread the batter into a round shape.
    • Cook the pancakes for about 2-3 minutes on the first side until bubbles form on top and the edges start to set. Flip the pancakes gently using a spatula and cook for another 2-3 minutes on the other side, until golden brown and cooked through.
  4. Serve:
    • Once the pancakes are cooked, transfer them to a plate. You can stack them up and serve them as is, or drizzle with more melted butter if you like.
    • For a savory twist, top with crispy bacon or a dollop of whipped cream cheese.

Optional Toppings and Variations:

  • If you tolerate dairy, you can top your pancakes with a little extra cheese or serve them with cooked bacon for a more filling breakfast.
  • For a slight sweetness (if you follow a less strict carnivore approach), consider adding a few drops of stevia or erythritol to the batter, though this is optional.

These Carnivore Zero Carb Pancakes are easy to make, rich in flavor, and will keep you satisfied without straying from your carnivore lifestyle. Enjoy them as a protein-packed breakfast or even a quick meal during the day!

🍑 Fresh Peach Fritters with Vanilla Glaze

Golden, crispy on the outside, fluffy and peach-packed on the inside — these fresh peach fritters are the ultimate summer treat.

Prep Time: 15 minutes
Cook Time: 15 minutes
Total Time: 30 minutes
Yield: 12 fritters
Calories: ~210 per fritter

🛒 Ingredients

Fritter Batter:

  • 1½ cups all-purpose flour

  • ¼ cup granulated sugar

  • 2 tsp baking powder

  • ½ tsp salt

  • ½ tsp ground cinnamon

  • ⅔ cup milk

  • 2 large eggs

  • 1 tsp vanilla extract

  • 2 tbsp melted butter

  • 1½ cups fresh peaches, peeled and diced

  • Vegetable oil for frying

Vanilla Glaze:

  • 1 cup powdered sugar

  • 2 tbsp milk

  • ½ tsp vanilla extract

👩‍🍳 Instructions

1. Mix Dry Ingredients

In a large bowl, whisk together the flour, sugar, baking powder, salt, and cinnamon. Set aside.

2. Mix Wet Ingredients

In a separate bowl, beat together the milk, eggs, vanilla extract, and melted butter until well combined.

3. Combine Wet & Dry

Add the wet mixture to the dry ingredients. Stir until just combined — don’t overmix to keep the fritters light and airy.

4. Fold in Peaches

Gently fold in the diced fresh peaches. The batter will be thick and chunky.

5. Heat Oil for Frying

In a deep skillet or pot, heat oil to 350°F (175°C). Use a thermometer for accuracy.

6. Fry the Fritters

Using a large spoon or cookie scoop, drop dollops of batter into the hot oil, a few at a time. Avoid overcrowding the pan. Fry each side for 2–3 minutes or until golden brown and cooked through.

7. Drain and Cool

Remove fritters with a slotted spoon and place on a paper towel-lined plate to drain.

8. Make the Glaze

Whisk together powdered sugar, milk, and vanilla until smooth. Adjust the milk for desired consistency.

9. Glaze and Serve

Drizzle glaze over warm fritters or dip them directly into the glaze. Let sit briefly to allow the glaze to set.

💡 Tips for Perfect Fritters

  • Use firm-ripe peaches for best texture — overly soft ones can make the batter too wet.

  • Don’t overcrowd the frying pan. Too many fritters at once will lower the oil temperature and affect crispiness.

  • If you prefer less sweetness, dust with powdered sugar instead of glazing.

  • Add a dash of nutmeg or cardamom for a spiced twist!

📦 Storage & Reheating

  • Store: Keep in an airtight container at room temp for 1 day or refrigerate for up to 3 days.

  • Reheat: Warm in a 300°F oven for 5–7 minutes or air fry briefly for that fresh-out-of-the-fryer crisp.

🌟 Make It Your Own

  • Swap peaches for nectarines, apples, or blueberries depending on the season.

  • Add chopped pecans or walnuts to the batter for extra crunch.

  • Serve with whipped cream or a scoop of vanilla ice cream for an indulgent dessert.

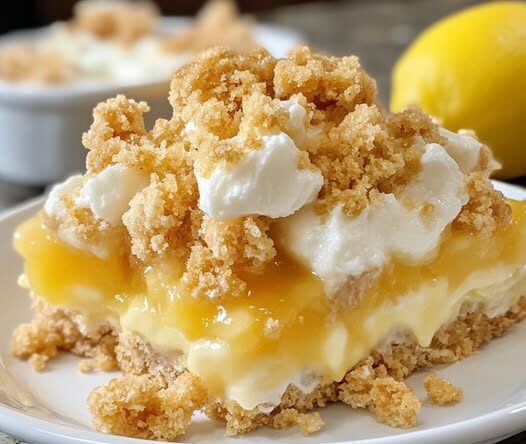
Sugar Cookie Lemonade Crumble Bars

A sunny, tangy twist on classic lemon bars — buttery sugar cookie crust, zesty lemonade filling, and a golden crumble topping.

Prep Time: 15 minutes
Cook Time: 30–35 minutes
Total Time: 50 minutes
Servings: 9–12

Ingredients

For the Sugar Cookie Base:

  • All-purpose flour – 1 ½ cups

  • Baking powder – ½ tsp

  • Salt – ¼ tsp

  • Unsalted butter – ½ cup, softened

  • Granulated sugar – ½ cup

  • Brown sugar – ¼ cup

  • Egg – 1 large

  • Vanilla extract – 1 tsp

For the Lemonade Filling:

  • Freshly squeezed lemon juice – 1 cup

  • Granulated sugar – ½ cup

  • All-purpose flour – ¼ cup

  • Salt – ¼ tsp

  • Eggs – 3 large

  • Unsalted butter – 2 tbsp, melted

For the Crumble Topping:

  • All-purpose flour – ½ cup

  • Granulated sugar – ½ cup

  • Unsalted butter – ¼ cup, cold and cubed

  • (Optional) Extra granulated sugar – ¼ cup for sprinkling

Instructions

  1. Prep the pan:
    Preheat oven to 350°F (175°C). Grease or line an 8×8-inch baking dish with parchment paper for easy removal.

  2. Make the cookie base:
    In a medium bowl, whisk together flour, baking powder, and salt. In a separate bowl, beat softened butter with granulated and brown sugars until creamy. Mix in the egg and vanilla. Gradually add dry ingredients until just combined. Press evenly into the bottom of the pan.

  3. Prepare the lemonade filling:
    Whisk lemon juice, sugar, flour, and salt in a bowl until smooth. Add eggs one at a time, whisking well after each addition. Stir in melted butter.

  4. Assemble:
    Pour the filling over the cookie crust.

  5. Make the crumble topping:
    Combine flour, sugar, and cold cubed butter in a bowl. Use a pastry cutter or your fingers to form coarse crumbs. Sprinkle evenly over the lemon filling.

  6. Bake:
    Bake for 30–35 minutes, until the filling is set and the crumble topping is golden brown.

  7. Cool & serve:
    Let cool completely before slicing into bars. Optionally, sprinkle with extra sugar for added sweetness.

Quick Notes & Pro Tips

  • For extra tang: Add lemon zest to the filling for a bolder lemon punch.

  • Crumble texture: Use very cold butter for a crunchier crumble topping.

  • Make-ahead: These bars taste even better the next day once flavors meld.

Why You’ll Love It

These bars combine sweet, tangy, and buttery layers into a perfect treat for picnics, bake sales, or a refreshing dessert after dinner.

Serving Suggestions

  • Dust with powdered sugar for a classic lemon bar look.

  • Serve chilled with a dollop of whipped cream for a creamy contrast.

Storage & Make-Ahead

  • Refrigerate: Store in an airtight container for up to 5 days.

  • Freeze: Wrap bars individually and freeze for up to 2 months. Thaw overnight in the fridge.

FAQs

Q: Can I use bottled lemon juice?
A: Fresh is best for bright flavor, but bottled juice works in a pinch.

Q: Can I double the recipe?
A: Yes! Use a 9×13-inch pan and adjust baking time to 35–40 minutes.

Q: Can I make these dairy-free?
A: Substitute butter with vegan butter or coconut oil for a dairy-free version.

Would you like me to create a “pink lemonade version” with raspberries or a “glazed version” with a sweet lemon drizzle on top?

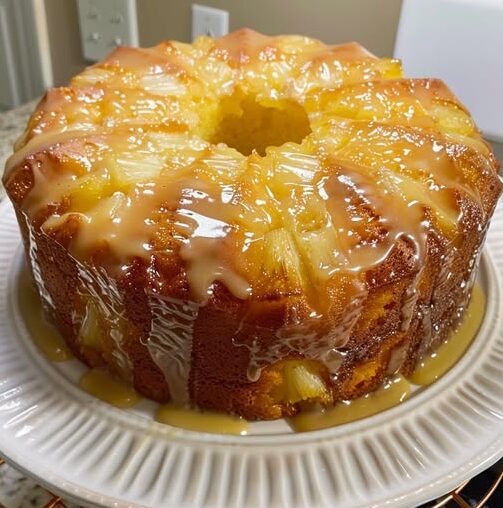
Pineapple Sour Cream Bundt Cake

A moist, tropical Bundt cake loaded with crushed pineapple and topped with a sweet pineapple glaze — perfect for holidays, potlucks, or just because.

Prep Time: 20 minutes
Cook Time: 60–70 minutes
Total Time: 1 hour 30 minutes
Servings: 12

Ingredients

For the Cake:

  • Unsalted butter – 1 cup (2 sticks), softened

  • Granulated sugar – 2 cups

  • Eggs – 4 large

  • Vanilla extract – 1 tsp

  • Almond extract – 1 tsp (optional for extra depth)

  • All-purpose flour – 3 cups

  • Baking powder – ½ tsp

  • Salt – ½ tsp

  • Sour cream – 1 cup

  • Crushed pineapple – 1 can (20 oz), well-drained

  • Pineapple juice – ¼ cup (reserved from can or added separately)

For the Glaze:

  • Powdered sugar – 1 cup

  • Pineapple juice – 2–3 tbsp (adjust for drizzling consistency)

  • Melted butter – 1 tbsp

  • Vanilla extract – ½ tsp

Instructions

  1. Prep the oven & pan:
    Preheat to 325°F (163°C). Grease and flour a 10-inch Bundt or tube pan thoroughly, making sure every crevice is coated.

  2. Cream the butter & sugar:
    In a large bowl, cream together softened butter and sugar until light and fluffy, about 4–5 minutes.

  3. Add eggs & extracts:
    Beat in eggs one at a time, mixing well after each. Stir in vanilla and almond extract.

  4. Mix dry ingredients:
    In a separate bowl, whisk together flour, baking powder, and salt.

  5. Combine wet & dry:
    Gradually add the dry mixture to the creamed butter mixture, alternating with sour cream. Begin and end with the dry mixture. Fold in drained crushed pineapple and pineapple juice gently.

  6. Bake:
    Pour batter into the prepared pan, tapping lightly to remove air bubbles. Bake for 60–70 minutes, or until a toothpick inserted in the center comes out clean.

  7. Cool & glaze:
    Let the cake cool in the pan for 10–15 minutes before inverting onto a wire rack. Cool completely. Whisk glaze ingredients until smooth, then drizzle over the cooled cake.

Quick Notes & Pro Tips

  • Avoid soggy cake: Be sure to drain pineapple well before adding.

  • Extra flavor: Toasted coconut or chopped macadamia nuts make a fantastic addition to the batter or glaze topping.

  • Bundt pan tip: Grease and flour thoroughly to prevent sticking, especially around intricate designs.

Why You’ll Love It

This cake is moist, fluffy, and tropical with a subtle tang from sour cream and the perfect amount of sweetness from the pineapple glaze.

Serving Suggestions

  • Serve as-is for a sweet treat with coffee or tea.

  • Add a dollop of whipped cream or a scoop of vanilla ice cream for a decadent dessert.

Storage & Make-Ahead

  • Room temp: Store covered for up to 3 days.

  • Refrigerate: Keeps up to 1 week in an airtight container.

  • Freeze: Wrap in plastic and foil for up to 3 months. Thaw in the fridge overnight before serving.

FAQs

Q: Can I use fresh pineapple instead of canned?
A: Yes! Finely chop fresh pineapple and use with ¼ cup added juice.

Q: Can I make this without sour cream?
A: Substitute with plain Greek yogurt for a similar texture and tang.

Q: How do I prevent the glaze from soaking in?
A: Make sure the cake is fully cooled before glazing.

Would you like me to create a “pina colada version” with coconut and rum glaze or a “cream cheese swirl version” for a richer twist?

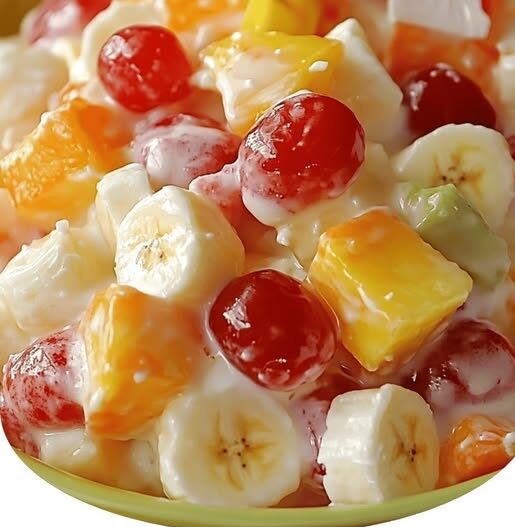
Cherry Banana Fruit Salad

A sweet, colorful fruit salad featuring juicy cherry pie filling, tropical pineapple, and fresh bananas — perfect for potlucks, barbecues, or a simple make-ahead dessert.

Prep Time: 10 minutes
Chill Time: 30 minutes
Total Time: 40 minutes
Servings: 8

Ingredients

Main Fruit Mix:

  • Mixed fruit cocktail – 1 can (15 oz), well drained

  • Crushed pineapple – 1 can (8 oz), thoroughly drained

  • Cherry pie filling – 1 can (21 oz)

  • Bananas – 2 medium, freshly sliced

Optional Add-ins:

  • Mini marshmallows – to taste

  • Shredded coconut flakes – as desired

  • Fresh whipped cream – for extra richness

Instructions

  1. Mix the fruit:
    In a large mixing bowl, combine drained fruit cocktail, crushed pineapple, and cherry pie filling. Stir gently until evenly blended.

  2. Add bananas:
    Just before serving, fold in freshly sliced bananas to keep them from browning or getting mushy.

  3. Customize:
    Toss in mini marshmallows for sweetness or sprinkle in coconut flakes for a tropical flair.

  4. Chill & serve:
    Cover the bowl and refrigerate for at least 30 minutes to let the flavors meld together. Serve cold.

Quick Notes & Pro Tips

  • Banana timing: Add bananas last to preserve their freshness and texture.

  • Make it creamy: Fold in whipped cream or a dollop of Cool Whip for a fluffier dessert-like salad.

  • Texture boost: Chopped nuts like pecans or walnuts add a nice crunch.

Why You’ll Love It

This no-fuss fruit salad is vibrant, refreshing, and easy to throw together in minutes — perfect for any gathering.

Serving Suggestions

  • Serve as a light dessert after a barbecue or holiday meal.

  • Pair with pound cake or angel food cake for a fun twist.

Storage & Make-Ahead

  • Refrigerate: Store covered for up to 2 days.

  • Bananas: If making ahead, add bananas right before serving to keep them fresh.

FAQs

Q: Can I make this ahead of time?
A: Yes, but wait to add the bananas until serving time to prevent browning.

Q: Can I use fresh fruit instead of canned?
A: Absolutely! Fresh pineapple, cherries, or seasonal fruits work wonderfully.

Q: Can I make it less sweet?
A: Use unsweetened fruit and swap cherry pie filling for fresh cherries with a light glaze.

Would you like me to create a “creamy ambrosia-style version” with Cool Whip and nuts or a “holiday version” with red and green cherries for a festive look?

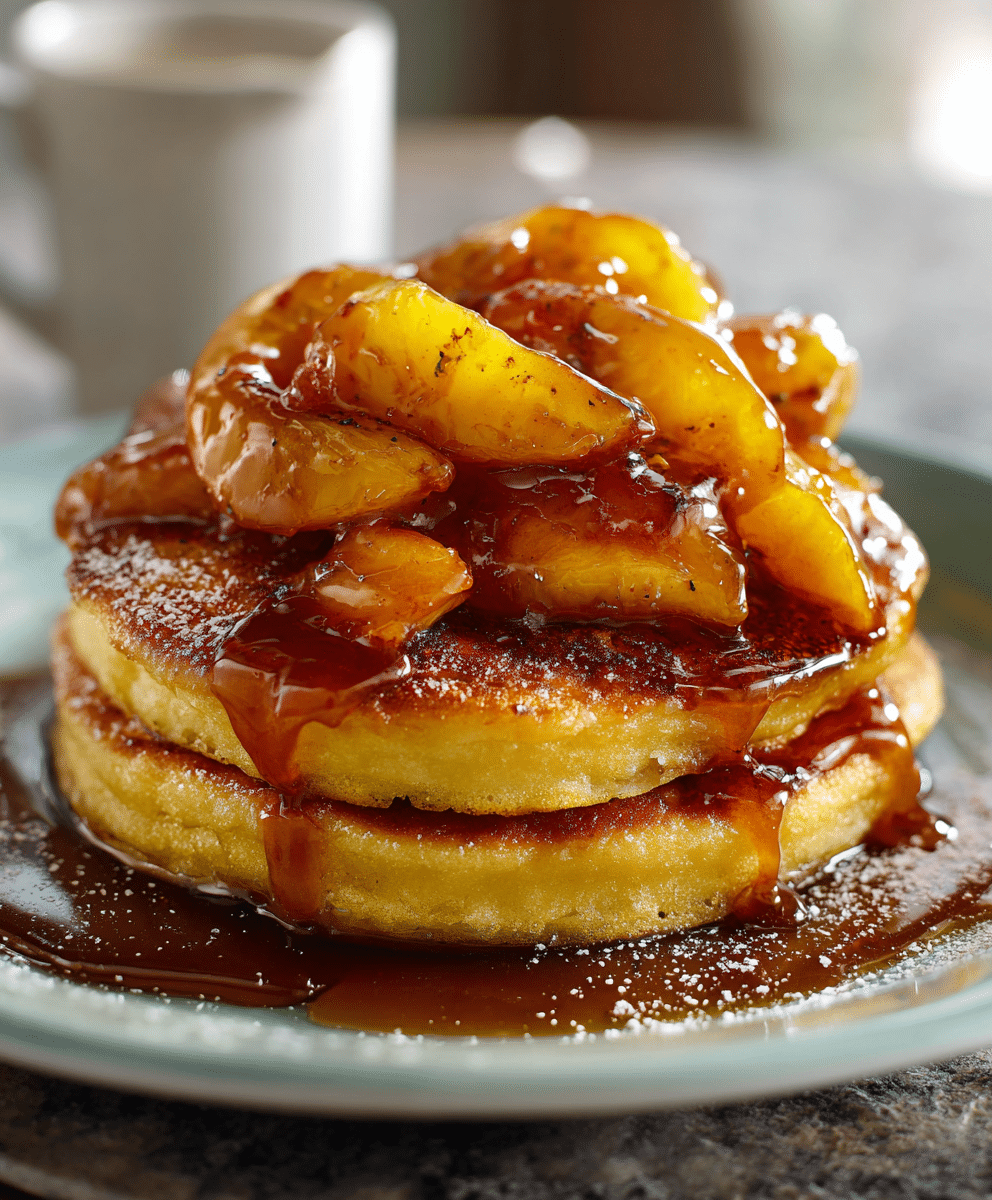
Caramel Peach Upside-Down Pancakes

A decadent skillet-baked pancake topped with buttery caramelized peaches — a showstopping breakfast (or dessert!) that’s as beautiful as it is indulgent.

Prep Time: 15 minutes
Cook Time: 20–25 minutes
Total Time: ~40 minutes
Servings: 4–6
Dietary: Vegetarian-friendly

Ingredients

For the caramel peach topping:

  • Ripe peaches – 2, sliced

  • Brown sugar – ¼ cup

  • Unsalted butter – 2 tbsp

  • Vanilla extract – 1 tsp

  • Cinnamon – ¼ tsp

For the pancake batter:

  • All-purpose flour – 1 cup

  • Granulated sugar – 2 tbsp

  • Baking powder – 1 tbsp

  • Salt – ½ tsp

  • Milk (dairy or non-dairy) – 1 cup

  • Large egg – 1

  • Melted butter – 2 tbsp

  • Vanilla extract – 1 tsp

Instructions

  1. Make the caramel peach topping: Heat a 9-inch oven-safe or cast-iron skillet over medium heat. Melt butter and swirl to coat the bottom. Sprinkle brown sugar over the butter, then add cinnamon and vanilla. Stir gently and cook for 1–2 minutes until bubbly and caramelized.

  2. Arrange the peaches: Remove from heat. Arrange sliced peaches in an overlapping pattern across the caramel layer, covering the bottom of the pan. Set aside.

  3. Mix the pancake batter: In a large bowl, whisk flour, sugar, baking powder, and salt. In another bowl, whisk milk, egg, melted butter, and vanilla. Pour wet ingredients into dry and fold gently until just combined. (A few lumps are fine.)

  4. Assemble: Preheat oven to 375°F (190°C). Pour the batter over the arranged peaches, spreading evenly to cover without disturbing the design.

  5. Bake: Transfer skillet to the oven. Bake 20–25 minutes, or until golden brown and a toothpick inserted into the center comes out clean.

  6. Flip & serve: Let cool 2–3 minutes. Run a knife along the edges. Place a serving plate over the skillet, then confidently flip. Let sit for 30 seconds before lifting off the pan. Serve warm.

Quick Notes & Pro Tips

  • Use firm peaches: Slightly underripe peaches hold their shape better during baking.

  • Don’t overmix the batter: This keeps the pancake tender and fluffy.

  • Be confident with the flip: Use oven mitts and commit to one quick, smooth motion.

Why You’ll Love It

This skillet pancake combines caramelized fruit, soft and fluffy cake-like texture, and a stunning upside-down presentation — perfect for brunch, special occasions, or when you want to impress without a ton of effort.

Ingredient Details & Substitutions

  • Fruit: Swap peaches for nectarines, plums, or pineapple for a twist.

  • Milk: Use almond, oat, or coconut milk for a dairy-free version.

  • Spice it up: Add nutmeg or cardamom for a warm flavor boost.

Variations & Serving Suggestions

  • Make it dessert: Top with whipped cream or a scoop of vanilla ice cream.

  • Nutty crunch: Sprinkle chopped pecans or almonds over the caramel layer before adding the batter.

  • Extra sauce: Drizzle with additional caramel or maple syrup when serving.

Storage & Make-Ahead

  • Refrigerate: Store leftovers in an airtight container for up to 3 days.

  • Reheat: Warm slices in the oven at 300°F or briefly in the microwave.

  • Make-ahead: Prepare caramel and slice peaches in advance; assemble and bake when ready.

FAQs

Q: Can I use canned peaches?
A: Yes, but drain them well and pat dry to prevent excess moisture.

Q: Can I make it gluten-free?
A: Substitute with a 1:1 gluten-free baking flour blend.

Q: Can I make it in advance?
A: It’s best served fresh, but you can bake ahead and reheat gently before serving.

Personal Note

This recipe is my go-to for weekend brunch when I want something that feels bakery-special but is simple enough to make at home. The caramelized peaches add a bright, fruity sweetness that pairs perfectly with the fluffy pancake base.

Your turn!
Tried these Caramel Peach Upside-Down Pancakes? Leave a comment or tag me on social media — I’d love to see your version!

Would you like me to create a “mini-skillet version” for individual servings or a “fall-inspired version” with apples and warm spices?