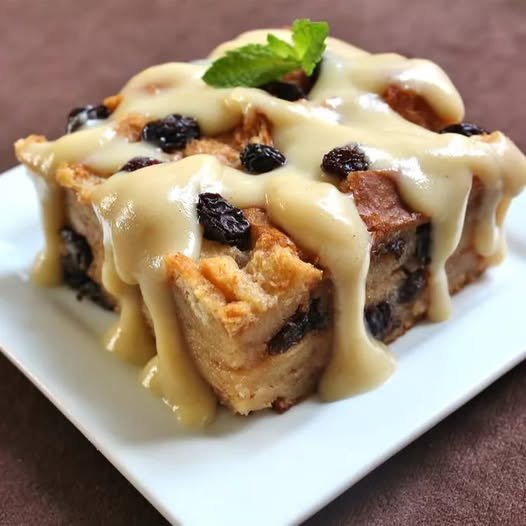
🍞 Best Bread Pudding with Vanilla Sauce

Since you have a preference for full recipes, I’ve gathered the complete details for the Bread Pudding with Vanilla Sauce to go along with the final steps for those Blueberry Pie Bombs and the Boat Dip.


🍞 Best Bread Pudding with Vanilla Sauce

This classic comfort dessert features a rich, custardy center and a warm, velvety vanilla drizzle.

Ingredients

For the Bread Pudding:

  • 6 cups Cubed day-old French or Italian bread

  • 3 cups Whole milk

  • ½ cup White sugar

  • ¼ cup Melted butter

  • 3 Large eggs, beaten

  • 1 tsp Ground cinnamon

  • 1 tsp Vanilla extract

  • ½ cup Raisins (optional)

For the Vanilla Sauce:

  • ½ cup Butter

  • ½ cup White sugar

  • ½ cup Heavy cream

  • 1 tsp Vanilla extract

Instructions

  1. Prep: Preheat oven to 350°F (175°C). Grease an 8×8 or 9×9 inch baking dish.

  2. Soak: Place bread cubes in a large bowl. Pour the milk over the bread and let it soak for 10 minutes.

  3. Mix: In a separate bowl, whisk sugar, melted butter, eggs, cinnamon, and vanilla. Stir in the raisins if using.

  4. Combine: Gently fold the egg mixture into the soaked bread. Pour into the prepared dish.

  5. Bake: Bake for 45–50 minutes until the top is golden and the center is set.

  6. Sauce: While pudding bakes, melt butter in a saucepan over medium heat. Stir in sugar and heavy cream. Bring to a simmer for 2–3 minutes, then remove from heat and stir in vanilla.

  7. Serve: Pour the warm sauce over individual servings of bread pudding.


🥧 Blueberry Pie Bombs

Soft pastries filled with creamy cheesecake and juicy blueberries.

Ingredients

  • 1 can (16.3 oz) Refrigerated flaky biscuit dough (8-count)

  • 1 cup Blueberry pie filling

  • 4 oz Cream cheese, softened

  • 2 tbsp Powdered sugar

  • ½ tsp Vanilla extract

  • 2 tbsp Butter, melted

Instructions

  1. Fill: Mix cream cheese, powdered sugar, and vanilla. Flatten each biscuit dough piece into a circle.

  2. Assemble: Place a dollop of cheese mixture and 1 tbsp of blueberry filling in the center.

  3. Seal: Pinch edges tightly to form a ball. Place seam-side down on a baking sheet.

  4. Bake: Brush with melted butter and bake at 375°F (190°C) for 12–15 minutes.


🥣 Boat Dip (Rotel Ranch Dip)

The ultimate zesty, creamy party appetizer.

Ingredients

  • 1 can (10 oz) Rotel diced tomatoes with green chilies, drained

  • 1 packet (1 oz) Ranch dressing mix

  • 8 oz Cream cheese, softened

  • 1 cup Shredded cheddar cheese

  • 1 cup Sour cream

  • ½ cup Mayonnaise

  • 1 tbsp Hot sauce (optional)

Instructions

  1. Combine: Mix cream cheese, sour cream, mayo, and ranch packet until smooth.

  2. Fold: Stir in drained Rotel and cheddar cheese.

  3. Chill: Refrigerate for at least 30 minutes to allow flavors to meld. Serve with tortilla chips.
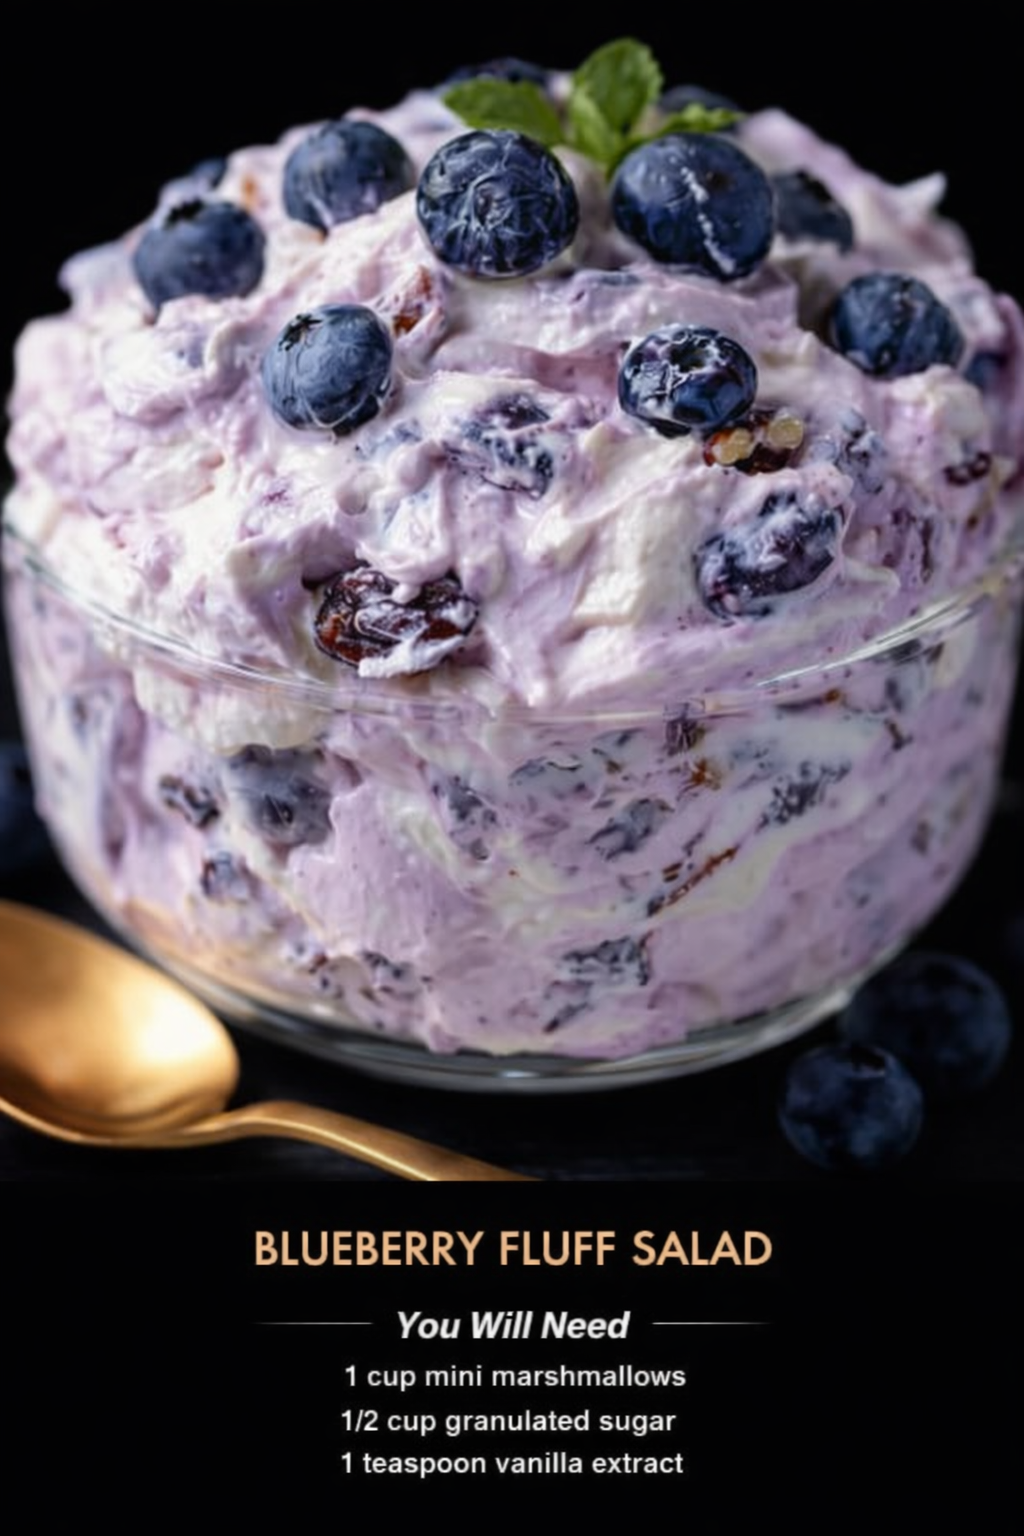
Blueberry Fluff Salad

Blueberry Fluff Salad

A creamy, fruity, no-bake dessert salad that’s light, fluffy, and perfect for summer or parties.


🕒 Prep Time

10 minutes

❄ Chill Time

1 hour

🍽 Servings

4–6


🛒 Ingredients

  • 1 cup fresh or frozen blueberries

  • 1 cup mini marshmallows

  • ½ cup granulated sugar

  • 1 teaspoon vanilla extract

  • 1 cup heavy whipping cream (cold)

  • 8 oz cream cheese, softened

  • ½ cup crushed pineapple, drained

  • ½ cup chopped nuts (optional – walnuts or pecans)

  • ½ cup raisins or dried cranberries (optional)


👩‍🍳 Instructions

1️⃣ Prepare the Blueberries

If using frozen blueberries, thaw and drain excess juice.
Mash half of the blueberries lightly for color and flavor.


2️⃣ Make the Cream Base

In a bowl, beat cream cheese with sugar until smooth.
Add vanilla extract and mix well.


3️⃣ Whip the Cream

In another bowl, beat cold heavy cream until soft peaks form.


4️⃣ Combine

Gently fold whipped cream into the cream cheese mixture.


5️⃣ Add Fruits

Fold in:

  • Blueberries

  • Crushed pineapple

  • Mini marshmallows

  • Nuts and dried fruit (if using)

Mix gently so it stays fluffy.


6️⃣ Chill

Cover and refrigerate for at least 1 hour before serving.


🍨 Serving Ideas

  • Serve cold in glass bowls

  • Garnish with:
    ✔ Fresh blueberries
    ✔ Mint leaves
    ✔ A few marshmallows


💡 Tips

  • For sweeter taste, add 1–2 tbsp extra sugar

  • For lighter version, use whipped topping instead of heavy cream

  • Best eaten within 24 hours

  • Do not freeze (texture will change)

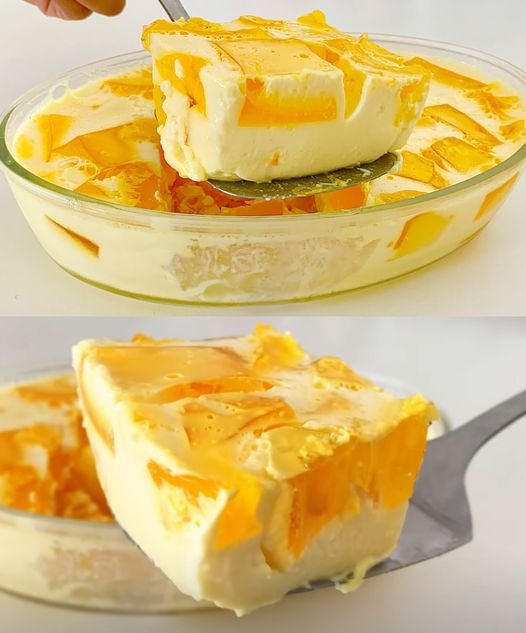
Creamy Mango Mosaic Gelatin

Ingredients

For the Mango Cubes:

  • 2 packages (approx. 85g each) Mango-flavored gelatin powder

  • 3 cups Boiling water (Use slightly less water than the box suggests to ensure the cubes are firm)

For the Creamy Base:

  • 1 can (397g) Sweetened condensed milk

  • 1 can (350ml-400ml) Evaporated milk (chilled)

  • 1 cup All-purpose cream or heavy whipping cream (chilled)

  • 4 tbsp Unflavored gelatin powder (clear/neutral)

  • ½ cup Cold water (to bloom the gelatin)

  • Optional: 1 cup of fresh mango chunks for extra texture.


Instructions

1. Prepare the Mango Cubes

  1. Dissolve the mango gelatin powder in boiling water. Stir until completely dissolved.

  2. Pour the mixture into a flat rectangular container so it’s about 1 inch deep.

  3. Refrigerate for at least 3 hours or until very firm.

  4. Once set, slice the gelatin into small, uniform cubes. Set aside in the fridge.

2. Bloom the Neutral Gelatin

  1. In a small bowl, sprinkle the unflavored gelatin over the ½ cup cold water.

  2. Let it sit for 5–10 minutes until it becomes thick and spongy.

  3. Microwave for 30 seconds or melt it over a double boiler until it is completely liquid and clear. Do not let it boil.

3. Mix the Creamy Base

  1. In a large mixing bowl, combine the evaporated milk, sweetened condensed milk, and cream.

  2. Whisk until well combined and smooth.

  3. Slowly pour the melted unflavored gelatin into the milk mixture while whisking constantly to prevent lumps.

4. Assembly

  1. Place your mango cubes (and fresh mango chunks, if using) into your serving glass dish or mold.

  2. Slowly pour the creamy milk mixture over the cubes.

  3. Gently stir or shake the dish to ensure the liquid fills all the gaps between the cubes.

  4. Refrigerate for at least 4 to 6 hours, or preferably overnight, until fully set.


💡 Pro-Tips for Success

  • The Temperature Rule: Ensure your creamy milk mixture is at room temperature before pouring it over the mango cubes. If it’s too warm, it will melt the cubes and ruin the “mosaic” look.

  • Easy Release: If you are using a silicone mold instead of a glass dish, lightly grease the mold with a tiny bit of neutral oil (like canola) before adding the gelatin to make it pop out perfectly.

  • Color Variation: You can make this with multiple colors (strawberry, lime, and orange) to create a true “Cathedral Window” effect!

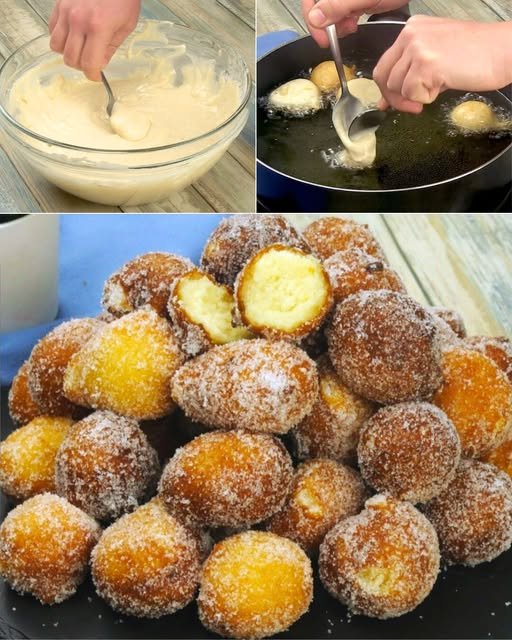
Easy Yogurt Doughnut Bites

Easy Yogurt Doughnut Bites

Prep time: 10 mins | Cook time: 10 mins | Yields: Approx. 20-24 bites

Ingredients

  • 1 Egg

  • 100g Sugar (plus extra for coating at the end)

  • 1 cup (250g) Plain Yogurt (Greek or regular)

  • 1/2 cup (120ml) Milk

  • 2.5 cups (approx. 320g) All-Purpose Flour

  • 1 tbsp Baking Powder

  • 1 tsp Vanilla Extract (optional)

  • Zest of 1 lemon or orange (optional, for aroma)

  • Oil for frying (Vegetable, Sunflower, or Canola)


Step-by-Step Instructions

1. Mix the Wet Ingredients

In a large mixing bowl, whisk together the egg and 100g of sugar until the mixture is slightly pale. Add the yogurt, milk, and vanilla extract. Whisk until the batter is smooth and the yogurt is fully incorporated.

2. Add the Aromatics and Dry Ingredients

If you are using citrus zest, stir it in now. Gradually sift in the flour and the baking powder. Stir with a whisk or a sturdy spoon until you have a thick, sticky batter. It should be thicker than pancake batter—thick enough to hold its shape briefly on a spoon.

3. Heat the Oil

Fill a deep pan with about 2 inches of oil. Heat it over medium heat.

  • Pro Tip: To check if the oil is ready, dip the handle of a wooden spoon into it; if small bubbles form around the wood, it’s ready. Avoid using high heat, or the outside will burn before the inside is cooked.

4. Form the Fritters

Using two small spoons, scoop a small amount of batter (about a tablespoon) with one spoon and use the second spoon to carefully push the batter into the hot oil. Do not overcrowd the pan; fry about 5–6 at a time.

5. Fry Until Golden

The fritters will often flip themselves over as they expand. If they don’t, gently turn them with a slotted spoon. Fry for about 2–3 minutes until they are a deep golden brown all over.

6. Drain and Coat

Use a slotted spoon to remove the fritters and place them briefly on a plate lined with paper towels to soak up excess oil. While they are still hot, toss them in a bowl of extra sugar (or a sugar-cinnamon mix) until they are well-coated.


Serving Suggestion

These are best served warm! They pair perfectly with a cup of coffee or tea. You can also fill them with a little jam or chocolate hazelnut spread using a piping bag if you want to get fancy.

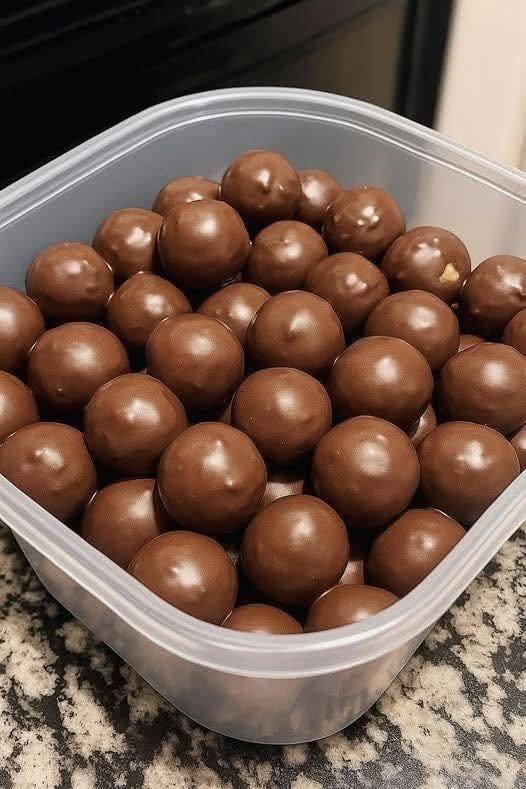
No-Bake High-Protein Chocolate Peanut Butter Balls — Easy, Sweet, and Satisfying

No-Bake High-Protein Chocolate Peanut Butter Balls — Easy, Sweet, and Satisfying

  • Servings: 12 balls
  • Total Time: 15 minutes
  • Difficulty: Very Easy
  • Calories per Ball: ~120 kcal
  • Macros (Per Ball): 6g Protein / 5g Net Carbs / 8g Fat / 2g Fiber

Introduction

Butter Balls are the perfect solution. Creamy peanut butter, rich cocoa, and protein powder come together in bite-sized treats that satisfy your sweet tooth and fuel your body.

Perfect for Keto, Slimming , Weight Watchers, High-Protein, and Mediterranean-inspired diets, these chocolate peanut butter balls are low-carb, nutrient-dense, and incredibly easy to make. Whether it’s a post-workout snack, a grab-and-go treat, or a healthy dessert, these balls deliver flavor, protein, and convenience in every bite.


Look at the Recipe

  • Texture & Visual: Smooth, chocolatey, and slightly firm with a soft peanut butter center.
  • Flavor Highlight: Nutty, rich, and naturally sweet — chocolate and peanut butter in perfect harmony.
  • Diet Benefit: High in protein, low in refined sugar, and made with wholesome ingredients.

Ingredients Needed

  • ½ cup natural peanut butter (or almond butter for variation/Keto)
  • ¼ cup protein powder (chocolate or vanilla)
  • 2 tbsp unsweetened cocoa powder
  • 2–3 tbsp sweetener of choice (erythritol, monk fruit, or honey for Mediterranean version)
  • 1 tsp vanilla extract
  • Optional: pinch of salt, chopped nuts, or sugar-free chocolate chips for topping

How to Make Our No-Bake High Protein Chocolate Peanut Butter Balls

  1. Mix the ingredients:
    In a medium bowl, combine peanut butter, protein powder, cocoa powder, sweetener, and vanilla. Stir until a thick, sticky dough forms.
  2. Shape the balls:
    Using your hands or a small cookie scoop, roll the mixture into 12 equal-sized balls.
  3. Optional toppings:
    Roll balls in cocoa powder, crushed nuts, or sprinkle with sugar-free chocolate chips for extra flavor and texture.
  4. Chill to set:
    Place the balls on a parchment-lined tray and refrigerate for at least 15 minutes to firm up.
  5. Serve & enjoy:
    Store in an airtight container in the fridge and grab one whenever you need a quick protein boost.

Storage & Serving Suggestions

  • Store: Refrigerate for up to 1 week.
  • Freeze: Freeze for up to 2 months; thaw in fridge for 10–15 minutes before eating.
  • Serving Ideas:
    • Pair with a protein shake for a post-workout combo.
    • Pack in lunchboxes for a portable snack.
    • Serve alongside fresh berries or Greek yogurt for a mini dessert platter.

Tips & FAQs

1. Can I make these Slimming -friendly?
Yes — use low-calorie peanut butter and a syn-free sweetener. Each ball is roughly 1–2 syns, depending on ingredients.

2. How many Weight Watchers points per ball?
Approximately 2–3 WW points, depending on sweetener and nut butter choice.

3. Can I make them Keto-friendly?
Use natural almond or peanut butter and a low-carb sweetener like erythritol.

4. Can I make these nut-free?
Yes — substitute peanut butter with sunflower seed butter or soy nut butter.

5. Can I add extra protein?
Absolutely — increase protein powder or fold in collagen peptides for an extra boost.

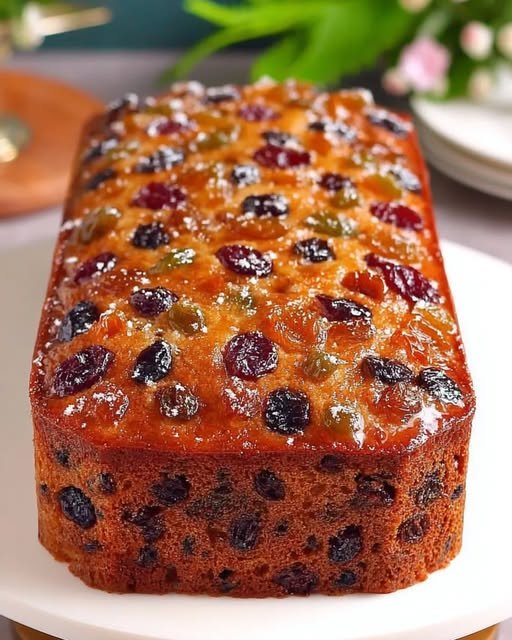
Eggless Buttermilk Fruit Cake

Eggless Buttermilk Fruit Cake

Prep time: 15 mins | Bake time: 50-60 mins | Servings: 1 loaf

Ingredients

Dry Base:

  • 1 1/2 cups (200g) all-purpose flour

  • 1 tsp (4 g) baking soda

  • 1/2 tsp (2 g) salt

Spices:

  • 1/2 tsp freshly grated nutmeg

  • 3/4 tsp ground cinnamon

  • 1/4 tsp ground ginger

  • 1/4 tsp ground cloves

Wet Ingredients:

  • 1 cup (240 ml) buttermilk (room temperature)

  • 1/2 cup (113g) unsalted butter (melted and cooled)

  • 3/4 cup (150g) light brown sugar (firmly packed)

  • 1/2 tsp (2 g) pure vanilla extract

The Fruit Mix:

  • 2 cups (300g) mixed dried and candied fruits (raisins, currants, dates, figs, cranberries, cherries, apricots, mixed peel, etc.)


Instructions

  1. Preparation: Preheat your oven to 350°F (180°C). Grease and flour a 9x5x3 inch loaf pan.

  2. Combine Dry Ingredients: In a large bowl, whisk the flour, salt, baking soda, and all spices. Add the fruit mix to the bowl and toss well until all the fruit pieces are coated in flour to prevent them from sinking.

  3. Mix Wet Ingredients: In a separate bowl, whisk together the buttermilk, melted butter, vanilla, and brown sugar.

  4. Create the Batter: Pour the buttermilk mixture into the dry ingredients and stir with a spatula until just combined and moistened.

  5. Bake: Pour the batter into the prepared pan and smooth the top. Bake for 50–60 minutes until the loaf is golden brown and a toothpick comes out clean.

  6. Cool: Let the cake cool in the pan for 10 minutes before transferring to a wire rack to cool completely.


Recipe Collection Roundup

  • Seafood: Crispy Joe’s Crab Shack Crab Cakes

  • Savory: Cheesy Air Fryer Hasselback Potatoes

  • Dessert: Rich Chocolate Cake with Glossy Glaze