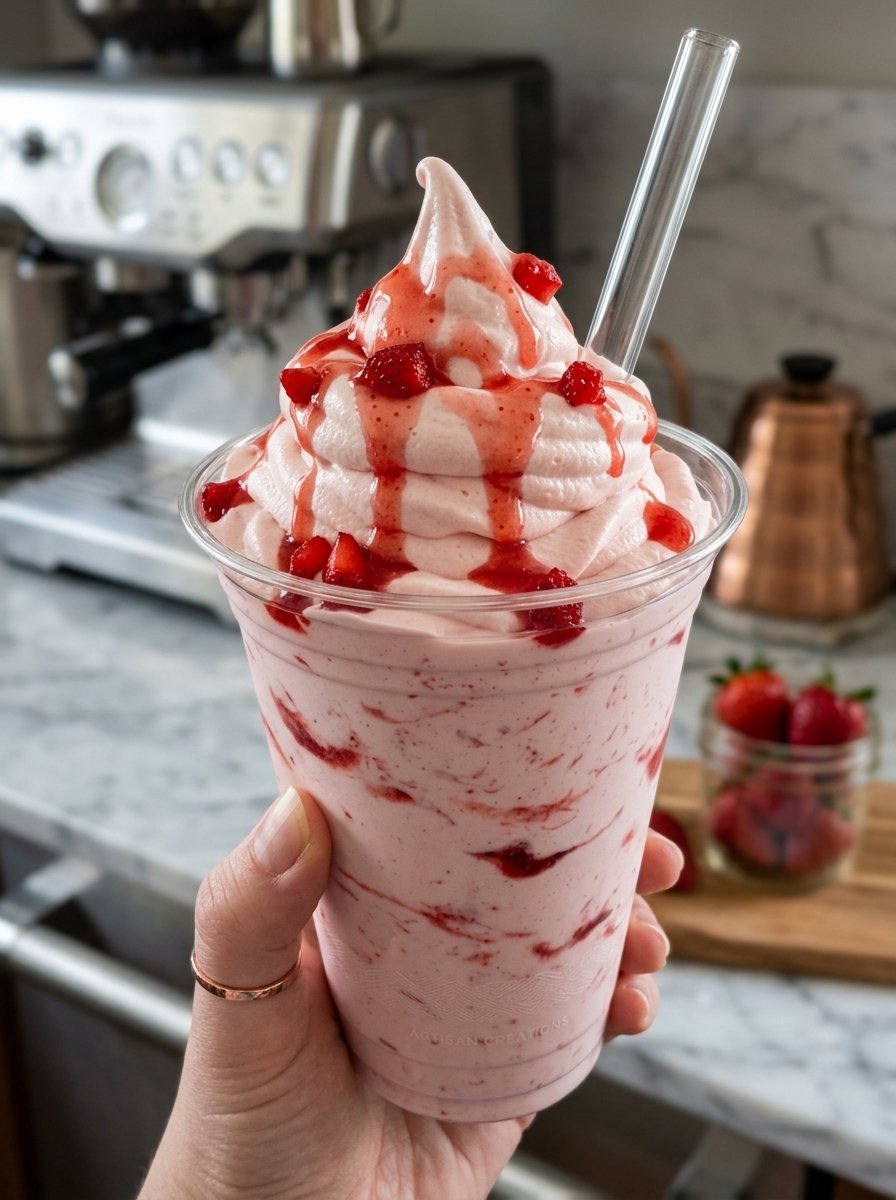
Strawberry Flavour Yogurt

Strawberry Flavour Yogurt

πŸ›’ Ingredients

➑️ 2 cups thick plain yogurt (hung yogurt works best) πŸ₯£
➑️ 1 cup fresh strawberries (chopped) πŸ“
➑️ 3–4 tbsp sugar or honey 🍯
➑️ ½ tsp vanilla essence (optional) 🌼
➑️ 2 tbsp strawberry sauce or jam πŸ“
➑️ 2 tbsp whipped cream (optional, for topping) 🍦


πŸ‘©β€πŸ³ Step-by-Step Recipe

πŸ”Ή Step 1: Prepare Yogurt

➑️ Take thick yogurt in a bowl
➑️ Whisk until smooth and creamy πŸ₯£βœ¨

πŸ”Ή Step 2: Make Strawberry Puree

➑️ Blend strawberries into a smooth puree πŸ“
➑️ Keep a few small chunks for texture

πŸ”Ή Step 3: Sweeten It

➑️ Add sugar or honey into yogurt 🍯
➑️ Mix well until fully combined

πŸ”Ή Step 4: Combine Flavors

➑️ Add strawberry puree into yogurt
➑️ Gently mix to create swirls (don’t overmix for that красив look πŸ˜‰)

πŸ”Ή Step 5: Add Final Touch

➑️ Add vanilla essence (optional) 🌼
➑️ Spoon into serving glass or bowl

πŸ”Ή Step 6: Decorate

➑️ Top with whipped cream 🍦
➑️ Drizzle strawberry sauce πŸ“
➑️ Add small strawberry pieces on top


πŸ’‘ Pro Tips

✨ Use hung yogurt for extra thick texture
✨ Don’t overmix if you want pretty strawberry swirls
✨ Chill for 30 minutes before serving for best taste ❄️


❓ Q & A

Q1: What is hung yogurt?
➑️ It’s yogurt strained to remove water, making it thick and creamy πŸ₯£

Q2: Can I skip cream?
➑️ Yes! It will still be delicious and lighter 😊

Q3: How long can I store it?
➑️ Keep in fridge for up to 2 days 🧊

Q4: Can I use jam instead of fresh strawberries?
➑️ Yes! It gives a stronger sweet strawberry flavor πŸ“

Q5: How to make it like soft-serve style?
➑️ Chill well and whip before serving for a fluffy texture 🍦
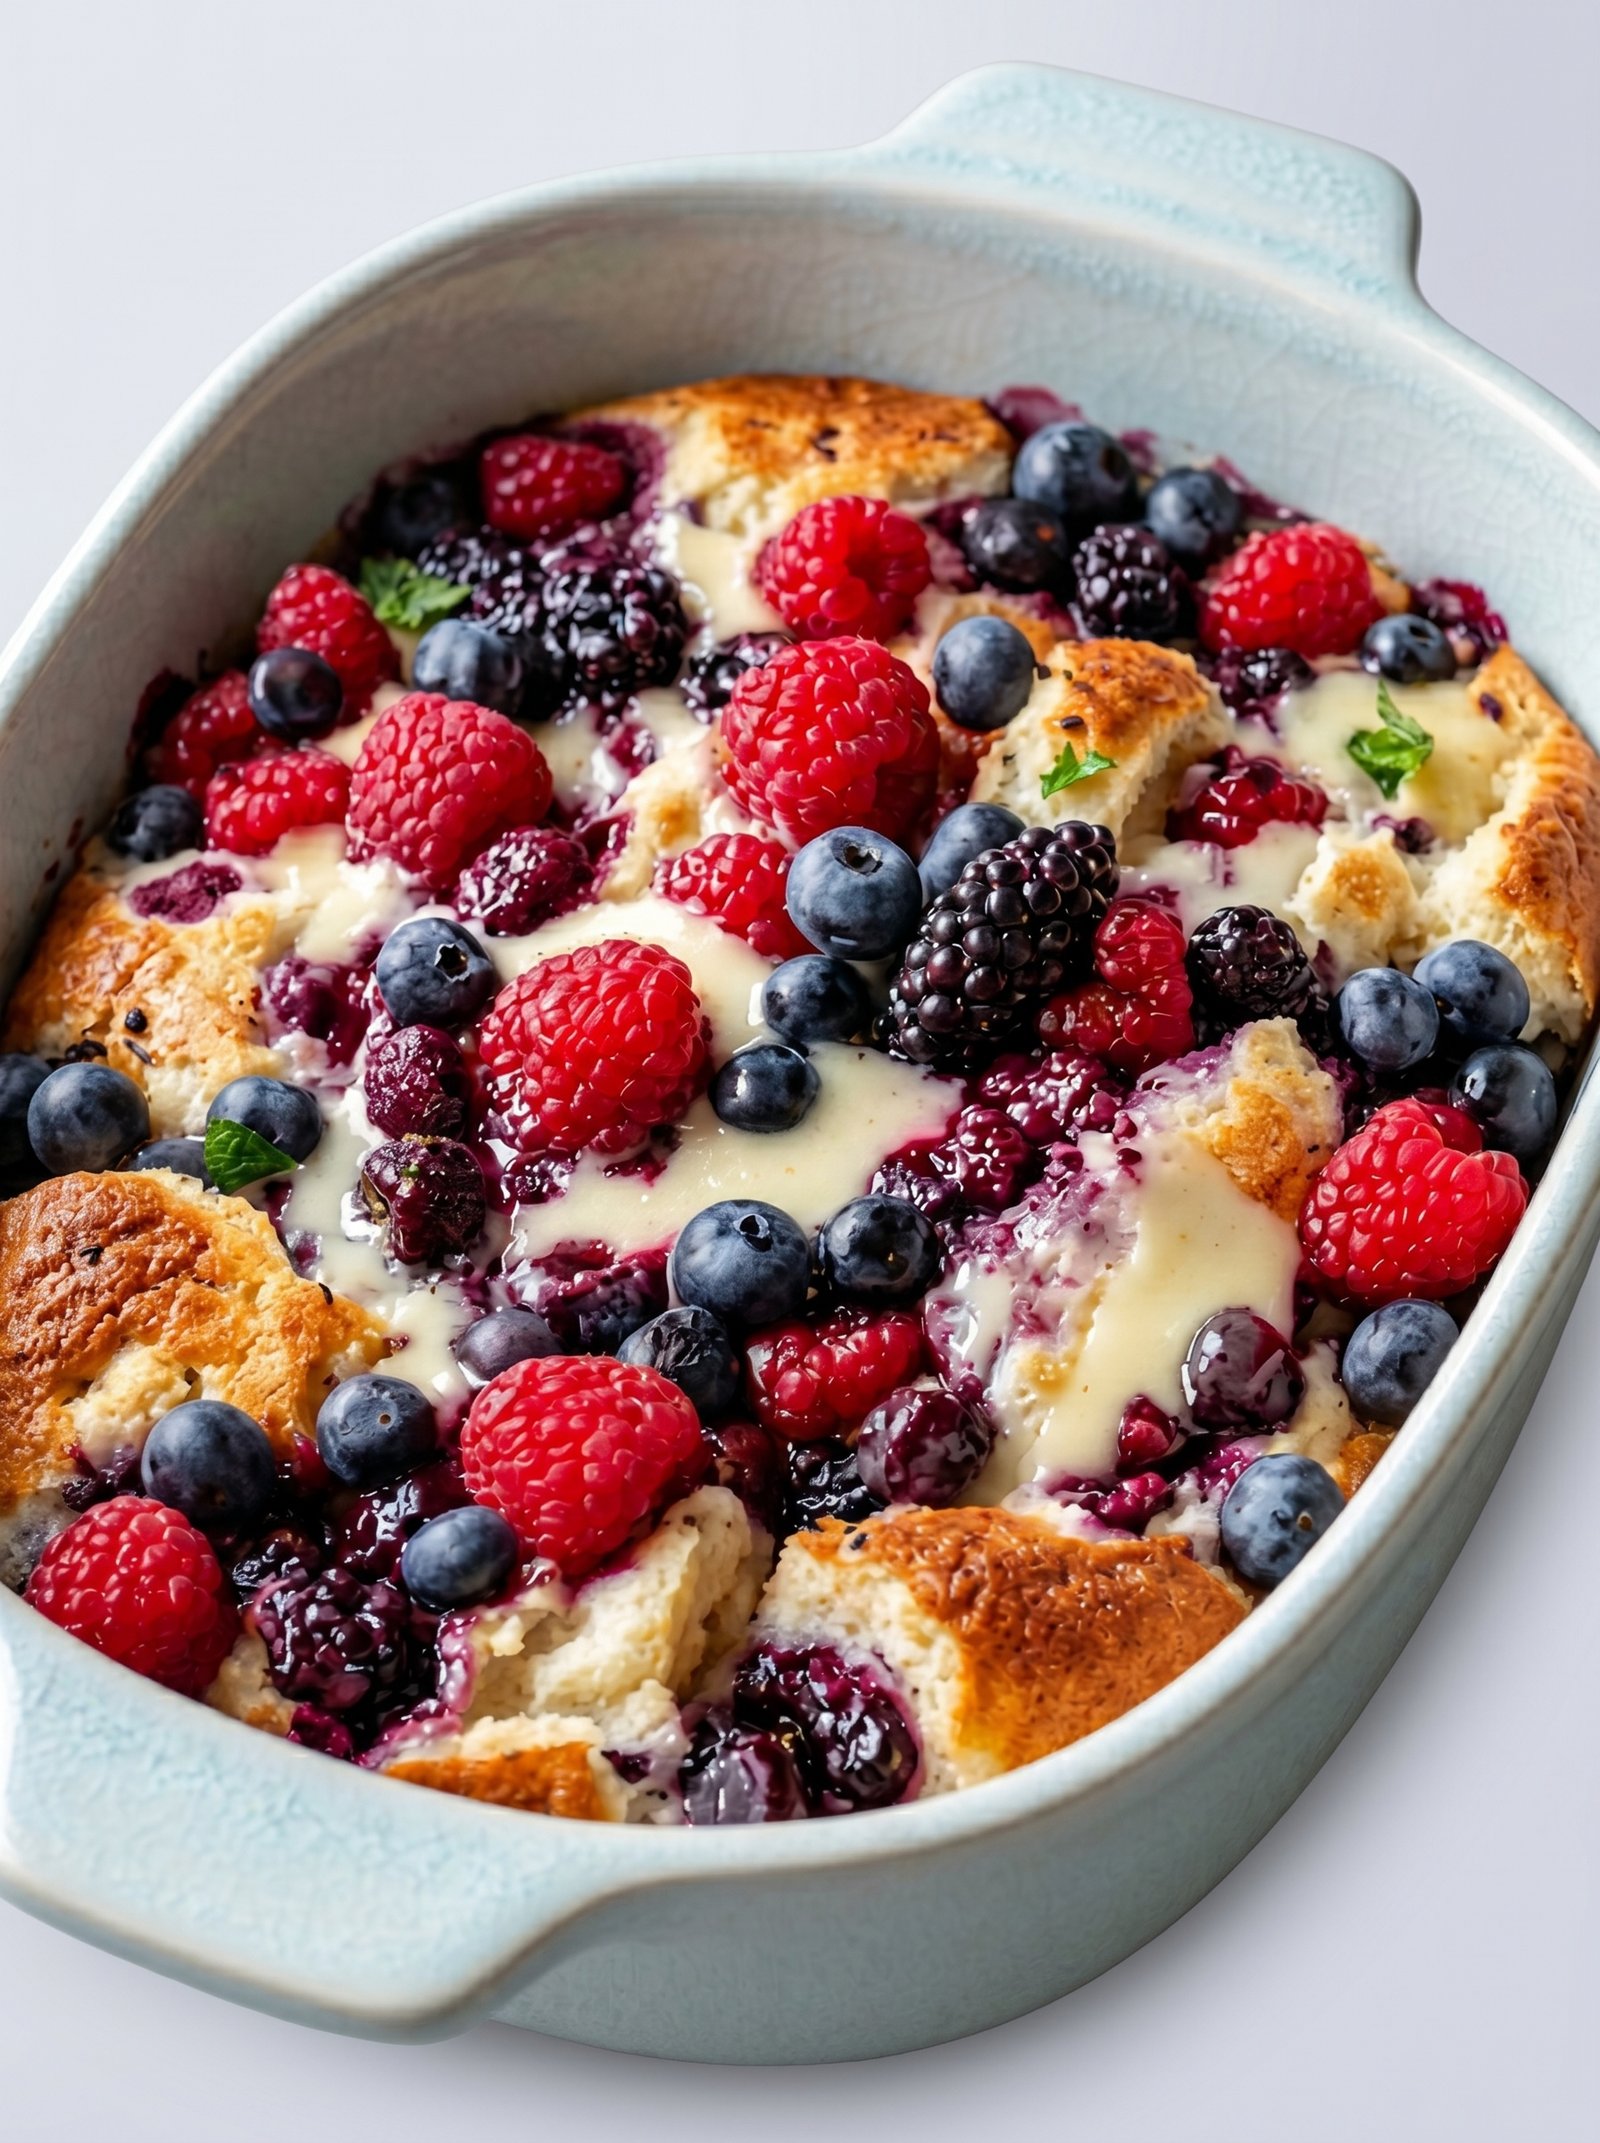
Mixed Berry Brioche Bread Pudding

Mixed Berry Brioche Bread Pudding

πŸ›’ Ingredients

  • 6-8 cups Brioche bread, cut into 1-inch cubes (stale bread works best!) 🍞

  • 2 cups Mixed berries (Raspberries, Blueberries, Blackberries) 🫐

  • 4 large Eggs πŸ₯š

  • 2 cups Whole milk (or heavy cream for extra richness)

  • 1/2 cup Granulated sugar

  • 1 tsp Vanilla extract

  • 1/4 tsp Salt

  • Optional: White chocolate chips or a drizzle of condensed milk (as seen in the image) πŸ₯›


πŸ₯£ Step-by-Step Instructions

  1. Prep the Dish ➑️ Grease a 9×13 inch baking dish with butter.

  2. Arrange the Bread ➑️ Spread the brioche cubes evenly into the prepared dish. 🍞➑️πŸ₯˜

  3. Add the Berries ➑️ Scatter 1.5 cups of the mixed berries over and between the bread cubes. Save the remaining 0.5 cup for the very top. πŸ“

  4. Whisk the Custard ➑️ In a large mixing bowl, whisk together the eggs, milk, sugar, vanilla extract, and salt until completely smooth. πŸ₯£

  5. The Soak ➑️ Pour the custard mixture slowly over the bread, ensuring every piece of brioche is coated. ➑️ Use a spatula to gently press the bread down so it absorbs the liquid. πŸ₯›

  6. Rest Time ➑️ Let the dish sit for at least 20–30 minutes (or refrigerate overnight). This prevents the pudding from being dry in the center. πŸ•’

  7. Preheat & Top ➑️ Preheat your oven to 350°F (175°C). Scatter the remaining berries and optional white chocolate on top.

  8. Bake ➑️ Bake for 40–50 minutes. The pudding is done when the custard is set (no longer wobbly) and the top is golden brown and slightly crisp. πŸ₯§πŸ”₯

  9. Cool Slightly ➑️ Let it cool for 10 minutes before serving. This allows the custard to firm up.

  10. Final Touch ➑️ Drizzle with a little extra cream, condensed milk, or maple syrup if desired. 🍯


❓ Common Questions (Q&A)

Q: Can I use frozen berries? A: Yes! Do not thaw them first, as the juice will bleed and turn the bread purple. Just toss them in straight from the freezer. β„οΈπŸ“

Q: What if I don’t have Brioche? A: Challah, Croissants, or even thick-cut Texas Toast are great substitutes. Avoid standard sandwich bread as it can become too mushy. 🍞

Q: Can I make this dairy-free? A: Certainly! Use full-fat coconut milk or oat milk for the best texture. πŸ₯₯πŸ₯›

Q: Is it okay to make this the night before? A: Yes, it’s actually better! Assembling it at night and baking it in the morning results in a much richer, more custardy texture. πŸŒ™βž‘οΈβ˜€οΈ


✨ Pro-Tips for Success

  • Stale is Better: If your bread is fresh, toast the cubes in a 300Β°F oven for 10 minutes to dry them out. Dry bread acts like a sponge for the custard! 🧽

  • Golden Top: If the top is browning too fast but the center is still wet, cover the dish loosely with foil for the last 15 minutes of baking. πŸ›‘οΈ

Triple Chocolate Moist Sheet Cake

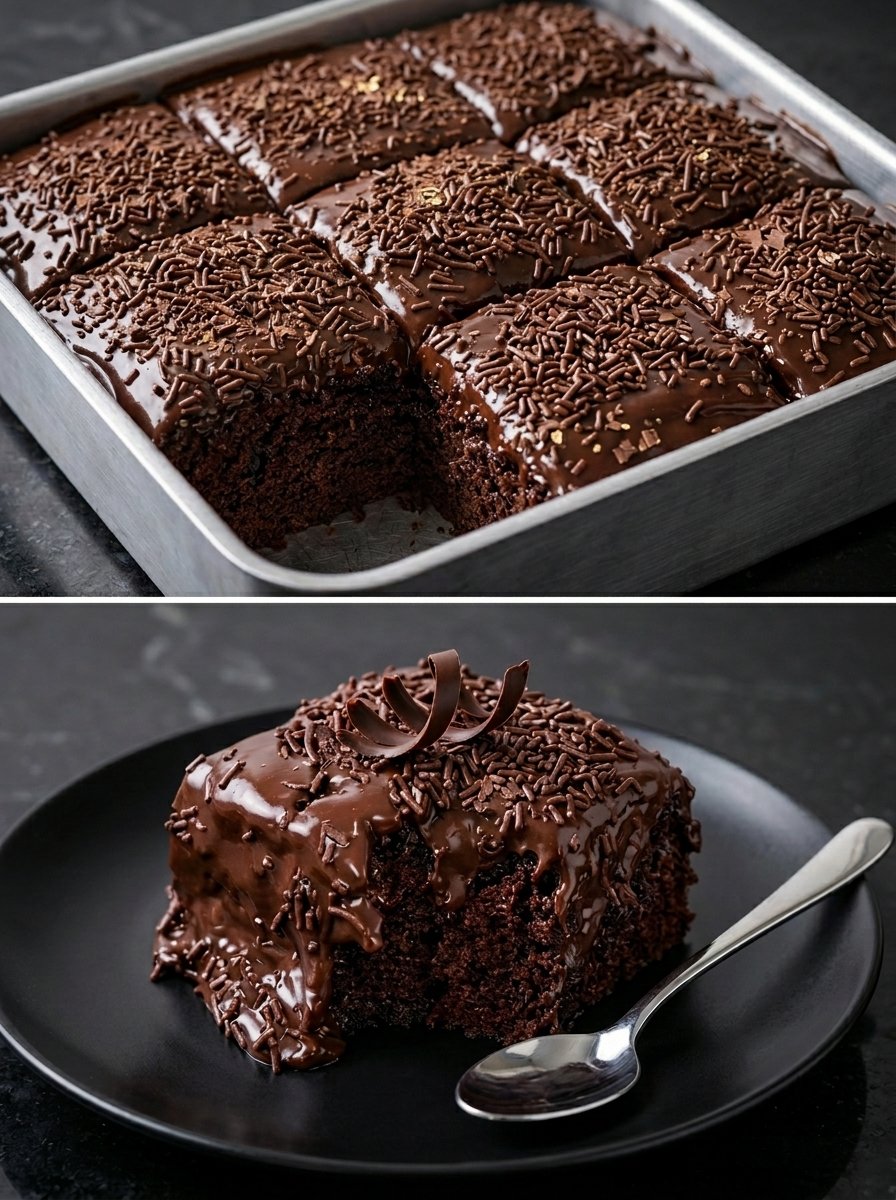
Triple Chocolate Moist Sheet Cake 🍫✨

This recipe produces an incredibly soft, tender cake topped with a rich, pourable chocolate ganache and classic sprinkles. It is the perfect dessert for celebrations or a cozy weekend treat.


πŸ›’ Ingredients

  • For the Cake:

    • 2 cups all-purpose flour 🌾

    • 2 cups granulated sugar 🍯

    • ΒΎ cup unsweetened cocoa powder 🍫

    • 2 tsp baking soda and 1 tsp baking powder

    • 1 tsp salt πŸ§‚

    • 1 cup buttermilk (at room temperature) πŸ₯›

    • Β½ cup vegetable oil 🌻

    • 2 large eggs πŸ₯š

    • 2 tsp vanilla extract

    • 1 cup hot coffee or boiling water (this “blooms” the cocoa for deeper flavor) β˜•

  • For the Topping:

    • 1 cup semi-sweet chocolate chips 🍫

    • Β½ cup heavy cream πŸ₯›

    • Chocolate sprinkles 🎊


πŸ”ͺ Step-by-Step Instructions

  1. Prep Work ➑️ Preheat your oven to 350Β°F (175Β°C). Grease and flour a 9×13 inch baking pan.

  2. Mix Dry Ingredients ➑️ In a large bowl, whisk together the flour, sugar, cocoa, baking soda, baking powder, and salt. πŸ₯£

  3. Add Wet Ingredients ➑️ Add the eggs, buttermilk, oil, and vanilla extract. ➑️ Beat on medium speed for about 2 minutes until well combined.

  4. The Secret Step ➑️ Lower the speed and carefully pour in the hot coffee or boiling water. ➑️ The batter will be very thinβ€”this is normal and ensures a moist crumb!

  5. Bake ➑️ Pour the batter into the prepared pan. Bake for 30–35 minutes, or until a toothpick inserted in the center comes out clean. ➑️ Let the cake cool completely in the pan.

  6. Prepare the Ganache ➑️ Heat the heavy cream until it just begins to simmer. Pour it over the chocolate chips in a small bowl. ➑️ Let it sit for 5 minutes, then stir until shiny and smooth.

  7. Glaze and Garnish ➑️ Pour the warm ganache over the cooled cake, spreading it to the edges. ➑️ Immediately top with a generous layer of chocolate sprinkles while the glaze is still wet.

  8. Set and Slice ➑️ Let the glaze set for at least 30 minutes before slicing into squares. 🍽️


❓ Q/A Section

Q: Can I taste the coffee in the cake? A: Not at all! ➑️ The coffee simply intensifies the chocolate flavor. If you prefer to avoid it, boiling water works perfectly fine.

Q: Why is my batter so watery? A: Don’t worry! ➑️ This high-moisture batter is exactly what makes the cake so soft and prevents it from becoming dry.

Q: Can I make this in a different pan? A: Yes! ➑️ This recipe works for two 9-inch round pans (bake for 30-35 mins) or about 24 cupcakes (bake for 18-22 mins).

Q: How should I store the leftovers? A: Cover the pan tightly with foil or plastic wrap. ➑️ It stays moist at room temperature for up to 3 days or in the fridge for up to 5 days.

Cottage Cheese Chocolate Ice Cream

Cottage Cheese Chocolate Ice Cream 🍦🍫


πŸ›’ Ingredients

  • The Base: 2 cups full-fat cottage cheese (small curd) πŸ§€

  • The Flavor: ΒΌ cup unsweetened cocoa powder 🍫

  • The Sweetener: 3–4 tbsp honey or maple syrup (adjust to taste) 🍯

  • The Boost: 1 tsp vanilla extract

  • Optional Mix-ins: Sugar-free chocolate chips or crushed walnuts πŸ₯œ


πŸ”ͺ Step-by-Step Instructions

  1. Blend the Base ➑️ Add the cottage cheese, cocoa powder, sweetener, and vanilla to a high-speed blender or food processor.

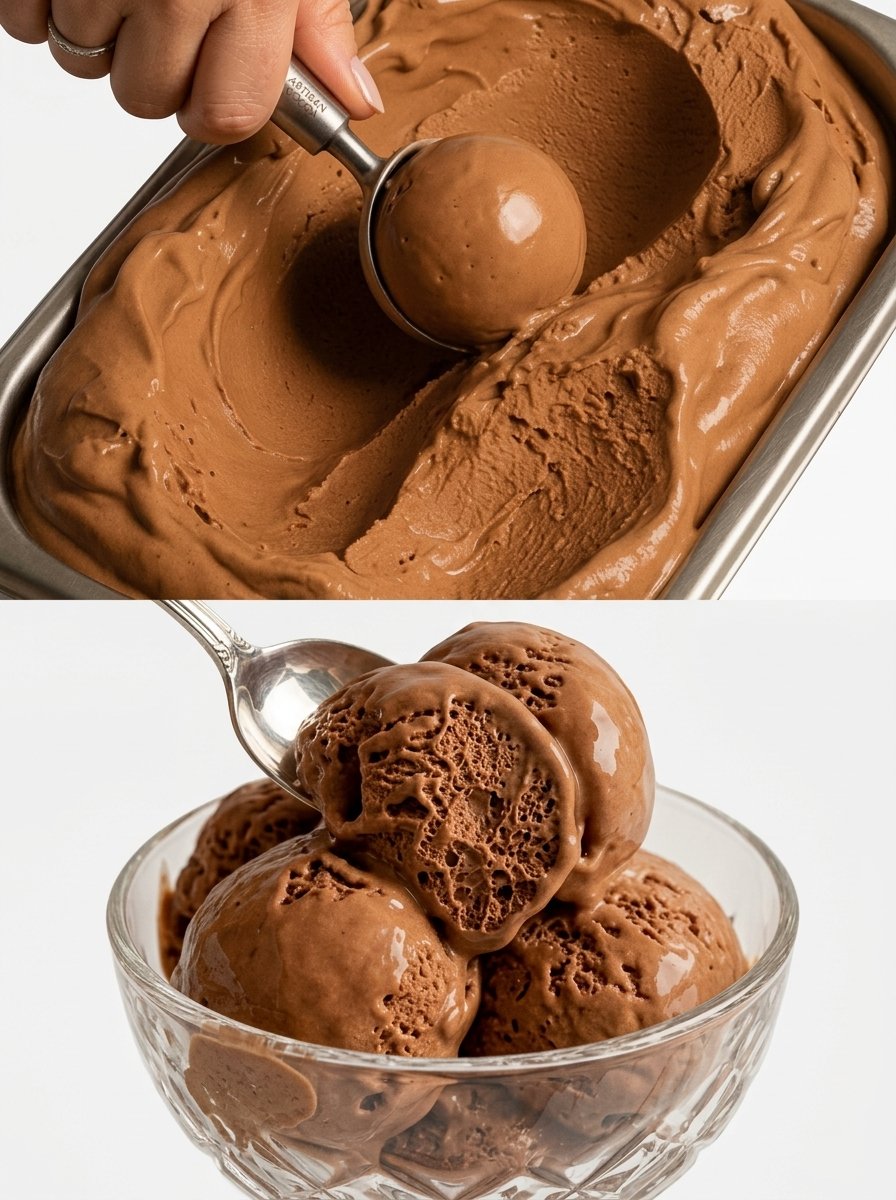
  2. Make it Smooth ➑️ Blend on high for 1–2 minutes until the mixture is completely smooth and no cheese curds remain. ➑️ The consistency should look like a thick chocolate pudding.

  3. Fold in Extras ➑️ If you are using chocolate chips or nuts, stir them in by hand now. πŸ₯£

  4. Transfer ➑️ Pour the mixture into a shallow, freezer-safe container or a loaf pan. Smooth the top with a spatula. ➑️

  5. Freeze ➑️ Place in the freezer for 3–5 hours. ❄️

  6. The “Soft Serve” Check ➑️ If you prefer a soft-serve texture, check it at the 2-hour mark. For scoopable ice cream, let it freeze until firm.

  7. Temper ➑️ If the ice cream has been in the freezer overnight, let it sit on the counter for 10–15 minutes before scooping. ➑️ This makes it much easier to get those perfect round scoops!

  8. Serve ➑️ Scoop into chilled bowls and enjoy! 🍨


❓ Q/A Section

Q: Does it actually taste like cottage cheese? A: Not at all! ➑️ Once blended, the “cheesy” texture disappears, leaving behind a rich, tangy creaminess that tastes very similar to a chocolate cheesecake.

Q: Can I use low-fat cottage cheese? A: You can, but for the best results, use full-fat. ➑️ Higher fat content results in a creamier mouthfeel and prevents the ice cream from becoming too icy in the freezer.

Q: How do I keep it from getting too hard? A: High-protein ice creams can freeze quite solid. ➑️ To help with this, you can add 1 tablespoon of vegetable glycerin or a splash of almond milk to the blender, which helps maintain a softer scoop. 🍦

Q: Can I make other flavors? A: Definitely! ➑️ Omit the cocoa powder and add frozen strawberries for a fruity version, or stir in peanut butter for a chocolate-peanut butter swirl. πŸ“πŸ₯œ

No-Bake Lemon Dazzling Blueberry Cream Cake

No-Bake Lemon Dazzling Blueberry Cream Cake

Β Description

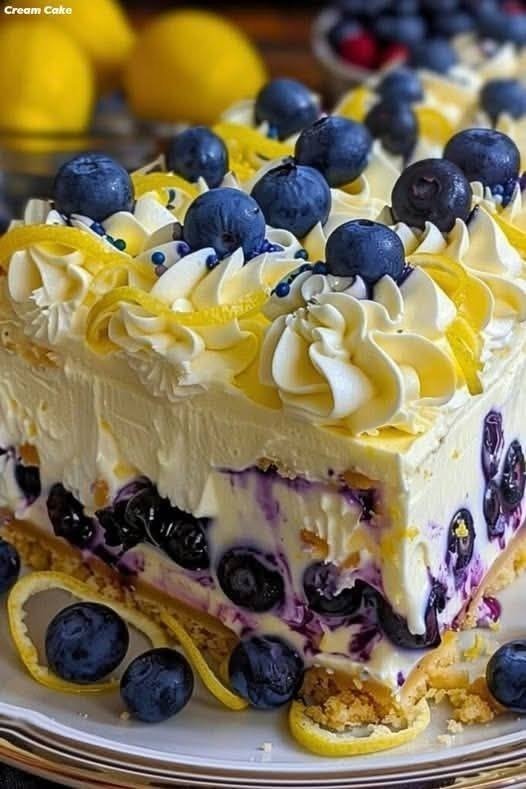
This No-Bake Lemon Blueberry Cream Cake is a light, refreshing dessert layered with a buttery biscuit base, silky lemon cream filling, and juicy blueberries. With no oven required, it’s the perfect make-ahead treat for warm daysβ€”zesty, creamy, and beautifully balanced between sweet and tangy flavours.

Β Servings

Serves: 8–10 slices

Β Ingredients

For the crust:

  • 2 cups crushed graham crackers or digestive biscuits
  • 1/2 cup melted butter
  • 2 tbsp sugar

For the lemon cream filling:

  • 1 1/2 cups heavy whipping cream
  • 8 oz cream cheese (softened)
  • 1/2 cup powdered sugar
  • 1/4 cup fresh lemon juice
  • 1 tbsp lemon zest
  • 1 tsp vanilla extract

For the blueberry layer:

  • 1 1/2 cups fresh or frozen blueberries
  • 2 tbsp sugar
  • 1 tbsp lemon juice
  • 1 tsp cornstarch (optional, for thickening)

Β Instructions

  1. Prepare crust:
    Mix crushed biscuits, melted butter, and sugar. Press firmly into a springform pan. Chill for 20–30 minutes.
  2. Make blueberry layer:
    In a saucepan, cook blueberries with sugar and lemon juice for 5–7 minutes until slightly thick. Cool completely.
  3. Prepare filling:
    Beat cream cheese and powdered sugar until smooth. Add lemon juice, zest, and vanilla.
    In another bowl, whip cream until soft peaks form, then gently fold into the mixture.
  4. Assemble cake:
    Spread half the cream over crust β†’ add blueberry layer β†’ top with remaining cream.
  5. Chill:
    Refrigerate for 4–6 hours (or overnight) until set.
  6. Serve:
    Garnish with fresh blueberries and lemon zest before serving.

Β Notes

  • Use fresh lemon juice for best flavor
  • Let blueberry layer cool completely before layering
  • Chill longer for cleaner slices

Β Tips

  • Add gelatin (optional) for extra firmness
  • Use a clear glass dish for visible layers
  • Freeze for 30 minutes before serving for a firmer texture

Β Nutritional Info (Approx per slice)

  • Calories: 320
  • Fat: 22g
  • Carbs: 28g
  • Sugar: 18g
  • Protein: 4g

Β Benefits

  • Blueberries are rich in antioxidants 🫐
  • Lemon supports digestion & adds vitamin C πŸ‹
  • No-bake = retains more freshness

Β Q&A

Q: Can I use frozen blueberries?
A: Yes, just cook them slightly longer.

Q: How long does it last?
A: 3–4 days in the fridge.

Q: Can I make it ahead?
A: Yes! Best made a day before.

Q: Can I make it lighter?
A: Use low-fat cream cheese and whipped topping.

Decadent Chocolate Mousse Terrine

Decadent Chocolate Mousse Terrine

πŸ›’ Ingredients

  • For the Shell: 300g Milk or Dark Chocolate (melted)

  • For the Mousse: * 200g Dark chocolate (60% cocoa or higher)

    • 300ml Heavy whipping cream (chilled)

    • 2 Large egg yolks

    • 30g Granulated sugar

  • For the Layers: 1 pack of thin rectangular wafers or butter biscuits

  • For the Base: 100g Crushed chocolate cookies mixed with 2 tbsp melted butter


πŸ‘©β€πŸ³ Step-by-Step Instructions

  1. Create the Chocolate Shell πŸ—οΈ Pour melted chocolate into your silicone mold. Tilt it until all sides are coated. ➑️ Invert the mold over a tray to let excess chocolate drip out, then refrigerate for 20 minutes until set. Repeat for a second coat if needed.

  2. Prep the Mousse Base πŸ”₯ Melt 200g of dark chocolate. In a small heat-proof bowl, whisk egg yolks and sugar over a pot of simmering water (double boiler) until pale and thick. ➑️ Fold the melted chocolate into the egg mixture.

  3. Whip and Fold ☁️ Whisk the chilled heavy cream until stiff peaks form. ➑️ Gently fold the cream into the chocolate mixture in three batches to keep it light and airy.

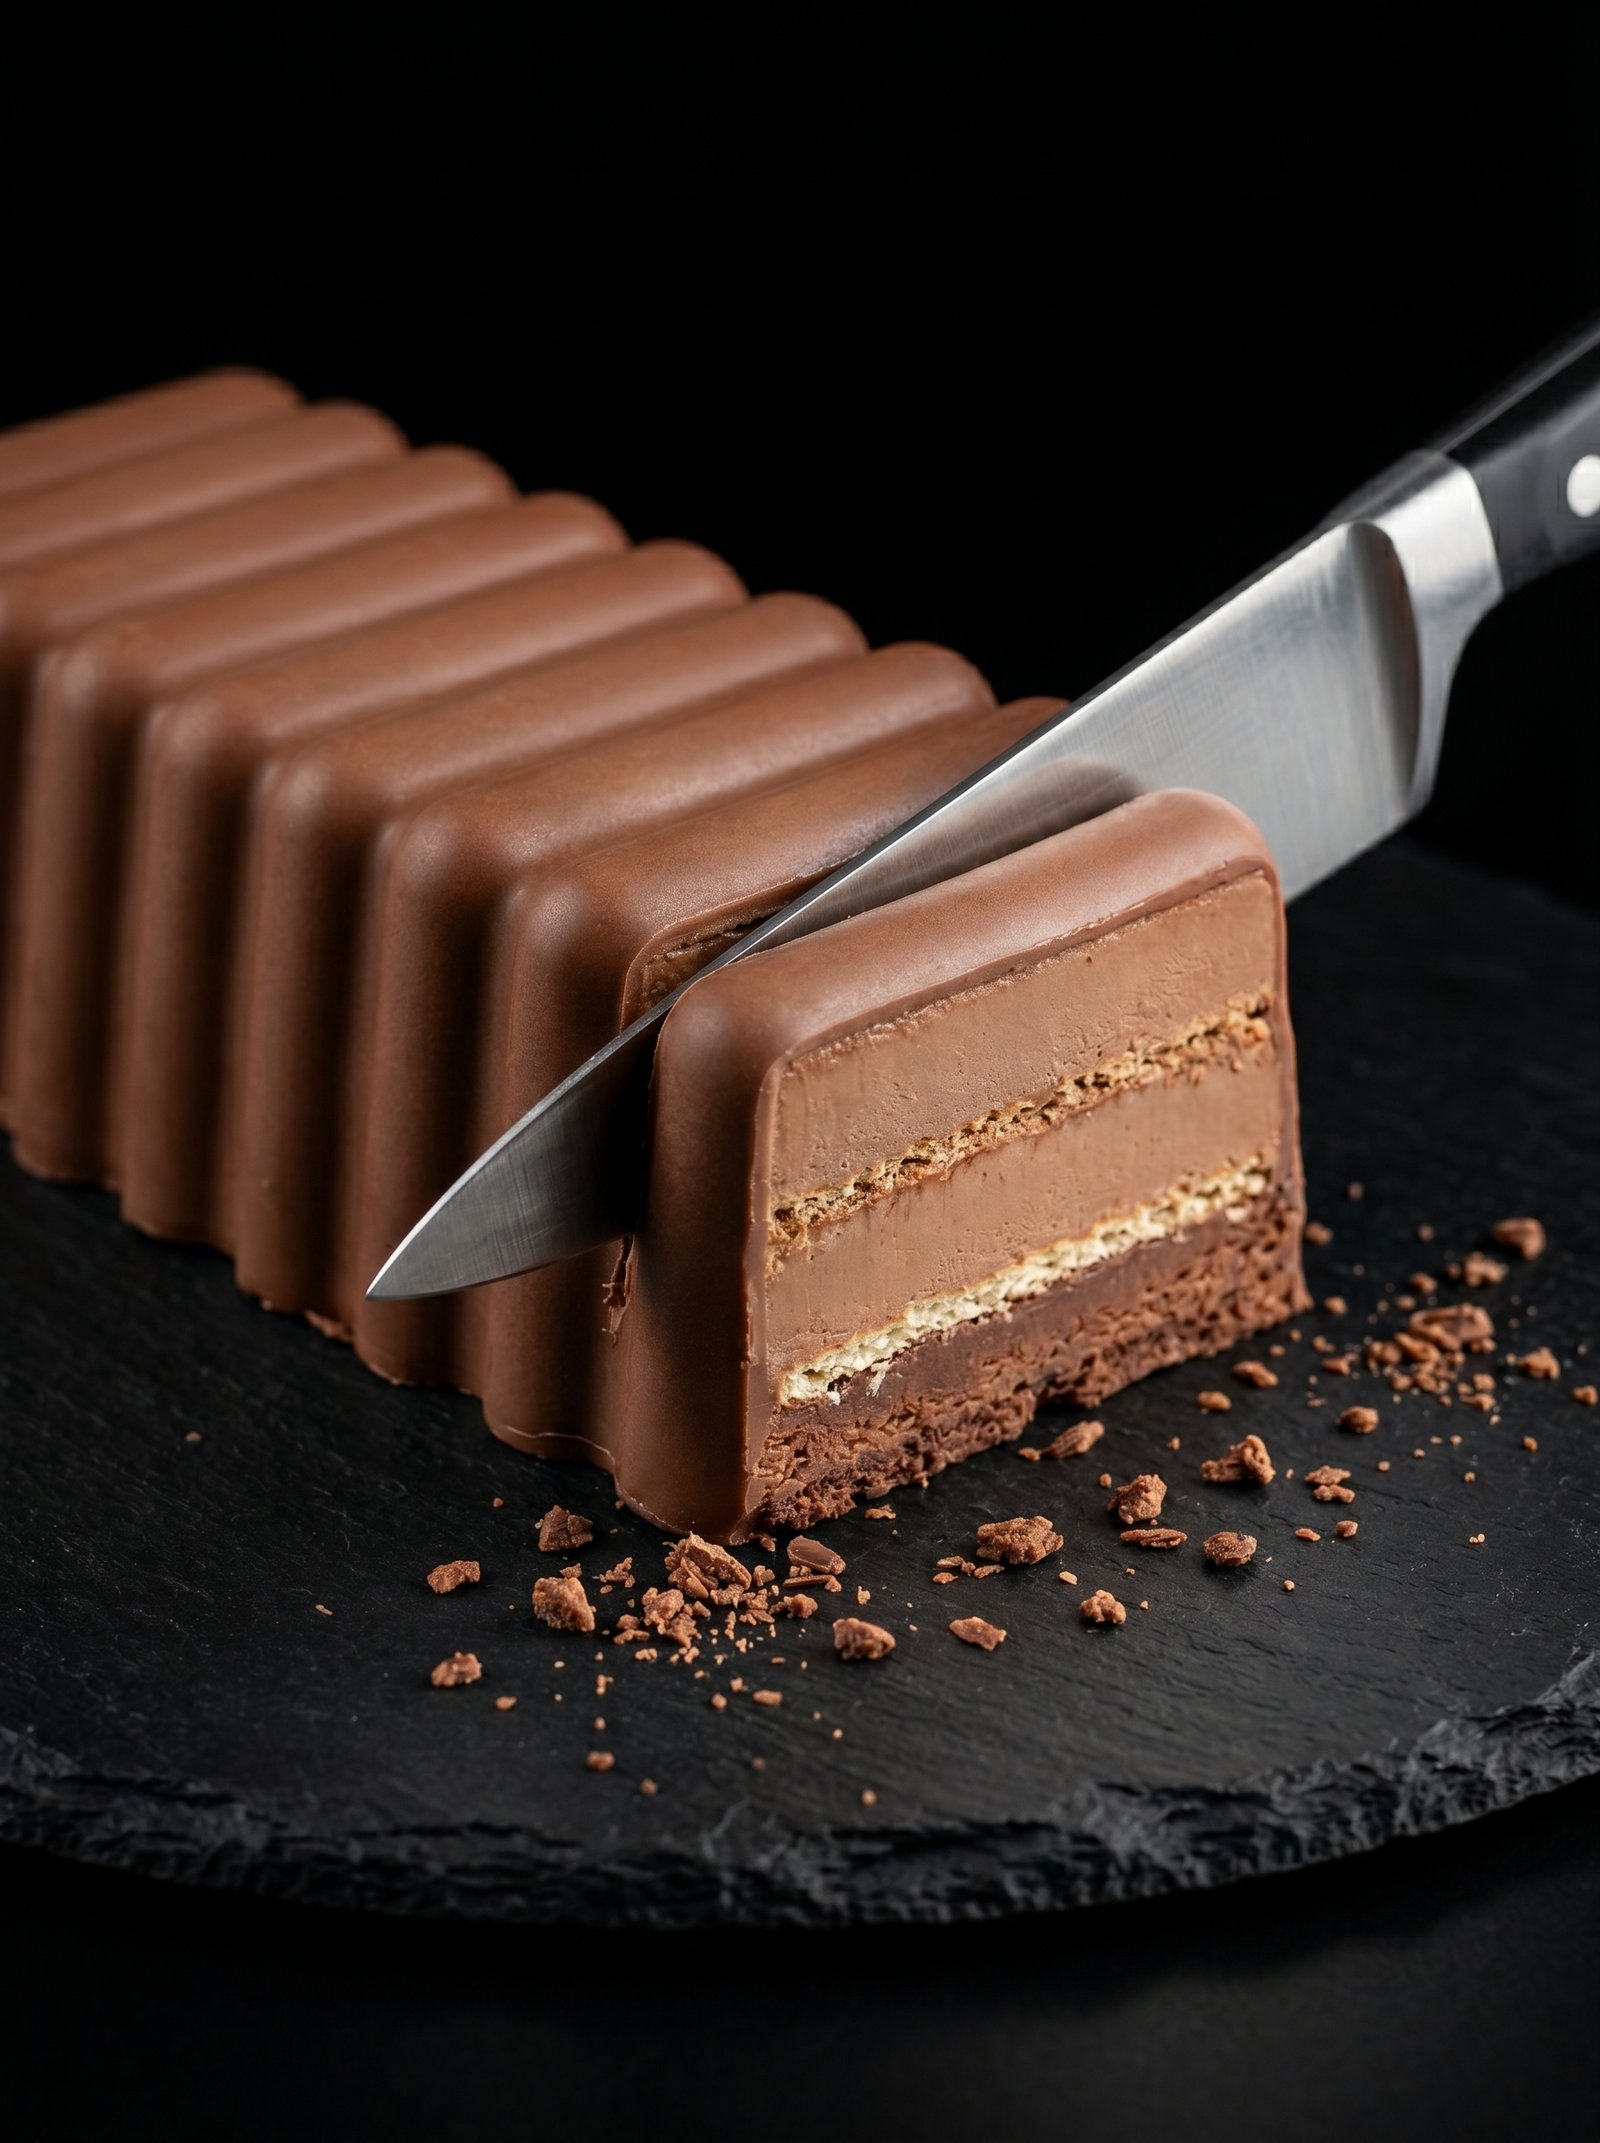
  4. Assemble the Layers πŸͺœ Pipe or spoon a layer of mousse into the chocolate shell. ➑️ Press a layer of wafers or biscuits on top. Repeat with more mousse and another layer of biscuits.

  5. Add the Base πŸͺ Press the crushed cookie and butter mixture firmly over the final layer of mousse. This becomes the “bottom” of the cake.

  6. The Set & Reveal ❄️ Refrigerate for at least 8 hours or overnight. ➑️ Carefully peel back the silicone mold to reveal the ridged design.


❓ Common Questions (Q&A)

Q: How do I stop the chocolate shell from cracking? A: Make sure the shell isn’t too thin. Two coats of chocolate usually provide the stability needed to peel the mold away safely. πŸ› οΈ

Q: Can I make this without raw egg yolks? A: Absolutely! ➑️ You can skip the eggs and sugar and simply fold melted chocolate into whipped cream (this is known as a Chantilly-style mousse).

Q: What if I don’t have a silicone mold? A: You can use a metal loaf tin lined with plastic wrap. You won’t get the ridges, but the taste will be exactly the same! 🍞

Q: Why is my mousse grainy? A: This happens if the melted chocolate is too hot when added to the cold cream. 🌑️ Let the chocolate cool to room temperature (but still liquid) before folding.


✨ Quick Tips

  • The Perfect Slice: Just like in the photo, use a warm, dry knife. ➑️ Run the blade under hot water and wipe it clean between every single cut. πŸ”ͺ

  • Flavor Boost: Add a splash of espresso or a drop of orange extract to the mousse for a gourmet touch. β˜•πŸŠ