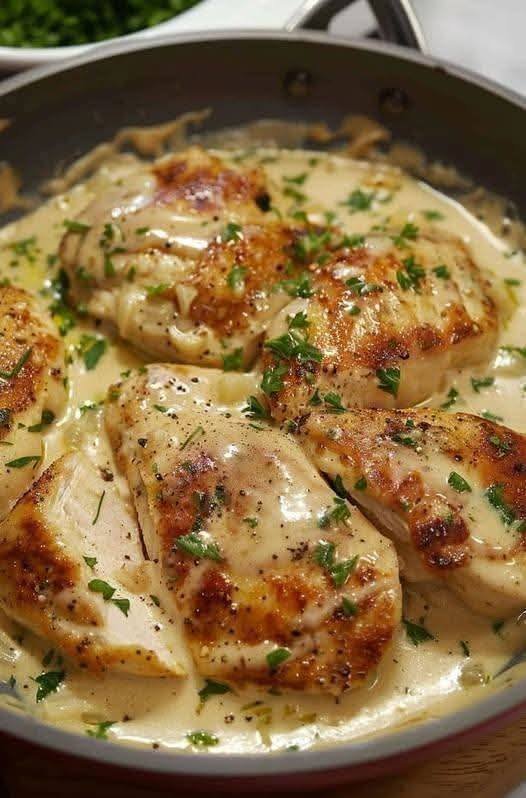
Creamy Garlic Butter Chicken

Creamy Garlic Butter Chicken

This recipe is perfect for managing meals because it feels indulgent but is actually quite simple and focuses on whole ingredients.

Ingredients

  • 1.5 lbs Chicken breasts (sliced into cutlets) or boneless thighs

  • 2 tbsp Olive oil

  • 3 tbsp Butter (divided)

  • 6 cloves Garlic (minced)

  • 1 cup Chicken broth (low sodium)

  • 1 cup Heavy cream (or full-fat coconut milk for a dairy-free version)

  • ½ cup Parmesan cheese (grated)

  • 1 tsp Italian seasoning (or a mix of dried oregano and thyme)

  • Salt and black pepper to taste

  • Fresh parsley (chopped, for garnish)


Step-by-Step Instructions

  1. Season the Chicken: Pat the chicken dry with paper towels. Season both sides generously with salt, pepper, and Italian seasoning.

  2. Sear the Chicken: In a large skillet, heat the olive oil and 1 tablespoon of butter over medium-high heat. Add the chicken and cook for about 5–7 minutes per side until golden brown and cooked through. Remove the chicken from the pan and set it aside on a plate.

  3. Sauté the Garlic: In the same skillet (don’t wash it! those brown bits are flavor), add the remaining 2 tablespoons of butter. Once melted, add the minced garlic and sauté for about 1 minute until fragrant.

  4. Deglaze and Simmer: Pour in the chicken broth. Use a wooden spoon to scrape the bottom of the pan to release the flavorful bits. Let the broth simmer for 2-3 minutes until it reduces slightly.

  5. Create the Cream Sauce: Turn the heat down to medium-low. Stir in the heavy cream and let it come to a gentle simmer (do not let it boil rapidly, or the cream might separate).

  6. Add Cheese: Stir in the Parmesan cheese. Continue stirring until the cheese is melted and the sauce begins to thicken slightly.

  7. Combine: Place the cooked chicken (and any juices from the plate) back into the skillet. Spoon the sauce over the chicken and let it simmer together for 2 minutes to ensure everything is hot.

  8. Garnish and Serve: Top with fresh chopped parsley and extra black pepper if desired.


Meal Management Tips

To keep your meals interesting and balanced, try these variations:

  • Add Greens: Stir in two handfuls of fresh spinach at Step 6 until wilted.

  • Vegetable Base: Serve this over steamed zucchini noodles, cauliflower rice, or roasted asparagus to keep it blood-sugar friendly.

  • The “Acid” Trick: If the sauce feels too heavy, add a squeeze of fresh lemon juice at the very end to brighten the flavors.
Savory Vegan Black-Eyed Pea & Mushroom Balls

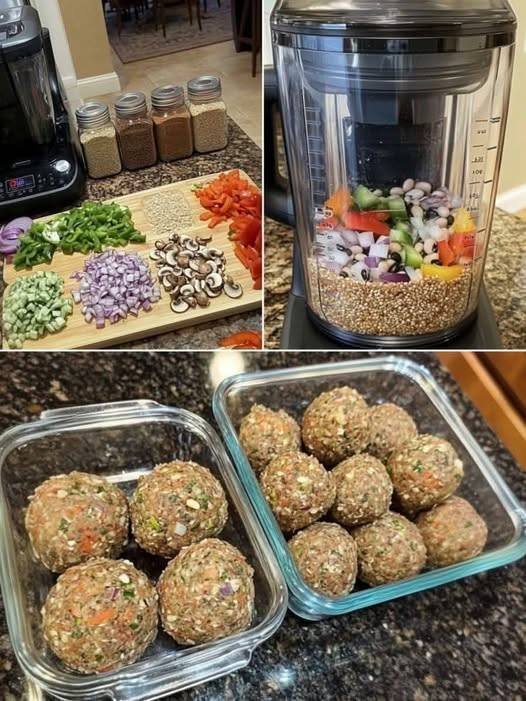
Savory Vegan Black-Eyed Pea & Mushroom Balls

Prep time: 15 mins | Cook time: 15-25 mins | Yields: 12-15 balls

Ingredients

The Base & Binding:

  • 1 cup Black-eyed peas, cooked and drained

  • 2 tbsp Ground flaxseed mixed with 5 tbsp water (your “flax egg”)

  • 1/2 cup Oats, blended into a fine flour

  • 1/4 cup Breadcrumbs (optional, for extra structural integrity)

The Fresh Veggie Mix:

  • 1/2 cup Red onion, finely chopped

  • 1/2 cup Mushrooms, finely chopped (adds great “meaty” texture)

  • 1/2 cup Spring onions, chopped

  • 1/2 cup Mixed bell peppers, finely diced

The Flavor Boosters:

  • 2 tbsp Soy sauce or Tamari

  • 1 tsp Garlic powder

  • 1 tsp Smoked paprika

  • 1 tsp Cumin

  • Salt and Black pepper to taste


Detailed Instructions

  1. Set the Binder: In a small cup, mix your flaxseed and water. Set it aside for 10 minutes until it becomes thick and gelatinous. This is what keeps your veggie balls from falling apart!

  2. Mash: In a large bowl, mash your black-eyed peas. You want a paste-like consistency but with some whole bean pieces left for texture.

  3. Sauté (Pro-Tip): For the best flavor, quickly sauté your onions, mushrooms, and peppers in a pan for 3–5 minutes to remove excess moisture before adding them to the beans.

  4. Combine: Add the veggies, spices, flax egg, soy sauce, and oat flour to the mashed beans. If the mixture feels too wet to hold a shape, stir in the breadcrumbs.

  5. Shape: Scoop about 2 tablespoons of the mixture and roll it between your palms to form a tight ball.

  6. Cook:

    • Oven: Bake at 190°C (375°F) on a parchment-lined tray for 20–25 minutes.

    • Air Fryer: Cook at 190°C (375°F) for 12–15 minutes for maximum crispiness.

    • Skillet: Pan-fry in a little oil over medium heat, turning frequently until browned all over.


Success Tips

  • The Chill Factor: If you have time, let the rolled balls chill in the fridge for 30 minutes before cooking. This helps the oats hydrate and ensures they don’t crack.

  • Finely Dice: Make sure your mushrooms and onions are very finely chopped; large chunks of vegetables can cause the balls to break apart during cooking.

  • Serving Ideas: These are amazing served over spaghetti with marinara, tucked into a pita with tahini, or dipped in a spicy BBQ sauce.

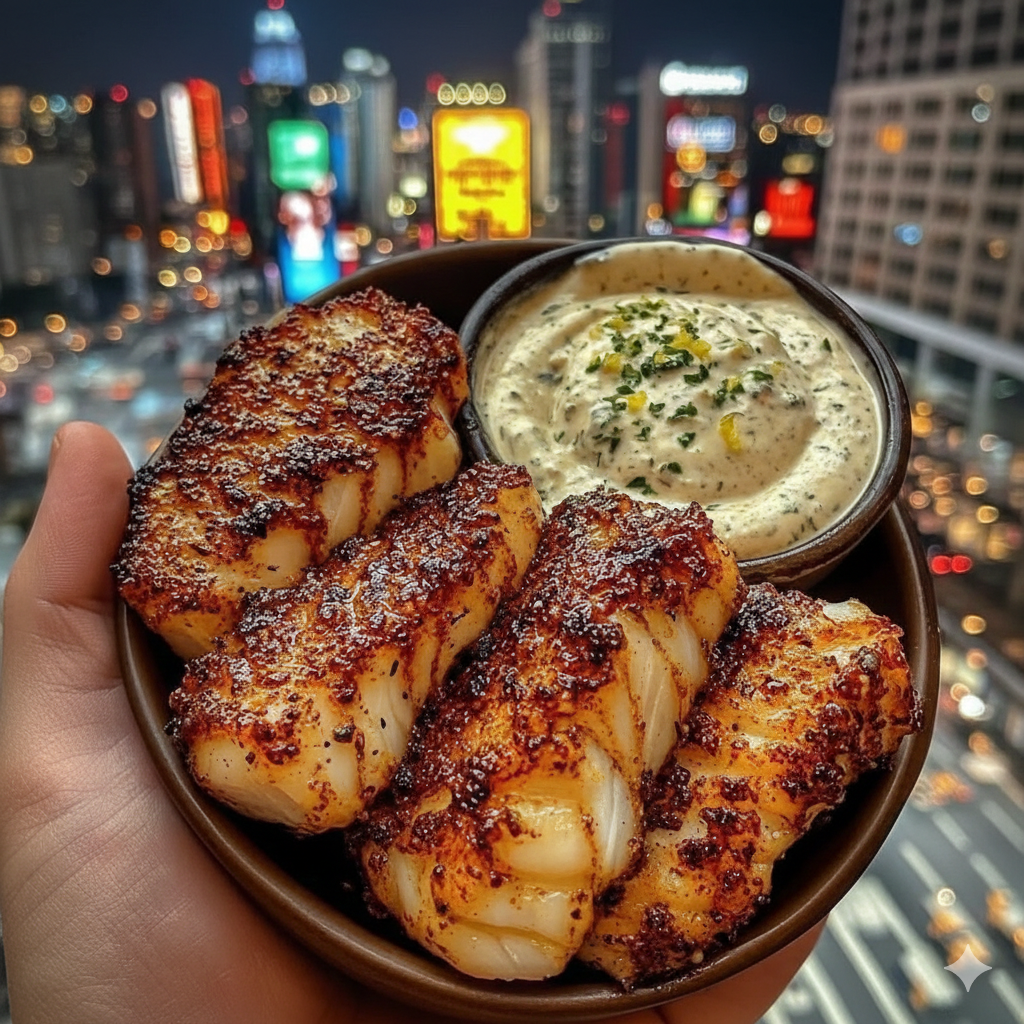
Crispy Garlic Butter Fish Bites with Creamy Herb Sauce

Crispy Garlic Butter Fish Bites with Creamy Herb Sauce

🛒 Ingredients

For the Fish:

  • 500g cod fillets (or any firm white fish like basa/halibut)
  • 1 tsp salt
  • ½ tsp black pepper
  • 1 tsp paprika
  • ½ tsp chili flakes (optional)
  • 1 tsp garlic powder
  • 1 tbsp lemon juice
  • 2 tbsp olive oil
  • 2 tbsp butter
  • 3 cloves garlic (minced)

For the Creamy Herb Sauce:

  • ½ cup mayonnaise
  • 2 tbsp sour cream (or Greek yogurt)
  • 1 tbsp lemon juice
  • 1 tbsp finely chopped parsley
  • 1 tsp dried oregano or mixed herbs
  • 1 small garlic clove (grated)
  • Salt & pepper to taste

👩‍🍳 Step-by-Step Method

Step 1: Prepare the Fish

  1. Wash and pat dry the fish completely (very important for crispiness).
  2. Cut into thick strips or large chunks like in the picture.
  3. In a bowl, add:
    • Salt
    • Black pepper
    • Paprika
    • Chili flakes
    • Garlic powder
    • Lemon juice
  4. Gently mix and coat evenly.
  5. Let marinate for 15–20 minutes.

Step 2: Make the Creamy Herb Sauce

  1. In a small bowl, combine:
    • Mayonnaise
    • Sour cream
    • Lemon juice
    • Parsley
    • Oregano
    • Grated garlic
  2. Mix until smooth.
  3. Adjust salt and pepper.
  4. Refrigerate until serving (cold sauce tastes better!).

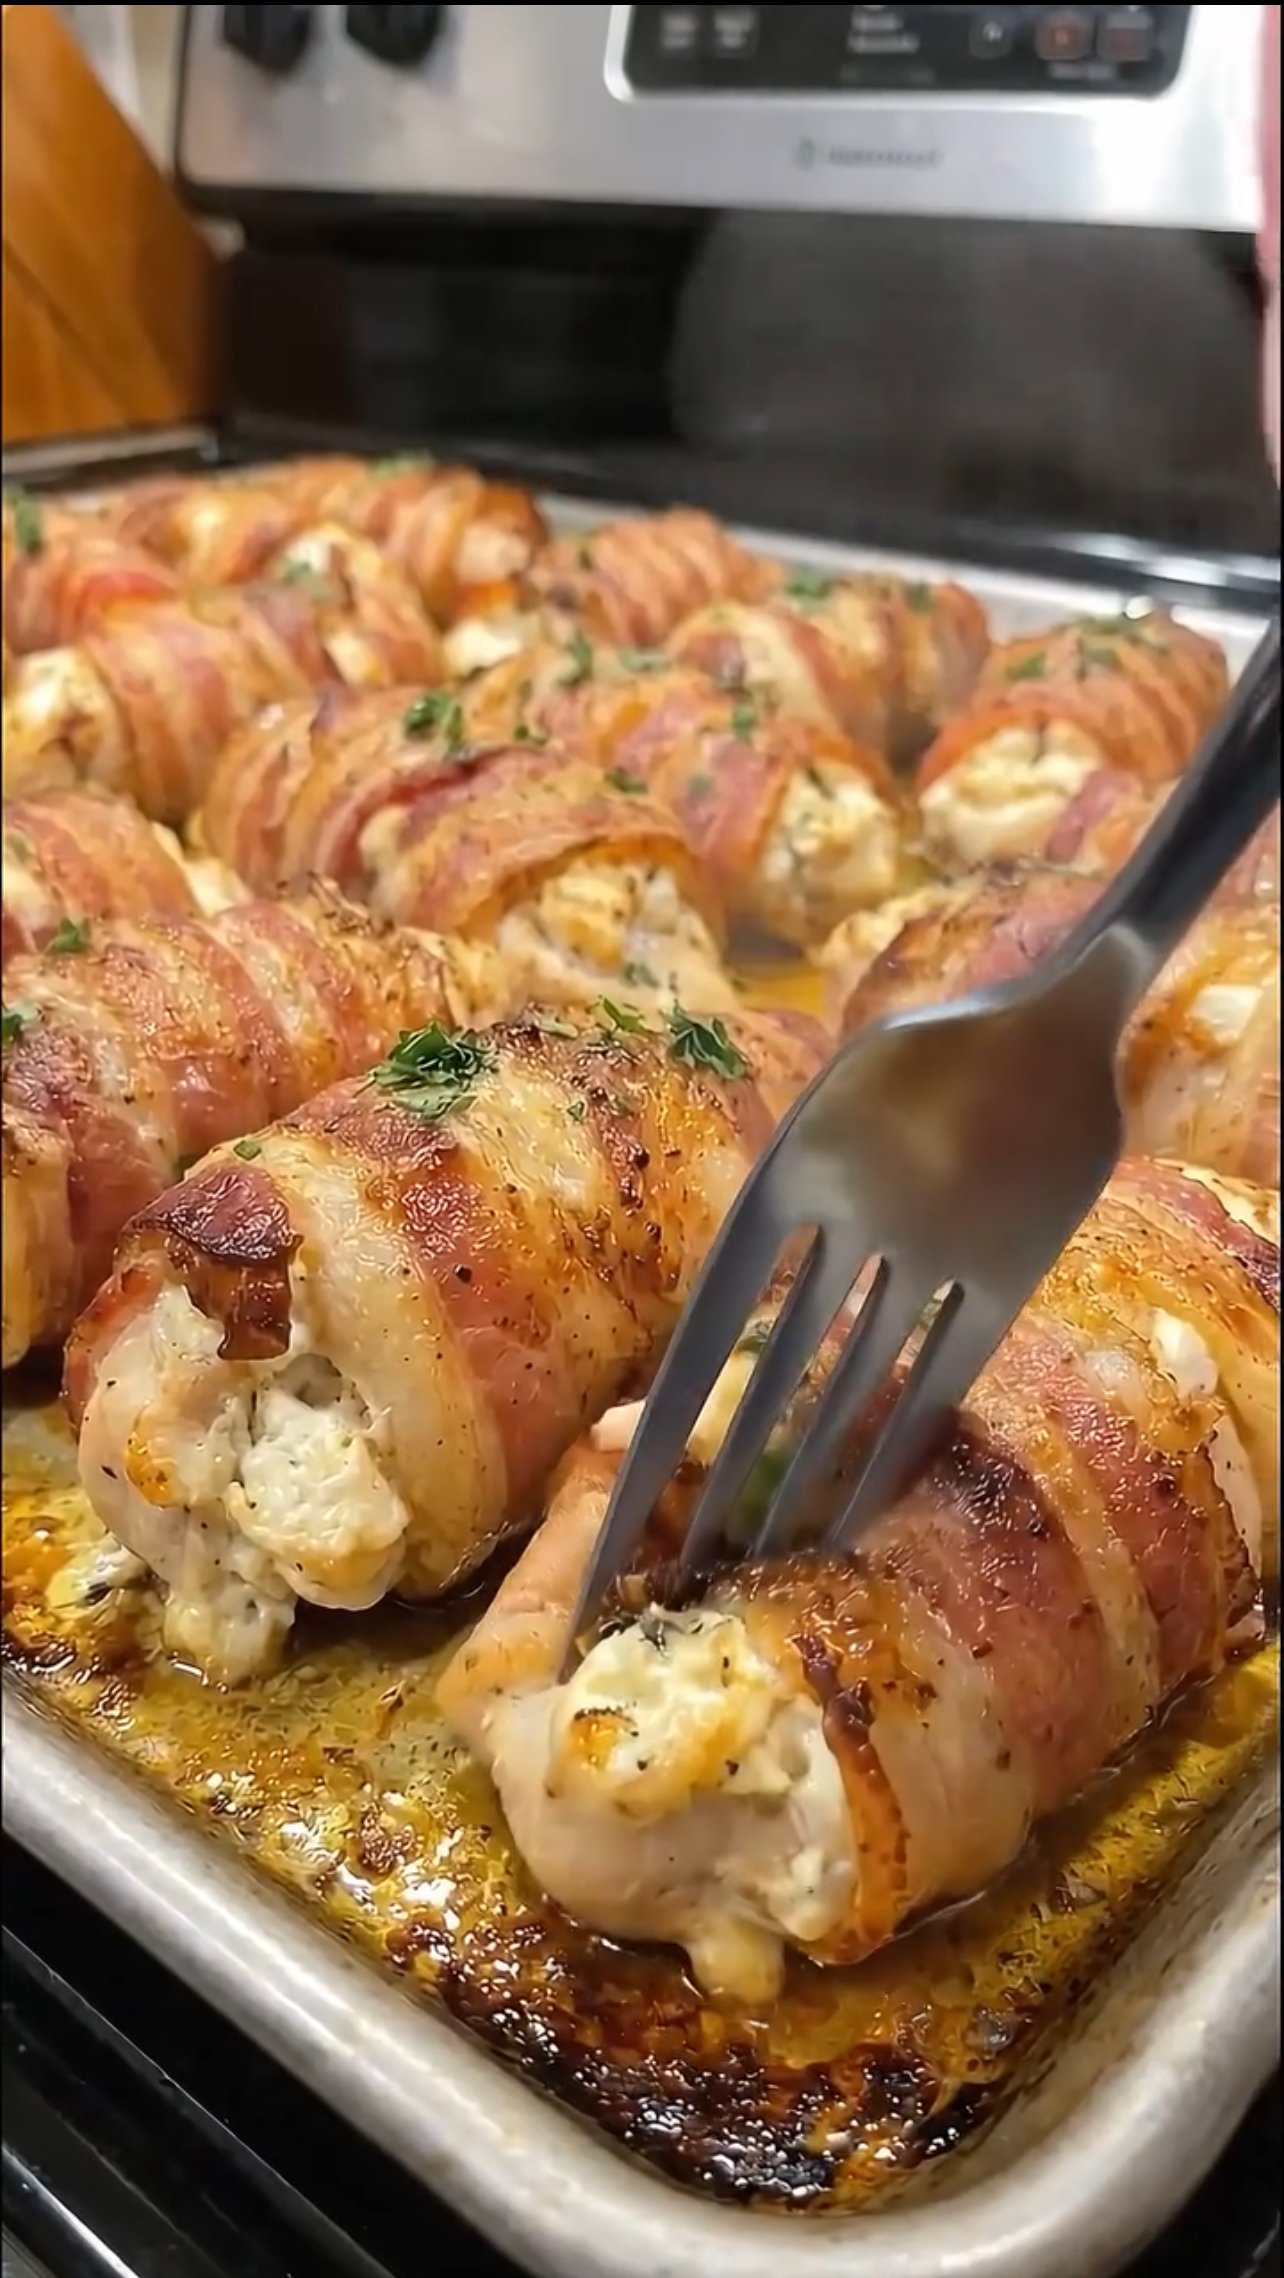
Bacon-Wrapped Cream Cheese Stuffed Chicken Rolls

🛒 Ingredients:
• 3–4 large chicken breasts
• 8 oz (1 block) cream cheese, softened
• 1 cup shredded mozzarella (or cheddar – works great!)
• 2 cloves garlic, minced
• 1 tsp Italian seasoning
• ½ tsp black pepper
• ½ tsp paprika
• Salt to taste
• 10–12 strips bacon
• Fresh parsley (optional, for garnish)

⸻

👩‍🍳 Step-by-Step Instructions:

Step 1: Prep the Chicken
1. Preheat oven to 375°F (190°C).
2. Slice each chicken breast in half lengthwise (or pound thin).
3. Lightly season both sides with salt, pepper, and paprika.

⸻

Step 2: Make the Creamy Filling
1. In a bowl, mix:
• Cream cheese
• Mozzarella (or cheddar)
• Garlic
• Italian seasoning
2. Stir until smooth and well combined.

⸻

Step 3: Stuff & Roll
1. Spread 2–3 tablespoons of the cheese mixture onto each chicken piece.
2. Roll the chicken tightly into a log shape.
3. Wrap each roll with 1–2 slices of bacon (overlapping slightly).
4. Place seam-side down on a greased baking sheet.

⸻

Step 4: Bake
1. Bake uncovered for 30–35 minutes.
2. Then broil for 3–5 minutes to crisp up the bacon (watch carefully so it doesn’t burn!).

Internal temperature should reach 165°F (75°C).

⸻

Step 5: Rest & Serve
1. Let rest for 5 minutes.
2. Garnish with fresh parsley.
3. Serve warm and watch them disappear 😍

⸻

🔥 Optional Flavor Twists:
• Add chopped spinach to the filling
• Mix in crispy cooked bacon bits
• Use sharp cheddar for stronger flavor
• Brush bacon with BBQ sauce before baking

Fluffy Cottage Cheese Bagels

Fluffy Cottage Cheese Bagels

Prep time: 10 minutes | Cook time: 20-25 minutes | Servings: 4 bagels

Ingredients

  • 1 cup cottage cheese: This provides the protein base and moisture.

  • 2 large eggs: Used to bind the dough and help it rise.

  • 1 cup almond flour: Keeps the recipe low-carb and gluten-free (you can substitute oat flour if preferred).

  • 1 ½ tsp baking powder: Essential for achieving a light, fluffy texture.

  • Pinch of salt: To enhance the flavors.

  • Optional: Everything Bagel seasoning, sesame seeds, or poppy seeds for the topping.


Detailed Directions

1. Preheat and Prep

  • Preheat your oven to 375°F (190°C).

  • Line a baking sheet with parchment paper or a silicone baking mat to prevent sticking.

2. Blend the Base

  • For the smoothest texture, place the cottage cheese and eggs in a blender or food processor.

  • Pulse until the mixture is completely smooth and creamy.

3. Mix the Dough

  • In a medium mixing bowl, whisk together the almond flour, baking powder, and salt.

  • Pour the wet cottage cheese mixture into the dry ingredients.

  • Stir until a thick, slightly sticky dough forms.

4. Shape the Bagels

  • Divide the dough into 4 equal portions.

  • With lightly oiled hands (to prevent sticking), roll each portion into a log and join the ends to form a donut shape, or roll into a ball and poke a hole through the center.

  • Place the shaped bagels on your prepared baking sheet.

5. Add Toppings and Bake

  • If using Everything Bagel seasoning, sprinkle it generously over the tops of the bagels.

  • Bake for 20–25 minutes until the bagels are firm to the touch and a beautiful golden brown on the outside.

6. Cool

  • Allow the bagels to cool on the baking sheet for at least 10 minutes. This helps the internal structure set so they remain chewy rather than soft.


Nutrition Profile (Per Bagel)

  • Calories: ~140 kcal

  • Protein: 12g

  • Fat: 8g

  • Net Carbs: 4g

Crispy Cheesy Tuna Melt Patties

Crispy Cheesy Tuna Melt Patties

Prep time: 10 minutes | Cook time: 8 minutes | Servings: 4-6 patties

Ingredients

The Base:

  • 2 cans (5 oz each) tuna: Drained very well (moisture is the enemy of a crispy patty).

  • 1/2 cup breadcrumbs: Panko provides the best crunch, but regular works too.

  • 1/2 cup shredded cheese: Sharp cheddar or Swiss are the traditional favorites.

The Binders & Flavor:

  • 1/4 cup mayonnaise: Keeps the inside moist.

  • 1 egg, beaten: Acts as the “glue” to hold everything together.

  • 1 tsp Dijon mustard: Adds a subtle tang.

  • 1 tbsp lemon juice: Brightens up the seafood flavor.

  • 2 tbsp green onions or parsley: Finely chopped for freshness.

The Seasoning:

  • 1/2 tsp garlic powder

  • 1/2 tsp onion powder

  • 1/2 tsp salt

  • 1/4 tsp black pepper

For Cooking:

  • 1 tbsp butter or oil: For a golden-brown sear.


Detailed Directions

1. Mix the Base

In a large mixing bowl, flake the drained tuna with a fork. Add the breadcrumbs, shredded cheese, green onions, and all the dry seasonings (garlic powder, onion powder, salt, and pepper). Toss these together so the spices are evenly distributed.

2. Add the Binders

Add the beaten egg, mayonnaise, Dijon mustard, and lemon juice to the bowl. Use a spatula or fork to fold everything together until the mixture is uniform.

Pro Tip: If the mixture feels too wet to hold a shape, add another tablespoon of breadcrumbs. If it’s too crumbly, add a tiny bit more mayo.

3. Shape the Patties

Divide the mixture into 4 to 6 equal portions. Scoop a portion into your hands and press it firmly into a disc about 1-inch thick. Pressing firmly is key to ensuring they don’t fall apart in the pan.

4. The Golden Sear

Heat your butter or oil in a large non-stick skillet over medium heat. Once the pan is hot, carefully place the patties in. Cook for 3–4 minutes per side. You are looking for a deep golden-brown crust and for the cheese inside to become gooey.

5. The “Melt” Finish (Optional)

If you want extra cheesiness, place a thin slice of cheese on top of each patty during the last 60 seconds of cooking. Cover the skillet with a lid for a moment to trap the heat and melt the cheese perfectly.


Serving Suggestions

  • Classic Style: On toasted brioche buns with sliced tomato, crisp lettuce, and a smear of tartar sauce.

  • Low Carb: Serve atop a fresh Caesar salad or inside large butter lettuce cups.

  • Dip it: These pair beautifully with a spicy remoulade or a simple lemon-garlic aioli.