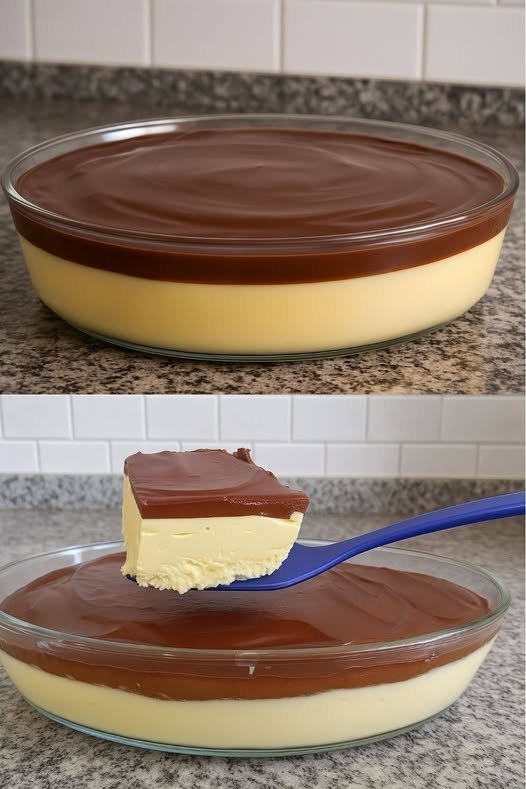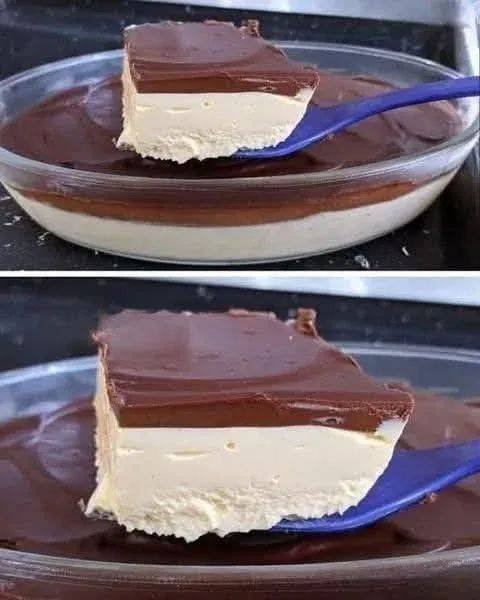
Carnivore Molten Lava Cake

Carnivore Molten Lava Cake (Christmas Edition)

Serves 2 — perfect for a cozy Christmas night!

🧈 Ingredients

  • 4 oz cream cheese, softened

  • 4 tbsp unsalted butter (plus extra for greasing)

  • 2 egg yolks

  • 2 whole eggs

  • 2 tbsp heavy cream

  • 1–2 tbsp beef gelatin powder (optional — thickens for gooey center)

  • ½ tsp vanilla extract (optional but OK if you’re flexible carnivore)

  • Pinch salt

For a chocolate-like flavor without cocoa:
Add 1 tsp instant espresso powder — optional but gives deeper taste & darker color.


🍽 Directions

1️⃣ Prep

  • Preheat oven to 190°C / 375°F.

  • Grease 2 small ramekins generously with butter.

2️⃣ Mix the base

  • In a microwave-safe bowl, melt butter + cream cheese together (20–30 sec).

  • Whisk until smooth and creamy.

3️⃣ Add eggs & gelatin

  • Whisk in egg yolks + whole eggs + heavy cream + salt until silky.

  • Sprinkle gelatin powder and let it sit 1 minute, then whisk until dissolved.

4️⃣ Pour & bake

  • Divide batter into ramekins.

  • Bake 8–10 minutes — edges should look set, but the center should still jiggle slightly.
    Do not overbake — that gooey center is the lava!

5️⃣ Rest & release

  • Rest 2 minutes, then gently run a knife around edges.

  • Flip onto a small plate or eat straight from the ramekin for extra molten flow.

6️⃣ Serve hot

  • Top with a tiny pat of butter, whipped heavy cream, or egg yolk custard drizzle for extra richness.


🎄 Optional Christmas Topping Ideas

  • Whipped cream + a sprinkle of cinnamon (if you allow seasoning)

  • Butter drizzle + pinch of salt flakes

  • Cream cheese frosting swirl (cream cheese + butter blended)


⭐ Nutrition (per cake, approx)

High in fat + protein, zero carbs unless flavorings are added.
Ultra satiating and carnivore-friendly!
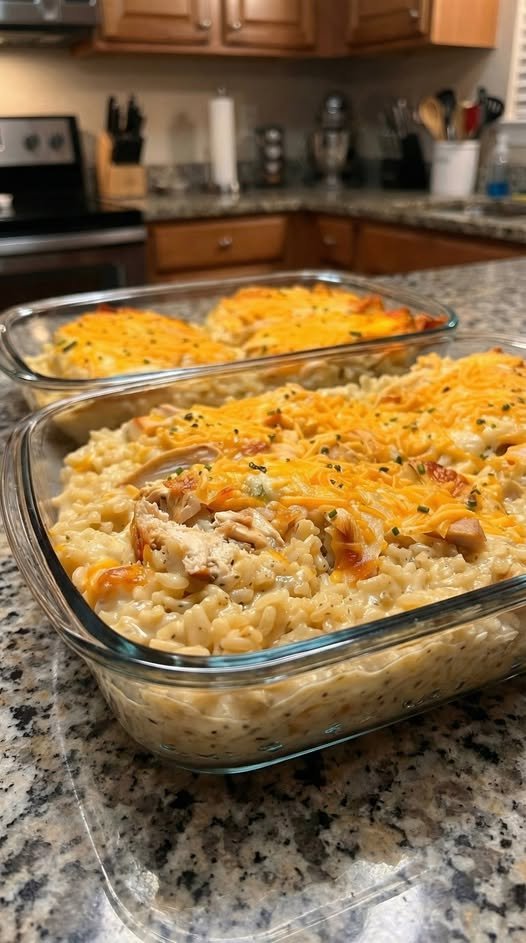
🧀 Baked Chicken & Rice Casserole

🧀 Baked Chicken & Rice Casserole

A creamy, cheesy comfort-food casserole that’s quick, filling, and perfect for busy nights.

⭐ Why You’ll Love It

✔ Comfort food classic
✔ Easy prep
✔ Kid-friendly
✔ Freezer-friendly
✔ Super cheesy


🛒 Ingredients

  • 1 box Rice-A-Roni (Chicken flavor)

  • 4 cups cooked shredded chicken

  • 1 can cream of onion soup (or cream of mushroom/chicken)

  • 1 cup sour cream

  • 2 cups shredded cheddar cheese

  • French fried onions (optional topping)


👩‍🍳 Instructions

  1. Preheat oven to 350°F (180°C).

  2. Cook Rice-A-Roni according to package directions.

  3. Stir in:

    • Cream of onion soup

    • Sour cream

  4. Add shredded chicken and mix well.

  5. Spread mixture into a greased 9×13 baking dish.

  6. Sprinkle cheddar cheese evenly on top.

  7. Bake for 40 minutes, until hot and bubbly.

  8. Let cool 5 minutes.

  9. Top with French fried onions (optional) and serve.


💡 Tips & Variations

  • Use turkey instead of chicken if needed.

  • Add peas, mushrooms, or onions for extra nutrition.

  • For extra creaminess: add ¼ cup milk or cream.

  • Use low-fat sour cream & low-sodium soup for a lighter version.


🧊 Storage

  • Fridge: 3–4 days in airtight container

  • Freezer: up to 3 months

  • Thaw overnight and reheat in oven or microwave

🍰 Passion Fruit & Chocolate Layered Dessert

🍰 Passion Fruit & Chocolate Layered Dessert

Welcome!

Hello everyone! Welcome to our food blog — your favorite place to find delicious and easy recipes.
Here you’ll discover desserts, snacks, breakfasts, appetizers, and fresh salads.
Let’s get started!


🍫 Passion Fruit & Chocolate Dessert

This creamy, no-bake dessert combines tangy passion fruit with rich chocolate ganache. It’s perfect for parties, family dinners, or when you want something sweet without turning on the oven.


🧾 Ingredients

Cream Layer

  • 2 packets passion fruit powdered drink mix (25 g / 0.88 oz each)

  • 800 g sweetened condensed milk (28.2 oz)

  • 600 g heavy cream (21.2 oz)

Chocolate Ganache Topping

  • 200 g semi-sweet chocolate, chopped (7 oz)

  • 200 g heavy cream (7 oz)


👨‍🍳 Instructions

Prepare the Cream Layer

  1. Add the heavy cream, sweetened condensed milk, and passion fruit drink mix to a blender.

  2. Blend for about 5 minutes until the mixture is smooth and slightly airy.

  3. Pour into a glass or ceramic dish and spread evenly.


Make the Chocolate Ganache

  1. Place the chopped chocolate in a microwave-safe bowl.

  2. Microwave in 30-second intervals, stirring each time until fully melted and smooth.

  3. Add the heavy cream and stir until glossy and well combined.


Assemble

  1. Pour the chocolate ganache over the passion fruit cream layer.

  2. Spread gently to fully cover the surface.


Chill & Serve

  • Refrigerate for at least 1 hour, or until set.

  • Slice and serve chilled.

Enjoy a beautiful layered dessert with a perfect balance of fruity freshness and rich chocolate!


💡 Tips & Variations

  • For stronger passion fruit flavor, add 1 extra packet of drink mix.

  • Use dark chocolate for a more intense chocolate taste.

  • Top with chocolate shavings or fresh fruit before serving.

  • Serve in individual cups for parties.

Cheesy Sloppy Joe Garlic Toast

Cheesy Sloppy Joe Garlic Toast

Ingredients

  • 1 lb ground beef

  • ½ yellow onion, finely diced

  • 2 cloves garlic, minced

  • 8 oz tomato sauce

  • 2 tbsp ketchup

  • 1 tbsp Worcestershire sauce

  • 1 tsp chili powder

  • Salt and pepper, to taste

  • 1 loaf thick-sliced garlic bread (store-bought or homemade)

  • 2 cups shredded cheddar cheese

  • 2 tbsp fresh parsley, chopped (for garnish)


Instructions

1. Prepare the Sloppy Joe Mixture

  • In a large skillet over medium heat, cook the ground beef and diced onion together. Stir frequently, breaking the beef into small crumbles, until the meat is fully browned and the onions are soft and translucent.

  • Drain any excess fat from the skillet to ensure the mixture isn’t greasy.

  • Add the minced garlic to the skillet and cook for about 1 minute until fragrant.

  • Stir in the tomato sauce, ketchup, Worcestershire sauce, and chili powder.

  • Season with salt and pepper to your preference.

  • Reduce the heat to low and let the mixture simmer for 5–10 minutes, allowing the sauce to thicken and the flavors to meld.

2. Prepare the Garlic Toast

  • While the meat simmers, preheat your oven according to the instructions on the garlic bread package (usually around 375°F or 190°C).

  • Place the garlic bread slices on a large baking sheet.

  • Lightly toast the bread in the oven for about 5 minutes. This “pre-toast” ensures the bread stays crispy and doesn’t get soggy once you add the toppings.

3. Assemble and Melt

  • Remove the baking sheet from the oven.

  • Spoon a generous amount of the Sloppy Joe mixture onto each slice of garlic bread, spreading it to the edges.

  • Top each slice with a heavy layer of shredded cheddar cheese.

  • Return the pan to the oven and bake for an additional 5–8 minutes, or until the cheese is completely melted and bubbly. For extra golden cheese, you can broil it for the last 60 seconds.

4. Garnish and Serve

  • Remove from the oven and sprinkle with freshly chopped parsley.

  • Serve immediately while the cheese is hot and the bread is crunchy.


Pro-Tip

If you prefer a little extra kick, add a few slices of pickled jalapeños under the cheese before the final bake!

Carnivore Fluffy Pancakes

🥩 Carnivore Fluffy Pancakes

Ingredients (1–2 servings)

  • 3 large eggs (room temperature)

  • 2 oz cream cheese (softened)
    or ¼ cup cottage cheese (for lighter texture)

  • 1 tbsp melted butter or beef tallow

  • Optional (still carnivore-friendly):

    • ¼ tsp salt (for savory)

    • ¼ tsp baking powder (optional – some strict carnivores skip it)


Instructions

  1. Blend

    • Add eggs, cream cheese (or cottage cheese), butter, and salt to a blender.

    • Blend until completely smooth (no lumps).

  2. Rest (important for fluffiness)

    • Let batter rest 5 minutes so air settles.

  3. Cook

    • Heat a non-stick pan or cast iron on low–medium heat.

    • Lightly grease with butter or tallow.

    • Pour small pancake circles (they spread).

  4. Flip carefully

    • Cook 2–3 minutes until bubbles form and edges set.

    • Flip gently and cook another 1–2 minutes.

  5. Serve

    • Stack and enjoy hot.


Optional Carnivore Toppings

  • Butter 🧈

  • Whipped heavy cream

  • Carnivore “maple” (butter + egg yolk blended)

  • Crispy bacon on the side 🥓

Garlic Cheese Fingers

Garlic Cheese Fingers

Prep Time: 10 minutes
Cook Time: 10–12 minutes
Serves: 4–6

Crispy flatbread or pizza crust topped with garlic butter and melted cheese, sliced into easy-to-share fingers.


Ingredients

  • 1 prepared pizza crust or flatbread (thin works best)

  • 1 tablespoon butter, melted

  • 1 tablespoon olive oil

  • 2 cloves garlic, finely minced

  • 1 cup shredded mozzarella cheese

  • ¼ cup grated Parmesan cheese

  • ½ teaspoon dried oregano or Italian seasoning

  • ¼ teaspoon black pepper

  • Optional:

    • Chopped fresh parsley

    • Red pepper flakes

    • Light sour cream or yogurt for dipping


Instructions

1. Preheat Oven

Preheat oven to 400°F (200°C).
Line a baking tray with parchment paper or lightly grease it.


2. Prepare Garlic Butter

In a small bowl, mix:

  • Melted butter

  • Olive oil

  • Minced garlic

  • Black pepper

  • Oregano or Italian seasoning

Stir until well combined.


3. Prepare the Crust

Place pizza crust or flatbread on the baking tray.
Brush the entire surface evenly with the garlic butter mixture.


4. Add Cheese

Sprinkle mozzarella evenly over the crust.
Top with Parmesan cheese.


5. Bake

Bake for 10–12 minutes, or until:

  • Cheese is fully melted

  • Edges are lightly golden

  • Bottom is crisp

For extra browning, broil for the last 1–2 minutes while watching closely.


6. Slice and Serve

Remove from oven and let rest for 2 minutes.
Slice into strips or triangles.
Garnish with chopped parsley if desired.


Optional Light Version (Lower-Calorie Method)

  • Use whole wheat or low-carb flatbread

  • Use part-skim mozzarella

  • Reduce butter to ½ tablespoon

  • Increase garlic and herbs for flavor without extra fat


Storage & Reheating

  • Storage: Refrigerate leftovers up to 2 days

  • Reheat: Oven or air fryer at 350°F (175°C) for 4–5 minutes

  • Avoid microwave for best texture


Serving Ideas

Serve with:

  • Marinara sauce

  • Light garlic yogurt dip

  • Tomato soup

  • Fresh salad