Loaded Steak Quesadillas

Ingredients

For the Steak

3/4 – 1 lbs sirloin steak

1 teaspoon ancho chili powder

1/2 teaspoon paprika

1/4 teaspoon ground mexican oregano

1/4 teaspoon cumin

1/4 teaspoon garlic powder

1/4 teaspoon onion powder

Pinch of cayenne pepper

1/4 teaspoon salt

For the Quesadillas

4 large flour tortillas

2 cups Mexican Cheese Blend

1/2 cup cherry tomatoes, thinly sliced

1/2 cup canned fire roasted corn kernels, drained

1/2 cup canned black beans, drained

1/2 an avocado, diced

Limes wedges and fresh minced cilantro for garnish

Instructions

Preheat oven to 425˚F. Prepare a baking sheet with a piece of parchment paper.

In a small bowl, mix together all spices and salt for the steak. Generously coat steak with spice blend.

Heat 2 tablespoons olive oil in a large skillet over medium high heat. Sear steak, no more than 3 minutes per side. The steak will cook more in the oven so make sure it’s just a sear! Remove from heat and let rest for 5 minutes while prepping quesadillas.

Place 2 tortillas on the prepared sheet and sprinkle each one with 1/2 cup of the cheese.

Top with tomatoes, corn, black beans, and avocado.

Thinly slice steak against the grain. Place slices on top of the loaded tortillas.

Sprinkle the rest of the cheese evenly over both quesadillas and cover with remaining tortillas.

Bake in the oven for 6-8 minutes, until cheese is melted and tortillas are warmed through.

Remove from oven and slice as desired. Top with cilantro and serve with lime wedges, a dollop of sour cream and your favorite salsa and guacamole!
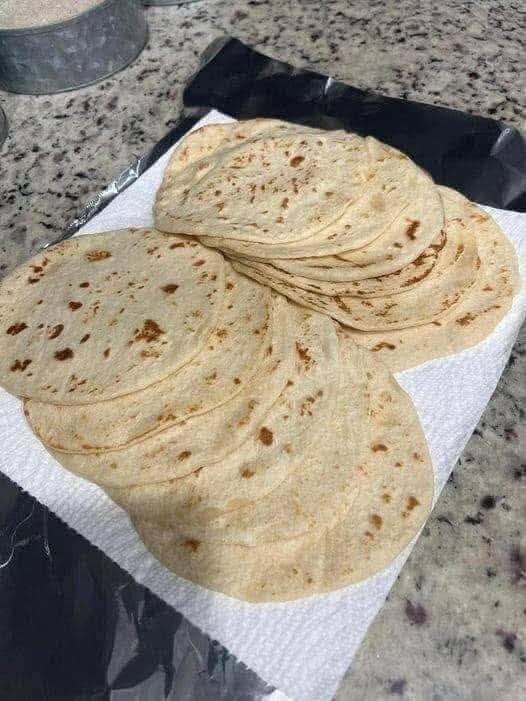
Mediterranean Low-Carb Tortillas

Mediterranean Low-Carb Tortillas (Flexible, Strong & Grain-Free)

These Mediterranean-style low-carb tortillas are soft, bendable, and shockingly sturdy—without flour, starches, or sugar. Made with just eggs and cheese (plus one secret ingredient), they’re perfect for wraps, gyros, quesadillas, or breakfast roll-ups while staying low-carb and protein-rich.

Unlike eggy flatbreads that crack or tear, these tortillas cool into a flexible, almost wheat-like texture. The key is gentle heat, full blending, and allowing them to rest after cooking. Simple ingredients. Smart technique. Big payoff.

Ingredients (Makes 4 Tortillas)

  • 2 large eggs
  • ½ cup shredded mozzarella (low-moisture works best)
  • 1 tablespoon cream cheese (the secret to flexibility)

Optional (still carnivore, improves strength):

  • ½ tablespoon beef gelatin

Equipment

  • Blender or food processor
  • Non-stick skillet (8–10 inch)
  • Silicone spatula

Instructions

1️⃣ Blend Until Silky

Add eggs, shredded mozzarella, cream cheese, and gelatin (if using) to a blender or food processor.
Blend until completely smooth—no cheese bits, no streaks. This step is crucial for even cooking and flexibility.

2️⃣ Heat the Pan Gently

Place a non-stick skillet over medium-low heat.
Lightly grease with butter or beef tallow.
The pan should be warm, not hot—too much heat causes rubbery tortillas.

3️⃣ Cook Thin & Even

Pour ¼ of the batter into the center of the pan.
Immediately swirl to form a thin, even circle.

Cook for 60–90 seconds, until:

  • The edges lift easily
  • The surface looks set with no wet spots
See also  Mediterranean Cleansing Green Detox Soup

4️⃣ Flip Carefully

Flip gently using a silicone spatula.
Cook the second side for 30–40 seconds, then remove to a plate or cooling rack.

👉 Do not overcook — they continue to firm up as they cool.

Cooling = Flexibility

Let tortillas cool for 2–3 minutes before using.
This resting phase is where the magic happens—they become bendable, strong, and tear-resistant.

Texture Troubleshooting

  • Too eggy?  Use 1 whole egg + 1 egg white
  • Breaking?  Add a little more cream cheese or gelatin
  • Rubbery?  Heat was too high

Storage

  • Fridge: 3–4 days (store with parchment between)
  • Freezer: Up to 1 month

Simple, clean, and endlessly versatile—these tortillas prove low-carb doesn’t mean low-satisfaction. 💪🌯

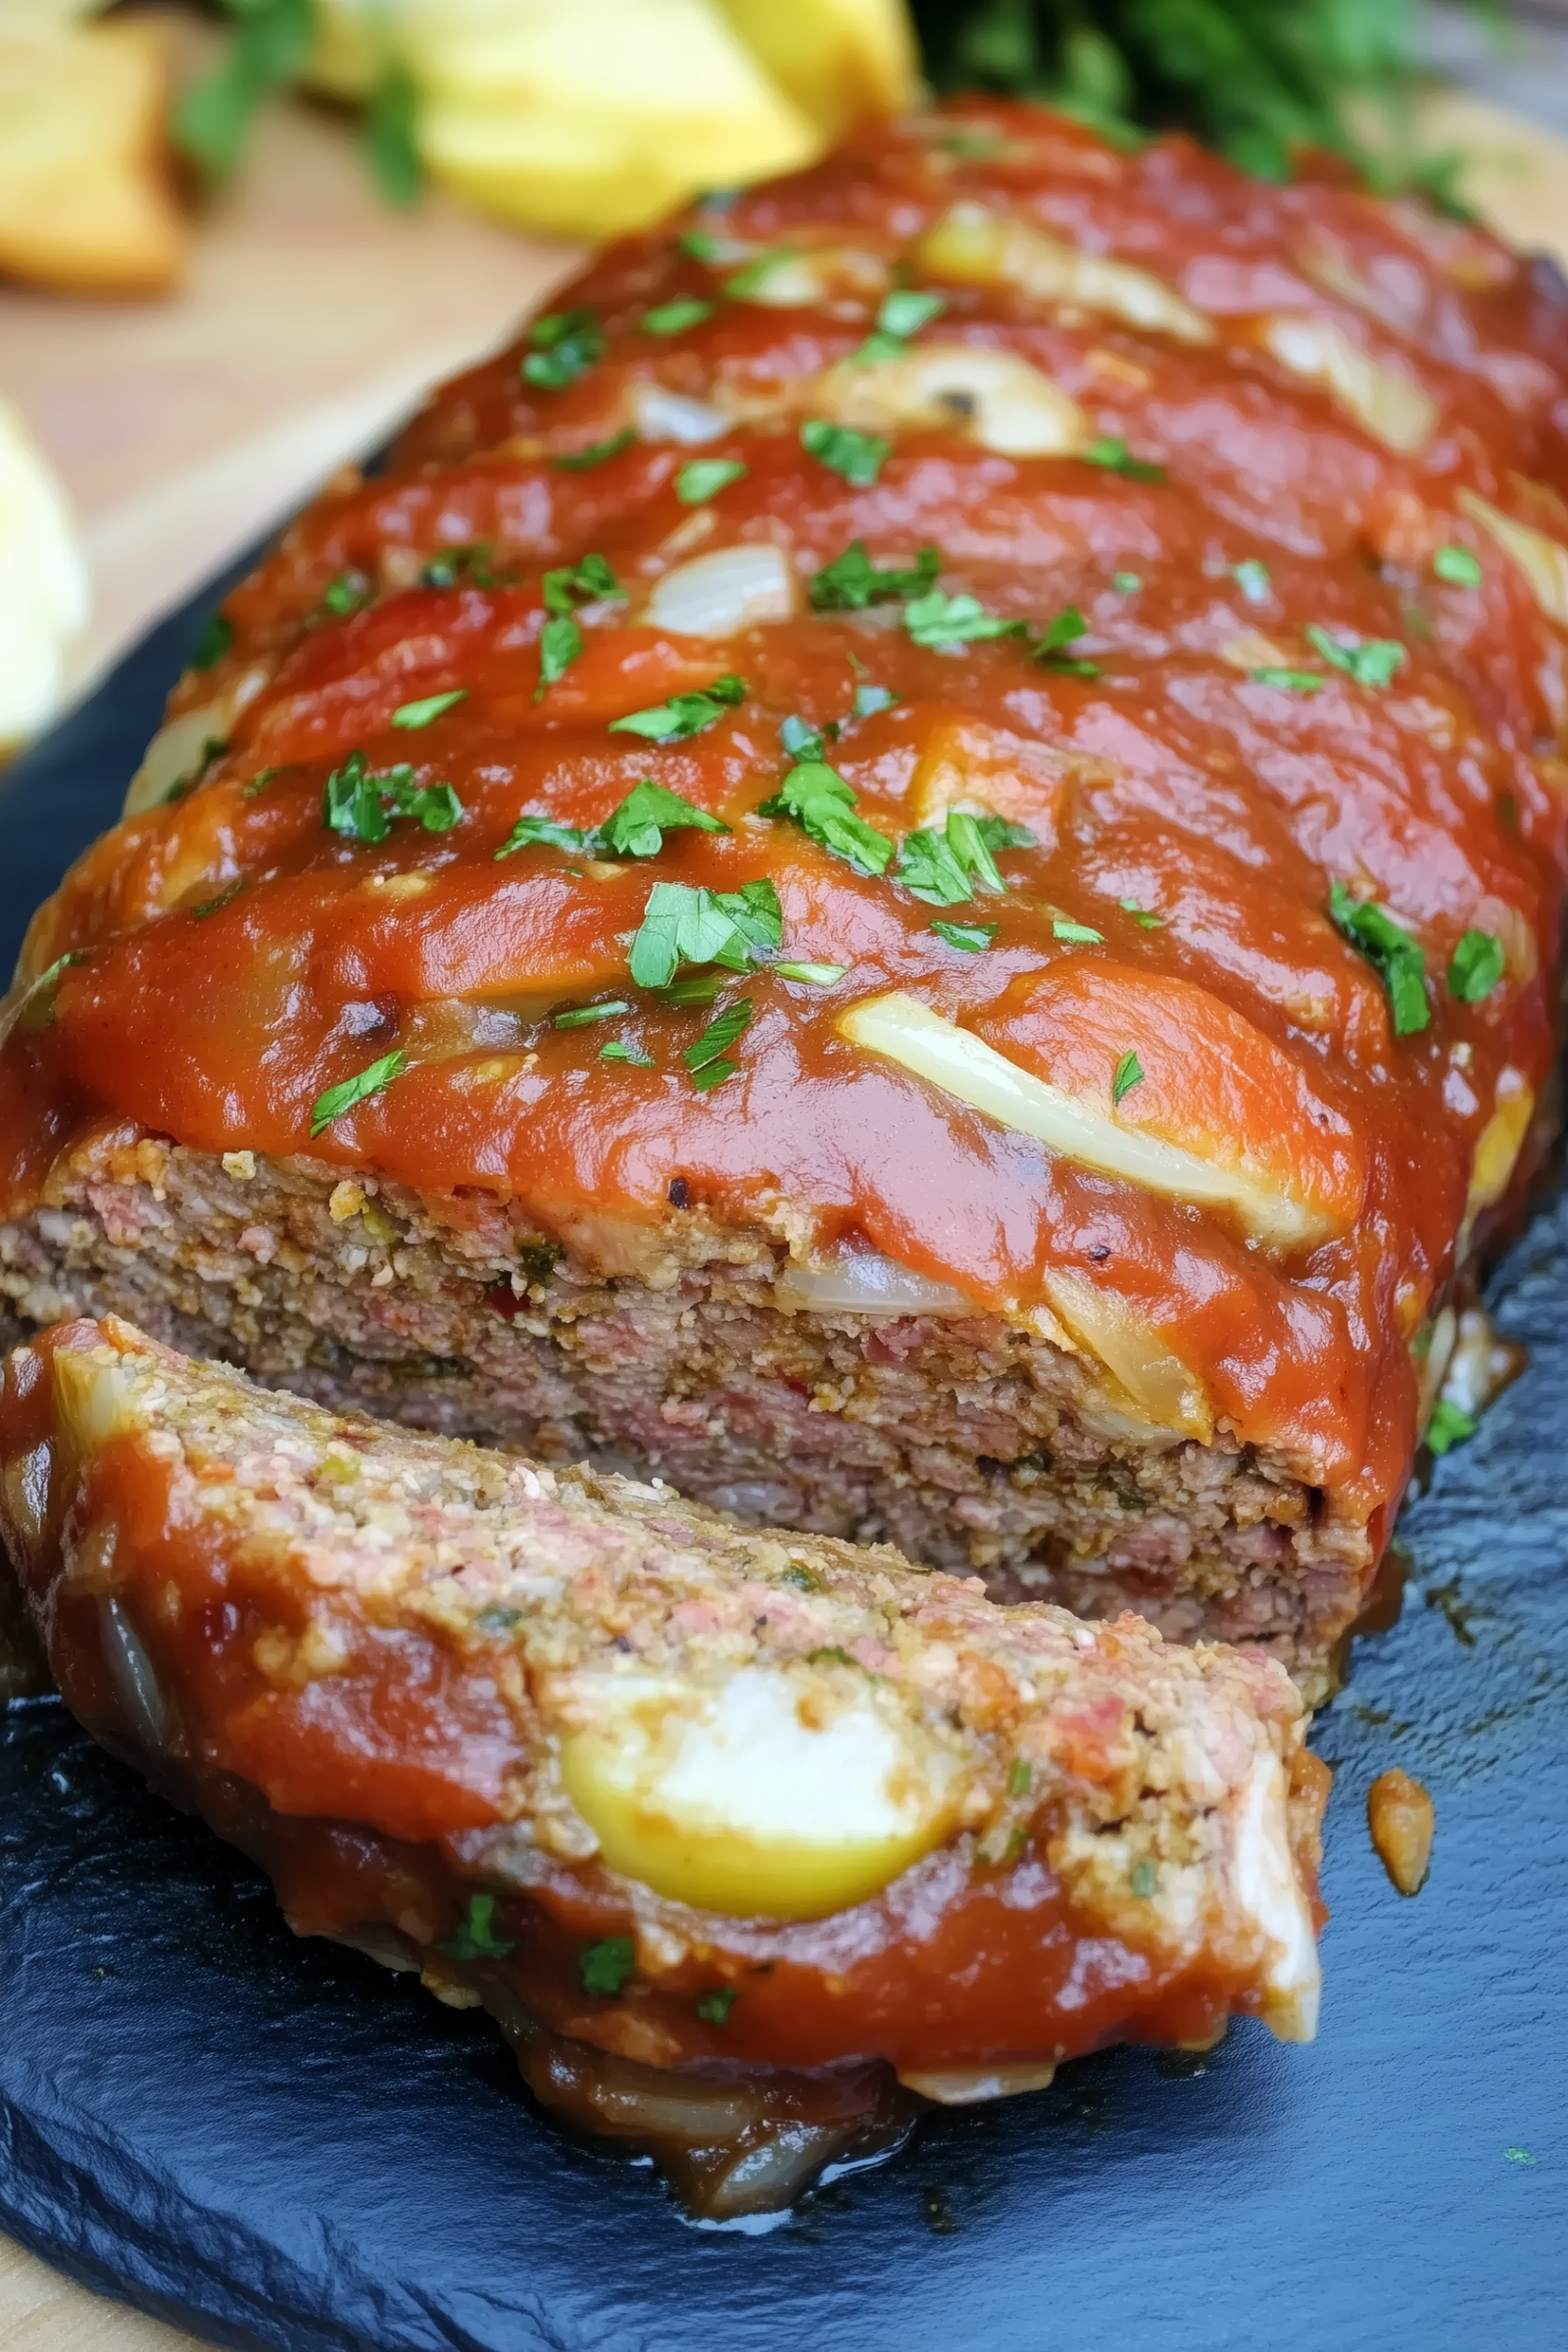
Moist Turkey Dinner Loaf

Moist Turkey Dinner Loaf

A healthier, juicy take on the classic meatloaf.

Ingredients

  • The Meat Base: 2 lbs (approx. 900g) Ground Turkey (93% lean is best; avoid 99% fat-free for better moisture)

  • The Aromatics: 1 Large Onion (finely diced), 2 cloves Garlic (minced), 1 Celery stalk (finely diced)

  • The Binder: ¾ cup Panko or Breadcrumbs + ¼ cup Milk

  • The Flavor: 2 Large Eggs, 2 tbsp Worcestershire sauce, 1 tsp dried Thyme, 1 tsp Salt, ½ tsp Black pepper

  • The Glaze: ½ cup Ketchup, 1 tbsp Brown sugar, 1 tsp Dijon mustard


Instructions

  1. Prep the Oven: Preheat your oven to 375°F (190°C). Lightly grease a 9×5 inch loaf pan or line a baking sheet with parchment paper.

  2. Sauté (The Secret Step): Heat a little oil in a pan and sauté the onion, celery, and garlic until soft (about 5 mins). Let them cool slightly. This prevents “crunchy” raw onions and adds moisture.

  3. Soak: In a small bowl, mix the breadcrumbs and milk. Let it sit for 2 minutes until it forms a paste (a panade).

  4. Mix: In a large bowl, combine the ground turkey, sautéed veggies, breadcrumb paste, eggs, Worcestershire sauce, and spices. Do not overmix—use your hands to just combine, or the loaf will become tough.

  5. Shape: Place the mixture into the loaf pan or shape it into a loaf on your baking sheet.

  6. Glaze: Whisk the ketchup, brown sugar, and mustard together. Spread half of it over the top of the loaf.

  7. Bake: Bake for 45 minutes. Spread the remaining glaze on top and bake for another 10–15 minutes (or until the internal temperature reaches 165°F / 74°C).

  8. Rest: Let the loaf rest for 10 minutes before slicing. This keeps the juices inside!

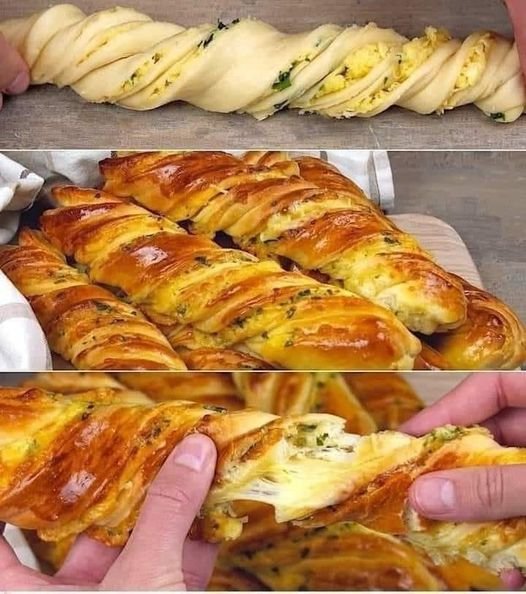
Cheesy Garlic Herb Twisted Bread

Cheesy Garlic Herb Twisted Bread

Yields: 6–8 large twists
Prep Time: 25 minutes
Rise Time: 1 hour 30 minutes
Bake Time: 15–20 minutes

Soft, fluffy bread filled with buttery garlic, herbs, and melted cheese, twisted into beautiful bakery-style strips.


🥖 Ingredients

For the Dough

  • 3½ cups all-purpose flour (or bread flour for extra chew)

  • 1 cup warm milk (about 110°F / 45°C)

  • 2¼ teaspoons active dry yeast (1 packet)

  • 1 tablespoon sugar

  • 1 teaspoon salt

  • 1 large egg (room temperature)

  • 4 tablespoons unsalted butter, softened

For the Filling

  • 2 cups shredded mozzarella or cheddar (or a mix of both)

  • 4 tablespoons unsalted butter, softened

  • 3 cloves garlic, finely minced

  • 2 tablespoons fresh parsley, finely chopped

  • ½ teaspoon onion powder

For the Glaze

  • 1 egg

  • 1 tablespoon water


👩‍🍳 Instructions

1️⃣ Prepare the Dough

Activate the Yeast
In a small bowl, combine warm milk, sugar, and yeast. Stir gently and let it sit for 5–10 minutes until the mixture looks foamy and bubbly.

Mix the Dough
In a large mixing bowl, combine the flour and salt. Add the yeast mixture, egg, and softened butter.

Knead
Knead the dough by hand or with a mixer for 8–10 minutes until it becomes smooth, stretchy, and slightly soft to the touch without sticking.

First Rise
Place the dough into a lightly oiled bowl. Cover with a cloth or plastic wrap and let it rest in a warm place for 1 to 1½ hours, until it has doubled in size.


2️⃣ Prepare the Filling

In a small bowl, mix together:

  • Softened butter

  • Minced garlic

  • Chopped parsley

  • Onion powder

Stir until it forms a smooth garlic-herb spread.
Set the cheese aside for later use.


3️⃣ Shape the Twists

Roll the Dough
Place the risen dough onto a lightly floured surface. Roll it into a large rectangle about 12 × 18 inches.

Add the Filling
Spread the garlic-herb butter evenly over the surface. Sprinkle the shredded cheese over the butter layer.

Fold and Slice
Fold the dough in half lengthwise so the filling is inside.
Using a knife or pizza cutter, slice into strips about 1½ inches wide.

Twist
Hold each strip at both ends and gently twist it several times.
Place each twist on a parchment-lined baking sheet with space between them.


4️⃣ Final Rise & Baking

Second Rest
Cover the twists loosely and allow them to rest for 20–30 minutes.
During this time, preheat the oven to 375°F (190°C).

Prepare Egg Wash
Beat 1 egg with 1 tablespoon water.

Brush
Lightly brush the tops of the twists with the egg wash for a glossy finish.

Bake
Bake for 15–20 minutes, until:

  • The bread is golden brown

  • The cheese is melted and bubbly

  • The kitchen smells amazing 😄


🌿 Serving Ideas

  • Serve warm with marinara or garlic butter

  • Perfect as a side for pasta or soup

  • Great for parties, lunchboxes, or snack boards


💡 Tips

✔ Add chili flakes for heat
✔ Add oregano or basil for Italian flavor
✔ Use pizza cheese blend for stretchier texture
✔ Best eaten warm, but reheats beautifully

Mexican Salmon Patties

Mexican Salmon Patties

Prep Time: 20 minutes
Cook Time: 10–15 minutes
Servings: 6 patties

Flavorful, hearty, and crisp on the outside while tender inside. These patties combine salmon, beans, corn, and fresh herbs for a balanced Tex‑Mex-inspired dish. Perfect for lunch, dinner, or meal prep.


🧾 Ingredients

  • 25 oz (1 can) canned salmon, drained & deboned

  • Juice of 2 limes

  • 1½ sleeves original saltine crackers, crushed (or other crackers/binder)

  • 15 oz can black beans, drained & rinsed

  • 15 oz can corn, drained

  • 2 tablespoons mayonnaise

  • 4 eggs

  • 1 medium-large onion, minced

  • 1 cup fresh cilantro, chopped

  • 3–4 jalapeños, diced (adjust seeds for heat preference)

  • 4 tablespoons taco seasoning

  • 2 tablespoons garlic powder

  • Salt and pepper, to taste

  • Vegetable oil, for frying


👩‍🍳 Instructions

Step 1: Mix the Patty Mixture

  1. In a large bowl, combine:

    • Drained salmon

    • Lime juice

    • Crushed crackers

    • Black beans

    • Corn

    • Mayonnaise

    • Eggs

    • Minced onion

    • Chopped cilantro

    • Diced jalapeños

    • Taco seasoning

    • Garlic powder

    • Salt and pepper

  2. Mix gently until everything is evenly combined.

  3. If mixture feels too loose, add more crushed crackers until it holds together.


Step 2: Form the Patties

  1. Using your hands, shape the mixture into 6 evenly sized patties.

  2. Make them thick enough to hold together but not so large that they won’t cook through.

  3. Optional: Chill patties in the fridge for 10–15 minutes for better stability.


Step 3: Fry the Patties

  1. Heat enough vegetable oil in a skillet over medium-high heat to coat the bottom.

  2. Carefully place patties into hot oil.

  3. Fry for 3–4 minutes on each side, until golden brown and cooked through.

  4. Use a spatula to flip carefully to maintain shape.


Step 4: Drain & Serve

  1. Remove patties from skillet and place on paper towels to drain excess oil.

  2. Serve hot with:

    • Cilantro cream sauce

    • Salsa or ranch

    • Fresh salad or grilled veggies


🌟 Tips for Success

  • Ensure salmon is well-drained so patties hold together.

  • Adjust jalapeño seeds to control heat.

  • Use enough oil to prevent sticking and ensure even browning.

  • Leftovers reheat well: re-sear in a skillet for crispness.


🍽 Serving Suggestions

  • Serve in tacos or wraps with fresh veggies.

  • Pair with cilantro-lime rice for a full meal.

  • Top with avocado slices or a dollop of yogurt for creaminess.

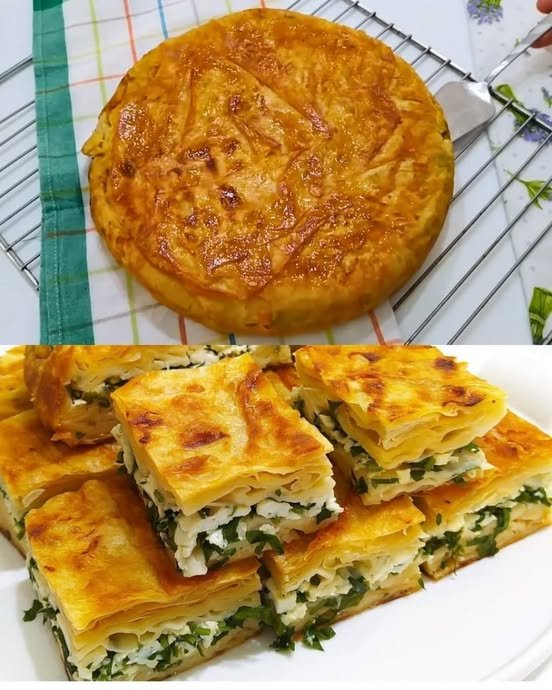
Golden Pan Börek (Su Böreği Style)

Golden Pan Börek (Su Böreği Style)

This pan-made börek has soft, layered pastry with a creamy cheese filling and a golden crust. It is inspired by traditional Su Böreği but prepared easily using ready-made phyllo dough and a frying pan.


📝 Ingredients

  • 4 sheets ready-made phyllo dough (yufka)

  • 300 g full-fat white cheese or feta cheese, crumbled

  • ½ bunch fresh parsley, finely chopped

  • 2 large eggs

  • 3 tablespoons plain yogurt

  • ½ cup milk (optional, for extra softness)

  • 3–4 tablespoons vegetable oil or melted butter


👩‍🍳 Step-by-Step Instructions

1️⃣ Prepare the Filling

  • In a medium bowl, combine the crumbled cheese and chopped parsley.

  • Mix well and set aside.


2️⃣ Prepare the Sauce

  • In a separate bowl, whisk together:

    • Eggs

    • Yogurt

    • Milk (if using)

    • 2 tablespoons of oil or melted butter

  • Mix until smooth and well blended.

This mixture keeps the börek soft and tender.


3️⃣ Prepare the Pan

  • Lightly grease a large non-stick frying pan with oil or butter.

  • Place one sheet of phyllo into the pan, allowing the edges to hang over the sides.


4️⃣ Build the Layers

  • Brush the first phyllo sheet generously with the sauce.

  • Tear the second and third sheets into large pieces.

  • Dip each piece into the sauce and place them loosely into the pan to form layers.


5️⃣ Add the Filling

  • Spread the cheese and parsley mixture evenly over the layered dough.


6️⃣ Seal the Börek

  • Dip any remaining phyllo pieces into the sauce and place them over the filling.

  • Fold the overhanging edges of the first sheet over the top to seal everything inside.

  • Pour any remaining sauce evenly over the top.


7️⃣ Cook the Börek

  • Cover the pan with a lid and cook on medium-low heat for 8–10 minutes.

  • Check the bottom; when it turns golden, carefully flip the börek using a plate or lid.

  • Cook the second side uncovered for another 5–8 minutes until golden and cooked through.


8️⃣ Rest and Serve

  • Slide the börek onto a cutting board.

  • Let it rest for 5 minutes before cutting.

  • Slice into squares or triangles and serve warm.


⭐ Helpful Tips

  • Use low heat to prevent burning

  • Do not press the layers too tightly; this keeps the börek soft

  • Serve with yogurt or fresh salad

  • Best enjoyed fresh, but can be reheated gently in a pan