Sourdough Apple Fritter Bread Recipe

Sourdough Apple Fritter Bread 🍎 Prep: 15 mins | Bake: 50-60 mins | Yields: 1 Loaf

INGREDIENTS: The Batter:

  • 1 cup All-Purpose Flour

  • 1 cup Sprouted Wheat Flour (or more AP flour)

  • 1/2 cup Sourdough Discard (or active starter)

  • 1/2 cup Granulated Sugar

  • 2 Eggs

  • 1/4 cup Melted Butter

  • 1/4 cup Milk

  • 2 tsp Baking Powder + 1 tsp Baking Soda

  • 1 tsp Cinnamon + 1/2 tsp Salt

The Apple Filling:

  • 2 large Apples (peeled & diced)

  • 1/4 cup Sugar + 1 tsp Cinnamon

  • 1/4 tsp Nutmeg (optional)

The Glaze:

  • 1 cup Powdered Sugar + 2-3 tbsp Milk

INSTRUCTIONS: 1️⃣ Apples: Toss diced apples with sugar, cinnamon, and nutmeg. Let it sit for 10 mins. 2️⃣ Dry Mix: Whisk flours, baking powder, soda, cinnamon, and salt in a large bowl. 3️⃣ Wet Mix: In a separate bowl, whisk eggs, sugar, discard, melted butter, and milk. 4️⃣ Combine: Gently fold wet ingredients into dry. Do not overmix! Fold in the apples and their juices last. 5️⃣ Bake: Pour into a greased 9×5 loaf pan. Bake at 350°F (175°C) for 50-60 mins until a toothpick comes out clean. 6️⃣ Glaze: Let cool, then whisk glaze ingredients and drizzle over the top.

Enjoy warm with a cup of coffee! YUMM! 😋


💡 Pro-Tip for the Baker

If you want that authentic “fritter” crunch on top, sprinkle a little bit of coarse turbinado sugar or a simple streusel (flour, butter, brown sugar) over the batter right before you pop it in the oven. It adds a beautiful texture contrast to the soft bread!
Oil-Free Orange Cranberry Loaf

Oil-Free Orange Cranberry Loaf
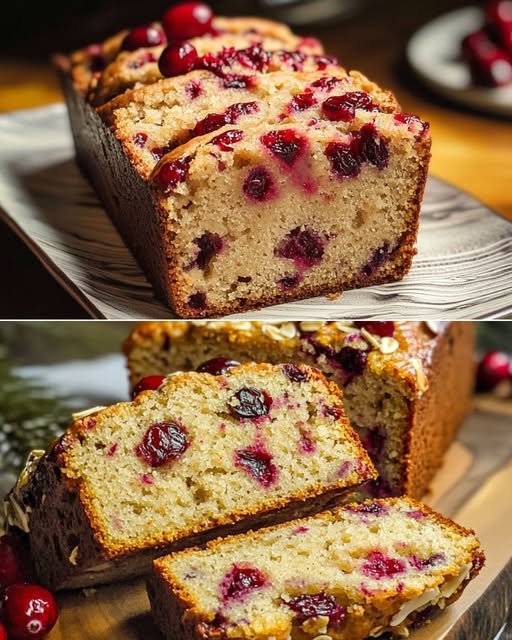
This soft and flavorful loaf gets its moisture from applesauce instead of oil, making it light, tender, and perfect for tea time or holiday baking.


🧾 Ingredients

  • 2 cups all-purpose flour (or 1:1 gluten-free baking blend)

  • 1 cup fresh or frozen cranberries

  • 1 cup orange juice (freshly squeezed for best flavor)

  • 1 tablespoon orange zest

  • ¾ cup granulated sugar (or coconut sugar)

  • 1 teaspoon vanilla extract

  • 1 teaspoon baking powder

  • ½ teaspoon baking soda

  • ½ teaspoon salt

  • ½ cup unsweetened applesauce

Optional topping:

  • Sliced almonds or rolled oats


👩‍🍳 Instructions

1. Prepare the Oven and Pan

Preheat your oven to 175°C (350°F).

Line a standard loaf pan with baking paper or lightly grease it with a small amount of butter or non-stick spray to prevent sticking.


2. Mix the Dry Ingredients

In a large bowl, add:

  • Flour

  • Sugar

  • Baking powder

  • Baking soda

  • Salt

Whisk well until evenly mixed.

Add the cranberries to the dry mixture and gently toss them in the flour. This helps keep them evenly distributed while baking.


3. Mix the Wet Ingredients

In a separate bowl, combine:

  • Orange juice

  • Orange zest

  • Applesauce

  • Vanilla extract

Whisk until smooth.


4. Make the Batter

Pour the wet mixture into the dry mixture.

Using a spatula or spoon, mix gently until just combined.
Do not overmix — this keeps the loaf soft and tender.

The batter will be thick.


5. Bake

Pour the batter into the prepared loaf pan and smooth the top.

Sprinkle almonds or oats on top if using.

Place in the oven and bake for 50–60 minutes, or until:

  • The top is lightly golden

  • A toothpick inserted in the center comes out clean

If the top browns too quickly, cover loosely with foil during the last 10 minutes.


6. Cool

Remove from the oven and let the loaf rest in the pan for 10 minutes.

Carefully transfer to a wire rack and allow to cool completely before slicing.
This helps the loaf hold its shape.


🍽 Serving Suggestions

Serve:

  • Plain

  • With tea or coffee

  • With a light dusting of powdered sugar

  • With a simple orange glaze (powdered sugar + orange juice)


📦 Storage

  • Store covered at room temperature for 2 days

  • Refrigerate for up to 5 days

  • Freeze slices for up to 1 month


⭐ Helpful Tips

✔ Use unsweetened applesauce
✔ Fresh orange juice gives better flavor
✔ Do not overmix the batter
✔ Frozen cranberries can be used without thawing

Easy & Delicious Oatmeal Apple Cake

Easy & Delicious Oatmeal Apple Cake


🧾 Ingredients

  • 200 g oat flakes

  • 250 ml milk

  • 3 eggs (room temperature)

  • 2 ripe bananas

  • 1 apple

  • Cinnamon, to taste

Optional (for extra flavor or texture):

  • 1 tablespoon honey or maple syrup (only if bananas are not sweet)

  • A handful of chopped walnuts or pecans


👩‍🍳 Instructions

1. Soak the Oats

Place the oat flakes in a large mixing bowl.

Pour in the milk and stir well.

Let the mixture rest for 10 minutes so the oats soften and absorb the liquid. This helps create a moist and tender cake texture.


2. Prepare the Fruit

Peel the bananas and mash them with a fork until smooth.

Wash the apple, remove the core, and slice it into thin, even slices. Set aside for topping.


3. Make the Batter

Add the mashed bananas to the soaked oats.

Crack in the eggs.

Add cinnamon according to your taste.

Mix everything thoroughly with a whisk or spoon until the batter is smooth and evenly combined.

If using honey or maple syrup, stir it in now.


4. Prepare for Baking

Preheat your oven to 180°C (350°F).

Grease a round cake pan or line it with baking paper.

Pour the batter into the pan and spread it evenly.

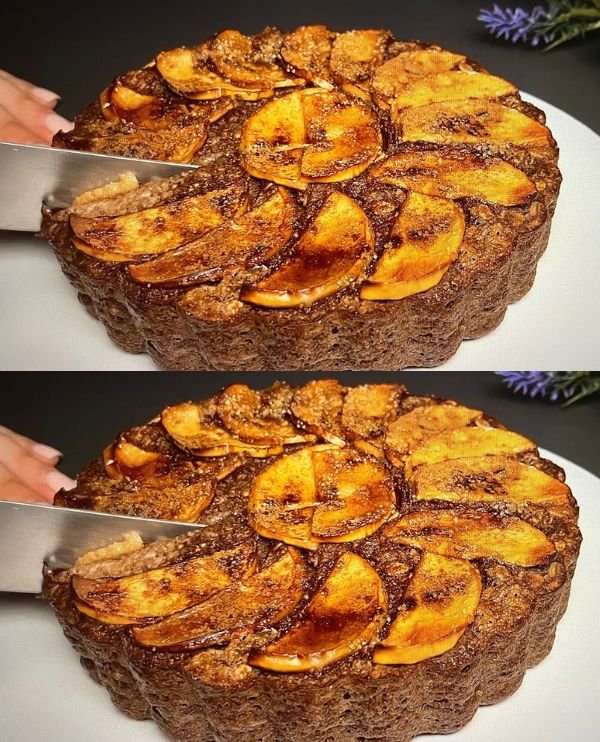
Arrange the apple slices neatly on top in a circular or decorative pattern.

If using nuts, sprinkle them over the top.


5. Bake

Place the pan in the preheated oven.

Bake for 35–40 minutes, or until:

  • The cake feels firm in the center

  • A toothpick inserted into the middle comes out clean

  • The apple slices on top are lightly golden

Remove from the oven and let the cake cool in the pan for about 10–15 minutes.


🍽 Serving Suggestions

Serve:

  • Warm or cold

  • With tea or coffee

  • With yogurt or a light drizzle of honey

  • As a breakfast cake or snack


⭐ Helpful Tips

✔ Use ripe bananas for natural sweetness
✔ Thin apple slices bake more evenly
✔ Do not overbake to keep the cake soft
✔ You can add raisins or dates for extra sweetness


📦 Storage

  • Store covered at room temperature for 1 day

  • Refrigerate for up to 3 days

  • Can be frozen in slices for up to 1 month

Grandma’s Chocolate Yogurt Marble Cake

Grandma’s Chocolate Yogurt Marble Cake
This soft and moist cake combines rich chocolate batter with creamy yogurt filling, creating a beautiful marbled look and a tender texture in every slice.


🧾 Ingredients

For the Cake Batter:

  • 3 eggs (room temperature)

  • 150 g (¾ cup) sugar

  • 110 ml vegetable or sunflower oil

  • 110 ml milk

  • 250 g (about 1⅔ cups) all-purpose flour

  • 15 g baking powder

  • 20 g cocoa powder

  • 2 tablespoons milk (for cocoa mixture)

  • A dash of vanilla extract

  • A pinch of salt


For the Yogurt Filling:

  • 300 g thick yogurt or Greek yogurt

  • 1 egg

  • 50 g sugar

  • 1 tablespoon cornstarch


👩‍🍳 Instructions

1. Prepare the Base Batter

In a large mixing bowl, add:

  • Eggs

  • Sugar

  • Salt

  • Vanilla extract

Whisk well until the mixture becomes pale and slightly thick.

Slowly add:

  • Oil

  • Milk

Whisk again until fully combined.

Sift in:

  • Flour

  • Baking powder

Fold gently using a spatula until smooth and lump-free. Do not overmix.


2. Make the Chocolate Batter

Transfer about one-third of the batter into a separate bowl.

In another small bowl, mix:

  • Cocoa powder

  • 2 tablespoons milk

Stir to form a smooth paste.

Add this cocoa paste to the smaller portion of batter and mix until dark and well blended.


3. Prepare the Yogurt Filling

In a bowl, combine:

  • Yogurt

  • Egg

  • Sugar

  • Cornstarch

Whisk until smooth and creamy. Set aside.


4. Assemble the Cake

Preheat oven to 180°C (350°F).

Grease a round cake pan or springform pan.

Pour the chocolate batter into the pan and spread evenly.

Pour the plain batter over the chocolate layer.

Use a skewer or knife to gently swirl the batters together to create a marble effect.

Spoon small dollops of the yogurt mixture on top. They will sink slightly during baking and create creamy pockets inside the cake.


5. Bake

Place the pan in the oven and bake for 35–45 minutes.

Check doneness by inserting a toothpick into the cake portion (not the yogurt spots). It should come out clean.

Remove from oven and let the cake cool completely in the pan before removing.


🍽 Serving

Slice and serve:

  • Plain

  • With tea or coffee

  • Lightly dusted with powdered sugar

  • With fresh fruit


⭐ Helpful Tips

✔ Do not overmix the batter
✔ Use thick yogurt for best texture
✔ Let cake cool fully before slicing
✔ Add chocolate chips for extra richness


📦 Storage

  • Store covered at room temperature for 1 day

  • Refrigerate for up to 3 days

  • Can be frozen for up to 1 month

Classic Moist Vanilla Sheet Cake

Classic Moist Vanilla Sheet Cake

Ingredients

  • 2 1/2 cups All-purpose flour

  • 1 3/4 cups Granulated sugar

  • 1 1/4 cups Whole milk (room temperature)

  • 1/2 cup (1 stick) Unsalted butter (softened)

  • 1/2 cup Vegetable oil

  • 4 Large eggs (room temperature)

  • 1 tbsp Vanilla extract

  • 2 1/2 tsp Baking powder

  • 1/2 tsp Salt


Instructions

1. Prep and Preheat

  • Preheat your oven to 175°C (350°F).

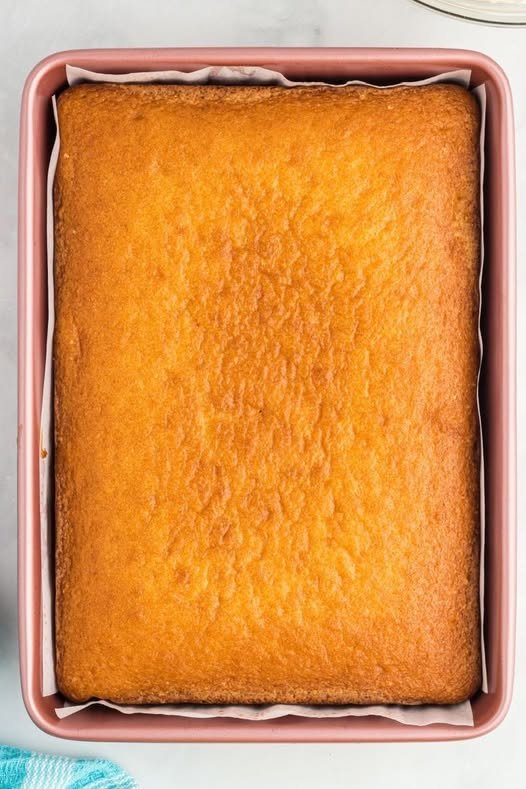
  • Grease a 9×13 inch baking pan and line the bottom with parchment paper to ensure the cake releases easily, as seen in the provided image.

2. Mix Dry Ingredients

  • In a medium bowl, whisk together the flour, baking powder, and salt. Set this aside.

3. Cream Butter and Sugar

  • In a large mixing bowl (or stand mixer), beat the softened butter and granulated sugar together on medium-high speed until the mixture is light and fluffy (about 3 minutes).

  • Pour in the vegetable oil and mix until well combined.

4. Add Eggs and Vanilla

  • Add the eggs one at a time, beating well after each addition.

  • Stir in the vanilla extract.

5. Combine Everything

  • Reduce the mixer speed to low. Add the flour mixture in three parts, alternating with the milk, starting and ending with the flour.

  • Mix just until combined; do not overmix, or the cake may become dense.

6. Bake

  • Pour the batter into the prepared pan and smooth the top with a spatula.

  • Bake for 30–35 minutes, or until the top is golden brown and a toothpick inserted into the center comes out clean.

7. Cool and Serve

  • Place the pan on a wire rack and let the cake cool completely before frosting.


Pro Tip for the Best Texture

Using room temperature milk and eggs is essential! It allows the ingredients to emulsify properly, creating a uniform, velvety crumb that doesn’t crumble when sliced.

Simple Homemade Oatmeal & Fruit Bake

Simple Homemade Oatmeal & Fruit Bake
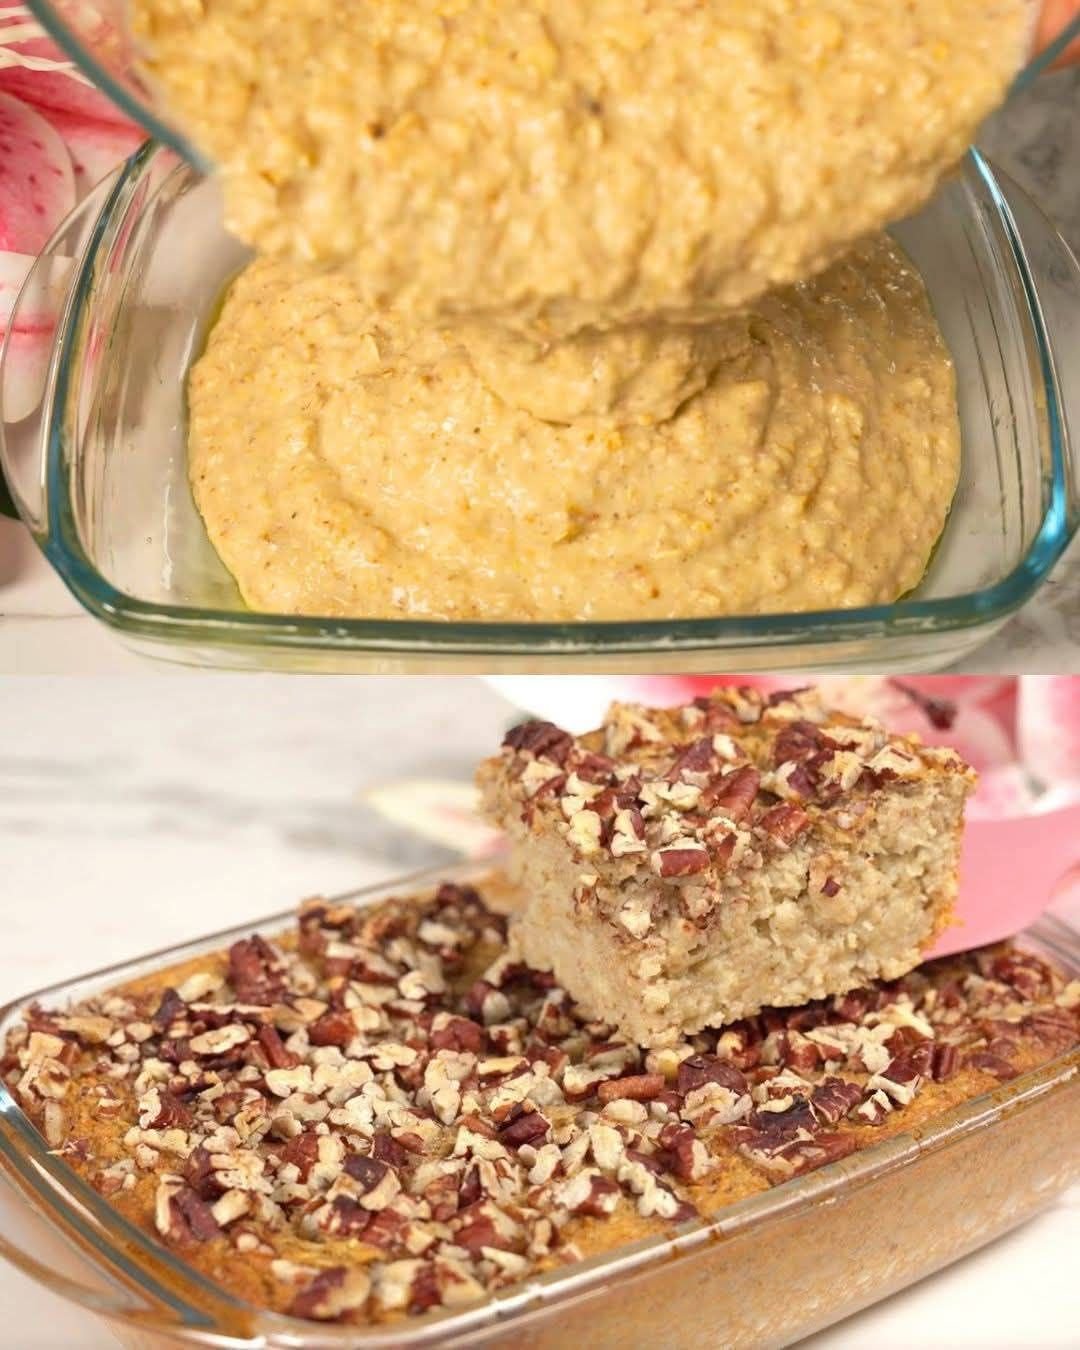
This baked oatmeal is naturally sweet from fruit and rich in fiber, making it a wholesome option for breakfast or a light dessert.


🧾 Ingredients

  • 1 cup oats (quick oats or rolled oats)

  • 250 ml milk

  • 1 egg

  • 1 apple

  • 1 ripe banana

  • 1 teaspoon baking powder

  • 1 teaspoon vanilla sugar OR vanilla extract

  • 50 g nuts (walnuts or pecans, chopped)

Optional Add-ins:

  • 1 teaspoon ground cinnamon

  • A pinch of salt

  • Raisins or chopped dates

  • A little honey or maple syrup (if you want extra sweetness)


🥣 Instructions

1. Prepare the Fruit

Peel the banana and place it in a bowl. Mash it well with a fork until smooth.

Wash the apple and grate it (you may keep the peel for extra fiber). Add the grated apple to the mashed banana and mix well.


2. Mix the Wet Ingredients

Add to the fruit mixture:

  • Egg

  • Milk

  • Vanilla sugar (or vanilla extract)

Whisk everything together until well combined.


3. Add the Dry Ingredients

Stir in:

  • Oats

  • Baking powder

Mix until evenly combined.

Let the mixture rest for 5 minutes so the oats absorb the liquid. This helps create a soft and moist texture.


4. Prepare for Baking

Lightly grease a small baking dish with oil or butter.

Pour the oatmeal mixture into the dish and spread it evenly.

Sprinkle chopped nuts over the top for a crunchy finish.


5. Bake

Preheat the oven to 180°C.

Bake for 30–35 minutes or until:

  • The center is firm

  • The top is lightly golden

  • A knife inserted comes out mostly clean


🍽 Serving

Let it cool slightly before cutting into squares.

Serve:

  • Warm for breakfast

  • Cold as a snack

  • With yogurt or a drizzle of honey if desired


🌟 Flavor Tip

Add 1 teaspoon cinnamon to the batter for warm flavor that pairs beautifully with apple and banana.


📦 Storage

  • Store in the refrigerator for up to 3 days

  • Reheat in microwave or oven

  • Can be frozen in slices for later use