Diabetic-Friendly Vanilla Cream Rolls (5-Minute No-Bake)

Diabetic-Friendly Vanilla Cream Rolls (5-Minute No-Bake)

 Description

These light, creamy vanilla rolls are made with a low-carb, sugar-free filling and thin, crisp roll shells. The texture is silky and melts in your mouth, while keeping carbohydrates lower than traditional pastry cream rolls. Perfect for a quick dessert, tea snack, or make-ahead treat.

⚠️ “Diabetic-friendly” means lower in sugar and carbs — always monitor blood glucose and consult your healthcare provider for personal guidance.

 Ingredients (Makes 8 Rolls)

For the Cream Filling

  • 1 cup heavy whipping cream (cold)

  • 4 oz (115 g) cream cheese, softened

  • 2–3 tablespoons powdered erythritol or monk fruit sweetener (adjust to taste)

  • 1 teaspoon pure vanilla extract

  • Pinch of salt

For the Roll Shells (Quick Option)

  • 8 low-carb wafer rolls OR

  • 8 thin low-carb crepes (store-bought or homemade)

Optional dusting: powdered erythritol

 Instructions (5–10 Minutes)

  1. Whip Cream
    Beat heavy cream until soft peaks form.

  2. Mix Base
    In another bowl, beat cream cheese, sweetener, vanilla, and salt until smooth.

  3. Combine
    Gently fold whipped cream into cream cheese mixture until light and fluffy.

  4. Fill Rolls
    Transfer filling into a piping bag (or zip bag with tip cut).
    Pipe into wafer rolls or spread onto crepes and roll tightly.

  5. Chill (Optional but Recommended)
    Refrigerate 20–30 minutes for best texture.

  6. Serve
    Dust lightly with powdered sweetener if desired.

Servings

  • 8 rolls

  • 1 roll per serving

Nutritional Info (Approx. Per Roll)

(Using erythritol and low-carb shells)

  • Calories: 120–150

  • Net Carbs: 2–4g

  • Fat: 12g

  • Protein: 2–3g

  • Sugar: <1g

  • Fiber: 1–2g

(Numbers vary depending on shells used.)

 Benefits

✔ Lower sugar than traditional cream rolls
✔ Low net carbs (keto-friendly option)
✔ High satiety from healthy fats
✔ No refined sugar
✔ Quick preparation
✔ Portion-controlled dessert

 Notes & Tips

  • Chill bowl and beaters for faster whipping.

  • Don’t overbeat cream — it can turn grainy.

  • Add lemon zest for brightness.

  • For firmer filling, add 1 tablespoon chia seeds or ½ teaspoon gelatin (bloomed).

  • Store refrigerated up to 3 days.

Variations

  • 🍓 Add sugar-free strawberry puree swirl

  • 🍫 Mix in 1 tbsp unsweetened cocoa powder

  • 🥥 Add 1 tbsp coconut cream for tropical flavor

  • ☕ Add ½ tsp instant espresso for mocha twist

 Q & A

Q: Is this safe for diabetics?
It contains no added sugar and uses low-glycemic sweeteners, but portion control is important.

Q: Can I use stevia?
Yes, but use a baking blend to avoid bitterness.

Q: Can I make it dairy-free?
Use coconut cream and dairy-free cream cheese.

Q: Can I freeze them?
Yes, freeze up to 1 month. Thaw in fridge.

Q: Why is my filling runny?
Cream wasn’t whipped enough or ingredients were too warm.
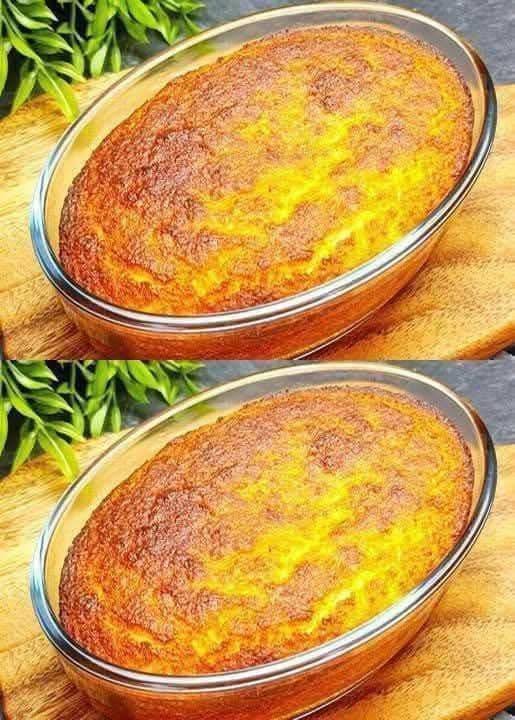
5-Minute Prep Coconut “Cloud” Cake

5-Minute Prep Coconut “Cloud” Cake

Prep time: 5 minutes | Bake time: 30–35 minutes | Servings: 6

Ingredients

  • 2 cups Unsweetened shredded coconut (fine desiccated works best)

  • 4 large Eggs (at room temperature)

  • 1 cup Full-fat coconut milk (from a can, shaken well)

  • 1 tsp Vanilla extract

  • A pinch of salt

  • Optional: 2–3 tbsp of monk fruit or erythritol if you prefer a sweeter cake.


Instructions

  1. Preheat and Prep: Preheat your oven to 350°F (175°C). Lightly grease a small baking dish (about 7 or 8 inches) with coconut oil or butter.

  2. Blend the Batter: In a blender or large bowl, combine the eggs, coconut milk, vanilla, and sweetener (if using). Whisk or blend until the mixture is frothy and well-combined.

  3. Incorporate Coconut: Fold in the shredded coconut and salt. Stir gently until all the coconut is moistened. Let the batter sit for 2 minutes so the coconut can absorb some of the liquid.

  4. Bake: Pour the batter into the prepared dish. Bake for 30 to 35 minutes, or until the top is a beautiful golden brown and the center feels set to the touch.

  5. Cool and Set: For the best “melt-in-your-mouth” experience, let the cake cool completely. Like the blueberry yogurt cake we discussed, this cake sets beautifully if chilled in the refrigerator for an hour before serving.


Why This Recipe Works

  • Simple & Fast: The active prep takes only about 5 minutes of mixing.

  • Naturally Healthy: By avoiding flour and sugar, this cake is high in healthy fats and protein, keeping you satisfied without a sugar crash.

  • Texture: The combination of shredded coconut and eggs creates a texture that is a cross between a traditional cake and a rich custard.

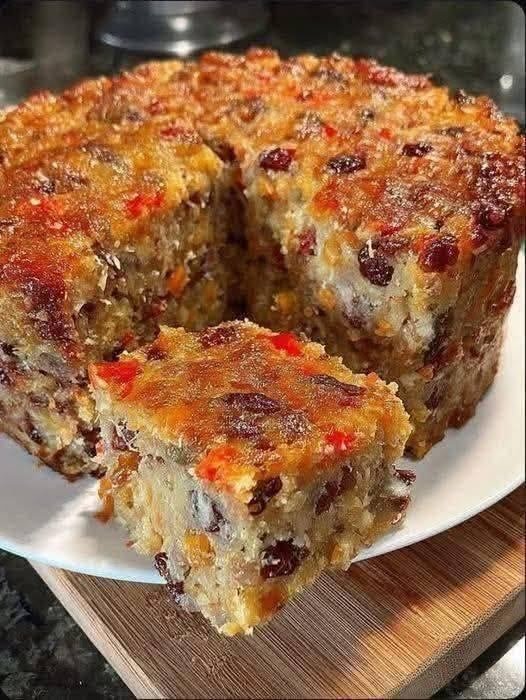
3-Ingredient Base “Morning” Fruit Cake

3-Ingredient Base “Morning” Fruit Cake

Prep time: 10 minutes | Bake time: 35–40 minutes | Servings: 6 slices

Ingredients

  • 2 cups Rolled oats (blended into a coarse flour)

  • 3 large Ripe bananas (mashed well—these provide the moisture and sweetness)

  • 1 cup Mixed dried fruits and nuts (such as raisins, dried cranberries, and chopped walnuts for that jeweled look)

  • Optional for better texture: 2 eggs and 1 tsp baking powder.


Instructions

  1. Prepare the “Flour”: Place your oats into a blender or food processor and pulse until they reach a coarse, flour-like consistency.

  2. Mash the Base: In a large bowl, mash the ripe bananas until they are liquid and smooth. This acts as your sugar and oil replacement.

  3. Combine: Stir the oat flour into the mashed bananas until a thick batter forms. Fold in your mixed dried fruits and nuts.

    • Note: If you are using eggs and baking powder for a fluffier rise, whisk them into the bananas before adding the oats.

  4. Bake: Pour the mixture into a greased or parchment-lined small cake pan or loaf tin. Smooth the top with a spatula.

  5. Cook: Bake at 350°F (175°C) for 35 to 40 minutes. The cake is done when the top is golden brown and a toothpick comes out clean.

  6. Cool: Let it cool completely in the pan before slicing. This type of flourless cake needs time to “set” so it doesn’t crumble when cut.


Why This is a Great Breakfast

  • Sustained Energy: The complex carbohydrates in the oats provide slow-releasing energy to keep you full longer.

  • Naturally Sweet: The ripeness of the bananas provides all the sweetness needed, eliminating the need for refined sugar.

  • Fiber-Rich: Between the oats, bananas, and dried fruits, this cake is excellent for digestive health.

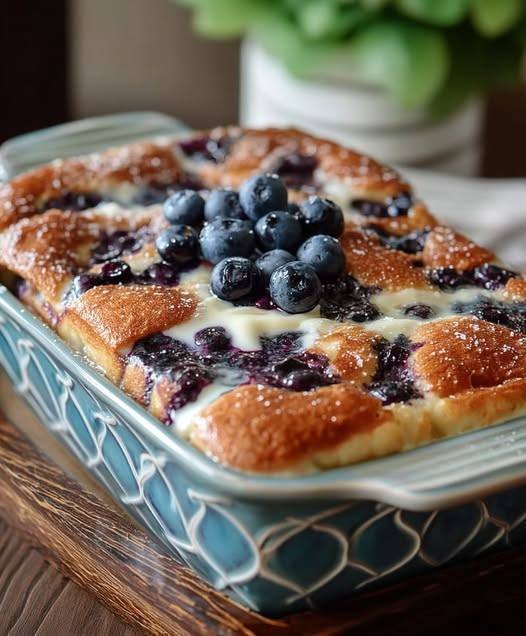
3-Ingredient Blueberry Yogurt “Cloud” Cake

3-Ingredient Blueberry Yogurt “Cloud” Cake

Prep time: 5 minutes | Bake time: 35–40 minutes | Servings: 6

Ingredients

  • 1 ½ cups (350g) Plain Greek yogurt (For the best texture, use full-fat or 2% Greek yogurt).

  • 3 large Eggs.

  • 3 tbsp Cornstarch (This provides the structure without using flour).

  • Optional: ½ cup fresh blueberries (as seen in your photo) and a few drops of vanilla extract or your favorite liquid sweetener.


Instructions

  1. Preheat and Prep: Preheat your oven to 350°F (175°C). Line a small baking dish or a 6-inch cake pan with parchment paper. Note: Greasing alone may not be enough, as this cake is very delicate.

  2. Mix the Base: In a medium bowl, whisk the eggs and Greek yogurt together until the mixture is completely smooth and there are no lumps.

  3. Incorporate the Thickener: Sift in the cornstarch. Whisk vigorously until the starch is fully incorporated and the batter is silky. If you are using vanilla or a sweetener, stir it in now.

  4. Add Fruit: Gently fold in most of your blueberries, saving a few to place on top.

  5. Bake: Pour the batter into the prepared dish. Top with the remaining blueberries. Bake for 35 to 45 minutes. The cake should be set around the edges but still have a slight “jiggle” in the very center.

  6. The Most Important Step (Cooling): Let the cake cool completely at room temperature, then refrigerate for at least 2 hours before serving. This cake behaves like a cheesecake; it needs time to set its structure.


Pro-Tips for the Best Result

  • Texture: This cake will puff up in the oven like a soufflé and then sink slightly as it cools—this is perfectly normal!

  • Sweetness: Since this recipe relies on the yogurt, using a “Vanilla” flavored Greek yogurt can add sweetness without needing extra ingredients.

  • Serving: It is delicious on its own, but a light dusting of powdered sweetener or a few extra fresh berries on top makes it look “bakery-quality.”

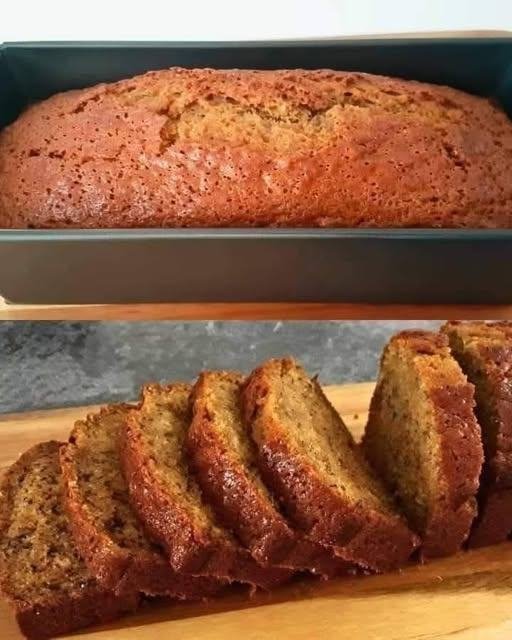
Classic Moist Banana Bread

Classic Moist Banana Bread

Prep time: 15 minutes | Bake time: 50–60 minutes | Yield: 1 Loaf

Ingredients

  • Bananas: 2 to 3 very ripe bananas, mashed

  • Eggs: 2 large eggs

  • Butter: ⅓ cup (75 g) butter, melted

  • Sugars: ¼ cup (50 g) brown sugar and ½ cup (100 g) white granulated sugar

  • Milk: ½ cup (120 ml) milk

  • Flour: 1 ½ cups (200 g) all-purpose flour

  • Leavening: 1 tsp (4 g) baking powder and 1 tsp (5 g) baking soda

  • Flavorings: 1 tsp (5 ml) vanilla essence, ¼ tsp cinnamon powder, and ¼ tsp salt


Instructions

  1. Preheat and Prep: Preheat your oven to 350°F (175°C). Grease a 9×5 inch loaf pan with butter or line it with parchment paper.

  2. Mash and Mix Wet: In a large bowl, mash the ripe bananas with a fork until smooth. Stir in the melted butter.

  3. Incorporate Liquids: Add the brown sugar, white sugar, beaten eggs, milk, and vanilla essence. Whisk until the mixture is well combined.

  4. Sift Dry Ingredients: In a separate bowl, whisk together the flour, baking powder, baking soda, cinnamon, and salt.

  5. Combine: Gradually add the dry ingredients to the wet banana mixture. Stir gently with a spatula until just combined. Do not over-mix, as this can make the bread tough.

  6. Bake: Pour the batter into your prepared loaf pan. Bake for 50 to 60 minutes.

    • Testing for doneness: Insert a toothpick into the center; if it comes out clean or with just a few moist crumbs, it’s ready.

  7. Cool: Let the bread cool in the pan for 10 minutes, then transfer it to a wire rack to cool completely before slicing.


Pro-Tips for Success

  • The Bananas: The spottier the banana, the better! Overripe bananas provide the most natural sweetness and moisture.

  • Storage: This bread tastes even better the next day. Wrap it tightly in plastic wrap and store it at room temperature for up to 3 days, or in the fridge for up to a week.

  • Add-ins: Feel free to fold in ½ cup of walnuts or dark chocolate chips if you want some extra texture.

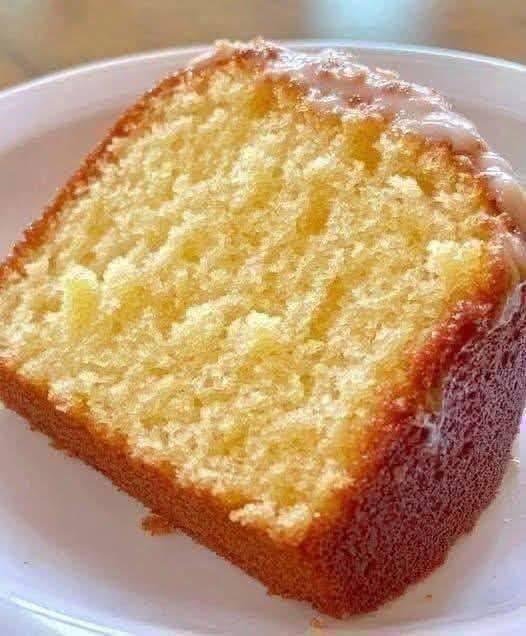
Flourless “Million Dollar” Pound Cake

Flourless “Million Dollar” Pound Cake

Prep time: 10 minutes | Bake time: 45–50 minutes | Servings: 10–12 slices

Ingredients

The Dry Base:

  • 3 cups Super-fine almond flour (replaces traditional flour for a moist texture)

  • ¾ cup Powdered monk fruit or erythritol sweetener

  • 1 ½ tsp Baking powder

  • ¼ tsp Salt

The Wet Ingredients:

  • ¾ cup Unsalted butter, softened to room temperature

  • 8 oz Cream cheese, softened (this provides the “million dollar” richness)

  • 5 Large eggs, room temperature

  • 1 tbsp Vanilla extract

  • 1 tsp Almond extract (optional, for extra depth)


Instructions

  1. Preheat and Prep: Preheat your oven to 325°F (160°C). Grease a 9×5 inch loaf pan thoroughly or line it with parchment paper for easy removal.

  2. Cream the Fats: In a large bowl, beat the softened butter, cream cheese, and sweetener together until the mixture is very pale and fluffy (about 3 minutes). This aeration is key for a good rise.

  3. Add Eggs: Add the eggs one at a time, beating well after each addition. Mix in the vanilla and almond extracts.

  4. Incorporate Dry Ingredients: Gradually stir in the almond flour, baking powder, and salt. Mix until just combined—do not over-mix, as almond flour can release too much oil if over-worked.

  5. Bake: Pour the batter into the prepared loaf pan and smooth the top. Bake for 45 to 55 minutes.

    • Tip: Check at the 40-minute mark; if the top is browning too quickly, tent it loosely with foil.

    • Test: The cake is done when a toothpick inserted into the center comes out clean.

  6. Cool: Let the cake cool in the pan for at least 20 minutes before transferring to a wire rack. This cake is quite tender when warm and needs time to “set” its structure.


Pro-Tips for the Best Texture

  • Room Temp Ingredients: Ensure your eggs, butter, and cream cheese are all at room temperature to prevent the batter from curdling.

  • The Glaze: If you want the white drizzle seen in the photo, mix ½ cup powdered sweetener with 1-2 tablespoons of heavy cream and a drop of vanilla. Drizzle only once the cake is completely cool.

  • Storage: Because this uses almond flour and cream cheese, it stays incredibly moist. Store it in the fridge for up to 5 days, or slice and freeze it for a quick treat later.