Sugar-Free Oatmeal and Apple Energy Dessert

Sugar-Free Oatmeal and Apple Energy Dessert

Ingredients

  • Rolled Oats: 1 cup

  • Warm Milk: ⅔ cup (150 ml)

  • Apples: 2, grated or finely diced

  • Butter: 2 tablespoons, melted

  • Eggs: 2 large

  • Vanilla Extract: ½ teaspoon

  • Walnuts or Almonds: ½ cup, chopped (optional for added texture)


Detailed Instructions

  1. Hydrate the Oats: In a large mixing bowl, combine the 1 cup of rolled oats with the ⅔ cup of warm milk. Stir well and allow the mixture to sit for 10 minutes so the oats can soften and absorb the liquid.

  2. Prepare the Fruit and Nuts: While the oats are soaking, peel and either grate or finely dice the 2 apples. If using walnuts or almonds, chop them into small pieces to ensure even distribution.

  3. Create the Batter: Add the 2 eggs, 2 tablespoons of melted butter, and ½ teaspoon of vanilla extract to the soaked oats. Mix thoroughly until the eggs are fully incorporated. Fold in the prepared apples and nuts.

  4. Fill the Molds: Lightly grease a silicone mold or muffin tin. Using a spoon, fill each cavity nearly to the top with the batter, as these bites do not rise significantly.

  5. Bake: Preheat your oven to 180°C (350°F). Bake for 25–30 minutes until the tops are golden brown and the centers are firm.

  6. Cool and Serve: Let the dessert cool in the mold for at least 5 minutes before removing. This helps the structure set, making them easy to grab as a portable energy snack.


Why This Works

  • Natural Sweetness: Grated apples provide moisture and sweetness without the need for refined sugar.

  • Satiety: The combination of fiber from the oats and protein from the eggs helps keep you feeling full and energized.
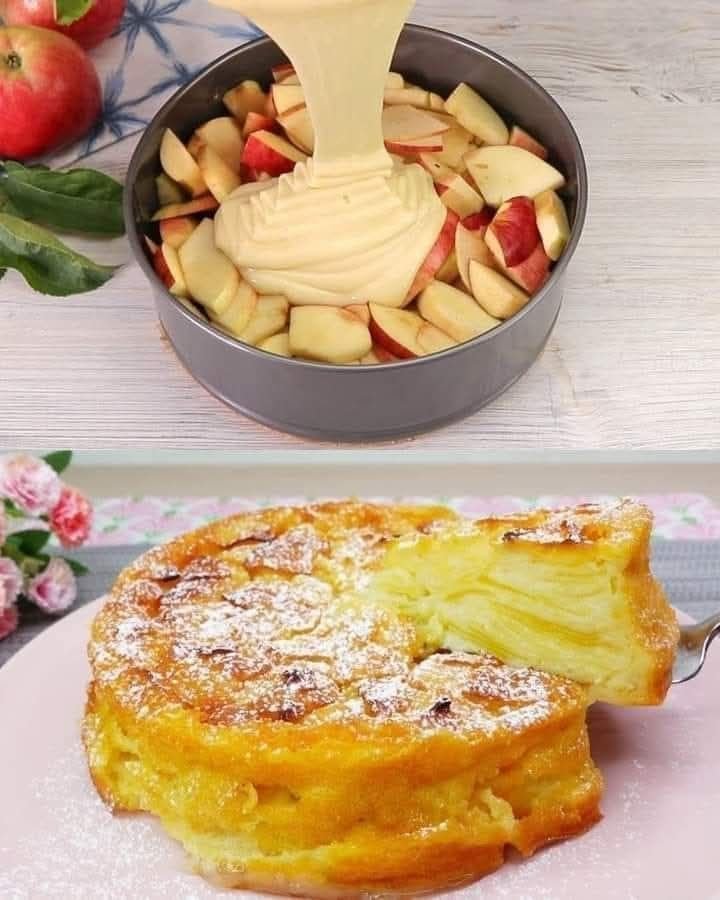
Zesty Lemon Apple Cake

Zesty Lemon Apple Cake

Ingredients

  • Apples: 4-5 medium, peeled and thinly sliced

  • Eggs: 2 large

  • Wheat flour: ⅔ cup (80g)

  • Milk: ⅓ cup (100ml)

  • Unsweetened applesauce: 1 ½ tablespoons

  • Lemon: Zest of 1 lemon and juice of ½ lemon

  • Baking powder: 1 teaspoon

  • Stevia: 1 teaspoon (adjust based on your brand’s sweetness level)

  • Salt: A pinch


Detailed Instructions

  1. Prepare the Apples: Peel and thinly slice your apples. Immediately toss them with the juice of ½ lemon in a bowl. This prevents browning and adds a bright base flavor.

  2. Mix the Wet Base: In a separate large bowl, whisk the 2 eggs with a pinch of salt and the 1 teaspoon of stevia until the mixture is slightly frothy. Stir in the 100ml of milk, 1 ½ tablespoons of applesauce, and the lemon zest.

  3. Incorporate Dry Ingredients: Sift the 80g of wheat flour and 1 teaspoon of baking powder into the wet mixture. Whisk gently until the batter is smooth and there are no large lumps.

  4. Combine: Fold the sliced apples into the batter. Ensure every slice is well-coated; this is what creates the “layered” look in the finished cake.

  5. Prepare for Baking: Preheat your oven to 180°C (350°F). Grease a round cake pan or line it with parchment paper. Pour the apple and batter mixture into the pan, smoothing out the top.

  6. Bake: Bake for 30–35 minutes. The cake should be golden on top and firm to the touch. Because of the high fruit content, it will remain moist and custard-like inside.

  7. Final Touch: Let the cake cool completely before slicing. This allows the fruit layers to set. If you like, you can lightly dust the top with a tiny bit of powdered stevia or cinnamon before serving.

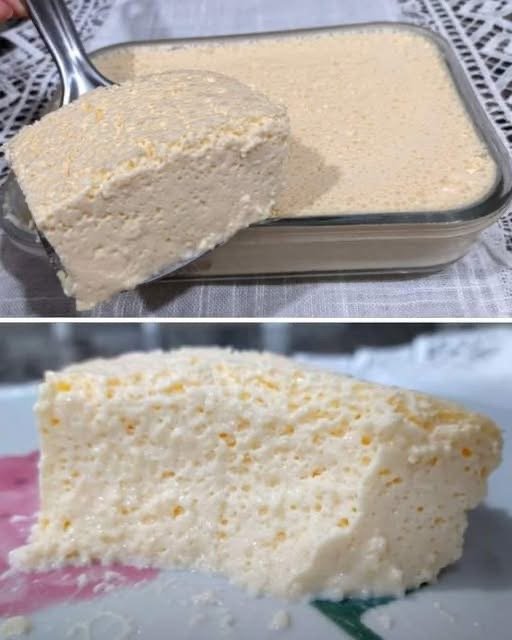
Soft & Fluffy Milk Pudding

Soft & Fluffy Milk Pudding

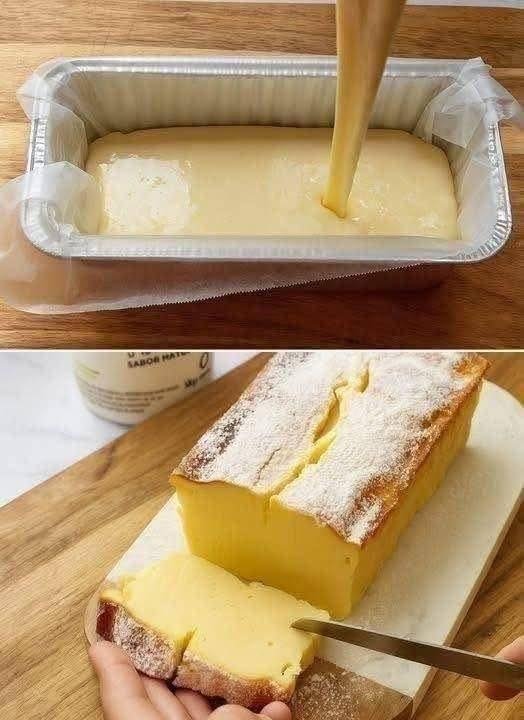
This looks like a light, airy baked milk pudding — soft, slightly bubbly texture, and melts in the mouth 🤍 Perfect simple dessert with basic ingredients!

🛒 Ingredients

  • 4 eggs (room temperature)
  • ½ cup sugar
  • 2 cups warm milk
  • 1 tsp vanilla essence
  • 1 tbsp melted butter (optional, for richness)
  • 1 tbsp flour or cornflour (optional – for slightly firmer texture)

👩‍🍳 Step-by-Step Detailed Recipe

🔹 Step 1: Prepare the Mixture

  1. In a bowl, crack 4 eggs.
  2. Add sugar and whisk until slightly light and creamy.
    (Do not overbeat, just mix well.)
  3. Add vanilla essence and melted butter.
  4. Slowly pour warm milk while mixing continuously.
  5. If using flour/cornflour, sift and mix until smooth.

💡 Tip: Strain the mixture for extra smooth texture.

🔹 Step 2: Prepare Baking Dish

  1. Lightly grease a glass or baking dish.
  2. Pour the mixture into the dish.

🔹 Step 3: Water Bath Baking (Important!)

  1. Place the filled dish inside a larger baking tray.
  2. Pour hot water into the larger tray (halfway up the sides).
    This prevents cracks and keeps pudding soft.

🔹 Step 4: Bake

  • Preheat oven to 170°C (340°F).
  • Bake for 35–45 minutes.
  • Center should be set but slightly jiggly.

🔹 Step 5: Cool & Chill

  1. Remove from oven.
  2. Let it cool at room temperature.
  3. Refrigerate for at least 2–3 hours before slicing.

🍽️ Serving Tip

  • Slice gently with a sharp knife.
  • Serve plain or drizzle with caramel or fruit sauce.

✨ Texture Tips

✔ Use room temperature eggs

✔ Do not overbake (it becomes rubbery)

✔ Always use water bath

✔ Chill well for clean slices

Golden Cloud Bread Rounds

Golden Cloud Bread Rounds

Prep time: 10 mins | Cook time: 15–20 mins | Yields: 6–8 rounds

Ingredients

  • 3 large Eggs (separated into whites and yolks)

  • 3 tbsp Cream cheese (softened to room temperature)

  • 1/4 tsp Cream of tartar (essential for holding the “cloud” shape)

  • 1/2 tsp Garlic powder or onion powder

  • 1 pinch Sea salt

  • Optional: 1 tbsp melted butter and fresh parsley for brushing on top


Detailed Instructions

  1. Preparation: Preheat your oven to 300°F (150°C). Line a large baking sheet with parchment paper. This is a very delicate batter, so the parchment paper is a must to prevent sticking!

  2. The Egg Yolks: In a medium bowl, whisk together the 3 egg yolks, the softened cream cheese, the garlic powder, and the salt until the mixture is completely smooth and creamy.

  3. The Egg Whites: In a separate, very clean glass or metal bowl, whip the 3 egg whites and the cream of tartar using a hand mixer or stand mixer. Whip on high speed until stiff peaks form (this means when you lift the beaters, the points of the foam stand straight up).

  4. The Folding Process: This is the most important step! Gently fold the yolk mixture into the whipped whites using a spatula. Do not stir. Use a slow “under-and-over” motion so you don’t deflate the air bubbles you just created.

  5. Form the Rounds: Spoon the mixture onto the prepared baking sheet into 6 to 8 even circles. Use the back of the spoon to lightly flatten them into a pancake shape.

  6. Bake: Place in the oven for 15–20 minutes. They are done when the edges are golden brown and the tops feel firm to the touch.

  7. The Finishing Touch: Brush the warm rounds with a tiny bit of melted butter and a sprinkle of fresh herbs. Let them cool for at least 5 minutes to allow the texture to firm up.


Why this recipe is a keeper:

  • Light & Airy: It has a unique, melt-in-your-mouth texture that is totally different from traditional bread.

  • Perfect for Sandwiches: You can use two rounds to make a gluten-free breakfast sandwich or a mini-burger.

  • Protein-Focused: Since it’s made primarily of eggs and cheese, it’s a satisfying way to fuel your body.

The 90-Calorie Creamy Yogurt Cake

The 90-Calorie Creamy Yogurt Cake

Prep time: 5 mins | Bake time: 35–45 mins | Serves: 6–8

Ingredients

  • 2 cups (500g) Greek yogurt (plain or vanilla)

  • 4 large Eggs

  • 4 tbsp (40g) Cornstarch (this provides the structure)

  • Optional Sweetener: 3–4 tbsp of honey, maple syrup, or your preferred granulated sweetener (if using plain unsweetened yogurt).

  • Optional Flavor: 1 tsp vanilla extract or a squeeze of lemon juice.


Instructions

  1. Preparation: Preheat your oven to 340°F (170°C). Line a 6-inch or 7-inch round cake pan with parchment paper. To make the paper fit better, scrunch it into a ball first, then flatten it out—it will mold to the pan much easier!

  2. Mix the Base: In a large mixing bowl, whisk the Greek yogurt and eggs together until the mixture is completely smooth and there are no streaks of yellow.

  3. Incorporate the Starch: Sift in the cornstarch. Add your sweetener and vanilla extract if you are using them. Whisk gently until the batter is silky and lump-free.

  4. Bake: Pour the batter into your prepared pan. Bake for 35 to 45 minutes. The cake should be set on the edges but still have a slight “jiggle” in the very center.

  5. The Secret Step (Chilling): Once baked, let the cake cool to room temperature in the pan. Do not skip this: Place the cake in the refrigerator for at least 2 hours (or overnight). This allows the proteins to set, transforming the texture into a creamy, cheesecake-like consistency.

  6. Serve: Gently lift the cake out using the parchment paper. Slice and enjoy as is, or top with fresh berries.


Why this works for a nightly treat:

  • High Protein: Using Greek yogurt makes this much more satisfying than a traditional flour-based cake.

  • Simplicity: With only a few minutes of active work, it fits easily into a busy evening routine.

  • Customizable: You can experiment by adding cocoa powder for a chocolate version or folding in blueberries before baking.

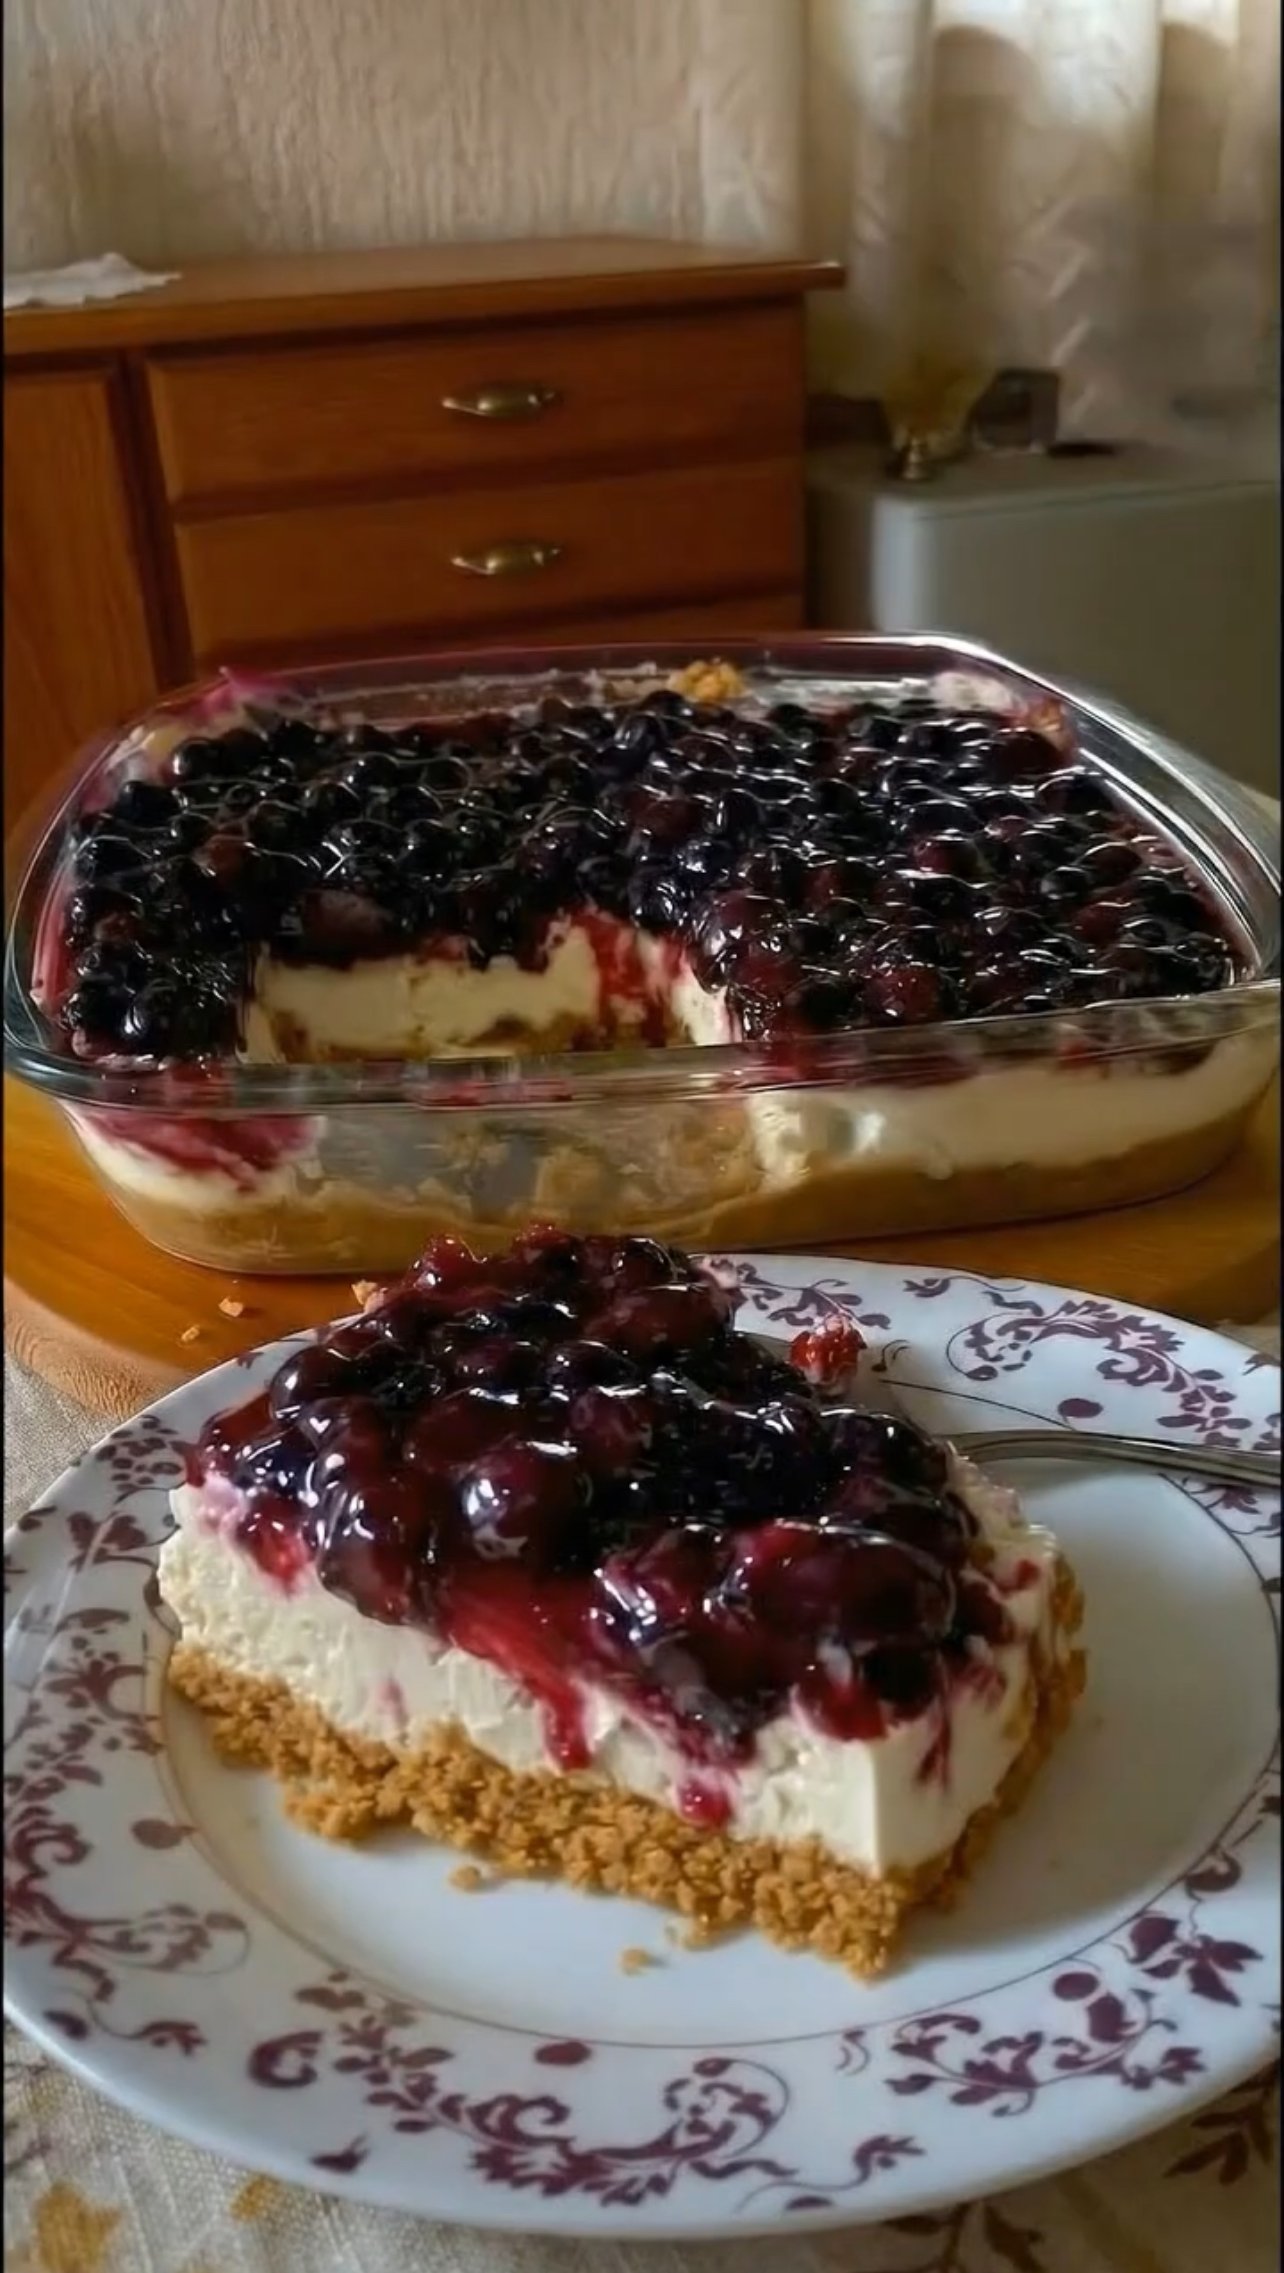
Elegant Baked Blueberry Cheesecake


Elegant Baked Blueberry Cheesecake

Ingredients

For the Crust:

  • 2 cups digestive biscuits or graham crackers (crushed)
  • ½ cup melted butter
  • 2 tbsp sugar (optional)

For the Cheesecake Filling:

  • 2 cups cream cheese (room temperature)
  • ¾ cup sugar
  • 2 large eggs (room temperature)
  • 1 cup heavy cream
  • 1 tsp vanilla essence
  • 1 tbsp cornflour (optional – helps prevent cracks)

For the Blueberry Topping:

  • 2 cups fresh or frozen blueberries
  • ¼ cup sugar
  • 1 tbsp lemon juice
  • 1 tbsp cornflour + 2 tbsp water (mix to make slurry)

👩‍🍳 Step-by-Step Method

Step 1: Prepare the Crust

  1. Crush biscuits into fine crumbs using a blender or rolling pin.
  2. Mix crumbs with melted butter (and sugar if using).
  3. Press mixture firmly into the bottom of a greased 8×8 inch baking dish or springform pan.
  4. Bake at 180°C (350°F) for 10 minutes.
  5. Remove and let it cool.

Step 2: Make the Cheesecake Filling

  1. In a large bowl, beat cream cheese until smooth and creamy.
  2. Add sugar and mix well.
  3. Add eggs one at a time, mixing gently (do not overbeat).
  4. Add heavy cream, vanilla essence, and cornflour.
  5. Mix until smooth and lump-free.

💡 Tip: Overmixing adds air and causes cracks.

Step 3: Bake the Cheesecake

  1. Pour the filling over the cooled crust.
  2. Tap the pan gently to remove air bubbles.
  3. Bake at 160°C (320°F) for 45–55 minutes.
    • Center should be slightly jiggly.
  4. Turn off oven and leave cheesecake inside for 1 hour (door slightly open).
  5. Cool completely at room temperature.
  6. Refrigerate for at least 4 hours or overnight.

Step 4: Prepare the Blueberry Topping

  1. In a saucepan, add blueberries, sugar, and lemon juice.
  2. Cook on medium heat until berries release juice.
  3. Add cornflour slurry and cook until thick and glossy.
  4. Let it cool completely.

Step 5: Assemble

  1. Spread cooled blueberry topping evenly over chilled cheesecake.
  2. Chill for another 30–60 minutes before slicing.
  3. Slice with a warm knife for clean cuts.

✨ Pro Tips for Perfect Cheesecake

✔ Use room temperature ingredients

✔ Don’t overmix

✔ Bake at low temperature

✔ Chill properly for best texture