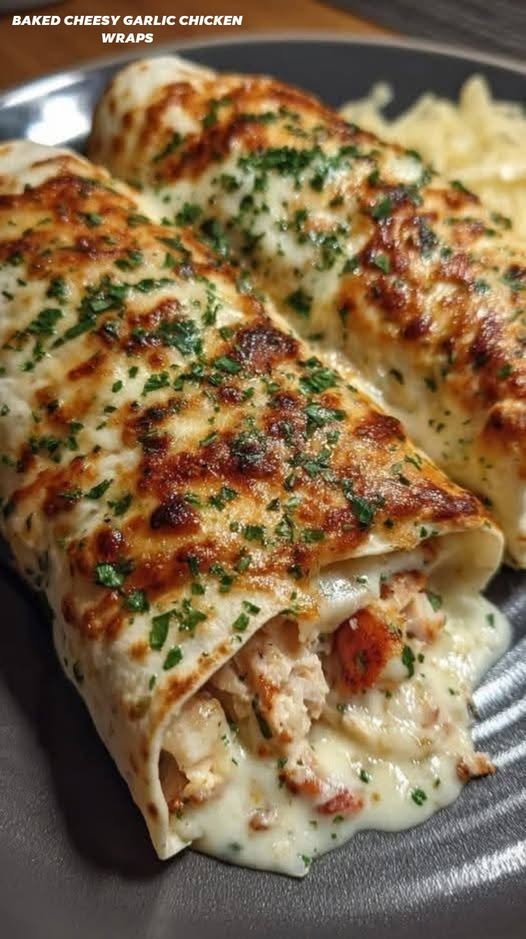
Mediterranean Baked Cheesy Garlic Chicken Wraps

These cheesy garlic chicken wraps are a warm, comforting Mediterranean-inspired meal with golden, melty cheese and savory chicken. The combination of shredded chicken, mozzarella, Parmesan, and garlic with a touch of marinara sauce makes them taste like a cozy fusion of pizza and a hearty chicken wrap. Perfect for a quick dinner, meal prep, or a family-friendly dish, they’re baked until crisp on the outside and gooey on the inside.

Time

Prep time: 15 minutes

Cook time: 15–20 minutes

Total time: 30–35 minutes

Servings: 4 wraps

Ingredients

1 lb (450g) cooked chicken breast, shredded

4 large tortillas or wraps

2 cups shredded mozzarella cheese

½ cup grated Parmesan cheese

3 cloves garlic, minced

½ cup marinara or tomato sauce

2 tbsp olive oil

1 tsp dried oregano

Salt & black pepper, to taste

Fresh parsley, chopped, for garnish

Instructions

Preheat oven:

Preheat oven to 375°F (190°C). Line a baking sheet with parchment paper.

Prepare garlic oil:

In a small pan, warm olive oil over medium heat. Add minced garlic and sauté for 1–2 minutes until fragrant (don’t let it burn). Remove from heat.

Assemble wraps:

Lay tortillas flat. Spread a spoonful of marinara sauce in the center.

Add shredded chicken, mozzarella, Parmesan, oregano, and season with salt and pepper.

Drizzle lightly with garlic oil.

Wrap & bake:

Fold tortillas tightly into wraps and place seam-side down on the baking sheet.

Brush tops with remaining garlic oil for extra flavor.

See also  Pineapple and Coconut Crab Cake Cheese Ball

Bake:

Bake for 15–20 minutes, or until golden and crisp on the outside and the cheese is melted inside.

Serve:

Garnish with fresh parsley and serve warm with extra marinara for dipping.

Tips & Variations

Cheese Options—Swap mozzarella with provolone, Gouda, or even crumbled feta for a sharper Mediterranean flavor.

Sauce Upgrade—Try roasted red pepper sauce, pesto, or sun-dried tomato spread instead of marinara for a different twist.

Make it Spicy—Add red pepper flakes, chili oil, or a drizzle of hot sauce inside the wrap.

Veggie Boost—Layer in sautéed spinach, mushrooms, roasted peppers, or zucchini to make it more hearty.

Crispier Finish—Brush the tops with garlic butter instead of olive oil before baking.

Grilled Version—Instead of baking, grill the wraps on a skillet or panini press for a quicker, crispier result.

Low-Carb Swap—Use low-carb tortillas or wrap the filling in collard greens for a lighter version.

Protein Twist—Replace chicken with cooked turkey, shredded beef, or grilled shrimp.

Make-Ahead Friendly—Assemble wraps in advance, refrigerate, and bake just before serving.

Q&A

Q: Can I use rotisserie chicken instead of cooking chicken breast?
A: Yes, rotisserie chicken is a great shortcut and adds extra flavor. Just shred it and mix it with the garlic oil and cheese.

Q: Can I make these wraps ahead of time?
A: You can assemble the wraps a day in advance and refrigerate them. Bake just before serving for the best texture.

Q: What can I serve with these wraps?
A: They pair well with a side salad, roasted vegetables, or a small bowl of Greek yogurt dip.

See also  Potato Classic Recipe

Q: Can I freeze these wraps?
A: Yes, wrap them tightly in foil or plastic wrap before baking. Freeze for up to 2 months. Bake straight from frozen, adding 5–10 minutes to cooking time.

Q: How can I make them more Mediterranean-style?
A: Swap marinara for roasted red pepper spread, add Kalamata olives, or mix in crumbled feta cheese with the chicken.

Nutrition

(per wrap, approx.)

Calories: 480–520

Protein: 38g

Carbohydrates: 32g

Fat: 23g

Fiber: 3 g

Sugar: 3 g

(Values will vary depending on tortilla size, type of cheese, and sauce used.)

Conclusion

These Mediterranean Baked Cheesy Garlic Chicken Wraps are warm, melty, and full of flavor. With cheesy chicken, garlicky olive oil, and a touch of marinara, they’re hearty enough for dinner but simple enough for weeknights. They’re also versatile—you can swap in your favorite cheeses, sauces, or proteins for endless variations. Whether you enjoy them fresh out of the oven or prep ahead for a quick meal, these wraps are a comforting Mediterranean-inspired dish that everyone will love.
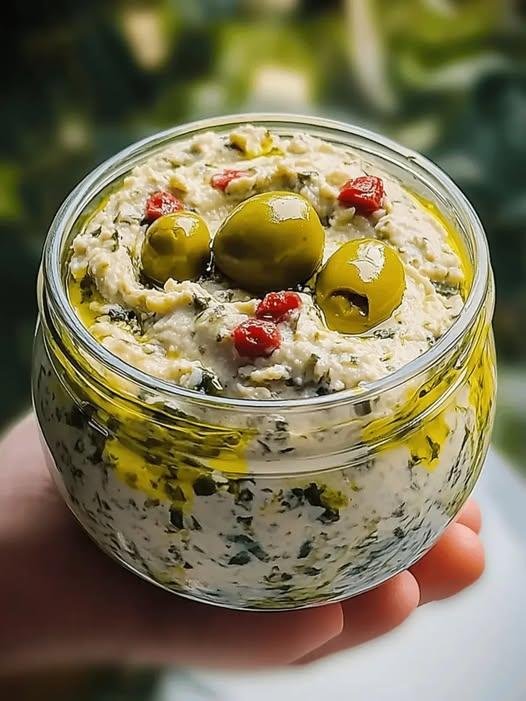
Green Olive Dip – Creamy, Tangy & Flavorful

A smooth and savory dip made with tangy green olives, creamy cheese, and fresh lemon juice. Perfect for parties, game nights, or as a quick appetizer.

Ingredients:

  • 1 cup pitted green olives (Castelvetrano, Manzanilla, or Kalamata green)
  • 8 oz (225g) cream cheese, softened
  • 1/2 cup sour cream or Greek yogurt
  • 1/4 cup mayonnaise
  • 2 cloves garlic, finely minced
  • 2 tbsp fresh lemon juice
  • Optional garnish: chopped parsley, chives, or a pinch of red pepper flakes

Instructions:

  1. Mix the base: In a medium bowl, beat the softened cream cheese, sour cream, and mayonnaise until smooth and creamy.
  2. Add flavor: Stir in the garlic and lemon juice.
  3. Fold in olives: Roughly chop the green olives and mix them into the creamy base.
  4. Customize: Add herbs (parsley, chives) or a little red pepper flakes if you want extra flavor.
  5. Chill & serve: Cover and refrigerate for at least 30 minutes before serving for best flavor.
  6. Enjoy: Serve with crackers, toasted crostini, pita chips, or fresh veggies.

 Q&A Section

Q1: Can I make this dip ahead of time?
👉 Yes! It tastes even better if made a few hours or a day before, since the flavors develop while chilling.

Q2: What type of olives works best?
👉 Castelvetrano olives are buttery and mild, while Manzanilla olives are briny. You can even mix different olives for a unique taste.

Q3: Can I make it healthier?
👉 Replace cream cheese with light cream cheese and mayonnaise with extra Greek yogurt.

See also  10-Minute No-Bake Chocolate Cheesecake

Q4: How long does it last in the fridge?
👉 Store in an airtight container for up to 3–4 days. Stir before serving.

Q5: Can I make it spicy?
👉 Yes! Add a dash of cayenne, red pepper flakes, or even a little jalapeño for a kick.

Q6: What pairs well with this dip?
👉 Crackers, sliced baguette, celery sticks, cucumber, carrot sticks, or pita bread.

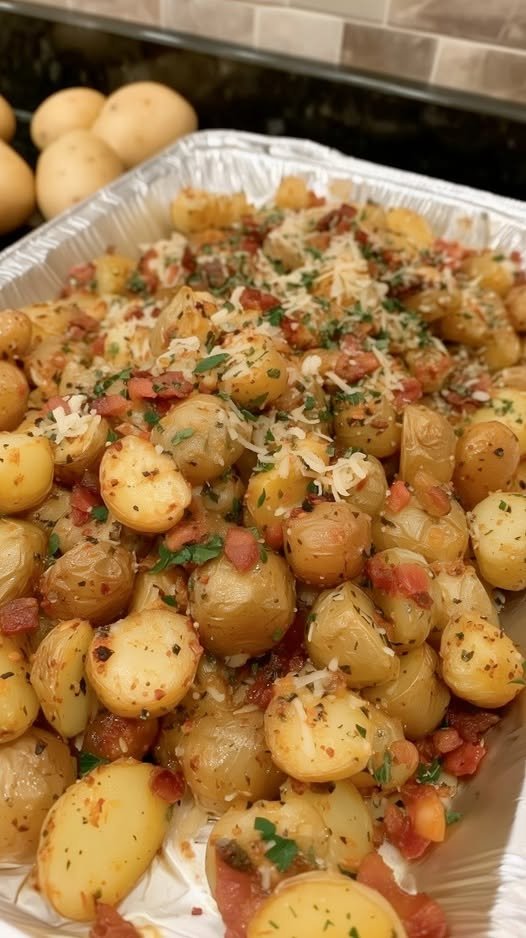
Crispy Parmesan Garlic Roasted Potatoes

Crispy Parmesan Garlic Roasted Potatoes

The ultimate “hero” side dish: golden-brown and crispy on the outside and buttery-soft on the inside.

  • Prep time: 10 minutes

  • Cook time: 30 minutes

  • Total time: 40 minutes

  • Servings: 6-8

Ingredients

  • 3 lbs small red-skinned potatoes, halved (keep the skins on!)

  • 2 tbsp refined olive oil

  • 5 cloves fresh garlic, finely crushed

  • 1 tsp dried thyme

  • ½ tsp dried oregano

  • ½ tsp dried basil

  • ⅓ cup finely shredded or grated aged Parmesan cheese

  • To taste: Coarse sea salt and freshly ground black pepper

  • 2 tsp unsalted butter, melted (for the finish)

  • 2 tsp fresh parsley, finely chopped (for garnish)

Instructions

  1. Preheat & Prep: Preheat your oven to 400°F (200°C). Lightly coat a large baking sheet with cooking spray or a thin layer of oil.

  2. Season the Potatoes: In a large mixing bowl, combine the halved potatoes, olive oil, crushed garlic, thyme, oregano, basil, and Parmesan cheese.

  3. Toss: Add a generous pinch of coarse salt and black pepper. Toss vigorously until every potato is evenly coated in the oil, herbs, and cheese.

  4. Arrange: Spread the potatoes onto the prepared sheet pan in a single layer. For the best results, try to place as many as possible cut-side down—this creates that “gourmet” crispy crust.

  5. Roast: Bake for a total of 30 minutes.

  6. Flip: At the 15-minute mark, use a spatula to flip the potatoes. This ensures they get golden-brown on all sides and prevents the garlic from burning.

  7. Final Touch: Once the potatoes are tender and crispy, remove them from the oven. Immediately drizzle with the melted butter and sprinkle with fresh parsley.

  8. Serve: Best enjoyed hot right off the pan!


Pro-Tips for Success

  • The Dry Secret: If you wash your potatoes right before cooking, pat them completely dry with a towel. Moisture creates steam, which leads to soggy potatoes rather than crispy ones.

  • Sheet Pan Space: Don’t crowd the pan! If the potatoes are piled on top of each other, they will steam. Use two pans if necessary to keep them in a single layer.

  • Leftovers: These stay good in the fridge for up to 5 days. To bring back the crunch, pop them in an air fryer at 350°F for 3–5 minutes.

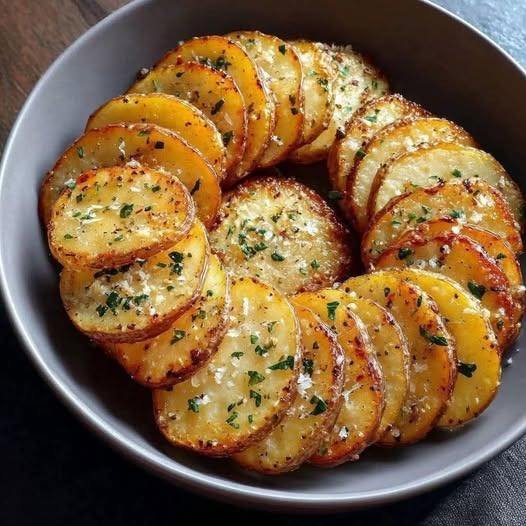
Air Fryer Garlic Parmesan Potato Rounds

Air Fryer Garlic Parmesan Potato Rounds

Crisp on the outside, tender on the inside, with garlic and cheese flavor

These air fryer potato rounds are evenly sliced, lightly seasoned, and cooked until golden and crisp. Garlic and Parmesan add depth of flavor, while the air fryer method uses a modest amount of oil to achieve a satisfying texture. This recipe works well as a side dish, snack, or appetizer.


Recipe Overview

  • Prep Time: 15 minutes

  • Soaking Time: 20 minutes

  • Cook Time: 16–18 minutes

  • Total Time: About 55 minutes

  • Servings: 4


Ingredients

For the Potatoes

  • 4 medium potatoes, scrubbed clean and sliced into ½ cm (¼-inch) rounds

  • 2 tablespoons olive oil or avocado oil

  • 3 cloves garlic, finely minced

  • 1 teaspoon sea salt

  • ½ teaspoon freshly ground black pepper

  • ½ teaspoon smoked paprika (optional)

For Finishing

  • ⅓ cup freshly grated Parmesan cheese

  • 1 tablespoon fresh parsley, finely chopped

  • A small pinch of red pepper flakes (optional)


Step-by-Step Instructions

1. Prepare the Potatoes

  • Wash and scrub the potatoes thoroughly.

  • Leave the skins on for texture and flavor.

  • Slice evenly into ½ cm (¼-inch) rounds using a sharp knife or mandoline for uniform thickness.


2. Soak for Better Texture

  • Place the sliced potatoes in a large bowl.

  • Cover with cold water and add 1 teaspoon salt.

  • Let soak for 20 minutes to remove excess surface starch, which helps with even browning.


3. Drain and Dry

  • Drain the potatoes completely.

  • Pat them very dry with a clean kitchen towel or paper towels.

  • Removing surface moisture helps the potatoes cook evenly.


4. Season the Potatoes

  • Transfer the dried potato slices to a large mixing bowl.

  • Add olive oil, minced garlic, salt, black pepper, and smoked paprika (if using).

  • Toss gently until every slice is evenly coated.


5. Air Fry

  • Preheat the air fryer to 200°C (390°F) for 3 minutes.

  • Arrange the potato slices in a single layer in the basket.

  • Cook in batches if needed to avoid overlapping.

  • Air fry for 10 minutes, then flip each slice.

  • Continue cooking for 6–8 minutes, until golden and lightly crisp at the edges.


6. Finish and Serve

  • Transfer the hot potato rounds to a serving bowl or platter.

  • Immediately sprinkle with Parmesan cheese and chopped parsley.

  • Add a small pinch of red pepper flakes if desired.

  • Serve warm.


Helpful Tips & Variations

  • Even cooking: Uniform slices ensure consistent texture.

  • Cheese options: Pecorino Romano can be used for a sharper flavor.

  • Batch cooking: Avoid stacking slices for best results.

  • Serving time: These are best enjoyed shortly after cooking.

  • Flavor additions: Try dried herbs or a squeeze of lemon before serving.


Serving Suggestions

  • Serve with yogurt-based sauce, garlic dip, or ranch-style dressing

  • Pair with grilled vegetables, chicken, or fish

  • Add to salads for added texture


Approximate Nutrition (Per Serving)

  • Calories: ~180

  • Protein: 4 g

  • Carbohydrates: 26 g

  • Fat: 7 g

  • Fiber: 3 g

Bubbly Garlic Cheese Toast

Bubbly Garlic Cheese Toast

Golden, crisp bread topped with a creamy garlic base and melted cheese

This garlic cheese toast features thick slices of bread topped with a smooth garlic cream spread and a generous layer of melted cheese. Baking on a rack keeps the bread crisp underneath, while a short broil at the end creates a lightly browned, bubbly surface.


Recipe Overview

  • Prep Time: 10 minutes

  • Cook Time: 10 minutes

  • Total Time: 20 minutes

  • Yield: 4–6 slices


Ingredients

Garlic Cream Sauce

  • 4 tablespoons unsalted butter, softened

  • 1 tablespoon all-purpose flour

  • ½ cup whole milk or heavy cream

  • 2 garlic cloves, finely minced (or 1 teaspoon garlic powder)

  • ¼ teaspoon salt

  • A small pinch of black pepper

Bread & Cheese

  • 4–6 thick slices sturdy bread (such as Texas toast, sourdough, or brioche)

  • 1½ cups shredded mozzarella or Gruyère cheese

  • ½ cup shredded Parmesan cheese

  • Fresh parsley, finely chopped (optional garnish)


Step-by-Step Instructions

1. Prepare the Oven and Bread

  • Preheat the oven to 400°F (200°C).

  • Line a baking sheet with foil or parchment paper and place a wire rack on top.

  • Arrange the bread slices in a single layer on the rack to allow heat to circulate and keep the bottoms crisp.


2. Make the Garlic Cream Sauce

  • Place a small saucepan over medium heat and melt the butter.

  • Add the garlic and cook gently for about 1 minute, stirring frequently.

  • Whisk in the flour and cook for another 1 minute, creating a smooth base.

  • Slowly pour in the milk or cream while whisking constantly.

  • Continue stirring until the sauce thickens to a spreadable consistency.

  • Remove from heat and season with salt and black pepper.

Tip: For extra coverage, the sauce ingredients can be doubled.


3. Assemble the Toast

  • Spread a generous layer of the warm garlic sauce evenly over each slice of bread, reaching the edges.

  • Sprinkle the mozzarella (or Gruyère) evenly over the sauce.

  • Finish with a layer of Parmesan cheese.


4. Bake

  • Place the tray in the oven and bake for 5–7 minutes, or until the cheese is fully melted.


5. Lightly Brown the Top

  • Switch the oven setting to broil.

  • Broil for 1–2 minutes, watching closely, until the cheese develops light golden spots.


6. Finish and Serve

  • Remove from the oven and allow the toast to rest for 2 minutes.

  • Sprinkle with chopped parsley if desired.

  • Serve warm.


Helpful Tips & Variations

  • Bread choice: Thick, sturdy bread holds the sauce and cheese best.

  • Cheese texture: Freshly shredded cheese melts more smoothly than pre-packaged shredded cheese.

  • Flavor options: Add a pinch of dried herbs or chili flakes to the sauce.

  • Serving idea: Serve alongside soup, salad, or pasta dishes.

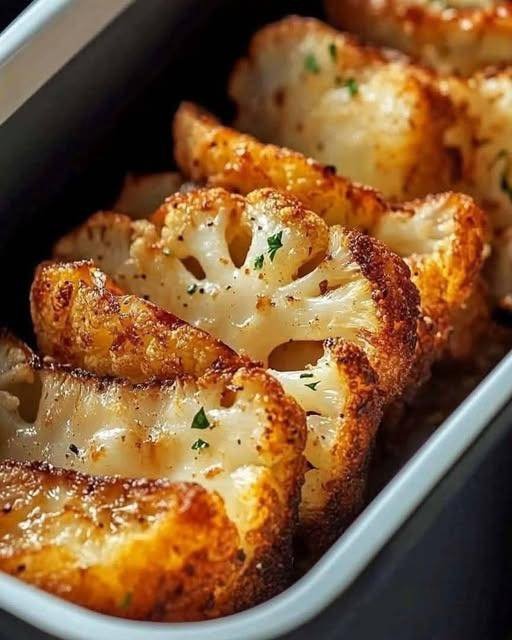
Crispy Golden Baked Cauliflower Steaks

Crispy Golden Baked Cauliflower Steaks

A flavorful oven-baked vegetable dish with crisp edges and a tender center

These baked cauliflower steaks transform a simple vegetable into a satisfying and hearty dish. A well-seasoned coating and high-heat roasting bring out deep flavor and a beautifully golden surface, while the inside stays soft and tender. This recipe works equally well as a main dish or a side.


Recipe Overview

  • Prep Time: 10 minutes

  • Bake Time: 30–40 minutes

  • Total Time: 40–50 minutes

  • Servings: 4


Ingredients

Main Ingredient

  • 1 large head cauliflower, outer leaves removed, core intact

Seasoning & Oil

  • 3 tablespoons olive oil

  • 2 tablespoons finely grated Parmesan cheese (optional)

    • For a plant-based option, use nutritional yeast

  • 1 teaspoon smoked paprika

  • 1 teaspoon garlic powder

  • 1 teaspoon salt, or to taste

  • ½ teaspoon black pepper

Garnish

  • 1 tablespoon fresh parsley, finely chopped


Step-by-Step Instructions

1. Prepare the Oven and Cauliflower

  • Preheat the oven to 400°F (200°C).

  • Line a large baking sheet with parchment paper for easy cleanup.

  • Remove the outer leaves from the cauliflower while keeping the core intact.

  • Using a sharp knife, slice the cauliflower from top to bottom into 1-inch-thick slices.

  • You should get 3–4 full steaks; reserve any loose florets for roasting alongside.


2. Make the Seasoning Mixture

  • In a small bowl, combine:

    • Olive oil

    • Parmesan cheese (if using)

    • Smoked paprika

    • Garlic powder

    • Salt

    • Black pepper

  • Stir until well blended and smooth.


3. Season the Cauliflower

  • Arrange the cauliflower steaks and florets in a single layer on the prepared baking sheet.

  • Brush both sides generously with the seasoning mixture.

  • Make sure the coating reaches all surfaces—this helps develop a golden finish during baking.


4. Bake the First Side

  • Place the baking sheet in the oven.

  • Bake for 15–20 minutes, until the underside begins to turn golden.


5. Flip and Finish Baking

  • Carefully turn each cauliflower piece using a spatula.

  • Return to the oven and bake for another 15–20 minutes, until:

    • The cauliflower is tender when pierced with a fork

    • The edges are deeply golden and lightly crisp


6. Serve

  • Transfer the baked cauliflower to a serving platter.

  • Sprinkle with freshly chopped parsley.

  • Serve immediately while warm.


Helpful Tips & Variations

  • Extra flavor: Add onion powder, dried herbs, or a squeeze of lemon before serving.

  • Crispier finish: Use convection or broil for the last 2 minutes, watching closely.

  • Meal idea: Serve over grains, with a yogurt-based sauce, or alongside roasted vegetables.

  • Leftovers: Reheat in the oven or air fryer to restore crispness.