Garlic Parmesan Cheeseburger Bombs

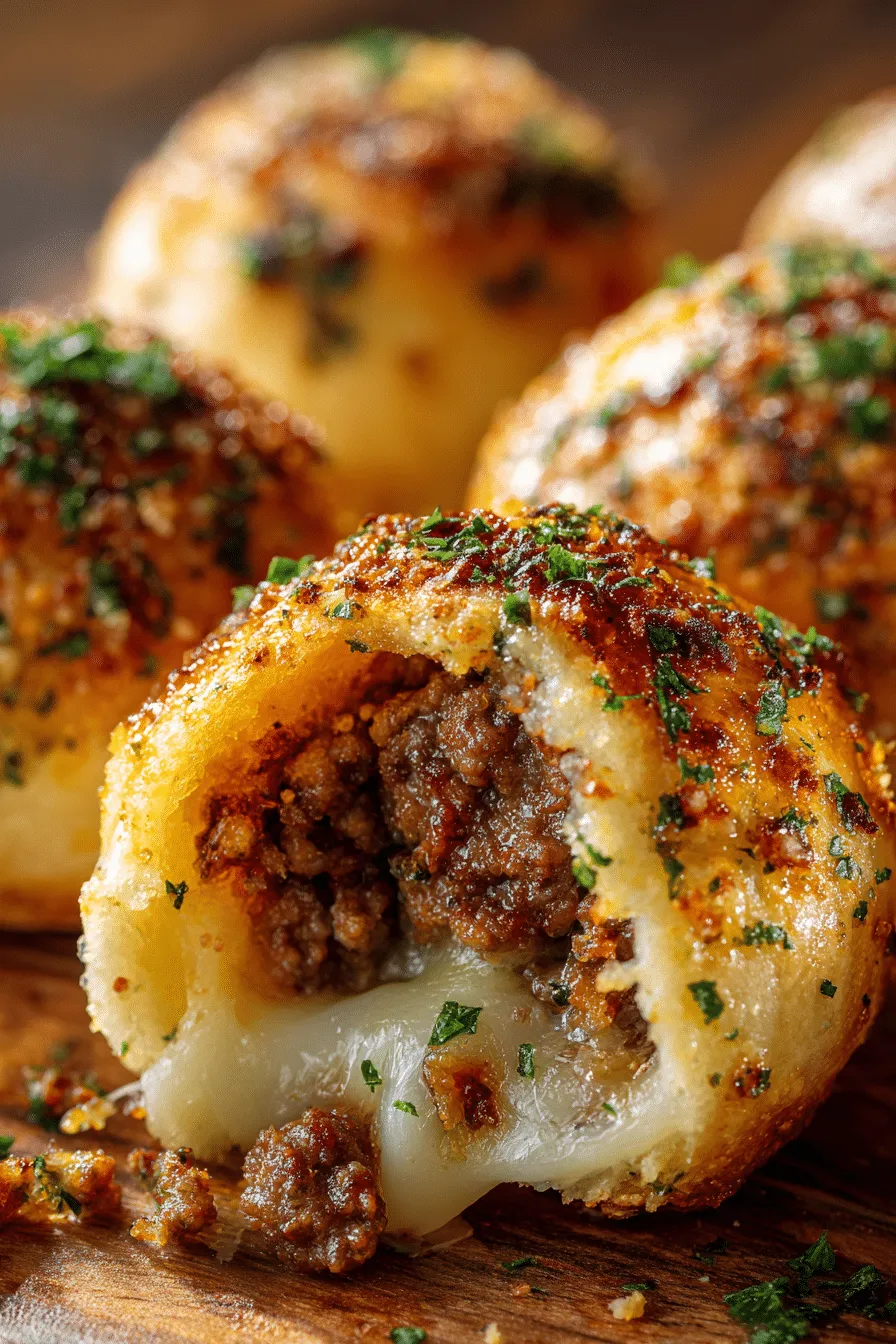
Garlic Parmesan Cheeseburger Bombs

These handheld pockets feature seasoned ground beef and melty cheese tucked inside soft biscuit dough, finished with a savory garlic-Parmesan butter.

  • Prep time: 15 minutes

  • Cook time: 25 minutes

  • Servings: 6-8 (Makes 8 large bombs)


Ingredients

For the Filling:

  • 1 lb (450g) ground beef (lean 85-90% recommended)

  • 1 tbsp olive oil

  • 1 small onion, finely diced

  • 2 cloves garlic, minced

  • 1 tsp Worcestershire sauce

  • 1 tsp salt

  • ½ tsp black pepper

  • 1 cup shredded cheddar cheese (or mozzarella/Colby Jack mix)

For the Dough & Topping:

  • 1 can (16 oz) refrigerated biscuit dough (8 count, like Pillsbury Grands)

  • ¼ cup unsalted butter, melted

  • 2 tbsp grated Parmesan cheese

  • 1 tsp garlic powder

  • 1 tsp dried parsley (optional garnish)


Instructions

1. Prepare the Beef Filling

  1. Heat the olive oil in a skillet over medium heat.

  2. Add the diced onion and sauté until softened (about 3 minutes). Stir in the minced garlic and cook for another 30 seconds until fragrant.

  3. Add the ground beef, salt, pepper, and Worcestershire sauce. Cook until the beef is fully browned, breaking it up with a spatula as it cooks.

  4. Drain any excess grease from the pan.

  5. Remove from heat and stir in the shredded cheese until it begins to melt and bind the beef together. Let the mixture cool slightly so it doesn’t tear the dough.

2. Assemble the Bombs

  1. Preheat your oven to 375°F (190°C) and line a large baking sheet with parchment paper.

  2. Take each biscuit and flatten it with your hands or a rolling pin into a circle roughly 4–5 inches wide.

  3. Place about 2 tablespoons of the beef and cheese mixture into the center of each dough circle.

  4. Gather the edges of the dough over the filling and pinch tightly to seal. Roll it gently in your hands to form a smooth ball.

  5. Place the balls seam-side down on the prepared baking sheet.

3. Add the Topping & Bake

  1. In a small bowl, whisk together the melted butter, grated Parmesan, garlic powder, and parsley.

  2. Brush the mixture generously over the top of each dough ball.

  3. Bake for 15–18 minutes, or until the bombs are puffed and a deep golden brown.

  4. (Optional) Brush with any remaining garlic butter immediately after taking them out of the oven for extra shine and flavor.

4. Serve

  • Serve warm while the cheese is still melty. These pair perfectly with ranch dressing, ketchup, or even a spicy marinara for dipping.


Pro-Tips for Success

  • Avoid the Leak: To prevent the “bombs” from bursting, ensure the beef mixture isn’t too hot when you assemble them, and make sure your pinch-seal is very firm.

  • Variety: Try adding a small slice of pickled jalapeño or a bit of crispy bacon inside the bomb for an extra flavor kick.

  • Storage: These keep well in the fridge for up to 3 days. Reheat them in an air fryer or oven to keep the biscuit exterior from getting soggy.
Baked Zucchini with Cheese

Baked Zucchini with Cheese

A creamy, golden-brown vegetable bake featuring tender zucchini and a savory yogurt-egg glaze.

  • Prep time: 15 minutes

  • Cook time: 30–35 minutes

  • Servings: 4 side portions


Ingredients

  • 2 zucchini, sliced into rounds

  • 2 onions, thinly sliced into rounds

  • 2 cloves garlic, finely chopped

  • 2 eggs

  • 150 g yogurt (plain or Greek)

  • 150 g cheese, grated (such as Mozzarella or Cheddar)

  • Seasonings: Salt, black pepper, paprika, and vegetable seasoning to taste

  • Oil for greasing and cooking


Instructions

1. Prepare the Vegetables

Preheat your oven to 390°F (200°C). Lightly grease a glass baking dish with oil. Season the zucchini rounds with salt, black pepper, paprika, and vegetable seasoning.

2. Layer the Dish

Arrange the seasoned zucchini rounds and sliced onions in rows in the baking dish, overlapping them slightly to fill the pan. Sprinkle the chopped garlic evenly over the top.

3. Mix the Creamy Glaze

In a small bowl, whisk together the 2 eggs and 150 g of yogurt until smooth. Season this mixture with a pinch of salt and pepper if desired.

4. Top and Bake

Pour the yogurt and egg mixture evenly over the rows of vegetables, ensuring they are well-coated. Sprinkle the 150 g of grated cheese generously over the entire surface.

5. Bake to Perfection

Place the dish in the oven and bake for 30–35 minutes, or until the zucchini is tender and the cheese topping is bubbly and deep golden brown.

6. Serve

Let the dish rest for 5 minutes before serving to allow the creamy sauce to set.


Recipe Variations

  • Extra Protein: You can tuck slices of cooked ham or turkey between the zucchini layers.

  • Herb Freshness: Top with fresh chopped parsley or dill after baking for a burst of color and flavor.

Air Fryer Cheesy Hasselback Potatoes

Air Fryer Cheesy Hasselback Potatoes

Crispy, garlic-buttered edges with a soft, cheesy center—made easily in the air fryer.

  • Prep time: 10 minutes

  • Cook time: 45 minutes

  • Total time: 55 minutes

  • Servings: 2 side portions


Ingredients

  • 2 large russet potatoes (scrubbed and cleaned)

  • 4 tbsp unsalted butter, melted

  • 1 tbsp garlic paste (or finely minced garlic)

  • 3 to 5 slices Colby Jack cheese (cut into small squares/fourths)

  • Kosher salt and black pepper, to taste

Optional Toppings:

  • Sour cream

  • Fresh chives, chopped

  • Bacon bits


Instructions

1. Prep the Potatoes

To ensure the potato sits still, cut a thin horizontal slice off the bottom of each potato to create a flat base. Do not discard these slices! Place the potato flat-side down between two chopsticks. Use a sharp knife to cut 1/4-inch slices across the potato. The chopsticks will act as a guard, preventing you from cutting all the way through the bottom.

2. The Air Fryer Setup

Place the small potato slices you cut from the bottoms into the air fryer basket. Place the large sliced potatoes directly on top of them. This creates a slight curve that helps the “Hasselback” slices fan out and open up during cooking.

3. First Garlic Butter Wash

In a small bowl, whisk together the melted butter, garlic paste, salt, and pepper. Gently pry the potato slices apart and brush about half of the garlic butter over the tops, ensuring some of it drips down into the crevices. Sprinkle with a little extra salt and pepper.

4. The Initial Roast

Set your air fryer to 370°F (188°C). Cook the potatoes for 20 minutes.

5. Second Baste

Open the air fryer and brush the remaining garlic butter over the potatoes. Continue cooking at 370°F for another 20–25 minutes. The potatoes should be tender on the inside and the edges should be golden-brown and crisp.

6. Add the Cheese

Take your cheese squares (Colby Jack melts beautifully here) and tuck them into the slices. You can put cheese in every slice for a “mega-melt” or every other slice depending on your preference. Return to the air fryer for 1–2 minutes until the cheese is bubbling and melted.

7. Garnish and Serve

Carefully remove the potatoes from the basket. Top with a dollop of sour cream and a sprinkle of fresh chives.


Success Tips

  • The Chopstick Trick: If you don’t have chopsticks, two wooden spoons with flat handles work just as well to stop your knife.

  • Potato Choice: Russets are best for this recipe because their high starch content leads to a fluffier interior and crispier skin compared to waxy potatoes.

  • Don’t Overcrowd: Ensure there is space between the two potatoes in the basket so the air can circulate and crisp up the sides.

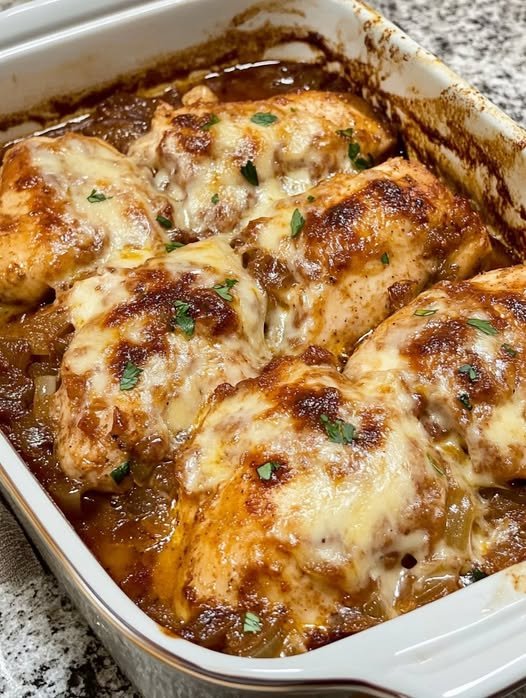
French Onion Chicken Bake

This French Onion Chicken Bake is the perfect marriage of two comfort food classics. Based on the details provided, here is the full, comprehensive recipe along with the best tips for perfecting those onions and making the dish work for your lifestyle.


French Onion Chicken Bake

Prep time: 10 mins | Cook time: 50 mins | Total time: 1 hour Yield: 4 servings

Ingredients

  • The Onions:

    • 4 large onions, peeled and sliced (Sweet onions like Vidalia are preferred)

    • 4 tbsp unsalted butter

    • 4 cloves garlic, finely chopped

    • 1 tsp fresh thyme

    • 2/3 cup low-sodium beef broth

    • 2 tbsp aged balsamic vinegar

  • The Chicken & Cheese:

    • 4 boneless, skinless chicken breasts

    • 1/2 tsp sea salt (adjust to taste)

    • 1/2 tsp black pepper

    • 1 cup shredded mozzarella cheese

    • 1/2 cup grated Parmesan cheese

Instructions

  1. Preheat and Prepare: Preheat your oven to 400°F (200°C). Lightly grease a 9×13 inch baking dish with cooking spray.

  2. Sauté the Onions: In a large skillet, melt the butter over medium-high heat. Add the sliced onions and sauté for about 5 minutes, stirring occasionally until they soften.

  3. Infuse Flavors: Reduce the heat to medium. Stir in the chopped garlic, black pepper, and fresh thyme. Cook for 1 more minute until fragrant.

  4. Create the Jam: Pour in the beef broth and balsamic vinegar. Continue to simmer on medium heat for about 10 minutes. The liquid will reduce, and the onions will become dark, tender, and “jam-like” in consistency.

  5. Assemble: Spread about one-third of the caramelized onion mixture into the bottom of your prepared baking dish. Place the chicken breasts on top of the onions and season them lightly with sea salt.

  6. Layer and Cheese: Top each chicken breast evenly with the remaining caramelized onions. Generously sprinkle the mozzarella and Parmesan over the top.

  7. Bake: Place in the oven and bake for 30 minutes, or until the chicken reaches an internal temperature of 165°F and the cheese is bubbly and golden brown.


Tips for Success

  • The Cheese Swap: For a more traditional French flavor, replace the mozzarella and Parmesan with Gruyere. If you want a sharper kick, mix in a little blue cheese with a mild melter like Fontina.

  • Keto Modification: To lower the carb count further, swap the balsamic vinegar for apple cider vinegar and a pinch of stevia. Serve with cauliflower mash instead of potatoes.

  • Make-Ahead Instructions: You can assemble the dish (onions and chicken) up to 24 hours in advance and store it covered in the fridge. Add the cheese just before baking, and add 5–10 minutes to the cook time since the dish is starting cold.

  • Wine Pairing: A Chardonnay with light oak notes or a crisp Pinot Noir pairs beautifully with the savory-sweet profile of the caramelized onions.

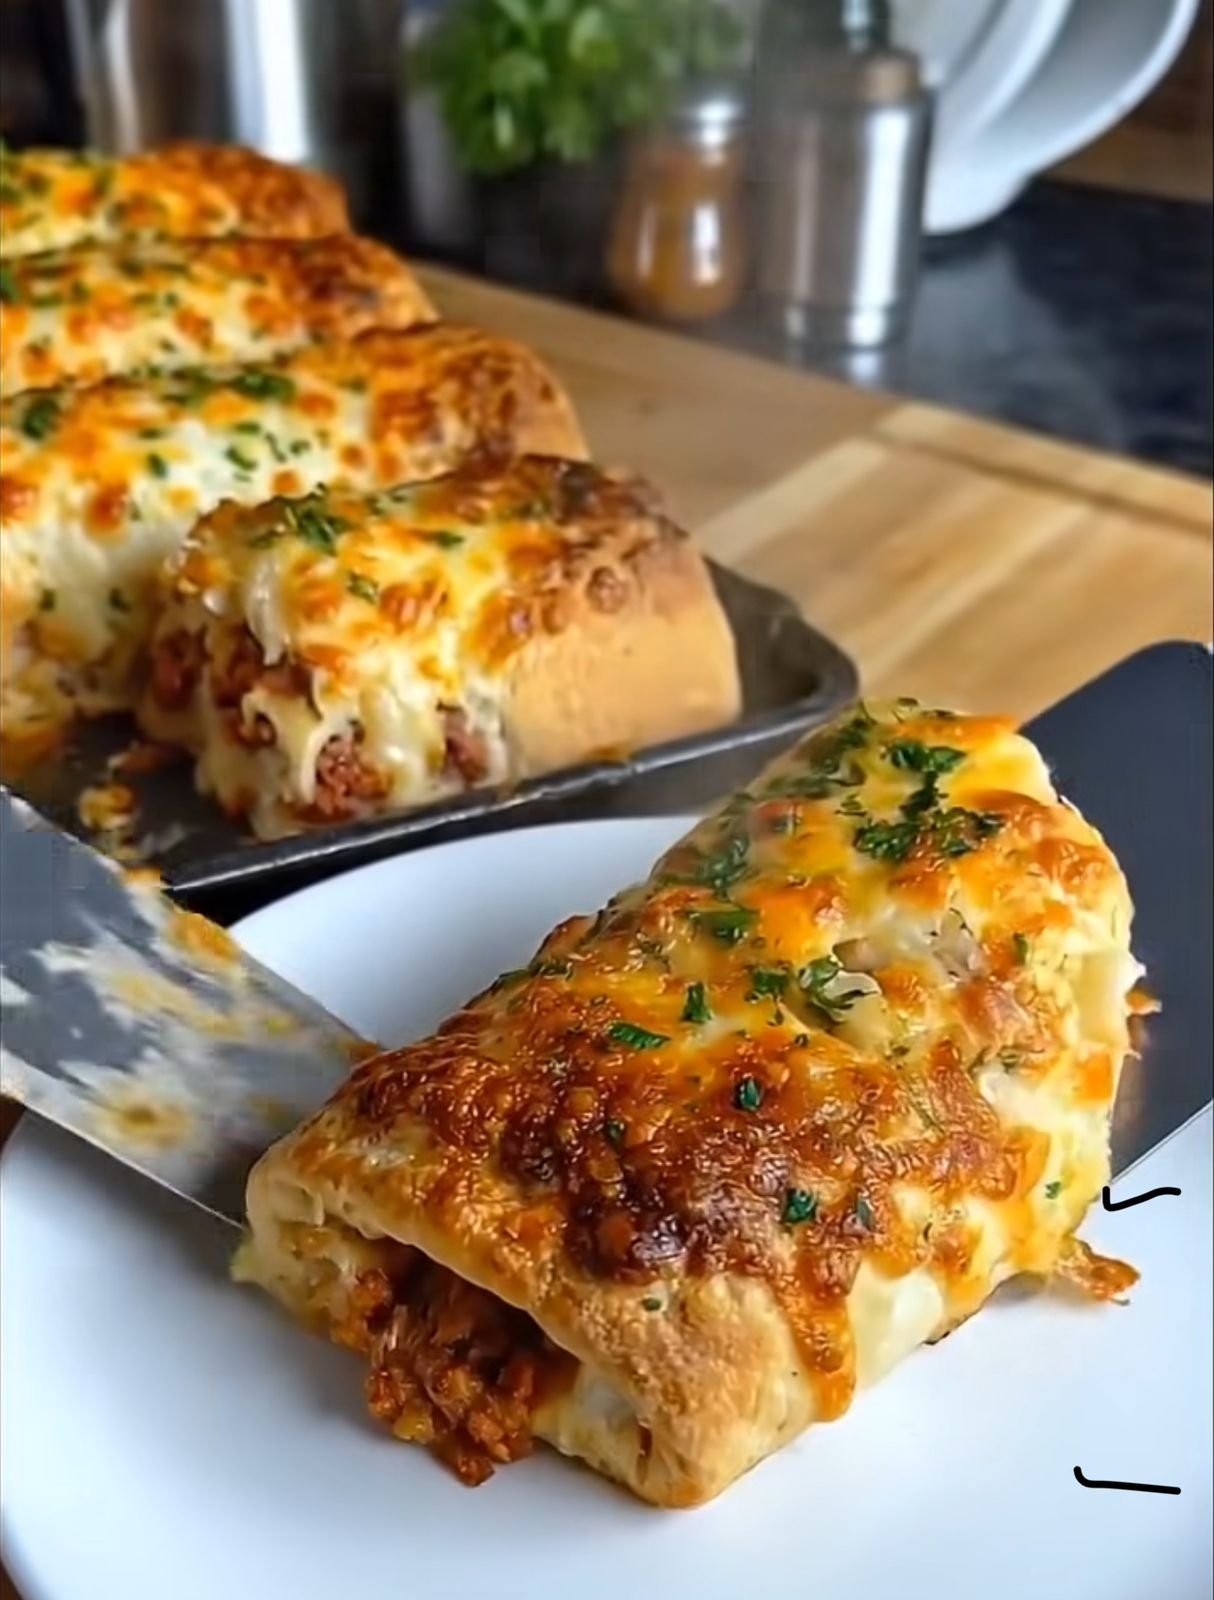
Loaded Cheeseburger Pastries

Cheeseburger-stuffed pastries take the classic comfort food you love and wrap it in flaky, golden pastry for a fun, flavorful twist. Juicy, seasoned beef, melty  cheese, and optional veggies are tucked inside buttery dough—perfect as a snack, appetizer, or main dish.

Food

Ingredients & Notes

  • Ground beef: Choose a mix with some fat for juiciness. Cook and season thoroughly.
  • Cheese: Cheddar is classic; mozzarella, American, or blends work too.
  • Onions & optional vegetables: Finely chop onions; cook any extra veggies first to avoid sogginess.
  • Seasonings: salt, black pepper, garlic powder, and paprika; optional mustard or ketchup for a true cheeseburger taste.
  • Pastry dough: Puff pastry gives flakiness; crescent dough is soft. Homemade dough works too.

Preparing the Filling

    1. Brown beef in a skillet over medium heat.

  1. Add onions and cook until soft.
  2. Season with spices, remove excess fat, and let cool.
  3. Stir in cheese after cooling.

Assembling the Pastries

  1. Roll out dough and cut into equal portions.
  2. Place filling in the center of each piece—don’t overfill.
  3. Fold dough over, seal edges, and crimp with a fork.
  4. Brush with egg wash for a golden finish.

Cooking Options

    • Baking: Preheat oven and bake until golden brown and crisp.

Discover more
Garlic
steaks
garlic
Beef
Steaks
Muffins
Stuffing
bread
cheese
beef

  • Frying (optional): Creates a rich, golden crust; monitor temperature carefully.

Flavor Variations

  • Bacon cheeseburger: Add cooked bacon.
  • Spicy: Mix in jalapeños, hot sauce, or chili powder; pepper jack cheese works well.
  • Vegetarian: Use plant-based ground meat or beans/vegetables; keep cheese and seasonings.

Serving Suggestions

  • Serve with ketchup, mustard, or creamy dips.
  • Pair with fries, salad, or roasted veggies.
  • Make smaller pastries for parties—they’re ideal finger food.

Storage & Reheating

    • Refrigerate: Airtight container for several days.

Discover more
garlic
beef
Stuffing Mixes
Muffins
Bread
filling
Steak
cheesy
Stuffing
Slow Cooker

  • Reheat: Bake to restore crispness; microwaving softens texture.
  • Freeze: Possible, though texture may change slightly.

Cheeseburger-stuffed pastries are proof that comfort food can be familiar and inventive—easy to make, crowd-pleasing, and endlessly customizable.

Baked Cheesy Chicken Bread Rolls

Baked Cheesy Chicken Bread Rolls

A savory, melt-in-your-mouth snack featuring seasoned shredded chicken and bubbly melted cheese nestled in soft dinner rolls.

  • Prep time: 15 minutes

  • Cook time: 15 minutes

  • Total time: 30 minutes

Ingredients

For the Chicken Filling

  • Chicken: 1 cup boiled and shredded chicken (rotisserie chicken works great here)

  • Onion: 1 small, finely chopped

  • Capsicum (Bell Pepper): ½ cup, finely chopped

  • Garlic: 1 tsp garlic paste

  • Condiments: 2 tbsp ketchup (or pizza sauce) and 2 tbsp mayonnaise

  • Seasoning: Salt (to taste), ½ tsp black pepper, ½ tsp red chili powder, and ½ tsp chili flakes (optional for heat)

For the Rolls & Topping

  • Bread: 1 pack of dinner rolls or slider buns

  • Cheese: 1½ cups mozzarella or cheddar cheese, grated

  • Butter Mixture: 2 tbsp butter (melted) mixed with 1 tsp garlic powder

  • Garnish: Freshly chopped parsley or coriander


Detailed Instructions

1. Sauté the Savory Filling

Heat 1 tablespoon of oil in a non-stick pan over medium heat. Add the finely chopped onion and garlic paste, sautéing for about 2 minutes until the onion becomes translucent and soft. Add the shredded chicken and chopped capsicum.

2. Season and Combine

Stir in the salt, black pepper, red chili powder, and chili flakes. Mix thoroughly and cook for 3–4 minutes to allow the flavors to meld and the capsicum to soften slightly. Remove the pan from the heat. Once the mixture has cooled for a minute, stir in the ketchup (or pizza sauce) and mayonnaise until the chicken is evenly coated and creamy.

3. Prepare and Stuff the Rolls

Preheat your oven to 180°C (350°F). Take your dinner rolls and make a deep slit down the center of each, being careful not to cut all the way through to the bottom. Gently pull the bread apart and stuff each roll generously with the prepared chicken filling.

4. Add Cheese and Butter

Place the stuffed rolls side-by-side on a baking tray lined with parchment paper. Sprinkle the grated mozzarella or cheddar cheese over the top of the filling in each roll. Using a pastry brush, coat the tops and sides of the bread with the melted garlic butter.

5. Bake to Perfection

Place the tray in the center rack of the oven. Bake for 12–15 minutes, or until the cheese is completely melted and bubbling, and the edges of the rolls have turned a beautiful golden brown.

6. Garnish and Serve

Remove from the oven and immediately sprinkle with fresh parsley or coriander. Serve these rolls while hot, ideally paired with extra ketchup or a creamy garlic dipping sauce.


Tips for the Best Rolls

  • Don’t Overfill: While it’s tempting to pile the chicken high, keep the filling level with the top of the bread to ensure the cheese stays on the roll rather than sliding off onto the tray.

  • Soft vs. Crusty: If you prefer a softer roll, cover the tray loosely with aluminum foil for the first 8 minutes of baking, then remove it for the final 5 minutes to melt the cheese.