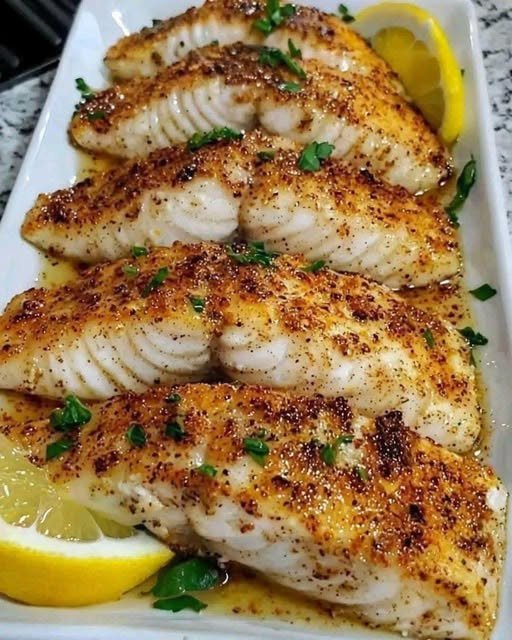
Lemon Butter Baked Cod

This Lemon Butter Baked Cod recipe is a delightful dish that combines the freshness of lemon with the richness of butter to create a flavorful and tender cod fillet. The cod is coated in a buttery lemon mixture, then lightly breaded and baked to perfection. It’s a simple yet elegant dish that is perfect for a weeknight dinner or a special occasion.

Why You’ll Love This Recipe:

  • Quick and easy to prepare
  • Bright and refreshing flavors
  • Versatile and can be paired with various side dishes

Ingredients:

  • 2 lb cod fillet (any white fish)
  • 1/4 cup butter or margarine
  • 2 tablespoons lemon juice
  • 1/4 cup all-purpose flour
  • Dash(es) of paprika
  • Salt & pepper to taste

Directions:

  • Cut the cod fillets into serving sizes.
  • Melt the butter in a saucepan or microwave. Add lemon juice to the melted butter.
  • In another dish, mix together flour, salt, and pepper.
  • Dip each fish fillet into the butter and lemon mixture, coating well on all sides.
  • Then dip the buttered fish into the flour mixture, coating well on all sides.
  • Place the coated fillets in an ungreased baking dish.
  • Drizzle the remaining butter mixture over the fillets.
  • Sprinkle the entire dish with paprika.
  • Bake the dish, uncovered, in a 350°F oven for 25-30 minutes or until the fish flakes easily with a fork.
  • Garnish with parsley and lemon wedges before serving.
  • Prep Time: 15 minutes
  • Cooking Time: 25-30 minutes
  • Total Time: 40-45 minutes
  • Servings: 4
  • Kcal: 320 per serving

Storage:

  • Store any leftovers in an airtight container in the refrigerator for up to 2 days. Reheat in the oven or microwave until heated through.

Recipe Tips:

  • For added flavor, you can squeeze some extra lemon juice over the baked cod before serving.
  • Serve this dish with a side of steamed vegetables or a fresh salad for a complete meal.
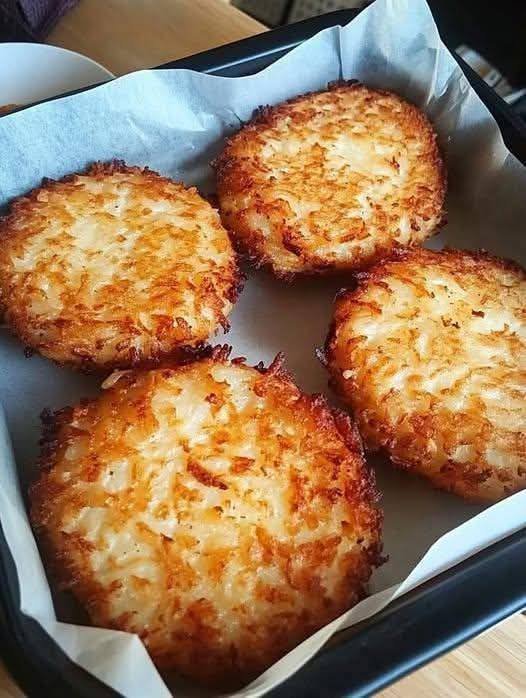
Crispy Hash Brown Patties

Crispy Hash Brown Patties

These are the ultimate breakfast sidekick. Unlike loose shredded hash browns, these patties are par-cooked and bound slightly so they hold their shape, giving you maximum surface area for browning.

  • Prep time: 15 minutes

  • Cook time: 10 minutes

  • Servings: 6 patties

Ingredients

  • Potatoes: 2 large Russet potatoes (approx. 1.5 lbs).  Russets are non-negotiable for the best crunch.

  • Binder: 1 large egg (beaten) and 1 tbsp cornstarch.

  • Seasoning: 1 tsp onion powder, ½ tsp garlic powder, salt, and black pepper to taste.

  • Oil: ¼ cup neutral oil (grapeseed, canola, or vegetable) for shallow frying.

Instructions

  1. Prep the Potatoes: Peel the potatoes and grate them using the large holes of a box grater.

  2. The “Squeeze” (Crucial Step): Place the shredded potatoes in a clean kitchen towel or cheesecloth. Wring them out with all your might. You want to remove as much liquid as possible.

  3. Par-Cook: Microwave the dried shreds in a bowl for 2 minutes. This softens the starch and ensures the middle isn’t raw when the outside is golden. Let them cool for a few minutes.

  4. Mix: Add the egg, cornstarch, onion powder, garlic powder, salt, and pepper to the potatoes. Mix until well combined.

  5. Shape: Divide the mixture into 6 portions. Form them into tight rectangles or ovals about ½ inch thick.

  6. Fry: Heat oil in a large skillet over medium-high heat. Once the oil shimmers, carefully add the patties. Fry for 4–5 minutes per side until deeply golden brown.

  7. Drain: Transfer to a wire rack (rather than paper towels) to keep them from getting soggy.

Tips for Success

  • Don’t Overcrowd: Fry in batches if necessary. If the pan is too full, the temperature drops, and the patties will absorb oil rather than crisping up.

  • Freeze for Texture: For an even better “fast food” texture, shape the patties and freeze them for 30 minutes before frying.

  • Uniform Thickness: Make sure the edges aren’t too thin, or they’ll burn before the center is done.

Nutritional Info (Per Patty)

Calories Total Fat Carbohydrates Protein Sodium
165 kcal 9 g 19 g 3g 210 mg

Benefits

  • Energy Boost: High in complex carbohydrates to fuel your morning.

  • Gluten-Free: Naturally wheat-free (ensure your cornstarch is certified if highly sensitive).

  • Vitamins C & B6: Potatoes are surprisingly high in these essential nutrients.

  • Cost-Effective: One of the cheapest “gourmet” breakfasts you can make at home.

Common Questions (Q&A)

Q: Can I use waxy potatoes like Yukon Gold?

A: You can, but you shouldn’t if you want maximum crunch.  Russets have the high starch content necessary to get that dry, crispy exterior.

Q: How do I store leftovers?

A: Let them cool completely and store them in an airtight container for 3 days. Reheat in an air fryer at 375°F (190°C) for 3–4 minutes to restore the crunch.

Q: Can I bake these instead of frying?

A: Yes. Brush both sides liberally with oil and bake at 425°F (220°C) for 20–25 minutes, flipping halfway through. They won’t be as decadent, but they’ll still be delicious.

​The Breakfast Tortilla Triangle ​Ingredients

The Breakfast Tortilla Triangle

​Ingredients

  • ​1 Large Flour Tortilla (Burrito size works best)
  • ​3 Breakfast Sausage Links (Pre-cooked or browned)
  • ​Shredded Mozzarella (or a pizza blend)
  • ​1 Fresh Egg
  • ​Toppings: Sliced red chilies (optional) and fresh spinach
  • ​Egg Wash: 1 egg yolk whisked
  • ​Garnish: Black sesame seeds or Nigella seeds

​Step-by-Step Instructions

  1. ​Prep the Crust: Place your tortilla on a baking sheet lined with parchment paper. Position your three sausages in a triangle shape in the center of the tortilla.
  2. ​Fold and Secure: Fold the edges of the tortilla over each sausage to create a “rim.” Use toothpicks to pin the corners together so the triangle holds its shape during baking.
  3. ​Fill the Center: * Layer a small bed of fresh spinach at the bottom.
    • ​Add a generous layer of shredded cheese.
    • ​Sprinkle your sliced chilies on top.
  4. ​The Centerpiece: Crack a fresh egg directly into the center of the cheese nest. (If you prefer it extra cheesy, you can add a little more cheese over the egg whites).
  5. ​The Golden Touch: Brush the “rim” (the folded tortilla parts) with the egg yolk wash. This gives it that deep golden, pastry-like finish. Sprinkle with black sesame seeds.
  6. ​Bake: Pop it into the oven at 180°C (350°F) for about 10–12 minutes. You’re looking for the cheese to be bubbly and the tortilla to be crisp and golden.
  7. ​Serve: Remove the toothpicks before serving! Slice it down the middle for that epic cheese pull and a perfectly runny yolk.

​Pro-Tips

  • ​Sausage Choice: If you use raw sausage, make sure to pan-fry them first. The oven time isn’t quite long enough to cook raw meat thoroughly.
  • ​Crispy Bottom: For an even crispier base, you can lightly brush the bottom of the tortilla with oil or melted butter before assembling

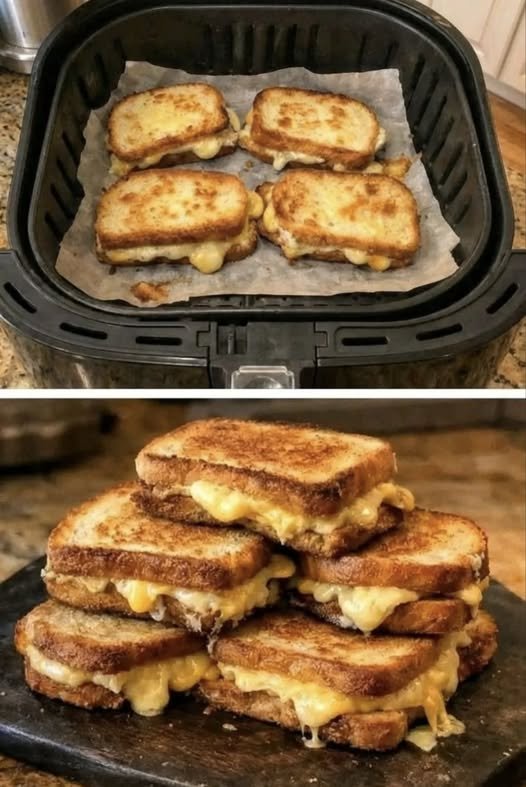
Air Fryer Carnivore Grilled Cheese Sandwich

Air Fryer Carnivore Grilled Cheese Sandwich

Description

This Carnivore Grilled Cheese uses carnivore bread (egg & cheese–based) instead of traditional bread, then gets air-fried until golden and crunchy with a gooey cheese pull inside. No grains, no plants—just cheese, eggs, butter, and pure comfort.


🧾 Ingredients

  • 2 slices carnivore sandwich bread
    (or egg-cheese flatbread cut into squares)

  • 2–3 slices cheddar, mozzarella, or Colby-Jack

  • 1–2 tbsp butter (softened)

  • Optional: 1 slice American cheese for extra melt


👩‍🍳 Instructions

  1. Preheat air fryer to 375°F (190°C) for 2–3 minutes.

  2. Butter one side of each bread slice.

  3. Place cheese between the unbuttered sides to form a sandwich.

  4. Put sandwich in air fryer basket.

  5. Air fry for 4–5 minutes, flip carefully, then air fry another 3–4 minutes until golden and melty.

  6. Rest 1 minute, slice, and enjoy that cheese pull 😮‍🔥


🍽️ Serving Suggestions

  • Eat as-is (it’s rich and filling)

  • Dip into warm bone broth

  • Add bacon inside for a carnivore melt

  • Pair with fried eggs for breakfast

  • Slice into fingers for snacking


🔄 Variations

  • Ultra cheesy: Use 3–4 cheese slices

  • Bacon grilled cheese: Add cooked bacon inside

  • Beefy version: Add thin cooked ground beef or steak

  • Extra crispy: Brush outside with beef tallow instead of butter


❓ Related Questions

Is this strict carnivore?
Yes—using carnivore bread, cheese, butter, and salt only.

Can I use a waffle iron instead?
Absolutely—press until crispy and melty.

What’s the best cheese?
Cheddar for flavor, mozzarella for stretch, American for melt.

Can I make it dairy-light?
Use harder cheeses and less butter.


🧮 Nutrition (approx. per sandwich)

  • Calories: 380–420 kcal

  • Protein: 18–22g

  • Fat: 30–34g

  • Carbs: ~1g


🧠 Final Thoughts

This Air Fryer Carnivore Grilled Cheese proves you don’t need carbs for comfort food. It’s fast, crunchy, melty, and ridiculously satisfying—perfect for quick meals or cravings. One bite and you’ll forget regular bread even exists 🧀🔥

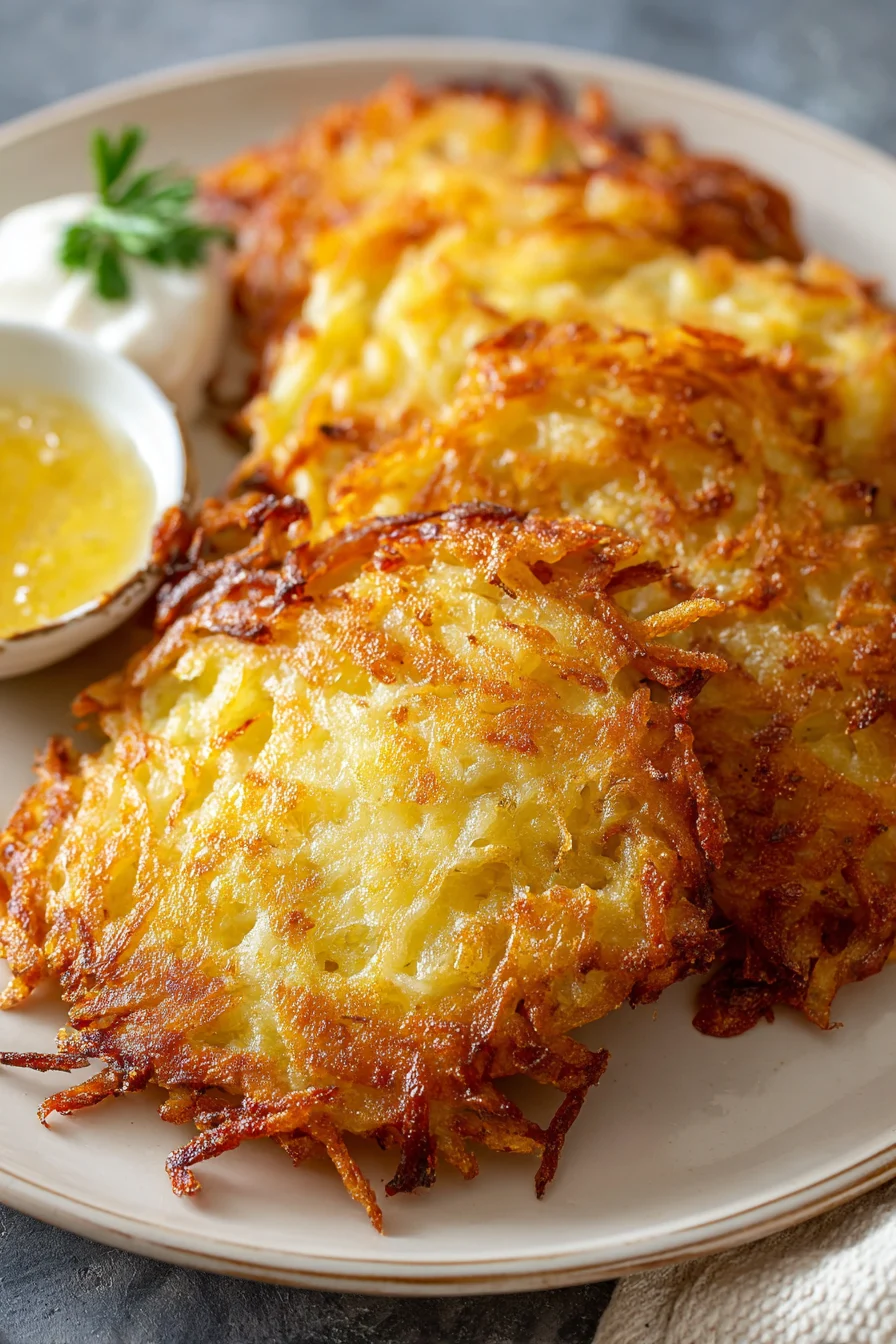
🥔 German Potato Pancakes (Kartoffelpuffer)

🥔 German Potato Pancakes (Kartoffelpuffer)

Crispy on the outside and soft inside, these traditional German potato pancakes are made with simple ingredients and fried until golden. They are delicious served with applesauce or sour cream.

⏱ Prep Time: 15 minutes

🍳 Cook Time: 20 minutes

🍽 Servings: 10–12 pancakes


🧾 Ingredients

  • 2 pounds (about 900 g) potatoes (Russet or Yukon Gold), peeled

  • 1 medium onion

  • 2 large eggs

  • ¼ cup all-purpose flour (or potato starch for gluten-free)

  • 1 teaspoon salt

  • ½ teaspoon black pepper

  • Vegetable, canola, or sunflower oil for frying


👩‍🍳 Instructions

1. Grate the Potatoes and Onion

Grate the potatoes and onion using the large holes of a box grater or food processor.

2. Remove Excess Moisture

Place the grated mixture into a clean kitchen towel or cheesecloth. Squeeze firmly to remove as much liquid as possible.
This step is important for crispy pancakes.

3. Make the Batter

In a large bowl, combine:

  • Grated potatoes and onion

  • Eggs

  • Flour

  • Salt

  • Black pepper

Mix well until evenly combined. The mixture should be moist but not watery.

4. Heat the Oil

Pour about ¼ inch of oil into a heavy skillet. Heat over medium-high heat until hot (a small drop of batter should sizzle immediately).

5. Fry the Pancakes

Scoop about ¼ cup of batter into the hot oil. Flatten gently with a spatula.
Cook for 3–4 minutes per side until golden brown and crisp.

Do not overcrowd the pan. Fry in batches.

6. Drain and Serve

Place cooked pancakes on paper towels to remove excess oil.
Serve immediately while hot.


🍽 Serving Ideas

  • Applesauce

  • Sour cream

  • Yogurt

  • Smoked salmon

  • Chopped herbs


🧊 Storage

  • Refrigerator: Store up to 3 days in an airtight container

  • Freezer: Freeze up to 2 months with parchment between pancakes

  • Reheat: Oven or air fryer only (avoid microwave)


🌟 Variations

  • Add chopped parsley or chives

  • Mix in shredded cheese

  • Add paprika or garlic powder

  • Replace half the potato with grated zucchini

  • For sweet version: add a pinch of sugar and cinnamon

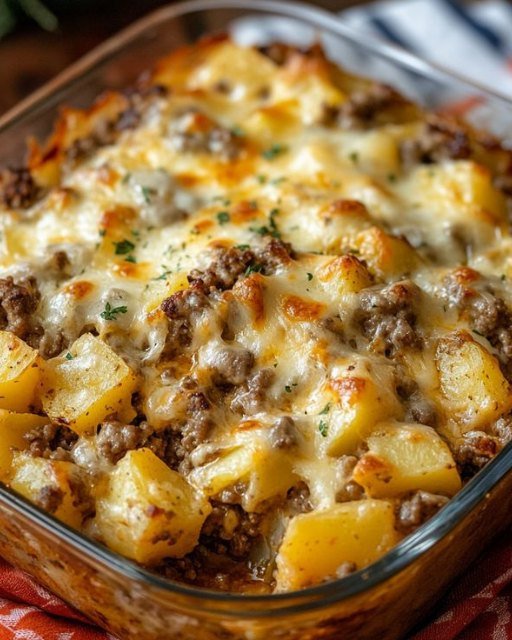
Cheesy Ground Beef & Potato Casserole

YES! This Cheesy Ground Beef & Potato Casserole is a hearty, comforting classic that is perfect for a family dinner. Since you requested the full detailed recipe with all the steps, here is the complete guide.


Cheesy Ground Beef & Potato Casserole

  • Prep time: 20 mins

  • Cook time: 45 mins

  • Serves: 6

Ingredients

The Base:

  • 2 lbs Russet or Yukon Gold potatoes (peeled and sliced into 1/4 inch rounds)

  • 1.5 lbs Ground beef (lean works best)

  • 1 Large onion, finely diced

  • 3 cloves Garlic, minced

  • 1 tbsp Olive oil

The Sauce & Seasoning:

  • 1 cup Beef broth

  • 1/2 cup Sour cream

  • 1 tsp Smoked paprika

  • 1 tsp Dried thyme or oregano

  • Salt & Pepper to taste

The Topping:

  • 2 cups Shredded Mozzarella or Sharp Cheddar (or a mix!)

  • 1/4 cup Grated Parmesan

  • Fresh parsley for garnish


Instructions

  1. Prep the Potatoes: * Place your sliced potatoes in a large pot of salted water.

    • Bring to a boil and cook for about 5–8 minutes until they are slightly tender but not falling apart.

    • Drain and set aside.

  2. Brown the Beef:

    • In a large skillet, heat the olive oil over medium-high heat.

    • Add the ground beef and onion.

    • Cook until the beef is browned and the onions are translucent.

    • Stir in the garlic, paprika, thyme, salt, and pepper for the last minute.

  3. Simmer:

    • Stir in the beef broth and sour cream.

    • Let it simmer for 3–5 minutes until the sauce thickens slightly and coats the meat.

  4. Layer the Bake:

    • Preheat your oven to 400°F (200°C) and grease a 9×13 inch baking dish.

    • Lay half of the par-boiled potatoes on the bottom.

    • Spread the beef mixture evenly over the potatoes.

    • Top with the remaining potatoes.

  5. Cheese & Bake:

    • Generously cover the top with the shredded cheese and Parmesan.

    • Bake for 20–25 minutes, or until the potatoes are tender and the cheese is bubbly and golden brown.

    • Pro Tip: Broil for the last 2 minutes if you want extra crispy cheese spots!

  6. Rest & Serve:

    • Let it sit for 5 minutes before slicing to let the layers set.

    • Garnish with fresh parsley before serving.