Banana Cocoa Oatmeal Cake (No Sugar Crash!)

🍫🍌 Banana Cocoa Oatmeal Cake (No Sugar Crash!)

“I love chocolate, but I hate the sugar crash.”
So I solved that problem with this Banana Cocoa Oatmeal Cake 😁😍
It’s gluten-free, refined-sugar-free, naturally sweetened, and deeply fudgy. You get rich chocolate flavor without the spike — the smartest way to enjoy chocolate any time of day.

🌿 Description

This Banana Cocoa Oatmeal Cake is moist, dense, and chocolatey with a brownie-like texture. Sweetened naturally with ripe bananas and a touch of honey or maple syrup, it delivers steady energy instead of a crash. Perfect for breakfast, snack time, or guilt-free dessert.

📝 Ingredients

Cake Batter

  • 2 ripe bananas, mashed
  • 2 cups gluten-free rolled oats (or oat flour)
  • ¼ cup unsweetened cocoa powder
  • 2 eggs
  • ¼ cup honey or pure maple syrup
  • ¼ cup coconut oil or olive oil, melted
  • 1 tsp baking powder
  • 1 tsp vanilla extract
  • ½ tsp cinnamon (optional)
  • Pinch of salt

Topping (Optional but Recommended)

  • ¼ cup chopped walnuts or hazelnuts
  • 1–2 tbsp dark chocolate chips (optional, 70%+)

👩‍🍳 Instructions

  1. Preheat oven to 350°F (175°C). Line a loaf pan or small baking dish with parchment paper.
  2. Blend oats into flour if using whole oats.
  3. In a bowl, mash bananas until smooth.
  4. Add eggs, honey/maple syrup, oil, and vanilla. Mix well.
  5. Stir in oat flour, cocoa powder, baking powder, salt, and cinnamon.
  6. Pour batter into prepared pan and smooth the top.
  7. Sprinkle chopped nuts (and chocolate chips if using) on top.
  8. Bake for 30–35 minutes, until set and a toothpick comes out mostly clean.
  9. Cool completely before slicing for best texture.

⭐ Notes

  • The cake firms up as it cools — don’t overbake.
  • Naturally sweet: very ripe bananas are key.
  • Texture is dense and fudgy, not fluffy.

💡 Tips for Best Results

  • Use spotty bananas for maximum sweetness.
  • For extra protein, add 1–2 tbsp nut butter to the batter.
  • Want it extra fudgy? Reduce bake time by 2–3 minutes.
  • Store in the fridge for up to 5 days — flavor improves overnight.

🍽 Servings

Serves: 8 slices
Serving Size: 1 slice

🧮 Nutritional Information (Approx. per slice)

  • Calories: ~180 kcal
  • Protein: ~6 g
  • Carbohydrates: ~24 g
  • Fiber: ~4 g
  • Fat: ~8 g
  • Sugar: ~8 g (naturally occurring)

(Values may vary depending on ingredients used)

🌟 Health Benefits

  • No refined sugar: Prevents energy crashes
  • Gluten-free: Gentle on digestion
  • High fiber: From oats and bananas
  • Sustained energy: Slow-digesting carbs + healthy fats
  • Antioxidants: Cocoa supports heart and brain health

❓ Q & A

Q: Can I make this vegan?
A: Yes! Replace eggs with 2 flax eggs (2 tbsp ground flax + 5 tbsp water).

Q: Is this good for breakfast?
A: Absolutely — it’s filling, balanced, and won’t spike blood sugar.

Q: Can I freeze it?
A: Yes! Slice and freeze up to 2 months.

Q: Can I make it nut-free?
A: Simply skip the nut topping.
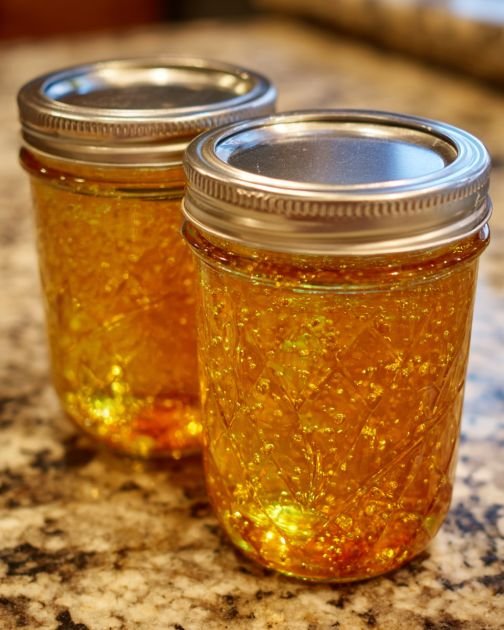
My daughter enjoys making these to give as presents. I’ve tried it, and it’s excellent.

Slow Cooker Golden Honey-Glazed Chicken

This recipe yields tender chicken with a rich, amber glaze. The slow cooking process allows the honey and garlic to infuse deeply into the meat.

  • Prep time: 10 minutes

  • Cook time: 3–7 hours (depending on heat setting)

  • Servings: 4

Ingredients

  • Chicken: 4 boneless, skinless chicken breasts (or thighs for extra juiciness)

  • Honey: 1 cup

  • Soy Sauce: 1/2 cup (or Tamari for gluten-free)

  • Ketchup: 1/4 cup

  • Oil: 2 tablespoons vegetable oil

  • Aromatics: 2 cloves garlic, minced

  • Spice: 1/4 teaspoon red pepper flakes (adjust to taste)

  • Seasoning: Salt and pepper to taste

Instructions

  1. Prep the Chicken: Place the chicken breasts in the bottom of your slow cooker.

  2. Whisk the Glaze: In a medium bowl, whisk together the honey, soy sauce, ketchup, vegetable oil, minced garlic, red pepper flakes, salt, and pepper until smooth.

  3. Combine: Pour the honey mixture evenly over the chicken.

  4. Slow Cook: Cover and cook on low for 6–7 hours or on high for 3–4 hours, until the chicken is tender and reaches an internal temperature of 165°F (74°C).

  5. Thicken the Sauce: Once cooked, remove the chicken and set aside. Pour the liquid from the slow cooker into a saucepan.

  6. Simmer: Bring the sauce to a simmer over medium heat for 5–10 minutes until it reduces and thickens into a glossy glaze.

  7. Serve: Drizzle the thickened glaze generously over the chicken.

Serving Suggestions

  • Grains: Serve over fluffy white rice or creamy mashed potatoes to catch the extra sauce.

  • Vegetables: Pairs perfectly with steamed broccoli, green beans, or a crisp green salad.

  • Additions: A crusty baguette is excellent for mopping up the remaining glaze.


Tips for Success

  • Tangy Twist: Add 1 tablespoon of apple cider vinegar to the sauce before cooking to cut through the sweetness.

  • Kid-Friendly: Omit the red pepper flakes and serve with sweet corn or glazed carrots.

  • Meal Prep: This chicken shreds beautifully, making it great for leftovers in wraps or salads the next day.

Slow Cooker Irish Potatoes (Short & Simple) ✨🥔

🧾 Ingredients

  • 3 lb Yukon Gold potatoes, peeled & chunked 🥔

  • 1 onion, sliced 🧅

  • 3 garlic cloves, minced 🧄

  • ½ cup butter 🧈

  • 1 cup vegetable or chicken broth 🍲

  • 1 tsp salt 🧂

  • ½ tsp black pepper

  • ½ tsp dried thyme (optional 🌿)

  • ½ cup warm milk or half-and-half 🥛

  • ¼ cup sour cream (optional 🤍)

  • Fresh parsley, chopped 🌿

  • Green onions for topping 🌱

👩‍🍳 Quick Directions

1️⃣ Add onion and garlic to slow cooker. Top with potatoes and butter.
2️⃣ Season with salt, pepper, and thyme. Pour in broth.
3️⃣ Cook on LOW for 5–6 hrs or HIGH for 3–4 hrs until very tender.
4️⃣ Add milk and sour cream. Mash gently until creamy. 🥔✨
5️⃣ Stir in parsley, adjust seasoning, and top with green onions.

Sugar-Free Chia Seed Breakfast Pudding

Slim Waist Morning Bowl

This Sugar-Free Chia Seed Breakfast Pudding is a simple, nourishing way to start your day without added sugars. Creamy, lightly sweet, and packed with fiber, protein, and healthy fats, it keeps you full for hours while supporting digestion and steady energy. Chia seeds absorb liquid overnight, creating a pudding-like texture that feels indulgent but is incredibly healthy. This recipe is perfect for weight management, gut health, and busy mornings since it can be prepared ahead of time.

Ingredients (Serves 1–2)

  • 3 tablespoons chia seeds
  • 1 cup unsweetened almond milk (or coconut milk, oat milk, or dairy milk)
  • ½ teaspoon vanilla extract
  • ½ teaspoon cinnamon
  • ¼ teaspoon ground ginger (optional)
  • 1–2 tablespoons mashed ripe banana or sugar-free sweetener to taste (optional)
  • Pinch of sea salt

Optional Toppings

  • Fresh berries (strawberries, blueberries, or raspberries)
  • Sliced almonds or walnuts
  • Unsweetened coconut flakes
  • Chia seeds or flaxseeds
  • Plain Greek yogurt (for extra protein)

Instructions

  1. Mix the Base
    In a medium bowl or jar, add chia seeds, almond milk, vanilla extract, cinnamon, ginger (if using), sea salt, and mashed banana or sugar-free sweetener. Stir well for 1–2 minutes to evenly distribute the chia seeds and prevent clumping.
  2. Rest and Stir Again
    Let the mixture sit at room temperature for 5 minutes, then stir again. This second stir is important—it helps the chia seeds absorb the liquid evenly and creates a smooth, creamy texture.
  3. Chill Overnight
    Cover the bowl or jar and refrigerate for at least 4 hours, preferably overnight. During this time, the chia seeds will swell and thicken the mixture into a pudding-like consistency.
  4. Check Consistency
    In the morning, give the pudding a good stir. If it feels too thick, add a splash of almond milk and mix until creamy. If it’s too thin, add 1 teaspoon of chia seeds and let it sit for 10 more minutes.
  5. Add Toppings and Serve
    Spoon the pudding into a bowl or enjoy it straight from the jar. Top with fresh berries, nuts, coconut flakes, or yogurt for added texture and nutrition.
See also  Lemon Cream Puff Pastry Tarts

Why This Bowl Supports a Slim Waist

  • Chia seeds are rich in soluble fiber, which promotes fullness and supports digestion.
  • No added sugar helps prevent blood sugar spikes and cravings.
  • Healthy fats and plant protein provide long-lasting energy.
  • Cinnamon and ginger may help support metabolism and reduce inflammation.

Make-Ahead & Storage Tips

  • Store chia pudding in an airtight container in the refrigerator for up to 4 days.
  • Prepare multiple jars at once for an easy grab-and-go breakfast.

This Slim Waist Morning Bowl is creamy, satisfying, and naturally nourishing—proof that healthy breakfasts can be simple, delicious, and sugar-free. 🌱✨

No bake Chocolate Eclair Cake

No-Bake Eclair Cake is the perfect dessert to whip up in a snap and serve for any occasion. Rich vanilla pudding mixed with whipped cream and layered between graham crackers, then topped with sweet chocolate frosting—everyone will enjoy this easy icebox cake!

Chocolate Eclair Cake is a great way to go. It is best served the first or second day, after being refrigerated for a few hours. I sometimes like to freeze it for an hour before serving for an even firmer texture.  I love it!

Ingredients:

  • 2 (3.5 oz) packages of instant vanilla pudding mix
  • 1 (8 oz) container of whipped topping (COOL WHIP), thawed
  • 3 cups milk
  • 2 sleeves graham cracker squares
  • 1 (16 oz) tub chocolate frosting

How To Make No-Bake Chocolate Eclair Cake:

In a medium bowl, mix together the pudding mix, milk, and Cool Whip.
In a 9 x 13 baking dish, arrange a single layer of graham cracker squares on the bottom. You may have to break them up a bit to get enough crackers to cover the bottom of your dish.

Spread half of the pudding mixture on top of the crackers.
Layer another layer of graham crackers over the pudding mixture.
Then layer the other half of the pudding mixture on top of the crackers.
Top with a final layer of graham crackers.
Put plastic wrap over the dish and put it in the fridge for about 30 min to an hour to allow the pudding to set.

When ready, put the tub of chocolate frosting in the microwave for about 15 seconds to soften (remove the lid and aluminum foil top before microwaving).
Take out and stir frosting. It should be easily spreadable now.
Remove plastic wrap from dish and evenly spread chocolate frosting all over the top layer of graham crackers.

Place plastic wrap over the top of the dish and put it back in the fridge and let it chill overnight.
This dessert gets better over time. The graham crackers need plenty of time to soften up.
When ready, slice and serve!

Homemade Chocolate Cake

🎉 Classic Nut Chocolate Birthday Cake with Silky Ganache

This is a truly special cake—rich, tender, and deeply comforting. Made every year for a loved one’s birthday, it’s one of those recipes that becomes part of family history. The cake is softly spiced with cinnamon, gently chocolatey, and wonderfully moist thanks to crème fraîche and finely ground nuts. Finished with a smooth chocolate ganache and simple decorations, it’s elegant without being complicated.

⏱ Time & Yield

  • Prep Time: 20 minutes

  • Bake Time: 50 minutes

  • Cooling & Setting: 1 hour

  • Total Time: 2 hours 10 minutes

  • Servings: 12


🧾 Ingredients

Cake

  • 1⅛ cups unsalted butter, room temperature

  • 1 ¼ cups white sugar

  • 5 large eggs, room temperature

  • 1 cup finely ground nuts (hazelnuts, walnuts, or almonds)

  • 2 teaspoons ground cinnamon

  • 2 tablespoons unsweetened cocoa powder

  • 5 ½ oz crème fraîche (or full-fat sour cream)

  • 2 cups all-purpose flour

  • 3 teaspoons baking powder

Chocolate Ganache

  • 2 cups semisweet chocolate chips

  • 2 cups heavy cream

  • 2 teaspoons vanilla extract

Decoration

  • ½ cup strawberries or mixed berries
    (Candy, chocolate shavings, or sprinkles also work beautifully.)


🥣 Instructions

1️⃣ Prepare the Pan

Preheat your oven to 350°F (175°C).
Grease a heart-shaped pan or fluted tube (Bundt) pan thoroughly.


2️⃣ Make the Batter

In a large bowl, beat the butter until smooth and creamy.
Gradually add the sugar (about ¼ cup at a time), mixing well after each addition.

Add the eggs one at a time, beating well after each.

Mix in:

  • Groundnuts

  • Cinnamon

  • Cocoa powder

  • Crème fraîche

Blend until smooth and well combined.


3️⃣ Add Dry Ingredients

Sift together the flour and baking powder.
Gently fold into the batter until just combined—do not overmix.

Pour the batter into the prepared pan and smooth the top.


4️⃣ Bake

Bake for about 50 minutes, or until a toothpick inserted in the center comes out clean.

Cool in the pan for 5 minutes, then carefully loosen the edges and invert onto a wire rack.
Allow the cake to cool completely before adding ganache.


🍫 Chocolate Ganache

Place chocolate chips in a heat-safe bowl.

Heat the cream in a saucepan until it just reaches a boil.
Immediately pour the hot cream over the chocolate.

Let sit for 1–2 minutes, then whisk gently until smooth and glossy.
Stir in the vanilla extract.

Cover the surface of the ganache directly with plastic wrap and let it cool slightly until pourable.


🎂 Assemble & Decorate

Pour the ganache evenly over the cooled cake, allowing it to drip naturally down the sides.

Let it set for a few minutes, then decorate with berries, candy, or anything festive you love.


💡 Helpful Tips

  • Any finely ground nut works beautifully—use what you have.

  • This cake tastes even better the next day as the flavors deepen.

  • Store covered at room temperature for 1 day, or refrigerate up to 4 days.