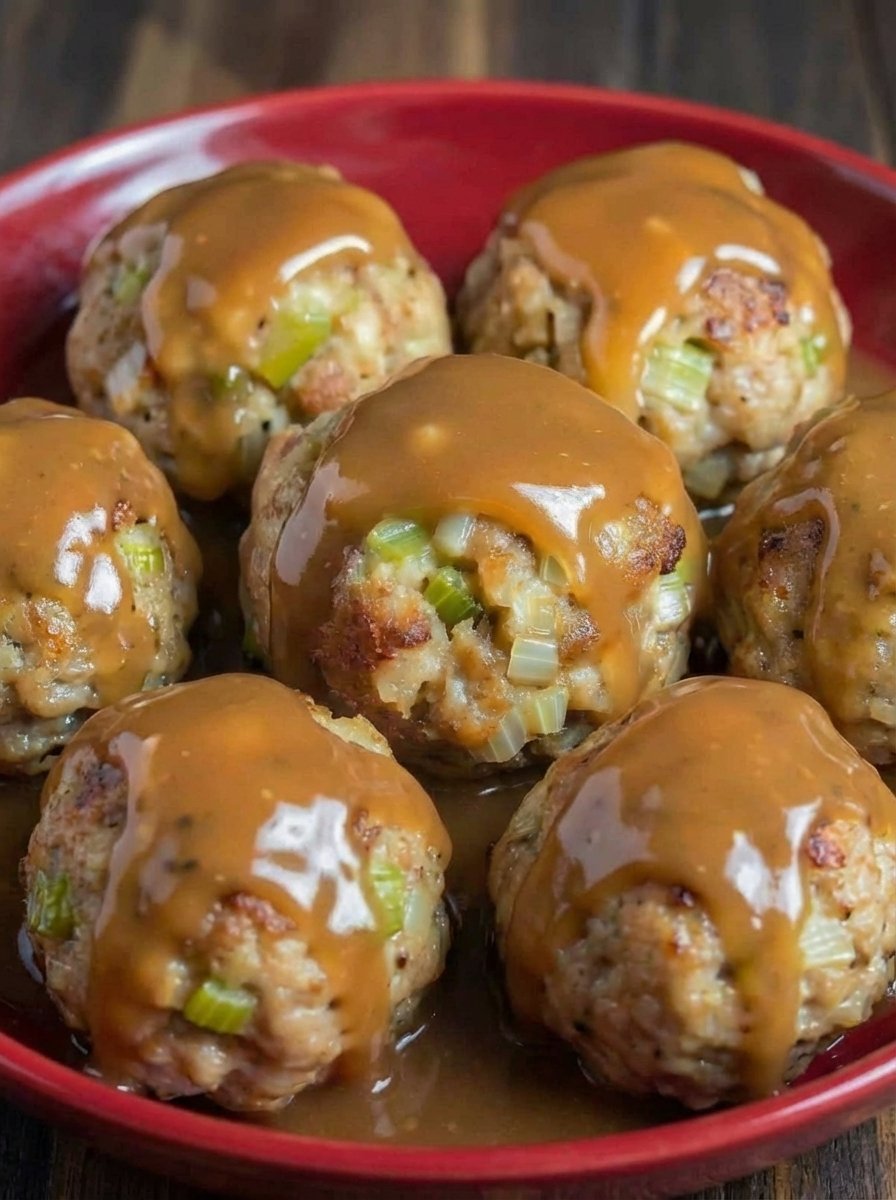
Thanksgiving Stuffing Balls

Thanksgiving Stuffing Balls

Ingredients

  • 3 cups dried bread cubes or stuffing mix
  • ½ cup melted unsalted butter
  • ½ cup finely chopped onion
  • ½ cup finely chopped celery
  • 2 cloves garlic minced
  • ¾ cup chicken or vegetable broth
  • 2 large eggs
  • 1 teaspoon poultry seasoning
  • ½ teaspoon dried sage
  • ½ teaspoon salt
  • ¼ teaspoon black pepper
  • 2 tablespoons fresh parsley chopped
  • Optional: ¼ cup dried cranberries or finely diced apple

Instructions

  • Preheat your oven to 375°F (190°C) and line a baking sheet with parchment paper.
  • In a skillet over medium heat, melt the butter. Add onion, celery, and garlic. Sauté for about 4–5 minutes, until soft and fragrant.
  • Place the bread cubes in a large bowl. Pour the sautéed vegetables and melted butter over the bread.
  • Add the poultry seasoning, sage, salt, pepper, parsley, and any optional add-ins you like.
  • In a separate bowl, whisk together the broth and eggs. Pour this mixture over the bread and gently stir until evenly moistened.
  • Using your hands or a scoop, form the mixture into golf-ball-size balls and arrange them on the prepared baking sheet.
  • Bake for 22–25 minutes, until the outsides are golden and slightly crisp while the centers stay soft.
  • Serve warm as a festive Thanksgiving side dish or party appetizer.

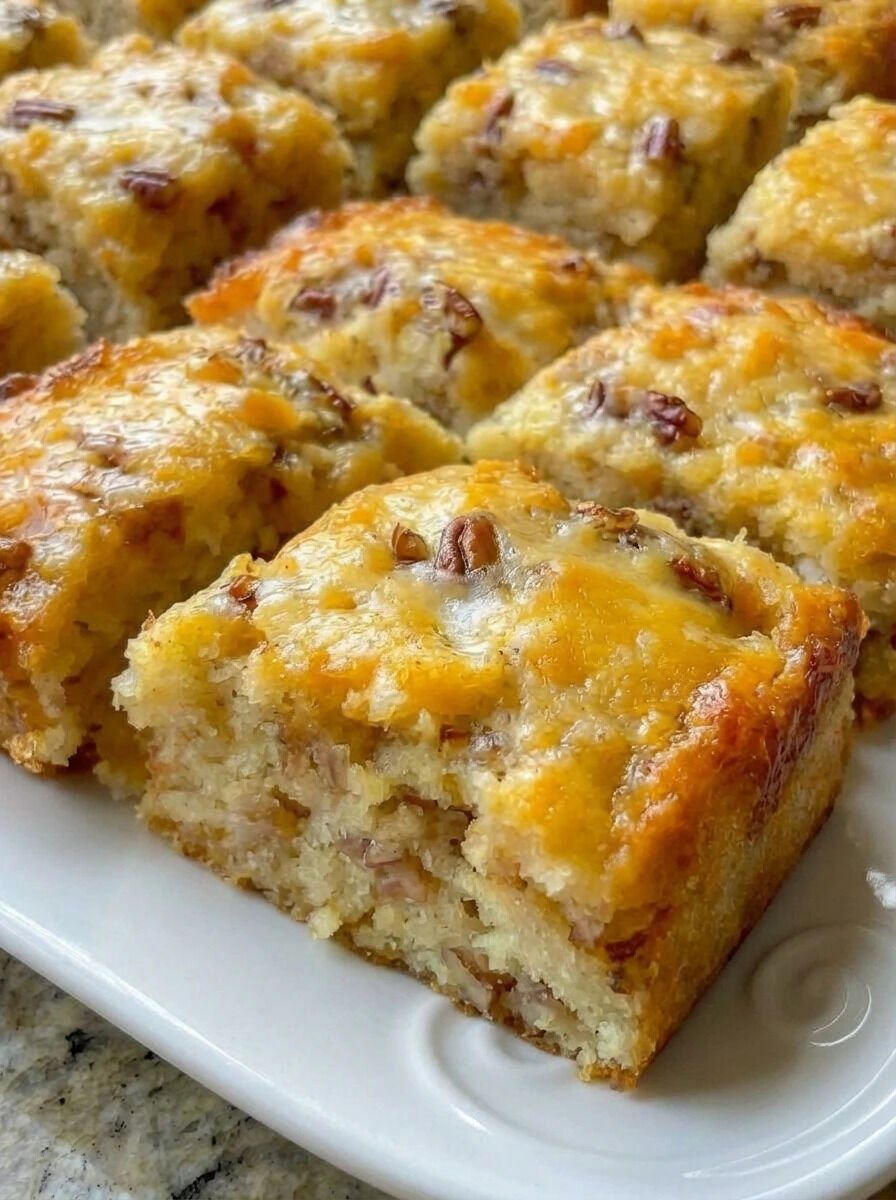
Sweet Alabama Pecanbread

Sweet Alabama Pecanbread

Ingredients

  • 2 cups granulated sugar
  • 1 cup vegetable oil
  • 3 large eggs
  • 2 cups all-purpose flour
  • 1 teaspoon vanilla extract
  • 1 teaspoon salt
  • 1 teaspoon baking soda
  • 1½ cups chopped pecans

Instructions

  • Preheat oven to 350°F (175°C). Lightly grease a 9×13-inch baking dish or line with parchment paper.
  • In a large bowl, whisk together the sugar and oil until smooth.
  • Add eggs one at a time, mixing well after each addition.
  • Stir in the vanilla extract.
  • In a separate bowl, combine flour, salt, and baking soda.
  • Gradually fold the dry ingredients into the wet mixture until just combined.
  • Gently fold in the chopped pecans.
  • Pour batter evenly into the prepared baking dish.
  • Bake for 30–35 minutes, or until a toothpick inserted in the center comes out clean.
  • Allow to cool before slicing and serving.

Strengthen Your Heart with This Keto Avocado Bread

Strengthen Your Heart with This Keto Avocado Bread

Soft on the inside, lightly crisp on the outside, this keto avocado bread is rich in heart-healthy fats, low in carbs, and naturally gluten-free. It’s an ideal breakfast or light meal that keeps you full, energized, and satisfied without spiking blood sugar.


Description

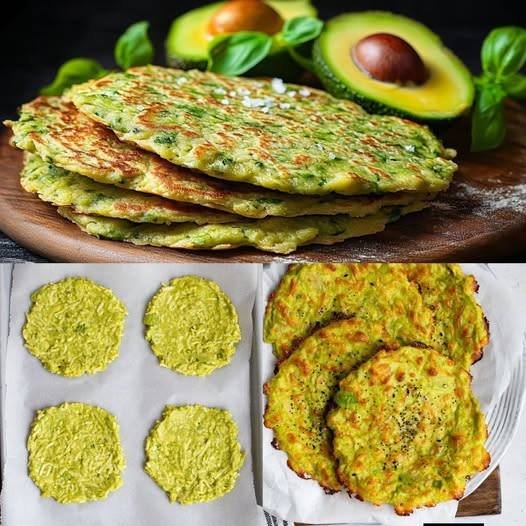
This keto avocado bread is a savory flatbread-style recipe, not a traditional loaf. Avocado provides healthy monounsaturated fats that support heart health, while almond and coconut flour keep it low-carb and grain-free. It’s quick to make and pairs beautifully with eggs, salmon, or fresh veggies.


Ingredients

  • 1 large ripe avocado

  • 2 large eggs

  • 1 cup almond flour

  • 2 tbsp coconut flour

  • ½ tsp baking powder

  • ¼ tsp salt

  • ½ tsp garlic powder (optional)

  • 1 tbsp olive oil or avocado oil

  • Optional: fresh herbs (parsley, basil, chives)


Instructions

  1. Mash the Avocado
    Mash avocado in a bowl until smooth.

  2. Add Wet Ingredients
    Mix in eggs and oil until well combined.

  3. Combine Dry Ingredients
    Stir in almond flour, coconut flour, baking powder, salt, and seasonings.

  4. Cook the Bread
    Heat a non-stick skillet over medium-low heat.
    Spoon batter into small, thin rounds.
    Cook 2–3 minutes per side until golden.

  5. Serve
    Enjoy warm or let cool slightly for firmer texture.


Tips for Best Results

  • Use a very ripe avocado for smooth texture

  • Keep heat medium-low to avoid burning

  • Make thinner rounds for a crispier finish

  • Add shredded cheese for extra flavor

  • Can also be baked at 180°C / 350°F for 12–15 minutes


Servings

  • Makes: 6 small flatbreads

  • Serves: 2–3


Nutritional Information (Approx. per flatbread)

  • Calories: 160

  • Fat: 13 g

  • Protein: 6 g

  • Net Carbs: 2 g

  • Fiber: 4 g

  • Sugar: <1 g

(May vary depending on ingredients used)


Health Benefits

  • ❤️ Supports heart health with healthy fats

  • 🥑 Rich in potassium and fiber

  • ✔ Keto & low-carb friendly

  • ✔ Gluten-free & grain-free

  • ✔ Helps maintain steady energy and fullness


Q & A

Q: Is this bread suitable for strict keto?
A: Yes, it’s low in net carbs and keto-friendly.

Q: Can I make it dairy-free?
A: It’s naturally dairy-free as written.

Q: Can I store it?
A: Refrigerate up to 3 days or freeze up to 1 month.

Q: Best toppings?
A: Eggs, smoked salmon, cream cheese, tomatoes, or avocado slices.

Q: Can I turn this into a sandwich bread?
A: Yes—make larger rounds and cook a bit longer.

Golden Turmeric Anti-Inflammatory Custard

Golden Turmeric Anti-Inflammatory Custard (Dairy-Free & Refined Sugar-Free)

 Description

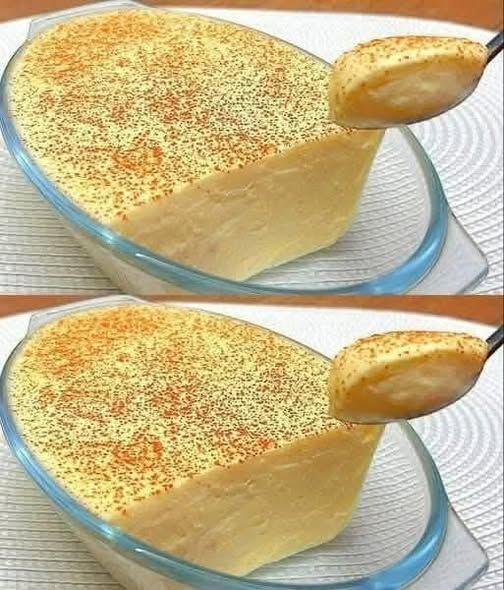
This silky, golden custard is a soothing, anti-inflammatory dessert made with plant-based milk and warming spices. It’s naturally sweetened, easy to digest, and perfect as a light dessert, healing snack, or bedtime treat. Creamy, comforting, and nourishing—without eggs, dairy, or refined sugar.

 Time & Yield

  • Prep time: 5 minutes

  • Cook time: 10 minutes

  • Chill time (optional): 1–2 hours

  • Total time: ~15 minutes (+ chilling)

  • Servings: 4

 Ingredients

  • 2 cups almond milk (or coconut milk for extra creaminess)

  • 2 tbsp cornstarch

  • 1 tbsp raw honey or maple syrup

  • ½ tsp turmeric powder

  • ¼ tsp ginger powder

  • 1 pinch black pepper (enhances turmeric absorption)

  • ½ tsp vanilla extract

  • Cinnamon or turmeric, for topping

 Instructions

  1. Make slurry

    • In a small bowl, whisk cornstarch with ¼ cup of the almond milk until smooth.

  2. Heat milk & spices

    • In a saucepan over medium heat, add remaining milk, turmeric, ginger, and black pepper.

    • Warm gently, stirring often (do not boil).

  3. Thicken custard

    • Add the cornstarch slurry to the saucepan.

    • Stir continuously for 5–7 minutes until thick and creamy.

  4. Sweeten & flavor

    • Remove from heat.

    • Stir in honey/maple syrup and vanilla extract.

  5. Set & serve

    • Pour into serving dishes.

    • Sprinkle with cinnamon or turmeric.

    • Serve warm or chill for a firmer texture.

 Tips for Best Results

  • Stir constantly to prevent lumps

  • Use full-fat coconut milk for ultra-creamy texture

  • Taste and adjust sweetness before pouring

  • If too thick, whisk in a splash of warm milk

  • For smoothest texture, strain before chilling

 Variations

  • Protein boost: Stir in collagen or plant protein after cooking

  • Golden latte flavor: Add ¼ tsp cardamom

  • Sugar-free: Use monk fruit or stevia

  • Chocolate version: Add 1 tsp cocoa powder

 Nutritional Information (Per Serving – Approx.)

  • Calories: 120

  • Carbohydrates: 16 g

  • Protein: 2 g

  • Fat: 5 g

  • Fiber: 1 g

  • Sugar: 6 g

(Values vary based on milk and sweetener used.)

Health Benefits

  • Turmeric: Powerful anti-inflammatory & antioxidant

  • Black pepper: Boosts curcumin absorption up to 2000%

  • Ginger: Aids digestion & reduces nausea

  • Dairy-free: Gentle on digestion

  • Low sugar: Supports balanced blood sugar

Q & A

Q: Can I make this ahead of time?
A: Yes! Store covered in the fridge for up to 3 days.

Q: Why add black pepper?
A: It dramatically increases turmeric’s bioavailability.

Q: Can I use regular milk?
A: Yes, dairy milk works perfectly if tolerated.

Q: Is this safe daily?
A: Yes, in moderate amounts—especially helpful for inflammation.

Q: Can kids eat this?
A: Absolutely—reduce turmeric slightly if sensitive to spice.

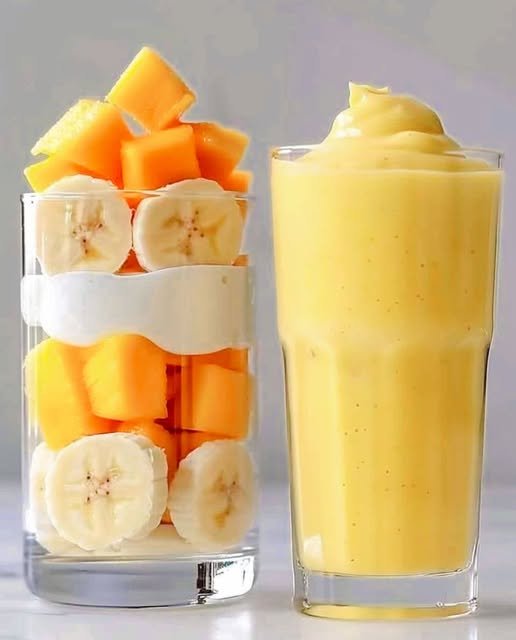
Creamy Mango Banana Smoothie

Creamy Mango Banana Smoothie

Prep time: 5 minutes | Servings: 1


Ingredients

  • 1 cup Frozen Mango Cubes: Using frozen mango is key to getting that thick, whipped texture shown in the image.

  • 1 Frozen Banana: Sliced before freezing for easier blending.

  • 1/2 cup Greek Yogurt: This provides the creamy white layer and adds protein.

  • 1/4 to 1/2 cup Milk of choice: (Dairy, almond, or oat milk all work well). Start with less to keep it thick.

  • Optional: A squeeze of honey or a splash of vanilla extract for extra sweetness.


Instructions

  1. Prep the Fruit: If your fruit isn’t already frozen, peel and slice the banana and cube the mango, then freeze for at least 4 hours.

  2. Layer the Blender: Add the liquid (milk) first, followed by the yogurt, then the frozen mango and banana. Adding liquid first helps the blades move more easily.

  3. Blend: Start on a low speed and gradually increase to high. If you have a tamper for your blender, use it to push the frozen fruit down.

    • Tip: If it’s too thick to move, add milk one tablespoon at a time until it blends smoothly.

  4. Assemble (Optional): To match the photo, you can place a few fresh banana slices and mango chunks against the inside of your glass before pouring the smoothie in.

  5. Serve: Pour the mixture into a glass. It should be thick enough to hold a “swirl” on top!


Pro-Tips for Success

  • For a “Smoothie Bowl” Texture: Use only a splash of milk. The less liquid you use, the more it will resemble the thick, whipped consistency in the picture.

  • Naturally Sweet: Make sure your bananas are spotty and ripe before you freeze them; this ensures the smoothie is sweet without needing added sugar.

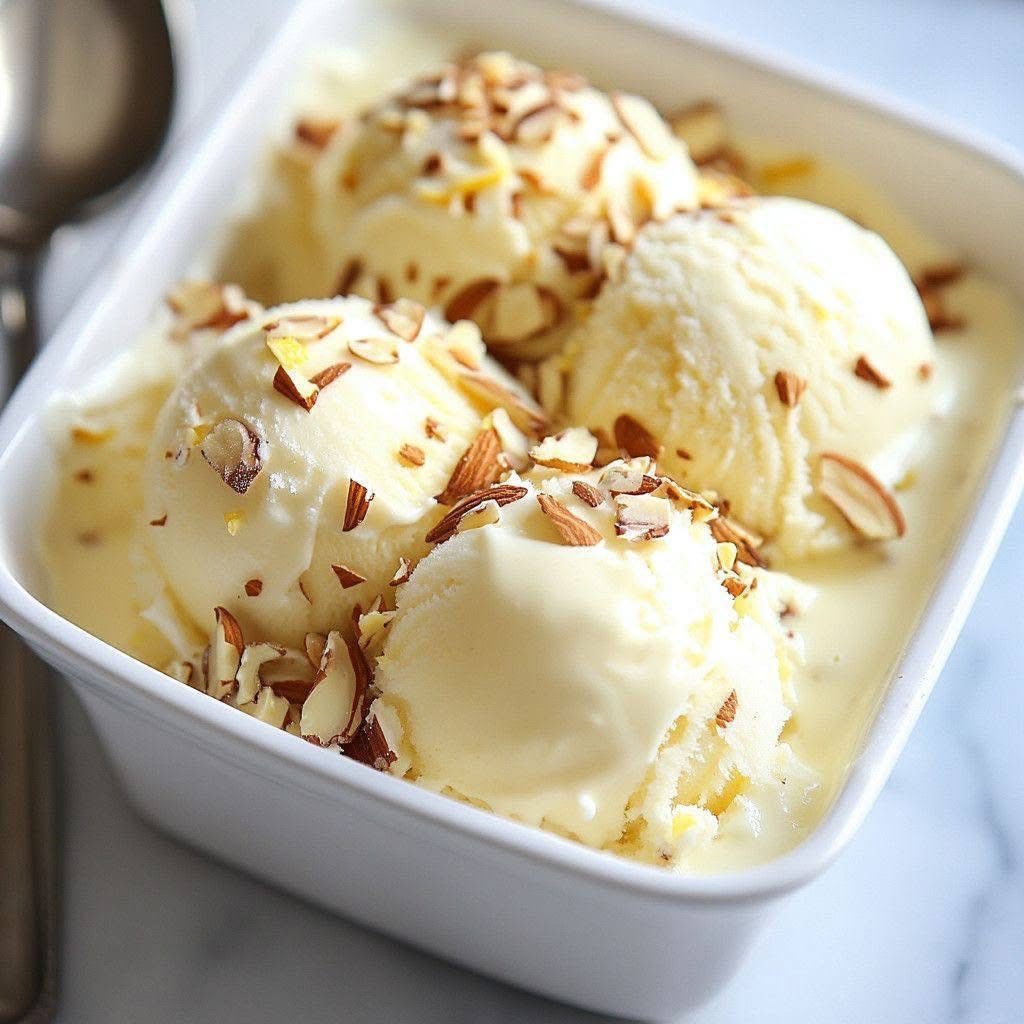
Creamy Vanilla Almond Ice Cream

Creamy Vanilla Almond Ice Cream

Ingredients

  • 2 cups Heavy cream

  • 1 cup Whole milk

  • 3/4 cup Granulated sugar

  • 1/8 tsp Salt

  • 5 Large egg yolks

  • 1 1/2 tsp Pure vanilla extract

  • 1/2 tsp Almond extract (optional, for extra almond flavor)

  • 3/4 cup Sliced almonds, toasted and roughly chopped


Instructions

1. Toast the Almonds

Place the sliced almonds in a dry skillet over medium heat. Stir frequently for 3–5 minutes until they are golden brown and fragrant. Remove from heat immediately and let them cool.

2. Warm the Dairy

In a medium saucepan, combine the heavy cream, milk, sugar, and salt. Heat over medium heat, stirring occasionally, until the sugar dissolves and the mixture is hot but not boiling (look for small bubbles around the edges).

3. Temper the Eggs

In a separate bowl, whisk the egg yolks. Slowly pour about half a cup of the hot cream mixture into the yolks, whisking constantly. This prevents the eggs from scrambling. Pour the egg mixture back into the saucepan with the rest of the cream.

4. Thicken the Custard

Cook over low-medium heat, stirring constantly with a wooden spoon or spatula. Continue until the mixture thickens enough to coat the back of the spoon (it should reach about 80°C or 175°F).

5. Chill

Strain the mixture through a fine-mesh sieve into a clean bowl. Stir in the vanilla and almond extracts. Cover the surface directly with plastic wrap (to prevent a skin from forming) and refrigerate for at least 4 hours (overnight is best).

6. Churn

Pour the chilled custard into your ice cream maker and churn according to the manufacturer’s directions. In the last 2 minutes of churning, add the toasted almonds so they are evenly distributed.

7. Freeze

Transfer the ice cream to a chilled container (like the one in your photo). Freeze for at least 4 hours to reach a “scoopable” firmness.


Quick Tips for Success

  • Don’t Rush the Chill: Starting with a very cold base ensures the smallest ice crystals, making the ice cream smoother.

  • The Crunch Factor: If you want the almonds to stay extra crunchy, you can toss them in a tiny bit of melted butter and salt before toasting.