
Potato Green Chile Tacos

Ingredients

1.5 lbs small boiling potatoes, halved

3 tablespoons olive oil + additional to fry tortillas

1 small white onion, thinly sliced

6 medium fresh poblano chiles, roasted and peeled

Salt

8 oz crumbled Mexican queso fresco or other fresh cheese such as feta or goat cheese

16 leaves epazote, chopped (optional)

8-12 corn tortillas, lightly fried in olive oil

How To Make Potato Green Chile Tacos

Step 1:


Simmer the potatoes in salted water to cover until tender, about 15 minutes.


Drain, cool under running water, peel and cut into 1/4-inch dice.


Step 2:


Heat the oil in a heavy medium-size skillet over medium.


Add the onion and potato, and fry, stirring regularly to ensure that nothing sticks to the pan, until the mixture is richly browned, 10 to 15 minutes.


Step 3:


While the potatoes are browning, seed the chiles and roughly chop.


Stir them into the potato mixture with epazote and season with salt to taste.


Remove the mixture from the heat and stir in the cheese.


Step 4:


Fry corn tortillas in olive oil over medium heat.


Fill with potato filling, fold in half, and serve with your favorite hot sauce.


Frequently Asked Questions:

Can I use a different type of cheese for these tacos?

Yes, you can substitute the Mexican queso fresco with other fresh cheeses such as feta or goat cheese.


The choice of cheese can impact the flavor and texture of the tacos.


Is epazote necessary for this recipe?

No, epazote is optional. Epazote is an herb commonly used in Mexican cuisine.


If you can’t find it, you can omit it or use a substitute herb, like cilantro or oregano, to add some additional flavor.


Can I roast the poblanos in advance?

Absolutely. You can roast the poblano chiles ahead of time and store them in an airtight container in the refrigerator until you’re ready to use them in the recipe.
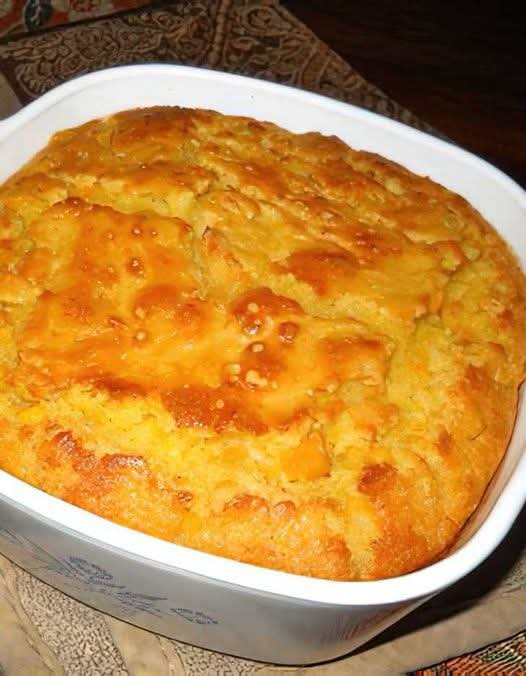

Corn Casserole

Susan Drees won third place in our “Sure Thing” Potluck Recipe Contest with her Corn Casserole recipe. She says, “This is the one casserole I always serve at potlucks and Thanksgiving. It’s quick to make, tastes great, and leftovers reheat wonderfully.” Now you can try it for yourself!

INGREDIENTS

  • 1 (15.25 oz) can corn, drained
  • 1 (14.75 oz) can cream-style corn
  • 1 (8 oz) package Jiffy corn muffin mix
  • 1 cup sour cream (can use light)
  • 6 tablespoons salted butter, melted
  • 1 to 1 1/2 cups shredded sharp cheddar cheese

How To Mak Corn Casserole

  1. Preheat oven to 350°F.
  2. Grease a 2-quart casserole dish.
  3. In a large bowl stir together corn, cream-style corn, corn muffin mix, sour cream, and melted butter. Stir in cheese. Pour into casserole dish.
  4. Bake, uncovered, 1 hour and 10 minutes, or until set in middle and toothpick inserted in center comes out clean.
  5. Let stand 5 minutes before serving

Cheesy Mashed Potato Puffs (Easy Leftover Potato Recipe)

Cheesy Mashed Potato Puffs (Easy Leftover Potato Recipe)

These cheesy mashed potato puffs are the ultimate way to transform leftover mashed potatoes into something golden, crispy, and irresistible. Baked in a muffin tin, they develop crunchy edges on the outside while staying soft and fluffy inside. Packed with melted cheese and fresh chives, they make an ideal side dish, snack, or party appetizer.

If you love creative potato recipes like potato pancakes or stuffed potato cups, this recipe will quickly become a favorite. It uses simple ingredients and turns everyday leftovers into a brand-new comfort food.


Why You’ll Love This Recipe

• Crispy outside, fluffy inside
• Melty cheddar cheese in every bite
• Perfect for meal prep and lunchboxes
• Easy to customize with meat, vegetables, or herbs
• Naturally gluten-free
• Great way to use leftover mashed potatoes

These baked potato puffs are portable, reheatable, and always a crowd-pleaser.


Ingredients

3 cups mashed potatoes (cold or room temperature)
1 cup shredded cheddar cheese
2 large eggs
1/4 cup chopped chives
Salt and black pepper, to taste


How to Make Cheesy Mashed Potato Puffs

Step 1: Preheat the Oven

Preheat oven to 400°F (200°C). Grease a standard muffin tin with butter or nonstick spray.

Step 2: Mix the Ingredients

In a large bowl, combine mashed potatoes, shredded cheese, eggs, chives, salt, and pepper. Mix until smooth and evenly blended.

Step 3: Fill the Muffin Cups

Spoon the mixture into the muffin tin, filling each cup to the top. Smooth the surface slightly.

Step 4: Bake

Bake for 25–30 minutes, or until the tops are golden brown and the edges are crispy.

Step 5: Cool and Serve

Allow to cool for 5 minutes before removing from the pan. Serve warm as a snack, side dish, or appetizer.


Recipe Variations

Make this recipe your own with easy add-ins:

Protein: cooked chicken, turkey bacon, or beef sausage
Vegetables: bell peppers, broccoli, caramelized onions
Herbs: parsley, dill, or thyme instead of chives
Spicy: chili flakes or hot sauce
Cheese: mozzarella, gouda, or white cheddar


Serving Ideas

• With scrambled eggs or omelets for breakfast
• Alongside soup or stew
• On party platters with dipping sauces
• In kids’ lunchboxes
• As mini sliders with sausage or tofu


Storage & Reheating

Refrigerator: Store in an airtight container for up to 4 days
Freezer: Freeze for 1–2 months

Reheat Options:
• Oven: 350°F for 8–10 minutes
• Air fryer: 375°F for 5–6 minutes
• Microwave: 30–40 seconds (softer texture)


Common Mistakes & Fixes

Sticking to pan: Grease well or use silicone liners
Falling apart: Use 2 eggs for binding
Too soft: Drain excess moisture from potatoes
Bland taste: Season mashed potatoes before mixing
Soggy bottoms: Bake at full temperature (400°F)


Frequently Asked Questions

Can I use instant mashed potatoes?
Yes, as long as they are thick and fully cooled.

Can I make them dairy-free?
Yes, use plant-based cheese and dairy-free mashed potatoes.

Can I freeze them?
Yes, freeze after baking and cooling completely.

How do I know they’re done?
They will be golden on top with crisp edges.

Best cheese to use?
Sharp cheddar for bold flavor, or mozzarella and gouda for a milder taste.


Final Thoughts

These cheesy mashed potato puffs are one of the easiest and tastiest ways to reinvent leftovers. They’re quick to prepare, endlessly customizable, and suitable for breakfast, lunch, or parties. Whether you serve them fresh from the oven or reheat them later, they deliver crispy edges and creamy centers every time.

Baked Garlic Butter Cheese Bombs

These Baked Garlic Butter Cheese Bombs make the ultimate appetizer or side dish. With flaky, buttery Pillsbury biscuit dough stuffed with gooey mozzarella cheese, then brushed with melted garlic butter, these cheesy bites are really something, and they will be a huge & probably the biggest hit! They come together quickly, making them great for parties, game days, or just a fun snack.

Instructions

  • Preheat your oven to 375°F (190°C) and line a baking sheet with parchment paper or grease it lightly.
  • Open the refrigerated biscuit dough container and separate the 8 biscuits. Flatten each biscuit slightly to make room for the cheese.
  • Cut mozzarella into 8 equal pieces. Place a piece of cheese in the center of each flattened biscuit.
  • Fold the edges of the biscuit dough around the cheese and pinch to seal. Roll into smooth balls and place seam-side down on the baking sheet.
    • In a small bowl, mix melted butter, garlic powder, Italian seasoning, and a pinch of salt. Brush generously over each biscuit.
    • Bake for 10-12 minutes, until golden brown and puffed up.
    • Remove from the oven and brush with remaining garlic butter. Serve warm with marinara or ranch for dipping.

    Notes

    For extra flavor, sprinkle Parmesan cheese over the biscuit bombs before baking.

Creamy Southern Chicken Salad – Classic Comfort in Every Bite

  • Servings: 4
  • Total Time: 15 minutes (plus chilled resting time if desired)
  • Difficulty: Easy
  • Calories per Serving: ~320 kcal
  • Macros (per serving, approx.):
    Protein 28g • Carbs 8g • Fat 20g • Fiber 1 g

Introduction

This Creamy Southern Chicken Salad is a true comfort food classic—rich, indulgent, and full of flavor. Tender chicken meets a creamy, tangy dressing with just the right hint of sweetness, accented by crisp celery, fresh herbs, and a touch of crunch.

Perfect for sandwiches, lettuce wraps, or as a protein-packed salad on its own, this recipe hits all the right notes for anyone looking for a quick and satisfying meal. It’s a southern-inspired favorite that balances creaminess with fresh textures, making it perfect for lunches, picnics, or easy dinner prep.

Whether you’re following a low-carb, Weight Watchers, or high-protein lifestyle, this southern-style chicken salad can be tailored to your preferences without losing flavor.

Look at the recipe.

  • Creamy, flavorful dressing with a touch of tang and sweetness
  • Tender, protein-rich chicken with crisp veggies
  • Quick assembly, perfect for meal prep or sandwiches

Ingredients Needed

Chicken Salad Base

  • 3 cups cooked chicken, shredded or diced (skinless, roasted or poached)
  • ½ cup celery, finely diced
  • ¼ cup red onion, finely diced
  • 2 hard-boiled eggs, chopped (optional)
  • 2 tbsp fresh parsley, chopped

Creamy Dressing

  • ½ cup mayonnaise (full-fat or fat-free depending on plan)
  • 1 tsp Dijon mustard
  • 1 tsp apple cider vinegar or lemon juice
  • ½ tsp garlic powder
  • Salt and pepper, to taste
  • Optional: 1 tsp honey or sugar-free sweetener

Serving Ideas

  • Leafy greens for a salad
  • Low-carb wraps or lettuce cups
  • Whole-grain crackers or sandwich bread

How to Make Our Creamy Southern Chicken Salad

  1. Prepare the chicken.  Dice or shred cooked chicken into bite-sized pieces.
  2. Mix the veggies.  In a large bowl, combine celery, red onion, eggs (if using), and parsley.
  3. Make the dressing.  Whisk mayonnaise, Dijon mustard, vinegar or lemon juice, garlic powder, and optional sweetener in a small bowl.
  4. Combine everything.  Toss the chicken and vegetables with the dressing until fully coated.
  5. Chill for best flavor.  Refrigerate 30–60 minutes before serving to allow flavors to meld.

Tip: Adjust the creaminess by adding more or less mayonnaise to your liking.

Macros & Plan Compatibility

Plan Notes
Keto & Low-Carb ✅ Use full-fat mayo and skip sweet additions; ~8g net carbs per serving.
Slimming ⚠️ Use fat-free mayo to reduce syns (~3–4 syns per serving).
High-Protein ✅ High protein with chicken; ~28 g per serving.
Weight Watchers ⚠️ 5–6 SmartPoints per serving using full-fat mayo; can reduce to 1–2 points with fat-free mayo.
Mediterranean ✅ Rich in protein and healthy fats; best as a meal with leafy greens or whole-grain crackers.

Storage & Serving Suggestions

Storage

  • Refrigerate in an airtight container for up to 3 days.

Serving Ideas

  • Spoon over a bed of lettuce for a low-carb salad
  • Use as a sandwich filling or wrap
  • Serve with sliced avocado or pickles for added texture

Tips & FAQs

Can I make this ahead of time?

Yes! It tastes even better after chilling for an hour or more.

What chicken works best?

Poached, roasted, or leftover rotisserie chicken all work perfectly.

Can I make this dairy-free?

Yes, simply ensure your mayonnaise is dairy-free. Eggs are optional.

Is this recipe low-carb?

Yes, using fat-free mayo keeps carbs minimal; omit sweetener for strict low-carb.

How can I make it Weight Watchers-friendly?

Use fat-free mayo and skip optional honey to reduce SmartPoints.

Creamy Ham & Garden Veggie Cheese Bake (Classic Oven Style)

Creamy Ham & Garden Veggie Cheese Bake (Classic Oven Style)

Description


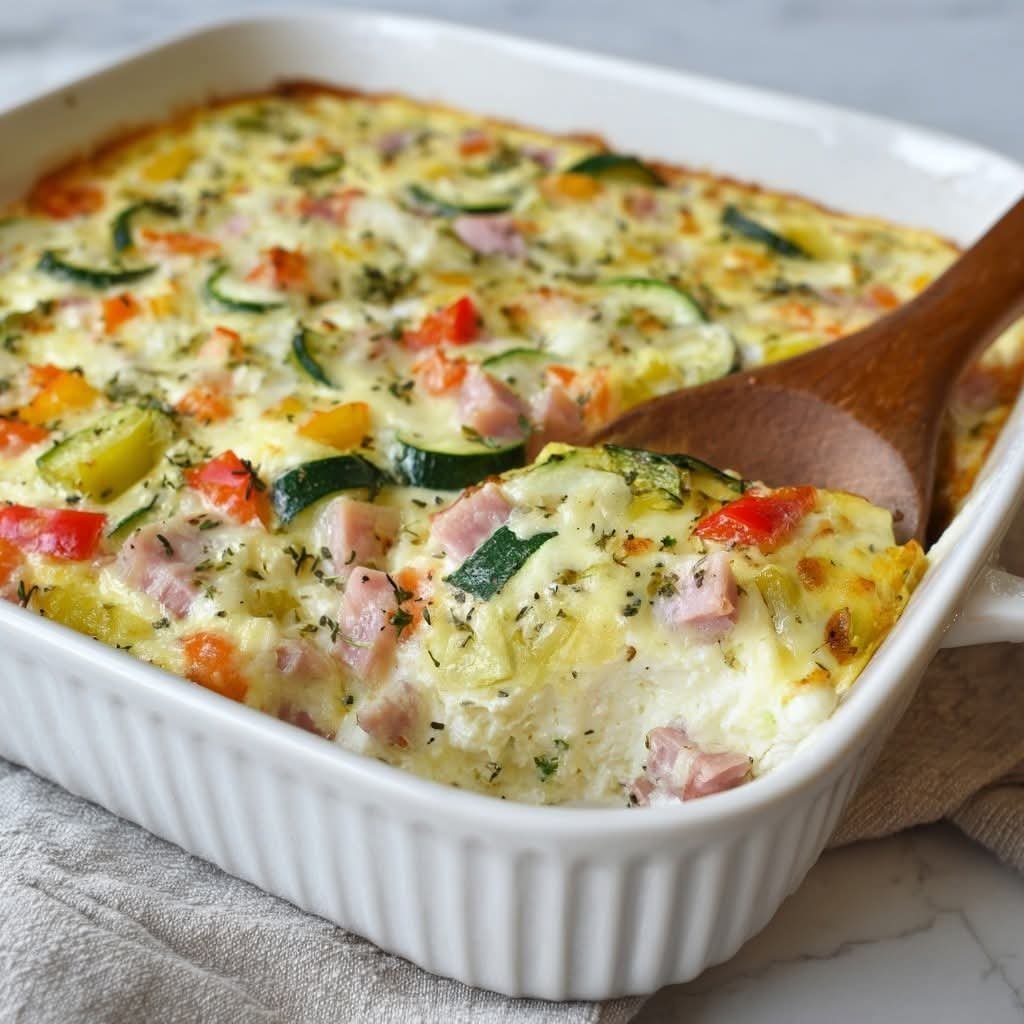
This Creamy Ham & Garden Veggie Cheese Bake is a comforting oven-baked dish that brings together savory ham, fresh garden vegetables, and a rich cheesy base made lighter with cottage cheese. It’s perfect for family dinners, meal prep, or casual gatherings. The vegetables add color, texture, and freshness, while the ham provides a satisfying savory bite. Baked until golden and bubbly, this dish delivers warmth and balance in every spoonful without feeling too heavy.


Ingredients


1 cup cottage cheese


1 cup diced cooked ham


1 cup shredded cheddar or mozzarella cheese


1 cup mixed garden vegetables (bell peppers, zucchini, carrots, peas)


3 large eggs


½ cup milk


1 tablespoon olive oil


½ teaspoon salt


¼ teaspoon black pepper


¼ teaspoon dried oregano or thyme


Directions


Preheat oven to 180°C (350°F). Lightly grease a baking dish.


Heat olive oil in a pan and lightly sauté the vegetables for 3–4 minutes until slightly tender.


In a bowl, whisk eggs, milk, salt, pepper, and herbs.


Add cottage cheese and mix until smooth.


Fold in ham, sautéed vegetables, and half of the shredded cheese.


Pour mixture into the prepared baking dish.


Sprinkle remaining cheese evenly on top.


Bake for 35–40 minutes until set and golden on top.


Rest for 5 minutes before serving.