Cheesy Garlic Potato & Onion Bake

Cheesy Garlic Potato & Onion Bake

Prep time: 15 mins | Cook time: 45 mins | Servings: 4

Ingredients

  • 2 cups potatoes: Peeled and diced into small, uniform cubes.

  • 1 cup onion: Chopped finely.

  • 1 cup shredded cheese: Use a good melting cheese like Cheddar or Mozzarella.

  • 2 cloves garlic: Minced finely.

  • 1/4 cup olive oil

  • 1 tsp salt

  • 1/2 tsp black pepper

Flavor Boosters (Optional):

  • Herbs: Freshly chopped rosemary, thyme, or parsley.

  • Spice: A pinch of cayenne or smoked paprika.

  • Cheese Twist: A sprinkle of Parmesan for a nutty crust.


Instructions

1. Preparation

Preheat your oven to 375°F (190°C). While the oven warms, prep your vegetables. Ensure the potatoes are diced into even cubes so they cook at the same rate. Thoroughly wash and scrub them before peeling.

2. Sauté the Base

In a large skillet, heat the olive oil over medium heat. Add the diced potatoes and cook, stirring occasionally, until they are slightly browned and starting to soften.

3. Add Aromatics

Stir in the chopped onions and minced garlic. Season with salt and black pepper. Continue to cook until the onions are translucent and the potatoes are tender.

Note: Be careful not to burn the garlic or over-brown the onions; you want them soft and fragrant.

4. The Cheesy Finish

Transfer the mixture to a baking dish (a rustic ceramic dish looks great for serving). Evenly sprinkle the shredded cheese over the top. If you are using Parmesan or smoked paprika, add them now.

5. Bake

Place the dish in the oven and bake until the cheese is completely melted, bubbly, and slightly golden (usually about 10–15 minutes depending on your oven).


Tips for Success

  • The Best Sauté: Keep an eye on your onions. You want them translucent, not caramelized to a crisp, to maintain that sweet, savory balance.

  • Storage: If you have leftovers, they keep beautifully in an airtight container in the fridge for 3–4 days.

  • Reheating: To maintain the texture of the potatoes, reheat in the oven with a tiny drizzle of olive oil to crisp the edges back up.

Creamy Amish Baked Custard

This Amish Baked Custard is a classic, simple dessert prized for its silky, melt-in-your-mouth texture and gentle sweetness. Unlike many modern custards that use heavy cream, this traditional version relies on sweetened condensed milk and a careful tempering method to create a light, airy consistency. Finished with a sprinkle of nutmeg, it’s comforting served warm from the oven or chilled for a cool treat.


Amish Baked Custard

Ingredients

Ingredient Amount
Sweetened condensed milk 1 can (14 oz)
Hot water 4 cups
Eggs 6
Vanilla extract 2 teaspoons
Salt ¼ teaspoon
Nutmeg For garnish

How to Make Amish Baked Custard

Step 1: Prep the Base
Preheat oven to 325°F. In a large bowl, combine the sweetened condensed milk and hot water, stirring until smooth.

Step 2: Beat the Eggs
In a separate bowl, beat the eggs until light and fluffy. This helps give the custard its signature lift.

Step 3: Temper the Eggs
Slowly add a small amount of the hot milk mixture to the eggs while whisking constantly to prevent scrambling. Once warmed, stir the eggs back into the main milk mixture. Add vanilla and salt.

Step 4: Set Up a Water Bath
Pour the mixture into individual ramekins or a 2-quart baking dish. Place the dishes in a larger, high-sided pan. Carefully add about ½ inch of hot water to the outer pan to ensure gentle, even cooking.

Step 5: Bake

  • Ramekins: Bake for 1 hour.
  • Large Dish: Bake for 1 hour 40 minutes.
    Custard is done when a knife inserted in the center comes out clean.

Step 6: Cool and Garnish
Let the custard cool for at least 1 hour to set. Sprinkle with nutmeg before serving. Serve warm, or refrigerate for a chilled version.

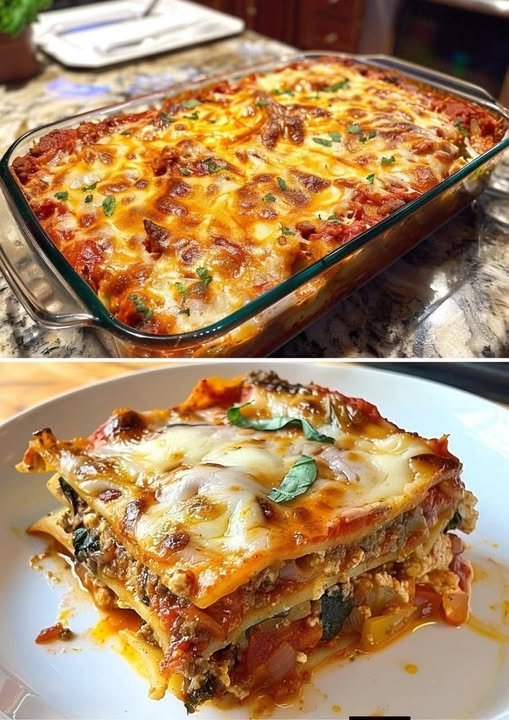
Creamy Cabbage Lasagna

Creamy Cabbage Lasagna

Prep time: 20 mins | Cook time: 35 mins | Total time: 55 mins

Ingredients

The Base & Filling

  • 1 medium head of cabbage: Cut into large leaves, tough stems removed.

  • 2 cups ricotta cheese

  • 1 1/2 cups mozzarella cheese: shredded.

  • 1/2 cup Parmesan cheese: Grated.

  • 1 medium onion: chopped.

  • 2 cloves garlic: Mince d.

  • 2 tbsp olive oil

  • Salt and pepper: To taste.

  • Fresh basil or oregano: For garnish.

The Béchamel Sauce

  • 3 tbsp butter

  • 3 tbsp all-purpose flour (Gluten-free flour works too).

  • 2 1/2 cups milk

  • 1/4 tsp nutmeg

  • Salt and pepper: To taste.


Instructions

1. Prepare the Cabbage “Noodles.”

Bring a large pot of salted water to a boil. Add the cabbage leaves and blanch them for 2-3 minutes until tender but still firm. Drain the leaves and pat them dry with paper towels. Removing excess moisture is key to preventing a watery lasagna!

2. Create the Béchamel

In a saucepan, melt the butter over medium heat. Whisk in the flour to form a smooth paste (roux). Gradually pour in the milk, whisking constantly to keep it smooth. Simmer for 5-7 minutes until thickened. Stir in the nutmeg, salt, and pepper, then set aside.

3. Mix the Ricotta Filling

Heat olive oil in a skillet and sauté the onion and garlic until softened (about 3-4 minutes). In a medium bowl, combine the ricotta, the sautéed onion/garlic, 1 cup of the mozzarella, and the Parmesan. Season well with salt and pepper.

4. Assemble the Layers

Preheat your oven to 375°F (190°C). Grease a baking dish and follow this order:

  • Bottom: A thin layer of béchamel sauce.

  • Layer 1: Cabbage leaves, followed by half of the ricotta mixture.

  • Layer 2: Cabbage leaves and the rest of the ricotta mixture.

  • Top: A final layer of cabbage, the remaining béchamel, and the final 1/2 cup of mozzarella.

5. Bake and Serve

Cover the dish with foil and bake for 25 minutes. Remove the foil and bake for another 10 minutes until the cheese is golden and bubbling. Let it rest for 5-10 minutes before slicing to let the layers set. Garnish with fresh herbs.


Pro Tip: If your cabbage leaves are very thick, you can use a rolling pin to gently flatten the blanched ribs before layering; this helps the lasagna lay flatter and cut more cleanly.

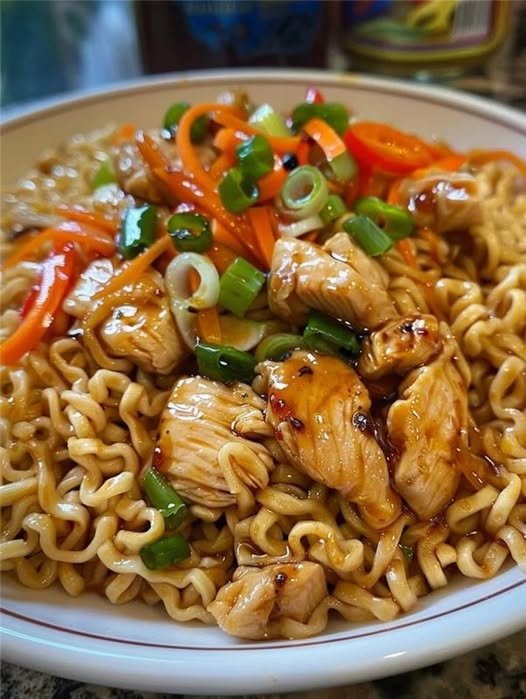
Keto Chicken Stir-Fry with Low-Carb Noodles

Introduction: This Keto Chicken Stir-Fry with Low-Carb Noodles is a delicious, low-carb twist on the classic stir-fry. Packed with tender chicken, crisp vegetables, and keto-friendly noodles, it’s a satisfying and flavorful meal that’s ready in under 30 minutes. With a savory garlic and ginger sauce, this dish is perfect for busy weeknights when you want something healthy, filling, and packed with flavor.


Ingredients:

  • 1 lb boneless, skinless chicken breast or thigh, sliced into thin strips
  • 2 tablespoons avocado oil or olive oil, divided
  • 1 medium bell pepper, thinly sliced
  • 1 medium zucchini, spiralized or sliced into thin strips
  • 1 cup broccoli florets
  • 1 cup mushrooms, sliced
  • 1 cup shredded cabbage (optional for extra crunch)
  • 2 cloves garlic, minced
  • 1 tablespoon fresh ginger, minced
  • 1 pack low-carb noodles (such as shirataki noodles or zucchini noodles, rinsed and drained)
  • 2 tablespoons soy sauce or tamari (for gluten-free)
  • 1 tablespoon rice vinegar
  • 1 teaspoon sesame oil
  • Salt and black pepper, to taste
  • Sesame seeds and sliced green onions, for garnish

Instructions:

Step 1: Prepare the Chicken

  1. Heat Oil in a Large Skillet:
    • In a large skillet or wok, heat 1 tablespoon of avocado oil over medium-high heat.
  2. Cook the Chicken:
    • Add the sliced chicken, season with a little salt and pepper, and stir-fry for 5-7 minutes, or until fully cooked and golden brown. Remove from the skillet and set aside.

Step 2: Stir-Fry the Vegetables

  1. Add Remaining Oil to the Skillet:
    • Add the remaining 1 tablespoon of oil to the skillet.
  2. Sauté Garlic and Ginger:
    • Add the minced garlic and ginger, stirring for 1-2 minutes until fragrant.
  3. Add Vegetables:
    • Add the bell pepper, broccoli, mushrooms, zucchini, and cabbage (if using). Stir-fry for 4-5 minutes, or until the vegetables are tender but still crisp.

Step 3: Add the Noodles and Sauce

  1. Prepare Low-Carb Noodles:
    • If using shirataki noodles, rinse them thoroughly and pat them dry. If using spiralized zucchini, lightly pat dry with a paper towel to remove excess moisture.
  2. Combine Noodles with Veggies:
    • Add the low-carb noodles to the skillet with the vegetables, stirring to combine.
  3. Add Sauce Ingredients:
    • Pour in the soy sauce (or tamari), rice vinegar, and sesame oil. Stir well, coating everything in the sauce.
  4. Return Chicken to Skillet:
    • Add the cooked chicken back to the skillet and toss to combine with the noodles and veggies. Stir-fry for an additional 2-3 minutes to heat everything through.

Step 4: Serve and Garnish

  1. Transfer to Serving Plates:
    • Divide the stir-fry into bowls or plates.
  2. Garnish and Enjoy:
    • Garnish with sesame seeds and sliced green onions. Serve hot, and enjoy your keto-friendly stir-fry!

Tips and Variations:

  1. Switch Up the Protein: Substitute chicken with shrimp, beef, or tofu for different flavors.
  2. Add Spice: Add a pinch of red pepper flakes or a drizzle of sriracha if you like a little heat.
  3. Storage: Store leftovers in an airtight container in the refrigerator for up to 3 days. Reheat in a skillet over low heat.

Nutritional Information (Per Serving, Approx. 4 Servings):

  • Calories: 250
  • Carbohydrates: 6 g
  • Fiber: 2 g
  • Net Carbs: 4 g
  • Protein: 25g
  • Fat: 15g

WW SmartPoints (Per Serving):

Each serving has approximately 6 SmartPoints on the Weight Watchers program, depending on specific ingredients used.


This Keto Chicken Stir-Fry with Low-Carb Noodles is a quick, satisfying, and flavorful meal that’s low in carbs but high in nutrients and protein. With tender chicken, fresh vegetables, and keto-friendly noodles, it’s a complete meal that’s perfect for any night of the week. Enjoy!

Baked Cauliflower Tastes Better Than Meat! Crispy Roasted Cauliflower

Baked Cauliflower Tastes Better Than Meat! Crispy Roasted Cauliflower

Table of Contents

Cauliflower has transcended its reputation as a bland, overlooked vegetable and emerged as a culinary superstar, especially when roasted to perfection. My Crispy Roasted Cauliflower recipe is a testament to the versatility and deliciousness of this humble vegetable. Infused with Italian herbs and Parmesan, this dish promises a crispy, flavorful experience that rivals any meat dish. Whether you are a dedicated vegetarian or simply looking to add more vegetables to your diet, this recipe will win you over with its crispy texture and rich, savory taste.

History

Cauliflower, a member of the Brassica family, has been cultivated for centuries. Originally from the Mediterranean region, it has been a staple in many traditional cuisines. Over time, it has gained popularity worldwide due to its adaptability and nutritional benefits. Roasting cauliflower enhances its natural sweetness and creates a delightful crispiness that makes it a favorite in modern kitchens. This recipe pays homage to the classic roasted cauliflower while elevating it with contemporary flavors and techniques.

Ingredients

1 head of cauliflower

3 slices of lemon

A handful of dill

1 1/4 cups panko breadcrumbs

1 clove of minced garlic

3/4 cup all-purpose flour

3 eggs

5 tbsp olive oil

1 tsp Italian herbs

A handful of chopped parsley

1 cup grated Parmesan cheese

Salt, to taste

Ground black pepper, to taste

Sauce:
  • 3/4 cup sour cream
  • 1/2 cup yogurt
  • Freshly chopped parsley
  • Salt and ground black pepper
  • Lemon juice
Directions
Prepare the Cauliflower

Start by cutting the cauliflower into florets. Bring a pot of salted water to a boil and add the lemon slices, a handful of dill, and the cauliflower florets. Boil for five minutes, then drain and set aside. This step helps to infuse the cauliflower with subtle flavors and tenderize it slightly before roasting.

See also  3 STEPS TO MAKE CAKE
Prepare the Coating Mixture

In a large mixing bowl, combine the panko breadcrumbs, minced garlic, olive oil, Italian herbs, salt, ground black pepper, chopped parsley, and grated Parmesan cheese. Mix until well combined. This breadcrumb mixture will give the cauliflower its irresistible crispy coating.

Coat the Cauliflower

Set up a dredging station with a plate of all-purpose flour, a bowl of whisked eggs, and the bowl of breadcrumb mixture. Dredge each cauliflower floret first in the flour, then dip it in the whisked eggs, and finally coat it in the breadcrumb mixture. Ensure each piece is evenly coated for maximum crispiness.

Bake the Cauliflower

Place the coated cauliflower florets on a parchment-lined baking tray. Preheat your oven to 350°F (175°C) and bake for 20 minutes, or until the cauliflower is golden brown and crispy. The aroma of the herbs and Parmesan will fill your kitchen, making it hard to wait for the finished product.

Prepare the Sauce

While the cauliflower is baking, prepare the sauce. In a small bowl, combine the sour cream, yogurt, freshly squeezed lemon juice, chopped parsley, salt, and ground black pepper. Mix well. This creamy, tangy sauce complements the crispy cauliflower perfectly, adding a refreshing contrast to each bite.

Serve and Enjoy

Once the cauliflower is done baking, remove it from the oven and let it cool slightly. Serve the crispy roasted cauliflower with the prepared sauce. Garnish with extra parsley if desired. Enjoy this delicious, meat-free dish that is sure to impress both vegetarians and meat-lovers alike.

Nutrition Information

Per Serving:

Calories: 220

See also  Mediterranean Lemon Chicken with Artichokes & Olives

Protein: 10g

Carbohydrates: 25g

Dietary Fiber: 3g

Sugars: 3g

Fat: 10g

Saturated Fat: 3g

Cholesterol: 75mg

Sodium: 320mg

Vitamin A: 8% DV

Vitamin C: 70% DV

Calcium: 20% DV

Iron: 10% DV

Conclusion

This Crispy Roasted Cauliflower recipe is a delightful alternative to traditional meat dishes. The combination of herbs, Parmesan, and a crispy breadcrumb coating makes it a standout dish that will leave you craving more. Perfect for a weeknight dinner or as a side dish for a special occasion, this recipe is sure to become a favorite in your household.


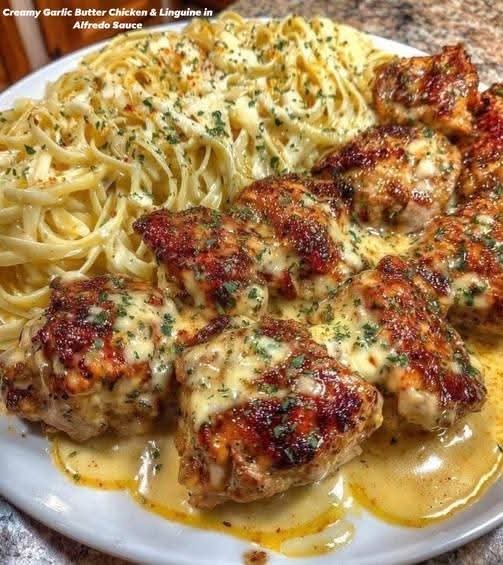
Creamy Garlic Butter Chicken & Linguine in Alfredo Sauce 🍝🧄

Full recipe >>>Creamy Garlic Butter Chicken & Linguine in Alfredo Sauce 🍝🧄

Ingredients

For the Chicken

2 boneless, skinless chicken breasts (sliced)

Salt & black pepper – to taste

1 tsp paprika

1 tsp Italian seasoning

2 tbsp butter

1 tbsp olive oil

For the Pasta

250 g linguine (or fettuccine)

Water + salt (for boiling)

For the Alfredo Sauce

3 tbsp butter

4–5 garlic cloves (minced)

1 cup heavy cream

1 cup milk

¾ cup grated Parmesan cheese

½ tsp black pepper

Salt – to taste

½ tsp chili flakes (optional)

1 tsp Italian seasoning

Garnish (optional)

Fresh parsley

Extra Parmesan cheese

Instructions

1. Cook the Pasta

Boil linguine in salted water according to package instructions.

Drain and set aside (reserve ¼ cup pasta water).

2. Cook the Chicken

Season chicken with salt, pepper, paprika, and Italian seasoning.

Heat butter + olive oil in a pan over medium heat.

Cook chicken 4–5 minutes per side until golden and fully cooked.

Remove chicken from pan and set aside.

3. Make the Garlic Alfredo Sauce

In the same pan, add butter.

Add minced garlic and sauté for 30 seconds (don’t burn).

Pour in cream and milk, stir well.

Add salt, black pepper, chili flakes, and Italian seasoning.

Simmer on low heat for 3–4 minutes.

Add Parmesan cheese slowly, stirring until smooth and creamy.

4. Combine Everything

Add cooked pasta to the sauce.

Slice chicken and add it back to the pan.

Toss everything together.

(Add a little pasta water if sauce is too thick.)

5. Serve

Garnish with parsley and extra Parmesan.

Serve hot and creamy