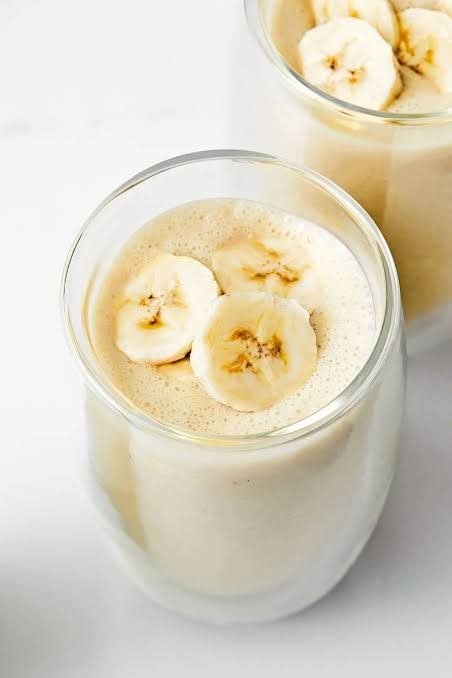
🍌 The Ultimate Creamy Banana Smoothie

🍌 The Ultimate Creamy Banana Smoothie


Prep time: 5 minutes | Servings: 1-2


Ingredients


To get that frothy texture seen in your photo, using a frozen banana is the secret!

1 large banana (peeled and frozen for extra creaminess)


1 cup milk of choice (dairy, almond, or oat work great)


1/4 cup Greek yogurt (adds tang and protein)

1/2 tsp vanilla extract


1 tsp honey or maple syrup (optional, depending on banana ripeness)


A pinch of cinnamon (optional, for warmth)

Ice cubes (only if you didn’t use a frozen banana)


Instructions


Prep the Banana: For the best results, slice your banana into chunks before freezing. If you’re using a fresh banana, add about 1/2 cup of ice to the blender to get that chilled, thick consistency.

Layer the Liquid: Add your milk and yogurt to the blender first. This helps the blades spin freely and prevents the fruit from getting stuck at the bottom.


Combine: Add the banana chunks, vanilla, and sweetener.


Blend: Start on a low speed and gradually increase to high. Blend for about 45–60 seconds until completely smooth and frothy.

Garnish: Pour into a glass and top with fresh banana slices and a light dusting of cinnamon, just like in your image.


đź’ˇ Pro Tips for Success


The “Spot” Rule: Use bananas that have a few brown spots. They have a much higher sugar content, which means you won’t need to add any extra honey or syrup.

Make it Thick: If you want a “smoothie bowl” consistency, reduce the milk to 1/2 cup.


Boost It: Feel free to throw in a tablespoon of peanut butter or a handful of spinach (though the color will change to green!).

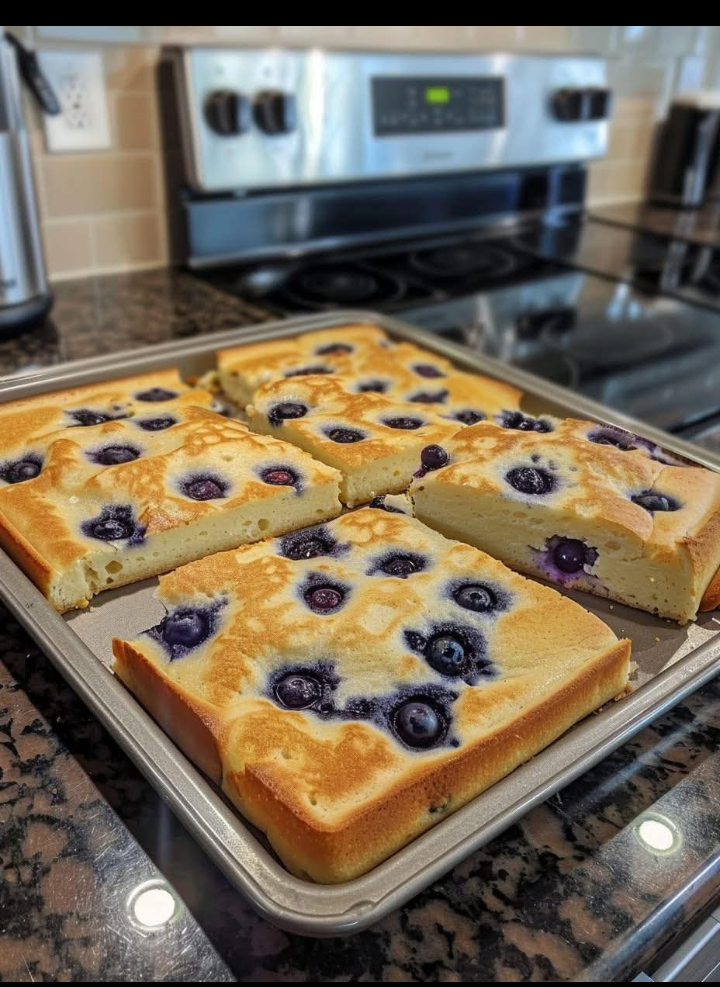
Sheet Pan Blueberry Pancakes

Sheet Pan Blueberry Pancakes

Ingredients

The Dry Mix:


2 cups All-purpose flour


2 tbsp Granulated sugar


1 tbsp Baking powder


1/2 tsp Salt


The Wet Mix:


1 ½ cups Milk (whole or 2% works best)


2 Large eggs


4 tbsp Unsalted butter, melted and slightly cooled


1 tsp Vanilla extract


The Topping:


1 – 1 ½ cups Fresh blueberries (frozen works too, just don’t thaw them first)


Instructions

Prep the Oven: Preheat your oven to 425°F (220°C). Grease a standard 13×18 inch rimmed baking sheet (half-sheet pan) generously with butter or non-stick spray. For extra safety against sticking, you can line it with parchment paper.


Mix Dry Ingredients: In a large bowl, whisk together the flour, sugar, baking powder, and salt.


Mix Wet Ingredients: In a separate medium bowl, whisk the milk, eggs, melted butter, and vanilla until smooth.


Combine: Pour the wet ingredients into the dry ingredients. Whisk gently until just combined. Pro-tip: Don’t overmix! A few small lumps are perfectly fine and actually help keep the pancakes fluffy.


Pour and Spread: Pour the batter onto your prepared baking sheet. Use a spatula to spread it evenly into the corners.


Add Blueberries: Sprinkle the blueberries evenly over the top of the batter.


Bake: Place in the oven and bake for 12–15 minutes. You’re looking for a golden-brown top and a toothpick inserted into the center to come out clean.


Serve: Let it cool for a minute, then slice into squares just like in your photo.


Tips for Success

Fluffiness: If you want them extra tall, you can swap the milk for buttermilk and add 1/2 tsp of baking soda to the dry mix.


Crispy Edges: For those buttery, crispy edges, melt a little extra butter directly on the pan while the oven preheats, then swirl it around before adding the batter.


Customization: You can do “sections” if you have picky eaters—blueberries on one half, chocolate chips or strawberries on the other!

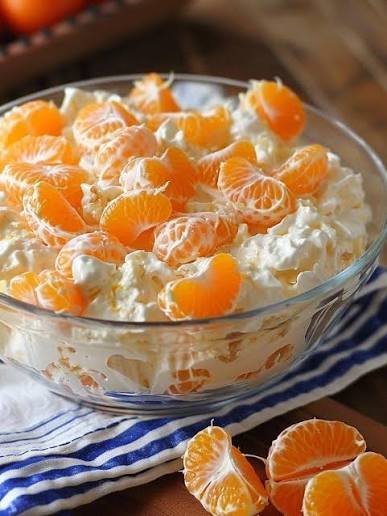
Mandarin Orange Salad

Mandarin Orange Salad

Refreshing Mandarin Orange Salad: A Step-by-Step Guide

If you’re looking for a salad that’s light, refreshing, and bursting with citrusy sweetness, the Mandarin Orange Salad is the perfect choice. It’s colorful, easy to make, and ideal as a side dish for lunch, dinner, or even as a vibrant addition to holiday meals. This salad combines crisp greens, juicy mandarin segments, and a hint of crunch, all dressed in a tangy-sweet dressing.


Ingredients You’ll Need

For the salad:


1 can (11 oz) of mandarin orange segments, drained (or fresh mandarin slices)

6 cups mixed salad greens (romaine, spinach, arugula, or spring mix)

½ cup sliced almonds, toasted

½ cup shredded carrots

ÂĽ cup thinly sliced red onion

½ cup crumbled feta cheese or goat cheese (optional)

½ cup dried cranberries or raisins (optional)

For the dressing:

3 tablespoons olive oil

2 tablespoons white wine vinegar or apple cider vinegar

1 tablespoon honey or maple syrup

1 teaspoon Dijon mustard

Salt and black pepper to taste

Step-by-Step Instructions

Step 1: Prepare the Salad Base

Start by washing your salad greens thoroughly under cold water. Spin them dry in a salad spinner or pat dry with a clean kitchen towel. Place the greens in a large mixing bowl as the base of your salad.


Step 2: Add Vegetables and Crunch

Add shredded carrots and thinly sliced red onions to the greens. These ingredients give the salad texture, color, and subtle flavor contrasts.


Step 3: Toast the Almonds

In a small pan over medium heat, toast the sliced almonds until they turn golden brown and emit a nutty aroma. Stir constantly to prevent burning. Once done, remove from heat and allow them to cool slightly before adding to the salad.

Step 4: Incorporate the Mandarin Oranges

Drain the mandarin oranges if using canned ones, or peel and segment fresh mandarins. Gently fold them into the salad, being careful not to mash the delicate fruit. Their bright, juicy flavor is the star of this dish.


Step 5: Add Cheese and Optional Ingredients

Sprinkle crumbled feta or goat cheese over the salad for a creamy, tangy element. If you like, add dried cranberries or raisins for a touch of sweetness. These optional ingredients make the salad more complex and flavorful.


Step 6: Make the Dressing

In a small bowl or jar, whisk together olive oil, vinegar, honey, and Dijon mustard until well combined. Season with a pinch of salt and freshly ground black pepper. Taste and adjust the sweetness or acidity to your liking.

Step 7: Dress the Salad

Pour the dressing over the salad just before serving. Toss gently to coat all ingredients evenly without crushing the mandarin slices. The dressing should lightly coat the salad rather than drenching it.


Step 8: Serve Immediately

Transfer the salad to a serving bowl or individual plates. Garnish with extra toasted almonds or a few whole mandarin slices for a visually appealing presentation. Serve fresh and enjoy the burst of citrus flavor in every bite.

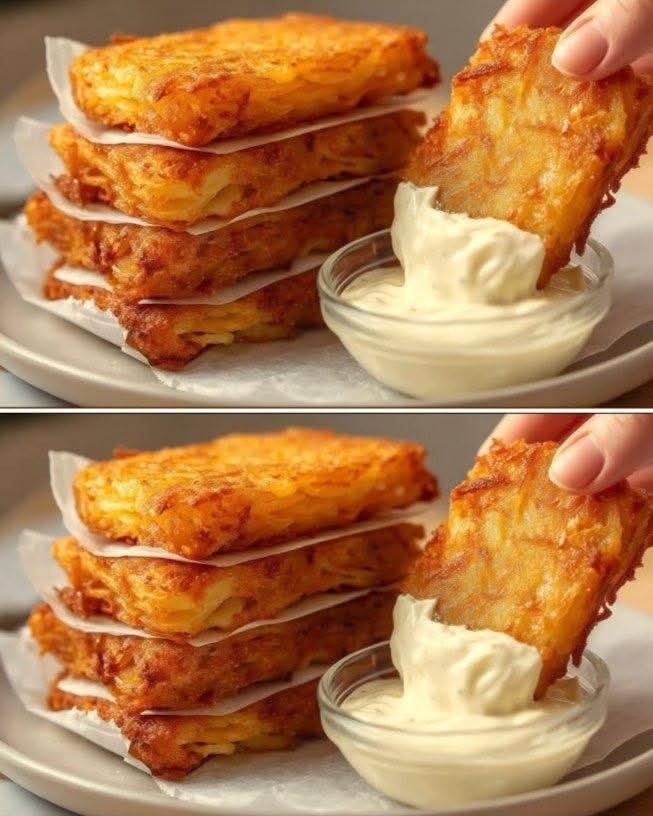
Easy and Crispy Homemade Hash Browns with Cheese Sauce

Easy and Crispy Homemade Hash Browns with Cheese Sauce

There’s something incredibly satisfying about homemade hash browns, especially when they’re crispy on the outside and fluffy on the inside. This Easy and Crispy Homemade Hash Browns with Cheese Sauce recipe is perfect for breakfast, dinner, or even as a delicious snack. With autumn in the air and cozy nights ahead, this recipe is trending as everyone looks for comforting meals that warm the heart and fill the stomach. Plus, who can resist a rich, cheesy sauce drizzled over perfectly fried potatoes? Let’s get cooking!

What You’ll Need for Crispy Homemade Hash Browns with Cheese Sauce

900 g (2 lb) potatoes, peeled and grated

Cold water, as needed

4 tbsp cornstarch

Salt, to taste

Black pepper, to taste

Paprika, to taste

Oil for frying

25 g (1 oz) butter

1 tbsp wheat flour

240 ml (1 cup) milk

40 g (1.5 oz) cheese, grated

Extra salt and black pepper, to taste

How to Make Crispy Homemade Hash Browns with Cheese Sauce

Prepare the Potatoes: Grate the potatoes and immediately place them in a bowl of cold water. This will help remove excess starch, keeping your hash browns extra crispy.

Drain and Dry: After soaking for a few minutes, drain the potatoes well. Squeeze them firmly with your hands or use a clean kitchen towel to remove as much moisture as possible.

Season the Potatoes: Transfer the drained potatoes to a bowl and sprinkle in the cornstarch, salt, black pepper, and paprika. Mix it all together until the potatoes are evenly coated.

Heat the Oil: In a large pan, heat a generous amount of oil over medium heat.

Shape and Fry: Shape the potato mixture into flat patties and carefully place them in the hot oil. Fry for about 5–7 minutes on each side until they are golden brown and crispy. Once cooked, drain the hash browns on paper towels to remove any excess oil.

Make the Cheese Sauce: In a saucepan over medium heat, melt the butter. Add the flour and cook, stirring for about 1 minute. Gradually pour in the milk while whisking continuously to avoid lumps. Keep cooking until the sauce thickens up.

Add the Cheese: Stir in the grated cheese along with some extra salt and pepper, mixing until everything is smooth and creamy.

Serve: Enjoy your crispy hash browns hot, either topped with the cheesy sauce or served on the side for dipping.

Why Everyone Is Loving This Crispy Homemade Hash Browns with Cheese Sauce

As comfort food becomes more sought-after during the colder months, recipes like this are becoming increasingly popular. Not only do they satisfy cravings, but they’re also easy to make, making them perfect for anyone looking to whip up a hearty meal without spending hours in the kitchen. Plus, the gooey cheese sauce adds an irresistible creamy texture that makes this dish a family favorite!

Serving Suggestions

These crispy hash browns are great for any meal of the day! Serve them for breakfast alongside eggs and toast, enjoy them as a savory snack, or even make them a part of your dinner plates. They pair wonderfully with a fresh salad or sautéed vegetables. Add some chives or green onions on top for a pop of color and flavor!


Helpful Tricks

Storage Tips: If you have leftovers, store the hash browns in an airtight container in the fridge for up to 3 days. Reheat in a skillet for the best texture.

Flavor Variations: Feel free to experiment with spices. Adding garlic powder or shredded carrots can kick up the flavor a notch!

Cheese Options: While cheddar is a classic choice for the cheese sauce, you could also try using mozzarella for a stretchier texture or a more pungent cheese like gouda for a unique twist.

Crispy Homemade Hash Browns with Cheese Sauce FAQs

Can I make these hash browns ahead of time?

Yes, you can prepare the potato mixture a few hours in advance. Just keep it covered in the fridge until you’re ready to fry

What type of potatoes is best for hash browns?

Russet potatoes are the best choice as their high starch content makes for crispy hash browns.


Can I bake these hash browns instead of frying?

Yes, you can bake them at 425°F (220°C) on a greased baking sheet for about 25-30 minutes, flipping halfway through. They might not be as crispy, but they’ll be healthier.

Give this recipe a try and enjoy the warm, cheesy goodness from your own kitchen. It’s a simple dish that brings a smile to the table, perfect for sharing and satisfying hunger all around. Bon appétit!

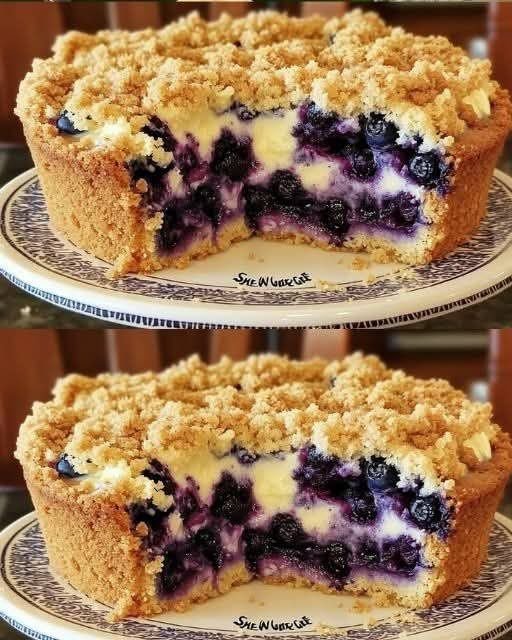
Blueberry Cream Cheese Crumb Cake

Blueberry Cream Cheese Crumb Cake

Description

A luscious, bakery-style treat featuring a soft, buttery cake base layered with tangy cream cheese, juicy blueberries, and a sweet crumbly streusel topping. This cake is perfect for brunch, tea time, or dessert, offering richness and fruitiness in every bite.

Ingredients

For the Cake Batter:

  • 1/2 cup (1 stick) unsalted butter, softened
  • 3/4 cup granulated sugar
  • 2 large eggs
  • 1 tsp vanilla extract
  • 1 1/2 cups all-purpose flour
  • 1 1/2 tsp baking powder
  • 1/4 tsp salt
  • 1/2 cup whole milk

For the Cream Cheese Layer:

  • 8 oz cream cheese, softened
  • 1/4 cup granulated sugar
  • 1 egg yolk
  • 1/2 tsp vanilla extract

For the Blueberry Layer:

  • 1 1/2 cups fresh or frozen blueberries
  • 1 tbsp all-purpose flour (optional, to coat berries and prevent sinking)

For the Crumb Topping:

  • 1/2 cup all-purpose flour
  • 1/4 cup brown sugar
  • 1/4 cup granulated sugar
  • 1/2 tsp ground cinnamon
  • 1/4 cup unsalted butter, melted

Instructions

  1. Preheat Oven:
    Preheat your oven to 350°F (175°C). Grease and flour a 9-inch springform or square baking pan.
  2. Prepare Cake Batter:
    • In a bowl, cream the softened butter and sugar together until light and fluffy.
    • Beat in the eggs, one at a time, then add vanilla.
    • In a separate bowl, whisk together flour, baking powder, and salt.
    • Alternate adding the dry ingredients and milk into the butter mixture, mixing just until combined.
    • Spread the batter evenly into the prepared pan.
  3. Cream Cheese Layer:
    • In a bowl, beat the cream cheese, sugar, egg yolk, and vanilla extract until smooth.
    • Gently spread this mixture over the cake batter in the pan.
  4. Blueberry Layer:
    • Toss blueberries with 1 tbsp flour (optional).
    • Evenly distribute the blueberries over the cream cheese layer.
  5. Crumb Topping:
    • In a bowl, combine flour, brown sugar, granulated sugar, cinnamon, and melted butter. Mix until crumbly.
    • Sprinkle over the top of the blueberry layer.
  6. Bake:
    • Bake for 45–55 minutes, or until the top is golden and a toothpick inserted in the center comes out mostly clean (it’s okay if a little cream cheese clings).
    • Let the cake cool in the pan for 10 minutes, then remove to a wire rack to cool completely.

Notes

  • Frozen blueberries? Don’t thaw before using—just coat in flour to prevent sinking.
  • For a lemon twist: Add 1 tsp lemon zest to the cream cheese mixture.
  • Storage: Store leftovers in the fridge for up to 4 days because of the cream cheese layer.

Tips

  • Don’t overmix the cake batter—this keeps it soft and tender.
  • Use a springform pan for easy removal and a clean presentation.
  • Serve slightly warm or at room temperature for best flavor.

Servings

Makes 8–10 generous slices.

Nutritional Information (Per serving, approx.):

  • Calories: 370
  • Protein: 5g
  • Fat: 20g
  • Carbohydrates: 42g
  • Sugar: 24g
  • Fiber: 2g
  • Calcium: 6% DV
    (Values may vary depending on specific ingredients.)

Benefits

  • Rich flavor with creamy, fruity, and crumbly textures.
  • Great make-ahead dessert—tastes even better the next day!
  • Blueberries provide antioxidants and vitamin C.
  • Versatile—works as a dessert, breakfast, or tea-time treat.

Q&A Section

Q: Can I use other berries instead of blueberries?

A: Yes! You can use raspberries, blackberries, or chopped strawberries. Keep the total berry amount to about 1 1/2 cups for best texture.

Q: Can I freeze this cake?

A: Absolutely. Slice the cake, wrap tightly in plastic wrap and foil, and freeze for up to 2 months. Thaw overnight in the fridge or microwave for a quick treat.

Q: Can I make this gluten-free?

A: Yes. Use a 1:1 gluten-free flour blend in place of the all-purpose flour for all components of the cake.

Q: What’s the best way to serve it?

A: Slightly warm, dusted with powdered sugar or topped with whipped cream.

Classic Moist Vanilla Sheet Cake

Classic Moist Vanilla Sheet Cake

Ingredients

  • 2 1/2 cups All-purpose flour

  • 1 3/4 cups Granulated sugar

  • 1 1/4 cups Whole milk (room temperature)

  • 1/2 cup (1 stick) Unsalted butter (softened)

  • 1/2 cup Vegetable oil

  • 4 Large eggs (room temperature)

  • 1 tbsp Vanilla extract

  • 2 1/2 tsp Baking powder

  • 1/2 tsp Salt


Instructions

1. Prep and Preheat

  • Preheat your oven to 175°C (350°F).

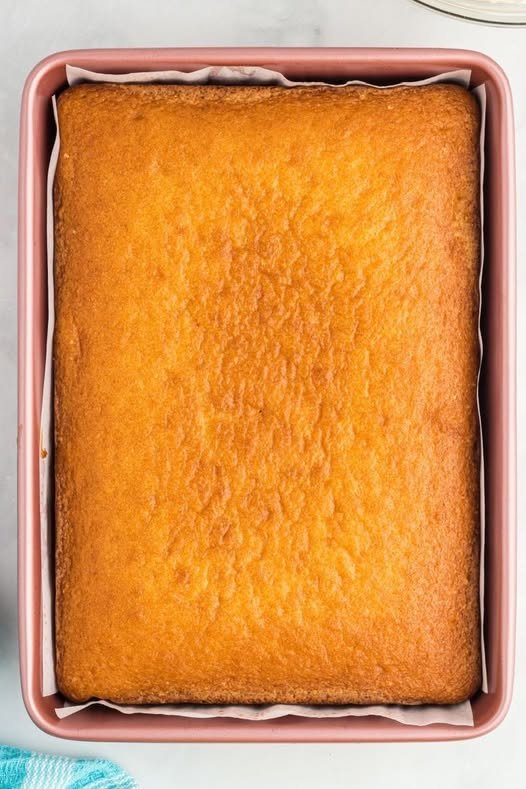
  • Grease a 9×13 inch baking pan and line the bottom with parchment paper to ensure the cake releases easily, as seen in the provided image.

2. Mix Dry Ingredients

  • In a medium bowl, whisk together the flour, baking powder, and salt. Set this aside.

3. Cream Butter and Sugar

  • In a large mixing bowl (or stand mixer), beat the softened butter and granulated sugar together on medium-high speed until the mixture is light and fluffy (about 3 minutes).

  • Pour in the vegetable oil and mix until well combined.

4. Add Eggs and Vanilla

  • Add the eggs one at a time, beating well after each addition.

  • Stir in the vanilla extract.

5. Combine Everything

  • Reduce the mixer speed to low. Add the flour mixture in three parts, alternating with the milk, starting and ending with the flour.

  • Mix just until combined; do not overmix, or the cake may become dense.

6. Bake

  • Pour the batter into the prepared pan and smooth the top with a spatula.

  • Bake for 30–35 minutes, or until the top is golden brown and a toothpick inserted into the center comes out clean.

7. Cool and Serve

  • Place the pan on a wire rack and let the cake cool completely before frosting.


Pro Tip for the Best Texture

Using room temperature milk and eggs is essential! It allows the ingredients to emulsify properly, creating a uniform, velvety crumb that doesn’t crumble when sliced.