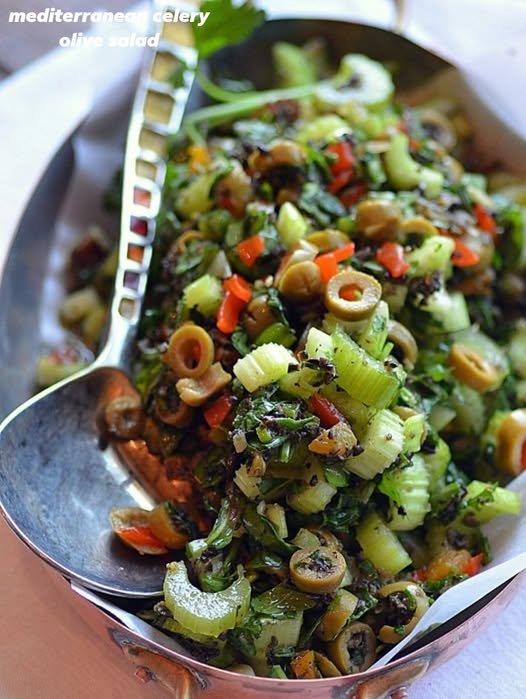
Mediterranean Celery Olive Salad

A crisp, refreshing, briny salad that comes together in minutes and brings BIG Mediterranean vibes.

⭐ Serves: 3–4

⭐ Time: 15 minutes

Ingredients

Salad Base

  • 3 cups celery, thinly sliced

  • ½ cup green olives, sliced (or whole pitted)

  • ¼ cup black olives, sliced

  • ¼ cup red onion, thinly sliced

  • ¼ cup fresh parsley, chopped

  • 2 tbsp capers (optional but highly recommended)

  • ¼ cup feta cheese, crumbled (optional)

Dressing

  • 3 tbsp extra-virgin olive oil

  • 1 tbsp lemon juice

  • 1 tbsp red wine vinegar

  • 1–2 garlic cloves, minced

  • ½ tsp dried oregano

  • Salt & black pepper to taste

🍋 Directions

1. Prep the veggies

Slice the celery into thin half-moons so it stays crunchy but not chunky. Slice both olives, thin out the red onion, and chop up the parsley. Set aside in a mixing bowl.

2. Make the dressing

In a small bowl, whisk together:
olive oil + lemon juice + red wine vinegar + garlic + oregano + salt + pepper.
The mix should be tangy and fragrant.

3. Combine everything

Add celery, olives, onions, parsley, and capers to a bowl. Toss gently to distribute the flavors.

4. Add the dressing

Pour the dressing over the salad and toss well until everything is lightly coated and glossy.

5. Finish with feta

Sprinkle crumbled feta on top.
Chill for 10–15 minutes to let the flavors mingle and the celery get extra crisp.

See also  Chili Mango Glazed Cauliflower

6. Serve cold

Enjoy as a side dish, snack, or lunch bowl.

❓ Q&A

Q1: Can I make it ahead?
Yep! It stays fresh and crisp for up to 24 hours. Add feta right before serving.

Q2: Best olives?
A combo of green olives (salty/briny) and black olives (mild) gives the perfect balance. Kalamata works great too.

Q3: Substitute for red wine vinegar?
Use apple cider vinegar or more lemon juice.

Q4: Is it vegan?
Yes — just leave out the feta.

Q5: What to serve it with?
Perfect with:

  • Grilled chicken or fish

  • Mediterranean rice

  • Hummus & pita

  • Falafel

  • Pasta dishes

Q6: How to make it more filling?
Add:

  • Chickpeas

  • White beans

  • Quinoa

  • Avocado cubes

Lemon Blueberry Cream Cheese Pound Cake

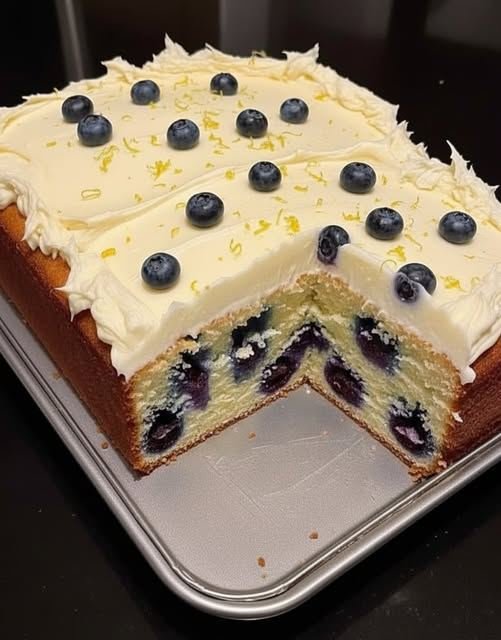
Spring has definitely arrived with this Lemon Blueberry Cream Cheese Pound Cake! This recipe balances zesty citrus with a rich, protein-friendly almond flour base for a dessert that feels indulgent but stays light.


Lemon Blueberry Cream Cheese Pound Cake

Zesty, moist, and perfectly topped with a tangy cream cheese frosting.

Prep time: 15 mins | Cook time: 35–40 mins | Yields: 1 loaf cake

Ingredients

The Cake Base

  • 4 Large Eggs

  • 4 oz Cream Cheese: Softened to room temperature.

  • 4 tbsp Unsalted Butter: Softened.

  • 2 tsp Vanilla Extract

  • 1 Lemon: Both the zest and the juice.

  • 1 ¼ cups Almond Flour

  • 3–4 tbsp powdered monk fruit or your preferred sugar-free sweetener.

  • 2 tsp Baking Powder

  • Pinch of Salt

  • ½ cup Blueberries: Fresh or frozen.

Tangy Lemon Frosting

  • 4 oz Cream Cheese: Softened.

  • 3 tbsp butter: softened.

  • ¼ cup Sweetener of choice

  • 1 tsp Vanilla Extract

  • 1–2 tsp Lemon Juice


Instructions

  1. Mix the Wet Base: In a large bowl, whisk together the eggs, softened cream cheese, butter, vanilla, lemon juice, and zest until the mixture is creamy and smooth.

  2. Incorporate Dry Ingredients: Add the almond flour, baking powder, salt, and sweetener one at a time. Stir gently until just combined.

  3. Prepare the Berries: Toss your blueberries lightly in a teaspoon of extra almond flour. This “secret” step keeps the blueberries from sinking to the bottom of your cake! Gently fold them into the batter.

  4. Bake: Pour the batter into a buttered loaf pan. Bake at 175°C (350°F) for 35–40 minutes until the top is golden and a toothpick comes out clean.

  5. Cool: Allow the cake to cool fully before frosting; otherwise, the cream cheese topping will melt!

  6. Frosting and Garnish: Beat the frosting ingredients until fluffy. Spread generously over the cake and garnish with extra blueberries and lemon zest for a professional finish.


Success Tip

For the best texture, ensure your cream cheese and butter are truly softened before mixing. This prevents lumps and ensures that beautiful, even crumb seen in the photo!

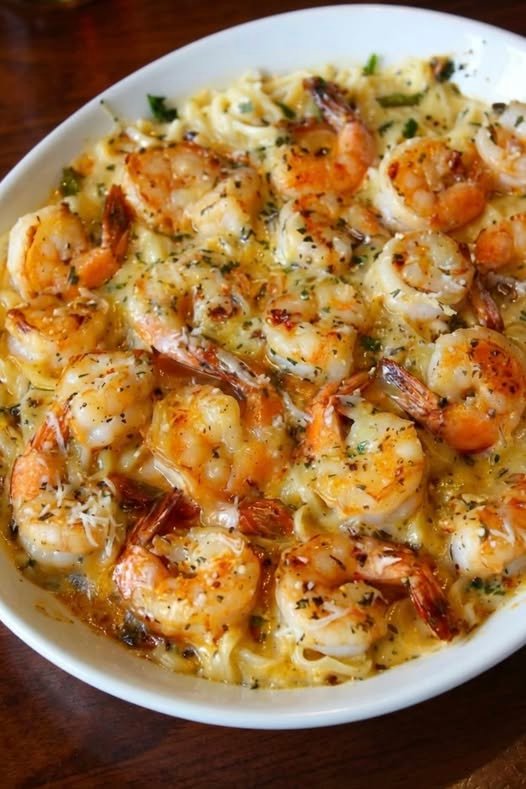
🍤 Shrimp Scampi Pasta Bake

🍤 Shrimp Scampi Pasta Bake

Prep Time: 15 minutes
Cook Time: 20 minutes
Serves: 6


🛒 Ingredients

  • 12 oz linguine or spaghetti

  • 1 lb large shrimp, peeled & deveined

  • 4 tbsp butter

  • 4 cloves garlic, minced

  • ¼ tsp red pepper flakes (optional)

  • ½ cup white wine or chicken broth

  • Zest and juice of 1 lemon

  • 1 cup heavy cream

  • ½ cup grated Parmesan cheese

  • 1 cup shredded mozzarella cheese

  • Salt & black pepper, to taste

  • 2 tbsp fresh parsley, chopped


👩‍🍳 Instructions

1️⃣ Preheat oven to 375°F (190°C).

2️⃣ Cook pasta until al dente. Drain and set aside.

3️⃣ Sauté garlic:
Melt butter in a large skillet over medium heat.
Add garlic and red pepper flakes. Cook 1 minute.

4️⃣ Cook shrimp:
Add shrimp and cook 3–4 minutes until pink.
Remove shrimp and set aside.

5️⃣ Make sauce:
Add wine (or broth) to skillet. Simmer 2 minutes, scraping pan.
Stir in lemon juice, lemon zest, and cream. Simmer gently.

6️⃣ Combine pasta:
Add cooked pasta to sauce. Toss well.
Season with salt and pepper.

7️⃣ Assemble:
Transfer pasta to baking dish.
Arrange shrimp on top.
Sprinkle Parmesan and mozzarella evenly.

8️⃣ Bake:
Bake 15–20 minutes until cheese is melted and bubbly.

9️⃣ Finish:
Garnish with parsley. Serve hot.


🔁 Variations

  • Chicken instead of shrimp

  • Zucchini noodles for low-carb

  • Gluten-free pasta

  • Extra spice with Cajun seasoning

  • Broth instead of wine


🧊 Storage

Fridge: 3 days
Freezer: up to 3 months
Reheat in oven or microwave.

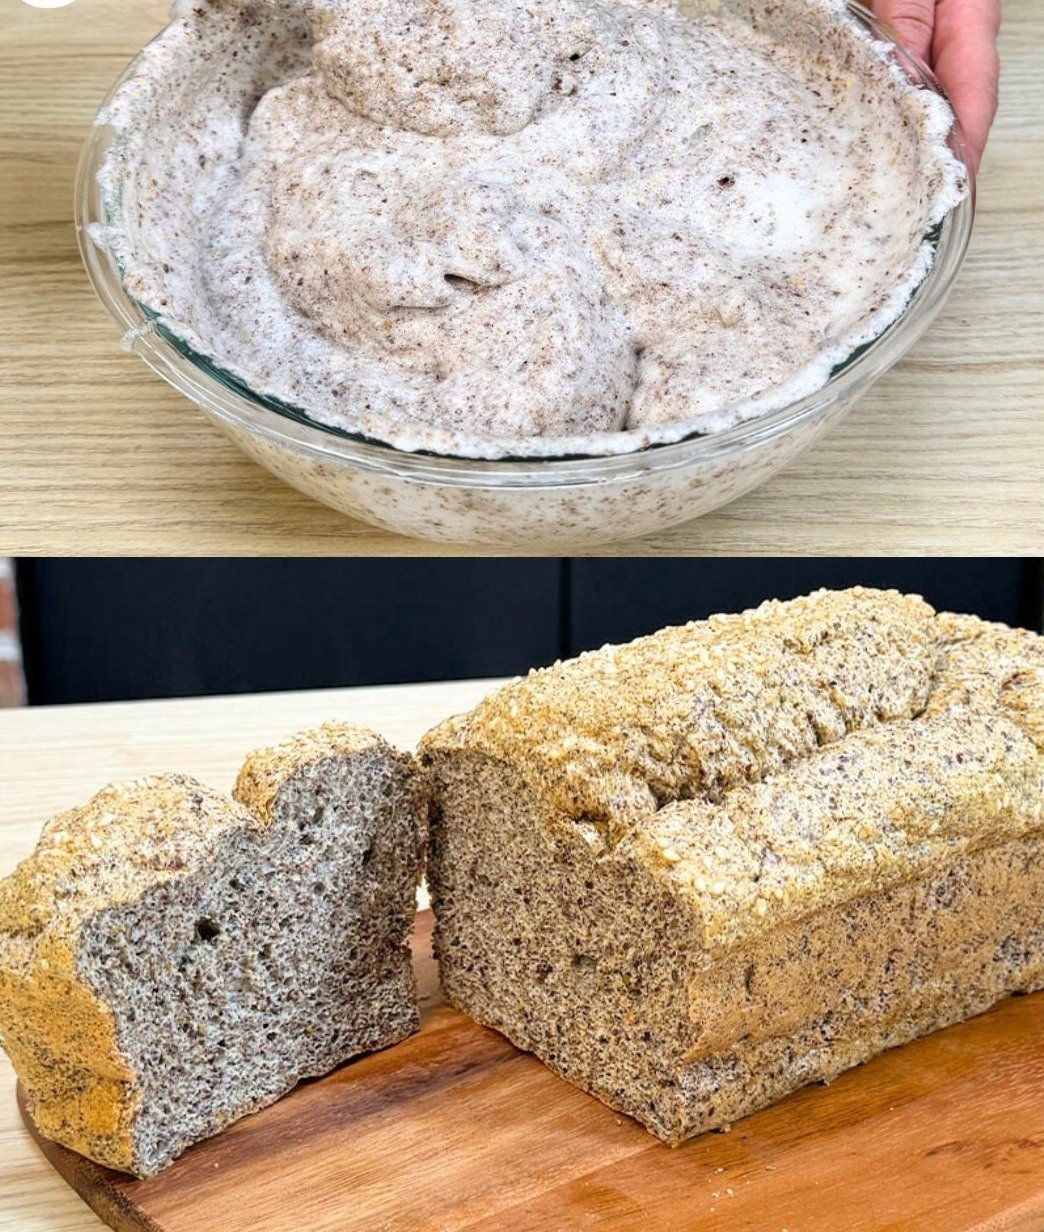
2 Ingredient Low-Carb Protein Bread

Quick, soft, and protein-packed bread made with just egg whites and chia seeds.

Servings: 8 slices
Prep Time: 10 minutes
Cook Time: 35 minutes
Total Time: 45 minutes
Dietary Badges: High-Protein, Low-Carb, Gluten-Free, Vegetarian

Ingredients

  • 500 grams egg whites
  • 180 grams chia seeds
  • Sesame seeds, optional, for topping

Instructions

1. Prepare the chia flour

  • Use a blender or food processor to grind 180 grams of chia seeds into a fine flour.
  • Set aside.

2. Whip the egg whites

  • In a large bowl, use an electric mixer to whip 500 grams of egg whites until very frothy but not stiff.

3. Combine ingredients

  • Gradually fold the chia seed flour into the frothy egg whites.
  • Mix gently until just combined, taking care not to over-mix to preserve the airiness.

4. Prepare the loaf pan

  • Grease or line a loaf pan with parchment paper to prevent sticking.

5. Bake

  • Transfer the batter into the prepared loaf pan, spreading it evenly.
  • Bake in a preheated oven at 180°C (356°F) for 35 minutes.

6. Cool and serve

  • Allow the bread to cool in the pan for 10 minutes before transferring to a wire rack.
  • Slice and enjoy immediately or store as preferred.

Additional Notes

  • Topping: Lightly sprinkle sesame seeds on top before baking for added texture and flavor.
  • Texture Tip: Folding gently preserves the airiness of the bread, resulting in a soft and fluffy texture.
  • Dietary Note: This bread is naturally gluten-free and very low in carbs.

Ingredient Details and Substitutions

  • Chia Seeds: Provide fiber, protein, and healthy fats. Ground into a flour to absorb moisture and help the bread rise.
  • Egg Whites: Act as the primary structure and protein source. Using pasteurized egg whites ensures safety if consumed lightly cooked.
  • Substitutions:
    • No chia seeds? Flaxseed meal can be used, but it will alter texture slightly.
    • Optional sesame seeds can be replaced with poppy seeds or omitted entirely.

Equipment Alternatives

  • No food processor? Use a high-speed blender to grind chia seeds.
  • No electric mixer? Whisk egg whites vigorously by hand, though it may take longer to reach frothy consistency.

Serving Suggestions

  • Serve toasted with avocado or nut butter for a quick breakfast.
  • Use as sandwich bread for a high-protein lunch.
  • Pair with soups or stews for a low-carb accompaniment.

Storage, Make-Ahead, and Reheating

  • Storage: Store in an airtight container at room temperature for up to 2 days, or refrigerate for up to 5 days.
  • Freezing: Slice and freeze individually for up to 2 months; thaw in the fridge or at room temperature.
  • Reheating: Warm slices in a toaster or oven at 160°C (320°F) for 5 minutes.

Nutrition Facts (per slice, yields 8 slices)

  • Calories: 60 kcal
  • Protein: 7 g
  • Carbs: 2 g
  • Fat: 2 g
  • Fiber: 2 g
  • WW Points: 1

Dietary Highlights: High-protein, low-carb, gluten-free, vegetarian.
Allergens: Egg.


Recipe Variations

  • Add 1 tsp cinnamon or cocoa powder to the batter for a flavored variation.
  • Mix in 1–2 tbsp chopped nuts or seeds for extra texture.
  • Top with a sprinkle of herbs (like rosemary) for a savory twist.

Frequently Asked Questions

Q: Can I use whole eggs instead of egg whites?

  • A: Using whole eggs will change texture and moisture content. Bread may be slightly denser.

Q: Why is it important not to over-mix?

  • A: Over-mixing collapses the air in the egg whites, resulting in denser bread.

Q: Can I double this recipe?

  • A: Yes, use a larger loaf pan and extend baking time slightly. Check doneness with a toothpick.

Q: Can I use chia flour instead of grinding whole seeds?

  • A: Yes, 180 grams of chia flour can be used directly.

Personal Notes

I developed this 2-ingredient protein bread when I wanted a quick, low-carb alternative to traditional bread. It’s surprisingly soft and versatile, perfect for breakfasts or snacks. I often toast it and add avocado or a fried egg for a satisfying start to the day.

Creamy Potato & Cheese Bake with Savory Layers

Creamy Potato & Cheese Bake with Savory Layers

There’s something so comforting about a warm dish of Potato and Cheese Bake. This recipe has become a favorite among home cooks, and it’s easy to see why! It combines tender potatoes with creamy cheese and savory ingredients, creating a deliciously rich and satisfying meal. Perfect for family dinners or when you’re having friends over, this dish not only fills your stomach but also your heart. Plus, it’s super easy to make, even if you’re not a seasoned chef!

What Goes Into This Potato and Cheese Bake

Here’s what you’ll need to whip up this delightful dish:

  • 1 kilogram (about 2.2 pounds) of potatoes
  • 3 tablespoons olive oil
  • 2 teaspoons salt
  • Black pepper to taste
  • 5 eggs
  • 300 ml (about 1 ¼ cups) cooking cream
  • 1 tomato, diced
  • A bunch of green onions, diced
  • 100 grams (about 3.5 ounces) of ham, diced
  • 200 grams (about 7 ounces) of yellow cheese, grated
  • Garlic powder to taste
  • 2 tablespoons butter
  • 1 tablespoon breadcrumbs

How to Make Potato and Cheese Bake

Follow these simple steps to create your own Potato and Cheese Bake:

  1. Start by peeling the potatoes and slicing them into rounds. In a bowl, toss the sliced potatoes with olive oil, salt, and black pepper. Mix in 50 grams of grated yellow cheese for extra flavor.
  2. Grease a baking dish with butter and sprinkle the bottom with breadcrumbs. Arrange the seasoned potatoes in the dish, making sure to cover the sides. Bake in a preheated oven at 200 degrees Celsius (about 400 degrees Fahrenheit) for 15 minutes.
  3. While the potatoes are baking, grab a separate bowl and beat together the eggs, cooking cream, a pinch of black pepper, salt, and a sprinkle of garlic powder.
  4. Next, wash, peel, and dice the tomato, green onions, and ham. Don’t forget to grate the remaining yellow cheese. Add all these ingredients to the egg mixture and combine well.
  5. Once 15 minutes is up, take the potatoes out of the oven and gently pour the cream mixture over them. Return the dish to the oven and bake for an additional 30 minutes at 180 degrees Celsius (about 350 degrees Fahrenheit), until everything is set and golden.

Why This Potato and Cheese Bake Is So Popular Right Now

People are loving this Potato and Cheese Bake for a few key reasons. First, it’s a fantastic comfort food option that warms you up, especially in colder weather. With the rise of home cooking trends, this dish offers a nostalgic taste that many are eager to recreate. It’s also incredibly convenient; using simple ingredients, you can whip up a filling meal without spending hours in the kitchen. Taking just one hour from start to finish makes it a quick choice for weeknight dinners too!

Best Ways to Serve It

You can enjoy Potato and Cheese Bake for any meal of the day! It makes a fabulous breakfast alongside fresh fruit or a light salad at lunch. For dinner, pair it with steamed vegetables or a crisp garden salad to balance out the richness. Want to add a special touch? Top it with some fresh herbs right before serving or a dollop of sour cream for that extra creamy finish.

Helpful Tricks

  • Storage Tips: If you have leftovers, store them in an airtight container in the refrigerator for up to 3 days. Reheat in the oven for best results.
  • Flavor Variations: Feel free to add more veggies like bell peppers or spinach to boost the nutrition.
  • Cheese Swap: You can experiment with different types of cheese. A sharp cheddar or a creamy gouda can add new flavors!

Potato and Cheese Bake FAQs

Can I freeze Potato and Cheese Bake?

Yes, you can freeze it! Just make sure to let it cool completely before wrapping it tightly and placing it in the freezer. It should last for up to 3 months.

How do I know when it’s done baking?

The dish is ready when the top is golden brown and a knife inserted in the center comes out clean.

Can I use a different kind of cream?

Absolutely! If you want a lighter option, you can use half-and-half or even milk for a lower-fat version.

Try making this Potato and Cheese Bake at home and enjoy the comforting flavors it brings to your table. It’s an easy recipe that’s sure to please everyone! Happy cooking!

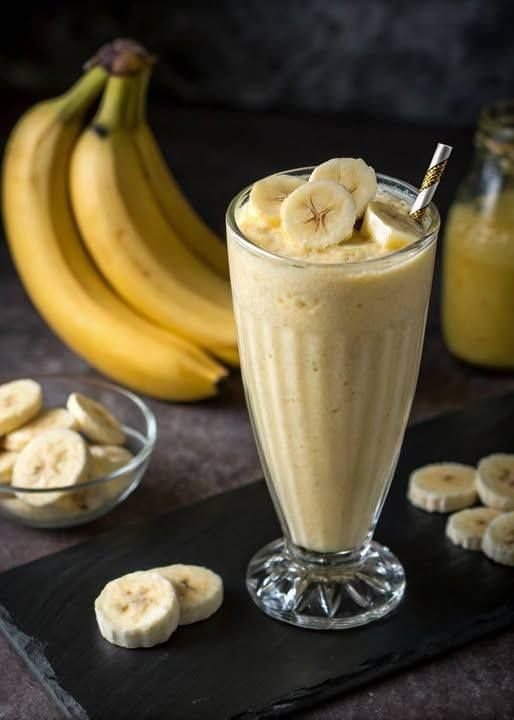
Classic Creamy Banana Smoothie

Classic Creamy Banana Smoothie

Prep time: 5 minutes | Servings: 1 large glass


Ingredients

  • 2 ripe bananas (The more spots on the skin, the sweeter the smoothie will be!)

  • 1 cup milk of choice (Whole milk for extra creaminess, or almond/oat milk for a lighter version)

  • 1/2 cup Greek yogurt (Plain or vanilla; this provides that thick, velvety texture)

  • 1/2 cup ice cubes (Use frozen banana slices instead if you want it even thicker)

  • 1 tsp honey or maple syrup (Optional, depending on how sweet your bananas are)

  • A pinch of cinnamon (Optional, for warmth)


Instructions

  1. Prep the Fruit: Peel your bananas. For the best result, slice one and freeze it for 30 minutes beforehand—this creates a “milkshake” consistency without needing as much ice.

  2. Combine: Add the milk, yogurt, bananas, and sweetener into your blender.

  3. Blend: Start on a low speed to break up the fruit, then increase to high. Blend for about 45–60 seconds until the mixture is completely smooth and no lumps remain.

  4. Check Consistency: If it’s too thick, add a splash more milk. If it’s too thin, add more ice or another half-banana.

  5. Serve & Garnish: Pour into a tall glass. To match your photo, top with a few fresh banana slices and a decorative straw.


Pro Tips for the Best Result

  • The “Spot” Rule: Use bananas that have brown speckles on the peel. These have higher sugar content and blend much smoother than firm, green-tipped ones.

  • Storage: Smoothies are best enjoyed immediately, but if you have leftovers, you can freeze them in popsicle molds for a healthy frozen treat!