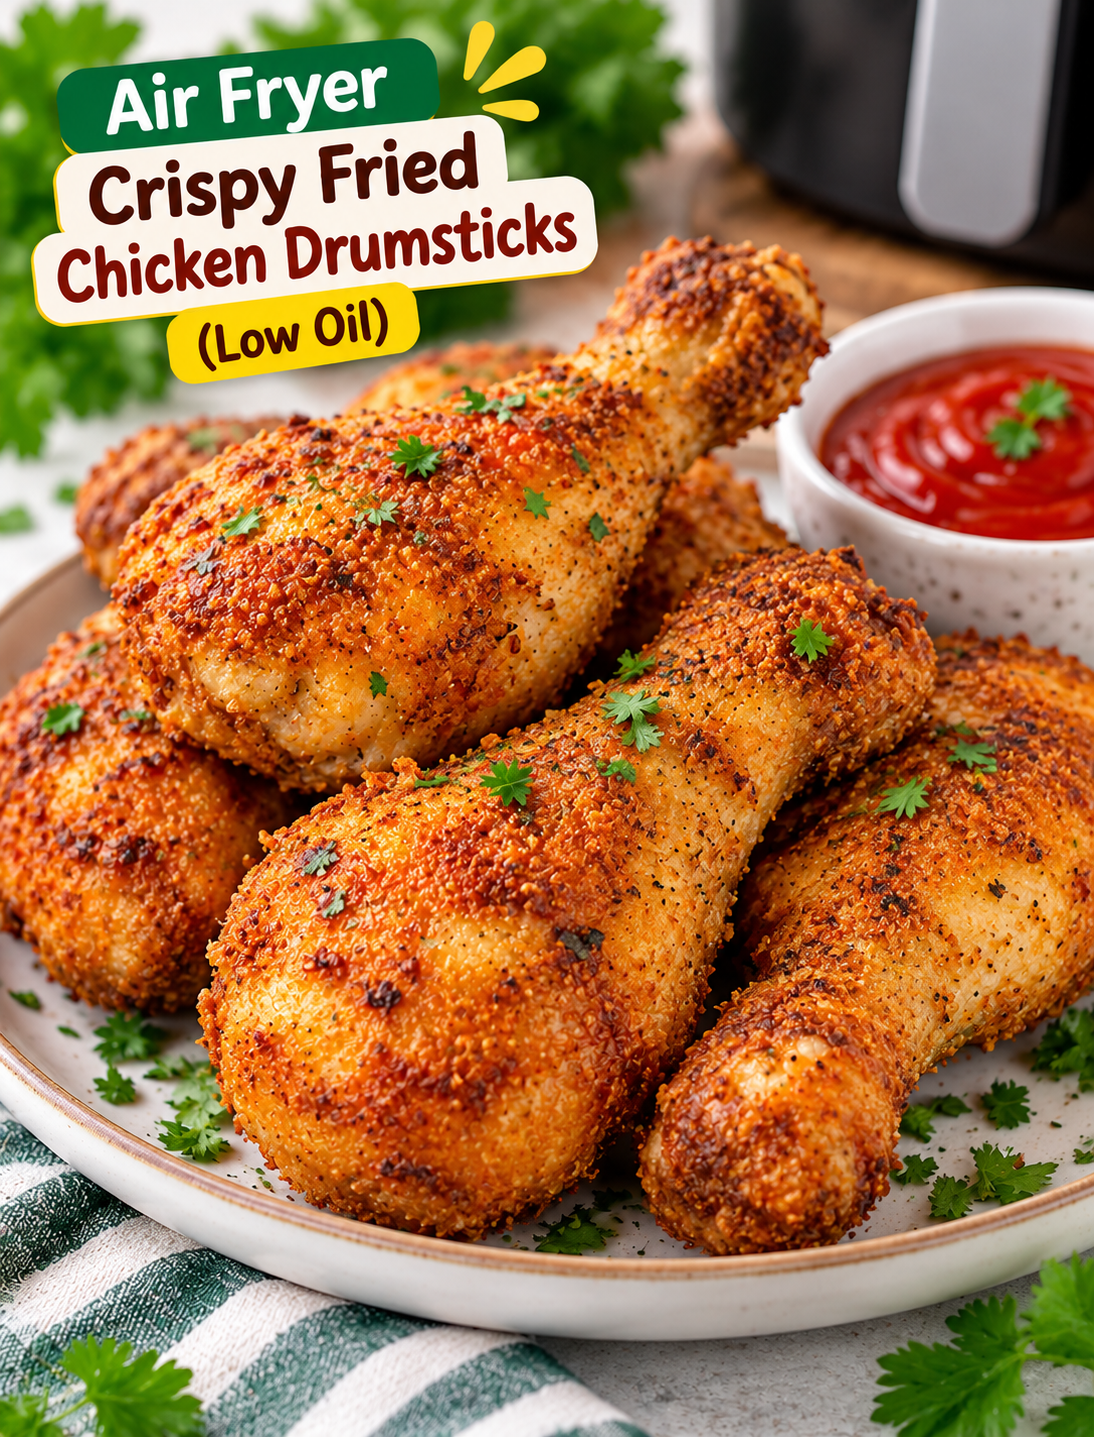
Craving crispy fried chicken without the mess of a pot of hot oil? These Air Fryer Crispy Fried Chicken Drumsticks deliver a crunchy, golden coating with juicy, tender meat inside. They use a light coating of oil and simple pantry seasonings to create a delicious chicken dinner with less oil than traditional deep-frying.
This easy recipe is perfect for busy weeknights, family dinners, game-day snacks, or weekend gatherings. A flavorful seasoning blend adds savory taste, while a seasoned flour coating creates the crisp texture everyone loves. The air fryer circulates hot air around each drumstick, helping the outside brown while the chicken cooks through.
Serve these crispy chicken drumsticks with coleslaw, roasted potatoes, corn on the cob, or your favorite dipping sauce. Once you learn a few simple tricks, you can make this satisfying meal at home without standing over a frying pan.
Why You’ll Love This Recipe
- Crispy coating: A seasoned flour mixture creates a crunchy exterior when cooked with a light oil coating.
- Juicy chicken: The drumsticks stay tender when you avoid overcooking them.
- Less oil: Air frying requires much less oil than traditional deep-frying.
- Easy ingredients: The recipe uses everyday seasonings and basic pantry staples.
- Simple preparation: Coat the chicken, arrange it in the basket, and let the air fryer do most of the work.
- Family-friendly meal: Serve the drumsticks with classic American sides for an easy dinner.
- Flexible seasoning: Adjust the paprika, black pepper, and cayenne to suit your preferred heat level.
Recipe Overview
- Prep Time: 15 minutes
- Cook Time: 22–28 minutes
- Total Time: 37–43 minutes
- Servings: 4
- Yield: 8 chicken drumsticks
- Cooking Temperature: 380°F (193°C)
- Cooking Method: Air fryer
- Cuisine: American-inspired
- Main Ingredients: Chicken drumsticks, flour, seasonings, and oil
Cooking time depends on drumstick size, air fryer model, and how many pieces fit in the basket. Always check the internal temperature before serving.
Ingredients You’ll Need
For the Chicken
- 8 chicken drumsticks, about 2–2½ pounds
- 1 tablespoon olive oil or avocado oil
- 1/2 teaspoon salt, or to taste
- 1/2 teaspoon ground black pepper
- 1 teaspoon garlic powder
- 1 teaspoon onion powder
- 1 teaspoon paprika
- 1/2 teaspoon dried oregano
- 1/4 teaspoon cayenne pepper, optional
For the Crispy Coating
- 1/2 cup all-purpose flour
- 2 tablespoons cornstarch
- 1 teaspoon paprika
- 1/2 teaspoon garlic powder
- 1/2 teaspoon salt
- 1/4 teaspoon black pepper
Optional Ingredients
- 1/4 teaspoon baking powder for a lighter, craggy coating
- 1/2 teaspoon dried thyme for extra savory flavor
- Hot sauce for serving
- Lemon wedges for a fresh finish
Use cornstarch with the flour to help create a crisp coating. Patting the chicken dry before seasoning also helps the flour mixture stick better.
Step-by-Step Instructions
Step 1: Prepare the Chicken Drumsticks
- Remove the drumsticks from their packaging.
- Pat each piece thoroughly dry with paper towels.
- Trim any loose skin or excess fat if needed.
- Place the chicken in a large mixing bowl.
Dry chicken gives the seasoning and coating a better chance to stick. Do not rinse raw chicken because splashing water can spread harmful bacteria around the sink and nearby surfaces.
Step 2: Season the Chicken
- Add the salt, black pepper, garlic powder, onion powder, paprika, oregano, and optional cayenne to the chicken.
- Drizzle the olive oil over the drumsticks.
- Toss the chicken until each piece is evenly coated.
- Let the seasoned chicken rest for 5–10 minutes while you prepare the flour mixture.
The seasonings add flavor beneath the crispy exterior. For a milder version, leave out the cayenne pepper.
Step 3: Mix the Crispy Flour Coating
- Add the all-purpose flour to a shallow bowl.
- Mix in the cornstarch, paprika, garlic powder, salt, and black pepper.
- Stir with a fork until the seasonings are evenly distributed.
- Add the optional baking powder if you want a more textured coating.
A shallow bowl makes it easier to coat the drumsticks evenly. Break up any lumps so that each piece receives a thin, consistent layer.
Step 4: Coat Each Drumstick
- Place one seasoned drumstick in the flour mixture.
- Turn it several times to cover all sides.
- Press the coating gently against the skin.
- Shake off any loose flour.
- Transfer the coated drumstick to a clean plate.
- Repeat with the remaining pieces.
Keep the coating relatively thin because thick patches of dry flour may remain powdery after cooking. If the flour looks completely dry on the chicken, lightly mist those spots with oil before air frying.
Step 5: Preheat the Air Fryer
- Preheat the air fryer to 380°F (193°C) for 3–5 minutes if your model recommends preheating.
- Check that the basket is clean and dry.
- Lightly spray the basket with an air-fryer-safe oil if needed.
Preheating helps the coating begin browning quickly. Check your appliance manual for any specific preheating instructions.
Step 6: Arrange the Drumsticks in the Basket
- Place the coated drumsticks in a single layer.
- Leave space between the pieces so hot air can circulate.
- Avoid stacking or overlapping the chicken.
- Lightly spray the exposed flour coating with oil.
The oil helps the flour brown and reduces dry, powdery spots. Cook in batches if the drumsticks do not fit comfortably in one layer.
Step 7: Air Fry Until Crispy
- Cook the drumsticks at 380°F (193°C) for 10–12 minutes.
- Carefully turn each piece with tongs.
- Lightly spray any remaining dry flour patches with oil.
- Continue cooking for another 12–16 minutes.
- Check the thickest part of the largest drumstick with a meat thermometer, avoiding the bone.
- Continue cooking in short intervals if the chicken has not reached a safe internal temperature.
The total cooking time is usually 22–28 minutes, but larger pieces may need longer. The coating should be golden brown, and the meat must reach at least 165°F (74°C) internally to be safe to eat.
Step 8: Rest and Serve
- Transfer the cooked drumsticks to a clean plate or wire rack.
- Let them rest for about 3–5 minutes.
- Check that the coating remains crisp and the chicken is fully cooked.
- Serve warm with your favorite side dishes and dipping sauces.
Avoid covering the chicken tightly with foil while it rests because trapped steam can soften the crispy coating.
Expert Tips for Extra Crispy Chicken Drumsticks
- Pat the chicken dry: Excess moisture makes the coating harder to crisp.
- Use cornstarch: Combining cornstarch with flour helps create a lighter, crispier crust.
- Spray the coating lightly: Oil helps the flour brown instead of staying powdery.
- Avoid overcrowding: Space between the drumsticks improves airflow and browning.
- Turn halfway through: Flipping helps the chicken cook more evenly.
- Use a thermometer: Color alone cannot confirm that chicken is safely cooked.
- Choose similar-sized pieces: Drumsticks of similar size are more likely to finish at the same time.
- Serve promptly: Air-fried chicken has its best texture shortly after cooking.
Delicious Variations to Try
Spicy Air Fryer Chicken Drumsticks
Add 1/2 teaspoon cayenne pepper and 1/2 teaspoon chili powder to the flour coating. Serve with hot sauce for extra heat.
Garlic Parmesan Drumsticks
Mix 2 tablespoons finely grated Parmesan with the dry coating. After cooking, sprinkle a little more Parmesan over the hot chicken if desired.
Smoky BBQ Chicken Drumsticks
Add 1/2 teaspoon smoked paprika to the seasoning mixture. Brush the cooked drumsticks lightly with barbecue sauce during the final 2–3 minutes, watching carefully to prevent the sauce from burning.
Lemon Herb Chicken Drumsticks
Add dried thyme, oregano, and a little lemon zest to the seasoning. Serve with fresh lemon wedges for a bright, savory finish.
Gluten-Free Option
Replace the all-purpose flour with a gluten-free flour blend suitable for coating. Check all seasonings and other packaged ingredients for gluten if you need to avoid it strictly.
What to Serve With Crispy Chicken Drumsticks
Pair these air-fried drumsticks with familiar sides for a balanced and satisfying meal.
- Coleslaw: Cool, crunchy cabbage adds a refreshing contrast to the crispy chicken.
- Roasted potatoes: Season potato wedges with garlic and paprika for a hearty side.
- Corn on the cob: Serve boiled or roasted corn with a little butter and black pepper.
- Green salad: Combine lettuce, cucumber, tomatoes, and your favorite dressing.
- Macaroni and cheese: Creamy pasta complements the crunchy coating.
- Steamed green beans: Add a simple vegetable side without extra frying.
- Dipping sauces: Ranch, honey mustard, barbecue sauce, and hot sauce all pair well with chicken.
For a casual family dinner, serve two drumsticks per adult with one vegetable side and one filling side.
How to Store and Reheat Leftovers
Refrigerating
Allow the chicken to cool slightly, then refrigerate it in a shallow, airtight container within 2 hours of cooking. Use refrigerated leftovers within 3–4 days.
Freezing
Let the cooked drumsticks cool, then freeze them in a freezer-safe container or bag. For best quality, use within 2–3 months. Thaw in the refrigerator before reheating for more even results.
Reheating in the Air Fryer
- Preheat the air fryer to 350°F (175°C).
- Arrange the refrigerated drumsticks in a single layer.
- Heat for about 5–8 minutes, turning once if needed.
- Check that the center reaches 165°F (74°C) before serving.
Reheating time depends on the size and starting temperature of the chicken. Avoid repeated reheating because it can dry out the meat and reduce its quality.
Common Mistakes to Avoid
- Skipping the drying step: Wet skin can lead to uneven coating.
- Leaving excess flour on the chicken: Thick dry patches may not crisp properly.
- Using too little oil on dry spots: Flour that is not lightly coated may remain pale and powdery.
- Overcrowding the basket: Packed drumsticks block airflow and cook unevenly.
- Setting the temperature too high: The outside may darken before the meat cooks through.
- Relying on color alone: Golden chicken is not always fully cooked inside.
- Covering the cooked chicken tightly: Steam can soften the crust.
- Putting cooked chicken on the raw-chicken plate: Always use clean plates, utensils, and a clean thermometer probe.
Frequently Asked Questions
1. How long do chicken drumsticks take in the air fryer?
At 380°F (193°C), plan for about 22–28 minutes, turning halfway through, and cook until the thickest part reaches 165°F (74°C).
2. How do I make air fryer drumsticks extra crispy?
Pat the chicken dry, use a flour and cornstarch coating, spray dry flour patches lightly with oil, and leave space between the pieces.
3. Do I need to boil chicken drumsticks before air frying?
No. Raw drumsticks can cook directly in the air fryer when the cooking time is sufficient and the internal temperature reaches 165°F (74°C).
4. Can I make this recipe without flour?
Yes. You can use seasoned cornstarch or a suitable gluten-free coating, although the texture may differ from the flour-based version.
5. Why is my chicken coating still powdery?
The coating may have too much flour or too little oil. Shake off excess flour and lightly spray any dry patches before cooking.
6. Can I use frozen chicken drumsticks?
For the most even coating and cooking, thaw the drumsticks safely in the refrigerator before following this recipe.
7. Can I prepare the chicken ahead of time?
You can season and refrigerate the chicken in a covered container, then coat it shortly before cooking for the best crust.
8. How do I know when chicken drumsticks are done?
Insert a meat thermometer into the thickest part without touching the bone; the internal temperature must reach at least 165°F (74°C).
Final Thoughts
Air Fryer Crispy Fried Chicken Drumsticks are a practical way to enjoy crunchy, flavorful chicken at home with much less oil than traditional deep-frying. A simple seasoning blend, a flour-and-cornstarch coating, and proper air circulation help create a golden crust while keeping the meat tender.
For the best results, dry the chicken thoroughly, coat each piece evenly, and avoid overcrowding the basket. Most importantly, use a meat thermometer to confirm that every drumstick reaches 165°F (74°C).
Serve these drumsticks with your favorite sides and dipping sauces for an easy family dinner or a crowd-pleasing game-day meal. If you try this recipe, leave a comment and share which seasoning variation you enjoyed most!