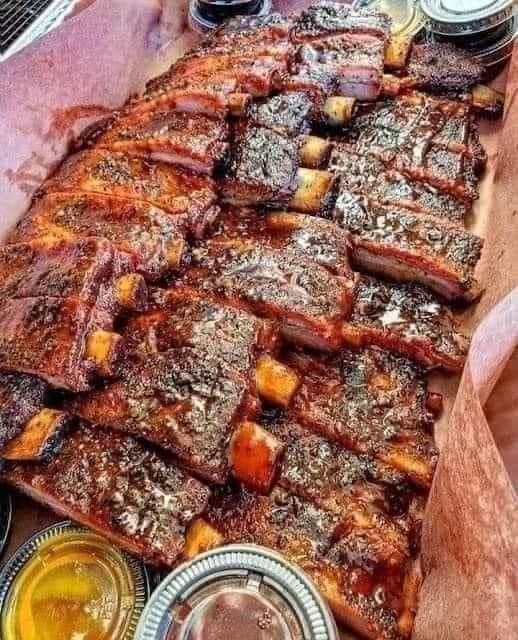
Oven Barbeque Ribs Recipe

Oven Barbecue Ribs slathered in the most delicious sticky barbecue sauce with a kick of garlic and optional heat! Juicy melt-in-your-mouth oven baked Barbecue Pork Ribs are fall-off-the-bone delicious! Double up on incredible flavour with an easy to make dry rub first, then coat them in a seasoned barbecue sauce mixture so addictive you won’t stop at one! Finger licking good ribs right here! 

Prep Time: 10mins

Cook Time: 2hrs 15mins

Total Time: 2hrs 25mins

Course: Dinner

Cuisine: American

Keyword: Oven, Pork Ribs Servings: 4 – 6 people 

Ingredients

RIBS:

  • 4 pounds (2 kg) baby back pork ribs
  • 2 teaspoons garlic powder
  • 1 teaspoon onion powder
  • 2 teaspoons paprika
  • 2 teaspoons salt
  • 1 teaspoon cracked black pepper
  • 1/2 teaspoon cumin
  • 1 teaspoon chili or Cayenne powder (optional)
  • 2 tablespoons olive oil
  • SAUCE:
  • 2 cups (500ml) barbecue sauce
  • 3 tablespoons minced garlic
  • 2 tablespoons olive oil
  • 1 tablespoon Worcestershire sauce
  • 1/2 – 1 tablespoon cayenne pepper (optional for heat)
  • 1 teaspoon salt

Instructions:

  1. Preheat oven to 350°F (180°C).
  2. Peel off tough membrane that covers the underside/bony side of the ribs. Place on a baking sheet or tray lined with foil (or parchment paper).
  3. Combine together garlic powder, onion powder, paprika, salt, pepper, cumin and chili or Cayenne. Sprinkle seasoning over ribs and drizzle with oil. Rub the seasoning all over the ribs on both sides. Cover tray with foil and bake for 2 hours.
  4. During the last 5 minutes of cook time, mix together sauce ingredients.
  5. Remove ribs from the oven, remove foil and spread the tops of the ribs with the barbecue sauce mixture.
  6. Increase oven temperature to 460°F (240°C). Return ribs to the oven, uncovered, and bake for a further 10 minutes. Change oven settings to broil (or grill) on medium-high heat to lightly char and caramelise the edges (about 3 minutes).
  7. Rest for 10 minutes to allow the juices to recirculate back into the meat before slicing.
  8. Enjoy!
NUTRITIONAL INFO:

Calories: 630kcal | Carbohydrates: 32g | Protein: 45g | Fat: 34g | Saturated Fat: 6g | Cholesterol: 167mg | Sodium: 1776mg | Potassium: 951mg | Fiber: 1g | Sugar: 24g | Vitamin A: 500IU | Vitamin C: 2.5mg | Calcium: 86mg | Iron: 2.9mg

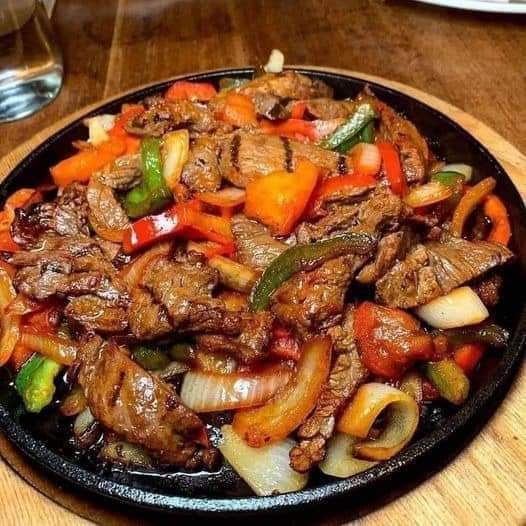
Chinese Pepper Steak with Onions

If you love restaurant-style Chinese Pepper Steak with onions, you’ll love this quick and easy stir-fry recipe! Featuring tender slices of beef stir-fried in a sticky, rich garlic pepper sauce with onions, bell peppers, and plenty of delicious flavor. It’s a simple 30-minute weeknight dinner that’s sure to impress!

If you love the popular Pepper Steak with Onions at your favorite Chinese restaurant, you’ll love this quick and easy recipe! Featuring tender steak stir-fried in a sticky, rich garlic pepper sauce with onions and peppers, this is a weeknight dinner that’s sure to impress.

Prep Time: 20 mins

Cook Time: 10 mins

Total Time: 30 mins

Course: entree, Main Course

Cuisine: Chinese

Keyword: black pepper beef, Pepper Steak, pepper steak with onions

Servings: 4 servings

INGREDIENTS:

Steak:

  • 1 TBS EACH: Low-Sodium Soy Sauce, Mirin & Cornstarch
  • 1 pound Steak(s) – excess fat trimmed & thinly sliced into ½ to ¼-inch thick strips (SEE NOTES)
  • Pepper Sauce
  • ½ Cup Low-Sodium Beef Broth (sub: chicken broth or ½ bouillon cube dissolved in water)
  • 3 TBS Low-Sodium Soy Sauce
  • 3 TBS Honey
  • 2 TBS Oyster Sauce
  • 2 TBS Chinese Cooking Wine or Mirin (sub: dry sherry)
  • 1 TBS Cornstarch
  • 1 ¼ tsp Coarsely-Ground Black Pepper (SEE NOTES)
  • ¼ tsp Kosher Salt

Stir-fry:

  • 3 TBS Peanut Oil – DIVIDED (sub: neutral oil, such as canola)
  • 1 medium White Onion – peeled & medium dice
  • 2 small Bell Peppers – seeded & medium dice
  • 2 cloves Garlic – peeled & minced
  • 1 ½ tsp Grated Ginger
  • Optional Garnishes: Sliced Scallions & Toasted Sesame Seeds
  • Serving Suggestions: Steamed Rice/Cauliflower Rice or Cooked Noodles

INSTRUCTIONS:

  1. Marinate steak: In a medium bowl, combine the soy sauce, mirin, and cornstarch. Pat the pieces of beef dry and add them to bowl. Gently stir to completely coat the beef in the marinade. Set aside for 10-15 minutes and continue with the recipe.
  2. Mix pepper sauce: In a glass measure or small bowl, add all the ingredients for the sauce. Whisk well to combine. Set aside.
  3. Cook steak: Heat 1 ½ tablespoons of oil in a wok or large heavy-bottom skillet over HIGH heat. When the oil is shimmering, add the steak to the pan in an even, single layer. Cook – undisturbed – for 30 to 45 seconds or until bottom side is lightly browned. Flip, and continue to cook, stir-frying, for an additional 30 seconds or until almost cooked to your liking. Immediately remove the beef from the pan and transfer to a plate. Set aside (Tip: Do not crowd the pan as that will cause the beef to steam, instead of stir-fry. If necessary to prevent over-crowding, cook the steak in two batching, adding more oil as needed.) (Note: Don’t overcook your steak! If anything, UNDERCOOK it during this step. You will be adding the steak back to the pan in the next steps.)
  4. Cook veggies, then aromatics: Return the pan to stove over MEDIUM heat. Add the remaining 1 ½ tablespoons of oil to the pan. When the oil is hot, add the onions and peppers to the pan. Season with a pinch of salt and pepper. Stir fry the vegetables for 3-4 minutes, or until they are starting to soften. Add the garlic and ginger to the pan. Stir-fry for 30 seconds.
  5. Add the sauce: Give your stir-fry sauce a good whisk to make sure everything is combined, and the cornstarch is fully dissolved. Add the stir fry sauce to the pan and immediately stir the mixture. Reduce the heat to maintain a simmer and cook, stirring occasionally, for 1 minute, or until the sauce resembles a thick syrup and coats the back of a spoon. (Note: The stir-fry garlic pepper sauce will simmer quickly when you add it to the pan, don’t be alarmed).
  6. Add beef: Add the cooked steak back to the pan, along with any juices pooled on the plate. Quickly stir-fry to coat the steak in the sauce, about 30 seconds. Immediately remove from heat.
  7. Serve: Transfer to a large serving platter or individual plates. Top with scallions and sesame seeds if using and serve with rice or noodles. Enjoy!

Notes:

  • Recipe: I recommend reading this recipe all the way through before cooking. Stir fry recipes are quick paced, so you’ll want to have everything prepared and ready to go *before* starting the recipe. Heads up – you need to marinate the steak for at least 10 minutes in step 1!
  • Steak: You can use any steak you love that’s suitable for stir-frying and quick stove-top cooking. For this recipe, I typically use sirloin as it’s the most economical option. However, tenderloin, NY strip and flank steak work well too! Just remember to the flank steak against the grain.
  • Cutting steaks: It’s easiest to cut cold meat. I like to transfer my steaks from the refrigerator to the freezer for 30-45 minutes before slicing to make my life easier. Just don’t forget the steaks in the freezer!!
  • Ground Pepper: The size of your pepper grinds matter in this recipe! If you are using regular ground black pepper (like from a tin), reduce the pepper by half (3/4 tsp). The measurement in the recipe is written for coarsely ground black pepper (like from a pepper mill).

Nutritional Info:

Calories: 440kcal | Carbohydrates: 27g | Protein: 25g | Fat: 27g | Saturated Fat: 9g | Polyunsaturated Fat: 4g | Monounsaturated Fat: 13g | Cholesterol: 69mg | Sodium: 1038mg | Potassium: 547mg | Fiber: 1g | Sugar: 19g | Vitamin A: 1176IU | Vitamin C: 50mg | Calcium: 27mg | Iron: 2mg

Cherry Cheesecake Chimichangas

Cherry Cheesecake Chimichangas are a quick and easy dessert – and perfect for all cheesecake lovers! These homemade chimichangas are irresistibly crispy, deep-fried burritos filled with sweet cherry cheesecake, and rolled in cinnamon-sugar – what could be better? Description Cherry Cheesecake Chimichangas are a quick and easy dessert – and perfect for all cheesecake lovers! These homemade … Read more

Keto Garlic Dinner Rolls

There is no doubt that the one thing everyone craves the most when doing keto is BREAD. Everyone loves the texture and taste of bread so much. So after a lot of experimenting with keto bread recipes, even we could not believe how good these rolls are. They’re fluffy and delicious and will satisfy your … Read more

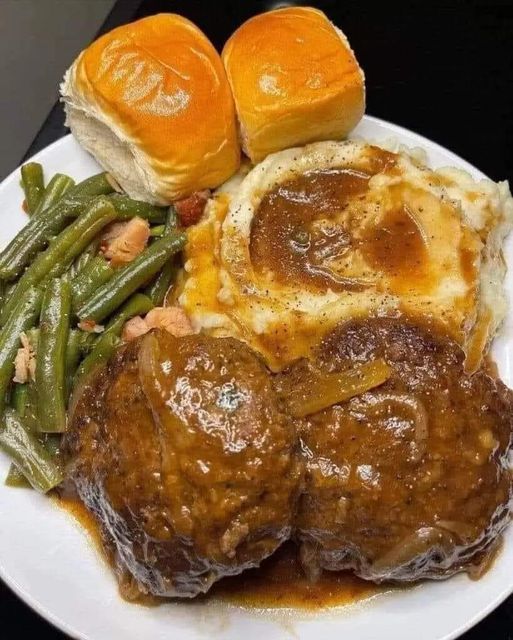
STEAK WITH ONIONS AND GRAVY

Steak with onions and gravy is a classic comfort food dish that’s both hearty and delicious. Here’s a simple recipe to make it: Ingredients for STEAK WITH ONIONS AND GRAVY 2 boneless beef steaks (such as ribeye or sirloin) 2 large onions, thinly sliced 2 tablespoons olive oil 2 cloves garlic, minced 1 cup beef … Read more

Italian Croissants Recipe

Cornetti: the delicious recipe for making soft, fragrant Italian croissants like the bars

Cornetti (pronounced kr-neh-tee) is a delicious, sweet recipe for making Italian croissants. People usually enjoy at breakfast or even as a snack together with a cup of coffee or cappuccino. The Italian word cornetto means “little horn” in English and it stands for are soft leavened brioches made with a lemon and vanilla scented dough.

Said cornetto in the singular, it is a delicious and fragrant recipe like those you can find in the so-called Italian bars (café). You can enjoy a cornetto plain or filled with creams and fruit jams.

With a shiny surface, Italian croissants are made with genuine, simple ingredients such as flour, eggs, milk, butter and sugar. Thanks to the quick puff pastry technique, it is possible to save precious time, obtaining not too sweet nor buttery treats.

Italian cornetti are also called 8-ply croissants precisely because they are made up of eight layers of dough overlapped and stuffed with a delicate cream of butter and sugar. In this way you will avoid having to make the classic folds. The cream of butter should be very soft but not liquid, otherwise it will come out of the sheets, ruining the croissants.

Once you have the triangles of brioche dough, you can leave them empty or fill them with jams, custard or a chocolate spread. In any case, Italian croissants will be delicious and irresistible, the perfect treat to start the day in the best possible way.

Cornetti vs. Croissants

Cornetti are the Italian version of the classic French croissants. Cornetti are as soft as a brioche, but less buttery and rich than croissants yet denser and sweeter.

Another difference is that croissants are often flavored with vanilla and the grated peel of lemons or oranges, while typical French ones are not.

Tips for making Italian Croissants

You can flavor the dough with grated orange zest, cinnamon, vanilla, lemon or orange blossom.

Use high-quality ingredients for this recipe.

How to store Cornetti

Italian croissants can be stored at room temperature, in a special food bag, for 2-3 days. Before serving, heat them for a few minutes in the oven.

Can you freeze Cornetti?

You can also freeze baked or raw cornetti before the second leavening. Arrange them on a baking sheet, store them in the freezer and transfer them to plastic bags once solid. Thaw them at room temperature for 2 to 3 hours, then brush an egg yolk on top and bake cornetti as directed.

Ingredients:

FOR THE LEAVENING
  • FLOUR 0: 70 g
  • WATER: 70 g
  • FRESH BREWER’S YEAST: 15 g
FOR THE DOUGH
  • MANITOBA’S FLOUR: 230 g
  • FLOUR: 230 g
  • FRESH WHOLE MILK: 180 g
  • EGGS: 2
  • GRANULATED SUGAR: 100 g
  • BUTTER, SOFTENED: 60 g
  • LEMON, ZESTED: 1
  • VANILLA EXTRACT: 1 tsp
  • FINE SALT: 8 g
FOR THE BUTTER CREAM
  • BUTTER: 70 g
  • GRANULATED SUGAR: 70 g
FOR BRUSHING AND DECORATING
  • EGG YOLK: 1
  • MILK
  • POWDERED SUGAR
How to make Cornetti Italian Croissants

Step 1

Prepare a leaven by mixing the flour with the water in which you have dissolved the brewer’s yeast. Double the volume, then add the remaining flour.

Step 2

Also combine all the other ingredients: eggs, sugar and milk. Work the dough and, when it takes on consistency, start incorporating the soft butter, a few pieces at a time, the salt and finally the flavorings.

Step 3

Work the dough until it is smooth and stringed (possibly with the stand mixer), form a ball and let it rise for 2-3 hours, until doubled in volume.

Step 4

When the dough has doubled in volume, it is ready to be used.

Step 5

Divide the dough into 8 equal pieces.

Step 6

Shape each of them into balls and let them rest for 10 minutes.

Step 7

Partially roll out each ball with a rolling pin on a lightly floured surface. Let rest for another 10 minutes.

Step 8

Roll out the sheets again until thin and as large as a flat plate.

Step 9

Spread the butter cream and sugar on each sheet.

Step 10

Overlap one sheet on top of the other after spreading the cream on the one below.

Step 11

Place the last sheet that will obviously not be brushed.

Step 12

Let it rest for 10 minutes, then seal the edges well and roll out the 8 sheets with a rolling pin until they are a few mm thick.

Step 13

Cut the resulting circle into quarters using a pastry cutter wheel.

Step 14

Divide each quarter into 3 parts to get 12 triangles.

Step 15

Make a small cut at the base of each triangle, then roll it tightly until you get a crescent shape.

Step 16

Place the Italian croissants on a dripping pan, lined with parchment paper, and let rise until doubled in volume, covered with cling film.

Step 17

When they are swollen, the croissants are ready to be baked

Step 18

Brush the cornetti with the egg yolk, beaten with a drop of milk.

Step 19

Bake the cornetti at 200°C/390°F for about 20 minutes. Take them out of the oven and let them cool.

Step 20

Sprinkle the Italian croissants with a little powdered sugar.

Step 21

Serve and enjoy cornetti.