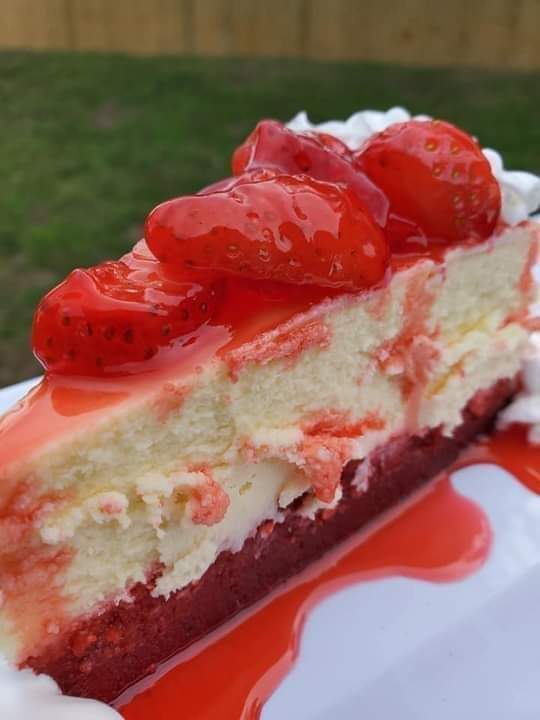
Strawberry Cheesecake Recipe

The perfect summer dessert, this Strawberry Cheesecake recipe comes together easily in a few straightforward steps. A rich, creamy, and smooth cheesecake topped with strawberries, you won’t be able to get enough of it!

Course: Dessert

Cuisine: American

Prep Time: 30mins

Cook Time: 1hr 35mins

Total Time: 9hrs 5 mins

Servings: 8 servings

Ingredients:

For the Crust:

2 ¼ cups graham cracker crumbs (270 g)

3 tablespoons granulated sugar

5 tablespoons unsalted butter melted (70 g)

For the Filling:

3 blocks cream cheese room temperature (8-ounce/227g)

1 ¼ cups granulated sugar (250 g)

¼ teaspoon salt

½ cup sour cream room temperature (120 g)

2 teaspoons lemon zest

2 teaspoons vanilla extract

3 large eggs room temperature, and lightly beaten

For the Topping:

2 pounds fresh strawberries halved and divided (900g)

½ cup granulated sugar (100g)

2 teaspoons vanilla extract

2 teaspoons cornstarch

¾ cup water (180ml)

Instructions:

For the Crust:

Preheat the oven to 350°F. Lightly spray a 9-inch springform pan with baking spray.

In a medium bowl, combine the graham cracker crumbs and sugar. Stir in butter until well incorporated and mixture holds together when tightly squeezed. Transfer the mixture to the prepared pan. Using a tall flat-bottomed glass, press the graham cracker mixture into the bottom and 1 inch up the sides of the pan. (I find it easiest to start with the sides, then press the remaining crumbs into the bottom.) Place the pan on a rimmed baking sheet.

Bake for 10 to 15 minutes or until the crust is fragrant and starting to turn golden brown on the edges. Let cool completely.

For the Filling:

In the bowl of a stand mixer fitted with a whisk attachment, add the cream cheese. Beat on medium-low speed until very smooth, about 2 minutes. Add the sugar and salt and beat until fully incorporated, about 2 minutes more, stopping to scrape down the sides of the bowl a few times during mixing.

Add the sour cream, lemon zest, and vanilla. Beat on medium speed until fully incorporated, about 1 minute. Scrape down bowl. Add the eggs, and beat just until fully combined, about 1 minute, stopping to scrape down the bowl once during mixing. Pour the filling into the cooled crust. (It should come up over the side of the crust and will be very full).

Bake for 15 minutes. Reduce the oven temperature to 300°F and bake until lightly puffed, the filling around edges is set, and the center has a slight jiggle, about 1 hour. Leaving the oven door shut, turn the oven off, and allow the cheesecake to cool for 1 hour. Remove the cheesecake from the oven and let it cool to room temperature. Loosely cover with a tea towel or paper towel and refrigerate overnight or for at least 6 hours.

For the Topping:

In a medium saucepan, combine 1 pound of strawberries, water, and sugar. Sprinkle with cornstarch and stir to combine.

Place the saucepan over medium heat and bring the mixture to a boil, stirring frequently. Boil for 5 minutes. Using a potato masher, mash the strawberries until they are very broken down. Continue cooking until the sauce is thickened, about 10 minutes. Remove from the heat and stir in the remaining 1 pound of strawberries and vanilla. Transfer to a bowl and let cool until lukewarm.

When ready to serve, run a knife around the edge of the cheesecake. Release the spring and removed the sides. Transfer the cheesecake to a serving plate and top with the cooled strawberry sauce. Refrigerate the cheesecake covered for up to 4 days.

Notes:

Do not overwhip the filling as it will introduce too much air to the batter. Overwhipping the batter will make the cheesecake rise too much and collapse in the middle.

Do not open the oven to peek at your strawberry cheesecake. The hot air from the oven will escape, and the cold air enters the oven, causing the cheesecake to fall or crack.

Make sure you budget enough time to make this cheesecake, as it requires several hours to cool.

Room temperature ingredients are ideal as they mix easier without accidentally over mixing. If your eggs are cold, place them in a bowl of warm water.

To bring your cream cheese to room temperature, leave it out the night before or heat it in the microwave for 20 seconds at 50% power.

Nutritional Info:

Calories: 449kcal | Carbohydrates: 76g | Protein: 5g | Fat: 15g | Saturated Fat: 7g | Polyunsaturated Fat: 1g | Monounsaturated Fat: 4g | Trans Fat: 1g | Cholesterol: 97mg | Sodium: 265mg | Potassium: 267mg | Fiber: 3g | Sugar: 60g | Vitamin A: 428IU | Vitamin C: 67mg | Calcium: 66mg | Iron: 2mg

Low Syn Skinny Trifle Recipe

Delicious Fruity Low Syn Skinny Trifle – a perfect summer time treat

We have had some glorious summer weather here the last few days and so I really fancied a summery fruity treat to enjoy while sat out in the garden.

I don’t know why but summer time always makes me crave jelly, probably because it is nice and cold and fruit when out of the fridge.

However rather than just make up a bowl of jelly, I decided on this lovely Skinny Trifles, which are perfect for enjoying while sat out in the garden.

Traditionally Trifle is Jelly with sponge fingers, thick creamy custard and fresh cream. My mum made the most amazing trifles, occasionally though she would add Sherry, but truth be told, I hated it with sherry and wasn’t keen on the sponge fingers either. I much prefer just jelly, custard and cream with a few sprinkles on top.

As these are a skinny trifle version, I’ve skipped the custard and instead gone for a layer of banana yoghurt and berries. It’s a perfect combination, lovely and fruity and refreshing for a warm summers day.

YIELD: 4 SERVINGS

PREP TIME: 10 minutes

TOTAL TIME: 10 minutes

Ingredients:

  • 1 box of sugar free jelly (I used raspberry) – 2 syns
  • 4x80g fat free yoghurt (I used banana)
  • 1.5 cups of mixed berries
  • 4×4 tbs of light aerosol cream – 6 syns
  • 1 tbs of rainbow sprinkles – 1 syn

Instructions:

  1. Make up the jelly by packet instructions
  2. Equally divided among 4 glasses and refrigerate too set.
  3. Top each glass with 80g of yoghurt and mixed berries, then 4 tbs of light aerosol cream.
  4. Sprinkle each glass with 1 tsp of sprinkles.
  5. If only using one, I recommend layering when ready to eat.
  6. Add to a glass, top with the yoghurt, then some fresh fruit and lastly the squirty cream.
  7. ENJOY!!!

A yummy and quick dessert

Notes

This recipe is gluten free, Slimming World and Weight Watchers friendlyExtra Easy – 2.5 syns per servingOriginal – 2.5 syns per servingGreen – 2.5 syns per servingWW Smart Points – 3Gluten Free – ensure all toppings are gluten free

Nutritional information is an estimate and is to be used for informational purposes only.

Nutritional Info:

Yield: 4

Serving Size: 1 serving

Amount Per Serving

Calories99TotalFat2.4gSaturatedFat2.1gSodium97mgCarbohydrates13.2gFiber1.9gSugar9.4gProtein4.6g

Crispy Chicken Strips Recipe

Crispy chicken strips are a kid-friendly dinner that’s perfect for a weeknight! Skip the fast food drive-thru and make perfectly juicy, crispy chicken at home!

Prep Time: 10mins

Cook Time: 10mins

Course: Main Course

Cuisine: American

Keyword: chicken, chicken strips, crispy chicken strips

Servings: 4 

INGREDIENTS:

  • 1 lb boneless skinless chicken breasts cut into strips or chicken tenders
  • 2 eggs
  • 1 cup Panko breadcrumbs
  • ¼ cup grated parmesan cheese
  • ½ teaspoon paprika
  • ½ teaspoon garlic powder
  • salt and pepper to taste
  • olive oil
  • honey mustard dipping sauce

INSTRUCTIONS:

  1. Sprinkle with salt and pepper.
  2. Lightly beat the eggs in a shallow bowl.
  3. In another bowl mix together the breadcrumbs, cheese, paprika, and garlic powder.
  4. Dip the chicken first into the eggs and then into the breadcrumb mixture.
  5. Transfer to a plate while you finish all the pieces this way.
  6. Heat a thin layer of oil in a large nonstick sauté pan over medium heat.
  7. Cook the chicken nuggets for several minutes on each side until they are golden brown. Make sure the nuggets are cooked all the way through.
  8. Transfer the nuggets to a plate lined with paper towels to help drain off any excess oil.
  9. Serve with honey mustard dipping sauce.

Nutritional Info:

Calories: 249kcal | Carbohydrates: 12g | Protein: 31g | Fat: 8g | Saturated Fat: 3g | Polyunsaturated Fat: 1g | Monounsaturated Fat: 2g | Trans Fat: 1g | Cholesterol: 160mg | Sodium: 369mg | Potassium: 497mg | Fiber: 1g | Sugar: 1g | Vitamin A: 330IU | Vitamin C: 1mg | Calcium: 116mg | Iron: 2mg

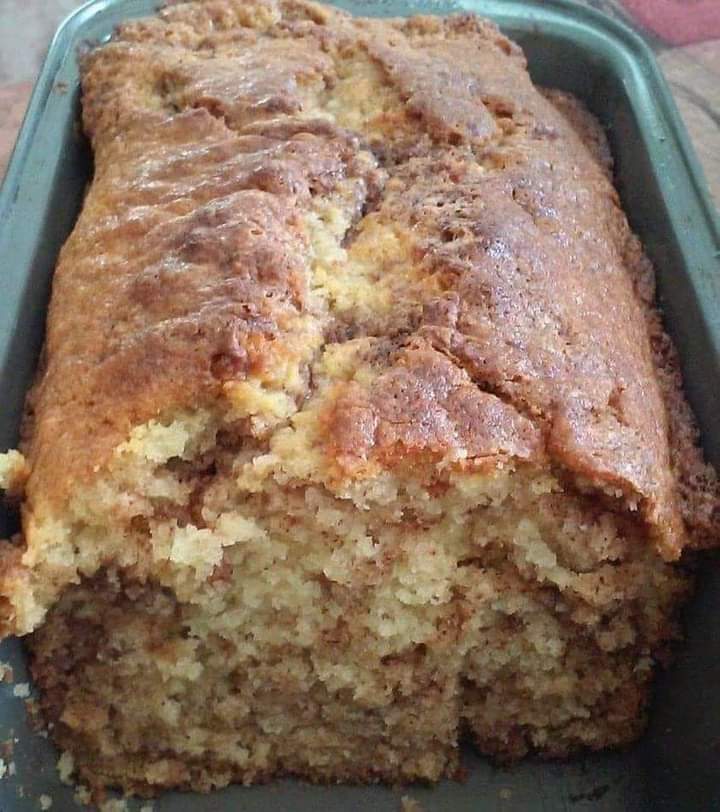
Amish Cinnamon Bread Recipe

This one bowl recipe for Amish Cinnamon Bread is easy to make, filled with cinnamon flavor, and perfect for serving with a hot cup of coffee.

Prep Time: 10 minutes

Cook Time: 1hour 10 minutes

Total Time: 1hour 20minutes 

Servings: 12 Slices 

Ingredients:

▢½ cup softened butter salted

▢¾ cup granulated sugar

▢¼ cup packed brown sugar

▢1 large egg

▢1 teaspoon vanilla extract

▢1 cup buttermilk

▢2 cups all purpose flour

▢1 teaspoon baking soda

Cinnamon Sugar Filling and Topping

▢⅓ cup sugar

▢1 ½ teaspoons cinnamon

▢2 tablespoons melted butter

Instructions:

Preheat the oven to 350ºF and grease a 9X5 loaf pan with butter or oil.

Add the softened butter to a large bowl with a hand mixer, OR a stand mixer fitted with the paddle attachment.

Add in granulated sugar and brown sugar to the butter and mix on medium-high speed until the butter and sugars have creamed and are light and fluffy, about 2-3 minutes.

Add the egg, vanilla and buttermilk and mix until fully incorporated.

Sift the flour and baking soda into the bowl and mix just until it starts to come together. Use a silicone spatula to fold everything together until the flour is absorbed and no large lumps remain.

Stir together ⅓ cup of sugar and 1 ½ teaspoons of cinnamon and set aside.

Add half of the batter to the prepared loaf pan, and add half of the cinnamon sugar mixture evenly on top of the batter. Use a butter knife to swirl it into the batter.

Add the remaining half of the batter on top, smoothing it out evenly.

Add the remaining cinnamon sugar mixture and swirl it into the top layer of batter using a butter knife.

Drizzle 2 tablespoons of melted butter on top of the loaf.

Bake in the preheated oven for 50-70 minutes, or until a cake tester (or toothpick) comes out clean when inserted into the center.

Allow to cool in the pan for 20 minutes, and then gently coax it out of the loaf pan and transfer to a wire rack. Allow to cool to room temperature before wrapping and storing.

Notes:

Storing: Wrap your loaf in a triple layer of plastic wrap. Store at room temperature for 2-3 days, or in the refrigerator for 5 days. For longer storage, add the wrapped loaf to a freezer bag and label. Freeze for up to 2 months.

Softened Butter: It’s important that you use softened butter, otherwise it will be very difficult to cream the butter and sugars together. In a pinch melted butter can work, but it will make for a less moist loaf.

Nutritional Info:

Serving: 1g | Calories: 261kcal | Carbohydrates: 39g | Protein: 3g | Fat: 10g | Saturated Fat: 6g | Polyunsaturated Fat: 3g | Cholesterol: 42mg | Sodium: 227mg | Fiber: 1g | Sugar: 23g

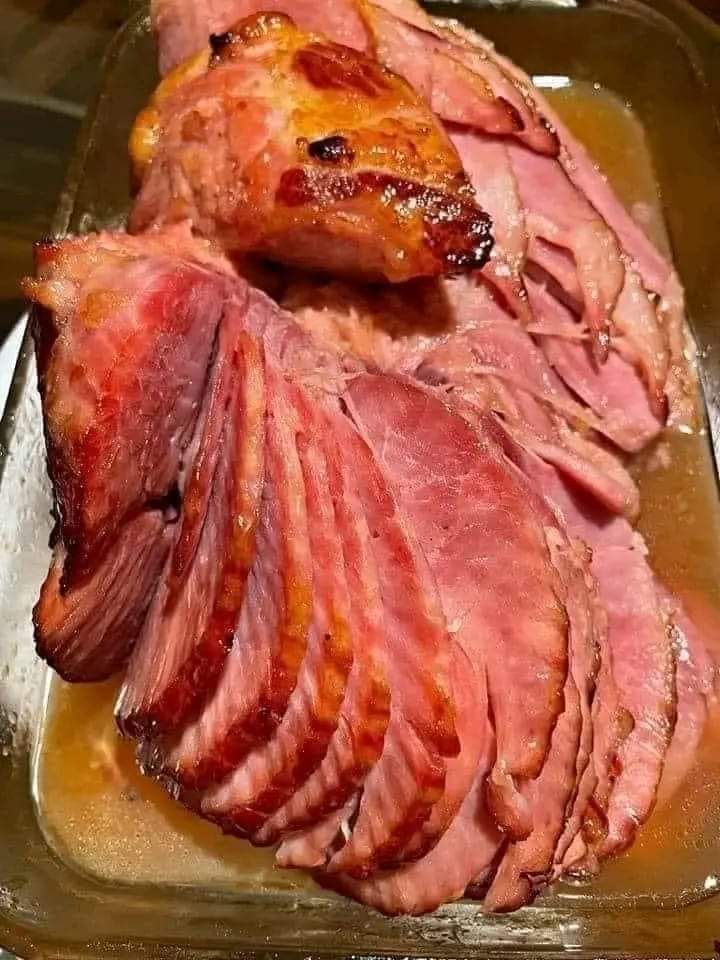
Baked Ham Recipe

Baked Ham is my kids’ all time favorite meal! They’d pass up a turkey dinner any day of the week (or any holiday) for ham.

This easy baked ham is moist, tender and delicious inside while the outside is brushed with a brown sugar glaze and caramelized for a hint of sweetness. We serve this baked ham for special occasions (like Easter and Christmas) but it’s simple enough to make any time of year!

How much ham per person

If you’re using a bone in ham, you’ll want about 3/4 pound of ham per person and a bit more if you want leftovers (for Ham and Corn Chowder or Cheesy Ham and Potato Casserole). An 8lb ham should feed about 9 people.

What to Serve With Glazed Ham

This beautiful brown sugar ham is most often served at Christmas dinner or Easter dinner at our house! We serve it with our favorite sides for the perfect meal!


PREP TIME: 5minutes

COOK TIME: 2 hours 30 minutes

TOTAL TIME: 2hours 35minutes 

SERVINGS: 12 Servings

Baked ham is moist, tender and delicious inside while the outside is brushed with a brown sugar glaze and caramelized for a hint of sweetness.

INGREDIENTS:

  • 1 spiral cut ham with bone-in approx 7-9 pounds
  • 2 tablespoons dijon mustard
  • ¼ cup pineapple juice or orange juice
Brown Sugar Glaze
  • ½ cup pineapple juice or orange juice
  • ½ cup brown sugar
  • 2 tablespoons dijon mustard
  • ¼ teaspoon ground ginger
  • 2 teaspoons cornstarch

INSTRUCTIONS:

  1. Preheat oven to 325°F.
  2. Combine dijon mustard and pineapple juice. Brush over ham.
  3. If your ham has a plastic disk on the bone, this should be removed and discarded. Place the ham, flat side down in a roasting pan, and cover tightly with foil. Roast 12-15 minutes per pound (or according to package directions).
  4. Meanwhile, combine glaze ingredients and bring to a boil. Turn heat down and simmer 2-3 minutes. Cool.
  5. 15 minutes before ham is done, remove from the oven and turn the oven up to 425°F.
  6. Brush with glaze and return to the oven until the glaze is caramelized and the ham has reached the safe cook temperature.

Notes:

If you purchase a smoked ham, it has been cooked, be sure to check the package to ensure it says it is “fully cooked”. If your ham is fully cooked on the package (as most spiral hams are), it will need to cook to 140°F (basically just to heat it).

NUTRITIONAL INFO:

Calories: 690, Carbohydrates: 11g, Protein: 57g, Fat: 44g, Saturated Fat: 15g, Cholesterol: 164mg, Sodium: 3200mg, Potassium: 795mg, Sugar: 10g, Vitamin C: 1.5mg, Calcium: 30mg, Iron: 2.5mg

Turmeric Honey: The Most Powerful Antibiotic That Not Even Doctors Can Explain

Turmeric and honey – The most potent antibiotic

Since ages Indian spices have been used as a medicine to cure several ailments. Indian spices have for long been used as medicines. Right from burns to minor cuts, turmeric was used as an instant remedy to treat such issues. This was simply because of the miraculous properties of turmeric.
From common cold to soar throat both honey and turmeric are very potent and important alternatives to conventional medicines because of their benefits and antibiotic properties! In fact, these two wonder ingredients are easily and most affordable items to be used as medicines, honey and turmeric would be it! Honey and turmeric both are used for a variety of problems like cold, digestive issues, cuts, wounds, muscles and sprains along with many other health and skin issues.
We are not even joking when we say, the majority of your health problems has turmeric and honey as their solution!
They have been used intensely in Ayurvedic, Indian and Chinese medicines for thousands of years.

What makes turmeric so powerful?

Turmeric has a very important compound in it, called the curcuminoids. Just like polyphenol, curcuminoid has several healing properties which makes turmeric so strong that it can fight almost all health issues in one go! It is also a very strong anti-oxidant which is why it is very good for the skin and it contains antiseptic, antibacterial, anti-fungal and anti-inflammatory properties which help it to treat wounds and allergies very easily!

What makes honey so powerful?

Honey has the power to fight infections without creating resistant bacterias like modern antibiotics. It is so potent that it should be the first method to be used when fighting infections. Many scientists have claimed that honey is more powerful than most of the conventional antibiotics. Honey can also be used to treat infections, cuts and wounds by applying on them directly. Honey can also be taken orally to treat health problems.

Benefits of turmeric

– Reduces inflammation
– Improves digestion
– Reduces pain
– Prevents cancer
– Improves anxiety and depression

How to use natural antibiotic using honey and turmeric?

Many of you must be very confused about using these wonderful items instead of your regualr medicines. You should give it a try. Here is a simple recipe that you can use when you fall sick.

Ingredients:

1/4th cup raw honey,
2 drops of lemon essential oil
1 tsp of ground turmeric

Instructions:

Mix all the ingredients together and stir well. Pour the mixture in a container with a lid and store in room temperature. Consume half teaspoon thrice a day to get rid of allergies, cold or flu.

Ingredients:

1 teaspoon turmeric powder
2 tablespoons pure honey (preferably raw honey)
A pinch of freshly ground black pepper

PREPARATION:

Make sure you use good quality turmeric powder and pure honey. Raw honey is preferred as it offers additional health benefits.
Mix: In a small bowl, add 1 teaspoon of turmeric powder and 2 tablespoons of honey. Add a pinch of freshly ground black pepper. The black pepper increases the bioavailability of the curcumin in turmeric, allowing your body to absorb it better.
Mix Thoroughly: Stir the ingredients thoroughly until they come together into a smooth paste.
Storage: Pour the mixture into an airtight jar or container. Store in a cool, dry place, preferably the refrigerator, to preserve freshness.
Application:
Turmeric honey can be used in different ways:
As a natural antibiotic: If you have signs of cold or infection, you can take 1 teaspoon of turmeric honey to boost your immune system and reduce inflammation.
As an anti-inflammatory: This mixture can be applied to inflamed areas of skin to relieve itching, redness and swelling.
As a calming tea: Add a teaspoon of turmeric honey to a cup of warm water to make a calming tea.
Note:
Before using turmeric honey as a remedy, consult your doctor, especially if you have any allergies or medical concerns.
Turmeric honey is a fascinating natural remedy that combines the healing powers of two amazing ingredients. It is an example of how nature provides us with simple but effective solutions to our health problems. Try it and experience the amazing benefits of this natural antibiotic for yourself.