Beef Liver and Onions Recipe

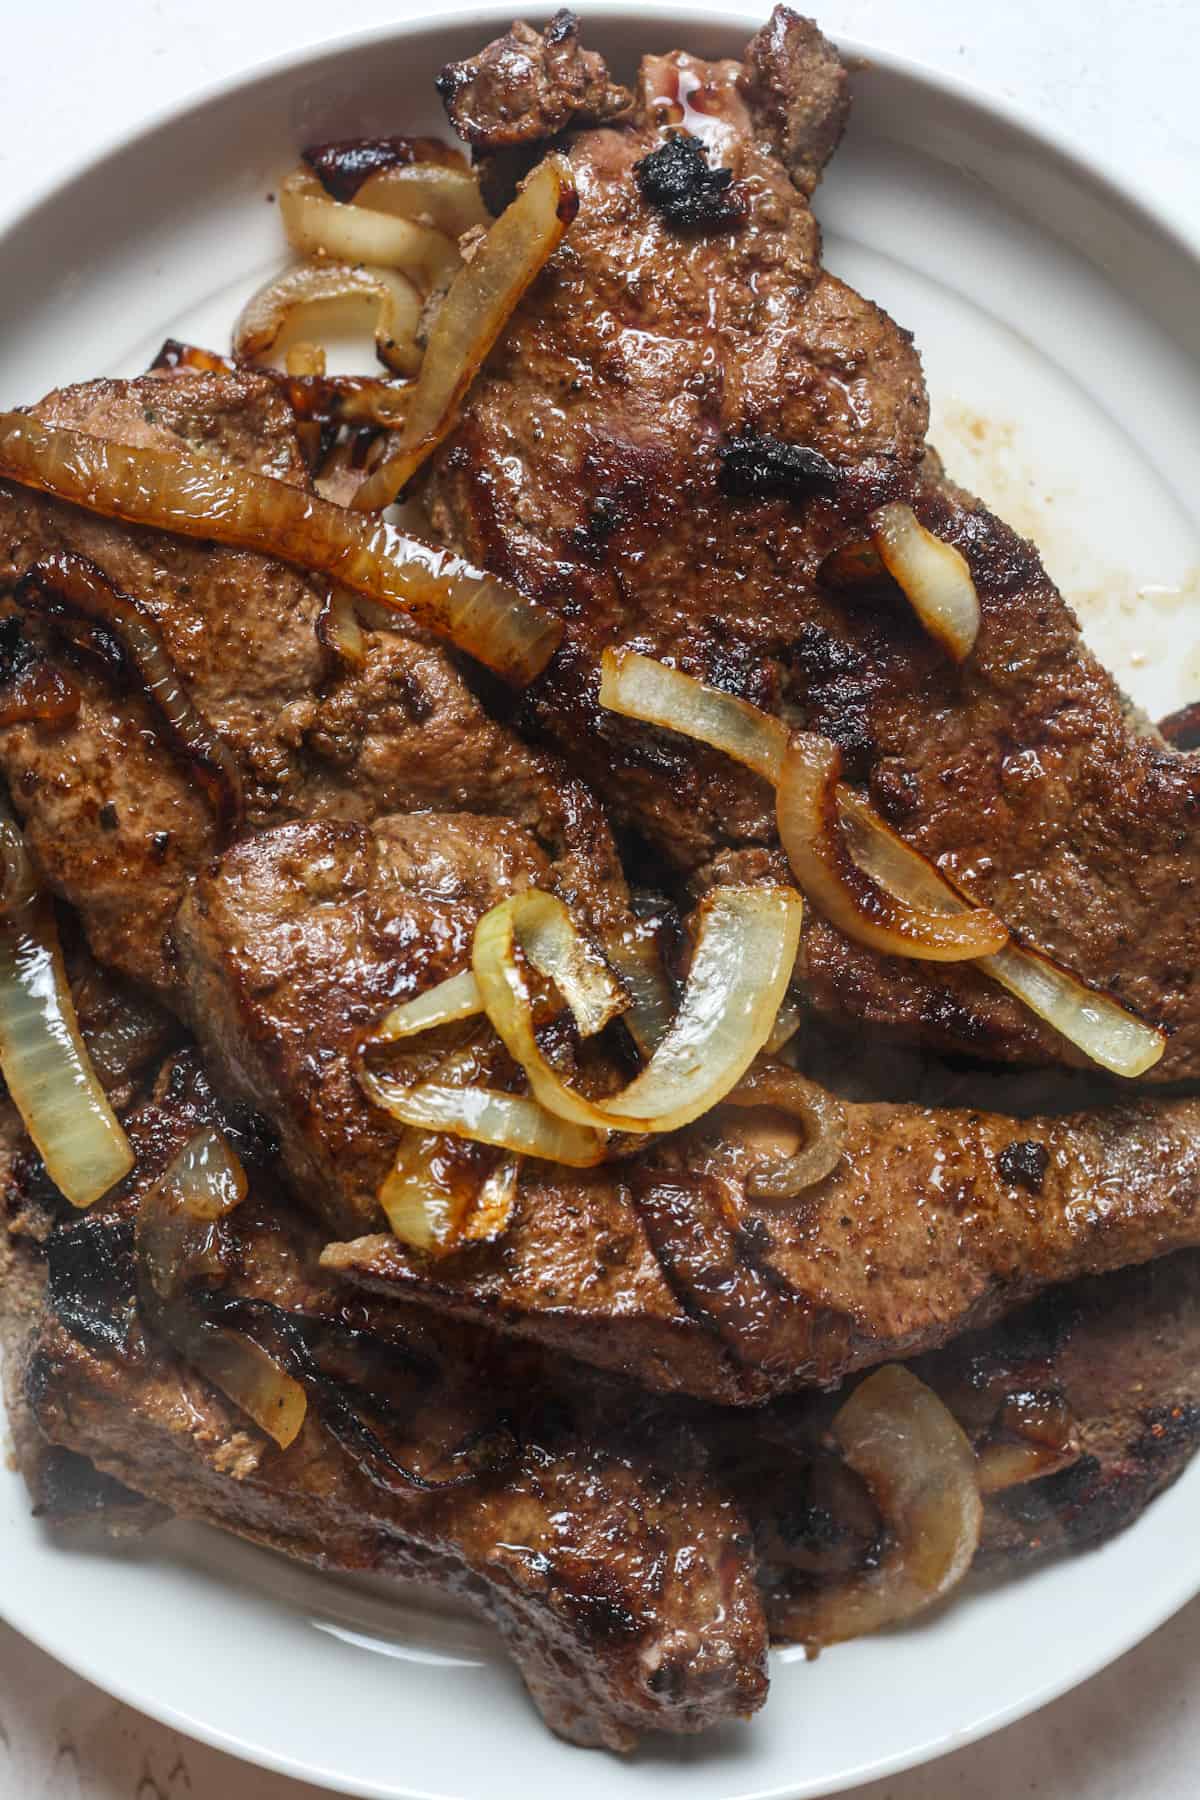
This beef liver and onions is packed with nutrients and flavor! The beef is tenderized and cooked to savory perfection. The onions add even more flavor. This quick and easy recipe for how to cook beef liver is super healthy and incredibly delicious!

WHY YOU’LL LOVE THIS RECIPE

Beef liver and onions is filled with nutrients and protein.

Liver is one of the healthiest foods.

This quick and easy recipe takes 10 minutes after the meat soaks.

Soaking the beef liver takes out the strong flavor.

In addition, this tenderizes the meat.

This recipe is gluten free, nut free, sugar free, high in protein, low in carbs, and high in vitamins.

For Paleo and Whole30, use unsweetened dairy free milk.

WHAT IS BEEF LIVER?

Beef liver is an organ meat. It comes from cows.

This cut of meat is considered a nutritional superfood. It is high in protein, high in vitamins, and low in carbs.

This meat is not popular with everyone. It is known to have a strong meat flavor and can be tough.

To combat this, soak the meat in buttermilk or milk. This neutralizes some of the meaty flavor. In addition, soaking the liver makes it more tender.

BEEF LIVER HEALTH BENEFITS

Beef liver is loaded with health benefits! It is very healthy and very high in many nutrients.

Liver is high in Vitamin A, riboflavin, Vitamin B12, and copper.

Additionally, liver is high in protein and low in carbs.

Compared to other superfoods, beef liver contains more nutrients. Even kale, spinach and blueberries pale in comparison to liver.

A serving of 100 grams contains only 4 carbs and more than 20 grams of protein. In addition, it contains over 3 grams of healthy fats.

TASTE & TEXTURE

This beef liver recipe is hearty and savory. The onions add a great flavor.

The longer the meat soaks, the more tender it becomes. Do not over cook liver. Overcooking leads to dry gritty meat.

EXPERT TIPS & TRICKS

Thinly slice liver into strips.

If using frozen, thaw completely beforehand.

Soak meat in buttermilk or milk for at least 1 hour. The longer it soaks, the more neutralized the flavor and tenderized it will become.

This beef liver and onions recipe is quick, easy and incredibly flavorful! The beef liver becomes tender and the onions add so much flavor. This protein packed meal is easy, healthy and delicious!

INGREDIENTS:

▢12 ounces beef liver, sliced

▢1 cup buttermilk

▢1 yellow onion, thinly sliced

▢2 tbsp olive oil, divided

▢½ tsp garlic powder

▢½ tsp black pepper

▢½ tsp sea salt

INSTRUCTIONS:

First, add sliced beef liver to a bowl. Pour buttermilk on top. Soak in the refrigerator for at least 1 hour up to overnight.

Once beef has soaked, remove from buttermilk. Pat dry with paper towels. Season on both sides with garlic powder, pepper and sea salt. Discard buttermilk.

In a large skillet, add 1 tablespoon olive oil over medium heat. Add in sliced onions.

Cook onions until tender. Stir occasionally to prevent burning. Remove onions from skillet.

Add remaining 1 tablespoon olive oil to skillet. Add seasoned beef liver to the pan.

Sear on both sides for about 2 to 3 minutes, until internal temperature reaches 160 degrees Fahrenheit. Add onions back to pan for 1 minute to heat up.

Finally, serve beef liver and onions.

NOTES:

Soaking the beef liver in buttermilk helps remove the strong flavor and helps make it more tender. Do not skip this step.

Feel free to soak it in milk or cream if you do not have buttermilk.

Organ meat is considered safe to eat at 160 degrees Fahrenheit.

Use a meat thermometer for accurate results.

Store in the fridge for up to 3 days.

Meat may become tough when reheated. Slowly reheat in the microwave or in a skillet.

Do not freeze.

Nutritional Info:

calories: 190kcal, carbohydrates: 6g, protein: 18g, fat: 10g, saturated fat: 2g, polyunsaturated fat: 1g, monounsaturated fat: 6g, trans fat: 0.1g, cholesterol: 234mg, sodium: 351mg, potassium: 314mg, fiber: 1g, sugar: 1g, vitamin a: 14373IU, vitamin c: 3mg, calcium: 12mg, iron: 4mg

Apple Upside Down Cake Recipe

This caramel apple upside down cake is a fall must-make. Combining a soft cinnamon-spiced cake with buttery caramelized apples, we’re essentially getting two desserts in one. After inverting, the topping’s juices seep down into the cake and add unbeatable flavor and moisture. What you’ll love most, besides the flavors, is that there’s no fancy decoration required—the lovely garnish is literally baked into the cake!

Prep Time: 25 minutes

Cook Time: 45 minutes

Total Time: 1 hour, 30 minutes

Yield: serves 8-10

This stunning apple upside down cake combines a soft cinnamon-spiced cake with a delicious buttery caramel topping. Pack those apples into the pan—this cake can hold a lot and you won’t regret those extra slices!

INGREDIENTS:

TOPPING

6 Tablespoons (85g) unsalted butter

1/2 cup (100g) packed light or dark brown sugar

1/4 teaspoon ground cinnamon

1/4 teaspoon pure vanilla extract

2 medium apples, peeled and sliced into 1/4-inch slices (1.5–2 cups, or 188–250g, apple slices)*

CAKE

1 and 1/2 cups (188g) all-purpose flour (spooned & leveled)

1 and 1/2 teaspoons baking powder

1 and 1/2 teaspoons ground cinnamon

1/4 teaspoon ground nutmeg

1/2 teaspoon salt

1/2 cup (8 Tbsp; 113g) unsalted butter, softened to room temperature

1/2 cup (100g) granulated sugar

1/2 cup (100g) packed light or dark brown sugar

2 large eggs, at room temperature

1 teaspoon pure vanilla extract

6 Tablespoons (90ml) whole milk, at room temperature*

INSTRUCTIONS:

Preheat oven to 350°F (177°C).

Prepare topping first: Combine butter and brown sugar together in a small saucepan over medium heat. Whisk occasionally until butter has melted. Cook, whisking constantly, for 1 minute as mixture thickens. Remove from heat and whisk in the cinnamon and vanilla extract. Pour into an ungreased 9×2 inch pie dish or round cake pan. (Make sure the pan is 2 inches deep. I recommend this pie dish, which is 1.8 inches deep but I never have an overflow issue.) Arrange the apple slices neatly on top, overlapping where necessary. See photo above. Place pan in the refrigerator for a few minutes as you prepare the cake batter. This helps solidify or “set” the topping’s arrangement.

Make the cake batter: Whisk the flour, baking powder, cinnamon, nutmeg, and salt together. Set aside.

Using a handheld or stand mixer fitted with a paddle or whisk attachment, beat the butter on high speed until smooth and creamy, about 1 minute. Add both sugars and beat on high speed until creamed together, about 1 minute. Scrape down the sides and up the bottom of the bowl with a rubber spatula as needed. On high speed, beat in the eggs and vanilla extract until combined. Scrape down the sides and up the bottom of the bowl as needed. Pour the dry ingredients into the wet ingredients. Turn the mixer onto low speed and as the mixer runs, slowly pour in the milk. Beat on low speed just until all of the ingredients are combined. Do not over-mix. You may need to whisk it all by hand to make sure there are no lumps at the bottom of the bowl. The batter will be slightly thick.

Remove topping from the refrigerator. Pour and spread cake batter evenly over topping.

Bake for 40-46 minutes, tenting foil on top of the cake halfway through bake time to prevent the top from over-browning before the center has a chance to fully cook. The cake is done when a toothpick inserted into the center of the cake comes out mostly clean—a couple moist crumbs are OK. Don’t be alarmed if your cake takes longer or if the cake rises up and sticks to the foil. (We serve the cake upside down anyway!)

Remove cake from the oven and cool on a wire rack for just 15 minutes. Invert the slightly cooled cake onto a cake stand or serving plate. Some of the juices from the topping will seep over the sides—that’s ok. You can slice and serve the cake warm, but the slices will be messy. I find it’s best to cool the cake completely at room temperature before slicing and serving. Do not refrigerate the cake to speed up the cooling process because it could end up tasting overly dense.

Cover leftover slices and store for up to 3 days in the refrigerator or 3 months in the freezer. Thaw at room temperature. I don’t recommend freezing the cake as a whole because the topping arrangement doesn’t thaw very nicely. See make ahead instructions below.

NOTES:

Make Ahead Instructions: You can refrigerate the topping in step 2 for up to 1 day. If refrigerating for longer than 1 hour, cover it tightly. Other than that, this isn’t the best cake to make ahead of time or freeze because the apples will settle down into the cake—while still tasty, the presentation won’t be as pleasing. You can, however, prepare the cake batter’s wet ingredients (cover and refrigerate) and dry ingredients (cover at room temperature) separately up to 1 day ahead of time, then continue with the recipe the next day. Let the wet ingredients come to room temperature before mixing.

Special Tools (affiliate links): Saucepan | Whisk | 9-inch Pie Dish | Glass Mixing Bowl | Electric Mixer (Handheld or Stand) | Cooling Rack

Old Recipe:  If you loved the old cake recipe,  increase the topping’s butter to 1/2 cup (1 stick; 115g) and add 1/4 teaspoon each of ground cloves and ground nutmeg when you stir in the cinnamon. Sprinkle 1/4 cup of walnuts on top of the apples before pouring/spreading on the cake batter. In the cake batter, reduce the milk to 1/4 cup (60ml).

Apples: Use your favorite variety of apple. I typically use Granny Smith, Fuji, or Honey crisp. Here’s more on the best apples to use for baking.

Milk: Whole milk is best, but you can use lower fat or nondairy milk if needed.

Why is everything at room temperature? All refrigerated items should be at room temperature so the batter mixes together easily and evenly. Read more about the importance of room temperature ingredients.

MAXICAN BEEF AND CHEESE SANCHILADAS RECIPE

We go to a special little Mexican and Tex-Mex taco joint that serves sanchiladas and it’s my absolute favorite dish on their menu. It recently dawned on me that I needed to figure out how to make sanchiladas at home…..so I did.

My recipe isn’t exactly how my little taco joint makes their sanchiladas, but it’s close, and my boys are super excited to get to eat this Mexican dish as any meal.

I get excited because it’s basic, cheesy, and fast Mexican food!

SANCHO VS BURRITO VS SANCHILADA

A sancho is a beef burrito with cheese and lettuce smothered in cheese sauce.

A burrito is a popular Mexican dish that typically consists of a tortilla wrapped around various fillings. A beef and cheese version of this is part of a Sancho.

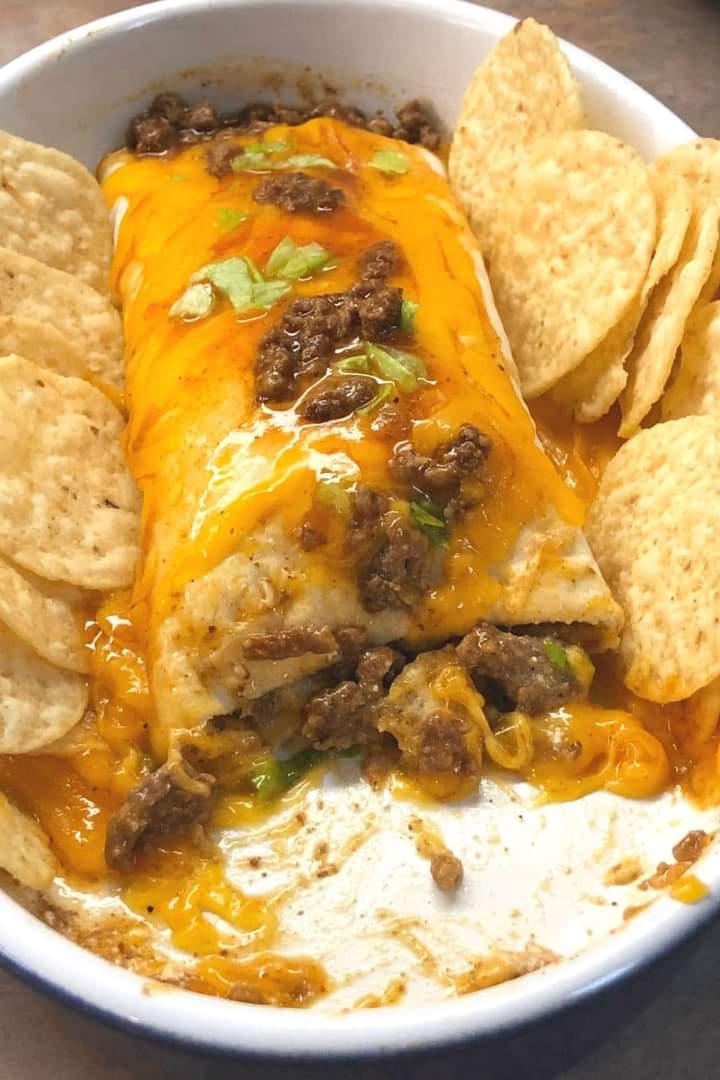
A sanchilada is part beef and cheese burrito with all the extra saucy love of enchiladas, including the enchilada sauce!

WHY THIS RECIPE IS A KEEPER

Sanchiladas are very basic beef and cheese Mexican fare. If you’ve got picky eaters in your family, not to worry! All of my picky eaters devour these sanchiladas.

You can dress up these sanchiladas any way you’d like.

My family prefers just beef, cheese, and the sour cream topping. I love to add cilantro, scallions, tomatoes, and fresh pico de gallo on top.

These Maxican Beef and Cheese Sanchiladas are a tasty Mexican favorite that crosses between a sancho and a beef enchilada.

Prep Time: 20minutes

Cook Time: 10minutes

Total Time: 30minutes

Servings: 4 sanchiladas 

INGREDIENTS:

1 lb. lean ground beef

1/2 tsp. granulated onion

1/2 tsp. granulated garlic

2 – 10 oz. cans mild red enchilada sauce

shredded cheddar cheese

chopped lettuce

1 cup sour cream

4 8-inch flour tortillas, warmed

tortilla chips, for serving alongside the sanchiladas

chopped cilantro and scallions, for garnishing, if desired

INSTRUCTIONS:

In a heavy-bottomed skillet over medium high heat, brown the ground beef with the spices until cooked throughout and no pink remains (160-165 degrees F.); drain any fats that accumulate as the beef cooks.

Stir one can of the enchilada sauce into the ground beef, continuing to cook over medium heat until the sanchilada mixture is hot throughout; remove from the heat.

Place a warm tortilla onto a work surface; place one-fourth of the prepared beef mixture across the center of the tortilla in a 2-inch strip; top with cheese and lettuce, as desired.

In a small bowl, combine the sour cream with 1/4 cup of red enchilada sauce, stirring to combine. Place the prepared sour cream mixture into a sandwich bag, snipping away the corner of the bag.

Press the sour cream mixture through the hole in the corner of the bag, onto the beef mixture over the top of the cheese and the lettuce, making two strips of sour cream the length of the beef mixture, or as desired.

Roll the flour tortilla around the beef filling, placing the sanchilada into a greased elongated and shallow glass baking dish for one, or create all four sanchiladas, placing them side-by-side into a larger baking dish.

Pour enchilada sauce, as desired, over the top of the sanchiladas, then top with more shredded cheese; garnish with scallions or cilantro.

Heat the prepared sanchilada for a few seconds in the microwave until heated throughout; stack tortilla chips alongside the sanchilada and serve at once.

NOTES:

Tips for Making the Best Beef and Cheese Mexican Sanchiladas

Warming the tortillas in the microwave before you roll them around the filling makes them much easier to work with.

We prefer beef for sanchiladas, but you could actually use any ground meat, such as ground turkey, ground pork, or even ground venison.

If you prefer, you can substitute green enchilada sauce for the red enchilada sauce for a new twist on your sanchiladas.

We use mild red enchilada sauce but if you prefer a more spicy sauce and experience, opt for the hot red enchilada sauce, or stir a bit of red pepper flakes into the mild enchilada sauce.

NUTRITIONAL INFO:

Calories: 424kcal | Carbohydrates: 29g | Protein: 30g | Fat: 20g | Saturated Fat: 10g | Cholesterol: 100mg | Sodium: 476mg | Potassium: 551mg | Fiber: 1g | Sugar: 4g | Vitamin A: 358IU | Vitamin C: 1mg | Calcium: 128mg | Iron: 4mg

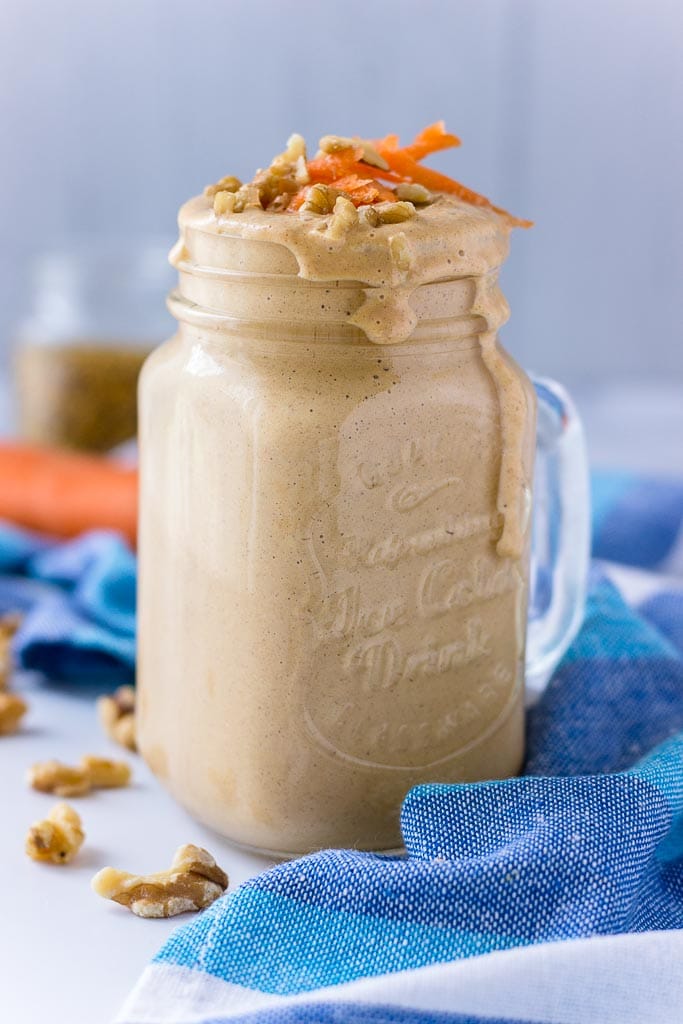
Carrot Cake Smoothie Recipe

Oh yes! I’m soooo into carrot cake everything mood lately. Because carrot cake symbolizes Spring and Spring means happiness. Carrot cake means happiness too. Does that make any sense? … Anyway, now that Spring has finally shown up in all its beauty … the weather is beautiful, birds are singing, and I’m blooming like flowers in my backyard … all I can think of is carrots and sweet carrot cake.

Carrots are sweet little veggies. Colorful and so HEALTHY. Honestly, I feel no guilt (nor shame) about having Carrot Cake Overnight Oats for breakfast and then later nibbling these amazing orange flavored Carrot Oatmeal Cookies. Nope. Both of these beauties are the healthiest + delicious thing EVER. And having this knowing I’m doing something good for my body is liberating.

This carrot smoothie recipe is super healthy, guilt-free and really incredible too. It’s loaded with nutrients and bursting with carrot cake flavor. It feels like a slice of carrot cake in a drinking form. I like that! Especially in the morning. It’s one really tasty breakfast option if you ask me. Sweet, creamy, thick and just beautiful.

This rich, sweet and creamy carrot cake smoothie is like dream come true, really. A nourishing blend of whole foods that tastes just like a slice of carrot cake. Yum! It’s very nutritious, loaded with proteins and healthy fats, and fibers good for digestion but without excess calories, WITHOUT ADDED SUGARS. It’s perfect healthy breakfast option. + It’s super easy to whip up! Trust me, you don’t want to miss this beauty. 

Thick, creamy and delicious, this Carrot Cake Smoothie is perfect nutritious and healthy breakfast. It’s packed with amazing flavors and SUPER FOODS, and completely added-sugar-free.

PREP TIME: 5mins

TOTAL TIME: 5 mins

COURSE: Breakfast

CUISINE: American

SERVINGS: 1 cup

INGREDIENTS:

1 ripe banana

1 cup carrots chopped (about 1 large)

1 cup almond milk

½ cup soya probiotic yogurt

¼ cup walnuts

1 teaspoon Ceylon cinnamon

1 teaspoon vanilla extract

¼ teaspoon freshly grated ginger

Dash of nutmeg

INSTRUCTIONS:

Add all the ingredients into your blender and process until smooth.

Pour in glass and add toppings. Drink immediately.

NOTES:

As a measure, I used UScup(240ml).

NUTRITIONAL INFO:

Calories: 436kcal | Carbohydrates: 50g | Protein: 10g | Fat: 24g | Saturated Fat: 2g | Sodium: 383mg | Potassium: 746mg | Fiber: 9g | Sugar: 24g | Vitamin A: 10265IU | Vitamin C: 28.9mg | Calcium: 519mg | Iron: 1.4mg Smoothies

 Super Green Spirulina Smoothie Recipe

A nutritious and vibrant green smoothie with 5 ingredients: banana, cucumber, coconut milk, spirulina, and spinach! The perfect plant-based breakfast or snack.

PREP TIME: 5minutes 

TOTAL TIME: 5minutes

Servings: 1

Course: Beverage, Breakfast

Cuisine: Gluten-Free, Vegan

Freezer Friendly: 1 Week

INGREDIENTS:

1 medium ripe banana (previously peeled and frozen // ~1 cup as original recipe is written)

1/2 cup sliced cucumber (organic when possible // skin on)

3/4 – 1 cup light coconut milk (or other non-dairy milk // less for thicker smoothie, more for thinner smoothie)

1 cup spinach or chopped kale (organic when possible // I like to freeze mine)

1 tsp spirulina powder*

1 Tbsp hemp seed (optional // or sub chia seeds or vegan protein powder)

FOR SERVING optional

1/4 cup frozen or fresh blueberries (organic when possible)

1/4 cup granola (store-bought or homemade*)

INSTRUCTIONS:

To a blender*, add frozen banana, cucumber, coconut milk, spinach, spirulina, and hemp seed (optional). Blend until creamy and smooth, scraping down sides (or using smoothie wand) as needed.

If too thick, thin with water or more coconut milk. If too thin, thicken with ice or more frozen banana. Taste and adjust flavor as needed, adding more banana for sweetness, cucumber for freshness, or greens or spirulina for green color. See note about spirulina (brands + how much to add).

Serve immediately as is or in my preferred: top with blueberries, granola, and more hemp seeds. Best when fresh, though leftovers will keep covered in the refrigerator up to 2 days or the freezer for 1 week. Thaw to enjoy from freezer.

Notes

*When adding spirulina to smoothies, start with 1 tsp and add more as desired, but this is the max for me without tasting it. Otherwise, it can start tasting a little seaweedy.

*Granola recipes: Peanut Butter Chocolate Chip Granola, Banana Bread Granola, Simple Quinoa Granola, or Nut ‘n’ Honey Granola (the one I used in photos).

*Spirulina also works extremely well when added in the same quantity to my Ginger Colada Green Smoothie!

Nutritional Info: (1 of 1 servings)

Serving: 1 smoothie

Calories: 225

Carbohydrates: 36.8 g

Protein: 5.8 g

Fat: 9.7 g

Saturated Fat: 8.7 g

Trans Fat: 0 g

Cholesterol: 0 mg

Sodium: 72 mg

Fiber: 4 g

Sugar: 15.4 g

Did you make this recipe?

Lemon Meringue Pie Recipe

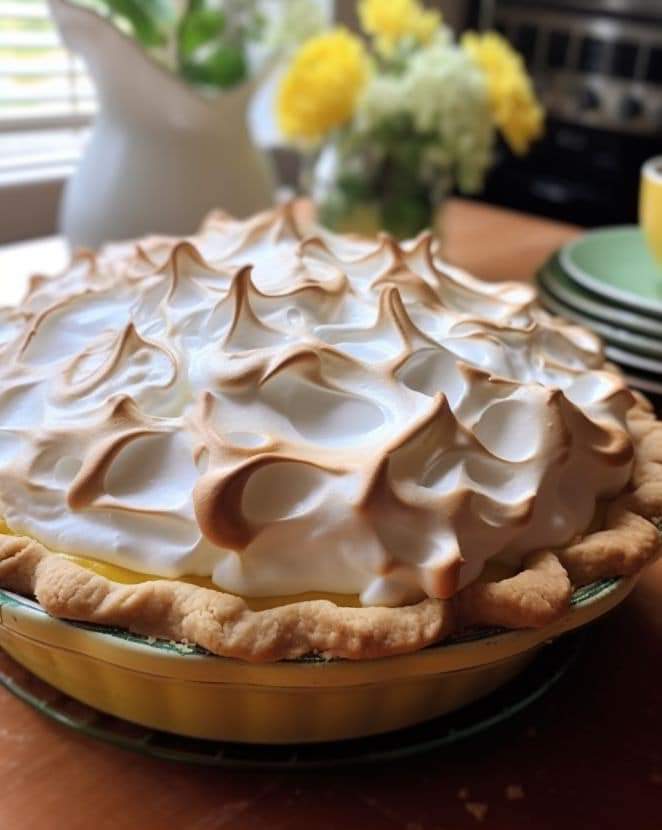
The best homemade lemon meringue pie with homemade lemon curd filling and a mountain of fluffy meringue!

Prep Time: 1hr

COOK Time: 45min

Chilling Time: 6hr

Servings: 10 servings

INGREDIENT’S:

For Pie Crust:

¾ cup unsalted butter, extra cold

1 ¾ cup all-purpose flour

¼ tsp salt

¼ cup cold water

For Lemon Curd:

1 1/3 cup freshly squeezed lemon juice

4 eggs

8 egg yolks

2 cups white granulated sugar

1 cup unsalted butter

2 tsp vanilla

For Meringue:

6 large egg whites

2 cups white granulated sugar

½ cup water

1 tsp cream of tartar

1 tbsp lemon juice

1 tsp vanilla extract

INSTRUCTIONS:

For the Pie Crust:

Prepare the all-butter pie crust first. Cut the cold butter into small cubes and drop it into a food processor along with the flour and salt. Pulse the butter and flour together for a few minutes, until fine crumbs form. Slowly start adding the water with the food processor running, until a dough ball forms. Remove the dough from the processor and shape it into a disk. Wrap it well with plastic wrap and refrigerate for a minimum of 1 hour or make it the day before and chill overnight.

Preheat the oven to 425F/218C. Once the dough is chilled, roll it out on a lightly floured work surface until it’s a few inches larger than your pie or tart tin. Gently transfer the dough into the pie tin and press the dough very gently into the bottom and sides, removing the excess dough. Watch my video to see how it’s done. Line the crust with parchment paper, then fill the pie with pie weights or dried beans. Blind bake the crust for about 30 minutes, or until it’s golden brown.

For the Lemon Curd:

While the pie crust is baking, prepare the lemon curd filling. This can also be done the day before. Place the eggs, egg yolks and sugar into a large mixing bowl. Whisk vigorously for 4 to 5 minutes, until the mixture is thick, pale and ribbons off the whisk. Pour this egg mixture into a medium-sized, stainless-steel saucepan and add the lemon juice. Cook the lemon curd over medium heat, stirring constantly with a rubber spatula for about 5 minutes, until the lemon curd thickens. Remove it from the heat and add the butter and vanilla, whisking until the butter is completely melted. Allow the lemon curd to cool down for at least 20 minutes before using.

Reduce the oven temperature down to 375F/190C. Pour the prepared lemon curd into the baked pie crust, spreading it evenly to the edges. Bake the pie for another 15 minutes, then remove from the oven and chill it for at least 2 hours in the refrigerator.

For the Meringue:

For the Meringue Topping: place the egg whites into a mixer bowl and whisk on high speed for a few minutes, until soft peaks form. Into a small saucepan, add the sugar and water and attach a candy thermometer to the side. Cook the sugar over medium heat, without stirring, until it reaches 240F/115C. This usually takes about 5 to 6 minutes from the time it starts to boil. Immediately, pour the hot sugar syrup in a slow and steady stream into the egg whites, with the mixer running on medium speed; avoid the whisk attachment! Watch my video recipe to see how it’s done!

Once all the sugar syrup has been added, add the cream of tartar, lemon juice and vanilla. Continue whisking the meringue on high speed for 8 to 10 minutes, until it’s cooled to room temperature and glossy peaks form. Using a spatula, add the meringue in large dollops onto the chilled lemon pie. Use a spoon to shape the meringue into a tall mountain. If desired, use a kitchen torch to caramelize/burn the meringue.

For best results, refrigerate the lemon meringue pie overnight. This will allow the lemon curd and meringue to thicken and it will be easier to serve. Use an extra-long knife for slicing.

Nutritional Info:

Calories: 767kcal | Carbohydrates: 100g | Protein: 9g | Fat: 38g | Saturated Fat: 22g | Polyunsaturated Fat: 2g | Monounsaturated Fat: 11g | Trans Fat: 1g | Cholesterol: 307mg | Sodium: 127mg | Potassium: 190mg | Fiber: 1g | Sugar: 81g | Vitamin A: 1297IU | Vitamin C: 13mg | Calcium: 46mg | Iron: 2mg