Crispy Turkish-Style Fried Eggplant

Crispy Turkish-Style Fried Eggplant

Yields: 4 Servings | Prep time: 15 mins | Cook time: 10–12 mins

Ingredients

The Base:

  • 2 Large eggplants

  • Salt (to taste, used for sweating and seasoning)

  • Water (for soaking)

The Coating:

  • 3 Eggs

  • 1/2 cup All-purpose flour

  • 1/2 cup Breadcrumbs (optional, for extra crunch)

  • 1/2 tsp Red pepper flakes (Pul Biber) or Paprika

  • 1/2 tsp Garlic powder

  • Vegetable oil (for frying)


Detailed Instructions

1. Prepare the Eggplants

  • Wash the 2 large eggplants.

  • You can peel them in a “zebra” pattern (strips of skin removed) or leave the skin on for texture.

  • Slice the eggplants into rounds or long strips about 1/2 inch thick.

2. Remove Bitterness (Sweating)

  • Place the eggplant slices in a large bowl and sprinkle generously with salt.

  • Let them sit for 10–15 minutes. This process draws out any bitter juices.

  • Rinse the slices under cold water and pat them completely dry with paper towels. Drying is key to ensuring the coating sticks and they don’t steam in the pan.

3. Set Up the Breading Station

  • In one shallow bowl, place the flour mixed with a pinch of salt, pepper flakes, and garlic powder.

  • In a second bowl, beat the 3 eggs thoroughly.

  • Optional: Place breadcrumbs in a third bowl if you prefer a thicker, crunchier crust.

4. Coat the Slices

  • Dredge each eggplant slice first in the flour, shaking off the excess.

  • Dip the floured slice into the beaten eggs, ensuring it is fully submerged.

  • If using breadcrumbs, press the egg-washed slice into the crumbs last.

5. Fry to Golden Perfection

  • Heat about 1 inch of vegetable oil in a large skillet over medium-high heat.

  • Once the oil is shimmering, add the eggplant slices in a single layer (do not overcrowd the pan).

  • Fry for 3–5 minutes per side until they are deep golden brown and the centers are tender when pierced with a fork.

6. Drain and Serve

  • Transfer the fried eggplants to a plate lined with paper towels to drain excess oil.

  • Serve immediately while hot and crispy.


Serving Suggestion

In Turkey, these are often served with a side of garlic yogurt sauce (plain yogurt mixed with minced garlic and a pinch of salt) and a drizzle of tomato sauce.
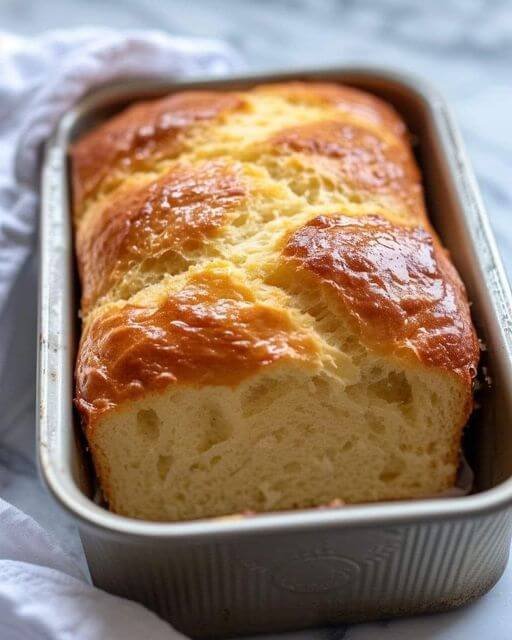

2-Ingredient Ice Cream Bread

2-Ingredient Ice Cream Bread

Yields: 1 Loaf | Prep time: 5 mins | Bake time: 40–45 mins

Ingredients

  • 2 cups (approx. 475ml) Full-fat vanilla ice cream (slightly softened)

  • 1 ½ cups (approx. 190g) Self-rising flour

  • Note: It is essential to use full-fat ice cream (not “light” or “low-fat”) because the fat content acts as the shortening for the bread.


Detailed Instructions

1. Prep the Oven and Pan

Preheat your oven to 350°F (175°C). Grease a standard loaf pan thoroughly with butter or non-stick spray, or line it with parchment paper for easy removal.

2. Soften the Ice Cream

Allow your ice cream to sit at room temperature for about 10–15 minutes until it is soft and easily scoopable, but not completely melted into a liquid.

3. Mix the Batter

In a large mixing bowl, combine the softened ice cream and the self-rising flour. Stir gently with a spatula just until the flour is incorporated. Do not overmix, as this will result in a tough, dense bread rather than a fluffy one.

4. Transfer and Smooth

Pour the batter into your prepared loaf pan. Use a spatula to smooth the top so it bakes evenly.

5. Bake to Perfection

Place the pan on the center rack and bake for 40–45 minutes. The bread is done when the top is golden brown and a toothpick inserted into the center comes out clean.

6. Cool and Serve

Let the bread cool in the pan for about 10 minutes before transferring it to a wire rack. This bread is best served warm with a little bit of butter or a drizzle of honey.


Why This Recipe Works

  • Self-rising flour already contains the baking powder and salt needed for the bread to rise.

  • Full-fat ice cream provides the liquid, sugar, and fat (cream), which are the core components of a traditional quick-bread batter.

Creative Variations

  • Chocolate Chip: Fold in 1/2 cup of chocolate chips before baking.

  • Berry Swirl: Use strawberry ice cream instead of vanilla for a fruity pink loaf.

  • Birthday Cake: Use “Funfetti” or cake-batter flavored ice cream and add extra sprinkles on top.

Soft Cheese-Stuffed Bread Boats with Herb Tomato Glaze

Soft Cheese-Stuffed Bread Boats with Herb Tomato Glaze

Yields: 10–12 Boats | Prep time: 20 mins (+1 hour rising) | Cook time: 20–25 mins

Ingredients

The Dough:

  • 200 ml Lukewarm milk

  • 200 ml Lukewarm water

  • 1 tbsp Sugar

  • 7 g (1 packet) Active dry yeast

  • 600-650 g All-purpose flour

  • 1 tsp Salt

  • 50 ml Vegetable oil

The Filling:

  • 300 g Feta cheese or soft white cheese, crumbled

  • 1 cup Shredded mozzarella

  • 1 Egg (optional, to bind)

  • Fresh parsley, chopped

The Herb Tomato Glaze:

  • 2 tbsp Tomato paste

  • 3 tbsp Olive oil

  • 1 tsp Dried oregano or Italian herbs

  • 1 clove Garlic, minced

  • Fresh parsley, finely chopped


Detailed Instructions

1. Prepare the Yeast Base

  • In a large mixing bowl, combine the 200 ml lukewarm milk, 200 ml lukewarm water, and 1 tbsp sugar.

  • Sprinkle 7 g of active dry yeast over the top and stir gently.

  • Let the mixture sit for about 5–10 minutes until it becomes foamy.

2. Mix and Knead the Dough

  • Add 50 ml vegetable oil and 1 tsp salt to the yeast mixture.

  • Gradually add 600-650 g of flour, mixing until a soft dough forms.

  • Knead the dough on a floured surface for 8–10 minutes until it is smooth and elastic.

3. First Rise

  • Place the dough in a lightly greased bowl and cover it with a warm, damp cloth.

  • Let it rise in a warm, draft-free spot for 1 hour or until it has doubled in size.

4. Shape the Boats

  • Punch the dough down to release air and divide it into 10–12 equal pieces.

  • Roll each piece into an oval shape.

  • Place a generous amount of the cheese filling (the crumbled feta, mozzarella, and parsley) in the center.

  • Fold the edges of the dough over the cheese and twist the ends to create a “boat” or twisted loaf shape.

5. Apply the Herb Tomato Glaze

  • Whisk together the 2 tbsp tomato paste, 3 tbsp olive oil, 1 tsp herbs, 1 clove minced garlic, and fresh parsley.

  • Use a pastry brush to coat the tops of the dough boats generously with this savory glaze.

6. Bake

  • Preheat your oven to 375°F (190°C).

  • Arrange the boats on a baking sheet lined with parchment paper.

  • Bake for 20–25 minutes until the bread is golden brown and the cheese is melted and bubbly.

7. Serve

  • Let the bread boats cool for a few minutes so the cheese sets slightly.

  • These are best served warm when the bread is at its softest.

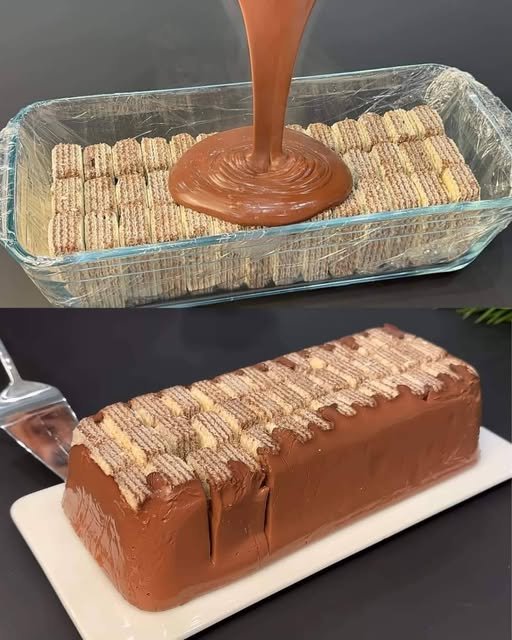
5-Minute Chocolate Wafer Layer Cake Yields: 6–8 Serving

5-Minute Chocolate Wafer Layer Cake

Yields: 6–8 Servings | Prep time: 5 mins | Cook time: 5 mins | Chill time: 1–2 hours

Ingredients

The Base:

  • 350 g Chocolate or vanilla wafers

The Chocolate Cream:

  • 500 ml (2 cups) Milk

  • 120 ml (1/2 cup) Whipping cream

  • 50 g (1/4 cup) Granulated sugar

  • 40 g (3 tbsp) Corn starch

  • 40 g (3 tbsp) Bitter cocoa powder

  • 1 tsp Vanilla extract (optional)


Detailed Instructions

1. Prepare the Cream Base

In a medium saucepan (off the heat), whisk together the sugar, corn starch, and bitter cocoa powder until no large lumps remain. Gradually pour in the milk and whipping cream, whisking constantly to create a smooth liquid.

2. Thicken the Custard

Place the saucepan over medium heat. Stir continuously with a whisk or spatula to prevent the bottom from scorching. Cook for about 3–5 minutes until the mixture thickens into a glossy, pudding-like consistency. Remove from heat immediately.

3. Layer the Wafers

Line a small rectangular baking dish or loaf pan with parchment paper or plastic wrap for easy removal. Spread a thin layer of the hot chocolate cream at the bottom. Arrange a single layer of wafers over the cream.

4. Build the Cake

Continue alternating layers: spread a generous layer of chocolate cream, followed by a layer of wafers. Repeat this process until you have used all the ingredients, finishing with a smooth layer of chocolate cream on top.

5. Chill and Set

Allow the cake to cool to room temperature, then place it in the refrigerator for at least 1–2 hours. This allows the wafers to slightly soften and the cream to set firmly, making it easy to slice.

6. Serve

Lift the cake out of the pan using the parchment paper edges. Dust the top with extra cocoa powder or chocolate shavings if desired. Slice into squares and enjoy!


Why This Recipe Works

The hot cream slightly softens the crisp wafers, turning them into a texture similar to delicate cake layers, while the corn starch ensures the chocolate filling is stable and rich.

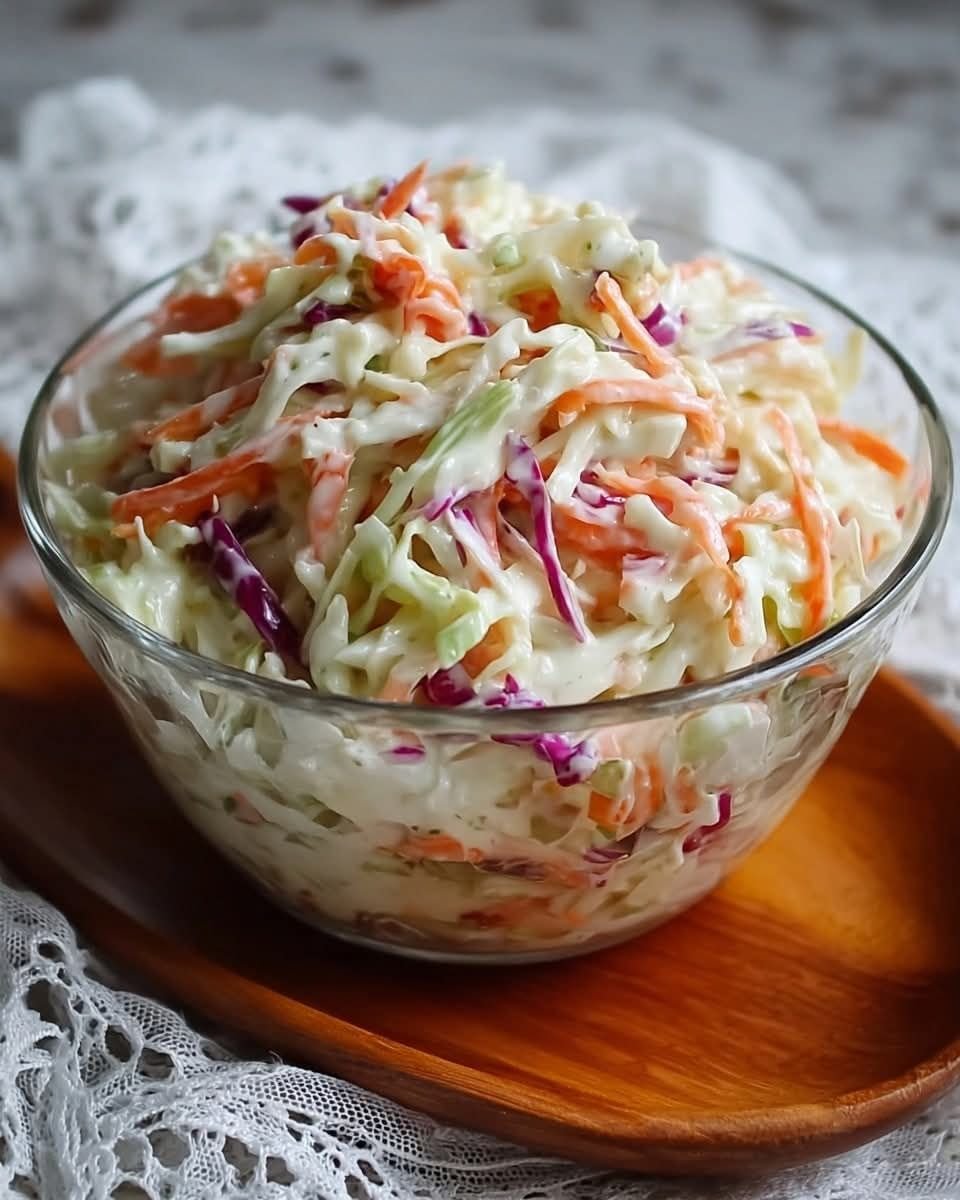
Creamy Apple Coleslaw

Creamy Apple Coleslaw

Yields: 6–8 Servings | Prep time: 15 mins | Chill time: 30 mins

Ingredients

The Dressing:

  • 1/2 cup Mayonnaise

  • 1/2 cup Sour cream or Greek yogurt

  • 1 tablespoon Fresh lime juice

  • 1 teaspoon Vinegar (white or apple cider)

  • 1 teaspoon Granulated sugar

  • Salt and pepper to taste

The Slaw Base:

  • 1 pound Coleslaw mix (shredded cabbage and carrots)

  • 1 small bunch Scallions, chopped

  • 1 Granny Smith apple, chopped fine

  • 1 Red apple (such as Gala or Fuji), chopped fine


Detailed Instructions

1. Whisk the Creamy Dressing

In a large mixing bowl, combine the mayonnaise, sour cream (or Greek yogurt), lime juice, vinegar, and sugar. Whisk the mixture vigorously until the dressing is completely smooth and the sugar has fully dissolved. Season the dressing with a pinch of salt and pepper.

2. Prep the Apples

Core and finely chop both the Granny Smith and the red apple. It is recommended to keep the skins on to provide a beautiful pop of color to the salad.

Pro Tip: To prevent the apples from browning (oxidizing) while you finish the prep, toss them directly into the prepared dressing immediately after chopping.

3. Combine the Ingredients

Add the 1-pound bag of coleslaw mix, the chopped scallions, and the chopped apples into the large bowl containing your dressing.

4. Toss and Coat

Using large spoons or salad tongs, toss the ingredients together until every shred of cabbage and piece of apple is evenly coated in the creamy dressing. Taste the mixture and add more salt or pepper if needed.

5. Chill Before Serving

Cover the bowl and refrigerate for at least 30 minutes before serving. This chilling period allows the cabbage to soften slightly and ensures the flavors of the lime and apple meld perfectly into the dressing.


Why This Recipe Works

The acidity from the lime juice and vinegar performs two roles: it prevents the apples from turning brown and balances the richness of the mayonnaise and sour cream.

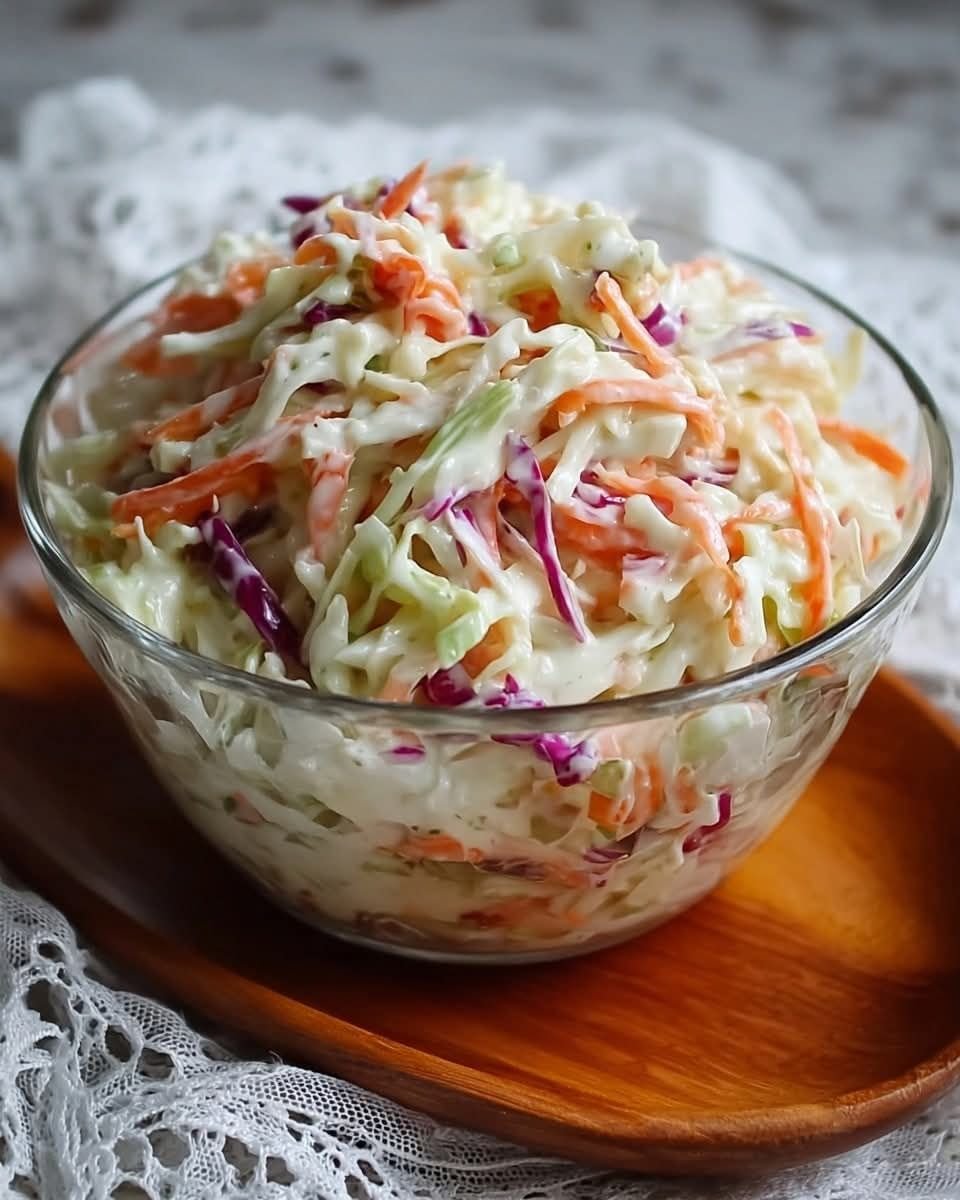
Creamy Apple Coleslaw

Creamy Apple Coleslaw

Yields: 6–8 Servings | Prep time: 15 mins | Chill time: 30 mins

Ingredients

The Dressing:

  • 1/2 cup Mayonnaise

  • 1/2 cup Sour cream or Greek yogurt

  • 1 tablespoon Fresh lime juice

  • 1 teaspoon Vinegar (white or apple cider)

  • 1 teaspoon Granulated sugar

  • Salt and pepper to taste

The Slaw Base:

  • 1 pound Coleslaw mix (shredded cabbage and carrots)

  • 1 small bunch Scallions, chopped

  • 1 Granny Smith apple, chopped fine

  • 1 Red apple (such as Gala or Fuji), chopped fine


Detailed Instructions

1. Whisk the Creamy Dressing

In a large mixing bowl, combine the mayonnaise, sour cream (or Greek yogurt), lime juice, vinegar, and sugar. Whisk vigorously until the dressing is completely smooth and the sugar has dissolved. Season with a pinch of salt and pepper.

2. Prep the Apples

Core and finely chop both the Granny Smith and red apple. Keeping the skins on provides a beautiful pop of color to the salad.

Pro Tip: To prevent the apples from browning while you prep the rest of the ingredients, you can toss them directly into the prepared dressing as soon as they are chopped.

3. Combine the Ingredients

Add the 1-pound bag of coleslaw mix, the chopped scallions, and the chopped apples into the large bowl containing the dressing.

4. Toss and Coat

Using large spoons or salad tongs, toss everything together until every shred of cabbage and piece of apple is evenly coated in the creamy dressing. Taste and add more salt or pepper if needed.

5. Chill Before Serving

For the best flavor and texture, cover the bowl and refrigerate for at least 30 minutes before serving. This allows the cabbage to soften slightly and the flavors of the lime and apple to meld into the dressing.


Why This Recipe Works

The acidity from the lime juice and vinegar prevents the apples from oxidizing (turning brown) while balancing the richness of the mayonnaise and sour cream.