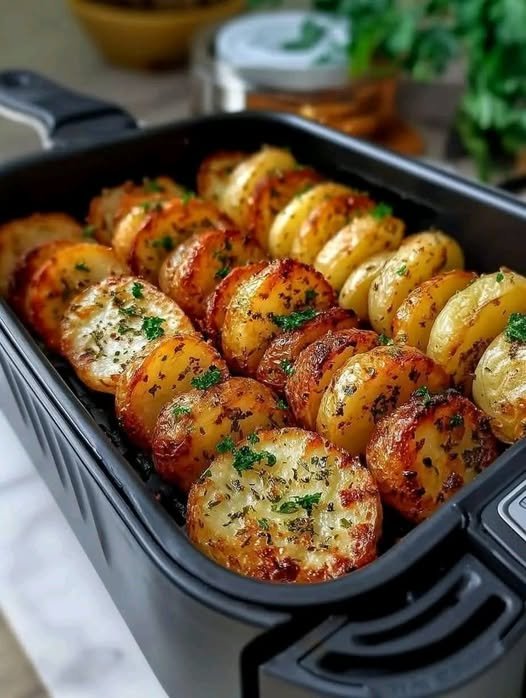
Cheesy Air Fryer Hasselback Potatoes

Cheesy Air Fryer Hasselback Potatoes

Prep time: 10 mins | Cook time: 45 mins | Servings: 2

Ingredients

  • 2 russet potatoes

  • 4 tbsp butter, melted

  • 1 tbsp garlic paste or minced garlic

  • 3 to 5 slices Colby Jack cheese (cut into fourths)

  • Kosher salt and black pepper to taste

  • Optional toppings: Sour cream and fresh chives


Instructions

  1. Prep the Potatoes: * Cut a thin slice from the bottom of each potato to create a flat, stable base.

    • Place the potato between two chopsticks. Use a sharp knife to cut 1/4-inch slices across the potato; the chopsticks will stop your knife from cutting all the way through.

  2. The “Lift” Trick: * Place the small slices you cut from the bottom into the air fryer basket.

    • Set the large sliced potatoes on top of these bottom slices. This helps the Hasselback layers fan open during cooking.

  3. Seasoning: * Mix the melted butter, garlic, salt, and pepper.

    • Gently fan out the potato slices and brush the garlic butter over the top, making sure it gets between the layers.

    • Sprinkle with a little extra salt and pepper.

  4. First Stage Air Fry: * Set your air fryer to 370°F and cook for 20 minutes.

  5. Second Stage Air Fry: * Brush any remaining garlic butter over the potatoes.

    • Cook for an additional 20 to 25 minutes at 370°F until the edges are crispy and golden.

  6. Add the Cheese: * Slide the small cheese pieces into the gaps between the potato slices (either every gap or every other gap depending on your preference).

    • Cook for 1 to 2 more minutes until the cheese is bubbling and melted.

  7. Serve: * Top with a dollop of sour cream and a sprinkle of fresh chives.


Pro Tips for the Best Hasselbacks

  • Butter is Key: Don’t be shy with the garlic butter; it’s what creates the “salty” and “cheesy” experience mentioned in your notes.

  • Potato Size: Try to choose russet potatoes of a similar size so they cook evenly at the same time.
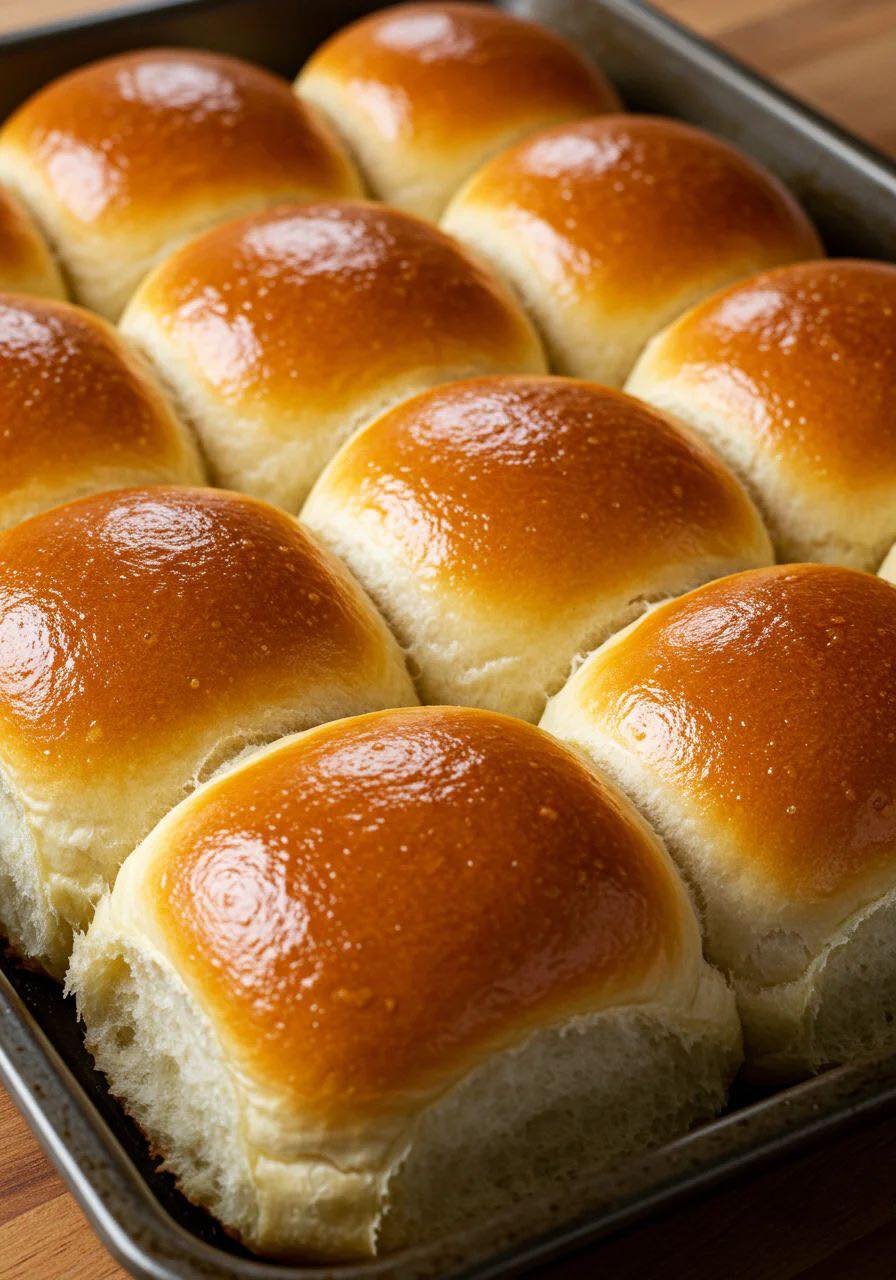
🍞 Soft Buttermilk Dinner Rolls

🍞 Soft Buttermilk Dinner Rolls

Pillowy • Tender • Lightly Sweet

These soft buttermilk rolls are fluffy on the inside with a golden, buttery top. The buttermilk adds a gentle tang and keeps the rolls moist for hours. Perfect for dinner, holidays, or breakfast with butter and jam.


Recipe Overview

  • Prep Time: 20 minutes

  • Rising Time: 1½–2 hours

  • Bake Time: 18–22 minutes

  • Oven Temperature: 180°C (350°F)

  • Yield: 12–15 rolls


Ingredients

  • 3½ cups (440 g) all-purpose flour

  • 1 cup warm buttermilk (lukewarm, not hot)

  • ¼ cup sugar

  • ¼ cup unsalted butter, melted and slightly cooled

  • 1 large egg, room temperature

  • 2¼ teaspoons instant yeast

  • 1 teaspoon salt

For Finishing

  • 2 tablespoons melted butter (for brushing after baking)


Equipment Needed

  • Large mixing bowl

  • Measuring cups and spoons

  • Wooden spoon or mixer

  • Clean kitchen towel

  • Baking pan (9×13 inch or similar)


Step-by-Step Instructions

1. Activate and Mix

  • In a large bowl, combine:

    • Warm buttermilk

    • Sugar

    • Yeast

  • Stir gently and let rest 5 minutes until slightly foamy

  • Add melted butter and egg

  • Mix until well combined


2. Form the Dough

  • Add flour and salt gradually

  • Mix until a soft, slightly sticky dough forms

  • Turn dough onto a lightly floured surface


3. Knead

  • Knead for 8–10 minutes until:

    • Smooth

    • Elastic

    • Soft but not sticky

  • Add small amounts of flour only if needed


4. First Rise

  • Place dough in a lightly greased bowl

  • Turn once to coat

  • Cover with a towel

  • Let rise in a warm place for 60–75 minutes, or until doubled


5. Shape the Rolls

  • Punch down the dough gently

  • Divide into equal portions (12–15 pieces)

  • Roll each piece into a smooth ball


6. Second Rise

  • Arrange rolls in a greased baking pan

  • Leave slight space between them

  • Cover and let rise 30–40 minutes until puffy


7. Bake

  • Preheat oven to 180°C (350°F)

  • Bake for 18–22 minutes, until tops are golden brown

  • Rolls should sound hollow when tapped lightly


8. Finish and Serve

  • Remove from oven

  • Brush immediately with melted butter

  • Let cool 10 minutes before serving


Texture & Flavor

  • Texture: Very soft, fluffy interior

  • Flavor: Mildly sweet with gentle tang from buttermilk

  • Crust: Lightly golden and buttery


Helpful Tips

  • Use warm, not hot, buttermilk

  • Do not over-flour the dough

  • Rolls rise best in a draft-free area

  • For extra softness, bake rolls close together


Storage

  • Store covered at room temperature for 2 days

  • Refrigerate up to 4 days

  • Reheat briefly before serving


Variations

  • Add garlic butter for savory rolls

  • Sprinkle sesame or poppy seeds before baking

  • Shape into slider buns

  • Make cloverleaf rolls using a muffin tin

Apple & Blueberry Yogurt Cake

Apple & Blueberry Yogurt Cake

Moist, fruity, and effortlessly beautiful—this Apple & Blueberry Yogurt Cake is a perfect blend of creamy texture and light sweetness. It’s the kind of dessert Tinsuf loves: simple ingredients, elegant results, and a taste that feels like homemade comfort.

Soft yogurt cake baked with apple slices and juicy blueberries—a light, rustic delight.


Table of Contents

Meta Section

  • Author: (tinsuf)
  • Cuisine: European
  • Category: Dessert
  • Keywords: yogurt cake, apple dessert, blueberry cake, simple baking
  • Prep Time: 15 minutes
  • Cook Time: 45 minutes
  • Total Time: 1 hour
  • Yield: 8–10 servings


Ingredients

  • 1 cup plain Greek yogurt
  • 3 large eggs
  • ¾ cup granulated sugar
  • ½ cup vegetable oil
  • 1 ½ cups all-purpose flour
  • 2 tsp baking powder
  • 1 tsp vanilla extract
  • 1 medium apple, thinly sliced
  • ½ cup blueberries
  • Pinch of salt
  • Powdered sugar for dusting (optional)


Instructions

  1. Preheat oven to 350°F (175°C). Line an 8-inch pan with parchment paper.
  2. In a bowl, whisk yogurt, eggs, sugar, oil, and vanilla until smooth.
  3. Add flour, baking powder, and salt. Mix until combined, then pour batter into the pan.
  4. Arrange apple slices decoratively on top and sprinkle blueberries evenly.
  5. Bake for 40–45 minutes until golden and just set in the center. Let cool fully.
  6. Slice and serve plain, dusted with powdered sugar, or with whipped cream.


ADVERTISEMENT


Tips & Variations

  • For extra flavor: Add lemon zest or a pinch of cinnamon to the batter.
  • Fruit swaps: Try raspberries, peaches, or sliced pears for seasonal twists.
  • Texture tip: Use Greek yogurt for a denser, custard-like texture, or plain yogurt for a lighter crumb.
  • Serving idea: Enjoy slightly chilled for a refreshing summer dessert.

Creamy Avocado & Banana Energy Smoothie

Creamy Avocado & Banana Energy Smoothie

This recipe yields approximately one large serving.


Ingredients

  • 1/2 Medium Avocado: Pitted and peeled (provides the creamy texture and healthy fats).

  • 1 Frozen Banana: Sliced (frozen works best for a “milkshake” consistency).

  • 1/4 Cup Whole Almonds: (as seen in the glass) or 1 tablespoon of almond butter.

  • 1 Cup Liquid Base: Unsweetened almond milk, coconut water, or regular milk.

  • Optional Sweetener: 1 teaspoon of honey or a pitted date if you prefer it sweeter.

  • Optional Topping: A sprinkle of crushed walnuts or extra sliced almonds.


Instructions

  1. Prep the Fruit: If you haven’t already, slice your banana and scoop the avocado out of its skin.

  2. Layer the Blender: Add the liquid base first (this helps the blender run smoothly), followed by the almonds, banana, and avocado.

  3. Blend: Start on a low speed and gradually increase to high. Blend for about 45–60 seconds until the mixture is completely smooth and no almond bits remain.

  4. Adjust Consistency: If the smoothie is too thick, add a splash more liquid. If you want it colder/thicker, add 2–3 ice cubes and blend again.

  5. Serve: Pour into a glass and top with crushed nuts as shown in the photo.


Quick Nutrition Tip

This combination is excellent for long-lasting energy because the healthy fats from the avocado and almonds slow down the absorption of the natural sugars in the banana, preventing a “sugar crash” later.

Homemade Lemon Water

Homemade Lemon Water

Ingredients

  • 2 Large Lemons: Choose firm, bright yellow lemons.

  • 4–6 Cups Water: Filtered or spring water works best.

  • Ice: Optional, for serving.

  • Optional Sweetener: A small amount of honey or stevia if you find it too tart.


Instructions

  1. Wash the Lemons: Since you are putting the slices directly into the water, scrub the skin thoroughly to remove any wax or residue.

  2. Slice: Cut one lemon into thin rounds.

  3. Juice: Squeeze the juice of the second lemon into your pitcher.

  4. Combine: Add the lemon slices to the pitcher and fill with water.

  5. Infuse: Let the pitcher sit in the refrigerator for at least 30 minutes before drinking. This allows the lemon oils and juice to blend with the water.


Healthy Tips for Use

  • Protect Your Teeth: The acid in lemons can soften tooth enamel. It is best to drink this through a straw or rinse your mouth with plain water afterward.

  • Temperature: Many people prefer drinking this warm in the morning to help wake up their digestive system, or ice-cold for refreshment.

  • Manage Expectations: While staying hydrated can reduce bloating and help you feel better, sustainable body changes come from a balanced diet and regular physical activity.

Mixed Berry Crumb Cheesecake


Mixed Berry Crumb Cheesecake

Ingredients

Crust Base:

  • 1½ cups graham cracker crumbs
  • ⅓ cup melted butter
  • 2 tablespoons sugar

Cheesecake Filling:

  • 24 oz (3 blocks) cream cheese, softened
  • 1 cup granulated sugar
  • 1 cup sour cream
  • 3 large eggs

Berry Swirl:

  • 1 cup fresh raspberries
  • 1 cup fresh blackberries
  • 2 tablespoons sugar
  • 1 teaspoon lemon juice

Crumb Topping:

Discover more
Bread
Garlic
Cake
CREAM CHEESE
cheese
Cream Cheese
bread
cream cheese
Cheese
cake

  • ½ cup all-purpose flour
  • ½ cup brown sugar
  • 4 tablespoons cold butter, cubed

Flavoring:

  • 2 teaspoons vanilla extract

Instructions

Prepare the crust by combining graham cracker crumbs, melted butter, and sugar.

Press the mixture firmly into the bottom of a 9-inch spring form pan.

Bake at 175°C (350°F) for 8 minutes, then cool completely.

Simmer raspberries, blackberries, sugar, and lemon juice in a small pan for 5–7 minutes until thickened.

Strain through a mesh sieve to remove seeds, then let the berry sauce cool.

Beat softened cream cheese and sugar until smooth.

Add sour cream and vanilla extract, mixing until incorporated.

Add eggs one at a time on low speed to avoid incorporating excess air.

Pour half the cheesecake batter over the cooled crust.

Drop spoonfuls of berry sauce on top and swirl lightly with a knife.

Add the remaining batter and repeat the berry swirl.

Mix flour, brown sugar, and cold butter until crumbly.

Sprinkle the streusel topping generously over the cheesecake.

Bake at 160°C (325°F) for 55–65 minutes, until edges are set but the center still has a slight jiggle.

Cool completely before removing from the pan.