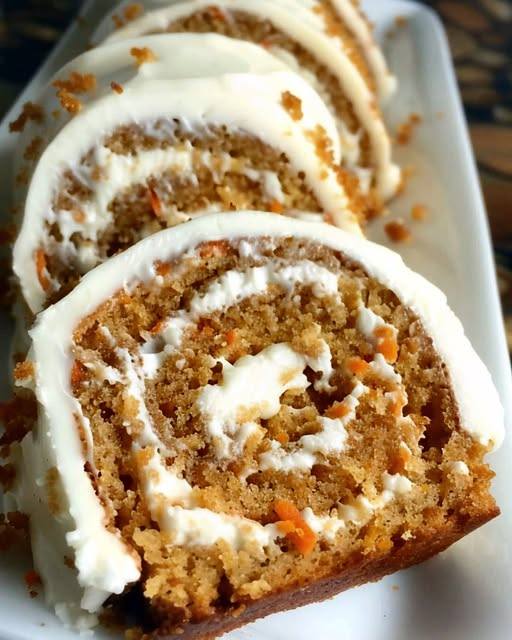
Carrot Cake Roll with Cream Cheese Frosting

Ingredients

Dry:

  • ¾ cup all-purpose flour

  • ½ tsp baking powder

  • ½ tsp baking soda

  • ½ tsp ground cinnamon

  • ½ tsp ground ginger

  • ¼ tsp ground nutmeg

  • ¼ tsp salt

Wet:

  • 3 large eggs

  • ½ cup granulated sugar

  • ⅓ cup packed light brown sugar

  • 2 tsp vanilla extract

  • 2 cups finely grated carrots

  • ½ cup chopped walnuts (optional)

Cream Cheese Filling:

  • 8 oz cream cheese, softened

  • 1 cup powdered sugar

  • 6 tbsp unsalted butter, softened

  • 1 tsp vanilla extract

Instructions

  1. Prep the Pan

    • Preheat oven to 350°F (175°C).

    • Line a 15×10-inch jelly roll pan with parchment paper, leaving overhang.

  2. Mix Dry Ingredients

    • In a medium bowl, whisk flour, baking powder, baking soda, cinnamon, ginger, nutmeg, and salt.

  3. Make Batter

    • In a large bowl, beat eggs, granulated sugar, and brown sugar until thick and creamy (3–4 minutes).

    • Mix in vanilla.

    • Gradually add dry ingredients, beating until just combined.

    • Fold in grated carrots and walnuts (if using).

  4. Bake the Cake

    • Spread batter evenly in prepared pan.

    • Bake 10–12 minutes, or until cake springs back when lightly touched.

  5. Roll the Cake

    • While baking, dust a clean kitchen towel with powdered sugar.

    • Turn hot cake onto the towel, peel off parchment, and roll up from a short end with the towel inside.

    • Cool completely on a wire rack.

  6. Make the Filling

    • Beat cream cheese, powdered sugar, butter, and vanilla until smooth and creamy.

  7. Assemble

    • Gently unroll cooled cake.

    • Spread cream cheese filling evenly over surface.

    • Roll cake back up (without towel) and wrap in plastic wrap.

  8. Chill & Serve

    • Refrigerate at least 1 hour before slicing.

⏱ Total Time: ~1 hr 30 min (including chilling)
🍽 Servings: ~10–12 slices
💡 Tip: For a bakery-perfect look, dust with extra powdered sugar before serving.

If you’d like, I can also give you a pumpkin cake roll version that follows the exact same process but swaps in fall flavors. Would you like me to make that version for you?
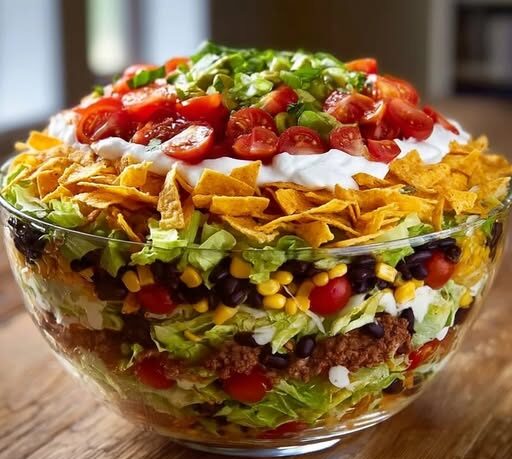
Seven Layer Taco Salad

Ingredients

  • 1 head lettuce, shredded

  • 1 can black beans, rinsed & drained

  • 1 cup cherry tomatoes, halved

  • 1 cup corn, drained

  • 1 cup shredded cheese (cheddar or Mexican blend)

  • 1 cup sour cream

  • 1 package taco seasoning

  • 1 cup salsa

  • Tortilla chips, for topping

Optional Garnish: extra cheese, green onions, fresh cilantro

👨‍🍳 Instructions

  1. Mix the Dressing

    • In a small bowl, combine sour cream and taco seasoning. Set aside.

  2. Layer the Salad (use a clear glass bowl or trifle dish for presentation)

    1. Shredded lettuce

    2. Black beans

    3. Corn

    4. Cherry tomatoes

    5. Shredded cheese

    6. Taco-seasoned sour cream

    7. Salsa

  3. Top & Serve

    • Just before serving, sprinkle crushed tortilla chips on top for crunch.

    • Garnish with extra cheese, green onions, or fresh cilantro if desired.

⏱ Prep Time: 15 min
🔥 Cook Time: None
📅 Total Time: 15 min
🍽 Servings: 6–8
⚡ Calories: ~320 kcal per serving

💡 Tip: Add guacamole or diced avocado between layers for extra creaminess.

If you want, I can also make a “walking taco salad” version of this that’s perfect for parties or picnics—no bowl needed. Would you like me to write that up?

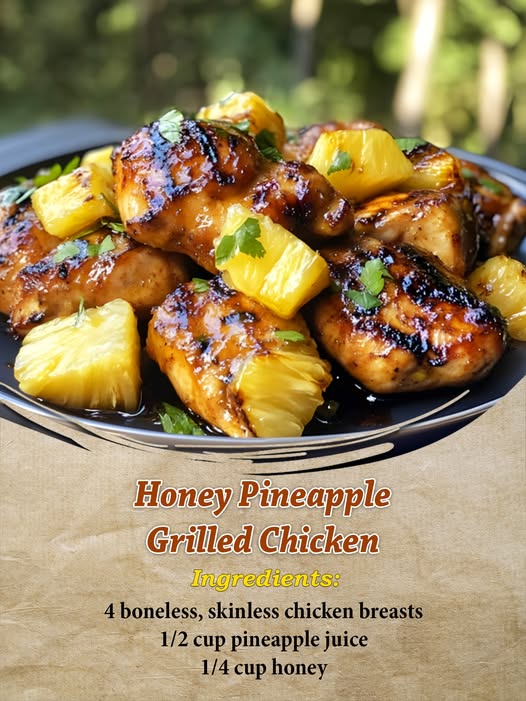
Honey Pineapple Grilled Chicken

Ingredients
4 boneless, skinless chicken breasts

½ cup pineapple juice

¼ cup honey

2 tbsp soy sauce

2 tbsp olive oil

2 cloves garlic, minced

1 tbsp fresh lime juice

1 tsp ground ginger

Salt & pepper, to taste

Fresh cilantro, for garnish (optional)

👨‍🍳 Instructions
Make the Marinade

In a medium bowl, whisk together pineapple juice, honey, soy sauce, olive oil, garlic, lime juice, ginger, salt, and pepper.

Marinate the Chicken

Place chicken breasts in a zip-top bag or shallow dish. Pour marinade over the chicken.

Seal and refrigerate for at least 1 hour (up to 4 hours for stronger flavor).

Preheat Grill

Set grill to medium-high heat. Lightly oil grates to prevent sticking.

Grill the Chicken

Remove chicken from marinade (discard leftover marinade).

Grill for 6–8 minutes per side, or until internal temperature reaches 165°F (75°C).

Serve

Rest chicken for a few minutes before slicing.

Garnish with fresh cilantro if desired.

⏱ Prep Time: 10 min (+ marinating)
🔥 Cook Time: 12–16 min
📅 Total Time: ~1 hr 30 min
🍽 Servings: 4
⚡ Calories: ~250 per serving

💡 Tip: Pairs beautifully with coconut rice or a fresh mango salsa.

If you want, I can also give you a sheet pan oven-baked version of this so you can make it without grilling. Would you like me to create that?

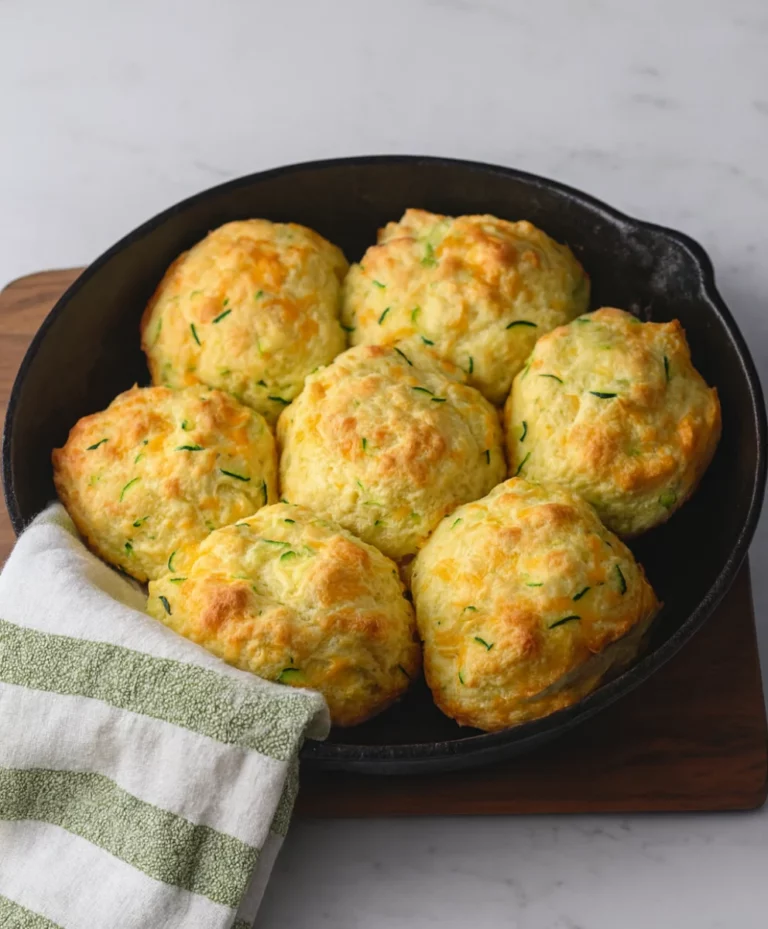
Flaky Zucchini Cheddar Biscuits

Ingredients

  • 2 cups (240 g) all-purpose flour

  • 1 tbsp baking powder

  • ¼ tsp baking soda

  • 1 tsp salt

  • ½ tsp garlic powder

  • 5 tbsp (70 g) unsalted butter, very cold

  • 1 cup (240 g) buttermilk

  • 1 cup (135 g) zucchini, finely grated & liquid squeezed out

  • 1 tbsp chopped chives

  • 4 oz (113 g) shredded sharp cheddar cheese

👨‍🍳 Instructions

  1. Preheat Oven – Set to 425°F (218°C). Lightly grease a 10-inch cast iron skillet or oven-safe baking dish.

  2. Mix Dry Ingredients – In a large bowl, whisk together flour, baking powder, baking soda, salt, and garlic powder.

  3. Add Cold Butter & Mix-ins – Grate cold butter into the dry mixture. Add buttermilk, zucchini, chives, and cheddar. Stir gently until a shaggy dough forms.

  4. Laminate Dough for Flakiness – On a floured surface, pat dough into a rectangle (10–12 inches wide, ¾ inch thick).

    • Fold in half, rotate, and pat back into a rectangle.

    • Repeat folding 4 times to create flaky layers.

  5. Cut Biscuits – Pat dough to ¾ inch thick again and cut biscuits with a round cutter.

  6. Bake – Arrange biscuits in the skillet so they’re just touching. Bake 18–20 minutes, until golden and fluffy.

  7. Serve – Best served warm for maximum flakiness.

💡 Tips:

  • Squeeze zucchini well—excess moisture will make biscuits dense.

  • Freeze grated butter for 5 minutes before grating for ultra-flaky layers.

  • Brush biscuit tops with melted butter right after baking for extra flavor.

If you want, I can also make a bakery-style version with taller layers by adjusting the folding and cutting technique. Would you like me to share that?

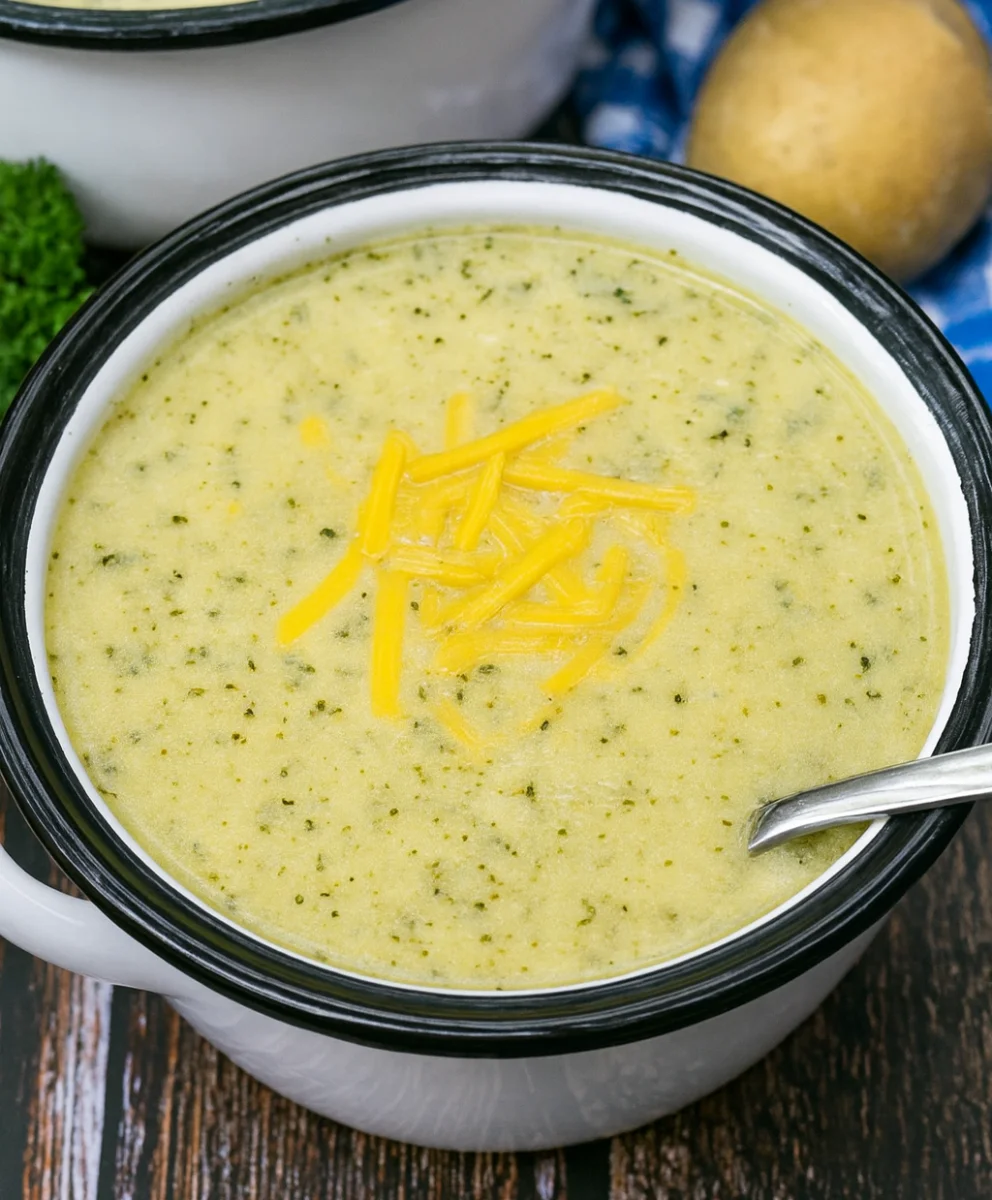
Creamy Zucchini Soup

Ingredients

  • 2 tbsp butter

  • 1 yellow onion, peeled & diced

  • 3 garlic cloves, peeled & minced

  • ¼ tsp dried rosemary

  • ¼ tsp dried thyme

  • Pinch dried oregano

  • ¼ tsp celery salt

  • Salt & pepper, to taste

  • Dash cayenne pepper (optional)

  • 5 cups fresh zucchini, chopped

  • 3–4 cups chicken broth

  • 1 tbsp soy sauce

  • 1 lb russet potatoes, washed, peeled, & diced

  • ½ cup heavy cream (room temperature)

  • 1¼ cups shredded cheddar cheese (room temperature)

👨‍🍳 Instructions

  1. Sauté Aromatics
    Melt butter in a large Dutch oven over medium heat. Add onion and cook until translucent.
    Add garlic and cook 1 more minute.

  2. Season
    Stir in rosemary, thyme, oregano, celery salt, cayenne, salt, and pepper.

  3. Cook Vegetables
    Add zucchini and cook for 5 minutes, stirring occasionally.

  4. Simmer
    Add potatoes, chicken broth, and soy sauce. Bring to a boil, reduce heat, and simmer 15–20 minutes or until vegetables are tender.

  5. Blend
    Remove from heat and blend soup until smooth using an immersion blender or regular blender (in batches if needed).

  6. Finish with Cream & Cheese
    Stir in heavy cream and cheddar cheese until melted and fully incorporated.

  7. Serve
    Serve warm, garnished with fresh herbs if desired.

💡 Tips:

  • For a vegetarian version, use vegetable broth instead of chicken broth.

  • Add a little extra cayenne or red pepper flakes for a spicy kick.

  • This soup freezes well—just skip adding the cream and cheese until reheating.

If you want, I can also make a printable one-page recipe card for this so it’s ready for your cookbook. Would you like me to do that?

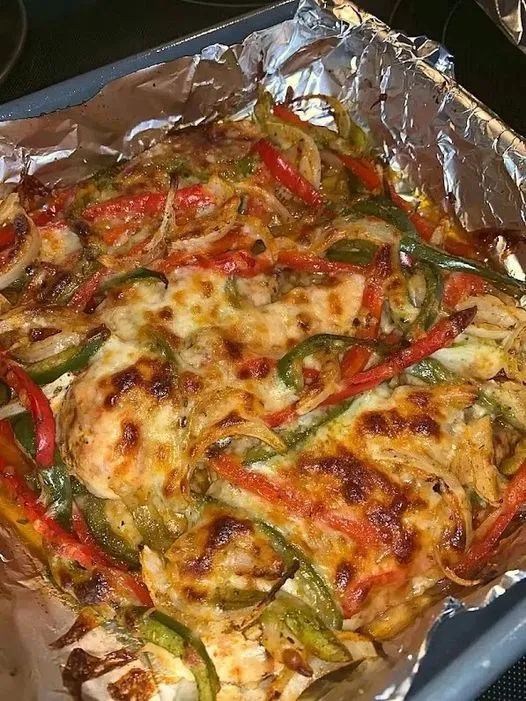
Easy Fajita Chicken Breasts Casserole

The  Fajita Chicken Breasts Casserole is a delightful twist on a classic Tex-Mex favorite, carefully crafted to be both flavorful and health-conscious. This wholesome dish features tender chicken breasts seasoned with a harmonious blend of cumin, chili powder, garlic, and paprika, offering a burst of vibrant flavors with every bite. The addition of colorful bell peppers and minced onions not only adds a pleasing visual appeal but also contributes a delightful crunch and sweetness to the dish. Topped with a generous sprinkling of reduced-fat mozzarella cheese, this casserole bakes to golden perfection, creating a satisfyingly gooey and cheesy layer over the succulent chicken and vegetables.

Thank you for reading this post, don’t forget to subscribe!

Garnished with freshly chopped cilantro or parsley for a final touch of brightness, this dish is as visually stunning as it is delicious. Whether served over cauliflower rice, steamed vegetables, or enjoyed on its own, this Fajita Chicken Breasts Casserole promises to be a comforting and nutritious meal option that’s perfect for any occasion. With its balanced flavors, customizable spice level, and suitability for meal prep, it’s a versatile recipe that’s sure to become a household favorite among those following a  plan or simply looking for a lighter take on a beloved classic.

Ingredients:

  • 3-4 small boneless, skinless chicken breasts (about 1 1/2 lbs/750g), or 2 large chicken breasts, sliced lengthwise
  • 2 bell peppers (1 red and 1 green), seeded and sliced into strips
  • 1 medium onion, minced
  • 1 teaspoon ground cumin
  • 1 1/2 teaspoons chili powder
  • 1 teaspoon garlic powder or minced garlic
  • 2 teaspoons paprika
  • Salt and freshly ground black pepper to taste
  • 1 tablespoon vegetable oil
  • 1 cup grated reduced-fat mozzarella cheese or your favorite reduced-fat cheese
  • Chopped fresh cilantro or parsley for garnish

Directions:

  1. Preheat your oven to 400°F (200°C) and lightly coat a baking dish with cooking spray.
  2. Season chicken breasts on both sides with cumin, chili powder, garlic, paprika, salt, and pepper. Reserve some seasoning for later use.
  3. Place the chicken breasts in the prepared baking dish and drizzle with oil. Top with peppers and onions, and sprinkle with the remaining fajita seasonings. Finish with grated reduced-fat mozzarella cheese.
  4. Bake the chicken fajita casserole for 20 to 30 minutes (depending on thickness) or until the chicken is cooked through and reaches an internal temperature of 165°F (74°C). You can broil the dish for 2 minutes at the end to crisp the top if desired.
  5. Serve immediately over cauliflower rice, steamed vegetables, zucchini noodles, or on its own.
  6. Garnish with chopped fresh cilantro or parsley before serving.

Points:

  • This recipe makes approximately 4 servings.
  • Points per serving (without accompaniments): Each serving is approximately 4-5  SmartPoints, depending on specific ingredients used.

Notes:

  • Adjust the spiciness according to your preference by increasing or decreasing the amount of chili powder and black pepper.
  • For a smoky flavor, you can substitute the paprika with smoked paprika.
  • This recipe is great for meal prep as it can be easily reheated for a quick and delicious lunch or dinner.