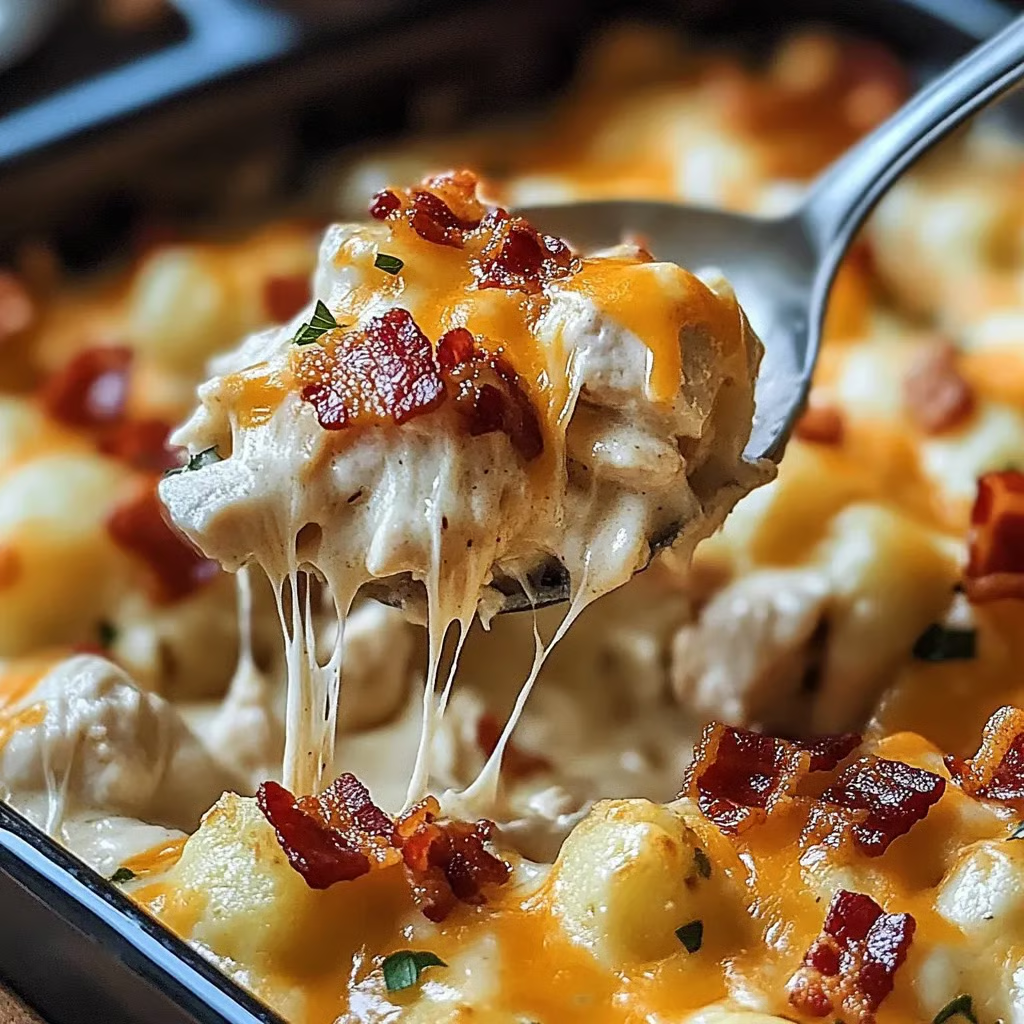
Chicken Bacon Crunch Casserole

Creamy, cheesy chicken and bacon casserole topped with golden, crispy tater tots — the perfect blend of comfort and crunch.

Servings: 8
Prep Time: 15 minutes
Cook Time: 40 minutes
Total Time: 55 minutes
Dietary Badges: Contains Dairy, Contains Gluten, Contains Meat

Ingredients

Casserole Base

  • Frozen tater tots (32 oz bag)

  • Sharp cheddar cheese, shredded

  • Ranch seasoning mix (1 packet)

  • Cream of chicken soup (1 can)

  • Sour cream

  • Bacon, cooked and crumbled (reserve 2 tbsp for garnish)

  • Cooked chicken, chopped or shredded

Fresh Garnish

  • Green onions, sliced

  • Reserved crumbled bacon

Instructions

  1. Preheat Oven: Set to 400°F (200°C). Grease a 9×13-inch baking dish.

  2. Mix Filling: In a large bowl, combine chicken, most of the bacon (reserve 2 tbsp for garnish), sour cream, cream of chicken soup, ranch mix, and shredded cheddar. Mix until fully combined.

  3. Assemble Casserole: Spread mixture evenly in the prepared baking dish. Arrange frozen tater tots in a single layer on top.

  4. Bake: Cook for about 40 minutes, until tater tots are golden and crispy and casserole is bubbling at the edges.

  5. Garnish & Serve: Sprinkle with reserved bacon and sliced green onions. Serve hot.

Notes:

  • Rotisserie chicken is a quick, flavorful shortcut.

  • Assemble ahead and refrigerate until baking, or freeze for up to 3 months.

Brief Introduction

This casserole is like a loaded baked potato in a dish — creamy chicken, smoky bacon, sharp cheddar, and crispy tater tots come together for the ultimate comfort food. It’s family-friendly, freezer-friendly, and weeknight-approved.

Step-by-Step Cooking Guide

Filling Prep

  1. Combine Base: Mix chicken, bacon, sour cream, cream soup, ranch seasoning, and cheddar until creamy and uniform.

Layering

  1. Spread & Top: Smooth mixture in baking dish, then neatly arrange tater tots on top for even crisping.

Baking & Serving

  1. Bake Until Golden: Watch for bubbling edges and crunchy, golden tater tots.

  2. Add Fresh Finish: Sprinkle with green onions and extra bacon right before serving.

Ingredient Details & Substitution Tips

  • Chicken: Rotisserie, baked, or leftover roasted chicken all work. Turkey is a great substitute.

  • Bacon: Thick-cut bacon gives bigger crunchy bits; turkey bacon for a lighter version.

  • Cheddar Cheese: Sharp cheddar for bold flavor; Colby Jack or mozzarella for a milder profile.

  • Tater Tots: Swap for seasoned potato wedges or hash brown patties for a twist.

Recipe Variations & Serving Suggestions

  • Spicy Kick: Add diced jalapeños or a pinch of cayenne to the filling.

  • Veggie Boost: Stir in broccoli florets or diced bell peppers.

  • Serving Ideas: Pair with a side salad or roasted vegetables for balance.

Storage & Make-Ahead Information

  • Refrigeration: Store leftovers in airtight container for up to 4 days.

  • Freezing: Freeze unbaked casserole up to 3 months; thaw before baking.

  • Reheating: Bake at 350°F covered with foil until heated through.

  • Make-Ahead: Assemble, cover, and refrigerate up to 24 hours before baking.

Nutrition Facts (per serving, 8 servings)

Calories: ~480 kcal | Carbs: 26g | Protein: 23g | Fat: 32g | Sodium: 950mg | Fiber: 2g

FAQs

Q: Can I use leftover turkey instead of chicken?
A: Yes — it works perfectly, especially after the holidays.

Q: Can I use Greek yogurt instead of sour cream?
A: Absolutely, for a lighter, tangier option.

Q: How do I keep the tater tots extra crispy?
A: Make sure they’re in a single layer and avoid overcrowding.

Personal Story

This casserole was born out of a craving for comfort food that still had texture and bite. The combination of creamy filling and crunchy tater tot topping hits every note — and the bacon-green onion garnish takes it over the top. It’s my go-to for potlucks and lazy Sunday dinners.

If you want, I can also create process photo captions so it’s completely ready for the “Hero Image & Step-by-Step Visual Guide” part of your outline. Would you like me to prepare those next?
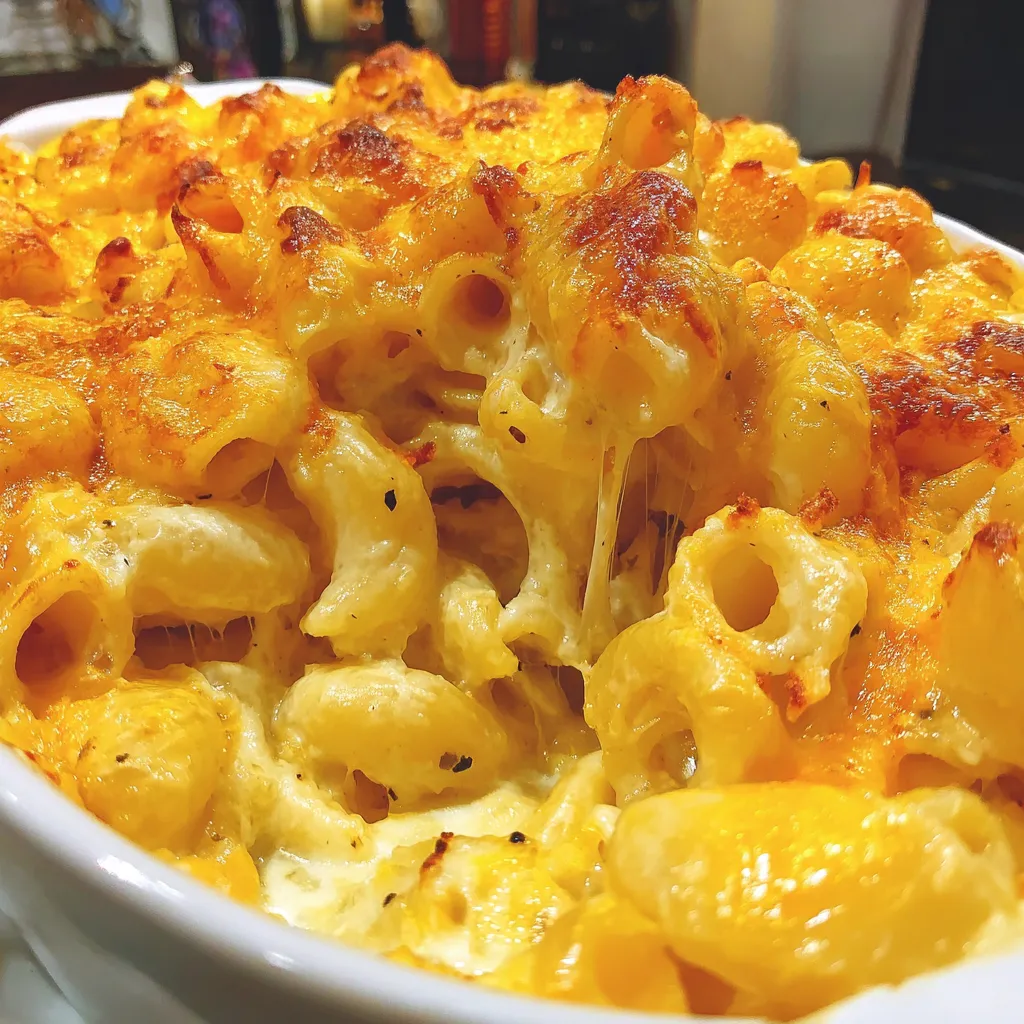
Southern Baked Macaroni and Cheese

Rich, creamy, and topped with a golden, crispy cheese crust — the ultimate soul food comfort dish.

Servings: 10–12
Prep Time: 25 minutes
Cook Time: 15 minutes
Broil Time: 5 minutes
Total Time: 45 minutes
Dietary Badges: Contains Dairy, Contains Gluten, Vegetarian-Friendly (no meat)

Ingredients

  • Pasta & Butter Base:

    • Pasta noodles (elbow or rotini)

    • Butter, room temperature (divided)

  • Cheese Sauce:

    • Garlic cloves, minced

    • All-purpose flour

    • Reserved pasta water

    • Heavy cream

    • Half and half

    • Shredded medium cheddar

    • Shredded Colby Jack

    • Shredded mozzarella

    • Shredded sharp cheddar

    • Shredded white cheddar

    • Whipped cream cheese

    • Onion powder

    • Paprika

    • Mustard powder

    • Salt & black pepper to taste

Instructions

  1. Prep Cheeses & Butter: Shred all cheeses. Reserve 1 cup each of medium cheddar, Colby Jack, and mozzarella for topping. Mince garlic and portion butter into 7 tablespoons.

  2. Cook Pasta: Boil pasta until slightly less than al dente. Reserve ½ cup pasta water before draining. Transfer to a greased 9×13-inch casserole dish and toss with 2 tablespoons butter.

  3. Make Cheese Sauce: In a large skillet, melt remaining 5 tablespoons butter over medium-high heat. Add garlic and sauté 1 minute. Whisk in flour, cooking until golden. Slowly whisk in reserved pasta water, heavy cream, and half and half until sauce thickens (about 4 minutes). Lower heat and add remaining shredded cheeses, one handful at a time, until melted. Stir in cream cheese, onion powder, paprika, mustard powder, salt, and pepper. Mix until smooth.

  4. Combine & Layer: Pour cheese sauce over pasta, toss to coat, then sprinkle reserved cheeses evenly on top.

  5. Bake: Bake at 425°F (220°C) for 10 minutes.

  6. Broil: Switch oven to broil and cook 5 minutes, until cheese topping is golden and crispy.

  7. Cool & Serve: Rest 3–5 minutes before serving.

Notes:

  • Freshly shredded cheese melts more smoothly than pre-shredded.

  • Slightly undercooking the pasta helps it hold texture during baking.

Brief Introduction

This Southern baked macaroni and cheese is all about indulgence — a velvety, multi-cheese sauce envelops tender pasta, topped with a bubbling crust of golden cheddar, Colby Jack, and mozzarella. It’s a side dish that steals the spotlight.

Step-by-Step Cooking Guide

Cheese Prep & Pasta Base

  1. Shred & Reserve: Grate all cheeses, setting aside the topping mix.

  2. Cook Pasta: Boil just shy of al dente for the perfect baked texture.

Cheese Sauce Perfection

  1. Build Roux: Melt butter, sauté garlic, and whisk in flour until golden.

  2. Creamy Blend: Add liquids gradually, whisk until thickened, then melt in cheeses and seasonings.

Baking & Crisping

  1. Bake for Fusion: Pasta and sauce meld together in the oven.

  2. Broil for Crust: The reserved cheese topping crisps beautifully under high heat.

Ingredient Details & Substitution Tips

  • Pasta: Elbows are classic; rotini or cavatappi hold sauce well.

  • Cheeses: Blend of cheddar, Colby Jack, mozzarella, sharp cheddar, and white cheddar gives depth.

  • Half and Half: Can use all milk for lighter sauce, or heavy cream for richer texture.

  • Cream Cheese: Adds extra creaminess; can be omitted for a slightly less rich sauce.

Recipe Variations & Serving Suggestions

  • Spicy Twist: Add diced jalapeños or a dash of cayenne to the sauce.

  • Crunchy Top: Sprinkle breadcrumbs mixed with butter over cheese before baking.

  • Serving Ideas: Serve as a side for BBQ meats, fried chicken, or holiday spreads.

Storage & Make-Ahead Information

  • Refrigeration: Store in airtight container up to 4 days.

  • Freezing: Freeze portions up to 2 months; thaw and reheat gently.

  • Reheating: Warm in oven at 325°F covered with foil to retain moisture.

  • Make-Ahead: Assemble up to 24 hours before baking; store covered in fridge.

Nutrition Facts (per serving, 12 servings)

Calories: ~420 kcal | Carbs: 29g | Protein: 16g | Fat: 27g | Sodium: 510mg

FAQs

Q: Can I make it without broiling?
A: Yes — bake 5–10 extra minutes for a golden crust.

Q: Can I use pre-shredded cheese?
A: You can, but it may not melt as smoothly due to anti-caking agents.

Q: Can I add meat?
A: Yes — cooked bacon, ham, or pulled chicken make it a main dish.

Personal Story

I first had Southern baked mac and cheese at a holiday dinner in Georgia, and I’ve been hooked ever since. After testing countless cheese blends, this one delivers the perfect creamy interior and crispy topping balance. It’s now my go-to for gatherings where I want guaranteed clean plates.

Do you want me to also prepare step-by-step photo captions for this one so it’s fully blog-ready with your “visual cooking guide” section? That would complete the structure from your outline.

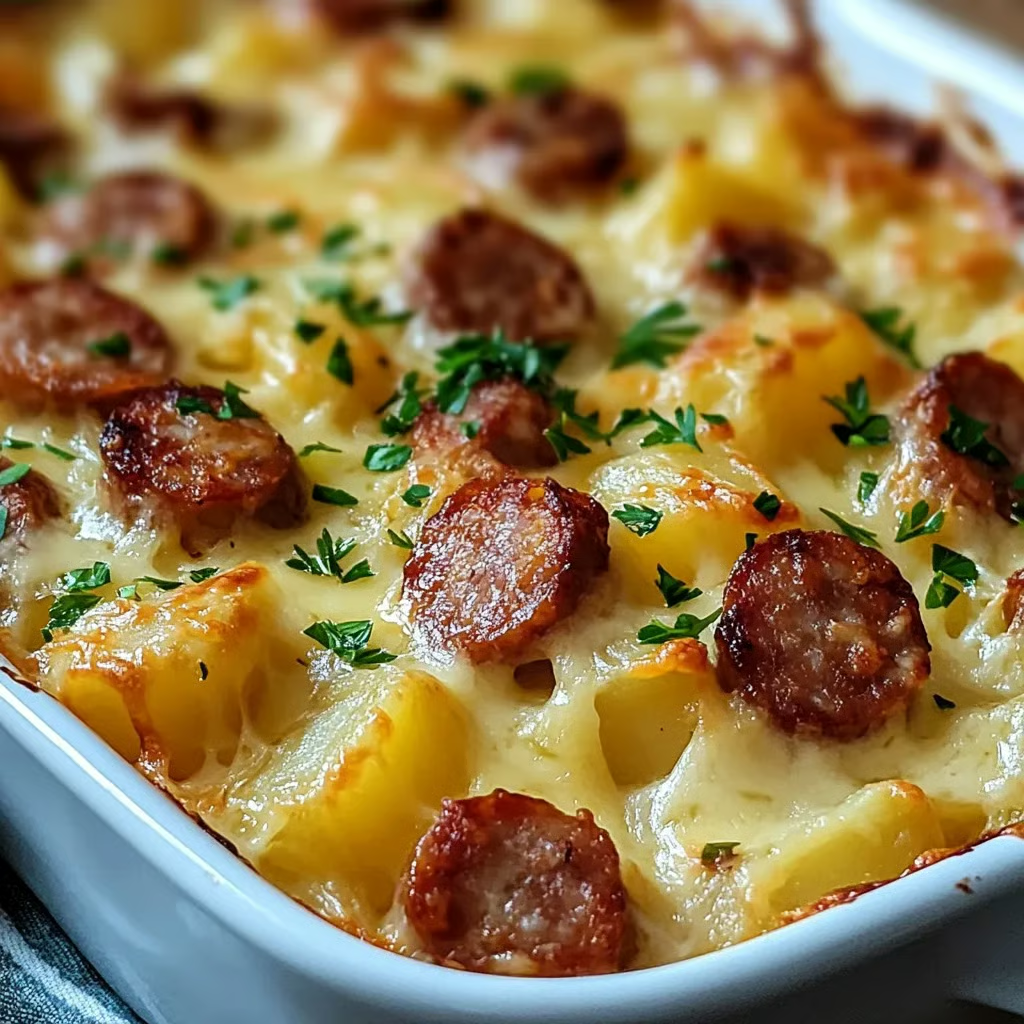
Cheesy Potato & Kielbasa Casserole

Thinly sliced potatoes layered with smoky kielbasa, onions, and cheddar, all baked in a creamy, seasoned sauce — the ultimate cozy bake for family dinners.

Servings: 6–8
Prep Time: 20 minutes
Cook Time: 55–60 minutes
Total Time: 1 hour 15–20 minutes
Dietary Badges: Contains Dairy, Contains Gluten, Contains Meat

Ingredients

Main Ingredients

  • Potatoes, peeled and thinly sliced

  • Kielbasa sausage, sliced into ¼-inch rounds

  • Onion, minced

  • Cheddar cheese, shredded

Creamy Sauce

  • Sour cream

  • Cream of chicken soup (10.5 oz can)

  • Melted butter

  • Garlic powder

  • Paprika

  • Salt

  • Black pepper

  • Fresh parsley, chopped (optional garnish)

Instructions

  1. Prep Oven & Dish: Preheat oven to 375°F (190°C). Grease a 9×13-inch baking dish.

  2. Mix Sauce: In a large bowl, whisk together sour cream, cream of chicken soup, melted butter, garlic powder, paprika, salt, and pepper until smooth.

  3. First Layer: Arrange half the potatoes in an even layer in the prepared dish. Top with half the kielbasa, half the onion, half the sauce, and 1 cup cheddar.

  4. Second Layer: Repeat layering with remaining potatoes, kielbasa, onion, sauce, and cheddar.

  5. Bake Covered: Cover with foil and bake for 40 minutes.

  6. Bake Uncovered: Remove foil and bake an additional 15–20 minutes, until cheese is bubbly and potatoes are tender.

  7. Finish & Serve: Garnish with parsley if desired. Serve hot.

Notes:

  • For a smokier flavor, use smoked kielbasa.

  • Bell peppers or mushrooms can be added between layers for extra flavor.

Brief Introduction

This hearty casserole layers tender potatoes, savory kielbasa, and plenty of cheese under a creamy, seasoned sauce. It’s easy to assemble, bakes to perfection, and works just as well for weeknight dinners as it does for potlucks.

Step-by-Step Cooking Guide

Sauce Prep

  1. Creamy Blend: Combine sour cream, cream of chicken soup, butter, and seasonings for a rich, flavorful sauce.

Layering the Casserole

  1. Base Layers: Half the potatoes, half the kielbasa, half the onion, sauce, and cheese.

  2. Repeat: Finish with the remaining ingredients for a full, even bake.

Baking & Finishing

  1. Cover & Bake: Keeps moisture in for tender potatoes.

  2. Uncover & Brown: Melts and browns the cheese for that perfect crust.

Ingredient Details & Substitution Tips

  • Kielbasa: Can substitute with smoked sausage, turkey sausage, or even chorizo for a spicy twist.

  • Cheddar Cheese: Sharp cheddar adds bold flavor; mozzarella or Colby Jack can be used for milder taste.

  • Cream of Chicken Soup: Cream of mushroom or celery works for different flavor profiles.

  • Potatoes: Russet or Yukon Gold are best for tenderness and flavor.

Recipe Variations & Serving Suggestions

  • Veggie Boost: Add layers of spinach, mushrooms, or roasted red peppers.

  • Spicy Kick: Add sliced jalapeños or a pinch of cayenne to the sauce.

  • Serving Ideas: Pair with a crisp green salad or crusty bread to round out the meal.

Storage & Make-Ahead Information

  • Refrigeration: Store in an airtight container for up to 4 days.

  • Freezing: Freeze baked or unbaked casserole for up to 2 months; thaw before reheating or baking.

  • Reheating: Warm in oven at 325°F covered with foil until heated through.

  • Make-Ahead: Assemble up to 24 hours ahead; refrigerate until ready to bake.

Nutrition Facts (per serving, 8 servings)

Calories: ~410 kcal | Carbs: 28g | Protein: 17g | Fat: 25g | Sodium: 1020mg | Fiber: 3g

FAQs

Q: Can I use precooked potatoes?
A: Yes — reduce covered baking time by about 15 minutes.

Q: How do I make this gluten-free?
A: Use gluten-free cream soup or make your own roux-based sauce with GF flour.

Q: Can I assemble and freeze before baking?
A: Absolutely — just thaw overnight before baking.

Personal Story

This casserole became a family favorite after I made it for a snowy weekend dinner. The smoky sausage, creamy sauce, and tender potatoes made it one of those “stick-to-your-ribs” meals that everyone asks for again.

If you want, I can also prepare step-by-step photo captions so this post is fully ready for your blog’s visual recipe card section. Would you like me to do that next?

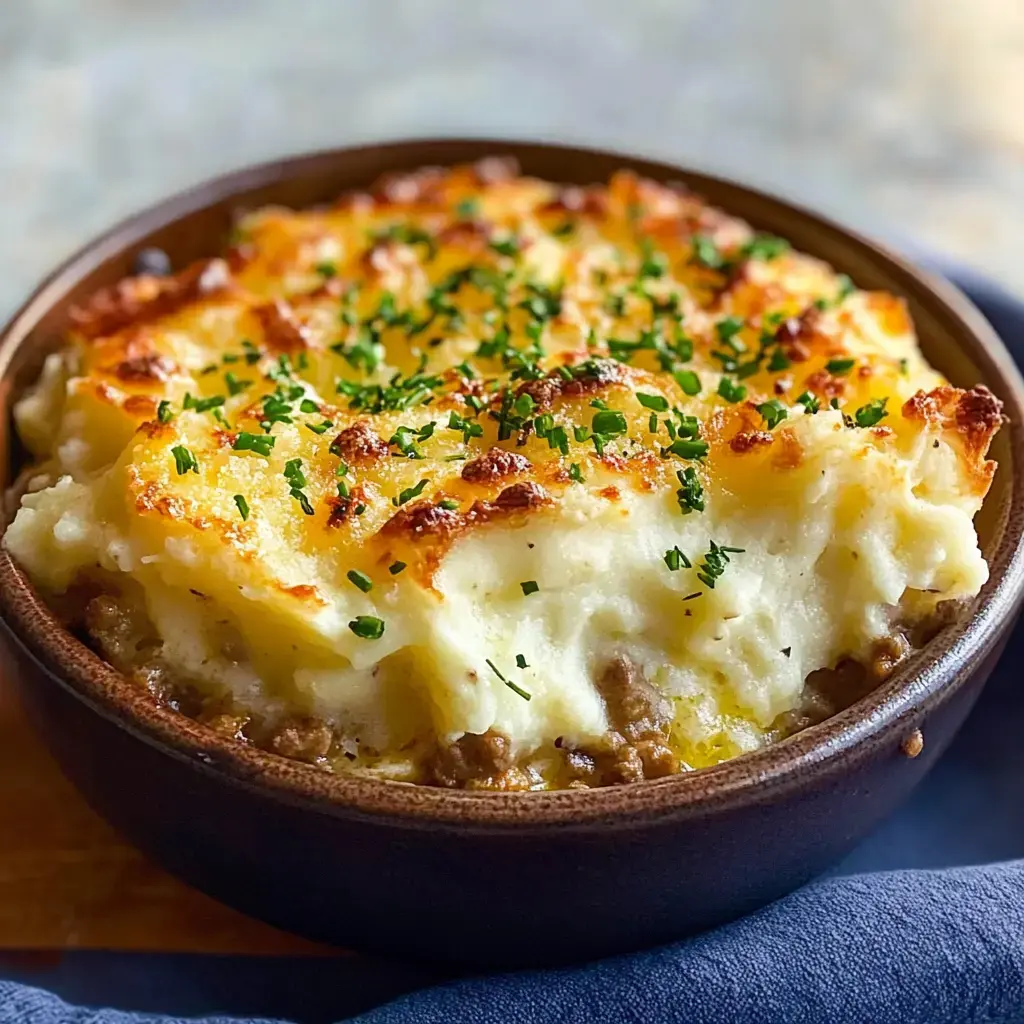
Cozy Comfort Classic (Shepherd’s Pie–Style Bake)

A rich, savory beef or lamb filling topped with buttery, cheesy mashed potatoes — the ultimate cold-weather comfort dish.

Servings: 6–8
Prep Time: 25 minutes
Cook Time: 55 minutes
Cooling Time: 15 minutes
Total Time: 1 hour 35 minutes
Dietary Badges: Contains Dairy, Contains Gluten, Contains Meat

Ingredients

Filling

  • Olive oil

  • Yellow onion, finely diced

  • Ground beef or lamb (lean, 90%)

  • Dried thyme

  • Crushed rosemary

  • Dried parsley

  • Salt

  • Ground black pepper

  • Garlic cloves, finely chopped

  • Worcestershire sauce

  • Plain flour

  • Tomato paste

  • Beef broth

  • Frozen peas, carrots, and corn

Mashed Potato Topping

  • Russet potatoes, peeled and cut into chunks

  • Unsalted butter

  • Half-and-half cream

  • Garlic powder

  • Extra salt (for mash)

  • Additional black pepper

  • Shredded parmesan cheese

Instructions

  1. Cook Onions: Heat olive oil in a large skillet over medium-high heat. Add onions; sauté 5 minutes.

  2. Brown Meat: Add ground beef or lamb, thyme, rosemary, parsley, salt, and pepper. Cook 6–8 minutes until browned.

  3. Add Aromatics & Sauce: Stir in garlic and Worcestershire sauce; cook 1 minute.

  4. Thicken & Flavor: Sprinkle in flour, then stir in tomato paste. Mix thoroughly.

  5. Simmer: Pour in beef broth, add peas, carrots, and corn. Simmer 5 minutes.

  6. Boil Potatoes: In a large pot, boil potato chunks 10–15 minutes until tender.

  7. Mash Potatoes: Drain, let steam 1 minute. Add butter, cream, garlic powder, extra salt, and pepper. Mash until smooth. Stir in parmesan until melted.

  8. Assemble: Preheat oven to 400°F (200°C). Spread meat mixture in a 9×9-inch baking pan. Top evenly with mashed potatoes.

  9. Bake: Cook 25–30 minutes until top is golden.

  10. Cool & Serve: Let rest 15 minutes before slicing.

Notes:

  • Lamb gives a more traditional shepherd’s pie flavor; beef makes it a cottage pie.

  • Can be prepped 1–2 days ahead or frozen for later.

Brief Introduction

This “Cozy Comfort Classic” is a rustic, heartwarming bake with a savory meat-and-vegetable base and a creamy, cheesy mashed potato crown. It’s perfect for Sunday dinners, holidays, or freezing ahead for busy weeks.

Step-by-Step Cooking Guide

Making the Filling

  1. Sauté & Brown: Build flavor by cooking onions first, then browning the meat with herbs.

  2. Layer Flavor: Garlic, Worcestershire, tomato paste, and flour add richness and thickness.

  3. Simmer: Let vegetables and broth mingle with the meat for a tender, flavorful base.

Mashed Potato Perfection

  1. Boil & Mash: Cook potatoes until tender, mash with butter, cream, and seasoning.

  2. Cheesy Finish: Parmesan melts into the mash for extra depth.

Assembly & Baking

  1. Layer & Bake: Spread filling in the dish, cover with mash, and bake until golden brown.

Ingredient Details & Substitution Tips

  • Meat Choice: Beef is milder; lamb adds a richer, traditional note.

  • Potatoes: Russets are ideal for fluffy mash; Yukon Golds add creaminess.

  • Parmesan Cheese: Optional but adds a savory, nutty finish.

  • Vegetables: Swap frozen mix for fresh chopped carrots, peas, and corn if desired.

  • Broth: Chicken or vegetable broth can be used in a pinch.

Recipe Variations & Serving Suggestions

  • Cheddar-Topped: Swap parmesan for sharp cheddar for a bolder topping.

  • Garlic Lovers: Roast garlic cloves and mash into the potatoes.

  • Serving Ideas: Best with crusty bread and a green salad.

Storage & Make-Ahead Information

  • Refrigeration: Store covered for up to 4 days.

  • Freezing: Freeze assembled (unbaked) or baked dish for up to 3 months.

  • Reheating: Bake at 350°F covered with foil until heated through.

  • Make-Ahead: Assemble up to 2 days in advance; refrigerate until baking.

Nutrition Facts (per serving, 8 servings)

Calories: ~410 kcal | Carbs: 28g | Protein: 19g | Fat: 25g | Fiber: 4g | Sodium: 670mg

FAQs

Q: Can I use sweet potatoes instead?
A: Yes — they add a sweeter, earthier flavor. Reduce cream slightly for a firmer topping.

Q: How do I keep the top golden without overbaking?
A: Broil for the last 2–3 minutes, watching closely.

Q: Can I make this gluten-free?
A: Yes — replace flour with cornstarch slurry and use GF Worcestershire sauce.

Personal Story

This dish started as my way to combine the comfort of mashed potatoes with the heartiness of a meat-and-veg stew. It became a household staple — a recipe I turn to when the weather cools or when someone needs a warm, home-cooked hug.

If you’d like, I can create process photo captions so your blog post matches the visual, step-by-step format in your outline. That would complete the “Hero Image & Process Guide” section. Would you like me to prepare them?

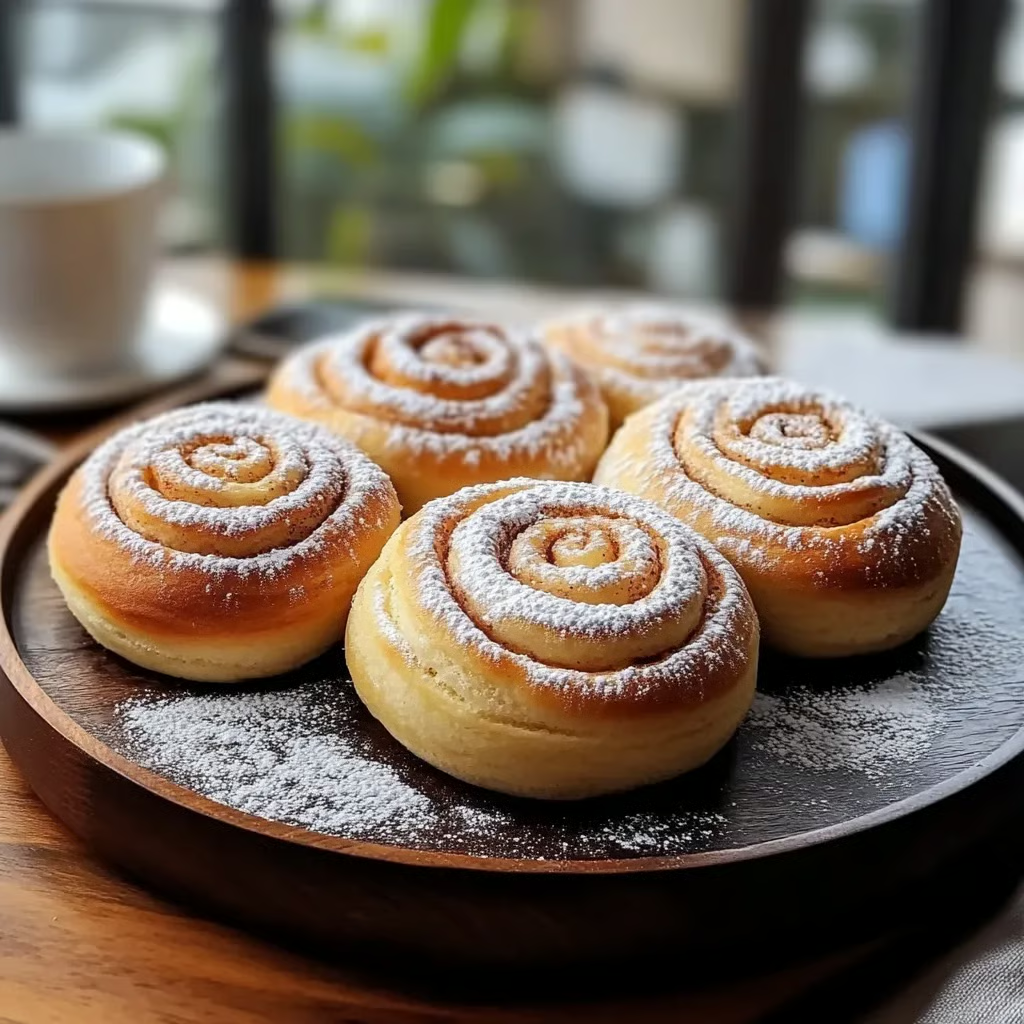
Amazing Vanilla Pan Rolls

Soft, fluffy rolls with a sweet vanilla aroma and a cinnamon-sugar swirl — perfect for breakfast, brunch, or an afternoon treat.

Servings: 12 rolls
Prep Time: 25 minutes (plus 1½–2½ hours rising)
Cook Time: 20–25 minutes
Total Time: About 2½–3 hours
Dietary Badges: Contains Dairy, Contains Eggs, Vegetarian

Ingredients

Making the Dough

  • Plain flour

  • White sugar

  • Salt

  • Active dry yeast

  • Heated milk (about 110°F / 43°C)

  • Vanilla essence

  • Large eggs

  • Unsalted butter, melted

Topping Ingredients

  • White sugar

  • Melted butter (for brushing)

  • Ground cinnamon

Instructions

  1. Activate Yeast: In a large bowl, mix heated milk, yeast, and sugar. Let sit 5–10 minutes until foamy.

  2. Mix Dough: Stir in melted butter, salt, eggs, and vanilla. Gradually add flour until a soft dough forms.

  3. Knead: On a floured surface, knead dough 8–10 minutes until smooth and elastic.

  4. First Rise: Place in a greased bowl, cover, and let rise in a warm place for 1–2 hours until doubled.

  5. Shape Rolls: Punch down dough, roll into a ¼-inch-thick rectangle, and brush with melted butter. Mix cinnamon and sugar, sprinkle evenly over dough, roll into a log, and slice into 12 pieces.

  6. Second Rise: Arrange rolls in a greased baking dish, cover, and let rise 30–45 minutes.

  7. Bake: Preheat oven to 350°F (175°C). Bake 20–25 minutes until golden on top.

  8. Finish: Brush hot rolls with melted butter. Cool slightly before serving.

Notes:

  • For extra indulgence, drizzle with vanilla icing or sprinkle powdered sugar before serving.

  • Rolls stay fresh for a few days in an airtight container.

Brief Introduction

These vanilla-scented pan rolls are light, buttery, and swirled with cinnamon sugar. They’re easy to make, freezer-friendly, and just as delicious warm from the oven as they are the next day.

Step-by-Step Cooking Guide

Making the Dough

  1. Yeast Activation: Warm milk and sugar feed the yeast, creating a frothy start for a soft, fluffy dough.

  2. Mix & Knead: Combine butter, eggs, salt, vanilla, and flour, then knead until smooth.

Rising & Rolling

  1. First Rise: Let dough double in size for a tender crumb.

  2. Shape & Fill: Roll out dough, brush with butter, sprinkle with cinnamon-sugar, roll, and slice.

Baking & Serving

  1. Second Rise: Allows rolls to puff up before baking.

  2. Bake & Brush: Bake until golden, then brush with butter for shine and flavor.

Ingredient Details & Substitution Tips

  • Flour: All-purpose works best; bread flour yields a chewier texture.

  • Milk: Whole milk gives richer flavor; plant-based milk works for dairy-free (adjust butter too).

  • Butter: Use unsalted for control; margarine can substitute in a pinch.

  • Cinnamon Sugar: Adjust cinnamon to taste or add nutmeg for warmth.

Recipe Variations & Serving Suggestions

  • Vanilla Icing Drizzle: Mix powdered sugar, milk, and vanilla for a sweet glaze.

  • Nutty Swirl: Add chopped pecans or walnuts to the filling.

  • Serving Ideas: Best warm with coffee, tea, or a glass of cold milk.

Storage & Make-Ahead Information

  • Refrigeration: Store in an airtight container for up to 3 days.

  • Freezing: Freeze baked rolls for up to 2 months; thaw and rewarm before serving.

  • Make-Ahead: Prepare dough the night before, refrigerate after first rise, then shape and bake in the morning.

Nutrition Facts (per roll, 12 servings)

Calories: ~240 kcal | Carbs: 35g | Protein: 5g | Fat: 9g | Sugar: 10g | Sodium: 210mg

FAQs

Q: Can I use instant yeast instead of active dry?
A: Yes — skip the activation step and mix it directly with dry ingredients.

Q: Can I make them dairy-free?
A: Yes — use plant-based milk and dairy-free butter.

Q: How do I keep rolls soft?
A: Don’t overbake; cover loosely with foil if tops brown too quickly.

Personal Story

I first made these rolls on a rainy Sunday when I wanted the coziness of cinnamon rolls without too much sweetness. The vanilla in the dough gives them a bakery-level aroma that fills the whole kitchen — they’ve been a brunch favorite ever since.

If you want, I can also create process photo captions so this recipe is fully blog-ready with a visual step-by-step section. Would you like me to prepare those?

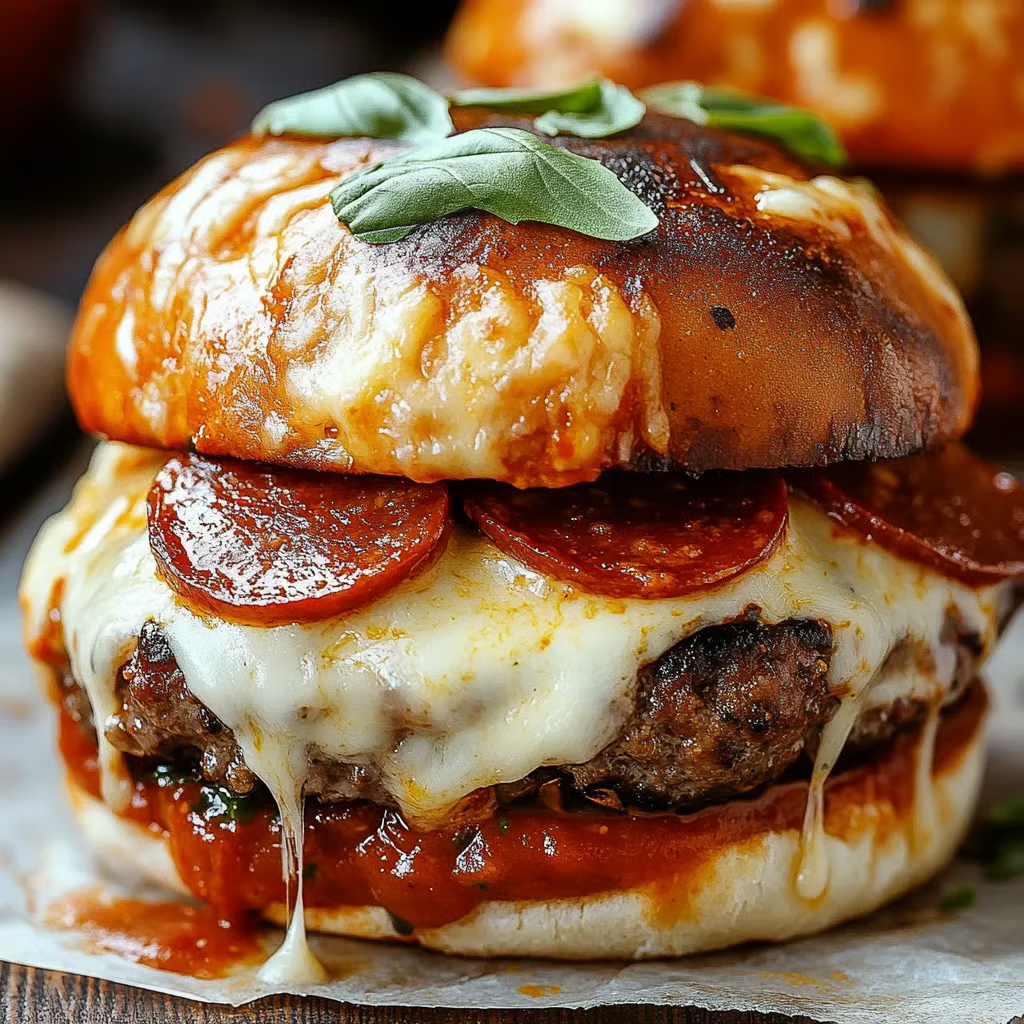
Pizza Burgers with Melty Pepperoni & Mozzarella

Juicy grilled beef patties topped with gooey mozzarella, crispy pepperoni, and tangy pizza sauce — the best of pizza and burgers in every bite.

Servings: 4
Prep Time: 15 minutes
Cook Time: 15 minutes
Total Time: 30 minutes
Dietary Badges: Contains Dairy, Contains Gluten, Contains Meat

Ingredients

Seasoned Burger Patties

  • Ground beef (80% lean, 20% fat)

  • Italian seasoning

  • Garlic powder

  • Salt

  • Freshly ground black pepper

Pizza Toppings and Assembly

  • Hamburger buns, split

  • Pizza sauce

  • Shredded mozzarella cheese

  • Pepperoni slices

Instructions

  1. Season & Form Patties: In a large bowl, mix beef with Italian seasoning, garlic powder, salt, and pepper until just combined. Form into 4 patties. Rest while prepping toppings.

  2. Toast Buns: Preheat grill or grill pan to medium-high and turn on broiler. Place buns cut-side up on a baking sheet; broil until golden. Set top halves aside.

  3. Grill Patties: Cook patties 4–5 minutes per side until fully cooked and grill-marked.

  4. Prep Bottom Buns: While patties cook, warm pizza sauce in a small pan. Spread half the sauce over toasted bottom buns, top with half the mozzarella and half the pepperoni. Broil 2–3 minutes until cheese melts.

  5. Assemble Burgers: Place patties on prepared buns. Top with remaining sauce, cheese, and pepperoni. Broil again until cheese is bubbly and pepperoni edges are crisp.

  6. Finish & Serve: Add top buns and serve hot.

Notes:

  • Resting formed patties helps them hold shape while cooking.

  • Toasted buns stay sturdy under sauce and cheese.

Brief Introduction

These pizza burgers take everything you love about pepperoni pizza and stack it on top of a juicy burger patty. They’re cheesy, saucy, and a little messy — exactly how comfort food should be.

Step-by-Step Cooking Guide

Burger Base

  1. Season & Shape: Combine beef with spices, form patties, and let rest.

  2. Toast the Buns: Broil until golden to avoid sogginess.

Pizza Transformation

  1. Grill to Juicy Perfection: Cook patties until browned and cooked through.

  2. First Layer Melt: Sauce, cheese, and pepperoni on the bottom buns, then broil until melty.

  3. Final Assembly: Add patties, more sauce, cheese, and pepperoni. Broil again for a crispy, bubbly finish.

Ingredient Details & Substitution Tips

  • Ground Beef: 80/20 blend balances juiciness and flavor; ground turkey or chicken can be used for a leaner option.

  • Mozzarella Cheese: Shreds melt best; fresh mozzarella adds extra creaminess but may be wetter.

  • Pepperoni: Turkey pepperoni for lighter option or swap with salami for a twist.

  • Pizza Sauce: Use homemade for fresher flavor; marinara works in a pinch.

Recipe Variations & Serving Suggestions

  • Veggie Pizza Burgers: Add sautéed mushrooms, onions, or bell peppers before the final broil.

  • Extra Spicy: Use hot pepperoni or add red pepper flakes to the sauce.

  • Serving Ideas: Pair with crispy fries, a side salad, or garlic breadsticks for the full pizzeria vibe.

Storage & Make-Ahead Information

  • Refrigeration: Store patties separately from buns/toppings for up to 3 days.

  • Freezing: Freeze raw patties up to 3 months; thaw before cooking.

  • Reheating: Warm patties in a skillet, then assemble with fresh toppings and broil to melt cheese.

  • Make-Ahead: Shape patties and prep toppings ahead; cook and assemble fresh.

Nutrition Facts (per serving, 4 servings)

Calories: ~620 kcal | Carbs: 35g | Protein: 35g | Fat: 35g | Sodium: 1100mg

FAQs

Q: Can I cook these indoors without a grill?
A: Yes — use a cast-iron skillet or grill pan on the stove.

Q: How do I prevent soggy buns?
A: Toast well under the broiler before adding sauce, and serve immediately.

Q: Can I make these open-faced?
A: Definitely — serve on toasted bread halves for a fork-and-knife version.

Personal Story

The first time I made these was for a game night with friends — I couldn’t decide between making pizza or burgers, so I made both in one dish. They disappeared before halftime, and now they’re my go-to crowd-pleaser.

If you’d like, I can create process photo captions for this recipe so your blog post matches the full visual step-by-step style from your outline. Would you like me to prepare those next?