5-Minute Chocolate Wafer Layer Cake Yields: 6–8 Serving

5-Minute Chocolate Wafer Layer Cake

Yields: 6–8 Servings | Prep time: 5 mins | Cook time: 5 mins | Chill time: 1–2 hours

Ingredients

The Base:

  • 350 g Chocolate or vanilla wafers

The Chocolate Cream:

  • 500 ml (2 cups) Milk

  • 120 ml (1/2 cup) Whipping cream

  • 50 g (1/4 cup) Granulated sugar

  • 40 g (3 tbsp) Corn starch

  • 40 g (3 tbsp) Bitter cocoa powder

  • 1 tsp Vanilla extract (optional)


Detailed Instructions

1. Prepare the Cream Base

In a medium saucepan (off the heat), whisk together the sugar, corn starch, and bitter cocoa powder until no large lumps remain. Gradually pour in the milk and whipping cream, whisking constantly to create a smooth liquid.

2. Thicken the Custard

Place the saucepan over medium heat. Stir continuously with a whisk or spatula to prevent the bottom from scorching. Cook for about 3–5 minutes until the mixture thickens into a glossy, pudding-like consistency. Remove from heat immediately.

3. Layer the Wafers

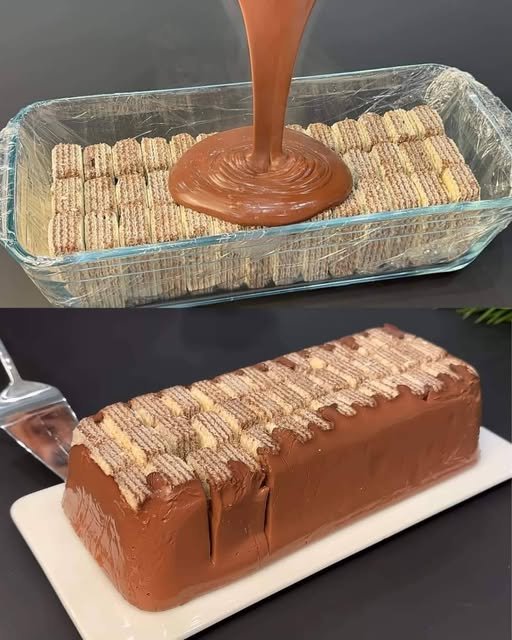
Line a small rectangular baking dish or loaf pan with parchment paper or plastic wrap for easy removal. Spread a thin layer of the hot chocolate cream at the bottom. Arrange a single layer of wafers over the cream.

4. Build the Cake

Continue alternating layers: spread a generous layer of chocolate cream, followed by a layer of wafers. Repeat this process until you have used all the ingredients, finishing with a smooth layer of chocolate cream on top.

5. Chill and Set

Allow the cake to cool to room temperature, then place it in the refrigerator for at least 1–2 hours. This allows the wafers to slightly soften and the cream to set firmly, making it easy to slice.

6. Serve

Lift the cake out of the pan using the parchment paper edges. Dust the top with extra cocoa powder or chocolate shavings if desired. Slice into squares and enjoy!


Why This Recipe Works

The hot cream slightly softens the crisp wafers, turning them into a texture similar to delicate cake layers, while the corn starch ensures the chocolate filling is stable and rich.
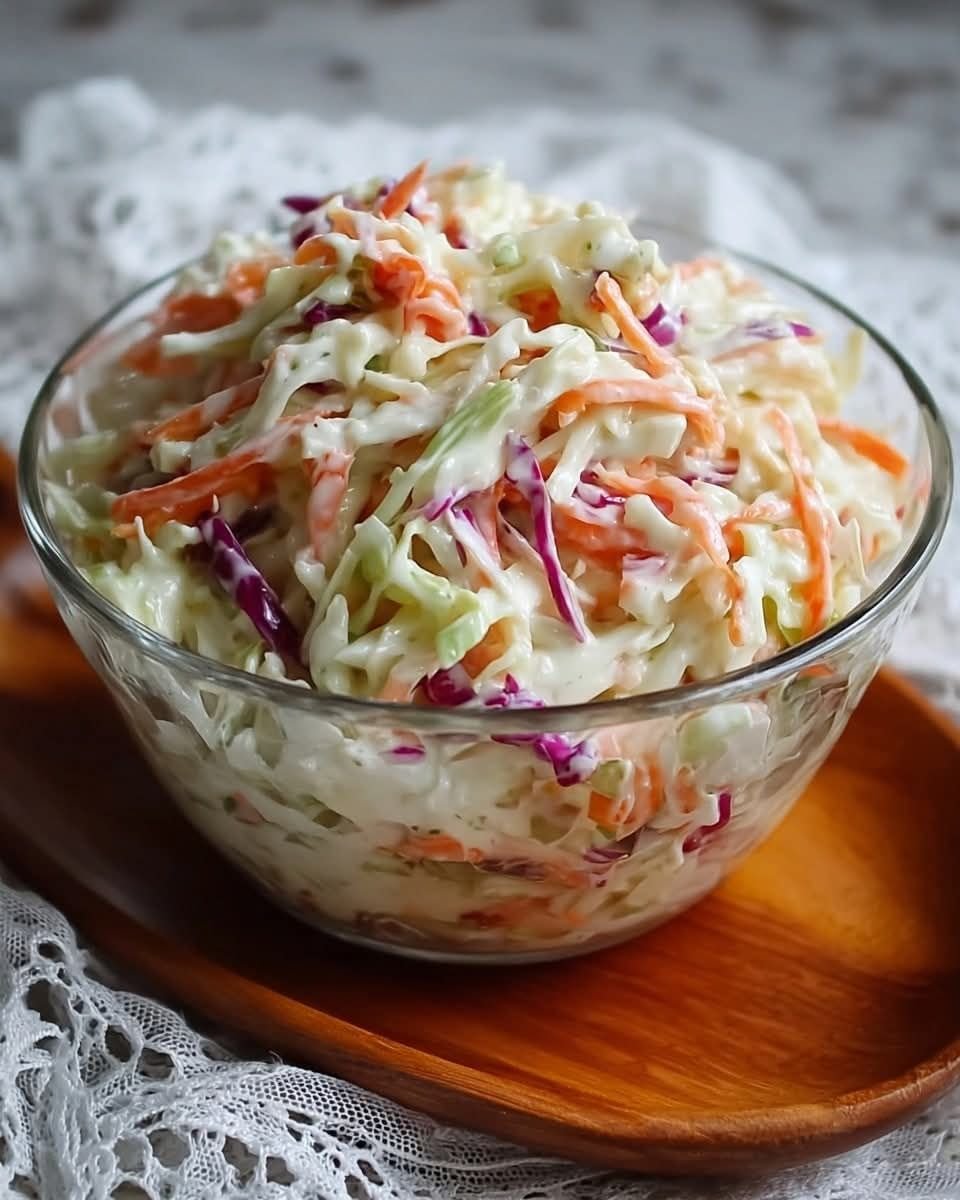
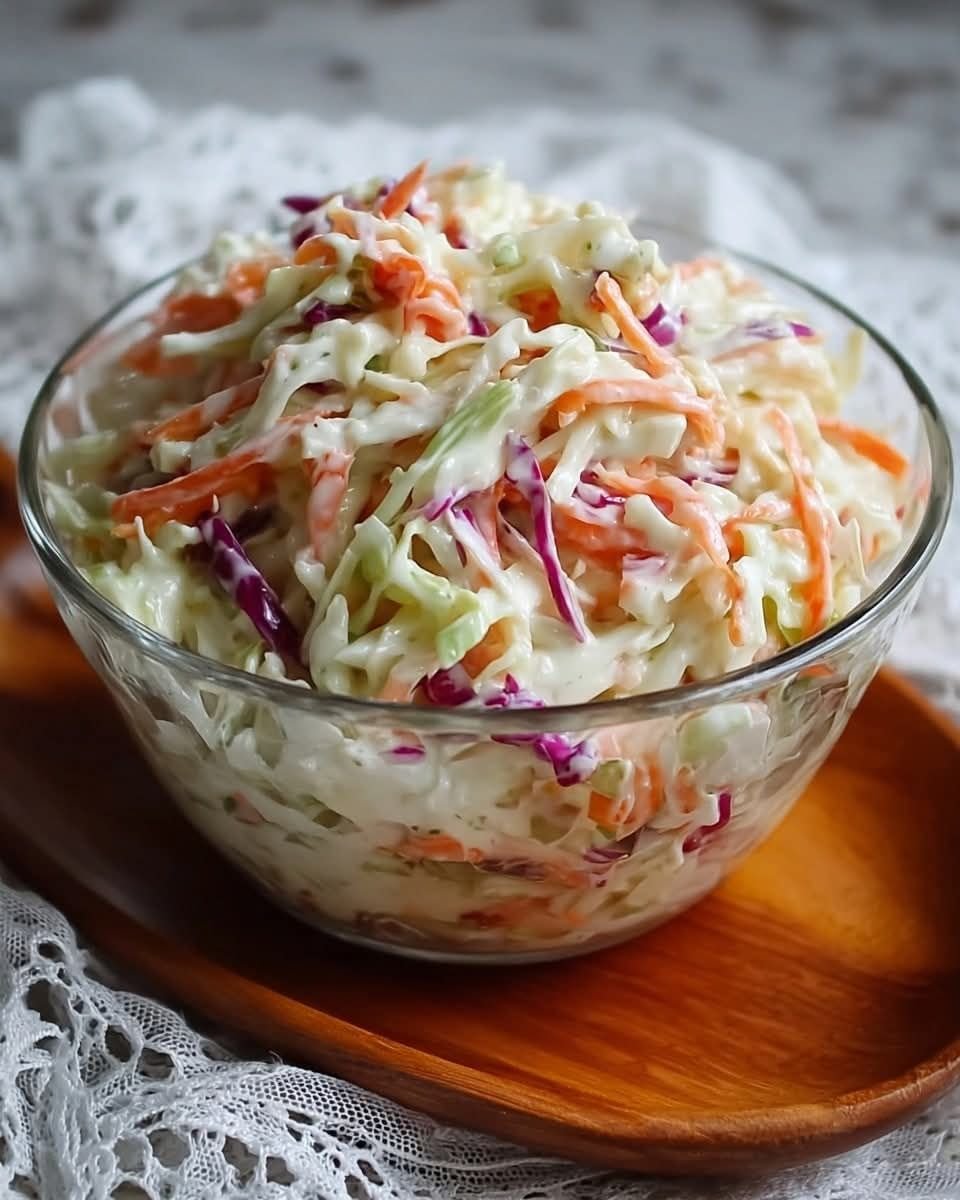
Creamy Apple Coleslaw

Creamy Apple Coleslaw

Yields: 6–8 Servings | Prep time: 15 mins | Chill time: 30 mins

Ingredients

The Dressing:

  • 1/2 cup Mayonnaise

  • 1/2 cup Sour cream or Greek yogurt

  • 1 tablespoon Fresh lime juice

  • 1 teaspoon Vinegar (white or apple cider)

  • 1 teaspoon Granulated sugar

  • Salt and pepper to taste

The Slaw Base:

  • 1 pound Coleslaw mix (shredded cabbage and carrots)

  • 1 small bunch Scallions, chopped

  • 1 Granny Smith apple, chopped fine

  • 1 Red apple (such as Gala or Fuji), chopped fine


Detailed Instructions

1. Whisk the Creamy Dressing

In a large mixing bowl, combine the mayonnaise, sour cream (or Greek yogurt), lime juice, vinegar, and sugar. Whisk the mixture vigorously until the dressing is completely smooth and the sugar has fully dissolved. Season the dressing with a pinch of salt and pepper.

2. Prep the Apples

Core and finely chop both the Granny Smith and the red apple. It is recommended to keep the skins on to provide a beautiful pop of color to the salad.

Pro Tip: To prevent the apples from browning (oxidizing) while you finish the prep, toss them directly into the prepared dressing immediately after chopping.

3. Combine the Ingredients

Add the 1-pound bag of coleslaw mix, the chopped scallions, and the chopped apples into the large bowl containing your dressing.

4. Toss and Coat

Using large spoons or salad tongs, toss the ingredients together until every shred of cabbage and piece of apple is evenly coated in the creamy dressing. Taste the mixture and add more salt or pepper if needed.

5. Chill Before Serving

Cover the bowl and refrigerate for at least 30 minutes before serving. This chilling period allows the cabbage to soften slightly and ensures the flavors of the lime and apple meld perfectly into the dressing.


Why This Recipe Works

The acidity from the lime juice and vinegar performs two roles: it prevents the apples from turning brown and balances the richness of the mayonnaise and sour cream.

Creamy Apple Coleslaw

Creamy Apple Coleslaw

Yields: 6–8 Servings | Prep time: 15 mins | Chill time: 30 mins

Ingredients

The Dressing:

  • 1/2 cup Mayonnaise

  • 1/2 cup Sour cream or Greek yogurt

  • 1 tablespoon Fresh lime juice

  • 1 teaspoon Vinegar (white or apple cider)

  • 1 teaspoon Granulated sugar

  • Salt and pepper to taste

The Slaw Base:

  • 1 pound Coleslaw mix (shredded cabbage and carrots)

  • 1 small bunch Scallions, chopped

  • 1 Granny Smith apple, chopped fine

  • 1 Red apple (such as Gala or Fuji), chopped fine


Detailed Instructions

1. Whisk the Creamy Dressing

In a large mixing bowl, combine the mayonnaise, sour cream (or Greek yogurt), lime juice, vinegar, and sugar. Whisk vigorously until the dressing is completely smooth and the sugar has dissolved. Season with a pinch of salt and pepper.

2. Prep the Apples

Core and finely chop both the Granny Smith and red apple. Keeping the skins on provides a beautiful pop of color to the salad.

Pro Tip: To prevent the apples from browning while you prep the rest of the ingredients, you can toss them directly into the prepared dressing as soon as they are chopped.

3. Combine the Ingredients

Add the 1-pound bag of coleslaw mix, the chopped scallions, and the chopped apples into the large bowl containing the dressing.

4. Toss and Coat

Using large spoons or salad tongs, toss everything together until every shred of cabbage and piece of apple is evenly coated in the creamy dressing. Taste and add more salt or pepper if needed.

5. Chill Before Serving

For the best flavor and texture, cover the bowl and refrigerate for at least 30 minutes before serving. This allows the cabbage to soften slightly and the flavors of the lime and apple to meld into the dressing.


Why This Recipe Works

The acidity from the lime juice and vinegar prevents the apples from oxidizing (turning brown) while balancing the richness of the mayonnaise and sour cream.

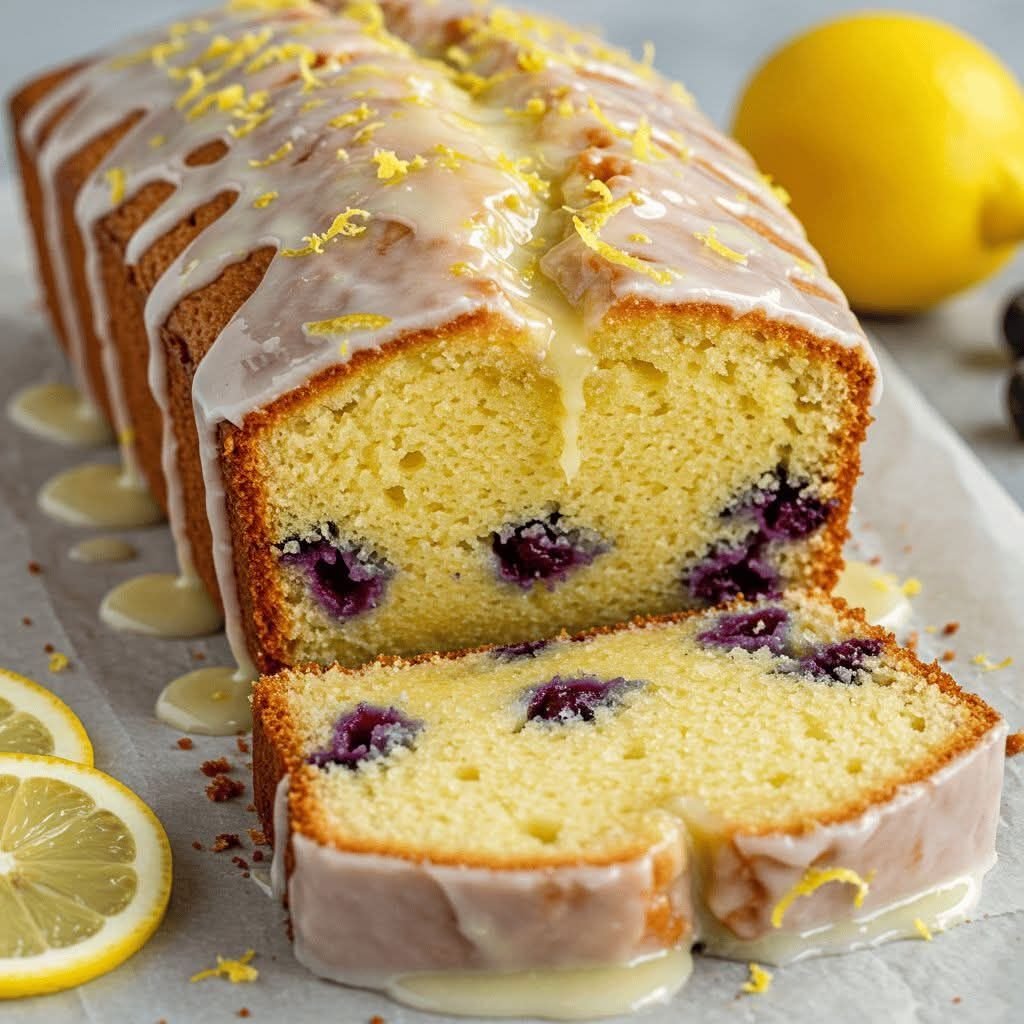
Lemon Yogurt Blueberry Loaf Cake

Lemon Yogurt Blueberry Loaf Cake

This loaf cake is soft, moist, and lightly flavored with lemon. Yogurt gives the cake a tender texture, while blueberries add gentle sweetness in every slice. It is suitable for breakfast, tea time, or dessert.


Yield

1 loaf (8–10 slices)

Time

  • Preparation: 15 minutes

  • Baking: 50–60 minutes

  • Cooling: 30 minutes


Ingredients

Dry Ingredients

  • 1 cup (120 g) all-purpose flour

  • ½ teaspoon baking powder

  • ½ teaspoon baking soda

  • ⅛ teaspoon salt


Wet Ingredients

  • 2 oz (57 g) unsalted butter, softened

  • ⅔ cup (134 g) granulated sugar

  • 1 large egg (room temperature)

  • ½ cup (118 ml) plain Greek yogurt

  • ½ teaspoon vanilla extract

  • Zest of 1 lemon (optional, for aroma and flavor)


Mix-ins

  • 1 cup blueberries (fresh or frozen)


Lemon Glaze (Optional)

  • ½ cup powdered sugar

  • 1 tablespoon fresh lemon juice


Instructions

1. Prepare the Oven and Pan

Preheat the oven to 350°F (175°C).
Grease a standard loaf pan with butter or line it with parchment paper, allowing extra paper to hang over the sides for easy lifting.


2. Combine Dry Ingredients

In a medium bowl, whisk together the flour, baking powder, baking soda, and salt.
Set aside.


3. Cream Butter and Sugar

In a large mixing bowl, beat the softened butter and sugar together until the mixture looks pale and fluffy.
This step helps create a soft, even crumb in the cake.


4. Add Egg and Flavoring

Add the egg and mix until fully blended.
Stir in the vanilla extract and lemon zest (if using).


5. Add Yogurt and Dry Ingredients

Add the dry ingredients to the batter in two parts, alternating with the yogurt.
Mix gently and stop as soon as everything is combined.
Avoid overmixing to keep the cake tender.


6. Fold in Blueberries

If using fresh blueberries, gently rinse and dry them first.
If using frozen blueberries, use them directly without thawing.

Lightly fold the blueberries into the batter using a spatula.

Helpful Tip: Toss the blueberries with 1 teaspoon of flour before adding them. This helps distribute them evenly throughout the loaf.


7. Bake

Pour the batter into the prepared loaf pan and smooth the surface.
Bake for 50–60 minutes, or until a toothpick inserted into the center comes out clean.

If the top browns too quickly, loosely cover it with foil during the last 10 minutes.


8. Cool the Cake

Allow the loaf to cool in the pan for 10 minutes.
Remove it carefully and place it on a wire rack to cool completely before glazing.


9. Prepare and Add the Glaze

In a small bowl, mix powdered sugar with lemon juice until smooth.
Drizzle the glaze over the cooled loaf and allow it to set for a few minutes.


Storage

  • Store at room temperature in a covered container for up to 2 days

  • Refrigerate for up to 5 days

  • Can be sliced and frozen for longer storage

Classic American Potato Salad

Classic American Potato Salad

A traditional potato salad with a creamy dressing, tender potatoes, and simple seasonings. This dish is suitable for picnics, gatherings, or everyday meals.


Yield

6–8 servings

Time

  • Preparation: 20 minutes

  • Cooking: 15 minutes


Ingredients

Salad Base

  • 6 medium potatoes, peeled and cut into 1-inch cubes

  • 4 hard-boiled eggs, peeled and chopped

  • ½ cup chopped celery

  • ½ cup chopped onion

Dressing

  • 1 cup mayonnaise

  • 2 tablespoons mustard

  • 1 tablespoon vinegar or pickle liquid

  • ½ teaspoon celery seed

  • ½ teaspoon salt (adjust to taste)

  • ¼ teaspoon black pepper

Optional Topping

  • Paprika

  • Chopped chives or green onions

  • Cooked bacon pieces


Instructions

1. Cook the Potatoes

Place the potato cubes in a large pot and cover with cold water.
Bring to a boil, then reduce to a gentle simmer.
Cook for 10–15 minutes until the potatoes are tender when pierced with a fork but still hold their shape.


2. Drain and Cool

Drain the potatoes and rinse briefly with cool water to stop further cooking.
Allow them to cool for about 15–20 minutes before mixing.


3. Prepare the Dressing

In a bowl, combine the mayonnaise, mustard, vinegar, celery seed, salt, and black pepper.
Mix until smooth.


4. Assemble the Salad

Place the cooled potatoes, eggs, celery, and onion into a large bowl.
Add the dressing and gently fold until everything is evenly coated.
Mix carefully to avoid breaking the potatoes.


5. Chill and Serve

Cover the bowl and refrigerate for at least 2 hours before serving.
This allows the flavors to blend and the salad to chill properly.


Optional Adjustments

  • Add chopped pickles for extra texture

  • Replace a portion of the mayonnaise with yogurt or sour cream for a lighter texture


Storage

Store covered in the refrigerator and use within 2 days.

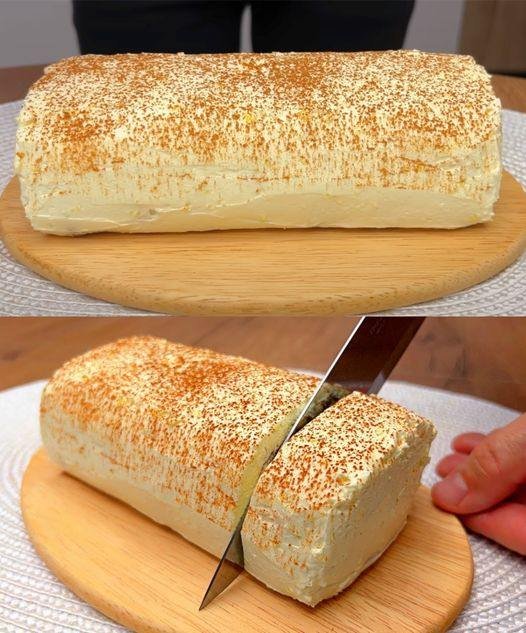
Creamy No-Bake Dessert Roll

Creamy No-Bake Dessert Roll

This no-bake dessert is smooth, lightly sweet, and easy to prepare. It is chilled to set and sliced before serving.


Yield

6–8 servings

Time

  • Preparation: 5 minutes

  • Chilling: 2 hours or longer


Ingredients

  • 500 g mascarpone cheese or cream cheese, room temperature

  • 250 ml heavy whipping cream, chilled

  • 100 g powdered sugar (adjust to taste)

  • 1 teaspoon vanilla extract

  • Cocoa powder or cinnamon, for topping

Optional

  • Ladyfingers or crushed biscuits, for added texture


Instructions

1. Whip the Cream

Place the cold whipping cream in a chilled bowl.
Beat until thick and able to hold its shape.
Keep chilled while preparing the rest of the mixture.


2. Prepare the Cream Base

In a separate bowl, mix the mascarpone or cream cheese with powdered sugar and vanilla.
Stir until smooth and free of lumps.


3. Combine the Mixtures

Add the whipped cream to the cheese mixture in portions.
Fold gently with a spatula until fully combined and light in texture.


4. Shape the Roll

Lay a large sheet of plastic wrap on a flat surface.
Spread the cream mixture evenly into a rectangle.

If using biscuits, place them in a line along the center.

Using the plastic wrap for support, roll the mixture carefully into a log shape.
Twist the ends of the wrap to hold the shape securely.


5. Chill

Place the wrapped roll in the freezer for 1–2 hours or in the refrigerator for at least 4 hours until firm enough to slice.


6. Serve

Remove the wrap and place the roll on a serving plate.
Dust the top evenly with cocoa powder or cinnamon.
Slice with a sharp knife and serve chilled.


Storage

Store covered in the refrigerator for up to 2 days.