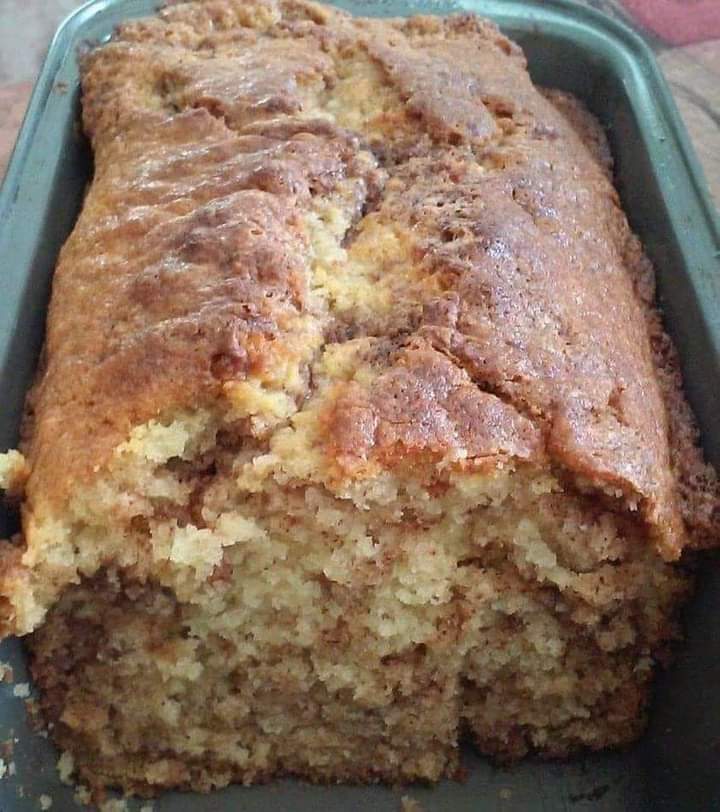
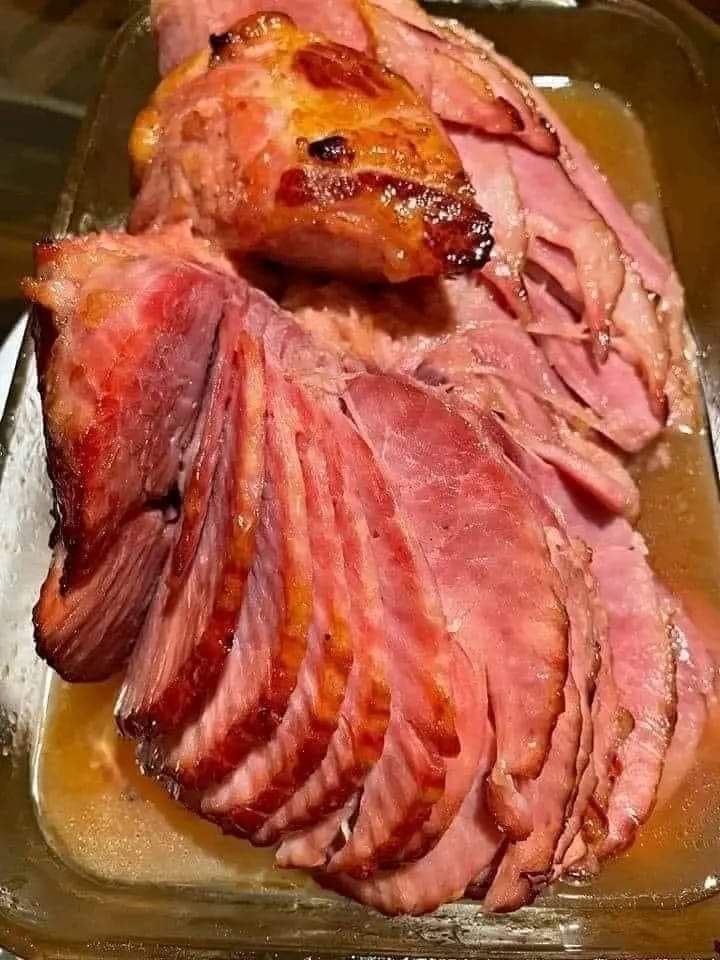
Homemade Summer Sausage Recipe

Make the best flavored summer sausage right in your very own home with this easy homemade recipe that requires no casing.

Mmmm homemade summer sausage beats out store bought by 100% any day. You will enjoy reaping the many compliments. This recipe is sure to impress your friends and family. Wherever you take this scrumptious dish be sure to let everyone know that the summer sausage is “homemade”. A well worth recipe in my book for sure!

How To Serve Summer Sausage

Summer sausage can be a simple appetizer served on a tray with cheese and crackers at your next holiday gathering, party or potluck. This summer sausage is a must-have while watching sports at home or just serve as a simple snack. And if you want to add some dipping sauces why not try a sweet hot mustard or your favorite BBQ sauce. However you plan to serve it I’m sure it will be a big hit!

Make the best flavored summer sausage right in your very own home with this easy recipe that requires no casing.

 Course Appetizer, Snack

 Cuisine American

 Prep Time 15 minutes

 Cook Time 8 hours

 chill 1 day

 Total Time 1 day 8 hours 15 minutes

 Servings 4 logs

INGREDIENTS:

3 pounds ground beef (first choice 70/30 or second choice 80/20)

1 Tablespoon Morton Tender Quick Meat Cure (this is usually found in the grocer spice section near the salt)

1 Tablespoon garlic powder

2 teaspoons mustard seed (can use up to 1 Tablespoon)

1/2 Tablespoons liquid smoke flavoring

1/2 cup water

2 1/2 teaspoons coarse ground peppercorns (I use this pepper mill to get fresh course ground)

INSTRUCTIONS:

Combine Ingredients

Place all ingredients into a large mixing bowl. Kneading by hand for about 3-5 minutes or until the mixture has that real sticky look.

Chill

Cover mixture with foil, plastic wrap or lid and place mixture in refrigerator for 8 hours.

Shape and Chill

Remove mixture from refrigerator and knead by hand for about 3 minutes. Using a kitchen scale divide meat evenly into four pieces. Roll each piece into about a 9-inch log. Place prepared logs on a quarter baking pan with rack, cover and return to the refrigerator for 16 more hours.

Bake

Preheat oven to 200 degrees Fahrenheit. Remove baking pan with sausage from refrigerator and discard cover. To get that beautiful brown edge on the outside of the logs bake the sausage on the quarter baking pan with rack for 8 hours uncovered. Carefully remove pan from oven, wrap each log in a sheet of aluminum foil and refrigerate.

Slice and Serve

Slice chilled summer sausage thinly and serve with a variety of cheeses and crackers like pepper cracked water crackers. If desired, serve with some type of sauce (mustard or your favorite BBQ sauce). Oh, and to keep all the food from getting touched by everyone don’t forget to set out the frilly toothpicks in a small cup or container. TIP: if the cup or container is too deep just add a few dried beans and then add the toothpicks. Works perfect!

Old Fashioned Homemade Bologna Recipe

Old-Fashioned Homemade Bologna is thick, meaty, and full of deep flavors. No wonder Grandpa enjoyed it with a smear of mustard and a slab of cheese on homemade bread!

This Homemade Bologna Recipe shows how radically food manufacturers have changed our taste expectations. That greasy, mushy pink stuff we’ve all eaten between slices of flat white bread is nothing like bologna used to be. Now you can enjoy it, too, with none of the guilt for eating the fatty, flavorless stuff from the store.

How To Make Homemade Bologna

It starts off simply enough, using ingredients you can pick up at any grocery store: meat, garlic powder, onion powder, liquid smoke, salt and a bit of brown sugar if you want. For equipment, you can get away with using a food processor, but a stand mixer is even easier.

Tender Quick Is Optional…Sort Of.

One ingredient for this homemade bologna that you probably don’t have in the pantry (unless you cure a lot of meat at home) is Morton’s Tender Quick

I’ve made it both with and without Tender Quick, and the flavor is much deeper when it’s used. If you’re skipping it, you may want to double the amount of garlic and onion powder, and possibly add a bit more liquid smoke.

Emulsifying ground beef and seasonings in a stand mixer bowl

Emulsifying Is A MUST

Unlike the floppy pink slices from the store, old-fashioned homemade bologna is more like salami or summer sausage. That’s not to say it’s spicy, although you can certainly make it that way. The main difference is that homemade bologna is meaty.

That meatiness turned me off the first time because it seemed more like a burger than the smooth stuff of my childhood. A little research revealed the problem: I didn’t know to emulsify the meat by adding ice water before shaping and cooking it. That step has made a world of difference in the texture of my homemade bologna recipe.

Keep Things Chilled Throughout

Once you’ve combined the meat and ice water, you must transfer the bowl to the freezer. This step accomplishes two things:

It allows the meat to firm back up before shaping.

And it’s essential for food safety. Ten minutes should do it.

Wrap And Secure It

After chilling the emulsified mixture, take half of the meat out and shape it into a log. Wrap this tightly with plastic wrap and use a twist-tie to keep the ends shut, so the log maintains its shape.

Overhead view of beef bologna ingredients formed into logs and tightly wrapped in plastic before chiling

Overnight Rest To Meld Flavors

Proceed with the remainder of the meat, then transfer the logs to the refrigerator to chill and rest for 24 hours. This step improves the flavor and lets the moisture in the beef move through the entire product.

After that, unwrap and cook it in the oven on a baking rack propped over a rimmed baking sheet, so excess fat can drip out without making the outside of the bologna greasy.

Why The Cooking Temperature Changes

The initial cooking time of 30 minutes at 300°F dries the exterior which helps the bologna maintain its shape. The rest of the cooking at 250°F for 2 1/2 hours cooks it all the way through, which is vital to food safety. Once cooked, let it cool completely before refrigerating or freezing for future use.

The result? A smooth yet meaty homemade bologna with a hint of smoky garlic flavor that’s perfect on homemade hamburger buns or with cheese and crackers.

Storage

If you skip the Tender Quick and use sea salt, you need to eat or freeze this homemade bologna within three days, just as you’d need to eat anything made of ground meat in that time frame. With the Tender Quick, which acts as a curing preservative, it’ll stay good for at least a month in the refrigerator.

Old world-style bologna with a hint of smoky garlic flavor. Excellent on sandwiches, or served with cheese and crackers.

Prep Time: 1hr

Cook Time: 3 hrs

Chilling Time: 1d

Total Time: 1d 4hrs

Equipment

Food processor OR stand mixer

Plastic wrap and twist ties

Baking Rack

Rimmed baking sheet

INGREDIENTS:

3 pounds ground beef no leaner than 80/20

1 cup water ice cold

1.5 teaspoon Morton’s Tender Quick OR 1 tablespoon sea salt

1 tablespoon brown sugar

1 teaspoon all-natural liquid smoke flavor

½ teaspoon garlic powder May increase to 1 teaspoon if not using Tender Quick

½ teaspoon onion powder May increase to 1 teaspoon if not using Tender Quick

INSTRUCTIONS:

In the bowl of a food processor or stand mixer, combine all of the ingredients until smooth. Transfer the bowl to the freezer for 10 minutes before proceeding.

Remove the bowl of meat from the freezer and divide the mixture in half. Using damp hands, form each half into a log. Compress it tightly as you work. Wrap each log in plastic wrap and use twist-ties to secure the ends tightly. Refrigerate flat for 24 hours.

Preheat oven to 300° F / 150° C / gas mark 2.

Remove plastic wrap from meat and carefully transfer both logs to a baking rack propped over a rimmed baking sheet. Bake for 30 minutes, turning halfway through.

Reduce heat to 250° F / 125° C / gas mark 1 and cook an additional 2 to 2½ hours to an internal temperature of 160° F. Remove from oven and allow to cool completely. Refrigerate up to 3 days. May be frozen for longer storage.

Notes:

For easiest slicing, chill the cooked bologna for 20 minutes and use a sharp, non-serrated knife.

Nutritional Info:

Serving: 1serving | Calories: 110kcal | Carbohydrates: 1g | Protein: 7g | Fat: 9g | Saturated Fat: 3g | Cholesterol: 30mg | Sodium: 113mg | Potassium: 115mg | Sugar: 1g | Calcium: 8mg | Iron: 1mg

Easy Baked Parmesan Pork Chops Recipe

These Easy Baked Parmesan Pork Chops are a simple and delicious weeknight meal option. Ready in just 30-minutes, they make a great last-minute meal that is always a hit with the family. Simply seasoned and baked, it has a great crispy coating that is baked instead of fried for a healthier meal. 

INGREDIENTS:

▢1/2 cup Parmesan cheese

▢1 egg

▢1 tablespoon milk or skim milk

▢1 teaspoon salt

▢1/2 teaspoon black pepper

▢3/4 cup Italian seasoned bread crumbs

▢4 4-ounce lean, boneless pork chops

▢3/4 cup Panko bread crumbs

INSTRUCTIONS:

Preheat the oven to 400°F and coat a 9×13-inch baking dish with nonstick cooking spray.

In a shallow dish, whisk together the egg, and milk.

In a second shallow dish or plate, stir together the cheese, both bread crumbs, and the salt and black pepper.

Dip the pork chops in the egg, allowing excess to drip off, and then dip them in the breadcrumbs and cheese mixture. Transfer to prepared baking pan.

Spray the tops of the pork chops with cooking spray, and bake in the prepared baking dish uncovered for 14-16 minutes, or until cooked through and golden.

NOTES

How do I Know Pork is Done Cooking? 

The USDA says that a pork chop should be cooked to at least 145ºF internal temperature. Typically, the cooking time listed will be just right, ut if you have a thinner or thicker chop, you may need to adjust to prevent under or overcooked pork.

I also cannot say enough about getting a quality digital meat thermometer that has a longer probe you can put into the meat and leave in while cooking so it alerts you when it reaches temperature. If you are unsure about food safety, it’s a perfect addition to your kitchen gadgets.

What Sides Go with Pork Chops? 

Much like chicken, pork is versatile enough to add just about any side you wish. I have eaten them with many things including classics like pasta or potatoes, but below are a few of my favorite sides that work great alongside my parmesan pork chops recipe.

Easy Baked Parmesan Pork Chops

Pork is the other white meat. A lean cut that is often overlooked, I love adding pork chops to our menu. Not only are they lean and high in protein, but they are also so easy to make and with just a few ingredients you can add so much flavor. This Easy Baked Parmesan Pork Chops Recipe is a family favorite because I can have it ready from start to finish in just 30-minutes.

Don’t fear pork! It makes a great lean protein option in your menu plan!


For this recipe, you can use both boneless and bone-in, but I much prefer the ease of a boneless pork chop. The flavor and cooking method would remain the same no matter which you choose. Just make sure that your pork is cooked to a safe temperature before eating, no matter what cut you choose.

You can also pick up bone-in pork chops on sale and simply trim the bone off the outside and bake as a boneless pork chop if you prefer. There is no right or wrong when making this recipe.

Smart Points: 8

NUTRITIONAL INFO:

Serving: 1pork chop | Calories: 304kcal | Carbohydrates: 20g | Protein: 30g | Fat: 13g | Saturated Fat: 5g | Cholesterol: 99mg | Sodium: 1210mg | Fiber: 1g | Sugar: 2g

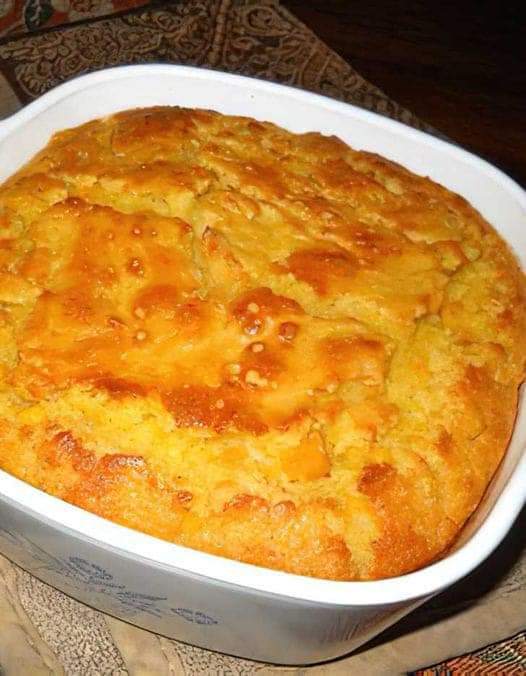
Corn Casserole Recipe

This stupid easy Creamed Corn Casserole recipe is made with a store bought Jiffy cornbread mix, and that’s not an apology. It is SO good! If you grew up with this Thanksgiving side dish you know what I’m talking about. It is creamy, corny, custardy, and sweet. It’s the perfect compliment to a holiday meal.

Prep Time: 10mins

Cook Time: 35mins

Total Time: 45mins

Course: Side Dish

Cuisine: American

Servings: 9

INGREDIENTS:

1/2 cup butter (1 stick)

1 (15-oz) can whole kernel corn drained

1 (15-oz) can creamed corn not drained

1 cup sour cream

3 tablespoons granulated sugar

1/2 teaspoon kosher salt

1 (8-oz) box Jiffy corn muffin mix

INSTRUCTIONS:

Preheat your oven to 350 degrees F.

In a 8×8 or 9×9 inch glass pan, add 1/2 cup butter. Put it in the microwave and melt it right in the pan. (If you only have a metal pan, melt it in a bowl and then transfer to the pan.*) Use a spatula or pastry brush to spread the butter up the sides of the pan, so that it doesn’t stick while baking.

Open the can of whole corn kernels and drain. I usually just press the lid down on the corn holding it upside down over the sink. Add the drained corn to the butter in the pan.

Open the can of creamed corn and dump the whole thing into the pan.

Add 1 cup sour cream.

Add 3 tablespoons sugar and 1/2 teaspoon kosher salt (add 1/4 teaspoon if using table salt).

Add an 8 ounce box of Jiffy corn muffin mix.

Use a spatula to stir it all together until well combined. Scrape down the edges.

Bake at 350 for about 35-40 minutes. The edges should be turning golden brown and pulling away from the sides. When you shake the pan, the center should not be jiggling more than the edges. You can also use the toothpick test, when a toothpick inserted in the center comes out with no wet batter, it’s done.

Let cool on a wire rack for a couple minutes before serving warm!

Variations

Sweet Corn Casserole: Add 1/2 cup or even 3/4 cup sugar instead of 3 tablespoons

For a cake-like texture, rather than custard texture: add 2 eggs. This makes the casserole a little more fluffy and taller. This is a VERY common addition to corn casserole, but I prefer it without the eggs. It’s good both ways though!

Add cheese: how can you go wrong? Omit the 3 tablespoons sugar and stir in 1 and 1/2 cups shredded cheddar cheese. Sprinkle another 1/2 cup cheese on top. You could even go wild and add in some chopped jalapenos…or some cooked bacon!

Make it in the slow cooker: You can make this recipe as written in a 4-quart slow cooker, or double the recipe and make it in a 6 quart slow cooker. Be sure to spray the edges. Cook on high for 2 hours, or low for 3-4 hours. Super handy for Thanksgiving when you need your oven for the turkey!

To make the second version I tried that you see in the photos: Follow the recipe as directed making these changes: reserve half of the sour cream. Add 2 eggs. Mix it all together, then dollop the remaining 1/2 cup sour cream on top and swirl in with a knife. It will take a couple minutes longer to bake.

Notes

*Corn casserole baked in a metal pan will cook a couple minutes faster than in a glass pan, so check it early if you’re using a metal pan.

You can double this recipe and bake in a 9×13 inch pan! It will probably take closer to 45 minutes to bake. A 9×13 inch pan will serve 16-20 people.

NUTRITIONAL INFO:

Calories: 330kcal | Carbohydrates: 37g | Protein: 4g | Fat: 19g | Saturated Fat: 10g | Polyunsaturated Fat: 1g | Monounsaturated Fat: 6g | Trans Fat: 1g | Cholesterol: 41mg | Sodium: 657mg | Potassium: 186mg | Fiber: 2g | Sugar: 11g | Vitamin A: 538IU | Vitamin C: 3mg | Calcium: 48mg | Iron: 1mg

Authentic Cornish Pasties Recipe

A flaky pastry crust filled with savory meat and vegetables, the Cornish Pasty is English comfort food at its best!

What are Cornish Pasties?

A Cornish pasty is a turnover-shaped baked shortcrust pastry filled with beef and vegetables. The edges are sealed by crimping them in characteristic Cornish fashion.

In 2011, Cornish pasties were given both a Protected Designation of Origin (PDO) and Protected Geographical Indication (PGI) status, which means that in order for these pasties to be made commercially and bear the name “Cornish pasty”, they have to meet very specific requirements. These requirements are as follows:

They have to be made in Cornwall.

They can only contain beef, potato, Swede (rutabaga), onion, salt and pepper. No other meat, no other vegetables, no other seasonings allowed.

The ingredients must be raw when the pasties are assembled and then slowly baked to produce the traditional Cornish pasty flavor and texture.

The edges of the pasties must be sealed by crimping them in traditional Cornish fashion.

PREP TIME: 30mins

COOK TIME: 45mins

CHILL TIME: 3hrs

TOTAL TIME: 4 hrs 15mins

COURSE: Main Course

CUISINE: British, Cornish, english

SERVINGS: 6 large pasties

INGREDIENTS:

For the Shortcrust Pastry:

3 1/2 cups (450 grams) all-purpose flour

1 teaspoon salt

5 ounces (140 grams) unsalted butter , very cold, diced

5 ounces (140 grams) lard , very cold

How to Render Lard (click link to learn how to make it yourself. It’s super easy and much cheaper than store-bought!)

2/3 cup (155 ml) ice cold water

For the Cornish Pasties:

1 pound (450 grams) beef skirt steak or sirloin , cut into small cubes

1 pound (450 grams) firm, waxy potato , peeled and diced in 1/4 inch cubes, or slice them according to personal preference (**starchy potatoes will disintegrate and turn mushy so be sure to use a firm, waxy potato that will hold its shape)

8 ounces (225 grams) rutabaga , peeled and diced in 1/4 inch cubes, or slice them according to personal preference

7 ounces (195 grams) yellow onion , chopped

salt and pepper to taste

unsalted butter (for cutting in slices to lay inside the pasties)

all-purpose flour (for sprinkling inside the pasties)

1 large egg , lightly beaten

INSTRUCTIONS:

To Make the Shortcrust Pastry: Place the flour and salt in a food processor and pulse a few times until combined. Add the cold butter and lard and pulse a few more times until the mixture resembles coarse crumbs. Add the water a little at a time, pulsing between additions, until the mixture begins to come together. DO NOT over-mix the dough or the pastry crust will be tough and won’t be flaky. Form the dough into a ball, wrap in plastic wrap, and refrigerate for at least 3 hours before using (this is crucial). (Can be refrigerated for a few days or frozen for up to 3 months.)

To Make the Cornish Pasties:

Preheat the oven to 350 degrees F.

Cut it into 6 equal pieces (rolling the dough into a log and then cutting makes this easier). Wrap and keep the other 5 pieces chilled in the fridge while you’re working on one at a time. Roll the dough out on a lightly floured work surface to a 8 inch circle that’s about 1/8 inch thick. You can use an 8-inch plate as your guide and cut the dough around it to form your circle.

Layer the filling (see note at end): Put layer of potatoes down the center of the pastry circle, leaving about 3/4 inch space on the top and bottom edges of the pastry dough. Lightly sprinkle with salt and pepper. Next add a layer of rutabagas, onions and finally the beef, adding a light sprinkling of salt and pepper between each layer. Lay a couple pats of butter on top of the beef and sprinkle a little flour over the filling.

Wet the tips of your fingers and lightly moisten the edges of the pastry dough. For this next part work gently so that the filling doesn’t puncture through the dough. If this happens, patch up the hole with some of the scrap pieces of pastry dough. Bring the sides up and seal the pasty down the middle. Turn the pasty onto its side and crimp the edges in traditional Cornish fashion (see blog post pictures as a visual).

Assemble the remaining pasties and lay them on a lined baking sheet. Use a sharp knife to cut a slit in the center of each pasty. Lightly brush each pasty with the beaten egg mixture.

Bake the Cornish pasties on the middle rack for 40-50 minutes until golden in color. Remove from the oven and let them sit for about 10 minutes (they will be very hot inside) before eating.

They can be reheated in the oven (recommended for a crispier crust) or microwave.

NOTE: Depending on how full you stuff the pasties you may have leftover filling. No worries, just fry it up together or add it to soup and enjoy it as a separate meal.

Tips for Making Cornish Pasties

Depending on how thin you roll out your shortcrust pastry you risk having the “hard” ingredients (the potatoes and rutabagas) pierce through the dough. If you prefer a thinner crust and you want to avoid that you can place the softer ingredients on the top and bottom with the harder ingredients sandwiched in the middle: Place the onions on the bottom followed by the potatoes and rutabagas and then the meat on top.

Use firm, waxy potatoes so they hold their shape. Starchy potatoes will disintegrate during baking and turn mushy.

Use a lean cut of beef. Traditional Cornish pasties use skirt steak from the underside belly of the cow because it’s lean and free of gristle.

Add a couple of pats of butter on top of the filling ingredients followed by a light sprinkling of flour. This will both form the gravy as well as absorb the liquids from the vegetables as their cooking to avoid a soggy pastry crust.

Can Cornish Pasties Be Frozen?

Yes. The shortcrust pastry holds up well to freezing and thawing and the filling has little liquid which means the pasties won’t get soggy. You can freeze them either baked or unbaked, whichever you prefer. Wrap each pasty individually in plastic wrap and then store the wrapped pasties in a heavy-duty freezer bag.

If you’re freezing them unbaked it’s best to cook them while frozen – don’t thaw them first. Baking time will take roughly 15-20 minutes longer.

NUTRITIONAL INFO:

Serving: 1large pasty | Calories: 697kcal | Carbohydrates: 63g | Protein: 28g | Fat: 48g | Saturated Fat: 23g | Cholesterol: 148mg | Sodium: 445mg | Potassium: 785mg | Fiber: 5g | Sugar: 3g | Vitamin A: 630IU | Vitamin C: 21mg | Calcium: 72mg | Iron: 8mg
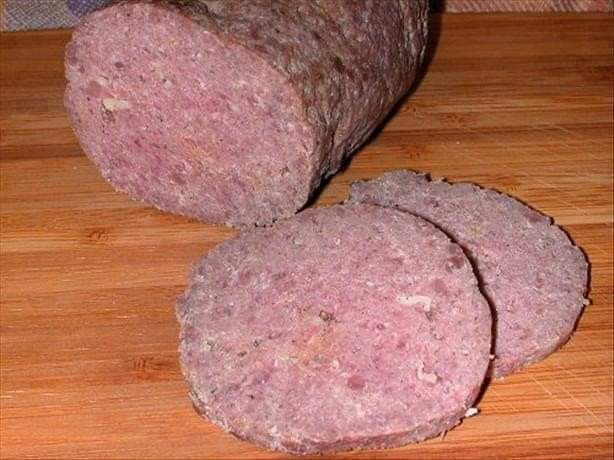
Instant Pot Pork Chops in Creamy Mushroom Sauce

Instant Pot Pork Chops in Creamy Mushroom Sauce – The perfect meal for busy weeknights. These Instant Pot pork chops are an easy and delicious dinner recipe your whole family will love. Seasoned pork chops are seared directly in the Instant Pot with olive oil and butter then smothered with a creamy mushroom sauce. The pork chops come out perfectly juicy and have such great flavor. It’s so easy, you’ll be adding this Instant Pot pork chops recipe to your weeknight dinner rotation soon enough. Enjoy!

INGREDIENTS:

  • 2 pork chops, bone-in (at least 3/4-inch thick – ours make 1-inch )
  • 1 teaspoon paprika
  • 1 1/2 teaspoon kosher salt
  • 3/4 teaspoon black pepper
  • 1 teaspoon Cayenne pepper, optional
  • 1 teaspoon Italian seasoning
  • 1 teaspoon garlic powder
  • 2 tablespoons olive oil
  • 2 tablespoons unsalted butter
  • 1/2 medium yellow onion, diced
  • 8 oz fresh sliced mushrooms
  • 1 cup chicken broth
  • 1/4 cup cornstarch
  • 1/2 cup heavy cream
  • 1/4 cup parmesan, grated, optional
  • Fresh chopped parsley, for garnish

Directions:

1. To make the Instant Pot pork chops in creamy mushroom sauce: Season pork chops with paprika, garlic powder, salt, pepper, Italian seasoning, and Cayenne. Turn on your Instant Pot and select the “Saute” mode. Add olive oil and butter to the insert. Once butter is melted, brown each pork chop 2-3 minutes per side. Remove pork chops to a plate while browning onions and mushrooms.

2. Still using the “Saute” function, cook the onion for about 1 minute, scraping the brown bits from the bottom of the insert. Add mushrooms and cook about 3 minutes until tender. Add in chicken broth. Add pork chops to Instant Pot and secure the lid in place.

3. Select “Pressure Cook” on a high level for 10 minutes, depending on the thickness of pork chops (if very thick, you might need to cook for 12 – 15 minutes). When the cooking time ends, release pressure and do a quick release. Transfer pork chops to a serving dish.

4. Prepare the creamy mushroom sauce by turning the instant pot back on the “Saute” mode.

5. In a small bowl, whisk together cornstarch with about 1/4 cup of the hot broth from the instant pot. Pour the whisked mixture into the instant pot and continue whisking until the sauce bubbles and thickens. Stir in heavy cream, parmesan, and adjust seasoning with more salt and pepper to taste. Return the pork chops into the Instant pot to reheat quickly. Serve the Instant Pot pork chops in creamy mushroom sauce immediately, over cauliflower rice (rice, pasta, or mashed potatoes for non-keto) and garnish with fresh chopped parsley. Enjoy!

For maximum flavor, we suggest you cooking pork chops with the bone is. You can also make Instant Pot boneless pork chops using this same method.

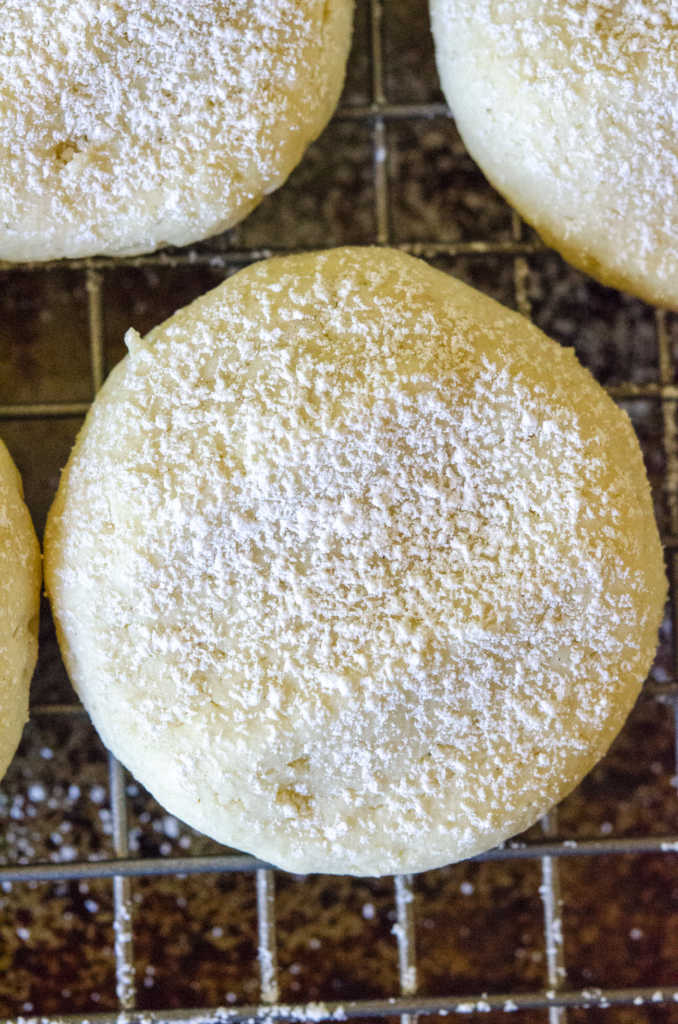
Cream Cheese Cookies Recipe

Are you in the mood for a sweet and simple cookie with an incredibly soft melt-in-your-mouth bite? If you’re anything like me, the answer is always and good news – I have just the cookie for you. These Cream Cheese Cookies take your basic baking ingredients and add – spoiler alert – cream cheese to the mix for a soft and nearly creamy cookie that’s a hit any time of year, anywhere

I am partial to drop cookies, mostly because I tend to reserve cut-out and rolled cookies for more special occasions where I can justify the time that goes into them. These do have a chilling step, but it’s only an hour and once the dough is firm it’s just a matter of rolling it into small balls and gently pressing them down after placing them on a cookie sheet. (To me, that’s much easier than finding the rolling pin and the cookie cutters.)

The dough is pretty basic. You just cream together butter and cream cheese before you add in granulated sugar and then the egg, vanilla, baking powder, flour, etc. (You know the drill.) It only takes one bowl and there are no complicated techniques, just a basic cookie dough that the cream cheese brings to new heights.

What that cream cheese does is create a soft and cloudy texture – these are not chewy, not crisp in the slightest, just gentle and snowy and sweet. Because they have both butter and cream cheese, the flavor is buttery and just on the edge of richness but it’s straightforward and clean too, not gussied up with nuts or baking chips or fruit. Simple is often best and that’s definitely the case with these.

Yield 20 cookies

15m prep time

10m cook time

1h inactive

Allergens: Eggs, Milk, Gluten

INGREDIENT’S

1/2 cup (1 stick) unsalted butter, at room temperature

4 oz cream cheese, at room temperature

1 cup granulated sugar

1 egg

2 teaspoons vanilla extract

1/2 teaspoon baking powder

1 3/4 cup all-purpose flour

1/2 teaspoon salt

Powdered sugar, for dusting

PREPARATION

Preheat oven to 375°F and line a baking sheet with parchment paper.

In a large bowl, cream the butter and cream cheese with an electric mixer.

Add sugar and beat 1 minute. Add egg and vanilla and mix until combined.

In three additions, add baking powder, flour, and salt, and mix to combine.

Cover dough and chill 1 hour.

Once chilled, dust hands with flour and roll dough into balls between 1-2 inches.

Set out on prepared baking sheet 2-inches apart and flatten gently with your fingers.

Bake 9-11 minutes. The top should remain pale while the bottoms should be golden.

Transfer to a wire rack to cool, then dust with powdered sugar to serve. Enjoy!

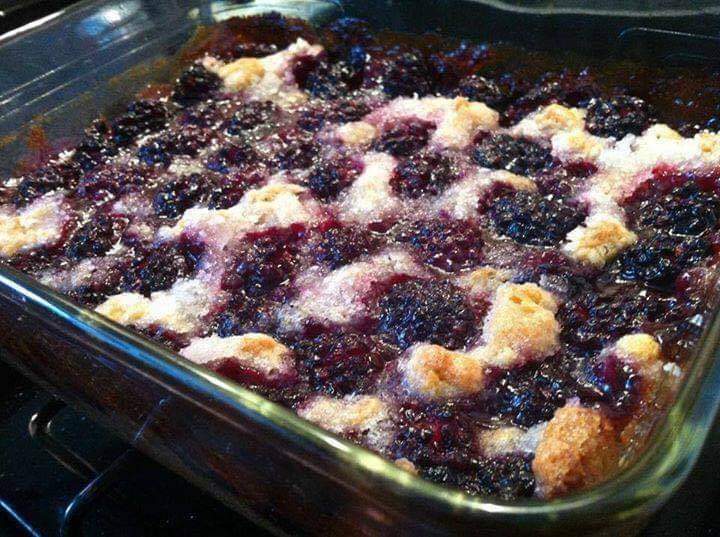
Kentucky Blueberry Cobbler Recipe

When I serve this wonderful dessert, memories flood back of blackberry picking, chiggers, and my grandmothers kitchen with the wood burning stove…and the wonderful smell of fresh baked blackberry cobbler.

Serves 8 | Prep Time 30 | Cook Time 45 minutes

INGREDIENTS YOU’LL NEED

2 1/2 c blackberries, washed

1 c sugar

1 c flour

2 t baking powder

1/2 t salt

1 c milk

1/2 c unsalted butter, melted

DIRECTIONS

Stir together just the berries and sugar in a large bowl and let it sit out for 25-30 minutes. Preheat oven to 375?. Stir together the flour, baking powder, salt, and milk with a wooden spoon. Next, stir in the melted butter and hand-mix it until the ingredients are well incorporated and you have few clumps. Pour batter into medium baking dish and smooth it out. You can choose to line it with parchment paper or not, but don’t grease the pan. Finally, pour the macerated blackberries on top with all the sugar included and evenly distribute it over the batter.

Bake for 45 minutes to an hour, depending on how golden you prefer it to be. Let it cool for 5 minutes so it will hold its shape.

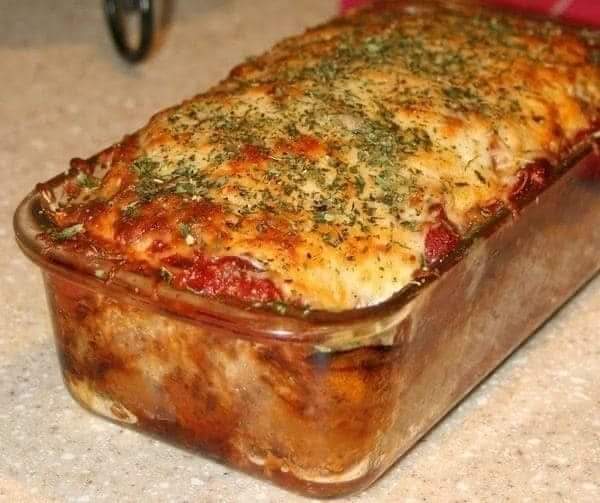
Parmesan Meatloaf Recipe

This Meatloaf Parmesan is a delicious spin on that traditional meatloaf we all know and love. Bursting with flavor, three types of meat, and two types of cheese – this recipe will make your dinner a success. Spice up meatloaf night and give this rendition a whirl!

Cheesy and tender meatloaf. An amazing twist on classic meatloaf.

Prep Time: 5mins

Cook Time: 1hr

Total Time: 1hr 5mins

Servings: 6 servings 

INGREDIENTS:

  • 1 lb ground turkey
  • 1 lb ground beef
  • 2 eggs
  • 1/4 cup gluten free breadcrumbs
  • 1/2 teaspoon dried basil
  • 1/2 teaspoon dried thyme
  • 1/2 teaspoon dried oregano
  • 1-2 cloves garlic, finely minced
  • 1 small onion, grated
  • 1/2 teaspoon salt
  • 1/4 teaspoon ground black pepper
  • 1/2 cup grated Parmesan cheese
  • 1/2 cup marinara pasta sauce (homemade here, minus the meat)
  • 1/2 cup shredded Italian cheese blend
  • minced parsley for garnish

INSTRUCTIONS:

  1. Preheat the oven to 350 degrees. Lightly grease a loaf pan with cooking spray, set aside.
  2. In a large bowl, combine the ground turkey and beef, eggs, breadcrumbs, thyme, oregano, basil, garlic, onion, salt, pepper and Parmesan cheese.
  3. To not over handle the mixture otherwise it will get tough.
  4. Place the mixture in the greased loaf pan and form into a loaf.
  5. Top the meatloaf with pasta sauce.
  6. Place filled loaf pan on a baking sheet and bake in the preheated oven for 40-45 minutes.
  7. Remove the meatloaf from the oven and sprinkle the top with the remaining shredded cheese.
  8. Place the meatloaf back in the oven and bake until the cheese is melted.
  9. Remove the meatloaf from the oven and allow to rest for 5-10 minutes before serving/slicing. Garnish with parsley if desired.
  10. Serve immediately and enjoy!

Nutritional Info:

Calories: 234kcal | Carbohydrates: 5g | Protein: 16g | Fat: 15g | Saturated Fat: 7g | Cholesterol: 78mg | Sodium: 530mg | Potassium: 285mg | Sugar: 4g | Vitamin A: 585IU | Vitamin C: 4.7mg | Calcium: 248mg | Iron: 1.5mg

Cool Whip Cookies Recipe

Cool Whip Cookies are one of the easiest cookie recipes you’ll ever make. Grab a box of your favorite cake mix, Cool Whip, an egg and powdered sugar and get started! Create a variety of flavors like lemon, strawberry, red velvet, funfetti, chocolate and more.

I can’t remember where I first heard of this Cool Whip Cookies recipe, but I’m so glad I did. Not only are they delicious, but they are also crazy simple. They are so easy you could make them in your sleep! Ok, maybe not in your sleep, but you get the idea.

I love them because they are so versatile. I wait for Cool Whip and cake mix to come on sale and I’ll grab a bunch so I can whip up a few batches. They never last long here

Want to learn how to make the easiest-ever holiday cookies? You’ve come to the right place. This crazy boxed-cake-mix hack makes super-fudgy crinkle cookies—with a third of the typical ingredients. 

Can you freeze these cookies?

Yes! You can freeze the baked cookies by letting them cool, then placing in freezer-safe plastic bags. You can also freeze the dough for up to 3 months. Freeze them as balls in freezer-safe plastic bags and let thaw before baking.

Having trouble rolling? Chill the dough.

Thanks to the Cool Whip, this is a very soft dough. If it’s too sticky in your hands to roll, chill the dough in the refrigerator for up to 30 minutes before rolling into balls and powdered sugar.

YIELDS: 20 serving(s)

PREP TIME: 5 mins

TOTAL TIME: 30 mins

CAL/SERV: 157

Ingredients:

1 box devil’s food cake mix

1 (8-oz.) container Cool Whip

1 large egg

1/2 c. powdered sugar

Directions:

Step 1

Preheat the oven to 350° with racks in the upper and lower thirds. Line two baking sheets with parchment paper.

Step 2

In a large bowl, using a hand mixer, beat cake mix with Cool Whip and egg until smooth and dough has a taffy-like consistency, about 1 minute.

Step 3

Place powdered sugar in a shallow bowl. Using a medium cookie scoop, scoop dough into the powdered sugar and roll to coat completely.

Step 4

Arrange each ball 2″ apart on prepared baking sheets and bake, rotating the trays halfway through, until cookies crackle and are set but still slightly soft in the center, 13 to 15 minutes.

Step 5

Transfer to a cooling rack and let cool completely.

Pineapple Dessert Recipe

This is the easiest pineapple dessert recipe you’ll find anywhere. Easy pineapple dessert has been one of the most popular desserts on my blog to date due to its simplicity and amazing taste. It’s 2023 and this is still the very top recipe year after year.

I can admit it, I’d eat dessert all day if I could pull it off. I’ve been in a fruity mood lately, so this is the perfect hack.

This easy pineapple dessert comes together with just three simple ingredients. Yes…just three.

easy pineapple dessert served in a vintage glass dish

Along with being so easy to throw together, it packs a yummy and surprising punch!

Last spring I made this Pineapple Lush Cake which blew my mind. So easy to make and the filling?

Well, that’s what completely inspired this dessert idea. Crushed pineapple is the star player in this simple treat.

The extra juices in this simple recipe soak up vanilla instant pudding mix and when combined with whipped topping (Cool Whip) comes together into a very tasty and satisfying dessert. Until I made this recipe, I never realized just how delicious a canned pineapple dessert could truly be. All of these flavors just work so well together and you get to skip the mess of cutting up a fresh pineapple.

angled down view of pineapple pudding served in individual dishes with whipped cream and a cherry on top

I served this up in mini parfait cups that are perfect for just that little sweet bite every once and awhile. Yum! Top with a little whipped cream and a cherry for a little added flair.

Pineapple Dessert with only 3 ingredients. Basically crack pineapple pudding. SO good.

This simple recipe is easily the best pineapple dessert with cool whip that I’ve ever made. So simple and easy but so delicious. 

YIELD: 6

PREP TIME: 5 MINUTES

Additional Time: 1 HOUR

Total Time: 1 HOUR 5 MINUTES

Ingredients:

  • 1 can (20 oz.) Crushed Pineapple in Juice, undrained
  • 1 pkg. (3.4 oz.) Vanilla Flavor Instant Pudding
  • 1 cup thawed Whipped Topping

Instructions:

  1. Mix pineapple and dry pudding mix.
  2. Gently stir in whipped topping.
  3. Refrigerate for an hour before serving.

Nutritional Info:

Yield: 6

Serving Size: 1

Amount Per Serving

Calories:100/TotalFat:4g/SaturatedFat:3g/TransFat:0g/UnsaturatedFat:0g/Cholesterol:1mg/Sodium:95mg/Carbohydrates:16g/Fiber:1g/Sugar:10g/Protein:1g


Quick Chile Lime Potato Tacos Recipe

This recipe is great for people who crave Mexican food but strive to consume fewer calories. The chili and lime flavors make this recipe so tasty and with all variations under 250 calories and 7 grams of fat per serving, this is a perfect recipe to include in a low-calorie diet. Adding potatoes to your taco increases the potassium and vitamin c, without adding fat or cholesterol.

Prep Time: 10minutes

Cook Time: 20minutes

Total Time: 30minutes 

Course: Main Course, Main Dish, Mains & Sides, Snacks

Cuisine: Mexican

Keyword: potato, potatoes, tacos

Servings: 4 

Equipment:

stovetop

microwave

INGREDIENTS:

  • 1/2 lb. yellow or red potatoes cut into bite-size cubes
  • Olive oil cooking spray
  • 1/2 cup chopped onion
  • 1/2 lb diced boneless skinless chicken breasts
  • 1/2 cup red chili enchilada sauce
  • 1/4 cup finely chopped poblano Anaheim or bell pepper
  • 1 teaspoon Mexican seasoning blend
  • 1/2 cup shredded reduced-fat Monterey Jack cheese
  • 8 small corn tortillas* warmed or crunchy taco shells
  • 8 lime wedges
  • Optional Ingredients
  • Shredded cabbage or romaine lettuce
  • Diced tomato
  • Diced avocado
  • Thinly sliced radishes
  • Fresh cilantro leaves

INSTRUCTIONS:

  1. Place potatoes in a microwave-safe bowl and cover with plastic wrap. Microwave on HIGH for 5 to 7 minutes.
  2. Spray a large skillet liberally with cooking spray.
  3. Add potatoes and onion; cook over medium-high heat for 5 minutes, stirring and coating with cooking spray occasionally.
  4. Stir in chicken, pepper and seasoning and cook for 5 minutes more.
  5. Add red chili enchilada sauce and simmer for 5 minutes.
  6. Place equal amounts of cheese on each tortilla and heat in a skillet until cheese is melted.
  7. Add potato mixture and any other desired toppings. Serve with lime wedge.

Notes:

Variations

Chicken Verde Potato Tacos

Cook potatoes, onion, chicken and peppers as directed above. Omit garlic salt, chili and lime seasoning and lime juice. Stir in 1 teaspoon Mexican seasoning blend and 1/2 cup green chile salsa.

Nutritional analysis per serving: Calories: 230, Fat: 5g, Saturated Fat: 2g, Trans Fat: 0g, Cholesterol: 40mg, Sodium: 340mg, Potassium: 397mg, Carbohydrates: 26g, Fiber: 1g, Sugar: 3g, Protein: 18g, Vitamin A: 6%, Vitamin C: 35%, Calcium: 10%, Iron: 6%

Turkey and Red Chili Potato Tacos

Sauté potatoes and onions as directed above. Omit chicken and add 1/2 lb. 99% lean ground turkey with peppers and Mexican seasoning; cook for 5 minutes more. Stir in 1/2 cup red chili enchilada sauce and simmer for 5 minutes over low heat.

Nutritional analysis per serving: Calories: 250, Fat: 7g, Saturated Fat: 2.5g, Trans Fat: 0g, Cholesterol: 40mg, Sodium: 500mg, Potassium: 303mg, Carbohydrates: 26g, Fiber: 1g, Sugar: 3g, Protein: 23g, Vitamin A: 15%, Vitamin C: 35%, Calcium: 15%, Iron: 8%

NUTRITIONAL INFO:

Calories: 220kcal | Carbohydrates: 25g | Protein: 19g | Fat: 5g | Cholesterol: 40mg | Sodium: 200mg | Fiber: 2g

Sweet Hawaiian Crock Pot Chicken Recipe

Three ingredients and a slow cooker is all you need to make this healthy Sweet Hawaiian Crock Pot Chicken. It’s sweetened naturally with pineapple and perfectly balanced with a smokey bbq kick! Simply add your ingredients and let it simmer away.

Why We Love It

Yup, you read that right. There are only 3 ingredients in this recipe! But don’t let that fool you into thinking it’s boring- It’s jam packed with flavor!

Sweet canned pineapple is paired with smokey, tangy bbq sauce to make the best ever Hawaiian inspired flavor combination.

The chicken comes out ultra tender and delicious. And because it’s made with all natural ingredients, it’s also Whole30 compatible and Paleo friendly.

But the real beauty of this dish is how little work is involved! You simply add your ingredients to your slow cooker, then turn it on. I call this “dump and start” cooking, and it’s one of my favorite things!

The chicken simmers away in the sauce until it’s fork tender, then just serve with cauliflower rice, purple cabbage slaw, or all by itself!

It’s also freezer friendly, so you can save leftovers or make a double batch for easy meals later on. And don’t forget to check out my Aloha Burgers, too!

Sweet Hawaiian Crock Pot Chicken

Three ingredients and a crock pot is all you need to make this healthy dinner. Sweet Hawaiian Chicken is sweetened with pineapple and perfectly balanced with a smokey bbq kick!

Prep Time: 5 mins

Cook Time: 3 hrs

Total Time: 3 hrs 5 mins

Course: Dinner, Main Course

Cuisine: American

Servings: 6 servings

Equipment:

1 Slow Cooker / Crock Pot

INGREDIENTS:

  • 2 lb. chicken breasts boneless & skinless
  • 1.5 cups bbq sauce
  • 15 oz. canned crushed pineapple

INSTRUCTIONS:

  1. Dice the chicken into about 1 inch cube pieces.
  2. Transfer the chicken to the slow cooker. Add the pineapple and bbq sauce. Stir to combine the ingredients.
  3. Cover and cook on low heat for 3.5 – 4 hours or high for 2 – 2.5 hours. If using frozen diced chicken, add an additional 30-45 minutes to the cook time.
  4. When it’s done cooking, the chicken should be at least 165°F (74°Ç) and fork tender, and the sauce should be simmering and thickened slightly.
  5. Carefully open the lid and spoon the chicken mixture onto plates. Garnish with lime and cilantro (optional).

Notes:

Ingredient Substitutions

Don’t like canned pineapple? Substitute diced fresh or frozen pineapple!

Don’t have chicken breasts? Use boneless, skinless thighs, and add about 20 minutes to cook time.

For extra veggies, add a diced bell pepper and/or red onion.

Instant Pot Instructions: Add all the ingredients to your Instant Pot inner pot. No additional liquid is necessary. Close the lid and turn High Pressure for 8 minutes. If using frozen diced chicken, adjust the time and cook for 12 minutes. Allow for a Natural Pressure Release (NPR), then carefully open the lid. Stir and serve!

To store leftovers: Transfer the leftover chicken and sauce to an airtight container. Store in the refrigerator for 3-4 days, per USDA.

To freeze leftovers: Allow the chicken and sauce to completely cool. Transfer to a freezer safe container or bag, squeezing out as much air as possible. Set flat in the freezer. For best taste, use within 6 months, per USDA. Defrost on plate overnight in the refrigerator.

NUTRITIONAL INFO:

Calories: 338kcal | Carbohydrates: 35g | Protein: 33g | Fat: 4g | Saturated Fat: 1g | Polyunsaturated Fat: 1g | Monounsaturated Fat: 1g | Trans Fat: 1g | Cholesterol: 97mg | Sodium: 910mg | Potassium: 813mg | Fiber: 2g | Sugar: 28g | Vitamin A: 241IU | Vitamin C: 9mg | Calcium: 42mg | Iron: 1mg

Butter Nut Cookies Recipe

These are my most requested cookie. I usually make at least 500 of these at Christmas. It’s a very simple recipe but packed with lots of flavor!

Cook time: 15 Min

  Prep time: 5 Min

  Serves: 3 dozen

INGREDIENTS:

  • 3/4 c butter, room temperature + 1 Tbsp
  • 1/2 c powdered sugar
  • 1/4 tsp salt
  • 1 3/4 c all-purpose flour
  • 1 pkg package butterscotch chips, 6 oz.
  • 1 c finely chopped pecans
RUM GLAZE
  • 3 c powdered sugar
  • 3 to 4 Tbsp milk or water
  • 1 tsp rum extract
TOPPING
  • 1/2 c chopped pecans

INSTRUCTIONS:

1. Cream butter with powdered sugar and salt until light and fluffy.

2. Blend in flour; mix well.

3. Add butterscotch chips and 1 cup finely chopped pecans.

4. Mix well by hand.

5. Shape dough, a scant teaspoonful at a time, into balls. Place 1-inch apart on ungreased cookie sheet.

6. Bake in 325 F oven for 15- 20 minutes or until firm but not brown. Let cool on wire racks.

7. Make rum glaze. Mix the powdered sugar, rum extract, and milk until smooth.

8. You can either dip the cookies in the glaze or use a spoon to pour over cookies.

9. Sprinkle with chopped pecans and allow the glaze to set up.

Final Step: Share!


Old Fashioned Stuffed Cabbage Rolls Recipe

Old Fashioned Stuffed Cabbage Rolls make a delicious and healthy dinner for a cozy night in. This easy traditional Polish-style cabbage roll recipe is a healthy, gluten-free, and lower-carb comfort food dish your family is sure to love!

 Course Dinner

 Cuisine Polish

 Prep Time 30 minutes

 Cook Time 1 hour

 Total Time 1 hour 30 minutes

 Servings 6 servings

INGREDIENTS:

1 large head of cabbage green*

Tomato Sauce:

2 Tbsp. oil olive or avocado

1 cup sweet onion finely chopped, divided

2 cloves garlic crushed

15 oz. tomato sauce canned

15 oz. crushed tomatoes canned

1 Tbsp. Worcestershire sauce

1 Tbsp. sugar optional

1 tsp. salt to taste

½ tsp. black pepper to taste

Filling:

1 lb. ground beef or turkey, uncooked*

1 cup rice cooked, white or brown*

½ cup sweet onion finely chopped, divided

1 clove garlic crushed

1 egg

1 tsp. salt

¼ tsp. black pepper

3 Tbsp. fresh parsley finely chopped

¼ tsp. paprika

⅛ tsp. cayenne pepper

INSTRUCTIONS:

Preheat oven to 350°F.

Bring a large pot of water to a boil.

Cut and remove about 1 inch from the bottom of the head of cabbage.

Place the entire head of cabbage into the pot of boiling water and boil for 4-5 minutes or until the leaves peel easily and are pliable. Remove the boiled head of cabbage from the pot and place on a dish towel to let drain.

Once cool to the touch, peel 12 cabbage leaves from the head, being careful not to tear them.

Tomato Sauce:

Add oil and chopped onion to a large skillet over medium heat. Sauté for 2-3 minutes, or until the onion has softened. Add crushed garlic and continue sautéing for an additional minute.

Add in tomato sauce, crushed tomatoes, Worcestershire sauce, sugar, 1 teaspoon salt and ½ teaspoon black pepper. Stir to combine.

Increase heat to high and bring sauce to a boil. Once boiling, reduce heat to low and simmer, uncovered, for 10-15 minutes.

Cabbage Rolls:

Add all filling ingredients to a large bowl. Mash the ingredients together using a potato masher until well combined.

Place one cabbage leaf on a cutting board. Cut a V-shaped incision at the base of each leaf to remove the bottom 1-2 inches of the tough rib.

Add in about 3-4 tablespoons of the filling mixture into each leaf. Fold the right side of the leaf over the filling and then fold the left side over. Starting at the base, begin rolling the cabbage leaf up. Repeat the previous steps with the remaining filling and cabbage leafs.

Spray a large 9×13 inch baking dish with non-stick cooking spray. Pour in tomato sauce and spread it out along the bottom of the dish. Place cabbage rolls, seam-side-down, in two rows of six rolls. Cover the baking dish with a piece of aluminum foil and bake in preheated oven for 60-75 minutes.

Recipe Notes:

A medium-large head of green cabbage is recommended. Larger leaves are easier to fill up and then roll without them tearing.

Substitute with uncooked cauliflower rice if on a low-carb diet.

Can use 90/10 or 93/7 ground meat.

To Store: Seal leftover stuffed cabbage rolls in an airtight container and refrigerate for up to 3-5 days.

EXPERT TIPS:

Soften it. Boiling an entire head of cabbage ensures you get the most number of leaves that are fully intact with no tears.

Get the right size. Make sure you choose a medium to large head of cabbage. This makes stuffing them with the filling MUCH easier.

Cut it out. Removing the rib from the base of each leaf helps the cabbage to become even more pliable and easier to roll.

Use the right tools. Mix the filling ingredients together first with a potato masher to ensure all of the meat is thoroughly mixed with the other ingredients.

Check for doneness. Use a meat thermometer to make sure the ground beef is cooked all of the way.

Shhhhhh! Worcestershire sauce is a secret ingredient that replaces the traditional vinegar found in other recipes.

Homemade Crispy Kremes Recipe

Homemade Krispy Kremes Donut Holes

You might have to play with this recipe depending on elevation and humidity differences for different areas. I live in Colorado and use 1 1/2 to 1 3/4 cups of flour. Good luck! 🙂

Ingredients:

DONUT RECIPE:

3 Tbsp milk

3 Tbsp boiling water

1 tsp dry active yeast

1 1/2 c all purpose flour (you might need up to 2 cups of flour. depending on where you live) see note above

3 Tbsp sugar

1 egg, slightly beaten

2 Tbsp butter, cold to room temperature (do not melt)

dash of salt

enough oil to cover the bottom few inches of a wok, or a deep fryer.

GLAZE:

1/3 c cup butter

2 c confectioners’ sugar

1 1/2 tsp vanilla

4 Tbsp hot water or as needed

Directions:

1. In a large measuring bowl, combine the milk and boiling water. Add a teaspoon of the sugar and the yeast. Stir it gently, then leave it in a warm place for the yeast to activate. It will look foamy

2. In a large mixing bowl, combine the flour, the rest of the sugar, and the salt. Cut in the butter using your fingers or a pastry blender, until it resembles crumbs.

3. Add the egg and yeast mixture to the flour mix, and mix into a smooth dough. This usually takes about 5 minutes of mixing.

4. Turn the dough out onto a lightly-floured counter and knead for about 5 to 10 minutes—it should feel springy and little bubbles should form under the surface. Place it back in the bowl, cover with a cloth or plastic wrap, and let rise for about an hour until double in size.

5. Once risen, place the dough onto the counter and cut it into 4 pieces. One piece at a time, stretch it into a long rope about an inch to an inch and a half wide. Cut strips about an inch long, ball em up with your hands, and place them on a baking tray or wire rack to wait.Cover the donut holes with a cloth to rise. Cover the donut holes with a cloth to rise

6. Heat the oil to 375F. Place the donuts into the oil and fry until golden brown on each side, about 2 minutes. Only cook a few at a time so they don’t overcrowd and stick together.

7. Drain on a paper towel or wire rack over a cloth, before glazing them.

8. Combine ingredients for glaze. Dunk cooked donuts in warm glaze and place on paper towel or wire rack to dry. Reheat glaze if it cools too much. It needs to be warm while dunking donuts to get that yummy Krisp Kreme affect.

Fluffy Condensed Milk Bread Recipe

This sweet and fluffy condensed milk bread is a real showstopper! It’s deliciously buttery and just the right amount of sweet, which makes it perfect to balance out a strong cup of morning coffee. If you’re looking for an easy yet delicious sweet treat recipe, then this condensed milk bread will be sure to hit the spot! With just a few simple pantry ingredients—flour, egg, condensed milk, and butter—you can make this rich, sweet bread without a lot of hassle. The texture is light and soft, while the sweet flavor of the condensed milk makes it totally moreish!

What is Condensed Milk Bread?

Condensed milk bread is a homemade bread recipe made with simple pantry staples and one special ingredient… condensed milk! Inspired by Japanese milk bread, the condensed make creates a super fluffy, soft textured bread, that’s slightly sweet, without being too overpowering.

Tips

When it comes to baking, it’s best to do it by weight measurement. This means the flour will be measured more accurately and your bread will more likely be a success.

If you prefer the bread to have a chewy texture, use bread flour.

The dough will be sticky, so oil your hands to prevent it from sticking.

How To Serve Condensed Milk Bread

This bread tastes good on its own with a bit of butter. But you can also use it to make French toast or a sandwich.

How to Store Condensed Milk Bread

The condensed milk bread can be wrapped in plastic wrap and store it at room temperature for up to 3 days.

INGREDIENTS:

  • WARM MILK: 240ml
  • CONDENSED MILK: 75g
  • EGG: 1
  • SUGAR: 30g
  • DRY YEAST: 7g
  • FLOUR: 520g
  • SALT: 1tsp
  • BUTTER: 50g

INSTRUCTIONS:

  1. Whisk warm milk with sugar and condensed milk. Add the dry yeast and an egg, whisk again.
  2. Add the dry ingredients (flour and salt) to the wet ingredients.
  3. Mix the dough with the dough hooks until it comes together.
  4. Add the softened butter and mix again with the dough hooks for 10 minutes. Set the dough aside to rest for one hour or until doubled in size.
  5. Punch down the dough.
  6. Cut ⅔ of the dough and roll it out into a 25×40 cm (10 x 16 inches) rectangle.
  7. Roll the dough into a log and cut it into pieces.
  8. Place pieces of dough into a prepared baking pan and set aside.
  9. To make smaller buns, cut the remaining dough into smaller pieces, and place in small baking tins.
  10. Set the buns aside for 1 hour.
  11. Brush the top of each bun with egg wash before baking, then bake at 180°C/350°F for 25-30 minutes. For smaller buns, 20 minutes will be enough.
  12. Whisk equal parts of butter and condensed milk. Brush buns with this mixture while they are still warm.
  13. Remove from the baking molds when they have cooled completely.


Cheesy Taco Lasagna Recipe

This dish is assembled casserole-style and filled with the most irresistible mixture of seasoned ground beef and black beans, tortillas, sour cream, and plenty of melted cheese.

What Is Taco Lasagna?

Take everything there is to love about ground beef tacos — the browned ground beef kissed with warm spices, the tortillas, cheese, and salsa — and then borrow some inspiration from the ways you’d layer a lasagna, and you’ve got taco lasagna. 

This version of taco lasagna is layered with corn or flour tortillas (pick your favorite one!), seasoned ground beef and black beans mixed with salsa, lots of shredded cheese, and creamy sour cream. And of course, don’t forget the toppings! Any of your favorite taco toppings are fair game here. We especially love shredded romaine, chopped tomatoes, avocado, fresh cilantro, pickled jalapenos, and extra sour cream. 

What’s the Best Way to Reheat Taco Lasagna?

Taco lasagna is at its best when eaten right after it’s cooked. With that said, the leftovers (which will keep for a couple of days in the fridge) are still pretty amazing and reheat well. As taco lasagna sits, the sour cream layer will soak into the tortillas, and the tortillas will soften a little, but you’ll still get clean, layered slices.

For the best results, reheat taco lasagna in a covered baking dish in a 350℉ oven until heated through, 10 to 20 minutes. Total cook time will vary depending on how big the pieces are. Covering the baking dish with foil will prevent the lasagna from drying out. 

SERVES: 6 to 8

PREP: 20 minutes

COOK Time: 43 minutes to 45 minutes

INGREDIENTS:

  • 1 medium yellow onion
  • 1 medium red bell pepper
  • 2 cloves garlic
  • 1 (about 15-ounce) can black bean
  • 2 tablespoons olive oil, divide
  • 1 pound lean ground bee
  • 1 tablespoon chili powder
  • 2 teaspoons ground cumin
  • 1 teaspoon dried oregano
  • 1 teaspoon kosher salt
  • 1/4 teaspoon freshly ground black pepper
  • 1 (about 16-ounce) jar tomato salsa, divide
  • 12 (8-inch) corn or flour tortillas, divide
  • 16 ounces sour cream, divide
  • 16 ounces shredded Mexican cheese blend (about 4 cups), divide
FOR SERVING (OPTIONAL)
  • Shredded romaine lettuce
  • Chopped tomatoes
  • Fresh cilantro leave
  • Sliced avocado
  • Pickled jalapeño slice

INSTRUCTION:

  1. Arrange a rack in the middle of the oven and heat the oven to 350℉
  2. Dice 1 medium yellow onion (about 1 cup). Core, seed, and dice 1 medium red bell pepper (about 1 1/2 cups). Mince 2 garlic cloves. Drain and rinse 1 can black beans
  3. Heat 1 tablespoon of the olive oil in a large, high-sided skillet over medium-high heat until shimmering. Add 1 pound lean ground beef and cook, breaking up the meat with a wooden spoon, until browned and cooked through, 6 to 8 minutes. Using a slotted spoon, transfer the meat to a plate, then pour off any fat from the skillet
  4. Reduce the heat to medium. Add the remaining 1 tablespoon olive oil and heat until shimmering. Add the onion, bell pepper, and garlic, and cook, stirring occasionally, until softened, about 5 minutes. Return the beef and any accumulated juices to the skillet, add the black beans, and stir to combine.
  5. Add 1 tablespoon chili powder, 2 teaspoons ground cumin, 1 teaspoon dried oregano, 1 teaspoon kosher salt, and 1/4 teaspoon black pepper, and stir to combine. Cook for 2 minutes
  6. Remove from skillet from the heat. Transfer 1/4 cup tomato salsa from a 16-ounce jar into a 9×13-inch baking dish, then pour the remaining salsa into the skillet and stir to combine
  7. Assemble the lasagna: Spread the salsa out in the baking dish into a thin layer. Arrange 4 (8-inch) tortillas in a single layer on top of the salsa, overlapping them as needed. Dollop and spread 2/3 cup of the sour sour cream.
  8. Spoon half of the meat mixture over the sour cream and spread in an even layer. Sprinkle with 1 1/3 cups of the shredded Mexican cheese blend
  9. Repeat layering the following: 4 tortillas, 2/3 cup sour cream, the remaining meat mixture, and 1 1/3 cups shredded cheese. Top with the remaining 4 tortillas and remaining 2/3 cup sour cream. Sprinkle with the remaining 1 1/3 cups cheese
  10. Bake uncovered until the cheese is melted and lightly browned, 30 minutes. Let cool for at least 15 minutes before serving. Garnish with the desired toppings

RECIPE NOTE:

Beef substitutions: Substitute an equal amount of plant-based meat alternative (like Beyond Beef or Impossible Burger), soyrizo, or crumbled tempeh for the ground beef

Storage: Refrigerate in an airtight container for up to 2 days. Reheat in a covered baking dish in the oven until heated through baking dish in the oven until heated through.

What’s the Best Way to Reheat Taco Lasagna?

Taco lasagna is at its best when eaten right after it’s cooked. With that said, the leftovers (which will keep for a couple of days in the fridge) are still pretty amazing and reheat well. As taco lasagna sits, the sour cream layer will soak into the tortillas, and the tortillas will soften a little, but you’ll still get clean, layered slices.

For the best results, reheat taco lasagna in a covered baking dish in a 350℉ oven until heated through, 10 to 20 minutes. Total cook time will vary depending on how big the pieces are. Covering the baking dish with foil will prevent the lasagna from drying out.

Baked King Crab Recipe

Baked King Crab – King crab is everyone’s favorite crustacean and this king crab recipe is baked with Sriracha lemon butter. The crab legs are so delicious!

Prep Time: 10 mins

Cook Time: 20 mins

Total Time: 30 mins

Ingredients:

2 lbs. king crab legs

1 stick unsalted butter room temperature and softened

1 teaspoon Sriracha

1 1/2 tablespoons lemon juice

1/2 tablespoon sugar

3 dashes smoked paprika and more for dusting

1 tablespoon chopped parsley and/or chives

Instructions

Preheat oven to 400°F (207°C).

Cut the king crab legs into shorter segments using a pair of scissors. Cut the crab leg segments lengthwise to expose the crab meat. Alternatively, you can also cut the top part of the shell to expose the crab meat.

King Crab

Arrange the king crab legs in a baking tray and bake for 20 minutes. Cover with aluminum foil to avoid drying out the crab.

In the meantime, make the Sriracha Lemon Butter by whipping the softened butter with a whisk. Add the Sriracha, lemon juice and sugar, whisk to combine well. Set aside.

As soon as the crab is out of the oven, spoon the butter over the crab meat. Dust with more smoked paprika and garnish with chopped parsley and/or chives. Serve immediately.

Nutritional Info:

Serving: 4people | Calories: 388kcal | Carbohydrates: 2g | Protein: 42g | Fat: 24g | Saturated Fat: 15g | Cholesterol: 156mg | Sodium: 1927mg | Fiber: 1g | Sugar: 2g

CHERRY CHEESECAKE LUSH

Ingredients

  •             1-14 ounce package of golden oreos, crushed in processor
  •             ⅓ cup butter, salted and melted
  •             1 tbsp for preparing the pan
  •             8 ounces cream cheese, softened to room temp
  •             ¾ cup white sugar
  •             16 ounces frozen whipped topping, thawed
  •             2 small boxes of Cheesecake flavored instant pudding mix
  •             3 cups whole milk
  •             2 large cans of cherry pie filling
  •             1 cup chopped pecans or chopped walnuts

Instructions

  • Butter the inside of a 9×13 baking dish and set to the side
  • Crush the cookies until small crumbs form
  • Add the melted butter and pulse until combined
  • Place the cookie mix into the bottom of the baking dish, press down and make the layer as even as possible
  • Place the crust into the freezer for 10 minutes while you make the filling.
  • In a bowl beat together the cream cheese, sugar, vanilla and 1 cup of the whipped topping.
  • Mix until smooth
  • Spread this mixture over the cookie crust and place back into the freezer for another 10 minutes
  • In another bowl combine the 2 packages of pudding mix, the milk and ½ cup of whipped topping mix. Using a whisk, whisk until it begins to thicken
  • Spread the pudding over the chilled cream cheese layer, smooth evenly and chill for 30 minutes or until the pudding is set
  • After 30 minutes, pour the Cherry pie filling over the pudding layer very carefully so as to not mix layers together
  • Carefully spread the remaining whipped topping over the entire dessert
  • Top with chopped pecans and chill for 1 to 2 hours before serving.
  • Enjoy!


Crispy Chicken Strips Recipe

Crispy chicken strips are a kid-friendly dinner that’s perfect for a weeknight! Skip the fast food drive-thru and make perfectly juicy, crispy chicken at home!

Prep Time: 10mins

Cook Time: 10mins

Course: Main Course

Cuisine: American

Keyword: chicken, chicken strips, crispy chicken strips

Servings: 4 

INGREDIENTS:

  • 1 lb boneless skinless chicken breasts cut into strips or chicken tenders
  • 2 eggs
  • 1 cup Panko breadcrumbs
  • ¼ cup grated parmesan cheese
  • ½ teaspoon paprika
  • ½ teaspoon garlic powder
  • salt and pepper to taste
  • olive oil
  • honey mustard dipping sauce

INSTRUCTIONS:

  1. Sprinkle with salt and pepper.
  2. Lightly beat the eggs in a shallow bowl.
  3. In another bowl mix together the breadcrumbs, cheese, paprika, and garlic powder.
  4. Dip the chicken first into the eggs and then into the breadcrumb mixture.
  5. Transfer to a plate while you finish all the pieces this way.
  6. Heat a thin layer of oil in a large nonstick sauté pan over medium heat.
  7. Cook the chicken nuggets for several minutes on each side until they are golden brown. Make sure the nuggets are cooked all the way through.
  8. Transfer the nuggets to a plate lined with paper towels to help drain off any excess oil.
  9. Serve with honey mustard dipping sauce.

Nutritional Info:

Calories: 249kcal | Carbohydrates: 12g | Protein: 31g | Fat: 8g | Saturated Fat: 3g | Polyunsaturated Fat: 1g | Monounsaturated Fat: 2g | Trans Fat: 1g | Cholesterol: 160mg | Sodium: 369mg | Potassium: 497mg | Fiber: 1g | Sugar: 1g | Vitamin A: 330IU | Vitamin C: 1mg | Calcium: 116mg | Iron: 2mg

Amish Cinnamon Bread Recipe

This one bowl recipe for Amish Cinnamon Bread is easy to make, filled with cinnamon flavor, and perfect for serving with a hot cup of coffee.

Prep Time: 10 minutes

Cook Time: 1hour 10 minutes

Total Time: 1hour 20minutes 

Servings: 12 Slices 

Ingredients:

▢½ cup softened butter salted

▢¾ cup granulated sugar

▢¼ cup packed brown sugar

▢1 large egg

▢1 teaspoon vanilla extract

▢1 cup buttermilk

▢2 cups all purpose flour

▢1 teaspoon baking soda

Cinnamon Sugar Filling and Topping

▢⅓ cup sugar

▢1 ½ teaspoons cinnamon

▢2 tablespoons melted butter

Instructions:

Preheat the oven to 350ºF and grease a 9X5 loaf pan with butter or oil.

Add the softened butter to a large bowl with a hand mixer, OR a stand mixer fitted with the paddle attachment.

Add in granulated sugar and brown sugar to the butter and mix on medium-high speed until the butter and sugars have creamed and are light and fluffy, about 2-3 minutes.

Add the egg, vanilla and buttermilk and mix until fully incorporated.

Sift the flour and baking soda into the bowl and mix just until it starts to come together. Use a silicone spatula to fold everything together until the flour is absorbed and no large lumps remain.

Stir together ⅓ cup of sugar and 1 ½ teaspoons of cinnamon and set aside.

Add half of the batter to the prepared loaf pan, and add half of the cinnamon sugar mixture evenly on top of the batter. Use a butter knife to swirl it into the batter.

Add the remaining half of the batter on top, smoothing it out evenly.

Add the remaining cinnamon sugar mixture and swirl it into the top layer of batter using a butter knife.

Drizzle 2 tablespoons of melted butter on top of the loaf.

Bake in the preheated oven for 50-70 minutes, or until a cake tester (or toothpick) comes out clean when inserted into the center.

Allow to cool in the pan for 20 minutes, and then gently coax it out of the loaf pan and transfer to a wire rack. Allow to cool to room temperature before wrapping and storing.

Notes:

Storing: Wrap your loaf in a triple layer of plastic wrap. Store at room temperature for 2-3 days, or in the refrigerator for 5 days. For longer storage, add the wrapped loaf to a freezer bag and label. Freeze for up to 2 months.

Softened Butter: It’s important that you use softened butter, otherwise it will be very difficult to cream the butter and sugars together. In a pinch melted butter can work, but it will make for a less moist loaf.

Nutritional Info:

Serving: 1g | Calories: 261kcal | Carbohydrates: 39g | Protein: 3g | Fat: 10g | Saturated Fat: 6g | Polyunsaturated Fat: 3g | Cholesterol: 42mg | Sodium: 227mg | Fiber: 1g | Sugar: 23g

Baked Ham Recipe

Baked Ham is my kids’ all time favorite meal! They’d pass up a turkey dinner any day of the week (or any holiday) for ham.

This easy baked ham is moist, tender and delicious inside while the outside is brushed with a brown sugar glaze and caramelized for a hint of sweetness. We serve this baked ham for special occasions (like Easter and Christmas) but it’s simple enough to make any time of year!

How much ham per person

If you’re using a bone in ham, you’ll want about 3/4 pound of ham per person and a bit more if you want leftovers (for Ham and Corn Chowder or Cheesy Ham and Potato Casserole). An 8lb ham should feed about 9 people.

What to Serve With Glazed Ham

This beautiful brown sugar ham is most often served at Christmas dinner or Easter dinner at our house! We serve it with our favorite sides for the perfect meal!


PREP TIME: 5minutes

COOK TIME: 2 hours 30 minutes

TOTAL TIME: 2hours 35minutes 

SERVINGS: 12 Servings

Baked ham is moist, tender and delicious inside while the outside is brushed with a brown sugar glaze and caramelized for a hint of sweetness.

INGREDIENTS:

  • 1 spiral cut ham with bone-in approx 7-9 pounds
  • 2 tablespoons dijon mustard
  • ¼ cup pineapple juice or orange juice
Brown Sugar Glaze
  • ½ cup pineapple juice or orange juice
  • ½ cup brown sugar
  • 2 tablespoons dijon mustard
  • ¼ teaspoon ground ginger
  • 2 teaspoons cornstarch

INSTRUCTIONS:

  1. Preheat oven to 325°F.
  2. Combine dijon mustard and pineapple juice. Brush over ham.
  3. If your ham has a plastic disk on the bone, this should be removed and discarded. Place the ham, flat side down in a roasting pan, and cover tightly with foil. Roast 12-15 minutes per pound (or according to package directions).
  4. Meanwhile, combine glaze ingredients and bring to a boil. Turn heat down and simmer 2-3 minutes. Cool.
  5. 15 minutes before ham is done, remove from the oven and turn the oven up to 425°F.
  6. Brush with glaze and return to the oven until the glaze is caramelized and the ham has reached the safe cook temperature.

Notes:

If you purchase a smoked ham, it has been cooked, be sure to check the package to ensure it says it is “fully cooked”. If your ham is fully cooked on the package (as most spiral hams are), it will need to cook to 140°F (basically just to heat it).

NUTRITIONAL INFO:

Calories: 690, Carbohydrates: 11g, Protein: 57g, Fat: 44g, Saturated Fat: 15g, Cholesterol: 164mg, Sodium: 3200mg, Potassium: 795mg, Sugar: 10g, Vitamin C: 1.5mg, Calcium: 30mg, Iron: 2.5mg

Turmeric Honey: The Most Powerful Antibiotic That Not Even Doctors Can Explain

Turmeric and honey – The most potent antibiotic

Since ages Indian spices have been used as a medicine to cure several ailments. Indian spices have for long been used as medicines. Right from burns to minor cuts, turmeric was used as an instant remedy to treat such issues. This was simply because of the miraculous properties of turmeric.
From common cold to soar throat both honey and turmeric are very potent and important alternatives to conventional medicines because of their benefits and antibiotic properties! In fact, these two wonder ingredients are easily and most affordable items to be used as medicines, honey and turmeric would be it! Honey and turmeric both are used for a variety of problems like cold, digestive issues, cuts, wounds, muscles and sprains along with many other health and skin issues.
We are not even joking when we say, the majority of your health problems has turmeric and honey as their solution!
They have been used intensely in Ayurvedic, Indian and Chinese medicines for thousands of years.

What makes turmeric so powerful?

Turmeric has a very important compound in it, called the curcuminoids. Just like polyphenol, curcuminoid has several healing properties which makes turmeric so strong that it can fight almost all health issues in one go! It is also a very strong anti-oxidant which is why it is very good for the skin and it contains antiseptic, antibacterial, anti-fungal and anti-inflammatory properties which help it to treat wounds and allergies very easily!

What makes honey so powerful?

Honey has the power to fight infections without creating resistant bacterias like modern antibiotics. It is so potent that it should be the first method to be used when fighting infections. Many scientists have claimed that honey is more powerful than most of the conventional antibiotics. Honey can also be used to treat infections, cuts and wounds by applying on them directly. Honey can also be taken orally to treat health problems.

Benefits of turmeric

– Reduces inflammation
– Improves digestion
– Reduces pain
– Prevents cancer
– Improves anxiety and depression

How to use natural antibiotic using honey and turmeric?

Many of you must be very confused about using these wonderful items instead of your regualr medicines. You should give it a try. Here is a simple recipe that you can use when you fall sick.

Ingredients:

1/4th cup raw honey,
2 drops of lemon essential oil
1 tsp of ground turmeric

Instructions:

Mix all the ingredients together and stir well. Pour the mixture in a container with a lid and store in room temperature. Consume half teaspoon thrice a day to get rid of allergies, cold or flu.

Ingredients:

1 teaspoon turmeric powder
2 tablespoons pure honey (preferably raw honey)
A pinch of freshly ground black pepper

PREPARATION:

Make sure you use good quality turmeric powder and pure honey. Raw honey is preferred as it offers additional health benefits.
Mix: In a small bowl, add 1 teaspoon of turmeric powder and 2 tablespoons of honey. Add a pinch of freshly ground black pepper. The black pepper increases the bioavailability of the curcumin in turmeric, allowing your body to absorb it better.
Mix Thoroughly: Stir the ingredients thoroughly until they come together into a smooth paste.
Storage: Pour the mixture into an airtight jar or container. Store in a cool, dry place, preferably the refrigerator, to preserve freshness.
Application:
Turmeric honey can be used in different ways:
As a natural antibiotic: If you have signs of cold or infection, you can take 1 teaspoon of turmeric honey to boost your immune system and reduce inflammation.
As an anti-inflammatory: This mixture can be applied to inflamed areas of skin to relieve itching, redness and swelling.
As a calming tea: Add a teaspoon of turmeric honey to a cup of warm water to make a calming tea.
Note:
Before using turmeric honey as a remedy, consult your doctor, especially if you have any allergies or medical concerns.
Turmeric honey is a fascinating natural remedy that combines the healing powers of two amazing ingredients. It is an example of how nature provides us with simple but effective solutions to our health problems. Try it and experience the amazing benefits of this natural antibiotic for yourself.

California Pasta Salad Recipe

This delicious and colorful California Pasta Salad is always a hit as part of a party menu. Make this easy pasta salad recipe up to a day ahead if you like; the flavors only get better as it marinates.

Course: Salad

Cuisine: American

Prep Time: 15minutes

Cook Time: 2hours 25minutes 

Total Time: 2 hours 40minutes

Servings: 16 (1-cup) servings

INGREDIENTS:

For the Salad Dressing:
  • 1 cup olive oil
  • 1/2 cup red wine vinegar
  • 1/4 cup Parmesan cheese
  • 1 tablespoon sesame seeds
  • 2 teaspoons dried oregano
  • 2 teaspoons poppy seeds
  • 1/4 teaspoon garlic or two cloves fresh, finely minced
  • 1 teaspoon paprika
  • 1/2 teaspoon celery seed
  • 1/4 teaspoon salt or more to taste
For the Pasta Salad:
  • 1 pound thin spaghetti broken into thirds (see note 1)
  • 2 medium zucchini diced
  • 1 pint grape tomatoes halved (see note 2)
  • 1 large hot house cucumber diced
  • 1 medium green bell pepper diced
  • 1 medium red bell pepper diced
  • 1 red onion diced (optional)
  • 1 (6.5 ounce) can sliced black olives drained (see note 3)

INSTRUCTIONS:

  1. In a small bowl with a whisk, or in a jar with a tight-fitting lid, combine olive oil, red wine vinegar, Parmesan cheese, sesame seeds, oregano, poppy seeds, garlic, paprika, celery seed, and salt.
  2. Mix well and allow flavors to blend while preparing the salad.
  3. Bring 4 quarts water and 1 tablespoon salt to boil.
  4. Add spaghetti and cook according to package directions, about 9 minutes. Drain well and rinse in cold water.
  5. In a large bowl add zucchini, tomatoes, cucumber, bell peppers, onion, and black olives.
  6. Add rinsed pasta and drizzle with salad dressing to taste (you don’t have to use it all).
  7. Toss to combine, cover, and chill at least 2 hours or overnight.

Notes:

Thin spaghetti: Yes, I know Italian chefs will scoff at me recommending that you break the noodles into thirds. I strongly suggest that you follow suit, however; this allows the pasta to not only cook faster and fit easier into your pot, but also makes it easier to eat.

Grape tomatoes: Cherry tomatoes or chopped Roma, classic, or heirloom tomatoes can also pinch hit.

Canned black olives: I know these are polarizing, so feel free to omit. But I adore the briny element they add to the pasta salad.

Yield: This California Pasta Salad recipe makes a whopping 16 1-cup servings. Talk about perfect for parties, potlucks, or picnics! Feel free to halve the recipe if you’re sharing it with a smaller crew.

Storage: Transfer extra pasta salad to an airtight container in the refrigerator up to 4 days

Make ahead: California Pasta Salad can be assembled up to 3 days in advance. Store in an airtight container in the refrigerator until ready to serve. Toss gently before serving.

Cheese, please! If you enjoy your pasta salad with a bit of creamy dairy in the mix, toss in mozzarella bocconcini or crumble in some feta or goat cheese.

Nutritional Info:

Serving: 1cup | Calories: 257kcal | Carbohydrates: 26g | Protein: 5g | Fat: 15g | Saturated Fat: 2g | Polyunsaturated Fat: 2g | Monounsaturated Fat: 10g | Cholesterol: 1mg | Sodium: 70mg | Potassium: 278mg | Fiber: 2g | Sugar: 3g | Vitamin A: 647IU | Vitamin C: 25mg | Calcium: 54mg | Iron: 1mg