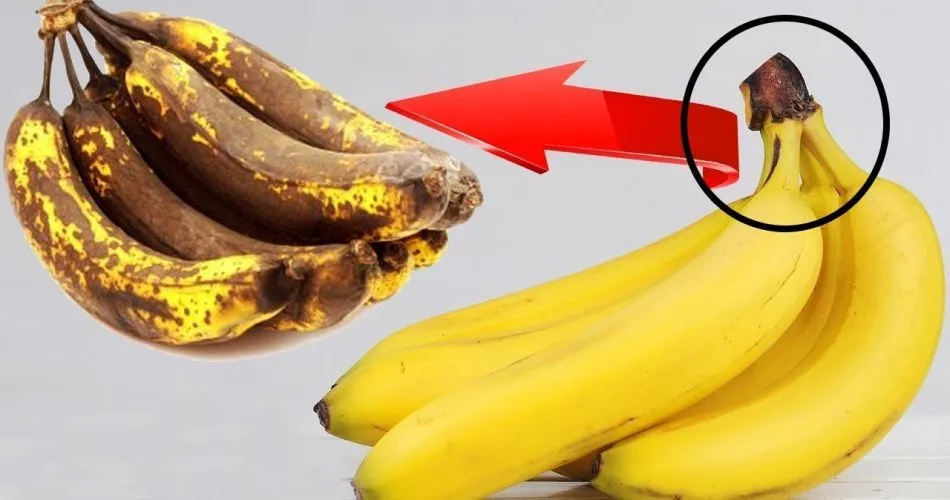
No more rotten bananas after a few days: With this method they will last for a long time

Bananas are a popular and healthy fruit, but they can quickly become overripe and develop a rotten, black appearance after just a few days of sitting on the kitchen counter. However, with a simple method, you can extend their shelf life and prevent them from spoiling too quickly. In this article, we will explore a technique that will help you keep your bananas fresh for a longer time.

The Problem with Rotten Bananas

Bananas are climacteric fruits, which means they continue to ripen even after they are harvested. As they ripen, bananas produce ethylene gas, a natural plant hormone that speeds up the ripening process. This is why bananas can go from green to yellow to brown and black in just a few days, especially in warm temperatures.

When bananas become overripe, their texture changes, becoming mushy and soft. The skin may turn brown or black, and the fruit inside may have a fermented smell and taste. This can be unappealing to eat, and many people end up discarding overripe bananas, resulting in food waste.

The Method to Extend Banana Shelf Life

To extend the shelf life of your bananas and prevent them from becoming rotten and black too quickly, you can use a simple method involving plastic wrap. Here’s how you can do it:

Step 1: Separate the Bananas:

If you have a bunch of bananas, gently separate them from each other. This will help to slow down the ripening process as it prevents the bananas from releasing excessive ethylene gas, which can accelerate ripening.

Step 2: Wrap the Stems:

Take a small piece of plastic wrap and tightly cover the stems of each banana. The plastic wrap will help to block the release of ethylene gas from the stems, which will slow down the ripening process.

Step 3: Store at Room Temperature:

Once you have wrapped the stems of all the bananas, place them back on the counter or in a fruit bowl at room temperature. Avoid placing them in the refrigerator, as bananas are sensitive to cold temperatures and can turn brown or black when refrigerated.

Step 4: Check Regularly:

Check the bananas regularly for ripeness. When they have reached the desired ripeness, you can remove the plastic wrap and enjoy them. If you prefer slightly greener bananas, you can leave the plastic wrap on for longer to slow down the ripening process.

Why Does This Method Work?

The plastic wrap method works by reducing the exposure of bananas to ethylene gas, which is produced by the bananas themselves and speeds up the ripening process. By blocking the release of ethylene gas from the stems, the bananas ripen at a slower rate and stay fresher for a longer time.

This method is also effective because it allows you to separate the bananas, preventing them from ripening too quickly in a bunch. When bananas are kept together in a bunch, they release more ethylene gas, which can accelerate the ripening process and result in faster spoilage.

To maximize the freshness and shelf life of bananas, it’s recommended to store them in a cool, dry place and consume them within a reasonable timeframe. If you have bananas that you won’t be able to consume before they start to spoil, consider using them for baking, freezing them for later use in smoothies or recipes, or donating them to reduce food waste.


Greek Chicken Marinade Recipe

This garlic, lemon, and oregano Greek marinade can be used for chicken that’s grilled, baked or pan-fried and is great any which way you choose.

Course: Main Course

Cuisine: Greek

Prep Time: 5minutes

Cook Time: 15minutes

Marinate the chicken: 30minutes

Total Time: 50minutes

Servings: 4

INGREDIENTS:

1 pound boneless , skinless chicken breasts (about 2 large breasts)

⅓ cup plain Greek yogurt

¼ cup olive oil

4 lemons

4-5 cloves garlic , pressed or minced

2 tablespoons dried oregano

1 teaspoon kosher salt

½ teaspoon freshly ground black pepper

INSTRUCTIONS:

Place the chicken pieces in a freezer bag or a bowl and set aside.

Add the Greek yogurt and olive oil to a medium size bowl. Zest one of the lemons and add to the bowl. Juice that lemon into the bowl with the zest. Slice the other three lemons and set aside. Add the minced garlic, oregano, kosher salt and black pepper to the lemon juice and zest and stir. Pour half of the marinade into the freezer bag or the bowl with the chicken pieces and reserve the other half of the marinade for basting. Marinate the chicken for 30 minutes or up to 3 hours in the refrigerator.

When ready to grill, prepare the grill by lightly oiling the grate with vegetable oil or cooking spray and set to medium high heat.

Grill the chicken, basting with the reserved marinade and turning often so each side browns and has light grill marks, until cooked through, about 15-20 minutes or until the chicken juices run clear. During the last 5 minutes of cooking add the 3 sliced lemons to the grill, turning once or twice. Allow the chicken to rest for 5 minutes before slicing and serve with the grilled lemons. Refrigerate leftovers for up to 3 days.

Nutritional Info:

Calories: 307kcal | Carbohydrates: 14g | Protein: 25g | Fat: 19g | Saturated Fat: 3g | Cholesterol: 109mg | Sodium: 692mg | Potassium: 494mg | Fiber: 4g | Sugar: 3g | Vitamin A: 94IU | Vitamin C: 58mg | Calcium: 102mg | Iron: 3mg

Oven-Baked Meatball Sandwiches Recipe

These Oven-Baked Meatball Sandwiches are so incredibly easy to make. Loaded with melted cheese & marinara making these perfect for your game day crowd.

Course: dinner

Cuisine: Italian

Keyword: meatballs, sandwich

Prep Time: 10minutes

Cook Time: 47minutes

Servings: 6 sandwiches

INGREDIENTS:

1-2 pkg Carando Abruzzese Fresh Italian Meatballs

4-6 hoagie rolls

4-6 slices provolone cheese

12 ounces marinara sauce

6 cups mozzarella cheese

Parmesan cheese & parsley for garnish – opt

INSTRUCTIONS:

Preheat oven to 375 degrees Fahrenheit.

Line a large baking sheet with foil & then place the raw meatballs on it about 1″ apart.

Bake the meatballs for 15 minutes.

Remove the baking sheet, turn the meatballs over & return to the oven to bake an additional 14-17 minutes or until internal temperature reaches 185 degrees F.

While the meatballs are baking, spray your casserole dish with oil or cooking spray.

Place the buns in the prepared dish & line the inside of each bun with a slice of provolone cheese.

Once the meatballs are cooked, place several in each bun in between the cheese. (*note- do not turn off your oven after baking the meatballs)

Spoon the marinara sauce over the meatballs & then top each sandwich with a handful of mozzarella cheese.

Bake in the 375-degree F oven for 10-15 minutes or until the cheese is melted.

*Opt – broil for 2-5 minutes to brown the cheese before serving.

Sprinkle with Parmesan cheese & parsley prior to serving.

Notes

To make these in the air fryer – cook the meatballs at 390 for 15 minutes. Assemble the sandwiches, then coo for another 3-5 minutes or until cheese is melted.

Why choose Carando Fresh Italian Meatballs?

I love Carando Fresh Italian Meatballs because not only are they juicy & delicious but the high quality, robust flavors of Carando Meatballs allow me to create authentic Italian-style meals in less time than cooking from scratch.

What kind of rolls work best?

I like to use a stadium roll vs a softer bun like you would use for a hot dog. This helps keep the bread from soaking in too much of the marinara sauce & from the sandwich from falling apart.

What toppings do you put on a meatball sandwich?

Personally, I usually prefer a classic meatball sub with just meatballs, sauce, and cheese. But I know many who like to add onions- grilled or raw, fried peppers, mushrooms, olives & so much more!

The easiest, neatest way to make bacon

Are you a bacon lover looking for the easiest and neatest way to prepare this crispy delight? Look no further! In this article, we’ll guide you through a simple yet delicious bacon-making process that will leave your taste buds craving for more.

Preparing Your Bacon

To begin, follow these steps:

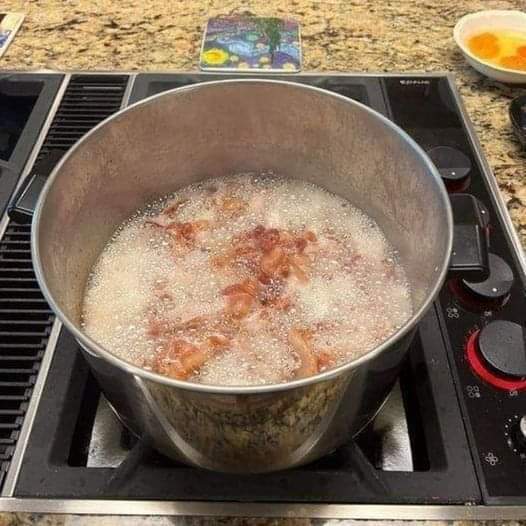
Cut the Bacon in Half: Start by taking a package of bacon (you can even do four packages from Costco at once) and cut it in half. This step will make it easier to handle and cook evenly.

Separate the Slices: Once you’ve halved the bacon, gently pull the slices apart. This will prevent them from sticking together during cooking and ensure that each piece gets crispy.

Cooking to Perfection

Now, let’s move on to the cooking process:

Place in a Pot: Take a suitable pot and place the separated bacon slices into it. Make sure the pot is large enough to accommodate all the bacon comfortably.

Heat on High: Turn up the heat to high and start cooking the bacon. Be prepared to give it some attention, stirring occasionally to ensure even cooking.

The Magic of Bacon Fat

Here’s where the magic happens:

As the bacon cooks, the fat within it begins to melt and collect in the pot. This is what sets this method apart – the bacon essentially deep-fries in its own delicious fat.

Enjoy the Results

The final result is a batch of bacon that’s not only perfectly crispy but also incredibly flavorful. What’s more, this method eliminates those annoying spatters you often get when frying bacon in a pan.

Grandma Bread Pudding with Vanilla Sauce

Just like Granny made it, you’ll love this classic Old Fashioned Bread Pudding with Vanilla Sauce recipe! This warm and comforting recipe is best served any time of the year with your favorite brand of vanilla ice cream. Filled with the sweet flavors of vanilla, freshly ground nutmeg, plump raisins, and sugar, this recipe is the perfect way to end any meal.

We found my mom’s best bread pudding recipe tucked inside her Bible when going through her things. It has become a family tradition on the first snow day of the year, and if that doesn’t happen, which can be the case here in central Virginia, we know it’ll be the featured dessert at Easter and anytime a comfort food is in order.

Prep Time: 15 mins

Cook Time: 1 hr

Additional Time: 10 mins

Total Time: 1 hr 25 mins

INGREDIENTS:

Bread Pudding:

3 cups whole milk

1 ½ cups white sugar

¼ cup butter, melted

3 eggs, beaten

2 tablespoons light brown sugar

½ teaspoon ground cinnamon

10 slices hearty farmhouse-style bread, toasted and cut into cubes

1 cup raisins

Vanilla Sauce:

1 ¼ cups whole milk

½ cup light brown sugar

2 tablespoons butter, melted

1 egg

1 tablespoon all-purpose flour

1 pinch ground cinnamon

1 pinch salt

1 tablespoon vanilla extract

Directions:

Preheat the oven to 375 degrees F (190 degrees C). Grease a 2-quart baking dish.

For bread pudding, whisk together milk, sugar, melted butter, eggs, brown sugar, and cinnamon in a mixing bowl. Gently stir in bread cubes and raisins. Lightly spoon mixture into the prepared baking dish.

Bake in the preheated oven until browned and set in the middle, 50 to 55 minutes; cover the dish with foil after 30 minutes to prevent excessive browning. Let pudding stand for 10 minutes before serving.

For vanilla sauce, whisk together milk, brown sugar, butter, egg, flour, cinnamon, and salt in a heavy saucepan until smooth. Cook over medium heat, whisking constantly, until sauce is thickened and coats the back of a spoon, 10 to 12 minutes. Stir in vanilla extract.

Pour sauce over warm bread pudding or serve on the side in a bowl.

Recipe Tip

For extra richness, substitute heavy cream for milk; for a lighter dessert, substitute 2% milk for whole milk.


Nutritional Info:

calories546total fat 17g saturated fat 9g cholesterol 129mg sodium 387mg total carbohydrate 92g dietary fiber 2g total sugars 72g protein 11g vitamin c 0mg calcium 236mg iron 2mg potassium 417mg

Pierce a banana and insert lemon pips: The ingenious trick

Witness a unique, almost magical, gardening trick that involves just a banana and some lemon seeds! This incredible method, celebrated by many enthusiasts across Italy and beyond, enables you to grow a thriving lemon tree in an unexpectedly simple and enjoyable way.
Why Embed Lemon Seeds into a Banana?
Navigating through daily DIY adventures, we often stumble upon innovative techniques that not only solve everyday challenges but also serve as eco-friendly, time-efficient, and pocket-friendly alternatives. Moreover, these ingenious methods pave the way for family bonding, spurring creativity, and indulging in relaxing hobbies.
Unveiling a Secret: The Banana-Lemon Seed Method
Presenting an awe-inspiring, expert-approved technique that promises to yield a bountiful lemon tree, this method is more than just a gardening activity. It’s an engaging and educational family activity, particularly enjoyable for inquisitive little minds. Here, we unravel the secret to growing your own lemon tree using just a banana and lemon seeds.
Sprouting a Lemon Tree: A Simple Guide
If the concept of cultivating a lemon tree in the comfort of your home piques your interest, this straightforward method is tailored just for you!
Harvesting Lemon Seeds: Begin by extracting seeds from a lemon. Place them in a glass of water and give them a gentle stir with a teaspoon.
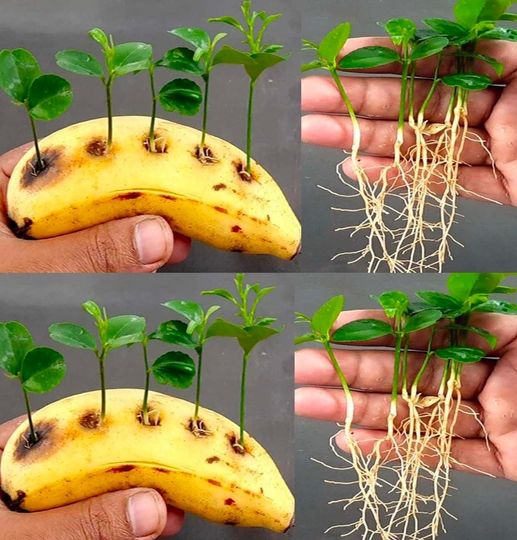
Preparing the Seeds: After thoroughly cleaning them, pat the seeds dry with a piece of paper. Next, grab a banana and without peeling it, divide it into chunks. Create small incisions in each piece and insert the lemon seeds.
Planting the Banana Chunks: Secure a pot and some soil. Bury the banana pieces in a small pit and water generously. After patiently waiting for 5 days, you’ll witness tiny plants emerging from the soil.
Nurturing the Seedlings: Upon carefully lifting the banana chunks after those 5 days, you’ll observe how the seeds have naturally emerged from the fruit. As time progresses, your tiny plant will demand more room to flourish.
Transplanting Your Tree: Once your plant shows signs of growth, gently transplant it into a larger pot. Though your lemon tree won’t require special care, it does need consistent attention to stay vibrant.
With diligent care, your tree will soon bless you with fragrant blossoms, eventually bearing its first fruits. Now, you can bask in the joy of harvesting them and admire your flourishing plant.
Remember, you can repeat this process as often as you like, each time witnessing the wonder of nature unfold through your very own home-grown lemon trees. So, gather your family, dive into this botanical adventure, and let the lemon trees blossom!

Toothpaste, never throw it away once used

Toothpaste, never throw it away once used: it is worth gold reused like this

Hello girls, you know those times when you squeeze that tube of toothpaste endlessly to get the last drop? Well, I had this face-to-face with my tube the other day. And I said to myself, there must be a better way!
“A tube of toothpaste is a bit like a handbag: you always find surprises in it until the end.”
Why not waste toothpaste?

Toothpaste, beyond its primary function, has many other uses. You would be surprised at the potential it can have in the house.

How to collect the remaining toothpaste in the tube?
So, this tip literally changed my life. I never had to struggle with my tube again.

What other uses for toothpaste?
Toothpaste, never throw it away once used: it is worth gold reused like this 2
You will laugh, but once, on vacation, toothpaste was my savior… for something other than my teeth!

Tutorial: maximum toothpaste recovery
Step by step so you don’t lose anything:

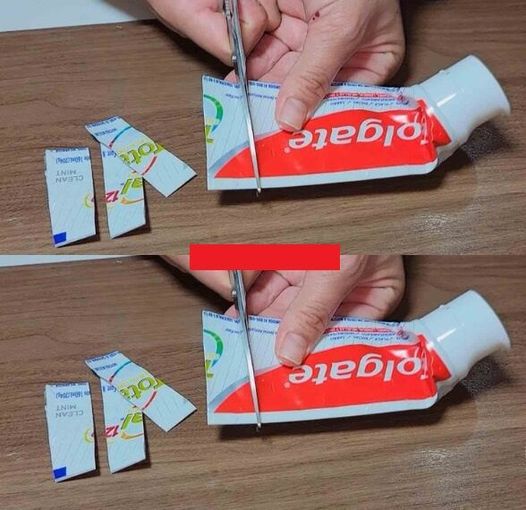
Cut off the bottom of the tube.
Slide a toothpick along the inside.
Press from bottom to top.
Tip: cleaning with toothpaste

Toothpaste, never throw it away once used: it is worth gold reused like this 3 Toothpaste, never throw it away once used: it is worth gold reused like this 3
Did you know that toothpaste can make your silver shine or remove stains from the wall? Amazing, isn’t it?

Situation: having toothpaste for a household emergency
Imagine this: A stain on your favorite dress, no stain remover on hand, but a tube of toothpaste that catches your eye…

Example: using toothpaste to clean jewelry
My jewelry has never been so shiny since I started using this tip with my toothpaste.

3 mistakes to avoid with toothpaste
Using gel toothpaste to clean; they are less effective.
Apply directly to delicate surfaces.
Forgetting to test on a small area before a large application.
2 golden rules for storing toothpaste
Always keep it away from heat.
Keep the cap tightly closed to prevent it from drying out.
1 surprising tip with toothpaste
Rub a small amount of toothpaste on your nails to strengthen them and give them a natural shine. Magic!

Conclusion

Toothpaste, never throw it away once used: it is worth gold reused like this 4
Together we explored all the hidden potential of this tube that we all keep in our bathroom. Who knew he was so versatile? And if you have a friend who is as passionate about DIY as you are, she will surely love this article. Why not share it with her?😉


Italian Drunken Noodles Recipe

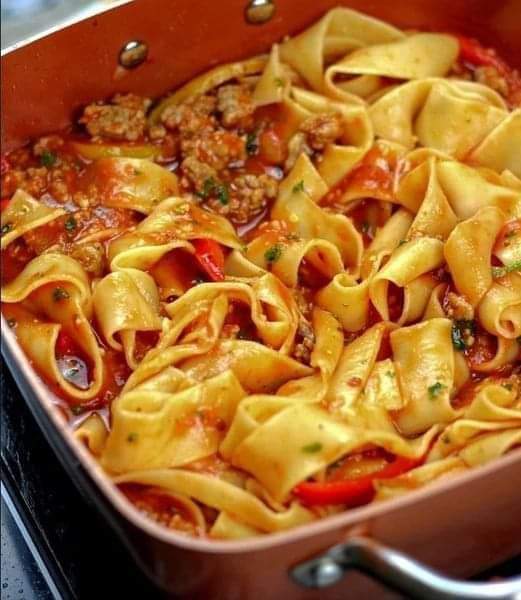
Any time I go out to Thai food, I’m getting Drunken Noodles, no question. There’s just something about that slippery, slurpable dish that’s positively irresistible, so when you find another opportunity to work it into your life, of course you have to do it. That opportunity is Italian Drunken Noodles. They’re just as slippery, just as slurpable, but are instead flavored with Italian flair such as spicy sausage, a red wine-kissed tomato sauce, onions, peppers, and fresh herbs. They’re absolutely delicious and they’re quick too!

The sauce here takes just about as long as it does to boil the pasta, so don’t think for a second that you’ll have to stand at the stove all day to get this kind of deliciousness. Nope, you’re looking at more of a thirty-minute meal. And it’s sure an easy one!

While your pappardelle boils, you just brown some sausage and then soften some onion and bell peppers in the drippings. (There’s garlic too, don’t worry.) From there, reduce some red wine and scrape up all the browned bits from the sausage and then stir in some crushed tomatoes which only need to simmer for a few minutes before fresh basil and parsley are stirred in

It’s fast, but it tastes fresh and herby and a nice drizzle of olive oil gives it that same satisfying slippery quality you know and love. So tasty! That’s my kind of fusion.

Serves 4

5m prep time

20m cook time

INGREDIENTS:

8 oz pappardelle noodles

1 lb bulk spicy Italian sausage

1 large onion, thinly sliced

1 teaspoon Italian seasoning

1 red bell pepper, thinly sliced

1 yellow bell pepper, thinly sliced

4 cloves garlic, minced

1/2 cup white wine

1 (28 oz) can crushed tomatoes

1/4 teaspoon red chili flake

2 tablespoons fresh parsley, chopped

1/4 cup fresh basil leaves, julienned

Olive oil, as needed

Kosher salt and freshly ground black pepper, to taste

PREPARATION:

In a large pot of salted boiling water, cook pappardelle according to package directions. Drain and set aside.

In a large heavy bottomed skillet or pot, heat 2 tablespoons of olive oil over medium-high heat.

Once hot, add sausage to pan, breaking up into small chunks with a spatula. Let brown, then remove to a plate and set aside.

Add onion to pan, and let cook until golden, about 5 minutes. Add more oil to the sausage drippings if needed. Season with salt, pepper, and Italian seasonings and stir to combine.

Add in bell peppers, and cook until tender, about 2 minutes. Then stir in garlic and cook 1 minute more.

Add wine and let reduce for a couple of minutes. Stir in tomatoes, then return sausage back to pan. Let simmer about 3 minutes, then remove from heat.

Drizzle in a couple tablespoons of olive oil, adjust seasoning as needed, then stir in basil and parsley.

Add pappardelle to sauce and toss with tongs. Serve and enjoy!

Cherry Bars Recipe

Great for a Church pot luck or a family get-together.Dig into these delectable cherry desserts at your next patriotic picnic! A perfect combination of cherry, almond and cookie flavors.

INGREDIENTS:

1 ½ cups butter, softened

3 cups granulated sugar

1 ½ tsps salt

5 large eggs

1 ½ tsps vanilla extract

1 ½ tsps almond extract

5 ½ cups all-purpose flour

1 ½ tsps baking powder

21 ozs cherry pie filling

For The Glaze

1 cup confectioner’s sugar

3 tbsps milk

Directions:

Preheat oven to 350 degrees F. Line a jelly roll pan (12×17) with aluminum foil. Spray with nonstick spray. Set aside.

In the bowl of your stand mixer, cream together butter and sugar, about 1-2 minutes. Add salt, eggs, and vanilla and almond flavorings and continue stirring until fully incorporated. Add flour and baking powder and mix until just combined. Reserve 1 3/4 cup of dough. Spread/Press remaining dough into the prepared baking pan. Top with cherry pie filling. Drop remaining batter in small pieces over the cherry filling.

Place in the oven and bake for 50-60 minutes or until golden brown.

Remove from the oven and place pan on a wire rack to cool completely.

Once cooled prepare the glaze. Whisk together confectioners’ sugar and milk until smooth and drizzle over the bars.

Cut into 35 squares and serve.

Nutritional Info:

Servings: 370 Calories per serving

Amounts Per Serving

Total Fat: 17g/Saturated Fat: 11g/TransFat: .5g/Cholesterol: 70mg/Sodium: 290mg/Total Carbohydrates: 48g/Dietary Fiber: 1g/Total Sugars: 27g/Added Sugars: 26g/Protein: 4g

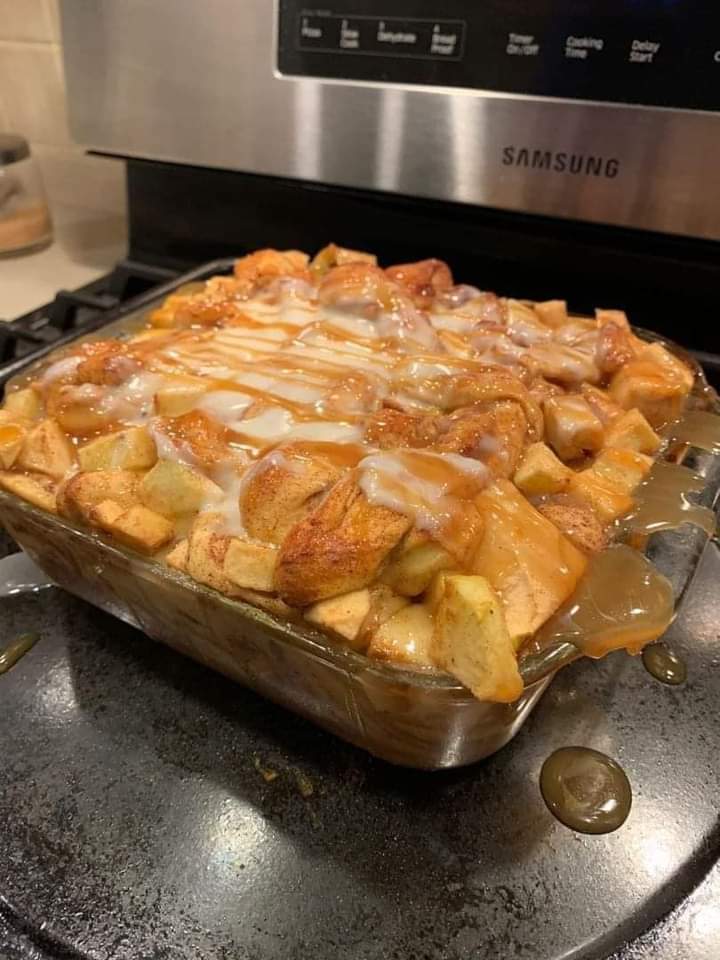
Insanely Delicious Cinnamon Roll Cake With Apples And Pecans

Insanely Delicious Cinnamon Roll Cake With Apples And Pecans combines the flavors of fall like apple and pecan together with refrigerated cinnamon rolls for an easy ooey gooey breakfast cake or quickie coffee cake.

Trust me – stop what you’re doing and make this recipe!

This easy country coffee cake cheats by calling for refrigerated cinnamon roll dough that, once combined with ripe apples and sweet pecans, becomes a coffeetime indulgence you’ll not soon forget.

One bite of a homemade cinnamon roll and you’ll swear you’re going to learn to bake come hell or high water.

Hey, in my case, there’s a first time for everything! But seriously…

Prep Time: 10mins

Cook Time: 40mins

Cooling: 10 mins

Total Time: 1hr

Servings: 8 servings 

INGREDIENTS:

for the cinnamon roll cake

2 tablespoons unsalted butter divided; 1 tablespoon melted, the other at room temperature

1 ½ cups apples peeled, cored, and chopped

1 can (roughly 10 ounces) canned cinnamon rolls

⅛ cup brown sugar light or dark, firmly packed

1 teaspoon cinnamon

⅓ cup light corn syrup

1 tablespoon whiskey may substitute apple brandy, pear cognac or any orange-flavored liquor such as Cointreau

2 large eggs

¾ cup pecans halves and pieces

for the glaze

⅓ cup Confectioners sugar

½ teaspoon vanilla extract

1 to 2 teaspoons milk reduced fat or full fat

INSTRUCTIONS:

Heat oven to 350°F. Use 1 tablespoon of the butter which has softened to room temperature to butter the bottom and sides of a 9-inch round or 8 x 8-inch cake/baking pan. **NOTE in Not Entirely Average test kitchen trial bakes, this cake baked ooey gooey at 350°F with the apples in tact and texture maintained. We also baked this cake at 375°F for the same amount of time and yielded a less ooey gooey cake with slightly broken down apples. Oven accurateness plays a major role in how recipes finish. Take all into consideration when determining the best temperature to set your oven within the 350°F to 375°F range for this recipe.

Spread 1 cup of the apples in the bottom of the pan. Separate the canned cinnamon rolls and cut each into 4 pieces. Arrange cinnamon roll pieces point side up over the apples. Scatter remaining apples.

In a large mixing bowl, combine the remaining tablespoon of butter which you have melted, brown sugar, cinnamon, corn syrup, whisky, and the eggs. Using an electric hand mixer, beat the mixture to 2 to 3 minutes until the brown sugar is visibly at least partially dissolved.

Stir in the pecans and pour over the assembles apples and cinnamon roll points being sure to fill all of the peaks and the valleys.

Bake for 35 to 45 minutes at 350°F or until the top of the cake has turned a deep golden brown. Remove from oven and allow to cool 10 minutes. Cake will have puffed up significantly.

While the cake cools, prepare the sugar icing by whisking all of the glaze ingredients in a small bowl until very smooth. Drizzle over warm coffee cake.

Serve warm with hot coffee as a breakfast, Brunch, or mid-morning treat, or serve warm with a scoop of French vanilla ice cream and a drizzle of hot caramel sauce as a dessert.

Notes:

Substituting Alcohol use apple or orange juice in equal measure in lieu of any alcohol if preferred.

Substituting Pecans use walnuts, macadamias, or whole or chopped almonds in lieu of pecans if preferred.

Make Ahead by one day and refrigerate uneaten portions for up to three days. Reheat in microwave for several seconds to serve warm.

To Freeze use a vacuum sealing system if possible. May also freeze in a plastic freezer bag or casserole dish with a lid.

Nutritional Info:

Serving: 1serving | Calories: 201kcal | Carbohydrates: 30g | Protein: 3g | Fat: 11g | Saturated Fat: 3g | Polyunsaturated Fat: 2g | Monounsaturated Fat: 5g | Trans Fat: 1g | Cholesterol: 54mg | Sodium: 31mg | Potassium: 96mg | Fiber: 2g | Sugar: 23g | Vitamin A: 175IU | Vitamin C: 1mg | Calcium: 28mg | Iron: 1mg

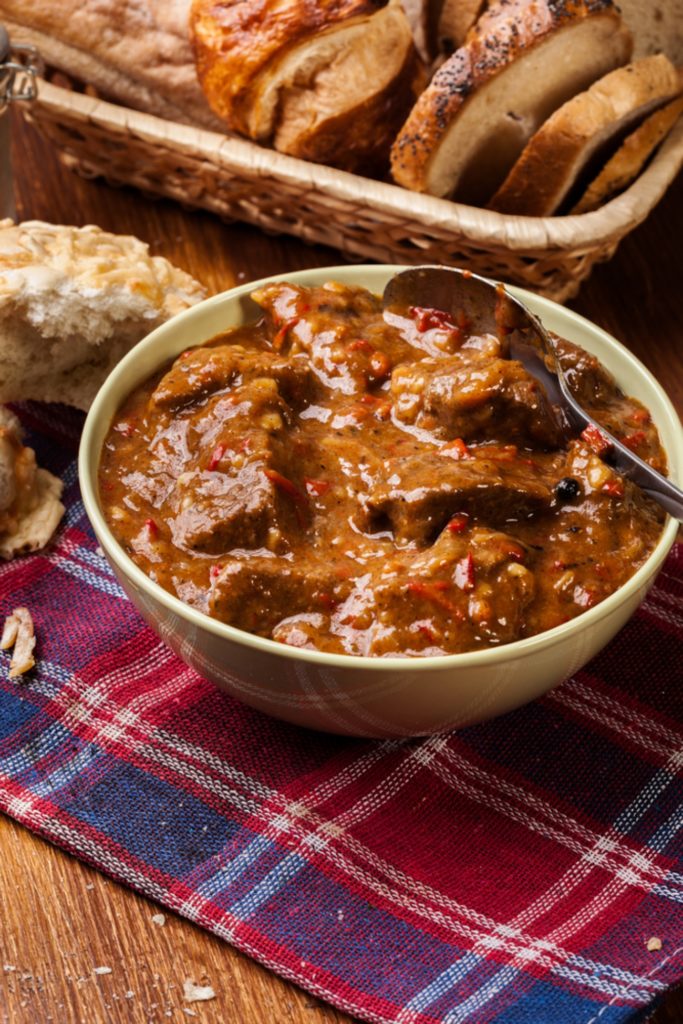
Rustic Beef Stew Recipe

Blustery fall days make us want to eat something that warms the soul, and nothing says warm and cozy like beef stew. This time, we give the slow cooker a rest and let the Dutch oven do the work. Throw a few ingredients into a pot and the kitchen will soon be toasty and smell delicious as this hearty meal bubbles away on the stove.

A good old-fashioned beef stew is delicious, but we love a more rustic take on the traditional recipe. Here’s how we like to put a little twist on it: skip the carrots and celery for fire-roasted red peppers, and instead of potatoes to “thicken” everything up, we add something completely different – cream of mushroom soup. Changing up the classic ingredients with the peppers and creamy soup really offers a deliciously new pop of flavor. C’mon…can you think of a better way to end a fall day?!? Grab a slice of crusty bread and enjoy!

Serves 8

Total Time: 2 hours

INGREDIENTS:

4 cups beef broth

2 pounds beef chuck, cut in 1-inch cubes

3 cloves garlic, minced

3 tablespoons flour

2 tablespoon canola oil

1 tablespoon Worcestershire

1 shallot, diced

1 (14 oz.) can fire roasted red bell peppers

1 (10 oz.) can cream of mushroom soup

1 (6 oz.) can tomato paste

Kosher salt and pepper, to taste

PREPARATION:

Place flour in a large bowl and toss beef until coated.

Heat 1 tablespoon olive oil in a large Dutch oven over medium heat, and, working in batches, brown beef. Set aside.

Add diced shallot and cook for 2-3 minutes or until softened.

Add garlic, stirring frequently for 1 minute or until fragrant.

Mix in fire-roasted bell peppers, tomato paste, beef broth, Worcestershire, and browned beef, stirring to pick up additional flavor from the beef bits. Bring to a boil, then reduce heat and cover for 1 hour.

After 1 hour, stir in cream of mushroom soup and continue cooking for 30 minutes.

Ladle into serving bowls and serve with a side of crusty bread. Enjoy!

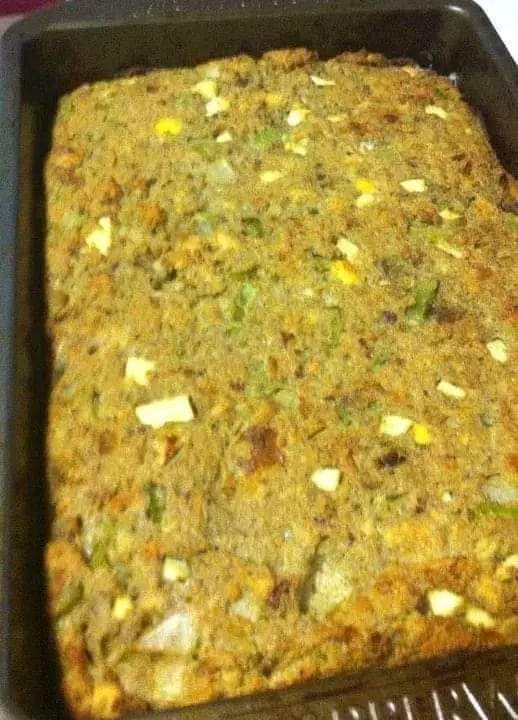
Southern Cornbread Dressing Recipe

This recipe is exactly the way my mom has always made it – who learned it from my Grandma B! It’s thin, crispy around the edges, and is a staple at every single holiday get together.

Course: Side Dish

Cuisine: Southern

Prep Time: 1hour 30minutes 

Cook Time: 1hour 

Servings: 24

INGREDIENTS:

Turkey Stock

3 lbs turkey thighs

2 large yellow onions roughly chopped

6 stalks celery roughly chopped

1 tablespoon sea salt

1 teaspoon black pepper

Dressing

1.5 cups yellow onions diced

1.5 cups celery diced

1.5 cups green peppers diced

1 teaspoon sea salt

½ teaspoon ground black pepper

2 tablespoon bacon fat

15 oz canned very young small sweet peas drained

6 cups cooked cornbread crumbled

12 oz Pepperidge Farm herb stuffing mix

8 cups turkey stock

1 tablespoon ground sage

2 tablespoon poultry seasoning

8 tablespoon melted butter

INSTRUCTIONS:

Turkey Stock

Add turkey thighs, 2 large yellow onions (roughly chopped), 6 stalks of celery, 1 tablespoon sea salt, and 1 teaspoon ground black pepper to pot. Add 12 cups of water, cover with lid, and bring up to a boil. Reduce heat and let simmer until the turkey thighs are falling apart (about 90 minutes).

Remove turkey and (once cool enough to touch) finely shred the meat. Discard the skin and bones.

Pass the stock through a strainer to remove any onions and celery. Note: If you’re making the stock ahead of time (like I always do), transfer to airtight containers and allow to cool for a while. Then refrigerate until ready to use. I also like to store the meat submerged in stock so that it doesn’t dry out.

Dressing

Using medium-high heat, add 2 tablespoons of bacon fat to large pan along with diced onions, peppers, and celery. Season with 1 teaspoon of salt and ½ teaspoon of black pepper. Cook just until vegetables release their juices, about 5 minutes. You’re not trying to cook them fully, you just want them to release their liquids. This step can also be done well in advance and refrigerated until ready to bake.

Preheat oven to 375 F. In a very large mixing bowl, add shredded turkey, sautéed veggies, and peas – mix well to combine.

Add crumbled cornbread and stuffing mix to bowl, along with 4 cups of the turkey stock, and mix well to combine.

Then add poultry seasoning, sage, and melted butter to bowl and mix again.

Finally, add remaining 4 cups of turkey stock and mix one last time. I know it seems like a lot of mixing, but you really want everything evenly distributed in every bite.

Spray two half size sheet pans (18″x13″) with nonstick cooking spray. Pour dressing mixture into pans, divided as evenly as possible.

Place pans on the middle and lower racks of oven and bake for 30 minutes. Then rotate the pans, bring the pan on the bottom up (and vice versa), and bake for another 30 minutes or so. It’s almost impossible (within reason) to overcook this, so you may way to leave it in longer if you prefer crispier edges like my family.

Notes:

Expert Tips

I recommend using a non-sweet cornbread for this dressing. I believe that sugar will take away from the savory goodness of what this recipe is all about.

While it is entirely possible to use store-bought broth, the depth of flavor from making your own is unmatched; but, it should still work! And since you’re not cooking you’re own turkey, you may as well cut another corner and buy a rotisserie chicken. Use the meat for the dressing and discard the skin and bones.

I recommend two specific brands in making this dressing. For the stuffing mix, my mom swears by Pepperidge Farm Herb Seasoned Stuffing. And Le Sueur Very Young Small Sweet Peas are the best peas on the market.

I know they are a non-traditional ingredient in dressing/stuffing, but the peas really add depth in three different ways: heartiness, moisture, and texture.

FAQs

Can I leave out the peas? Yes, you can leave them out – I understand that they are not common in dressing. But you’ll really be missing out on part of what sets this dressing apart from the rest.

Can I make this in a casserole dishes? Yes, you will want to use two 13×9 dishes. And the baking time will vary up, but probably needs an extra 15 minutes or so.

Can I make a smaller portion? If you halve all the ingredients, the proportion will equal a single casserole dish or a single half sheet pan. My family always demands leftovers, so this is barely enough!

Can I freeze the leftovers? Yes! This is a big portion. But the beauty is… If you make both pans at Thanksgiving, you can freeze the second to warm up and serve at Christmas! I would recommend slicing the dressing, wrapping in plastic wrap, and storing in an airtight container until you’re ready to reheat.

Nutritional Info:

Calories: 308kcal | Carbohydrates: 35g | Protein: 15g | Fat: 12g | Saturated Fat: 4g | Cholesterol: 70mg | Sodium: 909mg | Potassium: 304mg | Fiber: 2g | Sugar: 11g | Vitamin A: 220IU | Vitamin C: 9mg | Calcium: 100mg | Iron: 2mg

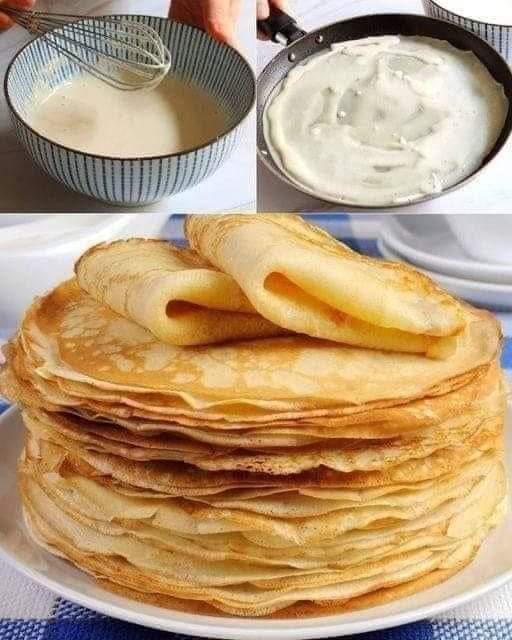
Crepes Recipe

A basic recipe for savory french crêpes. The instructions show you how crêpes are made in a skillet.

Prep Time: 20mins

Cook Time: 1hr

Resting Time: 15mins

Total Time: 1hr 35mins

Course: Breakfast, Main Course

Cuisine: French

Servings: 6 crepes

Equipment

1 Mixing Bowl

1 Hand Mixer or Whisk

1 Silicone Spatula easier to clean out the bowl

1 Wood or Bamboo Spatula to flip

1 Stainless Steal Non-Stick PFOA-free Frying Pan large

1 Soup Ladle

1 Plate to stack them

INGREDIENTS:

1½ Cup All-purpose Flour unsifted

2 Piece Eggs

2 Cups Milk

pinch Salt

6 Tablespoon Butter to fry, 1 tablespoon per Crepes

INSTRUCTIONS:

To make the Crepes Batter:

Keep all your ingredients on stand-by. Break the eggs into a mixing bowl and whisk or blend with a hand mixer foamy. The eggs have to be beaten until they turn pale yellow.

2 Piece Eggs

Stir some of the flour with the salt into the beaten eggs, together with some of the milk. Don’t add everything in at one time.

1½ Cup All-purpose Flour,2 Cups Milk,pinch Salt

Blend with the hand mixer until it gets thick and then add more milk. Blend and keep on adding all the flour and milk and keep on mixing until it’s well incorporated and you left with a lump-free thin batter.

Leave the batter to rest for 15 minutes.

To fry the Crepes:

Keep the skillet on the stove and the batter nearby with a ladl in it.

Heat up the skillet to a medium-hot setting and stir in a table spoon butter. Wait for it to melt and spread it well. The skillet should be hot but not smoking!

6 Tablespoon Butter

Take the skillet into your hand and pour with the other hand a ladle of batter into the hot pan and move around the pan in a circling motion quickly to spread the batter evenly to all ends. Don’t waste time!

Once your batter has spread and stopped moving around in the pan, take the skillet back to the heat. Keep over a medium-hot setting.

Cook on one side until the crepes turns a bit brown in some spots. The sides will start to detach themselves, making it easier to flip it.

Flip it carefully with a wooden spatula and cook on the other side. Keep on the same heat setting.

Fry your crepes on both sides until done, or they turn a bit brown in some places. It takes about 10 minutes to cook one crepes on a medium-high heat setting on both sides. One side takes about 5 minutes more or less. The crepes should be crispy on the thinnest parts.

Take the crepes from the griddle and place it with a wooden spatula on an empty plate. Reduce stove heat to medium.

Repeat the process with the remaining batter. Always add about 1 tablespoon butter to fry each savory crepes. Keep the skillet on the heat but control the heat, the pan and butter should never smoke (that would be a health hazard)! A little sizzle from the butter is ok.

Notes

If the batter is too thick, add some more milk. It should be the consistency of a syrup falling off a spoon.

Whisk the batter every time quickly before pouring it with the ladle into the skillet.

Don’t over fill the ladle, fill it to 90% because that’s all you need for a thin crepes and it’s also easier to move around the ladle without making a mess (I’m guilty of that!)

See savory filling ideas and serving instructions in the post.

Nutritional Info:

Calories: 284kcal | Carbohydrates: 28g | Protein: 8g | Fat: 16g | Saturated Fat: 9g | Polyunsaturated Fat: 1g | Monounsaturated Fat: 4g | Trans Fat: 0.5g | Cholesterol: 94mg | Sodium: 142mg | Potassium: 179mg | Fiber: 1g | Sugar: 4g | Vitamin A: 561IU | Calcium: 116mg | Iron: 2mg

Chicken Noodles Soup Recipe

One pot chicken noodle soup – Cold kicker soup loaded with chicken, carrots, celery and broth.

COURSE Main Course

CUISINE American

SERVINGS 4 people

INGREDIENTS

1 lb chicken thighs or breasts

¾ cup carrots sliced

¾ cup celery sliced

½ cup onion (yellow or white) chopped

2 cloves garlic minced

8 cups chicken broth

1 cup egg noodles

½ teaspoon black pepper

1 teaspoon parsley dried or ½ tablespoon fresh

1 teaspoon thyme dried or ½ tablespoon fresh

salt to taste

INSTRUCTIONS

Add all the ingredients to your dutch oven or stock pot EXCEPT for the egg noodles and bring to a low simmer.

Cover and cook for about one and a half hours, stirring occasionally.

When done, chicken and veggies will be tender.

Easily shred the chicken with two forks. Add the egg noodles and bring to a boil for about 10 minutes until tender.

Taste soup and salt to taste.

Be careful soup is hot! Remove soup from heat and serve.

Insect Repellent Are You Out Of Repellent An Open Vicks Jar Helps Prevent Mosquitoes And Other Insects

For Headaches:

Feeling that pesky headache? The menthol in search Vicks can ease your pain. Just rub a little on your temples.

Pamper Your Feet:

Want soft feet? Slather some search Vicks on them before bed, pop on some old socks, and wash it off in the morning. For super soft heels, scrub with a pumice stone and moisturize.

Train Your Pets:

Keep your pets from marking inside by applying Vicks to their usual spots. Its strong scent keeps both cats and dogs at bay.

Protect Your Furniture:

Save your furniture from your cat’s claws! Dab some Vicks on their favorite scratching posts.

Fade Stretch Marks:

Regularly applying Vicks can help reduce the visibility of stretch marks over time.

Battle Toenail Fungus:

Apply search Vicks every night, wear socks, and trim the affected nail in the morning. Keep at it until it’s gone.

Heal Bruises Faster:

Speed up your bruise recovery and reduce swelling with a little search Vicks.

Earache No More:

Temporary earache? Try placing a Vicks-coated cotton ball in your ear for a few hours. But if it lingers, see a doctor.

Clearer Skin:

Combat acne by applying a thin layer of Vicks overnight. Wash it off in the morning for cleaner skin with consistent use.

Muscle and Back Pain Relief:

Vicks’ natural ingredients can soothe muscle and back pain. Rub it into areas like sore elbows for relief.

Trim That Belly:

Mix one tablespoon each of crushed camphor, alcohol, and baking soda with half a jar of search Vicks. Apply it to your tummy, wrap in plastic before a workout, and rinse off afterward. Doing this 2-3 times a week can help in toning, just like some commercial creams.

Always do a patch test before trying out new search Vicks uses to ensure your skin loves it as much as you do!

Million dollars Spaghetti Casserole Recipe

Million Dollar Spaghetti Casserole is an easy hearty casserole that is both budget-friendly and easy to make. This casserole is simple and a delicious way to feed a family or a crowd!

PREP TIME: 40 minutes

COOK TIME: 45 minutes

TOTAL TIME: 1hour 25 minutes

SERVINGS: 12 servings

INGREDIENTS:

16 ounces dried spaghetti noodles

1 large yellow onion chopped

4-6 cloves garlic minced

1 ½ pounds sweet Italian sausage casing removed

3 teaspoons dried Italian seasoning divided

48 ounces spaghetti sauce 2 jars, divided

8 ounces cottage cheese or ricotta cheese

8 ounces cream cheese at room temperature

¼ cup sour cream

3 cups mozzarella shredded, divided

½ cup butter cut into slices, divided

INSTRUCTIONS:

Preheat oven to 350°F.

Bring a large pot of salted water to a boil. Cook pasta according to package, drain well and return pasta to original pot. Add 1 jar of prepared spaghetti sauce and combine. Set aside.

In a large skillet, heat 2 tablespoons of olive oil over medium heat. Add onion and garlic and cook until they begin to soften, about 5 minutes. Add sausage and 2 teaspoons Italian Seasoning to skillet, and cook until no pink remains. Drain well. Add 1 jar of spaghetti sauce to skillet. Set aside.

In a medium mixing bowl, combine Cottage cheese or ricotta cheese, cream cheese, sour cream, 1 cup mozzarella, and 1 teaspoon Italian seasoning. Set aside.

Place half the slices of butter in a 9×13 baking dish. Spread half the spaghetti in dish, then spread cheese mixture evenly over spaghetti. Spread remaining spaghetti over cheese mixture. Top with the remaining butter slices.Pour tomato meat sauce evenly over top layer of spaghetti.

Top with remaining mozzarella and bake in preheated oven until casserole is heated through, about 35-45 minutes.

Nutrition Information

Calories: 583, Carbohydrates: 32g, Protein: 23g, Fat: 39g, Saturated Fat: 19g, Cholesterol: 109mg, Sodium: 826mg, Potassium: 337mg, Fiber: 1g, Sugar: 3g, Vitamin A: 745IU, Vitamin C: 2.5mg, Calcium: 209mg, Iron: 1.7mg

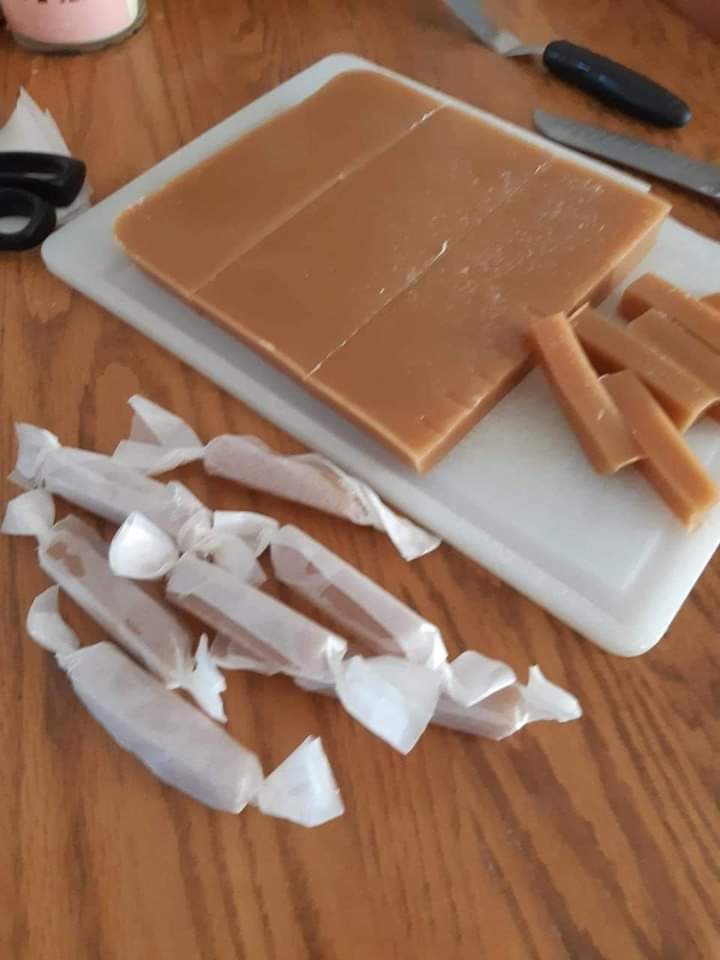
Home-made Salted Caramel Candy

Homemade caramels from scratch, for a fun homemade holiday gift-giving! Surprisingly easy with one special tool!

The only thing you need to make homemade caramels is a candy thermometer. I have one of those clip-on candy thermometers, but I also really love this one with the thermometer inside the spatula! Either will work for this recipe.

For homemade chewy, sticky, creamy BEST EVER caramels, you just have to be able to boil a mixture. Twice. To two different temperatures. I think we can handle that, yes?

Homemade caramels recipe, plus variations.

When you make your own homemade caramels, you no longer have to ask a Trader Joe’s employee if they could give you all of the boxes of fleur de sel caramels they have in stock and a bigger shopping cart. (Guilty).

I want to try making all sorts of flavored caramels now. Even if you leave the vanilla out of the batch (like I did the first time), the caramels still taste great. I’ve got my eye on apple cider caramels next. I’m not from a state with abundant apples, so I’m not well versed in apple treats, but I want to be! Would you believe I’ve never had a proper apple cider donut? I’m on a mission!

Please, friends, be careful when making these caramels. Boiling things are, um, hot. Don’t burn yourself. When the sugar gets to the right temperature, move quickly but skillfully. And please, whatever you do, do not scrape the pan! You will burn your fingers!

Use both hands to steady the pot of boiling hot stuff, and then be done with it. Let the caramels cool a few hours, or overnight (unconvered)

A small batch of homemade caramels with just 5 ingredients. Optional sea salt sprinkle on top!

PREP TIME: 5 minutes

COOK TIME: 15 minutes

ADDITIONAL TIME: 30 minutes

TOTAL TIME: 50 minutes

INGREDIENTS:

½ cup heavy cream

2 tablespoons unsalted butter

¼ teaspoon salt

¾ cup granulated sugar

2 tablespoons light corn syrup

2 tablespoon water

½ teaspoon vanilla

INSTRUCTIONS:

Line a 9 x 5 x 3-inch bread loaf pan with parchment paper, and spray with cooking spray.

In a 2-cup glass measuring cup, add the heavy cream, butter and salt. Microwave in 30 second pulses until melted and steaming. Set aside.

In a 2-quart saucepan (seriously, don’t use a smaller one-it boils up), add the sugar, corn syrup and water. Turn the heat to high, and cook without stirring until it reaches between 290-295 degrees.

Turn the heat off.

Slowly stream in the heavy cream mixture, and whisk gently. Turn the heat back to high, and cook without stirring until it reaches 240 degrees.

Turn off the heat, and add the vanilla. Whisk gently to combine.

Immediately pour the mixture into the loaf pan; do not scrape the bottom of the pan.

Let sit for at least 30 minutes until firm but somewhat soft. This might take a few hours on humid days. You can always leave them overnight, too.

Slice into desired shapes and wrap individually in wax paper.

Nutritional Info:

YIELD: 20 SERVING SIZE: 1

Amount Per Serving: CALORIES: 66TOTAL FAT: 3gSATURATED FAT: 2gTRANS FAT: 0gUNSATURATED FAT: 1gCHOLESTEROL: 10mgSODIUM: 30mgCARBOHYDRATES: 9gFIBER: 0gSUGAR: 9gPROTEIN: 0g


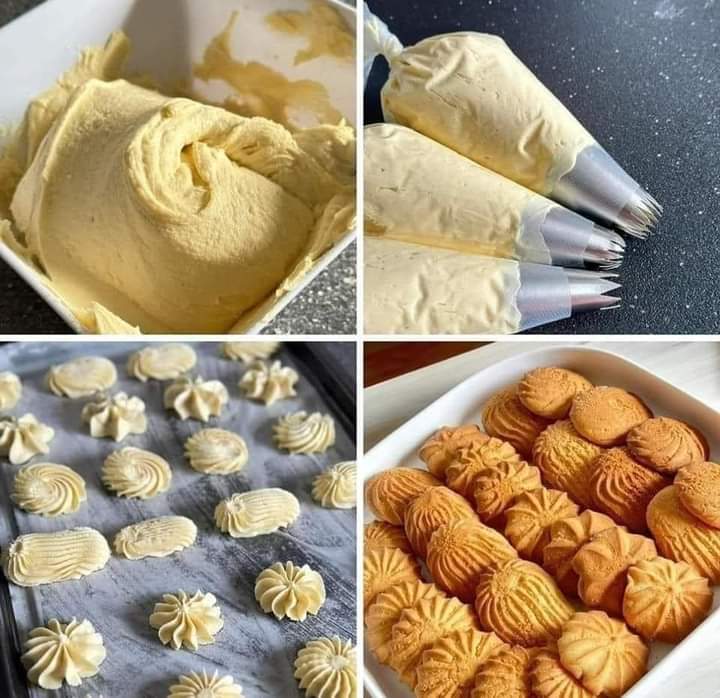
Butter Cookies Recipe

Butter Cookies are buttery, tender cookies that can be enjoyed as-is with a cup of coffee or tea or as a base for decorating holiday cookies.

Prep Time: 15mins

Cook Time: 15mins

Total Time: 30mins

Course: Dessert

Keyword: butter cookies, christmas cookies, cookie exchange

Servings: 16 cookies 

INGREDIENTS:

1 cup (2 sticks / 227 g) unsalted butter, softened

⅔ cup (133 g) granulated sugar

2 large egg yolks, room temperature

1 teaspoon vanilla extract

2 cups all-purpose flour

¼ teaspoon kosher salt

2-3 tablespoons whole milk, room temperature

INSTRUCTIONS:

Preheat oven to 350°F. Line a large baking sheet with parchment paper.

In a large bowl using a hand mixer on medium speed, cream together the butter and sugar until light and fluffy.

Add the egg yolks and vanilla. Mix until combined.

In a separate bowl whisk together the flour and salt.

Slowly add the flour mixture to the butter mixture. Mix on low until combined, scraping down the sides of the bowl as needed.

Working 1 tablespoon at a time, add milk until the mixture is sticky, thick, and well combined. Set aside.

This is a very thick batter, so you will need a heavy-duty piping bag, or you can use the double bag method. To do that you will need two piping bags, one fitted with a large star tip and one that has not been cut. Transfer the batter to the piping bag with no tip. Clip the tip of that bag and place it inside the second piping bag that is fitted with the star tip.

Pipe the batter into a circular pattern onto the lined baking sheet, leaving about 1 inch in between each cookie.

Bake 13-15 minutes, or until golden brown.

Allow the cookies to cool on the baking sheet for 10 minutes before transferring to a cooling rack. Let the cookies cool completely before decorating.

Nutrition

Calories: 202kcal

Strawberry Cheesecake French Toast Roll-Ups

French Toast Roll-Ups have cream cheese, fruit, or whatever fillings you like rolled up in cinnamon sugar bread. Impressive and crowd pleasing, you’ll love these French Toast Roll-Ups for breakfast.

These French Toast Roll-Ups have cream cheese, fruit, or whatever fillings you like rolled up in cinnamon sugar bread.

PREP TIME: 5MINS

COOK Time: 10MINS

TOTAL TIME: 15MINS

SERVINGS: 8 SERVINGS

INGREDIENTS:

8 slices white sandwich bread

softened cream cheese, diced strawberries, or Nutella

2 eggs

3 tablespoons milk

1/3 cup granulated sugar

1 heaping teaspoon ground cinnamon

butter, for greasing the pan

INSTRUCTIONS:

Cut the crust from each slice of bread and flatten it out with a rolling pin.

Place about 1-2 teaspoons of your chosen filling 1 inch from one end of the bread in a strip. Roll the bread up tightly and repeat with the remaining pieces of bread. I really like cream cheese with diced strawberries as one combination and Nutella with diced strawberries as another combination.

In a shallow bowl whisk the eggs and milk until well combined.

In a separate shallow bowl mix the sugar with the cinnamon.

Heat a skillet set over medium heat and melt a tablespoon of butter.

Dip each bread roll in the egg mixture coating well and then place them in the pan seam side down. Cook in batches until golden brown, turning them to cook and brown on all sides, about 2 minutes per side. Add butter to the pan as needed.

Add cooked rolls immediately from the pan to the cinnamon sugar and roll until completely covered in sugar. You can serve with syrup for dipping but I think they’re perfectly good all by themselves.

NOTES:

Source: inspired from Cinnamon Spice and Everything Nice

serving: 1grams

Mini Quiche Recipe

This easy mini quiche recipe comes together quickly using mini phyllo shells and an assortment of simple ingredients that you may have on hand. Toss these bite size quiches together for an easy appetizer or breakfast item that will please a crowd.

 Prep Time: 15 min

Cook Time: 15 min

Total Time: 30 min

Yield: 30 Category: appetizer

Method: bake Cuisine: French

INGREDIENTS:

2 boxes (15 count) mini phyllo shells

1 small broccoli floret finely chopped

5–6 baby spinach leaves finely chopped

2 tablespoons cheddar finely shredded

1 1/2 tablespoons chopped ham

1 mushroom finely chopped

1 1/2 tablespoons Swiss Cheese finely shredded

1 slice crispy cooked bacon finely chopped

1 green onion finely chopped

4 eggs

1 cup heavy whipping cream

1/4 teaspoon salt

1/8 teaspoon fresh ground black pepper

INSTRUCTIONS:

Preheat oven to 375 degrees. Spray mini muffin pans with nonstick cooking spray.

Add a pinch of broccoli, spinach, and cheddar to 10 phyllo shells. Add a pinch of ham, mushrooms, and Swiss cheese to 10 phyllo shells. Add a pinch of bacon, green onion, and cheddar cheese to the remaining phyllo shells.

In a medium whisk together eggs, cream, salt, and pepper. Using a teaspoon pour the egg mixture over the ingredients in the shell. Bake for about 15-20 minutes or until set and golden brown.

NOTES:

Phyllo shells can be found in the freezer section of most finer grocery stores. If you can not find the phyllo shells at your local grocery store, you can substitute ready-made pie crust or puff pastry. Cut the dough with a 2 1/2-inch cookie cutter or biscuit cutter and press the rounds into the muffin cups. Then proceed with the rest of the recipe.

These should not be assembled in advance because the moisture from the veggies, meat, cheese and eggs will start to break down the shells. However, they are easy enough to assemble that even older children can help.

When I say chop everything very fine, I mean really super crazy fine.

The amount of each ingredient added to the quiche is very small, so look around your fridge and see what you keep on hand.

Other add-ins for Mini Quiche might include red or green pepper, onions, tomatoes, asparagus cooked sausage, gouda, gruyere, or Monterey Jack.

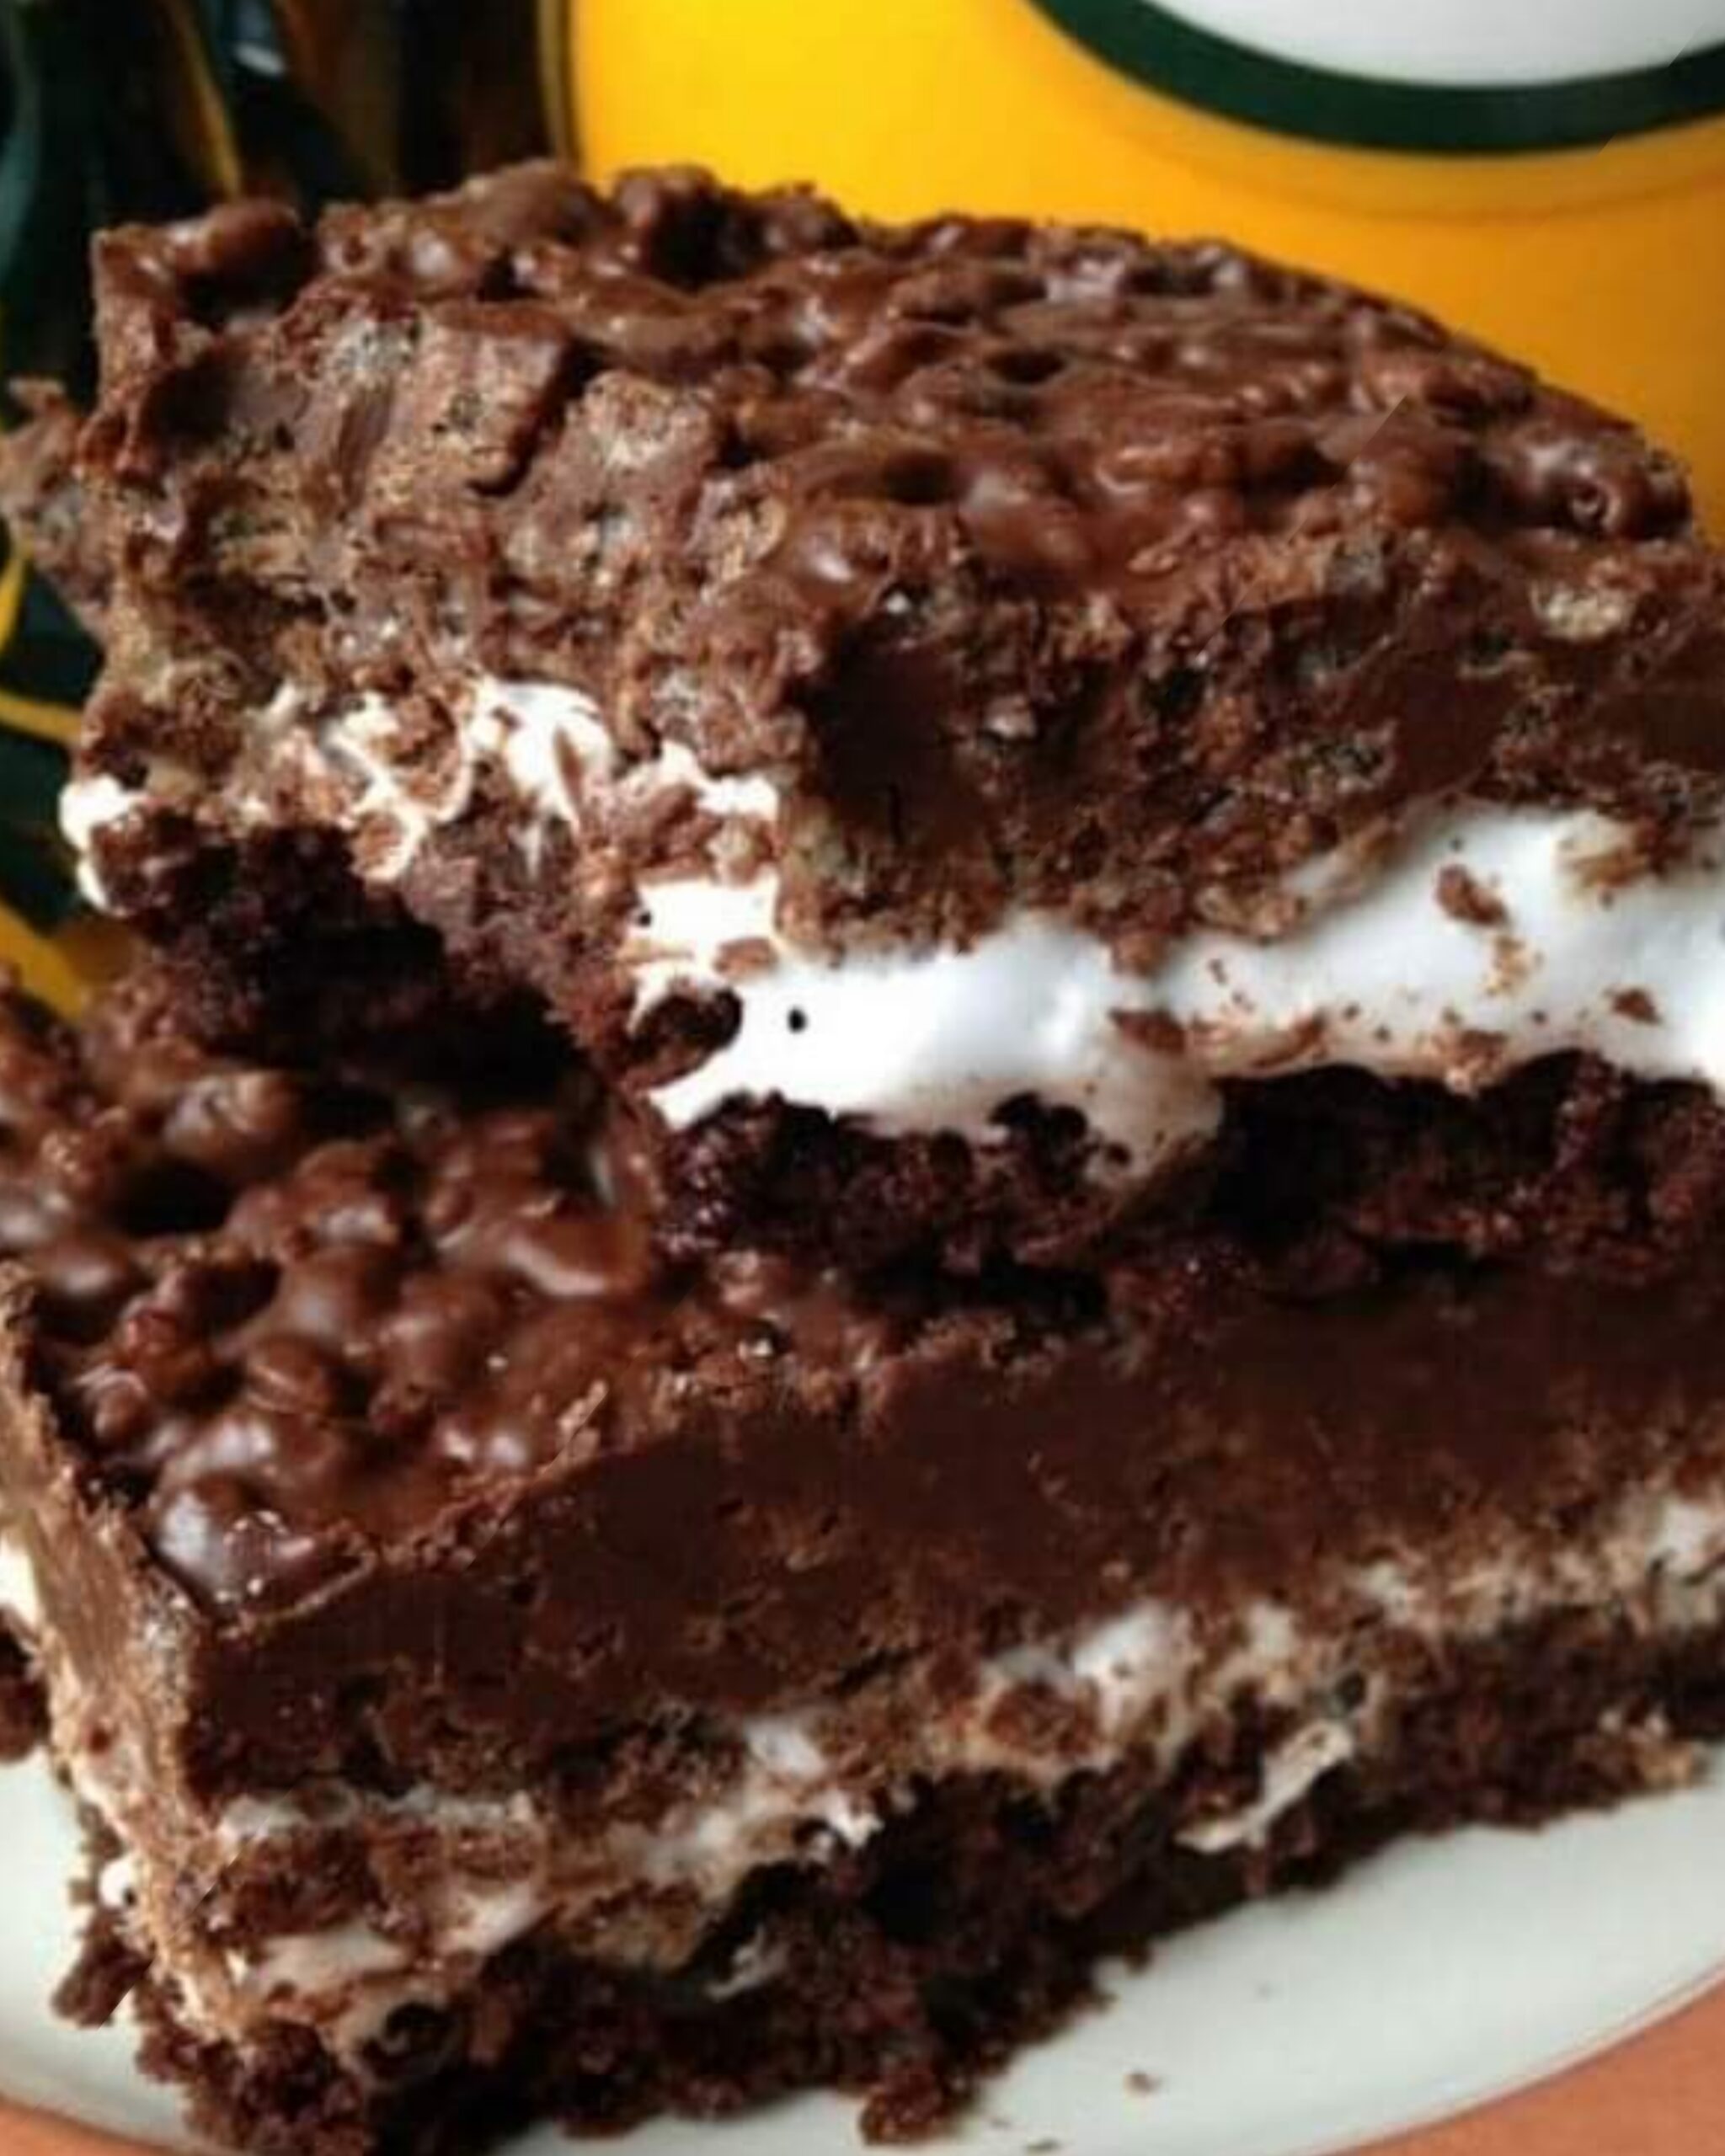
Brownie Bomb Bars Recipe

Brownie Bomb Bars are perfect for football season, my favorite time of year. Football season here in Wisconsin is a sure sign that fall has officially arrived. Football season also signals that comfort food is back on the menu and “grilling time” is reserved for brats on Sunday before the big game. The hot, humid days of summer are replaced with cool, crisp days. Lazy days of summer are gone and school is back in session. I can hear all you Mom’s cheering, Yippee!!

Three layers of goodness!

Course: Bar, Dessert

Cuisine: All-American

Servings: 8 servings

INGREDIENTS:

1 18 oz box double chocolate premium brownie mix with chocolate chips

1 egg

1/3 cup vegetable oil

1/4 cup water

1 7 oz jar jet-puffed marshmallow creme

1/3 to 1/2 cup sweetened flaked coconut

2 cups milk chocolate chips

1 cup chunky peanut butter

3 1/2 cups cocoa krispies cereal

INSTRUCTIONS:

Bottom Layer:

Heat oven to 325º Lightly grease 13 x 9-inch baking dish/pan.

In a medium bowl, stir together brownie mix, egg, oil and water until fully blended.

Spread brownie batter into prepared dish/pan.

Bake for 35 to 45 minutes. Do not over bake.

Let cool completely.

Middle Layer:

When cool, spread jet-puffed marshmallow creme on brownies.

Sprinkle coconut over marshmallow creme.

Top Layer:

Place chocolate chips and peanut butter in a medium size microwave safe bowl. Microwave until well blended and smooth, stopping at 1 minute intervals to stir. Once melted and smooth, stir in cocoa krispies cereal.

Spread evenly over marshmallow/coconut layer.

Cover and chill for 2 hours before cutting into bars.

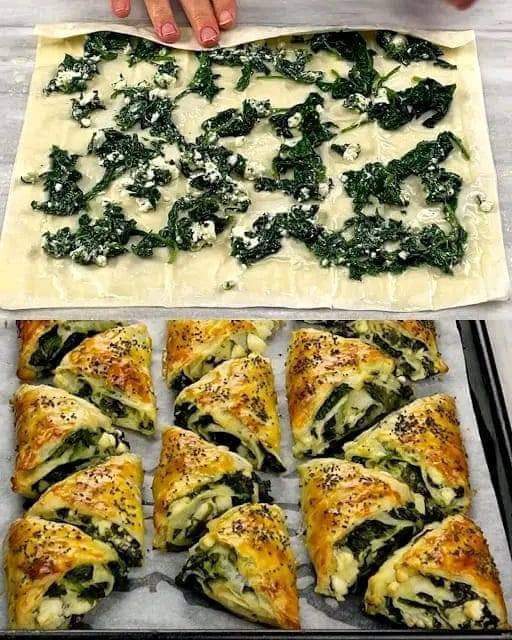
Spanakopita Triangles Recipe

This spanakopita recipe is sauteed spinach, feta cheese and seasonings, all wrapped up in phyllo dough and baked until golden brown and crisp. A savory and hearty appetizer or main course option that always gets rave reviews!

Course Appetizer, Main Course

Cuisine Mediterranean

Prep Time: 45minutes

Cook Time: 25minutes

Total Time: 1hour 10minutes

Servings: 30

INGREDIENTS:

2 tablespoons olive oil divided use

2 pounds fresh spinach leaves

1/2 cup onion finely chopped

1/2 cup green onions thinly sliced

1 teaspoon minced garlic

2 tablespoons chopped fresh parsley

2 tablespoons chopped fresh dill

8 ounces feta cheese crumbled

1 egg lightly beaten

salt and pepper to taste

1 pound phyllo dough sheets thawed

3/4 cup butter melted

INSTRUCTIONS:

Preheat the oven to 375 degrees F. Line 2 sheet pans with parchment paper.

Heat 1 tablespoon of olive oil in a large pan over medium heat. Add half the spinach to the pan and cook until wilted. Add the remaining spinach to the pan.

Cook for 3-4 minutes until all of the spinach is wilted.

Remove the spinach from the pan and let it cool. Wring out excess water. Coarsely chop the spinach.

Wipe out the pan with a paper towel. Heat the remaining tablespoon of olive oil over medium heat.

Add the onion and cook for 3-4 minutes or until softened. Stir in the green onions, garlic, parsley and dill and cook for 30 seconds.

Transfer the onion mixture to a bowl along with the chopped spinach, feta cheese and egg. Season generously with salt and pepper to taste. Stir until thoroughly combined.

Take the phyllo dough out of the package and unroll it onto a flat surface. Keep the phyllo covered with plastic wrap or a damp towel when you’re not working with it.

Lay out one sheet of dough with the long end facing you. Brush the melted butter over the dough.

Add a second layer of dough on top of the first, then brush the second layer with butter.

Cut the dough vertically into 3 inch wide strips.

Place 1 1/2 teaspoons of filling on one end of the dough strip. Fold one corner of the dough over the filling to make a triangle shape.

Fold the strip of dough over itself the same way you’d fold a flag until you reach the end. Brush a little melted butter over the top and place the triangle on the prepared sheet pan.

Repeat the process with the remaining dough and filling.

Arrange the triangles 1 1/2 inches apart on the sheet pans. Bake one pan at a time for 18-20 minutes or until golden brown. Serve immediately.

NOTES

It’s imperative that you squeeze as much liquid as possible out of the cooked spinach so that your filling isn’t watery. I use a potato ricer to press the liquid out, you can also use your hands or a thin kitchen towel to gather the spinach and wring out the liquid.

I think this recipe tastes best with fresh spinach. You can substitute frozen spinach if you prefer, just use 2 10-ounce boxes. Be sure to thaw the spinach and squeeze out any excess water.

NUTRITIONAL INFO:

Calories: 72kcal | Carbohydrates: 1g | Protein: 1g | Fat: 7g | Saturated Fat: 4g | Cholesterol: 24mg | Sodium: 127mg | Potassium: 16mg | Sugar: 0.5g | Vitamin A: 198IU | Vitamin C: 0.5mg | Calcium: 41mg | Iron: 0.1mg

Sliced Baked Potatoes Recipe

These baked potatoes topped with bacon, melted cheese, green onions and sour cream make a great side for steak or light dinner. Enjoy!

INGREDIENTS

Baking potatoes

Cheddar cheese, grated

Bacon, cooked and crumbled

Green onions, sliced

Sour cream

PREPARATION:

STEP 1

Preheat oven to 400°F.

Brush both side of potato slices with butter; place them on a cookie sheet.

Bake for 30 to 40 minutes, or until lightly browned on both sides, turning once.

When potatoes are ready, top with crumbled bacon, cheese, green onion.

Return to oven and continue baking until the cheese has melted.

Add a dollop of sour cream when done and enjoy!

Note:

You can also poke holes in the potatoes and microwave them for six minutes instead of baking.


Pecan Pie Cheesecake Bars Recipe

Pecan pie cheesecake bars are made with a graham cracker crust. Then, we top it with a smooth cream cheese filling. And finally, the top layer is a pecan pie caramel topping! These bars are DIVINE!

How far in advance can I make pecan pie cheesecake bars?

The thing I love most about this recipe is that you can make these pecan pie cheesecake bars up to 4 days in advance. I find that cheesecake most often tastes better the day after it was made, so this is the ideal make-ahead dessert recipe!

How long will these pecan cheesecake bars last?

I mean, if you have any left, you can store them covered in the refrigerator for up to one week. But I highly doubt you’ll have nay for that long!

How do I ensure I get clean cuts?

To make clean cuts, I suggest using a very sharp knife and wiping the blade on a piece of paper towel in between cuts.

Can I freeze these bars?

Yes, you can! We have a large batch stored in the freezer, and when you’re ready to eat, you can do a quick 15-20 second zap in the microwave or allow them to defrost in the refrigerator overnight! These pecan pie cheesecake bars are super low maintenance!

I really hope you won’t let this year go by without trying my favorite dessert – seriously though, and this is by far the best dessert I’ve ever made!

YIELD: 24 BARS

Pecan Pie Cheesecake Bars

prep time 20 MINUTES

cook time 50 MINUTES

total time 1 HOUR 10 MINUTES

Pecan pie cheesecake bars are made with a graham cracker crust. Then, we top it with a smooth cream cheese filling. And finally, the top layer is a pecan pie caramel topping! These bars are simply DIVINE!

INGREDIENTS:

Cheesecake:

1 (13.5-ounce) box graham cracker crumbs (or 3 ¼ cups)

1 ⅓ cup granulated sugar, divided

½ teaspoon ground cinnamon

1 cup (2 sticks) salted butter, melted

4 packets (2 pounds) softened cream cheese

2 large eggs + 2 egg yolks, room temperature

1 tablespoon vanilla extract

¼ cup sour cream, room temperature

Pecan Pie Topping:

½ cup EACH: diced salted butter, light corn syrup, AND heavy cream

1 cup light brown sugar, packed

1 teaspoon vanilla extract

2 cups of toasted pecans

INSTRUCTIONS:

PREP: Position a rack in the center of the oven and preheat the oven to 350ºF. Spray a 13×9 square baking pan with cooking spray and line with parchment paper, making sure it hangs over on all sides, so it’s easy to remove later, set aside.

CRUST: In a medium bowl, stir together the graham cracker crumbs, ⅓ cup sugar, and cinnamon. Add the melted butter and stir to combine. Make sure all the crumbs are moistened. Press the crumbs into the bottom of a baking pan in an even layer and bake for 10 minutes. Remove from oven and allow for it to cool while you prepare the filling.

FILLING: Beat the cream cheese and the remaining 1 cup of sugar together for a minute until smooth. Then, add the eggs + yolks, one at a time, waiting a few seconds, and allowing each egg/yolk to incorporate before adding the next. Add the sour cream, then add the vanilla extract and continue to mix for a few additional seconds. It’s okay if the batter has a few small lumps. When mixed, pour the cheesecake mixture over the graham cracker base and bake for 40-42 minutes or until the cheesecake is set and not wet. Mine was just barely jiggly in the center, and that’s perfect.

PECAN PIE LAYER: Add the butter, corn syrup, and brown sugar to a medium saucepan over medium-high heat and bring to boil while you stir it continuously. When boiling, whisk in the heavy cream and allow for the caramel mixture to cook for 4 minutes on medium-high while you whisk continuously. Remove the pot from the heat and pour in the vanilla extract and stir in the pecans. Then, continuously stir the pecan pie mixture for 5 minutes. Pour the prepared pecan pie layer over the cheesecake and let cool completely to room temperature. Allow the bars to cool in the refrigerator for several hours (ideally overnight), so they are completely set. Remove by gently lifting the parchment and place on a clean flat surface. Cut them into bars and serve!

Notes:

Bars are best when removed from the refrigerator about 15-20 minutes before serving. The pecan pie mixture softens a bit and is much easier to break with a fork!

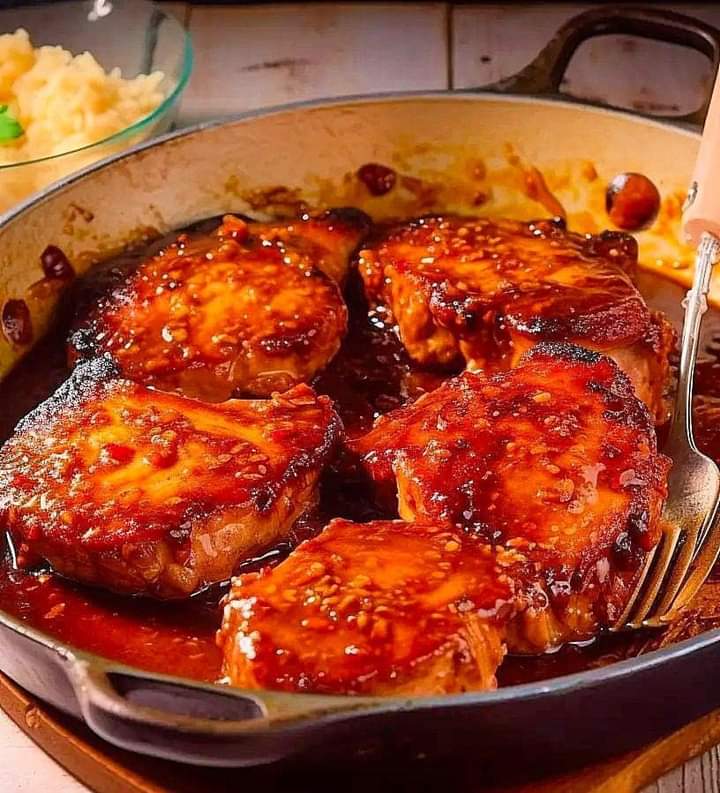
Harissa Maple Glazed Pork Chops Recipe

These maple glazed pork chops are infused with flavorful harissa for the perfect blend of sweet and spicy. The easy recipe is perfect for a quick weeknight dinner and you only need 5 ingredients to make it.

spooning extra pork chop glaze onto maple glazed pork chops in a skillet

Why I love this spicy glazed pork chops recipe

When it comes to dinner, I tend to go for one of two categories. Easy one-pot-type meals like chicken and broccoli or a meat-starch-veggie combo plate, and I have honestly always found the latter to be boring.

Until I realized that a few simple ingredients can turn bland meat into a phenomenal dinner. I did it with my baked mahi mahi recipe and my favorite garlic baked chicken legs, and I think the possibilities are endless.

spicy glazed pork chops in a cast iron skillet with a serving bowl of mashed potatoes, fresh herbs and a blow of glaze to the side

These maple glazed pork chops combine super flavorful and spicy harissa with sweet maple syrup for the perfect sweet and savory recipe. The simple, seasoned pork chops only take 10 minutes to cook and then they’re drenched it a thick, beautiful glaze that packs so much flavor.

Serve them with creamy, dairy free mashed potatoes and your favorite vegetable or salad. If you’re not in the mood for mashed, try crispy roasted potatoes or wild rice pilaf, instead.

 Should you rinse pork chops before cooking?

No. Rinsing any raw meat increases the chances of contaminating your kitchen. Simply remove them from their packaging and blot any excess liquid with a paper towel before seasoning.

How long do you cook pork chops for?

1-inch thick pork chops will generally take about 4 – 5 minutes per side to cook (bone-in) or 3 – 4 minutes per side (boneless). If your chops are a different thickness, you will need to adjust your cooking time accordingly.

What temperature do you cook pork chops to?

Pork chops need to be cooked to an internal temperature of 145˚F to be considered safe to eat. I recommend using a meat thermometer to accurately check the temperature 

These maple glazed pork chops are infused with flavorful harissa for the perfect blend of sweet and spicy. The easy recipe is perfect for a quick weeknight dinner and you only need 5 ingredients to make it.

 Prep Time: 10 minutes

  Cook Time: 15 minutes

Total Time: 25 minutes

  Yield: 4 servings 

INGREDIENTS:

For the pork chop glaze:

6 tablespoons maple syrup

2 tablespoons tomato paste

1/2 tablespoon harissa powder

1 teaspoons minced garlic

1/4 teaspoon coarse salt

For the pork chops

4 bone-in pork chops

1/2 – 1 teaspoon coarse salt

1/4 teaspoon black pepper

1 teaspoon harissa powder

1 tablespoon olive oil

Cook Mode Prevent your screen from going dark

INSTRUCTIONS:

In a small saucepan, combine the glaze ingredients and whisk until smooth. Bring to a boil, then immediately reduce heat to low and simmer for about 10 minutes, until thickened. Once the glaze has thickened, remove from heat and set aside.

Season pork chops with salt, pepper and harissa.

Heat olive oil in a large skillet to medium-high. Add the pork chops and sear for 4 – 5 minutes per side, or until pork chops reach an internal temperature of 145˚F.

Remove from heat and add prepared glaze before serving.

NOTES

This recipe makes enough glaze for up to 8 pork chops. Feel free to double the amount of chops you’re cooking if you need more servings.

NUTRITIONAL INFO:

Serving Size:Calories: 167Sugar: 19.4 gSodium: 493.6 mgFat: 5.1 gSaturated Fat: 1 gCarbohydrates: 22.3 gFiber: 0.4 gProtein: 8.7 gCholesterol: 24.9 mg