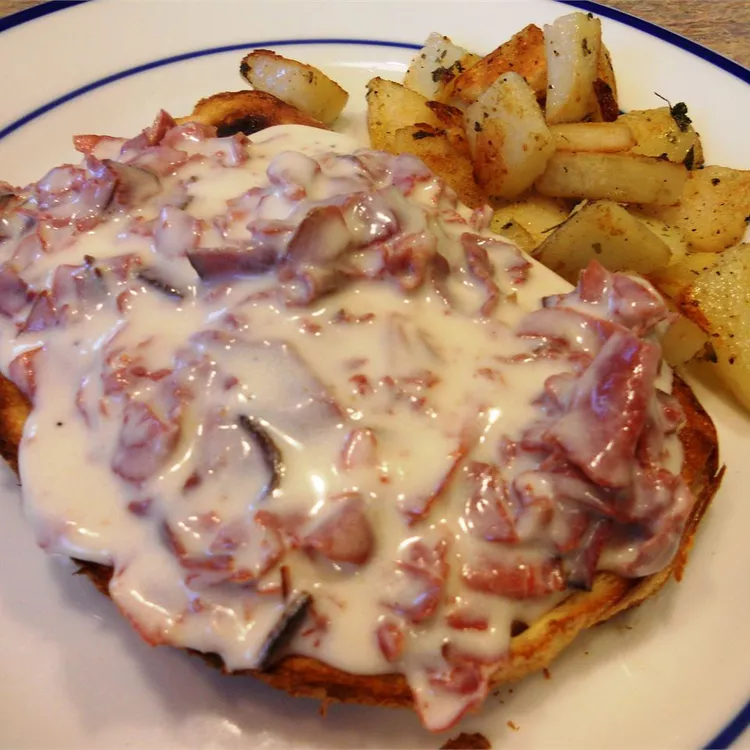
Chipped Beef Recipe

This chipped beef recipe is straight from my mom. We called it SOS (Same Ole Stuff), and it’s great comfort food! It’s easy to make and tastes great with a cold beer.

Get back to basics with this creamed chipped beef on toast recipe. The delicious comfort food is quick, easy, and ultra satisfying.

What Is Chipped Beef?

Chipped beef is pressed, salted, and dried beef. The thin, flexible slices are usually sold in glass jars. Creamed chipped beef (often called SOS) is chipped beef cooked in a cream sauce. A popular meal in the military, the comforting dish is traditionally served over toast.

Creamed Chipped Beef on Toast Ingredients

It’s easy to make this creamed chipped beef on toast recipe with just five ingredients:

Butter and flour: This top-rated recipe starts with a simple roux made of butter and flour.

Milk: Slow stir the (warm, not cold) milk into the roux.

Dried beef: You’ll need one 8-ounce jar of dried beef. If you’re sensitive to salt, you may want to rinse the beef before you chop it.

Cayenne: A pinch of cayenne pepper adds a subtle hint of heat.

Bread: Serve the creamed chipped beef on a slice of toasted bread.

Tip: This recipe can also be made with 3/4 pound browned, drained hamburger meat.

Best Bread for Chipped Beef on Toast

Choose a sturdy white loaf that will stand up to the heavy topping. Brioche, sourdough, and country white bread are all great options. Some people like serving the gravy over toasted English muffins.

How to Make Chipped Beef on Toast

You’ll find the full, step-by-step recipe below — but here’s a brief overview of what you can expect when you make creamed chipped beef on toast:

💦Whisk the flour into the melted butter, then slowly stir in the milk

💦Bring to a boil. Stir in the dried beef and cayenne.

💦Cook until warmed through. Serve on toast.
Chipped beef recipe

Prep Time: 10 mins

Cook Time: 10 mins

Total Time: 20 mins

Servings: 4

Ingredients:

  • 2 tablespoons butter
  • 2 tablespoons all-purpose flour
  • 1 ½ cups warm milk
  • 1 (8 ounce) jar dried beef, chopped
  • 1 pinch cayenne pepper
  • bread, toasted

Instructions:

  1. Melt butter in a medium saucepan over low heat.
  2. Add flour and whisk until smooth.
  3. Add milk a little at a time, whisking well after each addition.
  4. Bring to a boil over medium-high heat and cook, stirring, until thickened.
  5. Stir in beef and cayenne; cook until warmed through. Serve over toast.

Nutritional Info:

Servings Per Recipe: 4

Calories 197%Total Fat 9g 11%Saturated Fat 5g 27%Cholesterol 67mg 22%Sodium 1641mg 71%Total Carbohydrate 9g 3%Dietary Fiber 0g 0%Total Sugars 6gProtein 21gVitamin C 0mg 1%Calcium 114mg 9%Iron 2mg 9%Potassium 276mg 6%
Melt in Mouth Chicken

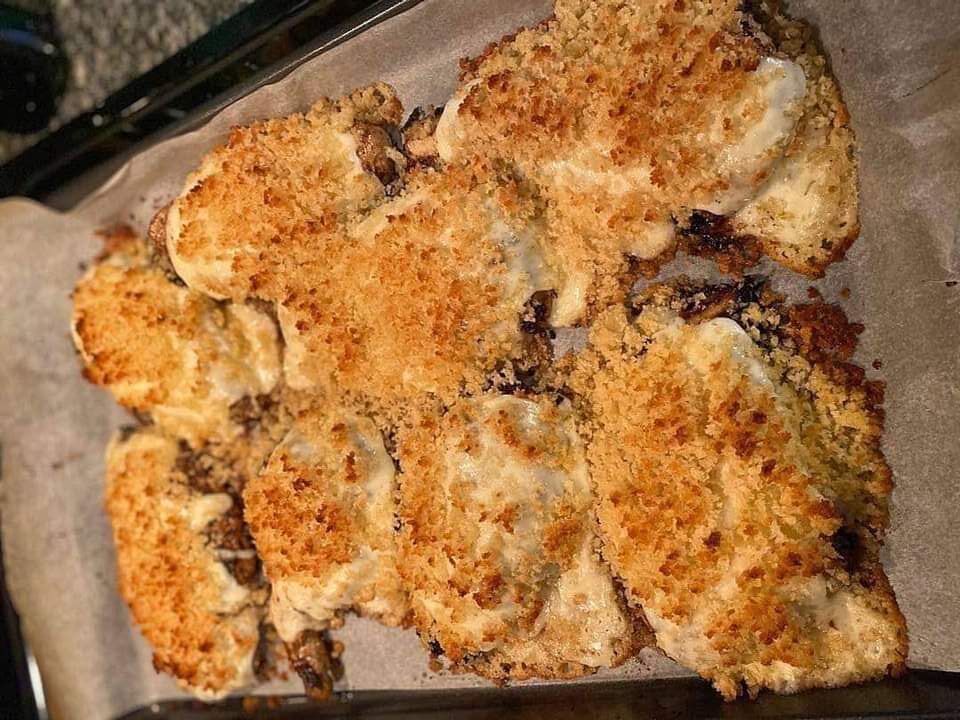
Melt In Mouth Chicken

This delicious recipe for Melt in Your Mouth Chicken is a real winner!

Mayo and parmesan chicken is always a recipe favorite. This extra quick and easy recipe has a creamy parmesan sauce that coats the chicken breasts. Then all that’s left to do is to bake them in the oven to tender & juicy perfection!

Why We Love This Chicken!

This is an easy chicken breast recipe that is perfect for all-week meal prep! Bake in one dish and use for healthy and tasty meals all week long!

It’s versatile, and the sauce can be made ahead of time. Short on time? Use frozen chicken tenders and serve them in a wrap, soups, or use to top a salad!

Everything goes with this tasty recipe, and it’s ideal for company; try serving it with roasted asparagus and a side of garlic mashed potatoes or risotto. Or, go for an easy broccoli salad and a side of the best cheesy bread ever!

Melt In Mouth Chicken

Prep Time: 5mins

Cook Time: 45mins

Total Time: 50mins

 Servings: 4 servings 

Ingredients:

  • 1 lb chicken breasts
  • ⅔ cup mayonnaise
  • ½ cup parmesan cheese shredded
  • 1 teaspoon garlic powder
  • 1 teaspoon seasoning salt
  • ½ teaspoon black pepper

Instructions:

  1. Preheat oven to 375°F.
  2. Mix mayonnaise, parmesan cheese, garlic powder, seasoning salt, and pepper in a small bowl.
  3. Place chicken in a baking dish and cover with the parmesan mixture.
  4. Bake for 40-45 minutes or until chicken reaches 165°F internally.

Nutritional Info:

Serving: 1g | Calories: 435kcal | Carbohydrates: 1g | Protein: 29g | Fat: 34g | Saturated Fat: 7g | Polyunsaturated Fat: 17g | Monounsaturated Fat: 8g | Trans Fat: 1g | Cholesterol: 97mg | Sodium: 1151mg | Potassium: 451mg | Fiber: 1g | Sugar: 1g | Vitamin A: 157IU | Vitamin C: 1mg | Calcium: 159mg | Iron: 1mg

Ribeye Steak Recipe

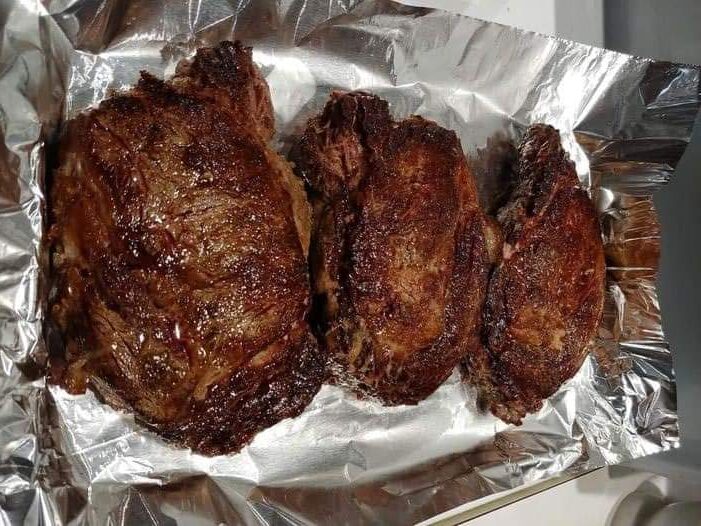
Tender ribeye steaks cooked to juicy perfection is the best way to enjoy steaks at home (and it’s not difficult to make)!

This amazing cut of beef is definitely a favorite and in my opinion, one of the most flavorful out there. There is no need for special or fancy ingredients, just steaks, seasonings, a brush of oil, and a pat of butter for perfection.

A Perfect Steak Every Time!

This recipe ensures a perfectly juicy ribeye steak every time!

Steaks can be cooked in the oven or on the grill.

A simple cut of beef is packed with flavor without a lot of fancy ingredients, sauces, or marinades.

This is a “foundation” recipe and truly, anyone can make great steaks.

Tips for Perfection

Making a great steak is not difficult but here are some things to ensure it’s perfect every time!

Prep:

If using frozen steak, be sure to let it fully thaw.

Bring steaks to room temperature before cooking.

A bit of vegetable or canola oil before seasoning helps the seasonings stick.

Season steaks just before cooking.

Preheat the cast iron pan, oven and/or grill.

Cooking:

Searing the outside of the meat helps ensure the juices are sealed inside.

Do not press the steak as it is cooking on the grill.

Use a meat thermometer and be sure not to overcook.

Remove the steaks a few degrees before they reach the desired temperature as they will continue to rise a few degrees as they rest.

Always rest steaks 5-10 minutes before serving for best results.

PREP TIME: 5min

COOK TIME: 15min

REST TIME: 10min

TOTAL TIME: 30min

SERVINGS: 2 steaks

Ingredients:

  • 2 ribeye steaks 1″ thick
  • 2 tablespoons olive oil or vegetable
  • steak seasoning or kosher salt & pepper, to taste
  • 2 tablespoons butter or herbed butter

Instructions:

Remove steaks from the fridge at least 45 minutes before cooking.

Just before cooking, rub steaks with olive oil and generously season to taste.

Grill

Preheat grill to medium heat (approximately 375°F).

Prepare steaks as above and grill 5-6 minutes per side for medium-rare or 6-7 minutes per side for medium.

Remove from the grill and top with a pat of butter, loosely tent with foil. Rest steaks 5-10 minutes before serving.

Notes:

Oven

Preheat the oven to 400°F.

Heat a large cast-iron pan on the stove over medium-high heat.

Add steaks and cook 2 minutes per side to brown. Place the pan in the oven and roast 11-14 minutes or until the ribeyes reache the desired temperature.

Immediately remove steaks from the pan and place on a plate to rest. Top steaks with a pat of butter, loosely tent with foil.

Rest steaks 5-10 minutes before serving.

Cooking Times/Temperatures

Cook times provided are approximate for a 1″ steak and will vary based on steak thickness and temperature.

Remove steaks from the heat about 5°F before it reaches the desired temperature as the temperature will continue to rise. The FDA recommends a minimum temperature of 145°F with a 3-minute rest.

Rare: 125°F

Medium-Rare: 135°F

Medium: 145°F

Medium Well: 155°F

Well: 160°F

Nutritional Info:

Calories: 694, Carbohydrates: 1g, Protein: 46g, Fat: 57g, Saturated Fat: 23g, Cholesterol: 168mg, Sodium: 218mg, Potassium: 606mg, Sugar: 1g, Vitamin A: 384IU, Calcium: 16mg, Iron: 4mg

Honey Garlic Shrimp Recipe

This honey garlic shrimp is undoubtedly a dinner favorite! Juicy shrimp are coated in a savory-sweet n’ garlicky glaze. And the best part? It’s done in about 20 minutes!

IT’S ALL ABOUT THE HONEY GARLIC SAUCE

What makes this dish so yummy is the sticky-sweet, savory sauce – with a little kick. Honey and garlic are the main components here, but there’s a few other additions to make it lip smackin’ good.

Honey: Gives the sauce that sticky-sweet texture and flavor.

Tamari Soy Sauce: I’m using tamari soy sauce as I’m gluten-free (and honestly, I think it tastes better than regular soy sauce anyway – it’s richer!). But if you’re soy-free, feel free to swap in coconut aminos.

Garlic and Ginger: The ultimate aromatic duo that adds a serious punch of flavor.

Crushed Red Pepper Flakes: Just a sprinkle is all you need for a little heat.

Garnishes: A little sprinkle of finely diced herbs and sliced green onion add that little something extra.

TURN THIS SINGLE RECIPE INTO A VARIETY OF SHRIMP MEALS

A classic rice plate combo is a given, but get creative with bowls and wraps to keep your meals interesting throughout the week.

Plate: Serve this with fresh rice (or cauliflower rice), with a side of cooked greens such as sauteed spinach, sauteed cabbage, or sauteed snap peas.

Bowl: Make a rice or grain bowl out of it with garlic bok choy, roasted broccoli (or other roasted veggies), and lots of green onion.

Wrap: For a low-carb option, remove the tails from the shrimp and wrap them in butter leaf lettuce along with bean sprouts and sliced green onions. You’re going to love this fresh combo.

PREP TIME: 2mins

COOK TIME: 4mins

MARINATE TIME: 20mins

TOTAL TIME: 26mins

Ingredients:

  • ⅓ cup honey
  • ¼ cup tamari soy sauce (or coconut aminos)
  • 4 garlic cloves minced
  • 1 teaspoon freshly grated ginger
  • ¼ teaspoon crushed red pepper flakes
  • 1 tablespoon olive oil
  • 1 pound raw shrimp peeled and deveined
  • 1 tablespoon finely chopped cilantro or parsley
  • 1 green onion thinly sliced

Instructions:

  1. In a small bowl, stir together the honey, soy sauce, garlic, ginger and red pepper flakes.
  2. Place the shrimp into a separate bowl and pour 1/3 of the sauce on top. Toss to coat the shrimp, then marinate for 15-20 minutes.
  3. Heat the oil in a pan on medium-high heat. Add the shrimp (discarding any leftover marinade) and cook for 1 to 2 minutes on each side, until pink and just barely cooked through.
  4. Pour the remaining 2/3 sauce into the pan and bring to a simmer, stirring with the shrimp as it slightly reduces and warms through, for about a minute.
  5. Turn off the heat, stir in the cilantro or parsley, and top with sliced green onions before serving.

Notes:

This is the gluten-free tamari soy sauce I use and love. I also buy the low-sodium version.

Nutritional Info:

Calories: 245kcal | Carbohydrates: 25g | Protein: 25g | Fat: 5g | Saturated Fat: 1g | Polyunsaturated Fat: 1g | Monounsaturated Fat: 3g | Cholesterol: 286mg | Sodium: 940mg | Potassium: 161mg | Fiber: 1g | Sugar: 24g | Vitamin A: 67IU | Vitamin C: 6mg | Calcium: 177mg | Iron: 3mg

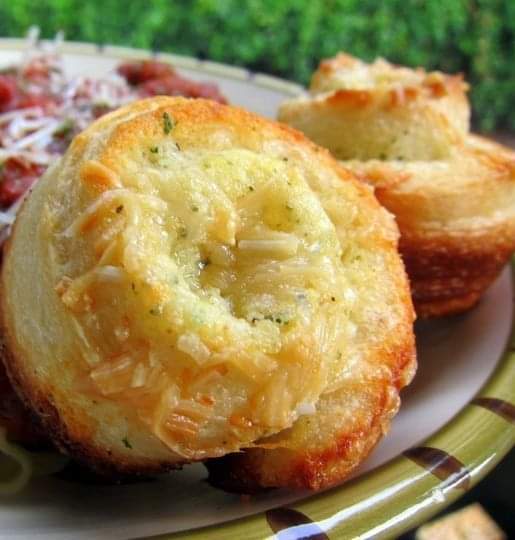
Garlic Roll Cupcake Recipe

Garlic Rolls Cupcake Recipe

Garlic Roll Cupcakes – great with pasta! Super easy to make with only 4 ingredients! Refrigerated bread sticks, garlic seasoning, butter and parmesan cheese baked in a muffin tin – SO yummy. I could eat the whole pan myself!! Great with pasta, soups, casseroles and grilled meats. Ready to eat in 15 minutes!

These garlic rolls are super easy to make. Open a can of refrigerated bread sticks and separate into individual bread sticks. Mix together butter and garlic bread seasoning. Spread over bread stick dough. Sprinkle with parmesan cheese and rolll up. Sprinkle with additional parmesan cheese and place in a muffin pan and bake.

Garlic Rolls Cupcake Recipe

Yield: 12 rolls

Prep Time: 10mins

Cook Time: 12 mins

Total Time: 22mins

Garlic Roll Cupcakes – great with pasta! Super easy to make with only 4 ingredients! Refrigerated bread sticks, garlic seasoning, butter and parmesan cheese baked in a muffin tin – SO yummy. I could eat the whole pan myself!!

Ingredients:

  • 1 (11-oz) can refrigerated breadsticks
  • ¼ cup butter, softened
  • 1 tsp garlic bread seasoning
  • 1 Tbsp grated parmesan cheese
  • ⅓ cup shredded parmesan cheese

Instructions:

  1. Preheat oven to 400ºF.
  2. Lightly spray a 12-cup muffin pan with cooking spray.
  3. Combine softened butter, garlic bread seasoning and 1 Tbsp grated parmesan.
  4. Unroll breadsticks and separate into individual bread sticks.
  5. Spread garlic butter over each bread stick.
  6. Roll up and place into muffin pan.
  7. Sprinkle each bread stick wtih some shredded or grated parmesan.
  8. Bake 12-15 minutes, until golden brown.

Notes:

  • I used Johnny’s Garlic Seasoning that I picked up at Costco last week. If you don’t have Johnny’s Garlic Seasoning, just use another brand of garlic bread seasoning or garlic & herb seasoning.
  • If you can’t find a can of the Pillsbury bread sticks, you can substitute a can of refrigerated French Bread Dough or Thin Crust Pizza. Unroll the dough at the seam and cut into 12 strips.
  • You can use freshly grated parmesan cheese or the stuff in the green can. I used a combination of the green can and shredded parmesan cheese on top.

Did you make this recipe?


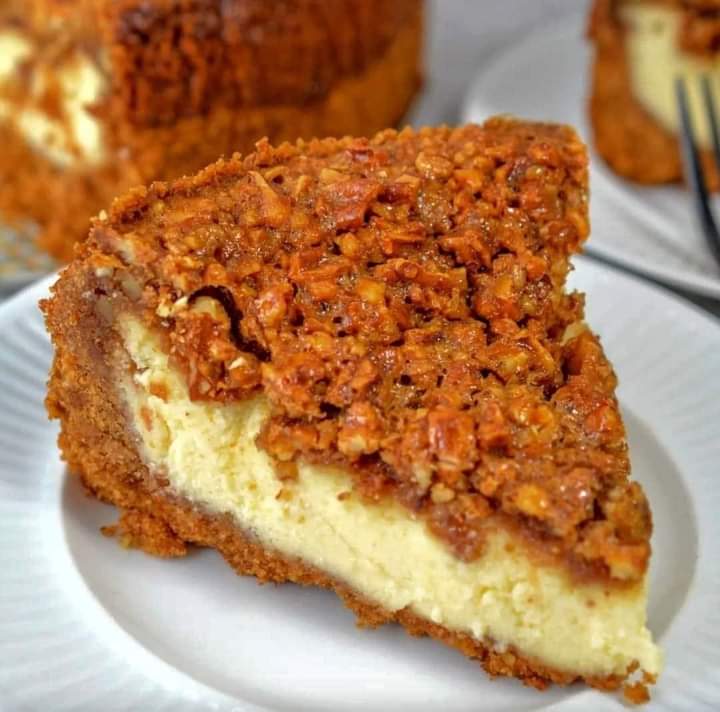
Apple Crumble Cheesecake Recipe

Apple crumble cheesecake recipe

Stepping in to fall with this apple crumble cheesecake. This cheesecake if full of fall flavors. It has a cinnamon and nutmeg cookie crust, cheesecake filling and topped with cinnamon sugar apples and lots of crumble.

This apple crumble cheesecake is a perfect fall dessert. It has apples and cinnamon giving it lots of flavor. The crust is spiced with nutmeg and cinnamon. It lifts the cheesecake to another level together with the cinnamon sugar apples and crumble. They are all tired together perfectly with the creamy cheesecake filling.

WHY THIS RECIPE WORKS

Cinnamon sugar apples: This cheesecake burst off apple flavor! It has diced apples covered in cinnamon sugar.

Cinnamon and nutmeg crust: The crust is spiced with cinnamon and nutmeg which takes this cheesecake to another level.

Crunchy crumble: The crumble is the cherry on top of this cheesecake, giving crunch and delicious flavor.

Creamy cheesecake filling: The creamy and smooth cheesecake filling ties together this delicious cheesecake.

Apple crumble cheesecake recipe

Apple crumble cheesecake with a cinnamon and nutmeg cookie crust, cheesecake filling and topped with cinnamon sugar apples and crumble.

PREP TIME: 1hr

COOK TIME: 1hr 25 mins

REST TIME: 6hrs

SERVINGS: 10 people

INGREDIENTS:

COOKIE CRUST

  • 200 g digestive or graham cookies
  • 1/2 tsp nutmeg
  • 1,5 tsp cinnamon
  • 1,5 tbsp brown sugar
  • 50 g butter melted

APPLES AND CRUMBLE

  • 150 g apple diced small (1-2 apples)
  • 1 tbsp granulated sugar
  • 1 tsp cinnamon
  • 100 g all-purpose flour
  • 80 g brown sugar
  • 70 g butter room temperature

CHEESECAKE

  • 600 g cream cheese full fat, room temperature
  • 200 g granulated sugar
  • 150 g sour cream 18% room temperature
  • 1 tsp cornstarch
  • 2 tsp vanilla extract
  • 3 large eggs room temperature

INSTRUCTIONS:

COOKIE CRUST

  1. Preheat the oven at 160ºC/325ºF, conventional oven.
  2. In a food processor, add the cookies, brown sugar, cinnamon and nutmeg and blend it all together until a fine sand-like texture. Melt the butter. Add the melted butter to the food processor and blend it together with the blended cookies.
  3. 200 g digestive or graham cookies,1/2 tsp nutmeg,1,5 tsp cinnamon,1,5 tbsp brown sugar,50 g butter
  4. In a 22 cm spring cake pan add parchment paper to the bottom. Add the cookie crumble and press the cookie crust down with the bottom of a glass, and up agains the side of the pan, so it’s well packed together and flattened out.
  5. Bake it for 10 min. Then let it cool down so that it’s cool to touch.

APPLES AND CRUMBLE

  1. While the crust cools down, prepare the apples and the crumble.
  2. Dice the apples into small cubes and toss them in granulated sugar and cinnamon. Overtime the sugar will drag out some of the liquid in the apples, avoid adding that to the cheesecake when placing the apples.
  3. 150 g apple,1 tbsp granulated sugar,1 tsp cinnamon
  4. Add flour, brown sugar and butter to another bowl. Mix it together by hand or with an electric hand mixer, until it forms a crumble structure. Set it aside both aside toppings while making the cheesecake filling.
  5. 100 g all-purpose flour,80 g brown sugar,70 g butter

CHEESECAKE

  1. Preheat the oven at 160ºC.
  2. With a hand mixer or in a stand mix using the paddle attachment, cream the cream cheese for 1 min on low speed. Then gradually add the granulated sugar. Once all the granulated sugar is added, scrape down the sides of the bowl and let it mix for 1 min on low speed.
  3. 600 g cream cheese,200 g granulated sugar
  4. In a small bowl, mix together the sour cream and cornstarch until smooth. Add it to the cream cheese with the vanilla extract and let it mix on low speed until combined. Then add one egg at a time and let it mix on low speed until combined. Once all the eggs have mixed in, scrape down the sides of the bowl and give it a final mix to make sure all the ingredients have incorporated.
  5. 150 g sour cream 18%,2 tsp vanilla extract,3 large eggs,1 tsp cornstarch
  6. Pour the cheesecake batter into the spring pan. Gently divide the cinnamon sugar apples first on top of cheesecake, followed by the crumble.
  7. Boil up water in a kettle. Place the springform pan in a 25 cm/10 inch cake pan. Place the cake pan in another baking pan or roasting pan and fill it with hot water ⅔ up the side of the pan. This method will prevent water from getting into the crust.
  8. Alternatively, add a triple layer of aluminium foil around the cake pan to safely seal it from the water before placing it in a water bath. There might be a possibility of water leaking in, so make sure it’s covered well if choosing this method.
  9. Bake for 1 hour and 20-30 min.
  10. Once the time has passed, give the tray a very gentle shake. The cheesecake should still be a bit wobbly in the middle. Turn off the oven and have the oven door slightly open and let the cheesecake cool down in the oven for 1 hour.
  11. Then take it out of the oven and remove it from the water bath. Take off the aluminum foil and place the cheesecake on a cooling rack. Let it cool down fully for about 1 hour to room temperature.
  12. Finally, once at room temperature, place it in the fridge and let it set for at least 6 hours, preferable overnight.

NUTRITIONAL INFO:

Carbohydrates: 61gProtein: 9gFat: 28gSaturated Fat: 15gPolyunsaturated Fat: 1gMonounsaturated Fat: 7gTrans Fat: 0.02gCholesterol: 120mgSodium: 368mgPotassium: 210mgFiber: 1gSugar: 41gVitamin A: 999IUVitamin C: 1mgCalcium: 121mgIron: 2mg