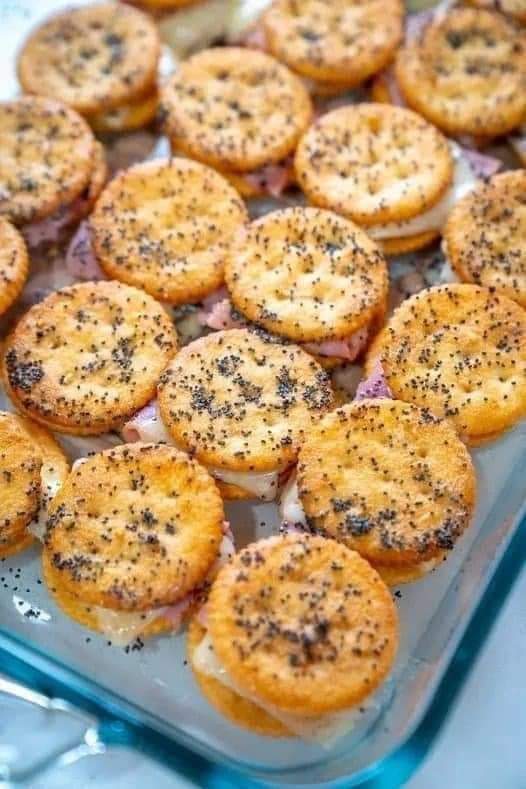
Ritz Cracker Party Sandwiches Recipe

I went through a pretty serious “ham and cheese party slider” phase. You know those little baked sandwiches using Hawaiian rolls and melted butter poured over the top? Well, for a while, I couldn’t get enough of them and served them for every party. No one was complaining though, because they’re delicious and buttery and easy to love. But now it’s time to change things up a little. Here’s the same concept, but on crackers so they’re just as buttery, just as delicious, but a little more bite sized. I think I might be about to enter another serious party sandwich phase.

Serves 12

Prep Time: 10min

Cook Time: 10min 

Total Time: 20min 

INGREDIENTS:

  • 48 Ritz crackers
  • 8 slices deli ham
  • 8 slices Swiss cheese
  • 4 tablespoons butter, melted
  • 2 teaspoons Dijon mustard
  • 1 teaspoon Worcestershire sauce
  • 1/2 teaspoon garlic powder
  • 1 teaspoon poppy seeds
  • 1/2 teaspoon dried minced onion

INSTRUCTIONS:

  1. Preheat oven to 350°F.
  2. Place half of the crackers in a 9×13-inch baking dish, flat side down.
  3. Tear ham into small strips and fold and place on each cracker.
  4. Cut cheese into 1-inch pieces and place one on each piece of ham/cracker. Top with another cracker to form a mini sandwich.
  5. Stir Dijon mustard, Worcestershire sauce, and garlic powder into the melted butter, then pour evenly over the cracker sandwiches.
  6. Sprinkle poppy seeds and minced onion evenly over the top.
  7. Bake until cheese has melted and tops are golden brown, 10-12 minutes.
  8. Serve warm and enjoy!

NOTES:

Make it ahead: these sandwiches are best served while warm. You can gather/prepare all of the ingredients ahead of time, and then assemble and bake the sandwiches when you’re ready to serve them.

Change it up: any combination of deli meat and cheese works well here. Roast beef and cheddar, or turkey and colby jack are a few ideas!

NUTRITIONAL INFO:

Calories: 65kcalCarbohydrates: 4gProtein: 2gFat: 4gSaturated Fat: 2gCholesterol: 9mgSodium: 131mgPotassium: 27mgFiber: 1gSugar: 1gVitamin A: 63IUVitamin C: 1mgCalcium: 37mgIron: 1mg

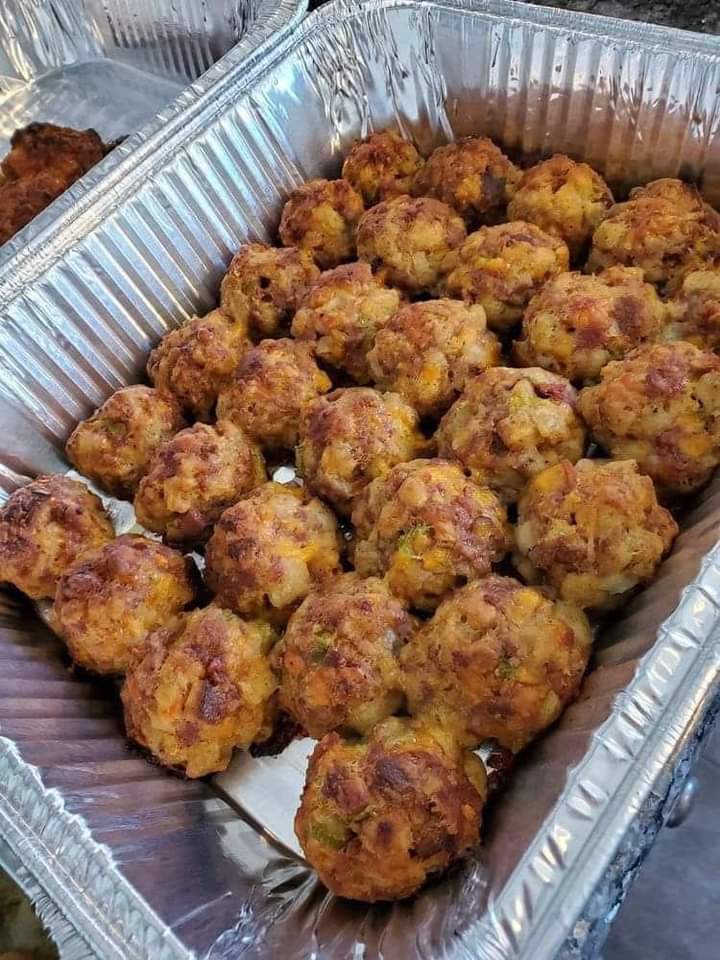
Easy Sausage Balls Recipe

Sausage Balls are savory, cheesy, and dippable, perfect as an appetizer or as part of a game-day spread! Make them with store-bought or homemade Bisquick mix.

Prep Time: 25 minutes

Cook Time: 22 minutes

Total Time: 47 minutes

INGREDIENTS:

1 pound (16 ounces) ground pork sausage

2 cups baking mix or Homemade Bisquick Mix

1 teaspoon garlic powder

2 tablespoons finely chopped jalapeños, optional

1 pound (16 ounces) sharp cheddar cheese, shredded

1/3 cup finely chopped pecans or pecan chips

INSTRUCTIONS:

Allow the ground sausage to sit at room temperature for about 30 minutes.

Preheat oven to 350°F. Line a baking sheet with foil and place a wire baking rack onto the lined pan. Spray the rack with nonstick cooking spray. This step will allow the grease to drip off onto the pan below.

Add all of the ingredients to a large bowl. Use clean hands to evenly combine the mixture. Do not worry about there being too much baking mix; it will incorporate as you mix everything together. You can speed up this process by using your stand mixer fitted with the paddle attachment.

Use a medium cookie scoop (1 1/2 tablespoons) to portion the mixture. Roll each portion into a ball and place onto the prepared baking rack.

Bake the sausage balls for 18-22 minutes.

Serve warm with your favorite dipping sauce, such as homemade ranch dip.

Notes:

For a mild version, use mild pork sausage. For a spicier version, use medium or hot pork sausage.

HOW TO SERVE SAUSAGE BALLS

I like to serve bisquick sausage balls with a bowl of homemade ranch dip. Whether it’s a dinner appetizer or part of a party spread along with spinach artichoke bites, beer cheese dip, and cheese straws, everyone loves them.

They’re best when they’re fresh out of the oven, but they are still delicious at room temperature.

Overhead view of several sausage balls arranged on a white plate next to a bowl of ranch dip

In fact, they’re good straight out of the fridge!

If you have leftovers, simply store them in an airtight container in the refrigerator and enjoy whenever the craving hits.

Give these sausage balls a try and see for yourself how delicious they are!

NUTRITIONAL INFO:

Yield: 38

Serving Size: 1 sausage ball

Calories:43TotalFat2gSaturatedFat1gTransFat0gUnsaturatedFat2gCholesterol1mgSodium95mgCarbohydrates5gFiber0gSugar1gProtein1g

Did you make this recipe?

Sweet Potato Pie Recipe

You will love this recipe for Sweet Potato Pie! The filling is sweet, creamy, and will melt in your mouth. It’s perfect for the holidays!

 Course: Dessert

 Cuisine: American

 Prep Time: 35minutes

Cook Time: 1hour 55minutes

Total Time: 2hours 30minutes

 Servings: 8 servings

INGREDIENTS:

  • 1 (1 pound) sweet potato
  • 1/2 cup butter, softened
  • 1 cup white sugar
  • 1/2 cup milk
  • 2 eggs
  • 1/2 teaspoon ground nutmeg
  • 1/2 teaspoon ground cinnamon
  • 1 teaspoon vanilla extract
  • 1 (9 inch) unbaked pie crust

Directions:

  1. -Boil sweet potato whole in skin for 40 to 50 minutes, or until done.
  2. Run cold water over the sweet potato, and remove the skin.
  3. -Break apart sweet potato in a bowl. Add butter, and mix well with mixer. Stir in sugar, milk, eggs, nutmeg, cinnamon and vanilla.
  4. Beat on medium speed until mixture is smooth. Pour filling into an unbaked pie crust.
  5. -Bake at 350 degrees F (175 degrees C) for 55 to 60 minutes, or until knife inserted in center comes out clean.
  6. Pie will puff up like a souffle, and then will sink down as it cools.
  7. Enjoy ❤

Nutritional Info:

Calories: 230kcal | Carbohydrates: 44g | Protein: 5g | Fat: 4g | Saturated Fat: 2g | Polyunsaturated Fat: 0.4g | Monounsaturated Fat: 1g | Trans Fat: 0.01g | Cholesterol: 56mg | Sodium: 93mg | Potassium: 462mg | Fiber: 4g | Sugar: 26g | Vitamin A: 16257IU | Vitamin C: 3mg | Calcium: 89mg | Iron: 1mg

No-Bake Peanut Butter Oatmeal Bars Recipe

These no-bake peanut butter bars have a thick layer of sweet oatmeal and a rich and fudgy chocolate peanut butter center. They’re very similar to your favorite no-bake cookie recipe, but they’re in bar form.

Prep Time: 10minutes 

Cook Time: 5minutes 

Total Time: 15minutes 

Servings: 16 bars

INGREDIENTS:

  • 3/4 cup butter
  • 1/2 cup packed brown sugar
  • 1 teaspoon vanilla extract
  • 3 cups quick cooking oats
  • 1 cup semi-sweet chocolate chips
  • 1/2 cup peanut butter

INSTRUCTIONS:

  1. Melt butter in a large sauce pan over low heat.
  2. Stir in brown sugar, vanilla, and oats.
  3. Cook for 3 to 4 minutes. Press half of mixture in to the bottom of a buttered 8 x 8 dish.
  4. In a microwave safe bowl, microwave the chocolate and peanut butter, stirring every 30 seconds until melted and blended.
  5. Pour the chocolate peanut butter mixture over the crust.
  6. Sprinkle the remaining oat mixture over the chocolate and peanut butter, pressing gently to form a crust.
  7. Refrigerate for 3 hours before cutting and serving.

Nutritional Info:

Calories: 271kcal | Carbohydrates: 24g | Protein: 4g | Fat: 18g | Saturated Fat: 8g | Cholesterol: 23mg | Sodium: 116mg | Potassium: 181mg | Fiber: 2g | Sugar: 11g | Vitamin A: 270IU | Calcium: 26mg | Iron: 1.6mg

Loaded Deviled Eggs Recipe

Loaded deviled eggs are a tasty twist on a classic deviled eggs recipe and include savory egg yolk, creamy mayo, cheese, and a dash of hot sauce topped with salty bacon bits. Serve this mouthwatering appetizer at your next holiday gathering or potluck for the ultimate crowd-pleasing snack.

Why You’ll Love this Bacon Deviled Eggs Recipe:

EASY: This recipe is so easy, but looks fancy! Just hard-boil your eggs, mix up some ingredients, and they’ll be ready to serve.

LOADED WITH FLAVOR: These are loaded with bacon, cheese, sour cream, and chives for a tasty dish.

HOLIDAY APPETIZER: Deviled eggs make the best holiday appetizer. These are the perfect appetizer for Easter, Christmas, Thanksgiving, or New Year’s!

Prep Time: 15minutes

Cook Time: 12minutes

Total Time: 27minutes 

Servings: 12 deviled eggs

Course: Appetizer, Side Dish

Cuisine: American

INGREDIENTS:

  • 6 large eggs
  • 2½ tablespoons quality mayo, I use Hellman’s
  • 2 tablespoons sour cream
  • 1 teaspoon dijon
  • 1 heaping tablespoon chives, finely chopped
  • ¼ plus ⅛ teaspoon onion powder
  • ¼ teaspoon Crystal hot sauce
  • ⅛ teaspoon smoked paprika
  • Kosher salt and freshly cracked black pepper, to taste
  • 2 strips thick-cut bacon, diced
  • ⅓ cup sharp cheddar cheese, freshly grated using a microplane grater
Garnish
  • Chives, chopped
  • 1½ tablespoons sharp cheddar cheese, freshly grated using a microplane grater
  • Freshly Cracked Black pepper

INSTRUCTIONS:

  1. Cook cut bacon until crispy. Transfer to a paper towel-lined bowl and set aside.
  2. Carefully add eggs to a medium-sized pot. Add enough water so that there is 1 inch of water above the eggs. Cover the pot and bring the water to a rolling boil over medium-high heat. As soon as you hear the water begin to boil, turn off the heat and set a timer for 12 minutes. Meanwhile, prepare an ice bath for the eggs.
  3. When the timer goes off, carefully add hard boiled eggs to the ice bath. Set a timer for 10 minutes.
  4. Carefully peel eggs under light running water.
  5. You can slice eggs the traditional way (lengthwise) or if you want the eggs like what you see picture, remove a small end on both sides of the eggs (save the ends!). This will allow them to stand on an end. Next, halve eggs width-wise and scoop the yolk into a bowl. Place halved whites on a platter and small ends back into the cavity of each egg.
  6. Mash yolks with a fork, then and add mayonnaise, sour cream, dijon mustard, smoked paprika, onion powder, hot sauce, cheese, season to taste with kosher salt and black pepper. Add chives then fold until combined. Stir until smooth.
  7. Evenly distribute remaining grated cheese into each cavity. Place creamy filling into a sandwich-sized ziplock bag and trim a small end off. Pipe filling into each cavity of the eggs. Garnish with chives, bacon and freshly cracked black pepper. Enjoy!

Tips:

  • You can hard-boil eggs with any method you like for this recipe. I have instructions to boil or steam in the recipe card. You could also use this instant pot hardboiled eggs recipe!
  • Trim off a very tiny sliver from the bottom of each egg half so that they sit flat.
  • I love this no mayo deviled eggs recipe, but you can use mayo instead of sour cream if you prefer.
  • Mix in other ingredients as you please. The sky is the limit for toppings!


Did you make this recipe?

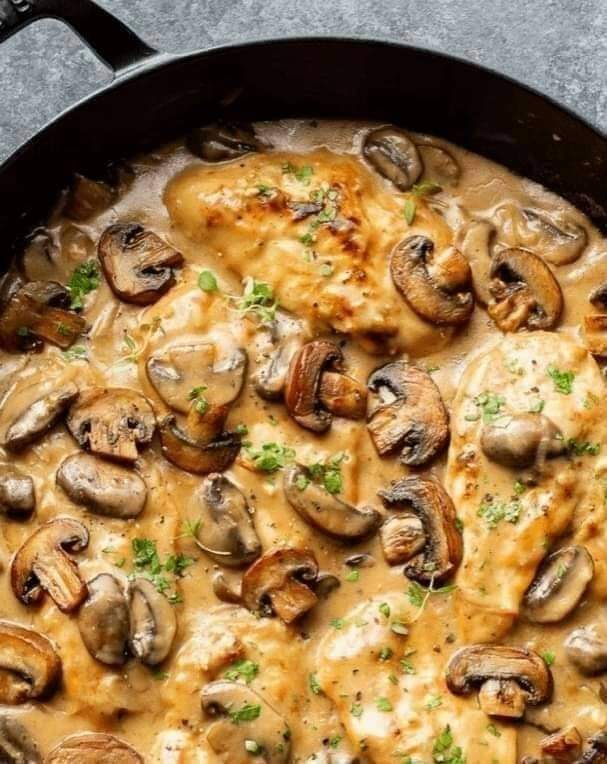
Chicken Marsala Recipe

This chicken marsala recipe is an Italian-American classic! It has juicy pan-fried chicken smothered in a creamy wine and mushroom sauce. It’s a 30-minute dish that’s simple to master in your own kitchen.

Why you’ll love it

Many restaurants have chicken marsala on their menu, but why not replicate it at home? It’s actually really effortless and quick, so it’s ideal for everything from a dinner party for easy entertaining to a weeknight meal when you’re craving something a little special.

What’s surprising to a lot of people is how few ingredients you need to make homemade chicken marsala. All it involves is a few pantry essentials along with a variety of wine that’s easy to get your hands on, and that’s it!

What is marsala?

Marsala is an Italian fortified wine, which means a spirit has been added to it, in this case brandy. It’s got a kind of nutty, caramelized flavor when used in sauces. I recommend using either semi-secco (semi-sweet) or secco (dry) marsala for this recipe. I used Cantine Pellegrino Fine I.P. Marsala here. Don’t use sweet!

This chicken marsala recipe is an Italian-American classic! It has juicy pan-fried chicken smothered in a creamy wine and mushroom sauce. It’s a 30-minute dish that’s simple to master in your own kitchen.

PREP TIME: 10mins

COOK TIME: 20mins

TOTAL TIME: 30mins

COURSE: Main Course

CUISINE: American

SERVINGS: 4

INGREDIENTS:

▢2 large chicken breasts

▢Salt & pepper to taste

▢1/4 teaspoon garlic powder

▢Flour for dredging

▢1 tablespoon olive oil

▢3 tablespoons butter divided

▢7 ounces cremini mushrooms sliced fairly thin

▢1 large clove garlic minced

▢3/4 cup marsala wine see note

▢1/2 cup heavy/whipping cream

INSTRUCTIONS:

  1. Cut the chicken breasts in half lengthwise and trim off any remaining fat.
  2. Season the chicken with the salt, pepper, and garlic powder. Coat each piece in flour.
  3. Heat the olive oil and 1 tablespoon of the butter in a skillet over medium-high heat.
  4. Once the pan is hot, add the chicken and sear it for 4-5 minutes/side or until golden.
  5. Take the chicken out of the pan and set aside (it’ll finish cooking in the sauce).
  6. Add the remaining butter and mushrooms to the skillet and cook them for 3-5 minutes, stirring occasionally, until browned.
  7. Add the minced garlic and marsala wine to the skillet and let it bubble for 2-3 minutes.
  8. Add the cream to the skillet, and then add the chicken back in.
  9. Cook for another 4-5 minutes until the chicken is cooked through and the sauce has thickened up a bit.
  10. Season with extra salt & pepper if needed. I added a little bit of chopped parsley to finish it off (optional).

NOTES:

If you have smaller chicken breasts, there’s no need to cut them in half lengthwise, but you will need to cook them a bit longer.

I recommend using either semi-sweet or dry marsala for this recipe. See blog post for more info.

Chicken is safe to eat when it’s reached an internal temperature of 165F. Use an instant read thermometer to test for doneness.

Leftovers and storage

This chicken will keep in the fridge for 3-4 days in an airtight container.

To reheat, place in a small saucepan over a low heat, stirring occasionally until it’s warmed through.

Tips for success

This particular version of chicken marsala is meant to be cooked at a fairly high temperature throughout. To get the nice sear on the chicken and to quickly brown the mushrooms, it’s necessary that the pan is nice and hot!

Only turn the heat down if it’s splattering like crazy or you’re using copper or cast iron cookware since they conduct heat much more than the regular stuff most of us use on a daily basis.

Be careful not to overcook it. If you’re in doubt, chicken is safe to eat at 165F as indicated by a meat thermometer.

chicken marsala on a plate with mashed potatoes and asparagus

What to serve with it

Chicken marsala is delicious served over pasta. Try my Quick & Easy Garlic Butter Noodles. Also, Garlic Mashed Potatoes or rice are equally tasty with the sauce.

Serving it with this easy asparagus recipe makes a great vegetable pairing.

A slice of crusty bread, garlic bread, or a side salad with this easy Italian dressing would be fantastic as well.

NUTRITIONAL INFO:

Calories: 428kcalCarbohydrates: 11gProtein: 26gFat: 26gSaturated Fat: 13gCholesterol: 136mgSodium: 225mgPotassium: 704mgFiber: 1gSugar: 4gVitamin A: 734IUVitamin C: 1mgCalcium: 40mgIron: 1mg