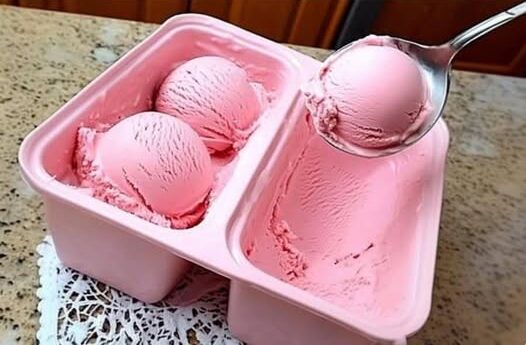
Zero Point Strawberry ice Cream

Introduction:

Indulging in a delicious frozen treat while sticking to your Weight Watchers plan is made possible with this 0-Point Strawberry Ice Cream. Packed with the natural sweetness of strawberries and tailored to meet Weight Watchers’ zero-point food list, this homemade ice cream is a guilt-free delight that satisfies your dessert cravings without compromising your health goals.

Ingredients:

Gather the following simple ingredients to prepare this delightful 0-Point Strawberry Ice Cream:
2 cups fresh strawberries, hulled and halved
1 cup fat-free Greek yogurt
1 teaspoon vanilla extract
Sweetener to taste (such as Stevia or monk fruit)

Instructions:
Prepare Strawberries:

Begin by thoroughly washing and hulling the fresh strawberries. Cut them into halves, ensuring they are ripe and flavorful.

Freeze Strawberries:

Spread the halved strawberries on a tray lined with parchment paper and freeze them until firm. This step enhances the creaminess of the ice cream and intensifies the strawberry flavor.

Blend Strawberries:

Once the strawberries are frozen, place them in a blender along with fat-free Greek yogurt, vanilla extract, and your chosen sweetener. Blend the ingredients until smooth and creamy.

Adjust Sweetness:

Taste the mixture and adjust the sweetness according to your preference. Add more sweetener if needed, keeping in mind that the sweetness may vary depending on the natural sugars in the strawberries.

Freeze the Mixture:

Transfer the blended mixture into a freezer-safe container, spreading it evenly. Cover the container and place it in the freezer for at least 4-6 hours or until the ice cream reaches a firm consistency.

Serve and Enjoy:

Once the 0-Point Strawberry Ice Cream is fully frozen, scoop it into bowls or cones. Garnish with fresh strawberry slices for an extra burst of flavor. This refreshing treat is perfect for satisfying your sweet tooth on warm days or as a guilt-free dessert option.

Conclusion:

Indulging in a tasty frozen treat is made healthier with the 0-Point Strawberry Ice Cream, specially crafted for Weight Watchers. By using fresh strawberries and fat-free Greek yogurt, this homemade delight offers a satisfying and flavorful dessert option that aligns with your weight management goals. Enjoy the sweetness of strawberries without any added points, making this guilt-free ice cream a delightful addition to your Weight Watchers journey.
Someone posted this 0 point strawberry ice cream recipe, made it today and it’s just perfect😋☺️ taste absolutely yum

Ingredients:

2 cups frozen strawberries (unsweetened)

1 ripe banana, frozen (this will add natural sweetness)

1/2 cup fat-free Greek yogurt

1 teaspoon vanilla extract (optional for added flavor)

Sweetener of your choice (if desired, but keep in mind this will add points)

Instructions:

Prepare the Fruit:

Slice the ripe banana into small pieces and freeze them along with the strawberries. It’s best to freeze them overnight for a creamier texture.

Blend the Ingredients:

In a blender or food processor, combine the frozen strawberries, frozen banana slices, fat-free Greek yogurt, and vanilla extract (if using).

Blend Until Smooth:

Blend the mixture until it’s smooth and creamy. You may need to stop and scrape down the sides of the blender a few times to ensure everything is well combined.

Taste and Sweeten (If Desired):

Taste the mixture and decide if it’s sweet enough for your liking. If you want it sweeter, you can add a small amount of your preferred sweetener. Keep in mind that this may add points if you’re following Weight Watchers, so use it sparingly.

Serve or Freeze:

You can serve the strawberry “ice cream” immediately for a soft-serve consistency.

For a firmer texture, transfer the mixture to a container with a lid and freeze it for an additional 1-2 hours.

Enjoy:

Scoop out your strawberry “ice cream” and enjoy it as a guilt-free and zero-point treat!
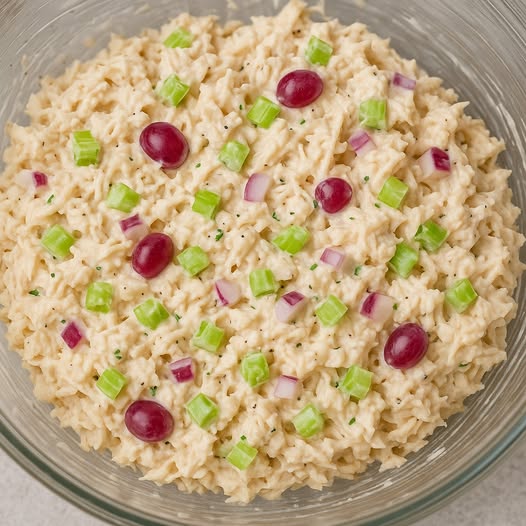
Weight Watchers Chicken Salad on Croissants

Yield: 4 servings
Prep Time: 15 minutes
Total Time: 15 minutes

For the Chicken Salad:

  • 2 cups cooked and shredded skinless, boneless chicken breast
  • 1/2 cup non-fat Greek yogurt
  • 1/4 cup light mayonnaise
  • 1 celery stalk, finely chopped
  • 1/4 cup red onion, finely chopped
  • 1/4 cup grapes, halved
  • 1 tablespoon Dijon mustard
  • Salt and pepper, to taste

For Serving:

  • 4 small whole wheat croissants

Instructions:

  1. Prepare the Chicken Salad:
    • In a large bowl, combine shredded chicken, non-fat Greek yogurt, light mayonnaise, chopped celery, chopped red onion, halved grapes, Dijon mustard, salt, and pepper. Mix until well combined.
  2. Assemble the Sandwiches:
    • Slice the whole wheat croissants in half. Place an equal amount of chicken salad onto the bottom half of each croissant.
  3. Serve:
    • Place the top half of the croissants on the chicken salad to create sandwiches.

SmartPoints Information:

  • The SmartPoints value will depend on the specific ingredients and brands used. Be sure to calculate the points based on your Weight Watchers plan and the ingredients you choose. Consider using light or fat-free alternatives to reduce points.

Enjoy your Weight Watchers Chicken Salad on Croissants, a delicious and point-friendly lunch option!

Frozen chocolate peanut butter bark

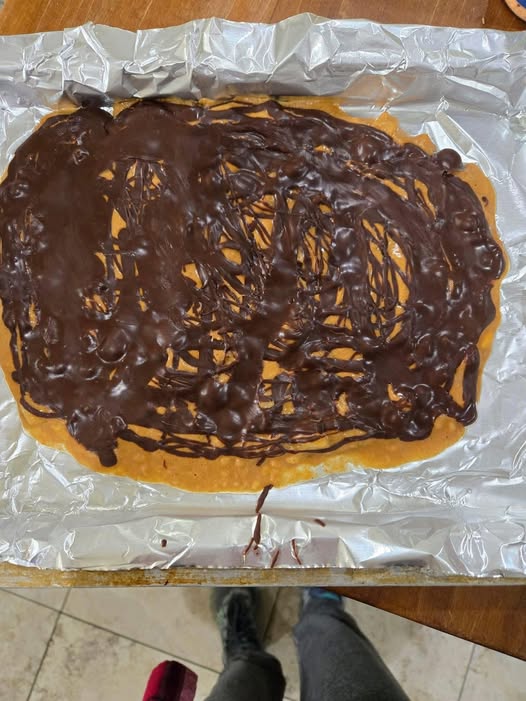
Serves 8 Frozen chocolate peanut butter bark is a delightful fruity spin on the more traditional frozen yogurt bark. This is 2 weight watchers points per serving! Simply arrange banana slices on a sheet pan, and mash them down until they flatten and form a base for your toppings—in this case, reconstituted powdered peanut butter and melted dark chocolate. After the bark freezes, cut or break it into pieces, and store it in a freezer-safe container for up to 2 weeks.

Ingredients

  • Banana
  • 2 large cut into 1/2-inch-thick slices
  • Powdered peanut butter
  • ¾ cup s
  • Lily’s Dark chocolate baking chips
  • 3 oz or similar product
  • Flaky salt
  • ¼ tsp

Instructions

  1. Line a sheet pan with foil or parchment paper. Arrange the banana slices on the pan to form a rectangle (about 8 x 5 inches). Cover the banana slices with a sheet of parchment paper; press the slices using the bottom of a glass or a dry measuring cup so that they flatten and touch each other. Carefully peel off the top sheet of parchment.
  2. In a small bowl, stir together the powdered peanut butter and 7 to 8 tablespoons of water until smooth; spread the peanut butter over the bananas.
  3. In a small microwave-safe bowl, microwave the chocolate chips on High until melted and smooth, about 1 minute, stopping to stir every 20 seconds. Drizzle the chocolate evenly over the peanut butter and gently spread to cover. Sprinkle evenly with the salt. Freeze until fully firm, at least 1 hour. Cut or break into 8 pieces.
  4. Serving size: 1 piece

Frozen chocolate peanut butter bark

Serves 8 Frozen chocolate peanut butter bark is a delightful fruity spin on the more traditional frozen yogurt bark. This is 2 weight watchers points per serving! Simply arrange banana slices on a sheet pan, and mash them down until they flatten and form a base for your toppings—in this case, reconstituted powdered peanut butter and melted dark chocolate. After the bark freezes, cut or break it into pieces, and store it in a freezer-safe container for up to 2 weeks.

Ingredients

  • Banana
  • 2 large cut into 1/2-inch-thick slices
  • Powdered peanut butter
  • ¾ cup s
  • Lily’s Dark chocolate baking chips
  • 3 oz or similar product
  • Flaky salt
  • ¼ tsp

Instructions

  1. Line a sheet pan with foil or parchment paper. Arrange the banana slices on the pan to form a rectangle (about 8 x 5 inches). Cover the banana slices with a sheet of parchment paper; press the slices using the bottom of a glass or a dry measuring cup so that they flatten and touch each other. Carefully peel off the top sheet of parchment.
  2. In a small bowl, stir together the powdered peanut butter and 7 to 8 tablespoons of water until smooth; spread the peanut butter over the bananas.
  3. In a small microwave-safe bowl, microwave the chocolate chips on High until melted and smooth, about 1 minute, stopping to stir every 20 seconds. Drizzle the chocolate evenly over the peanut butter and gently spread to cover. Sprinkle evenly with the salt. Freeze until fully firm, at least 1 hour. Cut or break into 8 pieces.
  4. Serving size: 1 piece

Weight Watchers-Friendly Sausage and Egg Breakfast Muffins

1 Point Egg Muffins
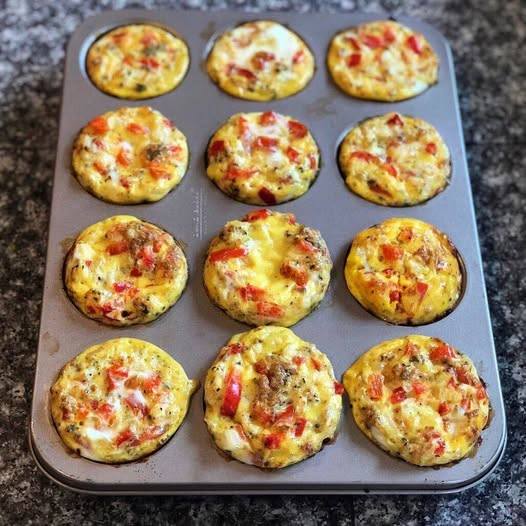
Introduction: Indulge in a culinary masterpiece with our delectable 1-Point Egg Muffins, a delightful fusion of flavors and textures that will elevate your breakfast experience. Packed with pre-cooked ham, finely diced bell pepper, and onion, these savory muffins are a perfect blend of protein and vegetables. Whether you’re seeking a convenient meal prep option or a sophisticated brunch dish, our egg muffins are a versatile addition to your culinary repertoire.
Ingredients:
1/2 lb pre-cooked ham, diced (bacon or sausage can be substituted)
1 bell pepper, finely diced
1/2 onion, finely diced
10 eggs
1/2 tsp salt
1/2 tsp pepper
2 tbsp avocado oil (bacon fat can be used for added flavor)
Instructions:
Preheat Oven to Perfection: Begin by preheating your oven to 375°F, ensuring the ideal temperature for achieving the perfect texture and flavor in our egg muffins.
Chop with Precision: Meticulously dice the pre-cooked ham, bell pepper, and onion to create bite-sized pieces that will be evenly distributed throughout each muffin, providing a burst of flavor in every bite.
Whisk and Mix with Finesse: Crack the eggs into a spacious bowl and whisk them to perfection. Add the meticulously chopped ingredients, along with 1/2 teaspoon of salt and pepper each, creating a harmonious blend of flavors.
Grease for Success: Ensure the muffin tin is generously coated with your preferred fat or oil, preventing any sticking issues during baking. Alternatively, opt for muffin tin liners for a hassle-free baking experience.
Spoonfuls of Culinary Art: Carefully spoon the egg mixture into each section of the muffin tin, filling them almost to the brim. Anticipate a delightful puffing up as they bake, promising an aesthetically pleasing presentation.
Bake to Perfection: Place the muffin tin in the preheated oven and let the magic happen for approximately 20 minutes. The result? A golden-brown exterior with a perfectly cooked, fluffy interior.
Cooling Elegance: Allow the egg muffins to cool slightly before serving, enhancing the overall texture and ensuring a delightful dining experience.
Nutritional Information (Per Serving):
Calories: 311kcal
Carbohydrates: 3g
Protein: 26g
Fat: 20g

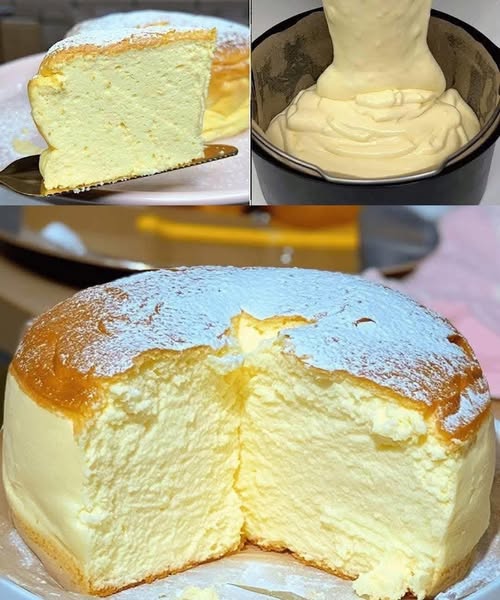
Two Ingredient Cloud Cake

Yields: 8-10 servings
Prep time: 30 minutes
Cook time: 60-70 minutes
Ingredients:
For the Batter:
3 large eggs, separated (yolks and whites)
1/4 cup (56g) light cream cheese, softened (Philadelphia 1/3 less fat or similar)
1/4 cup (60ml) unsweetened almond milk or skim milk
2 tbsp (30g) unsalted butter (or light butter alternative, if available and suitable for baking)
1/4 cup (30g) all-purpose flour, sifted
1 tbsp (8g) cornstarch, sifted
1/4 tsp cream of tartar (optional, but helps stabilize egg whites)
1/2 cup (80g) erythritol or another granular sugar substitute equivalent to 1/2 cup sugar
1/2 tsp vanilla extract
Pinch of salt
For the Water Bath:
Boiling water
For Dusting (Optional):
1-2 tsp powdered erythritol or other powdered sugar substitute
Equipment:
8-inch round springform pan or cake pan with a removable bottom
Parchment paper
Aluminum foil
Large roasting pan (for water bath)
Electric mixer
Spatulas
Whisk
Instructions:
Prepare the Pan: Grease and flour your 8-inch springform pan. Line the bottom with parchment paper. For easy removal and to prevent water from seeping in during the water bath, wrap the outside of the pan securely with 2-3 layers of aluminum foil. Preheat your oven to 325°F (160°C).
Make the Cheese Base:
In a heatproof bowl set over a pot of simmering water (double boiler), combine the softened light cream cheese, unsweetened almond milk (or skim milk), and butter. Whisk constantly until the mixture is smooth and fully combined. Remove from heat.
Whisk in the egg yolks one at a time until fully incorporated.
Sift in the flour and cornstarch into the mixture. Whisk until smooth and no lumps remain. Stir in the vanilla extract and a pinch of salt. Set aside.
Whip the Meringue:
In a very clean, dry bowl (preferably glass or metal), add the egg whites and cream of tartar (if using).
Using an electric mixer, start whipping the egg whites on medium speed until foamy.
Gradually add the erythritol (or sugar substitute) a little at a time while continuing to whip.
Increase the speed to high and whip until you achieve glossy, soft peaks. The to meringue should hold its shape but still be pliable. Do not over-whip to stiff peaks, as this can make the cake dry.
Combine the Batters:
Add about one-third of the meringue to the cheese base mixture. Gently fold it in with a spatula to lighten the batter.
Add the remaining meringue in two additions, gently folding until just combined. Be careful not to deflate the meringue; this is key to the soufflé texture. Overmixing will result in a dense cake.
Bake with Water Bath:
Pour the batter into the prepared springform pan. Gently tap the pan on the counter a few times to release any large air bubbles.
Place the springform pan into the larger roasting pan. Carefully pour boiling water into the roasting pan until it comes about 1 inch up the sides of the springform pan.
Carefully transfer the roasting pan to the preheated oven.
Bake for 60-70 minutes, or until the top is golden brown and the cake is set but still slightly wobbly in the center. An inserted skewer should come out with moist crumbs.
Cooling and Serving:
Once baked, turn off the oven and prop the oven door open slightly with a wooden spoon. Let the cheesecake cool in the oven for about 30-60 minutes. This slow cooling helps prevent the cake from deflating too much.
Remove the cake from the oven and the water bath. Carefully remove the aluminum foil. Let it cool completely on a wire rack before refrigerating for at least 2-3 hours (preferably overnight) to firm up.
Once chilled, carefully run a thin knife around the edge of the pan before releasing the springform.
Dust with powdered erythritol before serving, if desired.
Weight Watchers Point Considerations (Estimate):
Light Cream Cheese: Significantly lower in points than full-fat.
Unsweetened Almond Milk/Skim Milk: Very low or zero points.
Erythritol/Sugar Substitute: Zero points.
Butter: This is where some points will come from. Using a good quality light butter or a smaller amount if you can adjust, helps.
Flour & Cornstarch: These will contribute points.
Eggs: Points depend on the plan, but generally moderate.
To get accurate points for your specific cake, you would need to input all the exact ingredients and their quantities into your WW app and divide by the number of servings. For example, if the entire cake comes out to 30 points and you cut 10 slices, each slice would be 3 points.
Enjoy your light and airy Japanese Soufflé Cheesecake

Weight Watchers Blueberry Muffins

Ingredients:
1 cup plain nonfat Greek yogurt
1 cup unsweetened applesauce
2 eggs
1 ½ cups self-rising flour
1 tsp vanilla extract
¼ cup sweetener (like Stevia, Monk Fruit, or erythritol – adjust to taste)
1 cup fresh or frozen blueberries (if frozen, do not thaw)
Optional: dash of cinnamon or lemon zest for flavor boost
Instructions:
Preheat oven to 350°F (175°C). Line a 12-cup muffin tin with paper liners or spray with nonstick spray.
Mix wet ingredients: In a large bowl, whisk together Greek yogurt, applesauce, eggs, and vanilla.
Add dry ingredients: Stir in the self-rising flour and sweetener until just combined. Don’t overmix — a few lumps are okay.
Fold in blueberries gently.
Divide batter evenly among the 12 muffin cups.
Bake for 18–22 minutes, or until a toothpick inserted in the center comes out clean.
Cool in the pan for 5 minutes, then transfer to a wire rack.