Weight Watchers Chocolate Frosty Recipe

I made Chocolate Frosty’s!My hubby is beyond addicted to this stuff! We finish one serving and he’s asking when I can make it again haha. I need to teach him how to make it! I love this quick & easy recipe and it’s a treat for ww beginners
INGREDIENTS
1 Cup of Unsweetened Almond Milk
2 Tablespoons of Sugar-Free Fat-Free Chocolate Pudding Mix or Vanilla, Butterscotch, Pistachio – pick your favorite flavor.
1 teaspoon of Unsweetened Cocoa Powder
1 teaspoon of Vanilla Extract
2 Packets of Stevia
About 10-12 Ice Cubes
Optional – 2 Tablespoons of Cool Whip Lite
INSTRUCTIONS
1: Take all of your Ingredients and add to your Nutribullet or Blender
2: Mix or Blend for One Minute
3: Pour and Serve Yum!

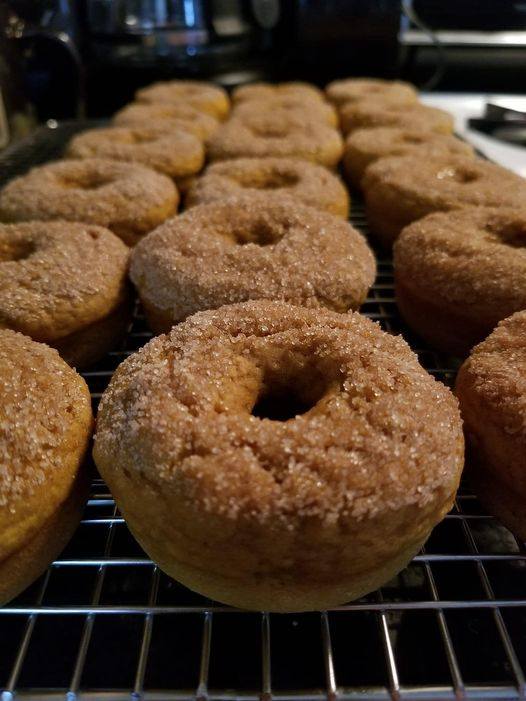
Pumpkin Cinnamon and Sugar Donuts

Ingredients:
1 cup pumpkin puree
1/4 cup unsweetened applesauce
1/4 cup non-fat Greek yogurt
1/4 cup granulated sugar substitute (e.g., erythritol, monk fruit sweetener)
1 teaspoon vanilla extract
1 cup all-purpose flour
1 teaspoon baking powder
1/2 teaspoon baking soda
1/2 teaspoon ground cinnamon
1/4 teaspoon ground nutmeg
Pinch of salt
For the Cinnamon Sugar Coating:
2 tablespoons granulated sugar substitute
1 teaspoon ground cinnamon
1 tablespoon unsalted butter, melted
Instructions:
Preheat your oven to 350°F (175°C). Lightly coat a mini donut pan with non-stick cooking spray.
In a mixing bowl, combine the pumpkin puree, unsweetened applesauce, Greek yogurt, sugar substitute, and vanilla extract. Mix until well combined.
In a separate bowl, whisk together the all-purpose flour, baking powder, baking soda, ground cinnamon, ground nutmeg, and salt.
Gradually add the dry ingredients to the wet ingredients, stirring until just combined.
Spoon the batter into the prepared mini donut pan, filling each cavity about 3/4 full.
Bake in the preheated oven for 8-10 minutes, or until the donuts are lightly golden and a toothpick inserted into the center comes out clean.
While the donuts are baking, prepare the cinnamon sugar coating. In a small bowl, combine the granulated sugar substitute and ground cinnamon.
Once the donuts are done baking, remove them from the oven and allow them to cool in the pan for a few minutes.
Carefuly remove the donuts from the pan and brush each one with melted butter.
Immediately dip each donut into the cinnamon sugar mixture, coating it evenly on all sides.
Serve the 1-Point Pumpkin Cinnamon Sugar Donuts warm or at room temperature, and enjoy the delightful flavors of fall in every bite!
These delicious and guilt-free pumpkin cinnamon sugar donuts are the perfect treat for satisfying your sweet tooth while staying on track with your wellness goals.

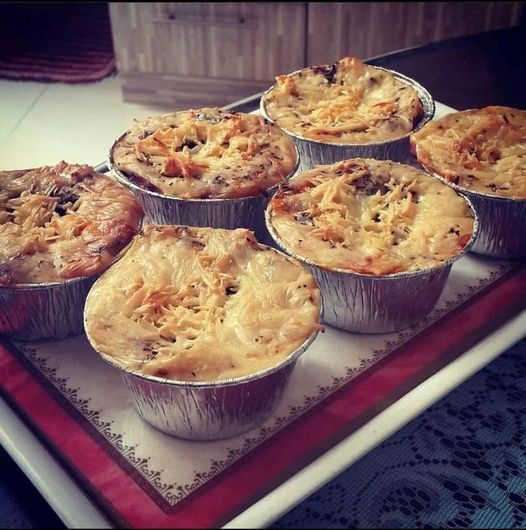
Lasagna Cups, 3 SmartPoints

WW Lasagna Cups are the perfect way to indulge in the classic comfort food of lasagna without derailing your Weight Watchers points. These individual servings are packed with flavor, from the lean ground turkey or chicken to the rich tomato sauce and melty cheeses. By using whole wheat lasagna noodles and part-skim cheese, these cups keep the calories and SmartPoints low, making them an ideal choice for anyone following a healthy eating plan. Each cup is only 3 SmartPoints, allowing you to enjoy the taste of lasagna in a way that’s both satisfying and guilt-free.

What makes these WW Lasagna Cups so appealing is how easily they can be customized to suit different tastes and dietary needs. If you prefer a vegetarian version, you can substitute the ground meat with lentils, mushrooms, or even tofu. You can also add extra vegetables like spinach or zucchini to the sauce to increase the fiber and nutritional value. The layers of cheese—ricotta, mozzarella, and Parmesan—create that signature lasagna flavor while still keeping the dish lighter than the traditional version. The individual serving sizes are perfect for portion control, ensuring you get a filling meal without overeating.

These lasagna cups are also incredibly convenient for meal prep. You can make a batch at the start of the week, store them in the fridge for a few days, or even freeze them for later use. When you need a quick, satisfying meal, you can simply pop one in the microwave or oven, and it’s ready to go. The fact that they hold up well in the fridge or freezer makes them a great choice for busy individuals or families looking for easy, nutritious meals that are ready when you are. Plus, they’re a hit with kids and adults alike, so you can feel good serving them to the whole family.

Not only do these WW Lasagna Cups offer a healthier alternative to traditional lasagna, but they also deliver on taste and texture. The combination of tender whole wheat noodles, savory meat sauce, and creamy cheese creates a comforting, satisfying meal that will leave you feeling full without overindulging. Whether you’re craving comfort food or need a quick, delicious dinner for the week, these lasagna cups are the perfect solution. Plus, with only 3 SmartPoints per cup, they’re an easy and tasty way to stick to your WW goals without feeling deprived.

WW Lasagna Cups Recipe

Ingredients:

  • 8 whole wheat lasagna noodles (cooked and cut into halves or thirds)
  • 1 lb lean ground turkey or chicken
  • 1 small onion, chopped
  • 2 cloves garlic, minced
  • 1 (14.5 oz) can crushed tomatoes (low-sodium, if preferred)
  • 1/2 tsp dried oregano
  • 1/2 tsp dried basil
  • 1/4 tsp red pepper flakes (optional for a little heat)
  • 1/2 cup low-fat ricotta cheese
  • 1/2 cup shredded part-skim mozzarella cheese
  • 1/4 cup grated Parmesan cheese
  • Salt and pepper to taste
  • Fresh basil or parsley for garnish (optional)

Instructions:

  1. Preheat Oven and Prepare Muffin Tin: Preheat your oven to 375°F (190°C). Spray a muffin tin with non-stick cooking spray or use silicone muffin cups for easy removal. This recipe makes 12 individual lasagna cups.
  2. Cook the Noodles: Boil the lasagna noodles according to the package instructions. Once cooked, drain and set aside to cool slightly. Once they’re cool enough to handle, cut them into halves or thirds to fit into the muffin tin.
  3. Make the Meat Sauce: In a large skillet, cook the ground turkey or chicken over medium heat, breaking it apart as it cooks. Add the chopped onion and garlic and sauté for about 3-4 minutes until the onion is soft. Stir in the crushed tomatoes, oregano, basil, red pepper flakes (if using), and salt and pepper to taste. Simmer the sauce for about 10 minutes to let the flavors meld together.
  4. Assemble the Lasagna Cups: Layer each muffin tin with a piece of the cooked lasagna noodle. Then spoon a small amount of the meat sauce over the noodle. Add a dollop of ricotta cheese, a sprinkle of mozzarella, and a little Parmesan on top. Repeat this layering process until all the muffin cups are filled, ending with a sprinkle of mozzarella and Parmesan on top.
  5. Bake: Place the muffin tin in the preheated oven and bake for 20-25 minutes or until the cheese is melted and bubbly. The lasagna cups should be lightly browned on top.
  6. Garnish and Serve: Let the lasagna cups cool slightly before removing them from the muffin tin. Garnish with fresh basil or parsley, if desired, and serve hot.

Nutrition Information (per serving – makes 12 cups):

  • Calories: 150
  • Fat: 7g
    • Saturated Fat: 3g
  • Carbohydrates: 12g
    • Fiber: 2g
    • Net Carbs: 10g
  • Protein: 12g
  • WW Points: 3 SmartPoints per cup

Why These WW Lasagna Cups Work:

  • Low in SmartPoints: At just 3 SmartPoints per cup, these lasagna cups are a fantastic way to enjoy a hearty and comforting meal without using up too many points. The combination of lean turkey, whole wheat noodles, and part-skim cheese makes these cups filling and flavorful, without being heavy on calories or points.
  • High in Protein: With the lean turkey or chicken and cheese, each lasagna cup provides a good amount of protein to keep you full. Protein also helps to support muscle recovery and helps curb cravings, making these a satisfying and nutritious meal option.
  • Customizable: These lasagna cups are highly customizable. You can swap the ground turkey or chicken for lean beef or even go meatless by using a vegetarian substitute like lentils or tofu. You can also add extra veggies, such as spinach, mushrooms, or zucchini, to the sauce for more fiber and nutrients.
  • Perfect for Meal Prep: These individual servings are easy to make ahead and store for later. You can prep a batch of WW Lasagna Cups at the beginning of the week and keep them in the fridge for up to 3 days or freeze them for longer storage. This makes them an excellent option for meal prepping, ensuring you have a healthy, filling meal ready to go when you need it.
  • Satisfies Lasagna Cravings: If you’ve been missing the comfort of traditional lasagna, these WW Lasagna Cups are a great alternative. They pack all the flavors of the classic dish—rich tomato sauce, creamy cheese, and hearty noodles—into a portion-controlled, lighter format that still feels indulgent.

Tips for Success:

  • Make Ahead: These lasagna cups are perfect for meal prep. Simply assemble them in advance, cover them, and refrigerate for up to 3 days. They can also be frozen and reheated, making them an excellent option for busy weeks.
  • Veggie Add-Ins: For more fiber and added nutrition, try sneaking in some finely chopped vegetables, like spinach, zucchini, or mushrooms, into the meat sauce. They’ll blend right in with the flavors and add more texture to the cups.
  • Freezer-Friendly: If you want to make a larger batch, these cups freeze beautifully. After baking, let them cool completely, then wrap each cup individually in plastic wrap or foil and store them in a freezer-safe container. When you’re ready to eat, simply reheat them in the microwave or oven.

Sugar Cookie Lemonade Crumble Bars

A sunny, tangy twist on classic lemon bars — buttery sugar cookie crust, zesty lemonade filling, and a golden crumble topping.

Prep Time: 15 minutes
Cook Time: 30–35 minutes
Total Time: 50 minutes
Servings: 9–12

Ingredients

For the Sugar Cookie Base:

  • All-purpose flour – 1 ½ cups

  • Baking powder – ½ tsp

  • Salt – ¼ tsp

  • Unsalted butter – ½ cup, softened

  • Granulated sugar – ½ cup

  • Brown sugar – ¼ cup

  • Egg – 1 large

  • Vanilla extract – 1 tsp

For the Lemonade Filling:

  • Freshly squeezed lemon juice – 1 cup

  • Granulated sugar – ½ cup

  • All-purpose flour – ¼ cup

  • Salt – ¼ tsp

  • Eggs – 3 large

  • Unsalted butter – 2 tbsp, melted

For the Crumble Topping:

  • All-purpose flour – ½ cup

  • Granulated sugar – ½ cup

  • Unsalted butter – ¼ cup, cold and cubed

  • (Optional) Extra granulated sugar – ¼ cup for sprinkling

Instructions

  1. Prep the pan:
    Preheat oven to 350°F (175°C). Grease or line an 8×8-inch baking dish with parchment paper for easy removal.

  2. Make the cookie base:
    In a medium bowl, whisk together flour, baking powder, and salt. In a separate bowl, beat softened butter with granulated and brown sugars until creamy. Mix in the egg and vanilla. Gradually add dry ingredients until just combined. Press evenly into the bottom of the pan.

  3. Prepare the lemonade filling:
    Whisk lemon juice, sugar, flour, and salt in a bowl until smooth. Add eggs one at a time, whisking well after each addition. Stir in melted butter.

  4. Assemble:
    Pour the filling over the cookie crust.

  5. Make the crumble topping:
    Combine flour, sugar, and cold cubed butter in a bowl. Use a pastry cutter or your fingers to form coarse crumbs. Sprinkle evenly over the lemon filling.

  6. Bake:
    Bake for 30–35 minutes, until the filling is set and the crumble topping is golden brown.

  7. Cool & serve:
    Let cool completely before slicing into bars. Optionally, sprinkle with extra sugar for added sweetness.

Quick Notes & Pro Tips

  • For extra tang: Add lemon zest to the filling for a bolder lemon punch.

  • Crumble texture: Use very cold butter for a crunchier crumble topping.

  • Make-ahead: These bars taste even better the next day once flavors meld.

Why You’ll Love It

These bars combine sweet, tangy, and buttery layers into a perfect treat for picnics, bake sales, or a refreshing dessert after dinner.

Serving Suggestions

  • Dust with powdered sugar for a classic lemon bar look.

  • Serve chilled with a dollop of whipped cream for a creamy contrast.

Storage & Make-Ahead

  • Refrigerate: Store in an airtight container for up to 5 days.

  • Freeze: Wrap bars individually and freeze for up to 2 months. Thaw overnight in the fridge.

FAQs

Q: Can I use bottled lemon juice?
A: Fresh is best for bright flavor, but bottled juice works in a pinch.

Q: Can I double the recipe?
A: Yes! Use a 9×13-inch pan and adjust baking time to 35–40 minutes.

Q: Can I make these dairy-free?
A: Substitute butter with vegan butter or coconut oil for a dairy-free version.

Would you like me to create a “pink lemonade version” with raspberries or a “glazed version” with a sweet lemon drizzle on top?

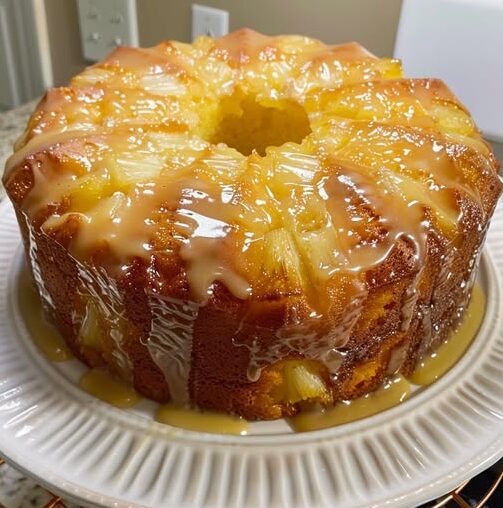
Pineapple Sour Cream Bundt Cake

A moist, tropical Bundt cake loaded with crushed pineapple and topped with a sweet pineapple glaze — perfect for holidays, potlucks, or just because.

Prep Time: 20 minutes
Cook Time: 60–70 minutes
Total Time: 1 hour 30 minutes
Servings: 12

Ingredients

For the Cake:

  • Unsalted butter – 1 cup (2 sticks), softened

  • Granulated sugar – 2 cups

  • Eggs – 4 large

  • Vanilla extract – 1 tsp

  • Almond extract – 1 tsp (optional for extra depth)

  • All-purpose flour – 3 cups

  • Baking powder – ½ tsp

  • Salt – ½ tsp

  • Sour cream – 1 cup

  • Crushed pineapple – 1 can (20 oz), well-drained

  • Pineapple juice – ¼ cup (reserved from can or added separately)

For the Glaze:

  • Powdered sugar – 1 cup

  • Pineapple juice – 2–3 tbsp (adjust for drizzling consistency)

  • Melted butter – 1 tbsp

  • Vanilla extract – ½ tsp

Instructions

  1. Prep the oven & pan:
    Preheat to 325°F (163°C). Grease and flour a 10-inch Bundt or tube pan thoroughly, making sure every crevice is coated.

  2. Cream the butter & sugar:
    In a large bowl, cream together softened butter and sugar until light and fluffy, about 4–5 minutes.

  3. Add eggs & extracts:
    Beat in eggs one at a time, mixing well after each. Stir in vanilla and almond extract.

  4. Mix dry ingredients:
    In a separate bowl, whisk together flour, baking powder, and salt.

  5. Combine wet & dry:
    Gradually add the dry mixture to the creamed butter mixture, alternating with sour cream. Begin and end with the dry mixture. Fold in drained crushed pineapple and pineapple juice gently.

  6. Bake:
    Pour batter into the prepared pan, tapping lightly to remove air bubbles. Bake for 60–70 minutes, or until a toothpick inserted in the center comes out clean.

  7. Cool & glaze:
    Let the cake cool in the pan for 10–15 minutes before inverting onto a wire rack. Cool completely. Whisk glaze ingredients until smooth, then drizzle over the cooled cake.

Quick Notes & Pro Tips

  • Avoid soggy cake: Be sure to drain pineapple well before adding.

  • Extra flavor: Toasted coconut or chopped macadamia nuts make a fantastic addition to the batter or glaze topping.

  • Bundt pan tip: Grease and flour thoroughly to prevent sticking, especially around intricate designs.

Why You’ll Love It

This cake is moist, fluffy, and tropical with a subtle tang from sour cream and the perfect amount of sweetness from the pineapple glaze.

Serving Suggestions

  • Serve as-is for a sweet treat with coffee or tea.

  • Add a dollop of whipped cream or a scoop of vanilla ice cream for a decadent dessert.

Storage & Make-Ahead

  • Room temp: Store covered for up to 3 days.

  • Refrigerate: Keeps up to 1 week in an airtight container.

  • Freeze: Wrap in plastic and foil for up to 3 months. Thaw in the fridge overnight before serving.

FAQs

Q: Can I use fresh pineapple instead of canned?
A: Yes! Finely chop fresh pineapple and use with ¼ cup added juice.

Q: Can I make this without sour cream?
A: Substitute with plain Greek yogurt for a similar texture and tang.

Q: How do I prevent the glaze from soaking in?
A: Make sure the cake is fully cooled before glazing.

Would you like me to create a “pina colada version” with coconut and rum glaze or a “cream cheese swirl version” for a richer twist?

Cheesy Zucchini Breadsticks

A low-carb, cheesy delight made with fresh zucchini, melty mozzarella, and savory parmesan — the perfect alternative to traditional breadsticks.

Prep Time: 10 minutes
Cook Time: 20 minutes
Total Time: 30 minutes
Servings: 4–6

Ingredients

  • Zucchini – 4 cups, grated (about 1 lb)

  • Mozzarella cheese – ½ cup (plus 1 cup for topping)

  • Parmesan cheese – ⅓ cup, grated

  • Egg – 1 large

  • Garlic parsley salt – 1 tsp

  • Optional: Extra herbs like rosemary or Italian seasoning for added flavor

Instructions

  1. Prep the oven & zucchini:
    Preheat oven to 425°F (218°C). Use a clean kitchen towel or cheesecloth to squeeze as much liquid as possible from the grated zucchini.

  2. Mix the base:
    In a large bowl, combine the zucchini with ½ cup mozzarella, parmesan, egg, and garlic parsley salt. Stir until fully combined.

  3. Shape & bake:
    Line a baking sheet with parchment paper. Spread the zucchini mixture into a thin, even rectangle about ½ inch thick. Bake for 15 minutes, or until the crust begins to brown and set.

  4. Add cheese topping:
    Remove from oven, sprinkle the remaining 1 cup of cheese evenly over the top, and bake for another 2–5 minutes until melty and bubbly.

  5. Slice & serve:
    Cut into breadstick shapes and serve hot.

Quick Notes & Pro Tips

  • Drain thoroughly: Removing excess liquid is key for a firm, non-soggy crust.

  • Cheese swaps: Try a Mexican cheese blend or add a sprinkle of sharp cheddar for a flavor boost.

  • Make it fancy: Add dried rosemary, oregano, or crushed red pepper for extra depth.

Why You’ll Love It

These breadsticks are cheesy, gooey, and perfect for dipping — plus, they sneak in extra veggies without sacrificing flavor.

Serving Suggestions

  • Pair with marinara sauce or garlic butter for dipping.

  • Serve alongside grilled chicken or pasta for a full meal.

Storage & Make-Ahead

  • Refrigerate: Store in an airtight container for up to 3 days.

  • Reheat: Bake at 350°F for 5–7 minutes or use an air fryer to re-crisp.

FAQs

Q: Can I make these ahead of time?
A: Yes! Bake the crust, cool it, and store in the fridge. Add cheese and reheat when ready to serve.

Q: Can I make them dairy-free?
A: Use dairy-free mozzarella and parmesan substitutes — they work well here.

Q: Can I freeze them?
A: Absolutely. Freeze after the first bake, then add cheese and finish baking when ready.

Would you like me to make a “garlic butter version” (brushed with garlic-herb butter before serving) or a “pizza breadstick version” with pepperoni and marinara baked on top?