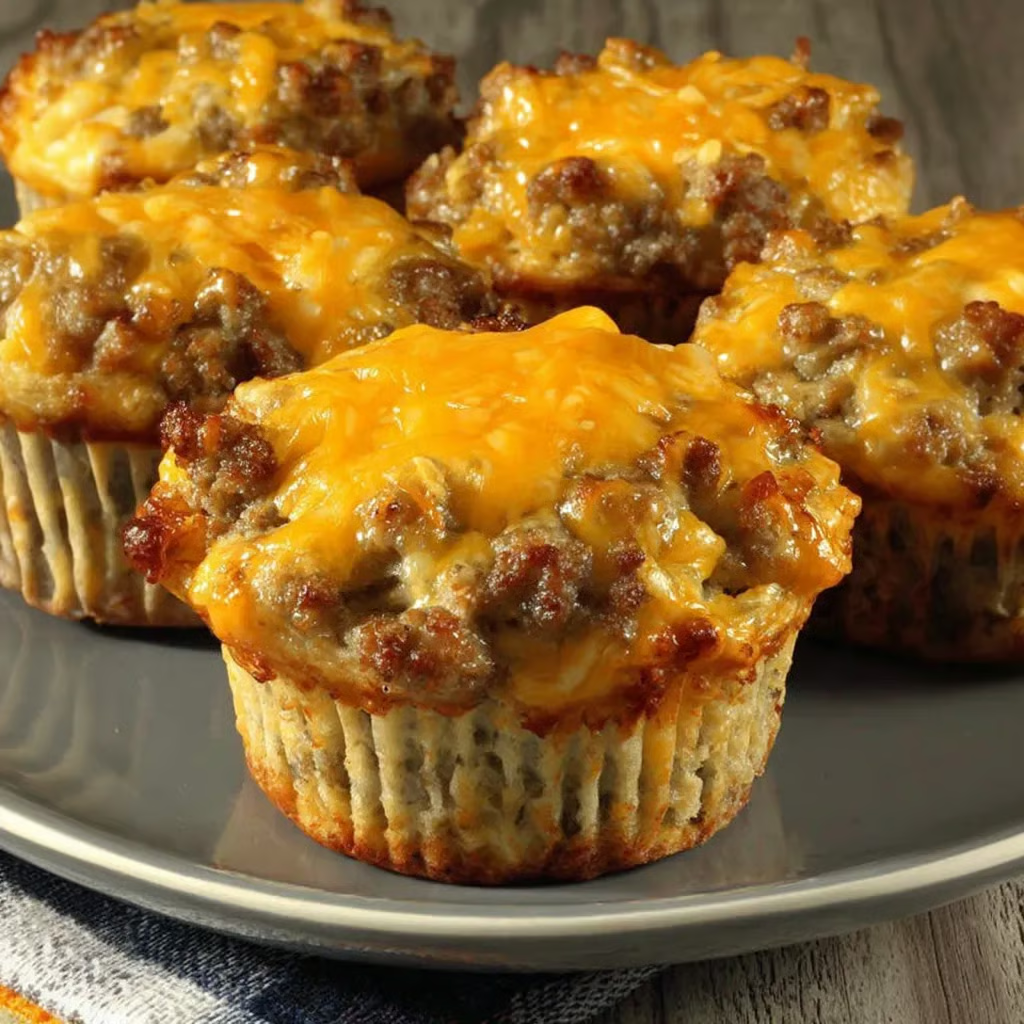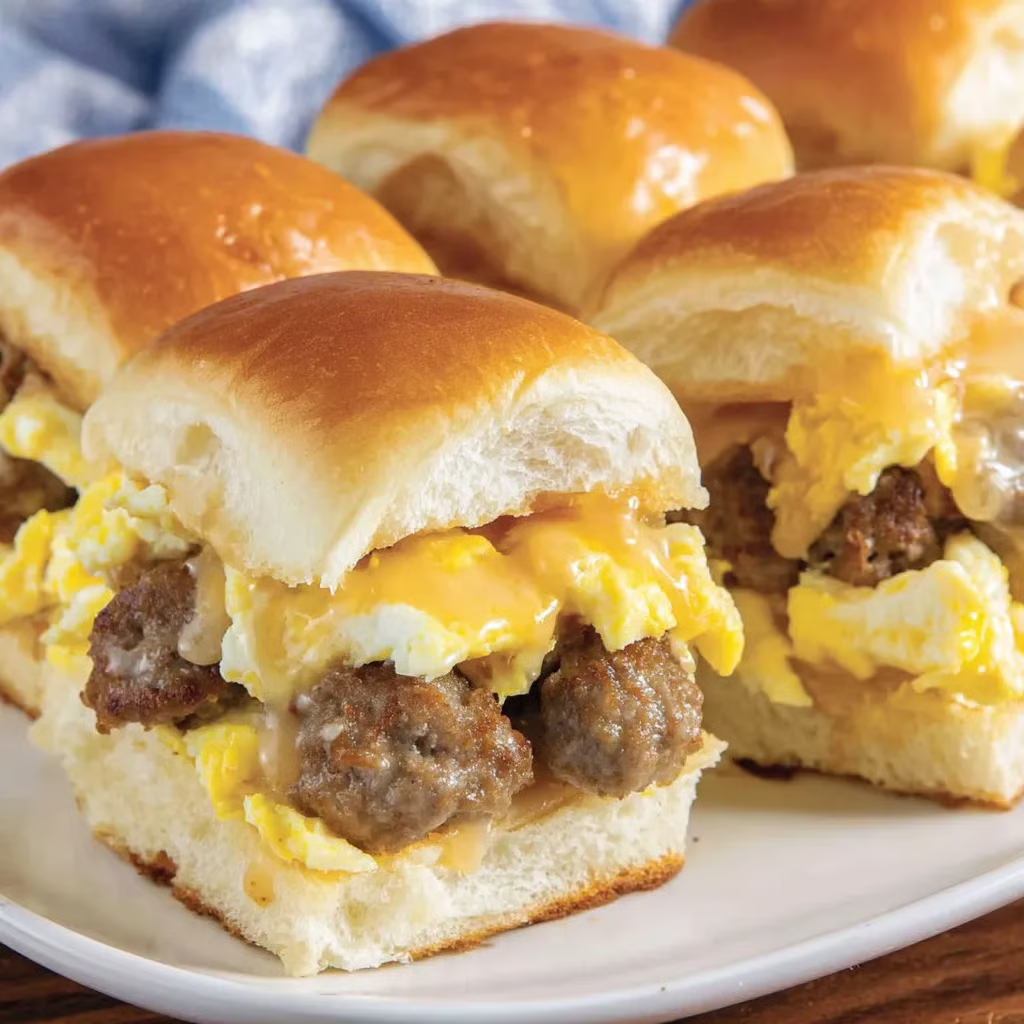
Sausage Breakfast Hawaiian Sliders

Soft Hawaiian rolls layered with fluffy eggs, savory sausage, and melty cheddar — brushed with a maple butter glaze for the ultimate sweet-and-savory breakfast bite.

Servings: 12 sliders
Prep Time: 15 minutes
Cook Time: 20 minutes
Total Time: 35 minutes
Occasion: Breakfast, Brunch, Holidays, Make-Ahead

Ingredients

Main Ingredients

  • 8 large eggs

  • ¼ cup heavy cream

  • Salt and pepper, to taste

  • 1 tablespoon butter

  • 12 sausage patties

  • 2 cups shredded cheddar cheese, divided

  • 1 (12-ounce) package Hawaiian rolls

Glaze

  • 1 tablespoon maple syrup

  • 2 tablespoons melted butter

Instructions

  1. Prep the Dish
    Preheat oven to 350°F (175°C). Lightly grease a 9×13-inch baking dish with nonstick cooking spray.

  2. Scramble the Eggs
    In a large mixing bowl, whisk together eggs, heavy cream, salt, and pepper. Melt 1 tablespoon butter in a large skillet over medium heat, add egg mixture, and scramble until just set. Remove from heat and set aside.

  3. Cook the Sausage
    In the same skillet, cook sausage patties over medium-high heat until fully cooked. Drain on paper towels.

  4. Assemble the Sliders
    Without separating the rolls, slice the loaf horizontally. Place the bottom half of the rolls in the prepared baking dish. Sprinkle with 1 cup shredded cheddar. Layer with scrambled eggs, sausage patties, and remaining cheddar. Top with the top half of the rolls.

  5. Add the Glaze
    In a small bowl, whisk together melted butter and maple syrup. Brush evenly over the tops of the rolls.

  6. Bake
    Bake uncovered for 15–20 minutes, or until cheese is melted and sliders are heated through. Serve warm.

Tips & Variations

  • Make Ahead: Assemble the sliders, cover, and refrigerate overnight. Add glaze just before baking.

  • Cheese Options: Swap cheddar for pepper jack, Swiss, or Colby Jack for a flavor twist.

  • Protein Swap: Try bacon, ham, or plant-based sausage patties.

  • Serving Idea: Perfect for brunch boards alongside fresh fruit and mini pastries.

Tools You’ll Need

  • Large mixing bowls

  • 12-inch non-stick skillet

  • 9×13-inch baking dish

  • Rotary cheese grater or box grater

  • Serrated knife for slicing rolls

If you want, I can group this with your Crack Croissant Breakfast Casserole and Hissy Fit Hash Brown Casserole into a Breakfast Slider & Casserole Party post so it’s an all-in-one brunch guide for readers. That would make a strong themed article for your blog. Would you like me to do that next?
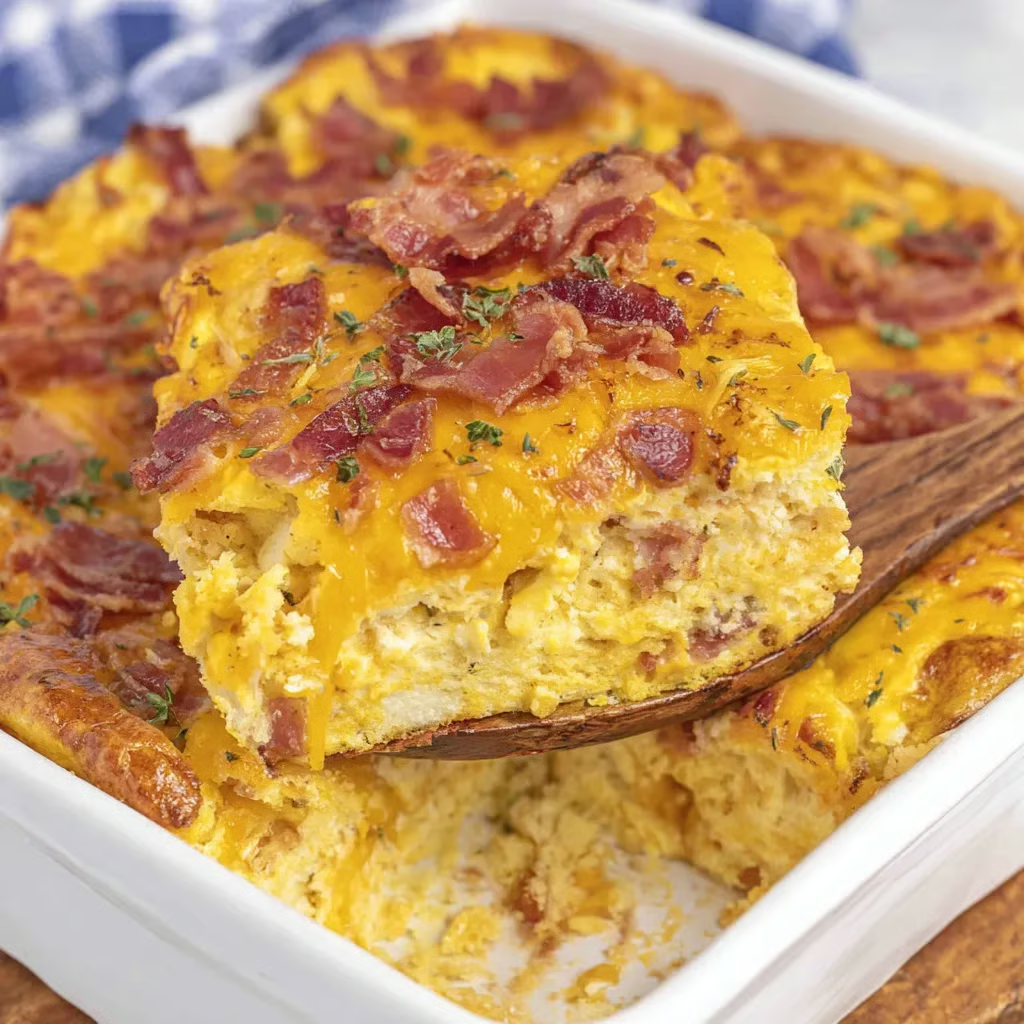
Crack Croissant Breakfast Casserole

Flaky, cheesy, and loaded with crispy bacon — this make-ahead croissant breakfast bake is perfect for holidays, brunch parties, and lazy weekend mornings.

Servings: 6–8
Prep Time: 20 minutes
Cook Time: 60 minutes
Chill Time: 8–24 hours
Total Time: 9–25 hours (including chilling)
Occasion: Breakfast, Brunch, Make-Ahead Meals

Ingredients

Main Ingredients

  • 3 large bakery-style croissants (about 5 inches each), chopped into 10–12 pieces

  • 1 lb bacon, cooked until crispy and crumbled

  • 1½ cups shredded cheddar cheese (or your choice — see tips)

  • 6 large eggs

  • 1 cup half-and-half (or heavy cream/whole milk)

  • 2 Tbsp ranch dressing mix

Instructions

  1. Prep the Croissants
    Chop each croissant into bite-sized pieces. Arrange evenly in a lightly greased 9×9-inch deep baking dish.

  2. Cook the Bacon
    In a skillet over medium-high heat, cook bacon until crispy. Drain excess fat and crumble into small pieces.

  3. Layer the Base
    Sprinkle cooked bacon and shredded cheddar cheese evenly over the chopped croissants.

  4. Make the Egg Mixture
    In a mixing bowl, whisk together eggs, half-and-half, and ranch dressing mix until smooth.

  5. Combine & Chill
    Pour the egg mixture evenly over the croissant mixture. Gently press down on the croissants so they’re fully submerged. Cover tightly with aluminum foil and refrigerate for at least 8 hours (up to 24 hours) to allow flavors to meld.

  6. Bake
    Preheat oven to 325°F (163°C). Bake covered for 35 minutes, then uncover and bake an additional 25 minutes, or until set and lightly golden on top.

  7. Rest & Serve
    Let the casserole rest for 10 minutes before slicing and serving warm.

Tips & Variations

  • Best Croissants: Use large, buttery bakery croissants — avoid refrigerated crescent rolls for best texture.

  • Cheese Swaps: Gouda, Swiss, Gruyere, or pepper jack all work well.

  • Lighter Option: Use turkey bacon for fewer calories.

  • Make-Ahead Friendly: Assemble up to 24 hours in advance and refrigerate until baking.

  • Freezer Option: Wrap tightly and freeze for up to 3 months. Thaw completely before baking.

  • Double It: For larger gatherings, double the recipe and bake in a 9×13-inch dish, adding 10–15 minutes to the cooking time.

Tools You’ll Need

  • 9×9-inch deep baking dish

  • 10-inch skillet

  • Rotary cheese grater or box grater

  • Whisk

  • Aluminum foil

If you’d like, I can also create a Holiday Brunch Casserole Collection post where this recipe is featured alongside your Hissy Fit Hash Brown Casserole and Crack Chicken Tater Tot Casserole so readers can pick from multiple crowd-pleasers in one article. That could make a strong seasonal blog entry. Would you like me to prepare that next?

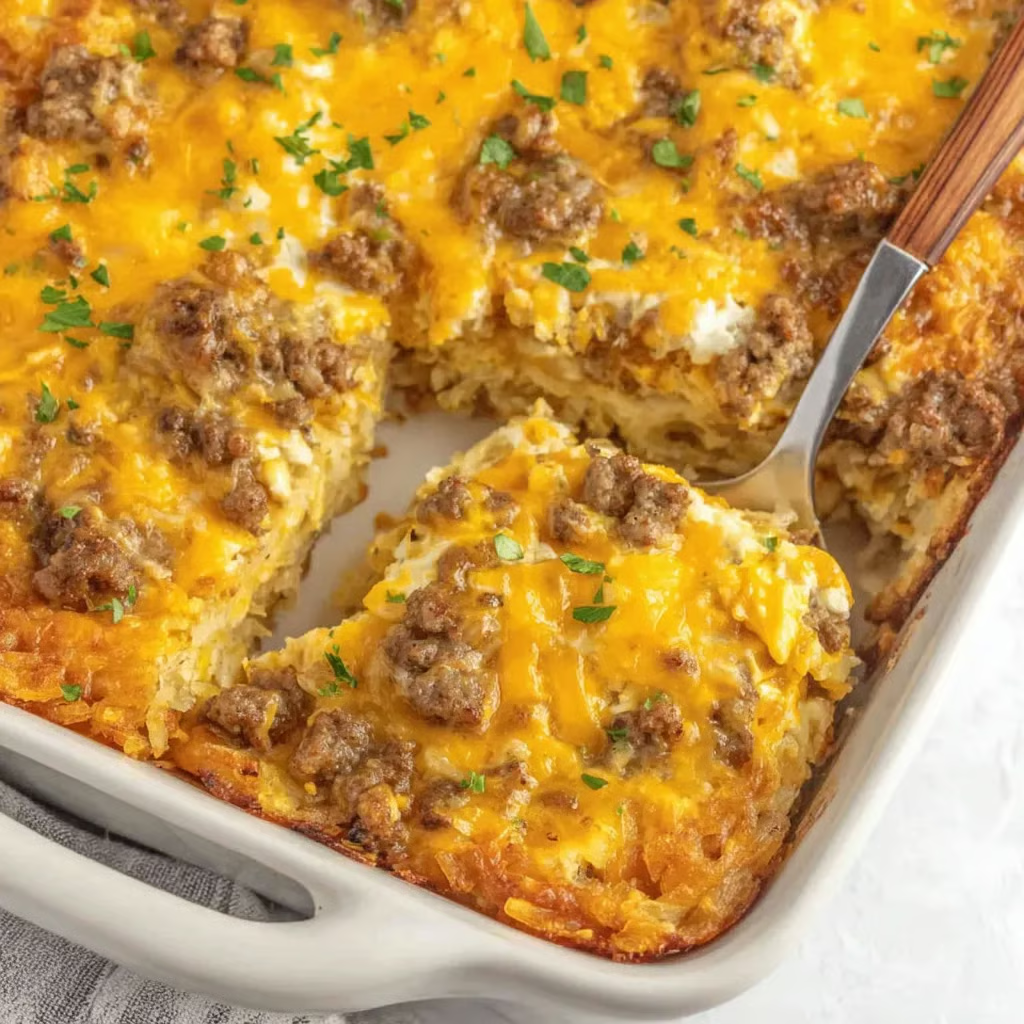
Hissy Fit Hash Brown Casserole

Cheesy, hearty, and packed with savory breakfast sausage — this make-ahead friendly casserole is perfect for brunches, holidays, or busy mornings.

Servings: 8–10
Prep Time: 15 minutes
Cook Time: 45–60 minutes
Total Time: 1 hour–1 hour 15 minutes
Occasion: Breakfast, Brunch, Meal Prep

Ingredients

Casserole Base

  • 2 lb hot breakfast sausage

  • 1 (30–32 oz) bag frozen shredded hash browns, thawed

  • 1 tsp salt

  • ½ tsp pepper

  • ¼ tsp garlic powder

  • ¼ tsp onion powder

  • 1 cup shredded muenster cheese

  • 1 cup shredded Velveeta cheese (or see substitutions below)

Egg Mixture

  • 8 large eggs

  • 2 cups milk

  • 1 Tbsp Worcestershire sauce

Instructions

  1. Preheat & Prep
    Heat oven to 350°F (175°C). Lightly spray a 9×13-inch baking dish with non-stick cooking spray.

  2. Cook the Sausage
    In a large skillet, brown sausage over medium heat until fully cooked. Drain any excess fat and set aside.

  3. Brown the Hash Browns
    In the same skillet, cook thawed hash browns until lightly golden (add a drizzle of oil if needed). Transfer to the prepared baking dish, spreading evenly.

  4. Layer the Casserole
    Top the hash browns with cooked sausage, then sprinkle evenly with both cheeses.

  5. Mix the Egg Custard
    In a large bowl, whisk together eggs, milk, Worcestershire sauce, salt, pepper, garlic powder, and onion powder until well combined.

  6. Assemble & Bake
    Pour the egg mixture evenly over the casserole layers. Bake uncovered for 45–60 minutes, or until the center is set and the top is golden.

  7. Serve
    Let the casserole rest for 5–10 minutes before slicing and serving hot.

Tips & Variations

  • Thaw First: Always thaw frozen hash browns before browning for better texture.

  • Cheese Swap: Try cheddar, colby-jack, gouda, or mozzarella instead of Velveeta.

  • Extra Veggies: Add sautéed bell peppers, mushrooms, or onions for more flavor.

  • Make-Ahead: Assemble the night before, refrigerate, then bake in the morning (add 10–15 minutes to the bake time).

  • Freezer-Friendly: Assemble, wrap tightly, and freeze for up to 3 months. Thaw overnight before baking.

Tools You’ll Need

  • 12-inch non-stick skillet

  • Large mixing bowls

  • 9×13-inch baking dish

  • Whisk

If you want, I can also prepare a “Party Brunch Board” serving suggestion where this casserole is the centerpiece, paired with easy sides and garnishes so it’s presentation-ready for gatherings. That could make this recipe even more engaging for a blog audience. Would you like me to add that?

Delicious Ham and Cheese Quiche

Fluffy eggs, smoky ham, and melty cheese baked in a buttery crust — perfect for breakfast, brunch, or even dinner.

Servings: 6–8 slices
Prep Time: 10 minutes
Cook Time: 35–40 minutes
Total Time: 45–50 minutes
Occasion: Breakfast, Brunch, Easy Dinner

Ingredients

  • 1 store-bought pie crust

  • 4 large eggs

  • 1 cup whole milk

  • 1 cup diced ham (smoked or honey-baked)

  • 1 cup shredded cheddar cheese

  • Salt and pepper, to taste

  • Optional: 1 cup fresh spinach or ½ cup diced bell peppers

Instructions

  1. Preheat & Prep the Crust
    Heat oven to 375°F (190°C). Gently unroll the pie crust into a 9-inch pie plate, pressing it into place. Crimp the edges if desired.

  2. Make the Egg Mixture
    In a medium mixing bowl, whisk eggs and milk together until light and frothy. Season with salt and pepper.

  3. Add the Fillings
    Fold in the diced ham, shredded cheddar cheese, and optional vegetables.

  4. Assemble the Quiche
    Pour mixture into the prepared pie crust, spreading it evenly.

  5. Bake
    Bake for 35–40 minutes, or until the center is set and the top is golden brown.

  6. Cool & Serve
    Allow quiche to cool for about 10 minutes before slicing. Serve warm or at room temperature.

Chef’s Tips

  • For a richer flavor, swap half the milk for heavy cream.

  • Pre-sauté spinach or peppers to remove extra moisture before adding to the filling.

  • This quiche reheats well in the oven at 300°F for 10–15 minutes.

Storage

  • Refrigerate: Store covered in the fridge for up to 4 days.

  • Freeze: Wrap slices individually in foil and store up to 2 months. Reheat from frozen at 350°F for 20–25 minutes.

Serving Ideas

  • Pair with a light side salad for brunch.

  • Serve with roasted potatoes or fresh fruit for a complete breakfast spread.

If you’d like, I can also prepare 5 quiche flavor variations so your readers can easily adapt this recipe for different tastes and seasons. That would make this post more versatile for your blog. Would you like me to create that next?

Sausage Breakfast Muffins with Bisquick

Savory, cheesy, and protein-packed — the perfect make-ahead breakfast you can grab and go!

Servings: 12 muffins
Prep Time: 10 minutes
Cook Time: 18–20 minutes
Total Time: 30 minutes
Occasion: Quick Breakfast, Brunch, Meal Prep

Ingredients

Main Ingredients

  • 1 pound breakfast sausage

  • 4 large eggs

  • 1 cup shredded sharp Cheddar cheese

  • 1 cup Bisquick baking mix

Instructions

  1. Prep the Oven & Pan:
    Preheat oven to 175°C (350°F). Grease a 12-cup muffin pan with non-stick spray and set aside.

  2. Cook the Sausage:
    Crumble breakfast sausage into a skillet over medium-high heat. Cook until no longer pink, about 5–7 minutes. Drain excess fat and set aside to cool slightly.

  3. Mix the Batter:
    In a large mixing bowl, lightly beat the eggs. Add shredded cheese, Bisquick, and cooked sausage. Stir until fully combined.

  4. Fill & Bake:
    Divide the mixture evenly into muffin cups, filling each about ¾ full. Bake for 18–20 minutes, or until golden brown on top and set in the center.

  5. Cool & Serve:
    Let muffins cool slightly before removing from the pan. Serve warm or refrigerate for later.

Brief Introduction

These savory breakfast muffins are a busy-morning lifesaver. Packed with sausage, eggs, and cheese, they’re satisfying, portable, and perfect for meal prepping ahead of time.

Step-by-Step Cooking Guide

  • Step 1: Use a well-greased muffin pan to prevent sticking — sausage and cheese can release oils as they bake.

  • Step 2: Allow sausage to cool slightly before mixing with eggs to avoid scrambling them.

  • Step 3: Watch closely near the end of baking to prevent overbrowning.

Ingredient Details & Substitution Tips

  • Sausage: Use pork, turkey, or chicken breakfast sausage. For extra spice, choose hot sausage.

  • Cheese: Sharp cheddar gives the best flavor, but you can substitute with pepper jack, Swiss, or Colby.

  • Bisquick: Can be swapped for other all-purpose baking mixes.

Recipe Variations & Serving Suggestions

  • Veggie Boost: Stir in chopped spinach, bell peppers, or mushrooms.

  • Mini Version: Bake in a mini muffin tin for bite-sized snacks — reduce bake time to about 12 minutes.

  • Freezer-Friendly: Cool completely, freeze, and reheat in the microwave for quick breakfasts.

Storage & Make-Ahead Information

  • Refrigerate: Store in an airtight container for up to 4 days.

  • Freeze: Freeze up to 3 months; thaw overnight in the fridge before reheating.

Nutrition Facts (per muffin, approx.)

Calories: ~180 | Protein: 9g | Carbs: 6g | Fat: 13g | Fiber: 0g | Sugar: 1g

FAQs

Q: Can I make these without Bisquick?
A: Yes, replace with 1 cup flour, 1½ tsp baking powder, and ¼ tsp salt.

Q: How do I keep them from drying out?
A: Avoid overbaking and store in an airtight container once cooled.

Personal Story

I first made these for a Saturday brunch when I didn’t feel like flipping pancakes or frying bacon. My family devoured them before I even got a second cup of coffee — they’ve been a weekend staple ever since.

If you’d like, I can also prepare a “3-in-1 Breakfast Muffin Trio” section for your blog so readers get a sausage version, a veggie version, and a sweet muffin option all in one post. That would make this recipe even more appealing. Want me to put that together?

Garlic Butter Beef and Rice

A one-pan comfort classic — tender rice, savory beef, and a silky garlic butter cheese sauce come together for an easy, hearty dinner.

Servings: 4–6
Prep Time: 10 minutes
Cook Time: 30 minutes
Total Time: 40 minutes
Dietary Badges: Contains Dairy, Contains Gluten-Free Option (with GF broth)

Ingredients

Main Ingredients

  • Ground beef (450g)

  • Long-grain white rice, uncooked (200g)

  • Low-sodium beef broth (720ml)

  • Small onion, diced

  • Garlic cloves, minced

Dairy and Cheese

  • Butter, divided (45g total)

  • Sharp cheddar cheese, shredded (120g)

  • Parmesan cheese, freshly grated (50g)

  • Whole milk (120ml)

Seasoning and Garnish

  • Salt, to taste

  • Black pepper, to taste

  • Italian seasoning (1 tsp)

  • Fresh parsley, chopped (2 tbsp, optional garnish)

Instructions

  1. Sauté Onions: In a large skillet over medium heat, melt 15g butter. Add diced onion and cook 3–4 minutes until translucent.

  2. Brown Beef: Add ground beef and cook, breaking apart with a spoon, until browned. Drain excess fat if needed.

  3. Add Garlic: Stir in minced garlic; cook 1 minute until fragrant.

  4. Add Rice & Liquid: Stir in uncooked rice, beef broth, Italian seasoning, salt, and pepper. Mix well so rice is evenly coated.

  5. Simmer: Bring to a boil, then reduce heat to low, cover, and simmer 18–20 minutes until rice is tender and most liquid absorbed. Avoid lifting the lid too often.

  6. Make Cheese Sauce: While rice cooks, melt remaining 30g butter in a small saucepan over low heat. Add milk, cheddar, and Parmesan, stirring constantly until smooth.

  7. Combine: Pour cheese sauce into skillet with beef and rice; stir until creamy and fully combined.

  8. Finish & Serve: Cook uncovered 2–3 minutes for flavors to meld. Garnish with parsley and serve hot.

Notes:

  • For extra flavor, toast the uncooked rice in the skillet for 1–2 minutes before adding broth.

  • Add veggies like diced bell peppers, mushrooms, or peas for variety.

Brief Introduction

This garlic butter beef and rice is comfort food at its finest — one pan, simple steps, and flavors that hit all the right notes. The creamy cheese sauce elevates it from weeknight meal to irresistible family favorite.

Step-by-Step Cooking Guide

Building the Base

  1. Onion & Beef: Create a savory foundation with sautéed onions and browned beef.

  2. Garlic Boost: Add minced garlic for that warm, aromatic kick.

Cooking the Rice

  1. Simmer to Tender: Let rice absorb broth and seasonings for a flavorful, fluffy finish.

Cheese Sauce Magic

  1. Low & Slow: Melt butter, milk, cheddar, and Parmesan over low heat, whisking constantly until smooth.

Final Blend

  1. Creamy Finish: Stir the sauce into the beef-rice mix and serve while hot and melty.

Ingredient Details & Substitution Tips

  • Beef: Use lean beef for less grease; ground turkey or chicken works too.

  • Rice: Long-grain holds its shape best; jasmine adds a subtle floral note.

  • Cheddar & Parmesan: Freshly shredded melts smoother than pre-packaged.

  • Milk: Swap with half-and-half for richer sauce.

  • Italian Seasoning: Use fresh herbs for a brighter flavor.

Recipe Variations & Serving Suggestions

  • Veggie Boost: Stir in spinach or broccoli before adding cheese sauce.

  • Spicy Kick: Add red pepper flakes or diced jalapeños.

  • Serving Ideas: Serve with a simple side salad or garlic bread.

Storage & Make-Ahead Information

  • Refrigeration: Store in airtight container for up to 4 days.

  • Freezing: Freeze in portions up to 2 months; thaw before reheating.

  • Reheating: Microwave gently, stirring occasionally; add a splash of milk if needed.

  • Make-Ahead: Cook rice and beef mixture ahead; reheat with fresh cheese sauce.

Nutrition Facts (per serving, 6 servings)

Calories: ~430 kcal | Carbs: 32g | Protein: 22g | Fat: 24g | Sodium: 640mg

FAQs

Q: Can I use brown rice?
A: Yes, but increase broth to 900ml and simmer for 35–40 minutes.

Q: Can I skip the cheese sauce?
A: Yes — you’ll have a flavorful garlic butter beef and rice without the creamy element.

Q: How do I keep the sauce smooth?
A: Use low heat and constant stirring to prevent separation or graininess.

Personal Story

I first made this dish as a quick dinner after a busy workday. The cheesy garlic butter sauce was a last-minute addition — and it turned a simple beef and rice skillet into something that tasted like a hug in a bowl.

If you want, I can also create step-by-step photo captions so this is fully ready for the “visual guide” section of your blog posts. Would you like me to prepare those?