The “Ultimate” Lean Chicken Salad

The “Ultimate” Lean Chicken Salad

Prep time: 15 minutes | Servings: 4–6 | Great for: Sandwiches, wraps, or over greens.

Ingredients

The Base:

  • 1 lb Chicken breast, cooked and shredded (poached or rotisserie-style works best)

  • ½ cup Celery, finely diced (adds a necessary crunch)

  • ¼ cup Red onion, finely minced

  • 2 tbsp Fresh cilantro or flat-leaf parsley, chopped

The Creamy Dressing:

  • 1 cup Non-fat plain Greek yogurt (this replaces mayo for a high-protein, tangy base)

  • 1 tbsp Dijon mustard

  • 1 tbsp Fresh lemon juice

  • ½ tsp Garlic powder

  • Salt and black pepper to taste

Optional Mix-ins:

  • ½ cup Grapes, halved (for a touch of sweetness)

  • 1 Small jalapeño, seeded and minced (if you like a little heat)


Instructions

  1. Prepare the Chicken: If you are cooking the chicken fresh, poach it in simmering water with a pinch of salt for 12–15 minutes until opaque throughout. Let it cool slightly, then shred using two forks or a hand mixer.

  2. Mix the Dressing: In a small bowl, whisk together the Greek yogurt, Dijon mustard, lemon juice, garlic powder, salt, and pepper until completely smooth.

  3. Combine: In a large mixing bowl, toss the shredded chicken with the celery, onion, and fresh herbs.

  4. Fold and Coat: Pour the dressing over the chicken mixture. Fold gently until everything is evenly coated. If the salad feels too dry, add an extra tablespoon of Greek yogurt.

  5. Chill: For the best flavor, cover and refrigerate for at least 30 minutes before serving. This allows the dressing to penetrate the chicken and the flavors to meld.


Meal Prep Tips

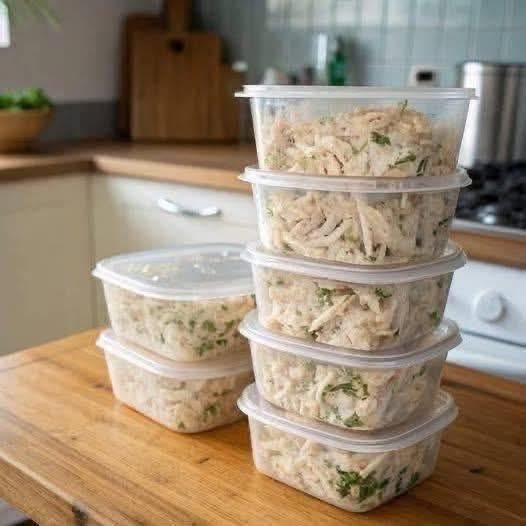
  • Storage: This salad stays fresh in airtight containers (like those in your photo) for up to 4 days in the refrigerator.

  • The “Zero Point” Secret: By using Greek yogurt instead of mayonnaise, you significantly reduce the fat and calorie content while adding a massive boost of protein.

  • Serving Ideas: Serve a scoop inside a large hollowed-out bell pepper, wrapped in large butter lettuce leaves, or simply on its own with a few whole-grain crackers.


The Surprising Health Benefits of Boiled Eggs

The Surprising Health Benefits of Boiled Eggs

  Boiled eggs have been a staple in human diets for centuries. Their simplicity, versatility, and impressive nutritional profile make them one of the most complete and affordable foods available. But beyond their convenience, doctors and nutrition experts are now highlighting that regularly eating boiled eggs can deliver an array of powerful health benefits.

For years, eggs were unfairly criticized due to their cholesterol content. However, recent research has turned that perception around, revealing that moderate egg consumption can actually support heart health, brain function, and more. Let’s dive into why the humble boiled egg deserves a regular spot on your plate.


1. A Natural Protein Powerhouse

Each boiled egg contains about 6 grams of high-quality protein — the kind your body can absorb and use efficiently. Protein is essential for muscle repair, tissue growth, and hormone production. Including boiled eggs in your daily meals helps preserve lean muscle mass, especially as you age. Athletes, fitness enthusiasts, and anyone looking to boost recovery or stay energized can benefit from this simple, nutrient-dense food.


2. Protects Eye Health

Boiled eggs are rich in lutein and zeaxanthin, two antioxidants that play a crucial role in maintaining good vision. These compounds help prevent damage from blue light and reduce the risk of cataracts and age-related macular degeneration — common causes of vision loss in older adults. Adding just one or two boiled eggs to your daily routine is a simple and effective way to protect your eyesight naturally.


3. Supports Brain Function and Memory

Eggs are one of the best natural sources of choline, a nutrient vital for brain health. Choline helps produce acetylcholine, a neurotransmitter responsible for learning, focus, and memory. Studies suggest that sufficient choline intake can reduce the risk of cognitive decline as you age. That makes boiled eggs an excellent choice for students, professionals, and older adults alike.


4. Helps Control Appetite and Weight

Thanks to their protein and healthy fat content, boiled eggs are highly satisfying and can keep you full for hours. Eating them for breakfast or as a snack can reduce overall calorie intake and help prevent cravings. This makes them ideal for those aiming to manage their weight naturally — no extreme diets required. Replacing processed snacks with a couple of boiled eggs can make a noticeable difference in your daily energy levels and hunger control.


5. Packed with Essential Nutrients

Boiled eggs provide a concentrated source of key vitamins and minerals your body needs every day. They’re loaded with:

  • Vitamin B12, which supports red blood cell production and energy metabolism.

  • Vitamin D, essential for bone health and immune support.

  • Selenium, a powerful antioxidant that protects your cells from oxidative stress.

This nutrient combination helps strengthen your immune system, support thyroid function, and promote overall well-being.


Final Thoughts

Boiled eggs are more than just a breakfast favorite — they’re a true superfood that deserves more recognition. Whether you’re looking to boost your protein intake, sharpen your mind, protect your eyes, or simply eat healthier, adding boiled eggs to your diet is a smart move.

Enjoy them as part of a balanced breakfast, in salads, or as a quick post-workout snack. Simple, affordable, and packed with nutrients, boiled eggs prove that sometimes, the healthiest foods are the ones we’ve had all along.

Cucumber and Mint Wellness Water

Cucumber and Mint Wellness Water

Prep time: 10 minutes | Servings: 1-2

Ingredients

  • 1 large Cucumber: Sliced into thin rounds. Cucumbers are highly hydrating and contain antioxidants.

  • 1 medium Lemon: Sliced into rounds. Lemons are a great source of Vitamin C.

  • 1 small piece of Fresh Ginger (1 inch): Peeled and thinly sliced. Ginger is often used to soothe the digestive system.

  • 5-10 Fresh Mint Leaves: Slightly bruised to release their natural oils.

  • 4 cups Filtered Water: The base for your infusion.

  • Ice cubes: For serving.


Detailed Directions

1. Prepare the Produce

  • Wash the cucumber, lemon, and mint leaves thoroughly under cold water.

  • Slice the cucumber and lemon into thin, even rounds.

  • Peel the ginger and slice it into thin coins to maximize the surface area for infusion.

2. Assemble the Drink

  • In a large glass pitcher or individual jars, add the cucumber slices, lemon slices, and ginger.

  • Take the fresh mint leaves and gently press or “clap” them between your hands before adding them to the container; this helps release the aromatic oils.

3. Infuse

  • Pour the 4 cups of filtered water over the ingredients.

  • Stir gently with a long spoon to combine.

  • For the best flavor, place the pitcher in the refrigerator and let it steep for at least 1 to 2 hours. For a more intense flavor, you can let it infuse overnight.

4. Serve

  • Fill a glass with ice cubes.

  • Pour the chilled water over the ice, ensuring a few slices of cucumber and lemon make it into the glass for a beautiful presentation.

  • Enjoy this refreshing drink throughout the day to stay hydrated.


Success Tips

  • Refill as You Go: You can refill the pitcher with water 2–3 times using the same ingredients before the flavor begins to fade.

  • Freshness: For the best taste and nutrient profile, prepare a fresh batch every 24 hours.

Cucumber & Citrus Infused Water

Cucumber & Citrus Infused Water

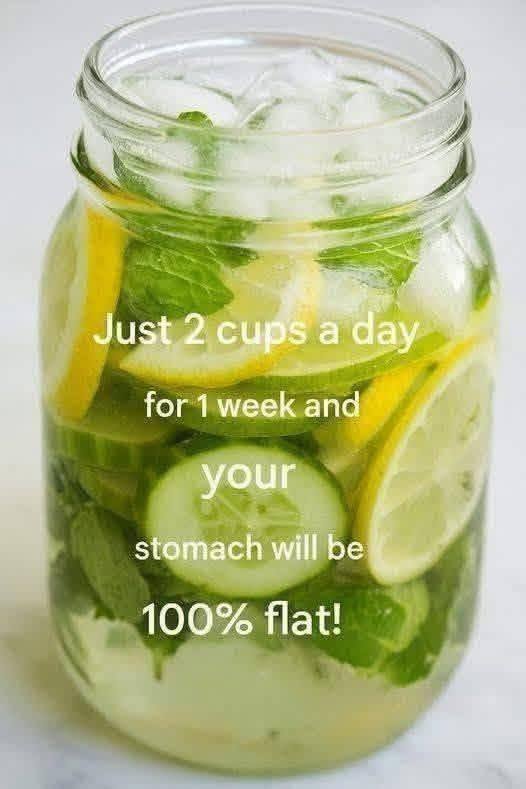
This refreshing drink is a fantastic way to enjoy the natural flavors of cucumber, lemon, and mint. While it’s often called a “detox” water, its real power lies in keeping you hydrated and providing a small boost of Vitamin C from the citrus.

Ingredients

  • Hydration Base: 8 cups (2 liters) of filtered water

  • Crisp Flavor: 1 large cucumber (thinly sliced)

  • Zest: 1 lemon (thinly sliced) and 1 lime (optional, thinly sliced)

  • Freshness: A handful of fresh mint leaves

  • Chill: 1–2 cups of ice


Detailed Step-by-Step Instructions

1. Prepare Your Produce

  • Thoroughly wash the cucumber, lemon, lime, and mint leaves under cool running water. Since these will be soaking in your water for hours, you want to ensure the skins are clean.

2. Slice Evenly

  • Use a sharp knife or a mandoline to slice the cucumber and citrus fruits into thin rounds. Thin slices allow more of the natural juices and oils to infuse into the water quickly.

3. Awaken the Mint

  • Take the mint leaves and gently “slap” them between your palms or bruise them slightly with the back of a spoon before adding them to the container. This releases the essential oils for a stronger aroma.

4. Combine

  • Place the cucumber slices, lemon, lime, and mint into a large glass pitcher or a 2-liter mason jar.

5. Add Water and Ice

  • Pour the 8 cups of water over the ingredients. Top with ice if you plan on serving it immediately.

6. The Infusion Process

  • For the best flavor, place the pitcher in the refrigerator and let it steep for at least 2 to 4 hours. This gives the ingredients time to flavor the water deeply.

7. Serving and Refilling

  • Serve chilled in a glass. You can keep refilling the pitcher with water throughout the day using the same fruit, though the flavor will become milder with each refill.


Helpful Success Tips

  • Bitterness Note: If you plan on keeping the water for more than 24 hours, it is best to remove the lemon and lime slices after about 4 hours. The white pith (the skin) of citrus can start to make the water taste bitter if left too long.

  • Keep it Fresh: Always store the infusion in the refrigerator and consume it within 2 days for the best taste and quality.

A Quick Note on Wellness

While this drink is a wonderful addition to a healthy lifestyle and can help reduce bloating by improving hydration, there is no single drink that can make a stomach “100% flat” on its own. True wellness comes from a balanced mix of nutrition, movement, and plenty of water!

Savory Cabbage & Egg Pancakes

Savory Cabbage & Egg Pancakes

Based on your second image, these are fantastic for a quick, nutritious breakfast or snack.

Ingredients

  • Base: 2 cups finely shredded cabbage.

  • Protein: 4 large eggs.

  • Binding: 3–4 tbsp flour (all-purpose or oat flour).

  • Seasoning: A pinch of salt, black pepper, and optional red chili flakes.

  • Oil: 1–2 tbsp vegetable oil for pan-searing.

Step-by-Step Instructions

  1. Prep the Cabbage: Shred the cabbage very thinly so it cooks quickly and evenly.

  2. Mix: In a large bowl, combine the shredded cabbage and the 4 eggs. Stir well until the cabbage is thoroughly coated.

  3. Season and Bind: Add your salt, pepper, and flour. Mix until the flour disappears and creates a light batter that holds the cabbage together.

  4. Heat the Pan: Add oil to a non-stick skillet over medium heat.

  5. Form Pancakes: Scoop about 1/4 cup of the mixture into the pan for each pancake. Flatten them slightly with a spatula.

  6. Cook: Sear for 3–4 minutes on each side. They are ready when they are golden brown and firm to the touch.

  7. Serve: Enjoy them plain or with a side of Greek yogurt or soy sauce for dipping.

Fresh Cucumber Lemonade

Fresh Cucumber Lemonade

A crisp, zesty beverage perfect for hot afternoons or as a bright addition to brunch.

  • Prep time: 15 minutes

  • Servings: 4–6 glasses

Ingredients

  • 2 large cucumbers, peeled and chopped

  • 1 cup fresh lemon juice (approx. 4–6 lemons)

  • 1/2 cup honey or sugar (adjust to your preferred sweetness)

  • 4 cups cold water

  • Ice cubes

  • Garnish: Fresh lemon slices, cucumber rounds, and mint sprigs


Detailed Directions

  1. Puree the Cucumber: Place the peeled and chopped cucumber pieces into a blender with 1 cup of the cold water. Blend on high until completely smooth and liquefied.

  2. Strain (Optional): If you prefer a clear lemonade, pour the cucumber puree through a fine-mesh sieve or nut milk bag into a large pitcher to remove the pulp. For a more fiber-rich “agua fresca” style, you can skip this step.

  3. Mix the Base: To the pitcher, add the fresh lemon juice and your choice of sweetener (honey or sugar). Stir vigorously until the sweetener is fully dissolved.

  4. Dilute: Pour in the remaining 3 cups of cold water and stir well to combine.

  5. Adjust to Taste: Give it a quick taste. If it’s too tart, add another tablespoon of sweetener. If it’s too sweet, add a splash more lemon juice or water.

  6. Chill and Garnish: Add plenty of ice cubes to the pitcher. Toss in a few lemon slices and cucumber rounds for a beautiful presentation.

  7. Serve: Pour into glasses and top with a sprig of fresh mint for an extra burst of aroma.