Rustic No Knead Rosemary Garlic Bread

Rustic No Knead Rosemary Garlic Bread

Table of Contents

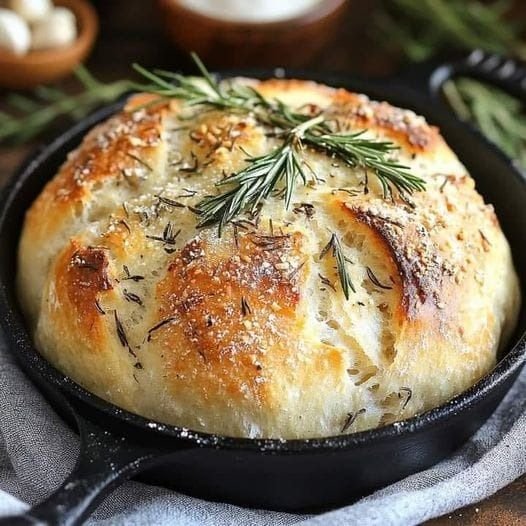
This rustic no-knead rosemary garlic bread is warm, crusty, and flavorful the type of home-cooked comfort food that fills your house with a heady scent. Without the need for kneading or laborious procedures, this loaf, infused with aromatic rosemary and roasted garlic, has a golden, crackly top and a delightfully chewy centre. It’s the perfect addition to stews and soups, or it may be spread with butter for a delicious bite.

Ingredients:

3 cups all-purpose flour

3 cloves garlic, minced

1 tablespoon finely chopped fresh rosemary, or more, to taste

1 ¼ teaspoons kosher salt

¾ teaspoon freshly ground black pepper

½ teaspoon instant yeast

1 ½ cups water, at room temperature

2 tablespoons cornmeal

Directions:

In a large bowl, combine flour, garlic, rosemary, salt, pepper, and yeast.

Using a wooden spoon or your hand, add water and mix until a wet, sticky dough forms, about 30 seconds.

Cover the bowl tightly with plastic wrap and let stand at room temperature until the surface is dotted with bubbles, about 18 to 24 hours.

Lightly oil a 10-inch cast iron skillet or coat with nonstick spray; sprinkle with cornmeal.

Working on a lightly floured surface, gently shape the dough into a round.

Place the dough into the prepared skillet.

Cover with a clean dishtowel and let stand at room temperature until the dough has doubled in size and does not readily spring back when poked with a finger, about 2 hours.

Preheat oven to 450 degrees F. Place into oven and bake until golden brown, about 30-40 minutes.

See also  Easy Crispy Air Fryer Cod Recipe

Air Fryer Method:

Preheat air fryer to 375°F (190°C).

Punch down dough and shape into a round or oblong loaf.

Place loaf in air fryer basket, lined with parchment paper.

Drizzle olive oil over loaf and sprinkle with garlic, rosemary, and Parmesan cheese (if using).

Cook for 15-20 minutes or until bread is golden brown and sounds hollow when tapped.

Let cool on wire rack for 10-15 minutes before slicing.

Air Fryer Tips:

– Use parchment paper to prevent sticking.

– Rotate loaf halfway through cooking.

– Adjust cooking time based on air fryer model.
Servings: 8 servings Enjoy!

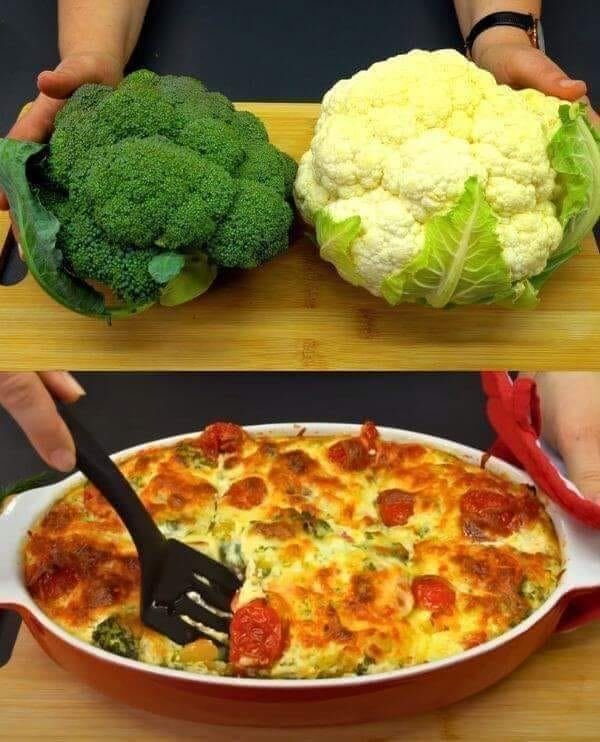
Creamy Broccoli & Cauliflower Bake

Creamy Broccoli & Cauliflower Bake

Prep time: 15 mins | Cook time: 30 mins | Servings: 6-8

Ingredients

  • Vegetables: 900g broccoli, 450g cauliflower.

  • Aromatics: 1 onion, 1 carrot, 1 bell pepper, 1 garlic clove.

  • Liquid & Seasoning: 5 cups milk, salt to taste, 2 tablespoons olive oil, parsley to taste.

  • Topping: 200g red cherry tomatoes.

  • Note: For the cheesy topping seen in the photo, you will also need about 1-2 cups of shredded mozzarella or cheddar cheese.


Step-by-Step Instructions

1. Prepare the Vegetables

  • Wash the broccoli and cauliflower thoroughly.

  • Cut them into bite-sized florets.

  • Steam or boil the florets in lightly salted water for about 5 minutes until they are tender-crisp. Drain well and place them into a large baking dish.

2. Sauté the Aromatics

  • Finely dice the onion, carrot, and bell pepper. Mince the garlic.

  • Heat the olive oil in a pan over medium heat. Add the onion and sauté until translucent.

  • Add the carrot, bell pepper, and garlic. Cook for another 3–4 minutes until softened.

3. Create the Creamy Base

  • In a large bowl, whisk the 5 cups of milk with salt and parsley.

  • If you prefer a thicker sauce, you can whisk 3 tablespoons of flour into the milk before heating it gently in a saucepan until it slightly thickens.

  • Stir your sautéed vegetables into this milk mixture.

4. Assemble the Bake

  • Pour the creamy mixture over the broccoli and cauliflower in the baking dish.

  • Arrange the 200g of cherry tomatoes on top.

  • Sprinkle a generous layer of shredded cheese over the entire surface to achieve the golden crust shown in the picture.

5. Bake

  • Preheat your oven to 200°C (400°F).

  • Bake for 20–25 minutes, or until the sauce is bubbling and the cheese is melted and browned into a beautiful crust.

6. Serve

  • Let the dish rest for 5 minutes before serving to allow the sauce to set.


Pro-Tip

To make it even more “melt-in-your-mouth,” ensure the broccoli and cauliflower are drained very well after boiling so the extra water doesn’t thin out your creamy milk sauce.

How delicious is that, crispy cauliflower from the oven

Discover the joy of turning a simple head of cauliflower into a crispy, golden delight with this easy-to-follow recipe. Perfect as a healthy snack, a savory side dish, or a tasty appetizer, this crispy oven-baked cauliflower is sure to impress with its delicious flavor and satisfying crunch. If you find yourself loving this recipe, don’t hesitate to share your thoughts in the comments!

Ingredients:

1 head of cauliflower

Salt, to taste

A pinch of nutmeg

For the Batter:

50g wheat flour

A dash of sweet paprika powder

2 eggs

40g butter, melted

2 cloves garlic, minced

A bit of grated nutmeg

A pinch of salt

Preparation:

Prep the Cauliflower:
Rinse the cauliflower head thoroughly under cold water.

Carefully break it down into florets.

In a large pot of boiling water seasoned with salt and a pinch of nutmeg, cook the cauliflower florets until al dente. This should take about 5-7 minutes.

Remove the florets with a slotted spoon and let them steam dry or pat dry with a kitchen towel to remove excess moisture.

Prepare the Batter:

In a mixing bowl, whisk together the eggs and melted butter until frothy.

Add in the minced garlic, salt, paprika, a touch of nutmeg, and gradually sift in the wheat flour. Stir everything together until you achieve a smooth, consistent batter.

Coat the Cauliflower:

Once the cauliflower florets have cooled slightly and are manageable to touch, dip and roll them in the prepared batter. Make sure each floret is evenly coated.

Bake:

Preheat your oven to 190°C (375°F) with the setting on both upper and lower heat.

Arrange the batter-coated cauliflower florets on a greased baking tray, ensuring they are spaced out evenly.

Bake in the preheated oven on the middle rack for about 20 minutes, or until the florets are golden brown and crispy.

Serve:

Once done, remove the tray from the oven and let the cauliflower cool for a few minutes before serving. This allows the florets to crisp up even further.

Enjoy your crispy oven-baked cauliflower as is, or pair it with your favorite dipping sauce for an extra flavor kick. Whether you’re serving this to guests, enjoying it as a nutritious snack, or adding it as a side to your main meal, this cauliflower recipe is a delicious way to incorporate more veggies into your diet. Don’t forget to share your experience and any personal twists you added to the recipe in the comments below

Rainbow Garden Vegetable Soup

Rainbow Garden Vegetable Soup

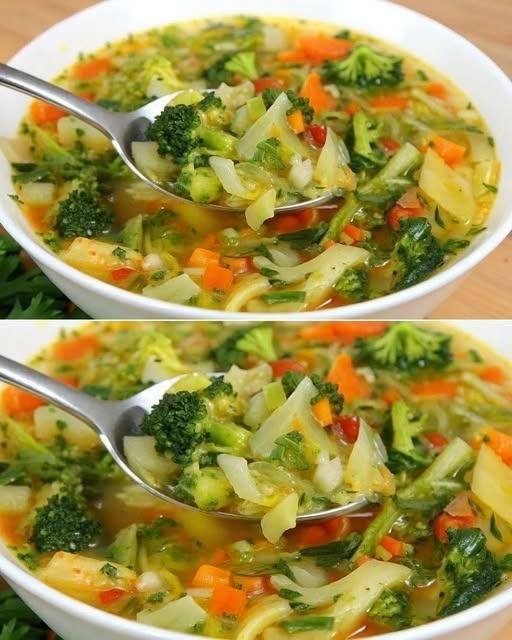
This recipe focuses on maintaining the bright colors and crisp-tender textures seen in your photo.

Ingredients

Category Ingredients
The Base 1 tbsp Olive Oil, 1 medium Onion (finely diced), 2 cloves Garlic (minced)
The Colors 2 large Carrots (diced), 2 stalks Celery (sliced), 1 cup Broccoli florets (cut small)
The Hearty Bits 1 large Potato (peeled and cubed), 1 cup Green Cabbage (shredded or chopped)
The Liquid 6–8 cups Low-sodium Vegetable Broth or Filtered Water
The Seasoning 1 tsp Sea Salt, ½ tsp Black Pepper, 1 tsp Dried Oregano or Italian Seasoning
The Fresh Finish ¼ cup Fresh Parsley (finely chopped), a squeeze of fresh Lemon juice

Step-by-Step Instructions

1. Sauté the Foundation

In a large pot, heat the olive oil over medium heat. Add the onion and celery. Sauté for about 5 minutes until the onions are soft and translucent. Stir in the garlic and cook for 1 minute more until fragrant.

2. Add Hearty Vegetables

Add the diced carrots and cubed potatoes to the pot. Stir them into the aromatics for 2–3 minutes. This light “toasting” helps the vegetables hold their shape during the simmering process.

3. Simmer the Broth

Pour in the vegetable broth or water. Add the salt, pepper, and dried herbs. Bring the mixture to a gentle boil, then reduce the heat to low. Cover and simmer for 15 minutes, or until the potatoes are just beginning to soften.

4. Add the Delicate Greens

Stir in the shredded cabbage and the small broccoli florets. These cook quickly and stay vibrant if added toward the end. Simmer for an additional 5–7 minutes until the broccoli is tender but still bright green.

5. Adjust and Brighten

Taste the broth and add a little more salt or pepper if needed. Stir in the fresh parsley and a squeeze of lemon juice just before turning off the heat. This adds a “pop” of freshness that complements the savory broth.

6. Serve and Enjoy

Ladle the soup into bowls, ensuring everyone gets a good mix of all the colorful vegetables.


A Couple of Tips

  • Uniformity: Cutting the vegetables into similar small sizes (as seen in your photo) ensures that every spoonful has a bit of everything.

  • Storage: This soup keeps beautifully in the fridge for up to 4 days, and the flavors often deepen by the second day!

🍆 Eggplant & Tomato Cheese Bake (No Sauce)

Eggplant & Tomato Cheese Bake (No Sauce)

This simple baked casserole proves you don’t need tomato sauce to make a creamy, comforting dish. The natural moisture from the tomatoes and eggplant blends with ricotta and cheeses as it bakes, creating a rich, soft texture without being watery.

No salting. No draining. No fuss.


🧾 Ingredients

  • Eggplant, peeled in stripes and sliced

  • Tomatoes, sliced

  • Ricotta cheese

  • Grated Parmesan cheese

  • Mozzarella cheese

  • Garlic powder

  • Black pepper

  • Dried or fresh basil

(No added salt—Parmesan provides enough saltiness.)


👩‍🍳 Instructions

  1. Prep the Pan
    Use a medium-sized stoneware or baking dish.

  2. Do NOT Salt the Vegetables
    Do not salt the tomatoes or eggplant to remove water.
    Since there is no tomato sauce, the moisture released during baking helps loosen the cheeses and makes the dish creamy instead of dry.

  3. Start Layering

    • First layer: sliced tomatoes on the bottom

    • Spread ricotta over tomatoes

    • Sprinkle with grated Parmesan

    • Season with basil, black pepper, and a small amount of garlic powder

  4. Add Eggplant
    Place a layer of eggplant slices over the cheese layer.

  5. Repeat Layers
    Continue layering:

    • Ricotta

    • Parmesan

    • Basil

    • Black pepper

    • Garlic powder

    • Eggplant

  6. Top Layer
    Arrange tomato and eggplant slices in a circular overlapping pattern on top.
    Finish with:

    • Ricotta

    • Grated Parmesan

    • Mozzarella

  7. Bake
    Bake uncovered at 350°F (175°C) for 1 hour 10 minutes.


💡 Notes & Tips

  • No salt needed—Parmesan adds enough flavor

  • Don’t drain vegetables—their moisture creates the sauce

  • Great as a main dish or side

  • Let rest 10 minutes before cutting for clean slices


⭐ Final Thoughts

This eggplant and tomato bake is rustic, simple, and surprisingly creamy without any sauce. The layered vegetables soften beautifully while the cheeses melt into a savory, comforting dish that tastes far more indulgent than it is.

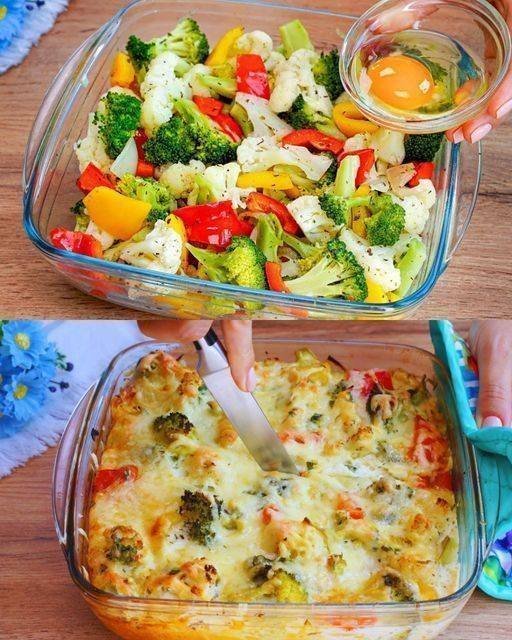
Cheesy Roasted Vegetable Bake

Recipe: Cheesy Roasted Vegetable Bake

  • Prep time: 15 minutes

  • Cook time: 35–40 minutes

  • Servings: 6

  • Dietary: Vegetarian, Gluten-Free (ensure spices are certified)

Ingredients

The Veggie Base:

  • Potatoes: 2 medium (cubed small)

  • Zucchini: 2 medium (sliced into half-moons)

  • Red Bell Pepper: 1 large (chopped)

  • Broccoli: 1 head (cut into small florets)

  • Red Onion: 1 large (wedged)

  • Cherry Tomatoes: 1 cup (whole)

The Seasoning:

  • Olive Oil: 3 tbsp

  • Garlic: 3 cloves, minced

  • Dried Oregano & Thyme: 1 tsp each

  • Smoked Paprika: ½ tsp

  • Salt & Black Pepper: To taste

The Topping:

  • Mozzarella Cheese: 1 ½ cups, shredded

  • Parmesan Cheese: ¼ cup, grated

  • Fresh Parsley: For garnish

Instructions

  1. Prep the Oven: Preheat your oven to 200°C (400°F). Grease a large baking dish or rimmed sheet pan.

  2. Toss the Veggies: In a large bowl, combine all the chopped vegetables. Drizzle with olive oil and add the garlic, oregano, thyme, paprika, salt, and pepper. Toss until every piece is well-coated.

  3. Initial Roast: Spread the vegetables in a single layer on the tray. Roast for 25–30 minutes, tossing halfway through, until the potatoes are fork-tender and the edges are slightly charred.

  4. Add the Cheese: Remove from the oven. Sprinkle the mozzarella and parmesan evenly over the top.

  5. The Melt: Return to the oven for another 8–10 minutes, or until the cheese is golden and bubbly.

  6. Serve: Let it rest for 5 minutes (this prevents the juices from being too runny), garnish with fresh parsley, and dig in!

💡 Tips & Notes

  • Size Matters: Cut harder vegetables (potatoes, carrots) into smaller pieces and softer vegetables (zucchini, peppers) into larger chunks so they finish cooking at the same time.

  • Don’t Overcrowd: Use two pans if necessary. If the veggies are piled on top of each other, they will steam instead of roast, and you’ll lose that delicious caramelization.

  • The “Crunch” Factor: For a crispy topping, mix ¼ cup of Panko breadcrumbs with the cheese before sprinkling.

📊 Nutritional Info (Per Serving)

Values are estimates based on standard ingredient sizes.

Nutrient Amount
Calories 245 kcal
Protein 11g
Total Fat 14g
Carbohydrates 21g
Fiber 4g
Net Carbs 17g

✨ Health Benefits

  • Phytochemical Punch: The variety of colors (purple onion, red pepper, green broccoli) ensures a broad spectrum of antioxidants that fight inflammation.

  • High Fiber: Excellent for gut health and keeping you full longer.

  • Bone Health: A solid dose of calcium from the cheese and Vitamin K from the broccoli.

❓ Common Q&A

Q: Can I use frozen vegetables?A: You can, but they tend to release more water. Thaw and pat them dry thoroughly first. Increase the heat by 10°C to help evaporate excess moisture.

Q: How do I store leftovers?A: Keep them in an airtight container in the fridge for up to 3 days. Reheat in the oven or air fryer to maintain the texture; the microwave makes the veggies a bit soft.

Q: What protein goes well with this?A: This is great alongside grilled chicken, pan-seared salmon, or even a simple fried egg on top for breakfast.