Creamy Cheesy Broccoli and Potato Bake

Creamy Cheesy Broccoli and Potato Bake

Soft vegetables baked in a smooth, savory sauce with a golden cheese topping

This comforting broccoli and potato bake combines tender vegetables with a creamy, well-seasoned sauce and a lightly golden cheese layer. It works beautifully as a main dish with a salad or as a satisfying side for family meals. Every step is simple, and the result is rich, balanced, and comforting without being heavy.


Ingredients

For the Vegetable Base

  • Broccoli – 1 large head, cut into small florets
    Provides freshness, color, and a mild earthy flavor.

  • Potatoes – 2 to 3 medium, peeled and thinly sliced
    Create structure and softness once baked.

  • Onion – 1 medium, finely diced
    Adds gentle sweetness and depth.

  • Olive oil or butter – 2 tablespoons
    Used for sautéing and flavor.

  • Salt and black pepper – to taste


For the Creamy Sauce

  • Large eggs – 3
    Help the bake set into neat slices once cooked.

  • Heavy cream or Greek yogurt – 200 ml (about ¾ cup)
    Cream gives richness; yogurt gives a lighter, slightly tangy finish.

  • Garlic powder – ½ teaspoon
    or fresh garlic – 2 cloves, finely minced

  • Paprika – ½ teaspoon
    Adds gentle warmth and color.

  • Dried herbs – 1 teaspoon
    Thyme or oregano work especially well.


For the Topping

  • Shredded cheese – 150 g (about 1½ cups)
    Mozzarella for stretch, cheddar for flavor, or a mix of both.


Equipment Needed

  • Saucepan

  • Frying pan

  • Mixing bowl

  • Whisk

  • Baking dish (round or rectangular)


Step-by-Step Instructions


1. Prepare the Oven and Vegetables

  • Preheat your oven to 375°F (190°C).

  • Bring a large pot of lightly salted water to a gentle boil.


2. Pre-Cook the Potatoes and Broccoli

  • Add the sliced potatoes to the boiling water and cook for about 5 minutes until just tender.

  • Add the broccoli florets to the same pot during the last 2 minutes.

  • Drain everything thoroughly and set aside.

This step ensures the vegetables finish cooking evenly in the oven.


3. Cook the Onion

  • Heat the olive oil or butter in a pan over medium heat.

  • Add the diced onion and cook gently for 4–5 minutes, stirring occasionally, until soft and lightly golden.

  • Remove from heat.


4. Layer the Vegetables

  • Lightly grease your baking dish.

  • Arrange the potatoes and broccoli evenly in the dish.

  • Scatter the cooked onions throughout the layers.

  • Season lightly with salt and black pepper.


5. Make the Creamy Sauce

  • In a medium bowl, add the eggs, cream (or yogurt), garlic, paprika, and dried herbs.

  • Whisk until smooth, well blended, and lightly airy.


6. Bake the Dish

  • Pour the sauce evenly over the vegetables.

  • Gently tap the dish on the counter to help the sauce settle.

  • Cover with foil and bake for 20 minutes.


7. Add the Cheese Topping

  • Remove the foil.

  • Sprinkle the shredded cheese evenly over the surface.

  • Return to the oven uncovered and bake for 10–15 minutes, until the cheese is melted and lightly golden.


8. Rest and Serve

  • Remove from the oven and let the bake rest for 5 minutes.

  • This helps the layers settle and makes slicing easier.

  • Cut into portions and serve warm.


Serving Suggestions

  • Serve with a fresh green salad

  • Pair with roasted vegetables or crusty bread

  • Enjoy as a main dish or hearty side


Storage Tips

  • Store covered in the refrigerator for up to 3 days

  • Reheat gently in the oven or microwave until warmed through
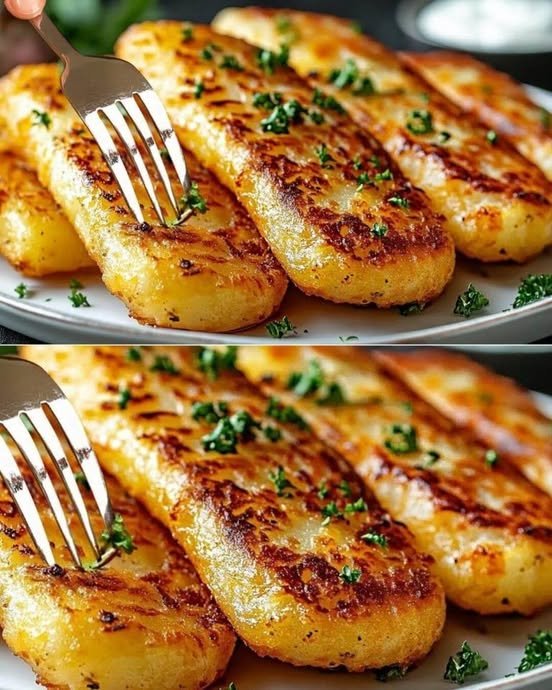
Stuffed Potato Patties with Mushroom Filling

Stuffed Potato Patties with Mushroom Filling

Crispy on the outside, creamy inside, with a savory mushroom and cheese center and a bright dill yogurt sauce

Prep Time: 40–50 minutes
Cook Time: 20–25 minutes
Total Time: 1 hour 10–15 minutes
Servings: 6

These patties combine smooth mashed potatoes, flavorful mushroom filling, and melty mozzarella, coated and fried to golden perfection. Served with dill yogurt sauce, they make an elegant appetizer or a hearty main course.


Ingredients

For the Potato Mixture

  • 1 kg (2.2 lbs) starchy potatoes (Russet or Yukon Gold)

  • 2 large eggs, beaten

  • 15 g (2 tablespoons) all-purpose flour

  • 1 teaspoon fine sea salt

  • ½ teaspoon freshly ground black pepper

For the Mushroom Filling

  • 400 g (14 oz) fresh mushrooms, finely chopped

  • 1 medium onion, finely diced

  • 1 large carrot, grated

  • 45 g (3 tablespoons) unsalted butter

  • 100 g (3.5 oz) mozzarella, cut into small cubes

  • Salt and pepper to taste

For Coating and Frying

  • 120 g (1 cup) all-purpose flour

  • 1 large egg, beaten

  • Additional butter for frying

For the Dill Yogurt Sauce

  • 2 tablespoons (30 g) plain yogurt

  • 2 tablespoons fresh dill, finely chopped

  • Pinch of salt


Step-by-Step Instructions

1. Prepare the Mashed Potatoes

  1. Peel and cut potatoes into uniform chunks.

  2. Place in cold, salted water and bring to a boil.

  3. Cook until tender when pierced with a fork (about 15–20 minutes).

  4. Drain thoroughly and return potatoes to the pot over low heat for 1–2 minutes to remove excess moisture.

  5. Mash while hot until completely smooth.

  6. Add 2 beaten eggs, 2 tablespoons flour, salt, and pepper. Mix until combined but do not overmix.

  7. Let the mixture cool until comfortable to handle.


2. Make the Mushroom Filling

  1. Finely chop mushrooms with a knife or food processor.

  2. Melt butter in a large skillet over medium heat.

  3. Add diced onion and cook until soft and translucent (5–6 minutes).

  4. Add grated carrot and cook 2–3 minutes until softened.

  5. Add chopped mushrooms and increase heat to medium-high. Cook, stirring frequently, until all moisture evaporates (8–10 minutes).

  6. Season generously with salt and pepper.

  7. Transfer to a bowl and let cool completely.


3. Assemble the Patties

  1. Place 1 cup of flour on a shallow plate for coating.

  2. Take about 3 tablespoons of the potato mixture and flatten in your palm.

  3. Make a small well in the center.

  4. Place 1 tablespoon mushroom filling and a cube of mozzarella in the well.

  5. Fold edges over to enclose filling completely. Shape into an oval patty about 3 inches long.

  6. Coat thoroughly in flour, shaking off excess.

  7. Repeat with remaining mixture.


4. Cook the Patties

  1. Heat 2 tablespoons butter in a large skillet over medium heat.

  2. Dip flour-coated patties in beaten egg.

  3. Place patties in the hot pan without overcrowding.

  4. Fry 3–4 minutes per side until golden brown and crispy.

  5. Transfer to paper towels to drain excess butter.

  6. Keep warm in a 200°F oven while cooking remaining batches.


5. Prepare the Dill Yogurt Sauce

  • In a small bowl, combine yogurt, chopped dill, and a pinch of salt.

  • Refrigerate until ready to serve.


Tips for Success

  • Use starchy potatoes for a fluffy, smooth texture.

  • Ensure mashed potatoes and filling are cooled before assembly to prevent breakage.

  • If the potato mixture is too soft, chill in the refrigerator for 30 minutes.

  • Test oil temperature with a small piece of mixture; it should sizzle gently.

  • Don’t flip patties too early—wait until a golden crust forms.


Storage and Reheating

  • Uncooked Patties: Store between layers of parchment paper in the fridge for up to 24 hours.

  • Cooked Patties: Keep in an airtight container in the fridge for 2–3 days. Reheat in a 350°F oven for 10–12 minutes.

  • Dill Sauce: Refrigerate for up to 3 days.


Nutrition (Per Serving, Serves 6)

  • Calories: 380 kcal

  • Total Fat: 15 g

  • Saturated Fat: 8 g

  • Cholesterol: 120 mg

  • Sodium: 450 mg

  • Total Carbohydrates: 52 g

  • Dietary Fiber: 4 g

  • Protein: 12 g

  • Iron: 10% DV

  • Calcium: 15% DV

Spinach Artichoke Crescent Roll Bake

🥬 Spinach Artichoke Crescent Roll Bake

Yields: 8–10 rolls
Prep Time: 20 minutes
Bake Time: 18–22 minutes

A warm, cheesy appetizer that combines creamy spinach and artichokes inside golden, buttery crescent rolls. Perfect for parties, snacks, or cozy meals.


📝 Ingredients

For the Filling:

  • 1 cup frozen chopped spinach, thawed and well-drained

  • 1 cup canned artichoke hearts, chopped and well-drained

  • 4 oz (115 g) cream cheese, softened

  • ¼ cup sour cream

  • ¼ cup mayonnaise

  • ½ cup shredded mozzarella cheese

  • ¼ cup grated Parmesan cheese

  • 1 clove garlic, minced

  • Salt & pepper, to taste

For the Rolls:

  • 1 can (8 oz / 225 g) refrigerated crescent roll dough (sheet or regular)

  • 1 egg, beaten (optional, for brushing tops)

  • Extra mozzarella or Parmesan for topping (optional)

  • Fresh parsley, chopped (for garnish, optional)


👩‍🍳 Step-by-Step Instructions

Step 1 — Preheat & Prepare the Dish

  1. Preheat oven to 375°F (190°C).

  2. Lightly grease a baking dish or oven-safe skillet with butter or cooking spray.


Step 2 — Make the Filling

  1. In a medium bowl, combine cream cheese, sour cream, and mayonnaise. Mix until smooth.

  2. Stir in mozzarella, Parmesan, and garlic.

  3. Add the spinach and artichokes, mixing until evenly combined.

  4. Season with salt and pepper to taste.

Optional: Add a pinch of red pepper flakes or Italian seasoning for extra flavor.


Step 3 — Prepare the Dough

  1. Unroll the crescent dough onto a clean surface. If using perforated crescent rolls, pinch the seams to form a solid rectangle.

  2. Spread the spinach artichoke filling evenly over the dough, leaving about ½ inch from the edges.

  3. Starting from one long edge, roll the dough into a log (like a jelly roll).

  4. Using a sharp knife or unflavored dental floss, slice the log into 1-inch rolls (about 8–10 pieces).


Step 4 — Assemble & Bake

  1. Place the rolls cut side up in the prepared baking dish.

  2. Optional: Brush tops with beaten egg for a golden finish.

  3. Optional: Sprinkle extra mozzarella or Parmesan on top.

  4. Bake for 18–22 minutes or until golden brown and puffed.


Step 5 — Garnish & Serve

  1. Remove from oven and let cool for 5 minutes.

  2. Garnish with fresh parsley if desired.

  3. Serve warm as an appetizer, snack, or side dish.


💡 Tips for Success

  • Drain Well: Squeeze out excess liquid from spinach and artichokes to avoid soggy rolls.

  • Cheese Variations: Try Monterey Jack, cheddar, or Gruyère for different flavors.

  • Make Ahead: Assemble rolls and refrigerate for up to 8 hours before baking. Add 2–3 minutes to baking time.

  • Freezing: Bake, cool, and freeze in an airtight container for up to 1 month. Reheat at 350°F until warmed through.


🍴 Serving Ideas

  • Pair with tomato soup for a cozy meal.

  • Serve alongside a fresh garden salad for lunch.

  • Offer with marinara or garlic dip for extra indulgence.


⏱ Summary Table

Step Time Key Notes
Preheat Oven 5 min Grease baking dish
Make Filling 10 min Drain spinach well
Prepare Dough 5 min Roll tightly for neat slices
Bake 18–22 min Golden brown top
Serve — Best served warm

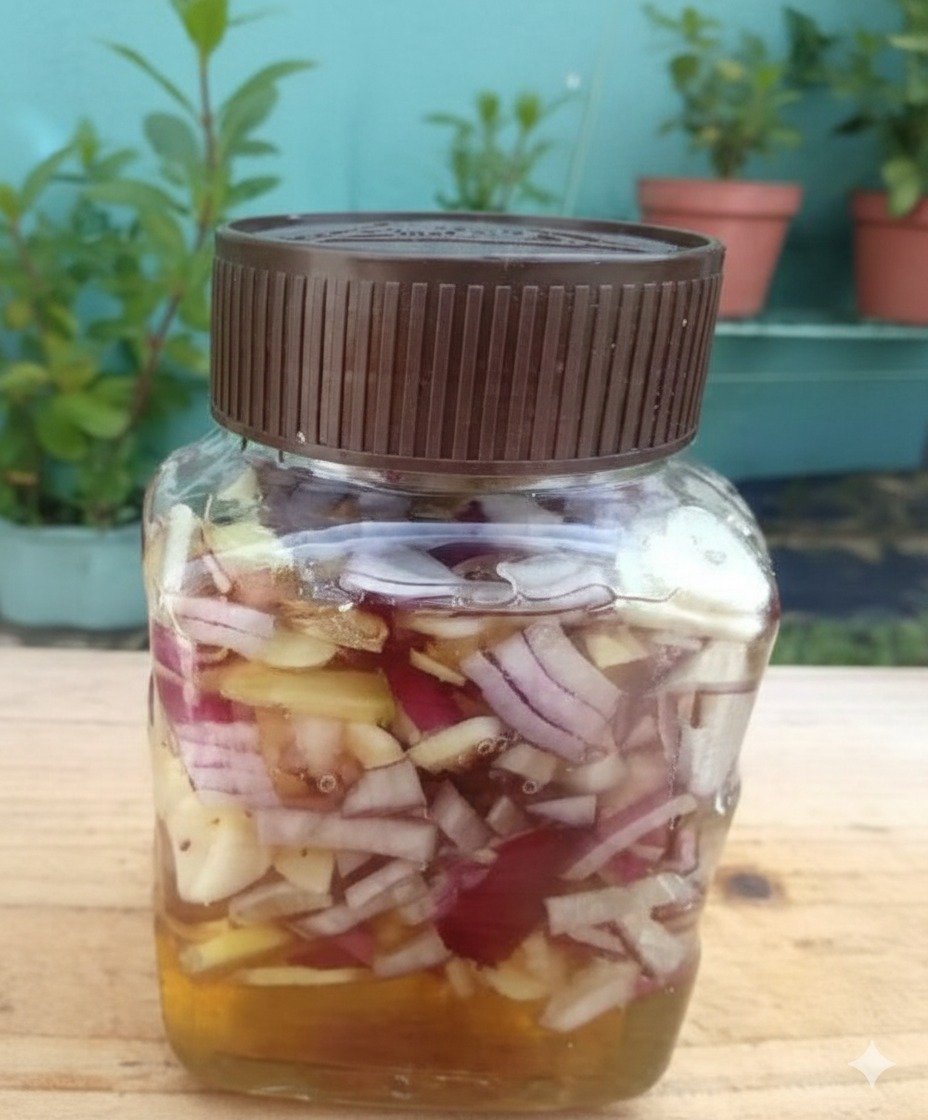
🍯 Honey Infusion with Ginger, Garlic & Onion

🍯 Honey Infusion with Ginger, Garlic & Onion

Yields: 1 small jar
Preparation Time: 10 minutes
Infusion Time: 12–24 hours

This honey-based infusion combines aromatic ingredients with natural sweetness to create a richly flavored syrup. It can be used in warm drinks, drizzled over foods, or enjoyed in small amounts as part of a balanced diet.


📋 Ingredients

  • 1 cup raw honey

  • 1 large red onion, finely diced

  • 3–4 garlic cloves, peeled and thinly sliced or lightly crushed

  • 1 tablespoon fresh ginger, finely grated or thinly sliced

  • 2 tablespoons fresh lemon juice


👩‍🍳 Step-by-Step Instructions

Step 1: Prepare the Ingredients

  1. Peel and finely dice the red onion.

  2. Peel the garlic cloves and slice them thinly or lightly crush them to release flavor.

  3. Peel the ginger and grate it finely or cut it into very thin strips.


Step 2: Layer the Jar

  1. Use a clean, dry glass jar.

  2. Add the onion, garlic, and ginger to the jar in layers.

  3. Pour the lemon juice evenly over the ingredients.


Step 3: Add the Honey

  1. Slowly pour the honey into the jar.

  2. Make sure all ingredients are fully submerged.

  3. Leave about 2–3 cm (1 inch) of space at the top, as the mixture may release liquid over time.


Step 4: Infuse

  1. Seal the jar tightly.

  2. Place it in the refrigerator or a cool, dark area.

  3. Allow the mixture to infuse for 12–24 hours.

  4. During this time, the honey will thin slightly and absorb the flavors.


Step 5: Use and Store

  1. Stir gently before each use.

  2. Use small amounts as desired:

    • Stir into warm (not hot) water or tea

    • Drizzle over roasted vegetables

    • Add to salad dressings or marinades

  3. Keep refrigerated and use within 2 weeks.


💡 Helpful Notes

  • The flavor is strong at first but becomes more balanced as it infuses

  • Honey helps soften the sharp taste of onion and garlic

  • Always use clean utensils when scooping to maintain freshness


🔄 Optional Flavor Additions

  • A cinnamon stick for warmth

  • A small pinch of ground spice for depth

  • Orange or lemon peel for citrus aroma


🧊 Storage Tips

  • Store in a sealed glass jar

  • Keep refrigerated after opening

  • Discard if you notice unusual odor or appearance

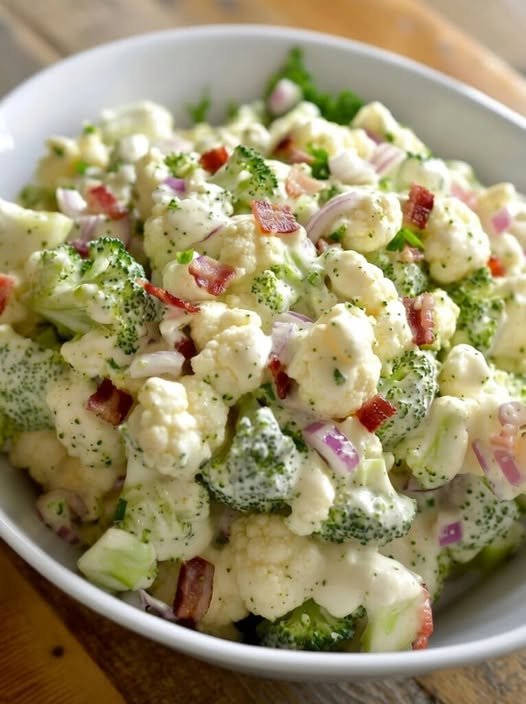
Creamy Broccoli Cauliflower Salad

Creamy Broccoli Cauliflower Salad

Crunchy • Creamy • Savory-Sweet • Perfect for Gatherings

This classic Creamy Broccoli Cauliflower Salad is a well-loved favorite for potlucks, picnics, and family meals. Crisp fresh vegetables are paired with smoky, crunchy bacon, sharp cheese, and a tangy-sweet dressing that coats every bite beautifully. It improves with time, making it ideal for preparing ahead.


Why This Recipe Works

  • Raw broccoli and cauliflower stay crisp and refreshing

  • Creamy dressing balances tang and sweetness

  • Bacon adds depth and crunch

  • Chilling time allows flavors to blend perfectly

  • Easy to customize for different diets


Ingredients

The Salad Base

  • 3 cups fresh broccoli florets, chopped into bite-sized pieces

  • 3 cups fresh cauliflower florets, chopped small

  • 6 slices bacon, cooked until crisp and crumbled

  • ¾ cup sharp cheddar cheese, freshly grated

  • ⅓ cup red onion, finely diced

  • ½ cup roasted sunflower seeds
    (or chopped almonds for a nutty variation)

  • Optional: ½ cup dried cranberries or raisins for gentle sweetness


The Creamy Dressing

  • ¾ cup mayonnaise, good quality

  • ¼ cup sour cream or plain Greek yogurt

  • 2 tablespoons apple cider vinegar

  • 2 tablespoons granulated sugar
    (or honey or maple syrup)

  • ½ teaspoon salt

  • ¼ teaspoon black pepper


Step-by-Step Instructions

1. Prepare the Vegetables

  • Wash broccoli and cauliflower thoroughly

  • Pat completely dry using a clean kitchen towel

Important Tip: Dry vegetables allow the dressing to cling properly instead of sliding off.

  • Chop into small, evenly sized pieces for the best texture and flavor in every bite


2. Cook the Bacon

  • Cook bacon in a skillet or oven until deeply crisp

  • Transfer to paper towels to cool

  • Crumble into small pieces

Make-Ahead Tip: Store bacon separately and add just before serving to keep it crunchy.


3. Make the Dressing

  • In a medium bowl, whisk together:

    • Mayonnaise

    • Sour cream (or yogurt)

    • Apple cider vinegar

    • Sugar

    • Salt

    • Black pepper

  • Whisk until smooth and creamy

  • Taste and adjust:

    • Add more vinegar for tang

    • Add a touch more sweetener if desired


4. Assemble the Salad

  • In a large mixing bowl, combine:

    • Broccoli

    • Cauliflower

    • Red onion

    • Cheddar cheese

    • Sunflower seeds

  • Pour dressing over the salad

  • Fold gently until all vegetables are evenly coated


5. Chill for Best Flavor

  • Cover and refrigerate for at least 30 minutes

  • For best results, chill 3–4 hours to allow flavors to blend

  • Stir in the crumbled bacon just before serving
    (or sprinkle on top for presentation)


Texture & Flavor Notes

  • Crisp vegetables with creamy coating

  • Savory, slightly sweet, and tangy balance

  • Bacon adds crunch and smoky depth


Customization & Variations

Lighter Version

  • Replace half the mayonnaise with Greek yogurt

  • Use honey or reduce sweetener

Low-Carb Version

  • Omit sugar and dried fruit

  • Add extra bacon or chopped hard-boiled eggs

Plant-Based Version

  • Use dairy-free mayonnaise

  • Replace bacon with toasted seeds or smoked seasoning


Storage & Make-Ahead Tips

  • Make Ahead:

    • Chop vegetables and prepare dressing up to 24 hours in advance

    • Store separately and combine 1–2 hours before serving

  • Leftovers:

    • Store in an airtight container in the refrigerator

    • Keeps well for up to 3 days

    • Stir before serving as some moisture may release

  • Freezing:

    • Not recommended due to texture changes

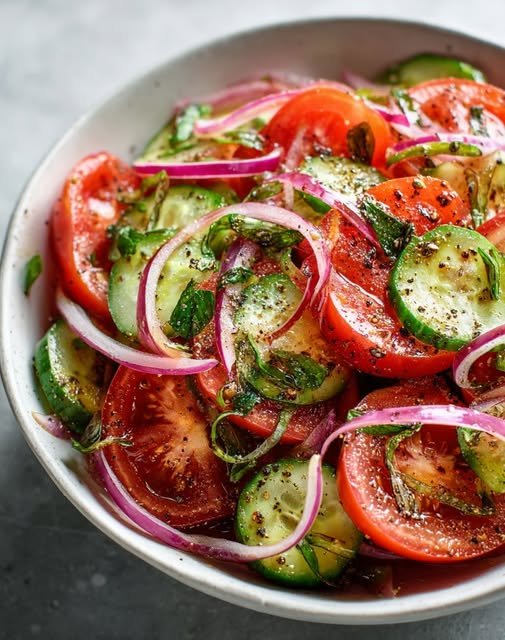
🥒🍅 Classic Cucumber Tomato Salad

🥒🍅 Classic Cucumber Tomato Salad

Fresh • Light • Everyday Mediterranean Side

This simple cucumber tomato salad is crisp, refreshing, and packed with bright flavor. Juicy tomatoes, crunchy cucumber, and thinly sliced red onion are tossed in a light olive oil and red wine vinegar dressing with just a touch of honey for balance. It’s perfect as a quick side dish, a picnic salad, or a healthy addition to any meal.


🧾 Ingredients

  • 1 English cucumber (no need to peel)

  • 10 ounces grape or cherry tomatoes, halved

  • ½ small red onion, thinly sliced (about ½ cup)

  • 2 tablespoons olive oil

  • 2 tablespoons red wine vinegar

  • 1 teaspoon honey

  • ½ teaspoon kosher salt or fine sea salt

  • ¼ teaspoon black pepper

  • 1 tablespoon chopped fresh parsley, dill, and/or basil (optional)


👩‍🍳 Instructions

  1. Prepare the cucumber
    Trim off both ends of the cucumber. Slice it in half lengthwise, then cut into ¼-inch thick half-round slices.

  2. Combine the vegetables
    Place the sliced cucumber, halved tomatoes, and red onion into a medium mixing bowl.

  3. Make the dressing
    In a small bowl, whisk together the olive oil, red wine vinegar, honey, salt, and black pepper until well blended.

  4. Toss the salad
    Pour the dressing over the vegetables and gently toss until everything is evenly coated.

  5. Add herbs and serve
    Gently stir in the fresh herbs if using. Serve immediately, or refrigerate for 1–2 hours to allow the flavors to blend before serving.


🌿 Helpful Tips

  • For extra crunch, add sliced bell peppers or radishes

  • Feta cheese or olives make a great optional topping

  • This salad tastes even better after chilling for a short time

  • Best enjoyed within 24 hours for maximum freshness